.png)
Discuss
STEP 1. Pick the topic for discussion 🔖
After moving to this final stage, the groups of reflection cards are arranged in the left column according to the number of votes, as shown in the image below:
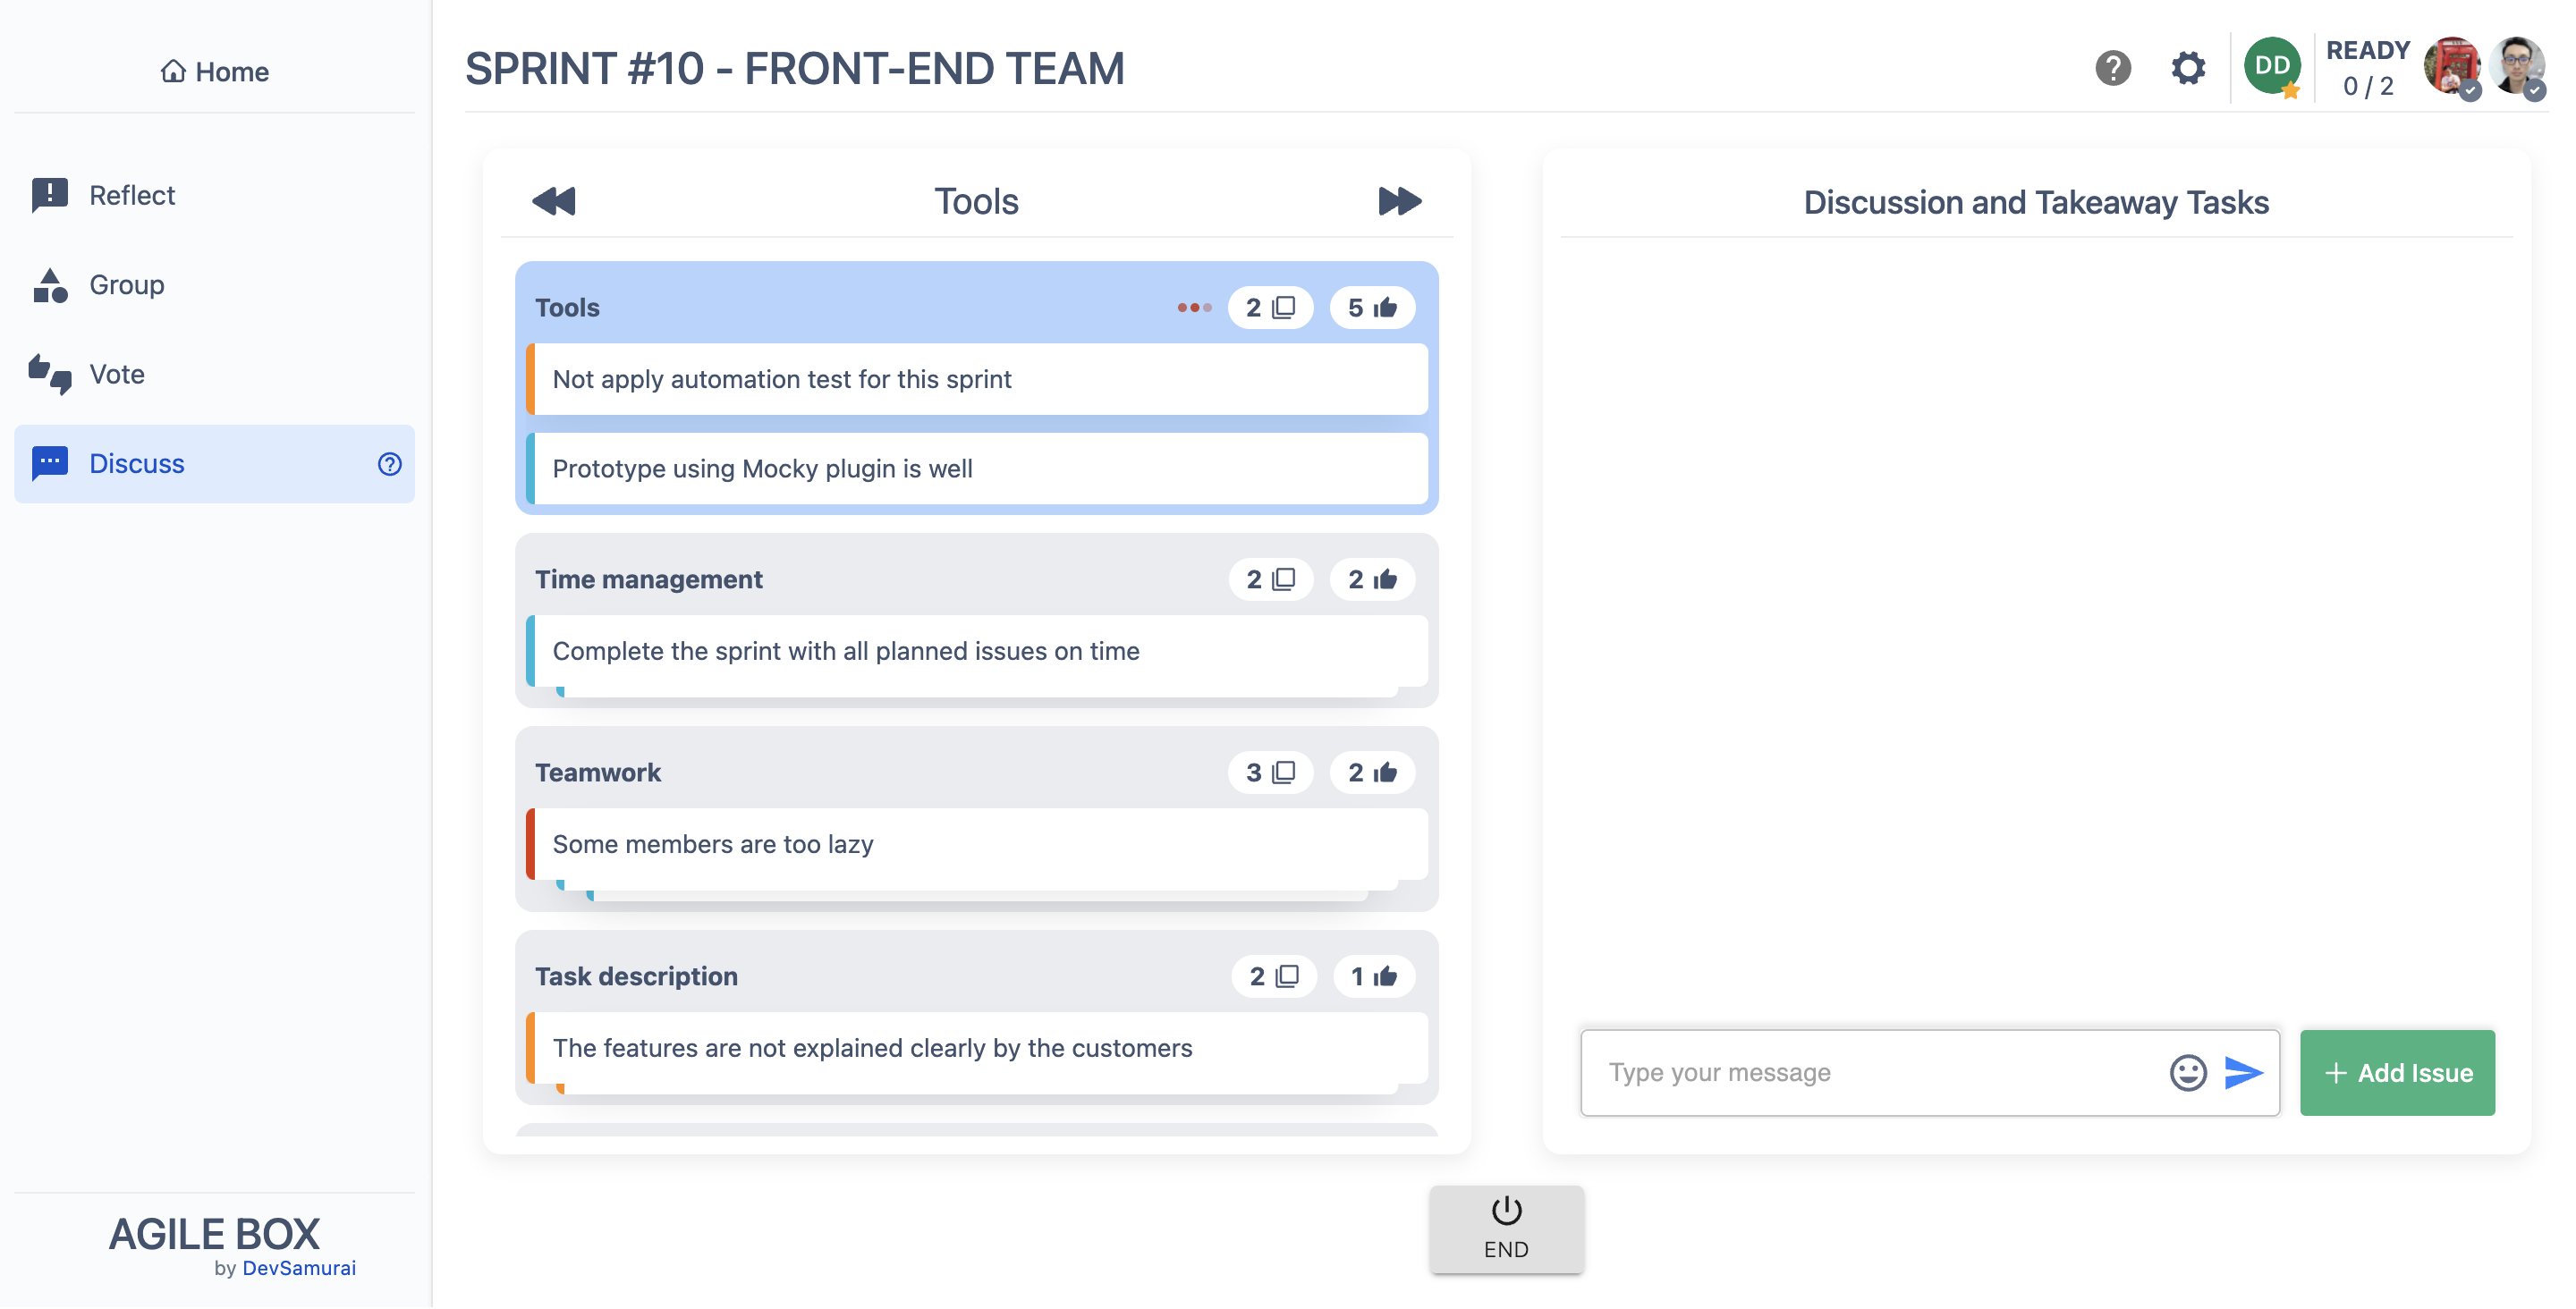
The facilitator can pick any topic to start the discussion.
When other participants view a group that is not the same group as the facilitator, they will notice the following differences:
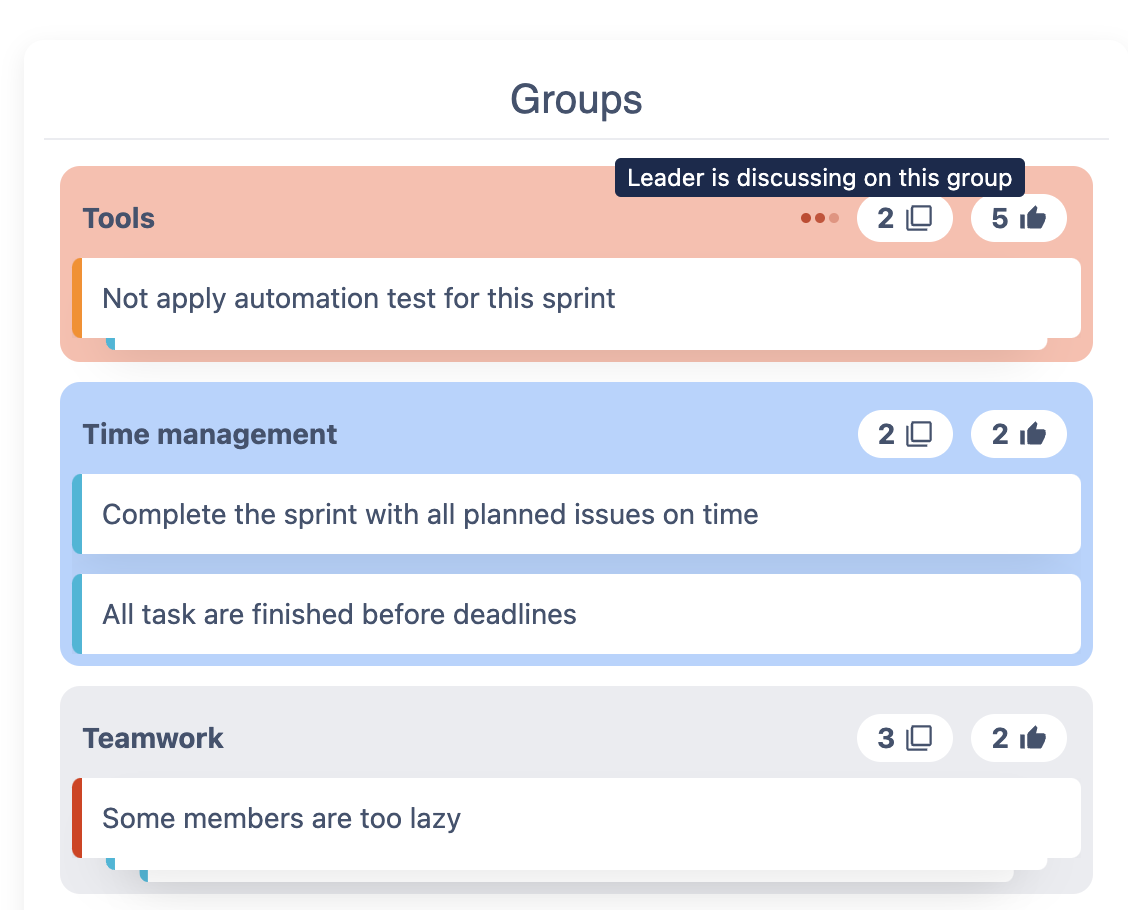
The blue 🔵 group is the group the user is viewing, and the red 🔴 one is the group that the facilitator has picked for discussion.
STEP 2. Discuss 🧑💻
Participants use the chat box on the right column to discuss the topic.
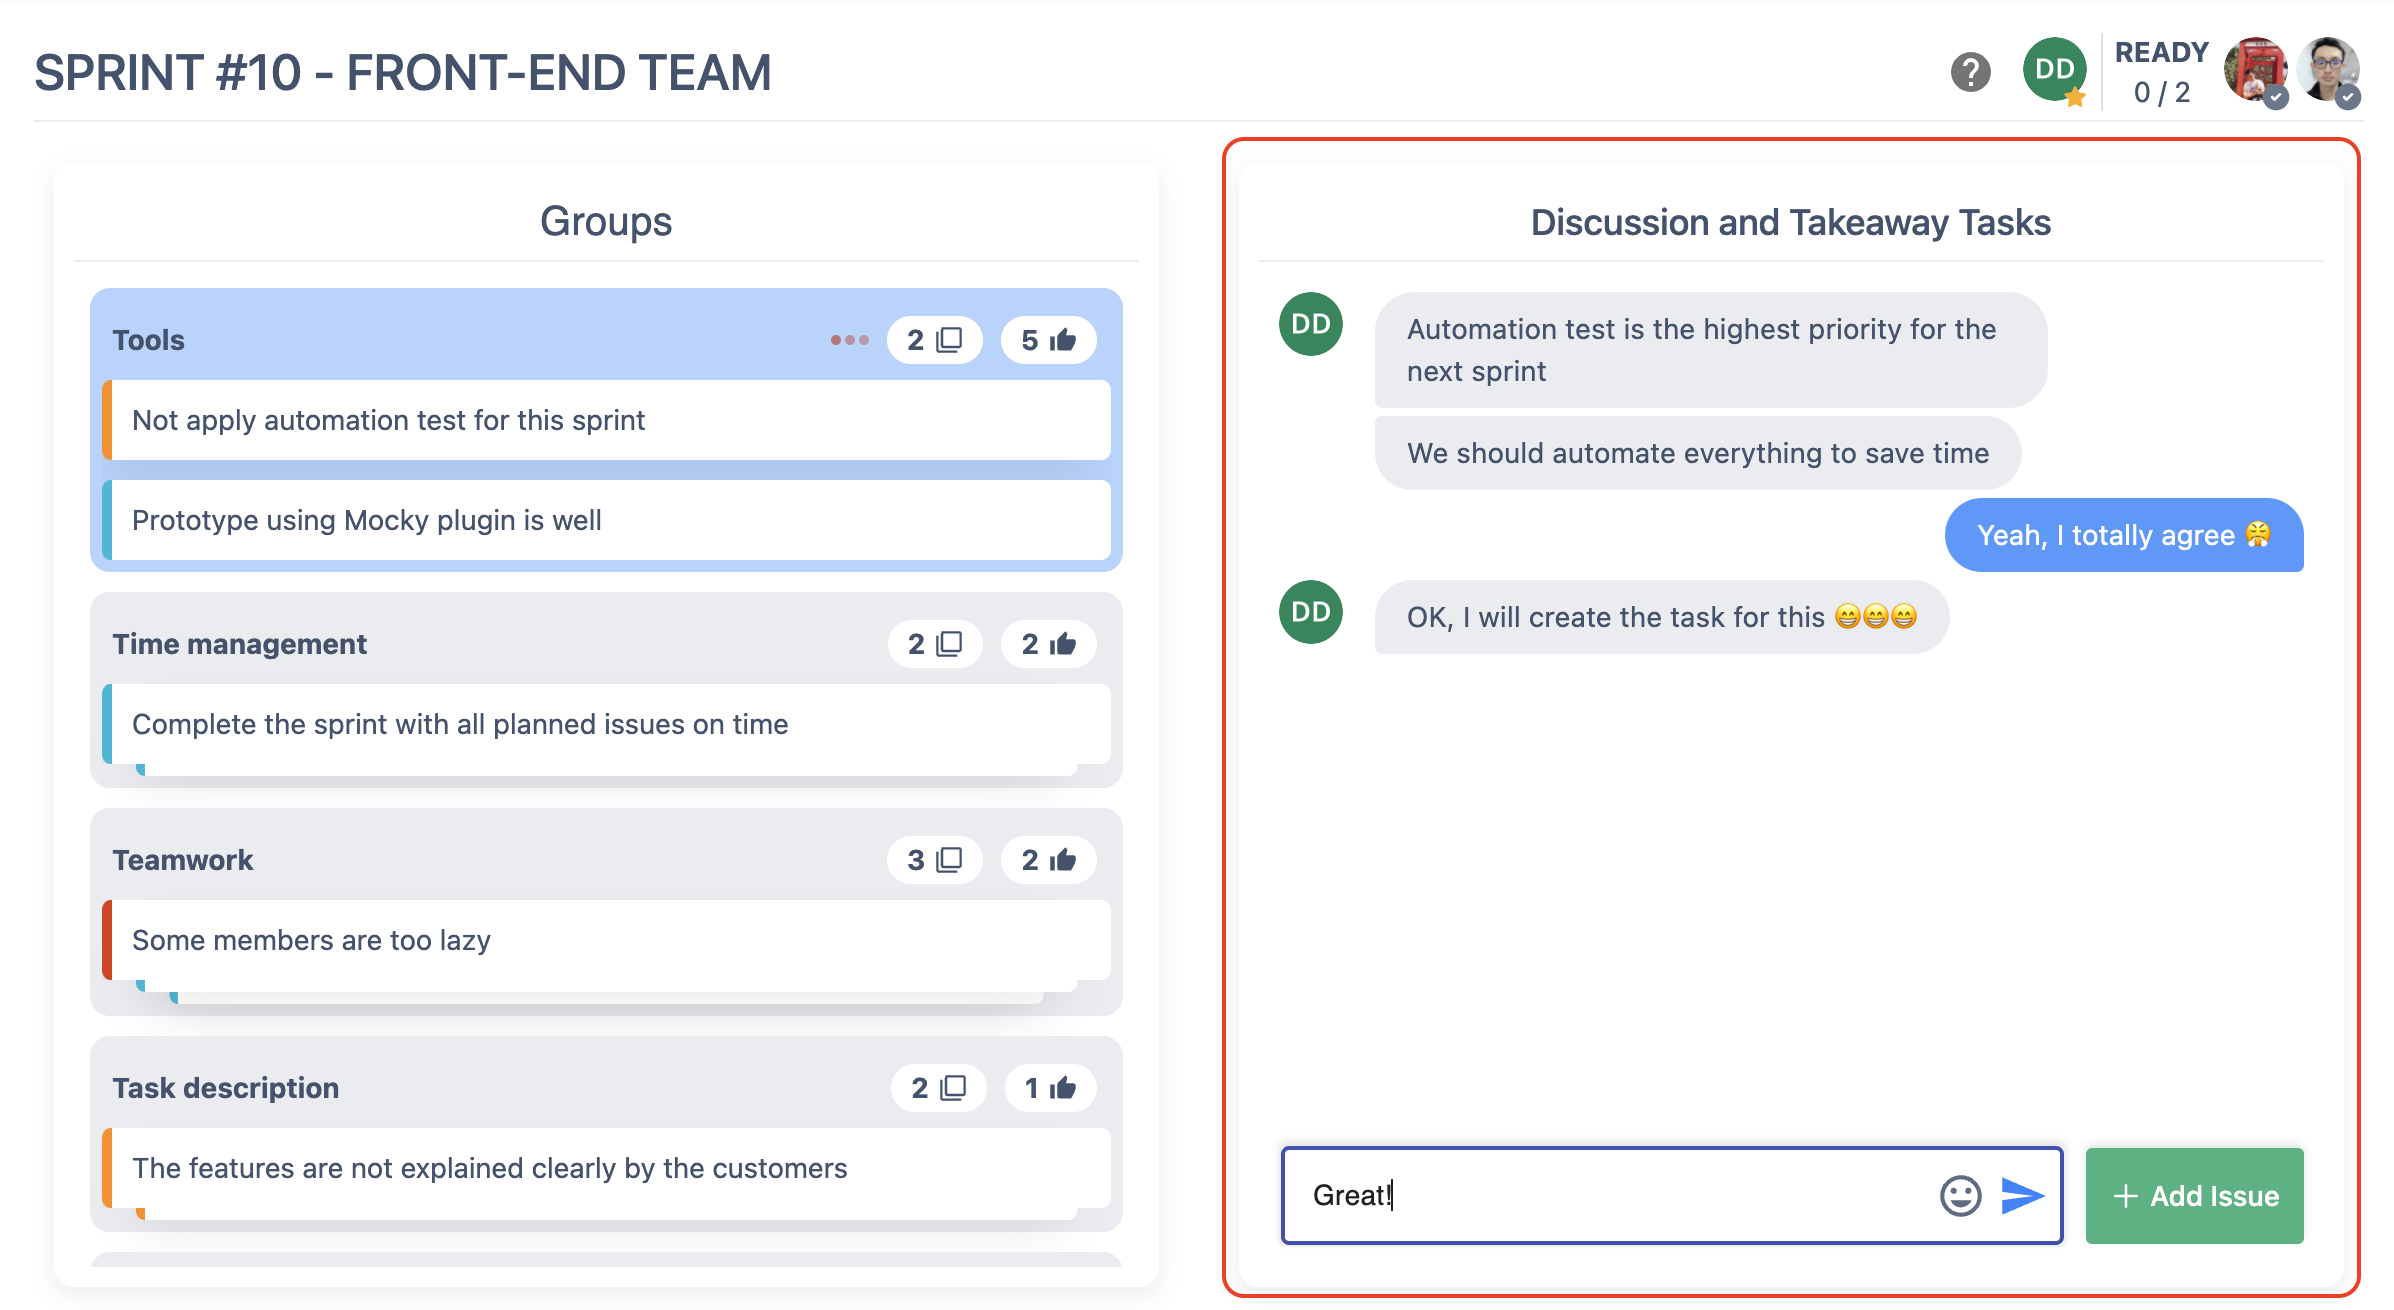
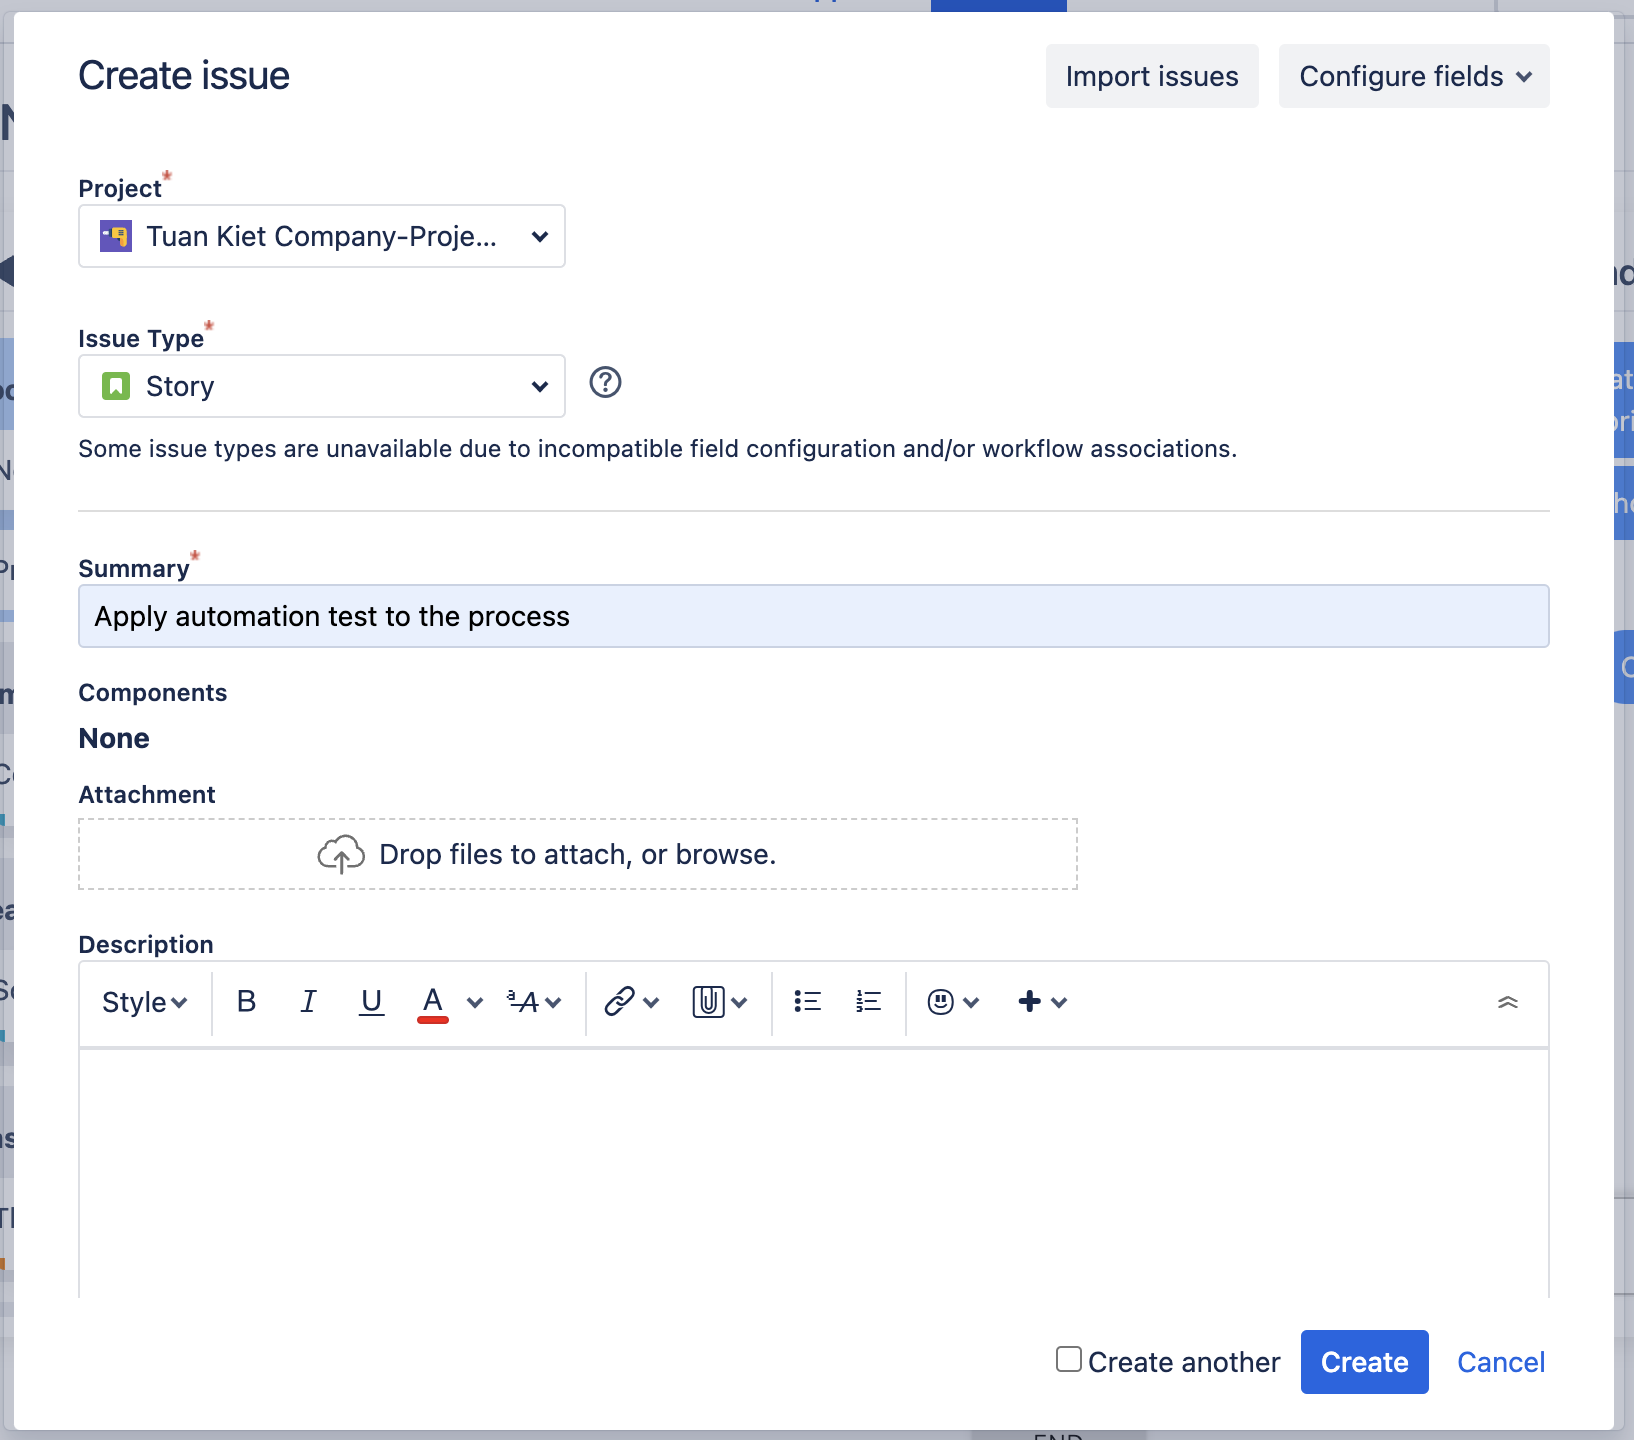
In order to create a new Jira issue, user can click on the + Add Issue button next to the chat input and then fill out the form below:
STEP 3. Ready and End 🏁
Similar to the previous stages, normal participants (not the facilitator) can click the READY button to inform the facilitator that he/she has done 🔔.
Then the facilitator can click on the END button to close the retrospective meeting at all.

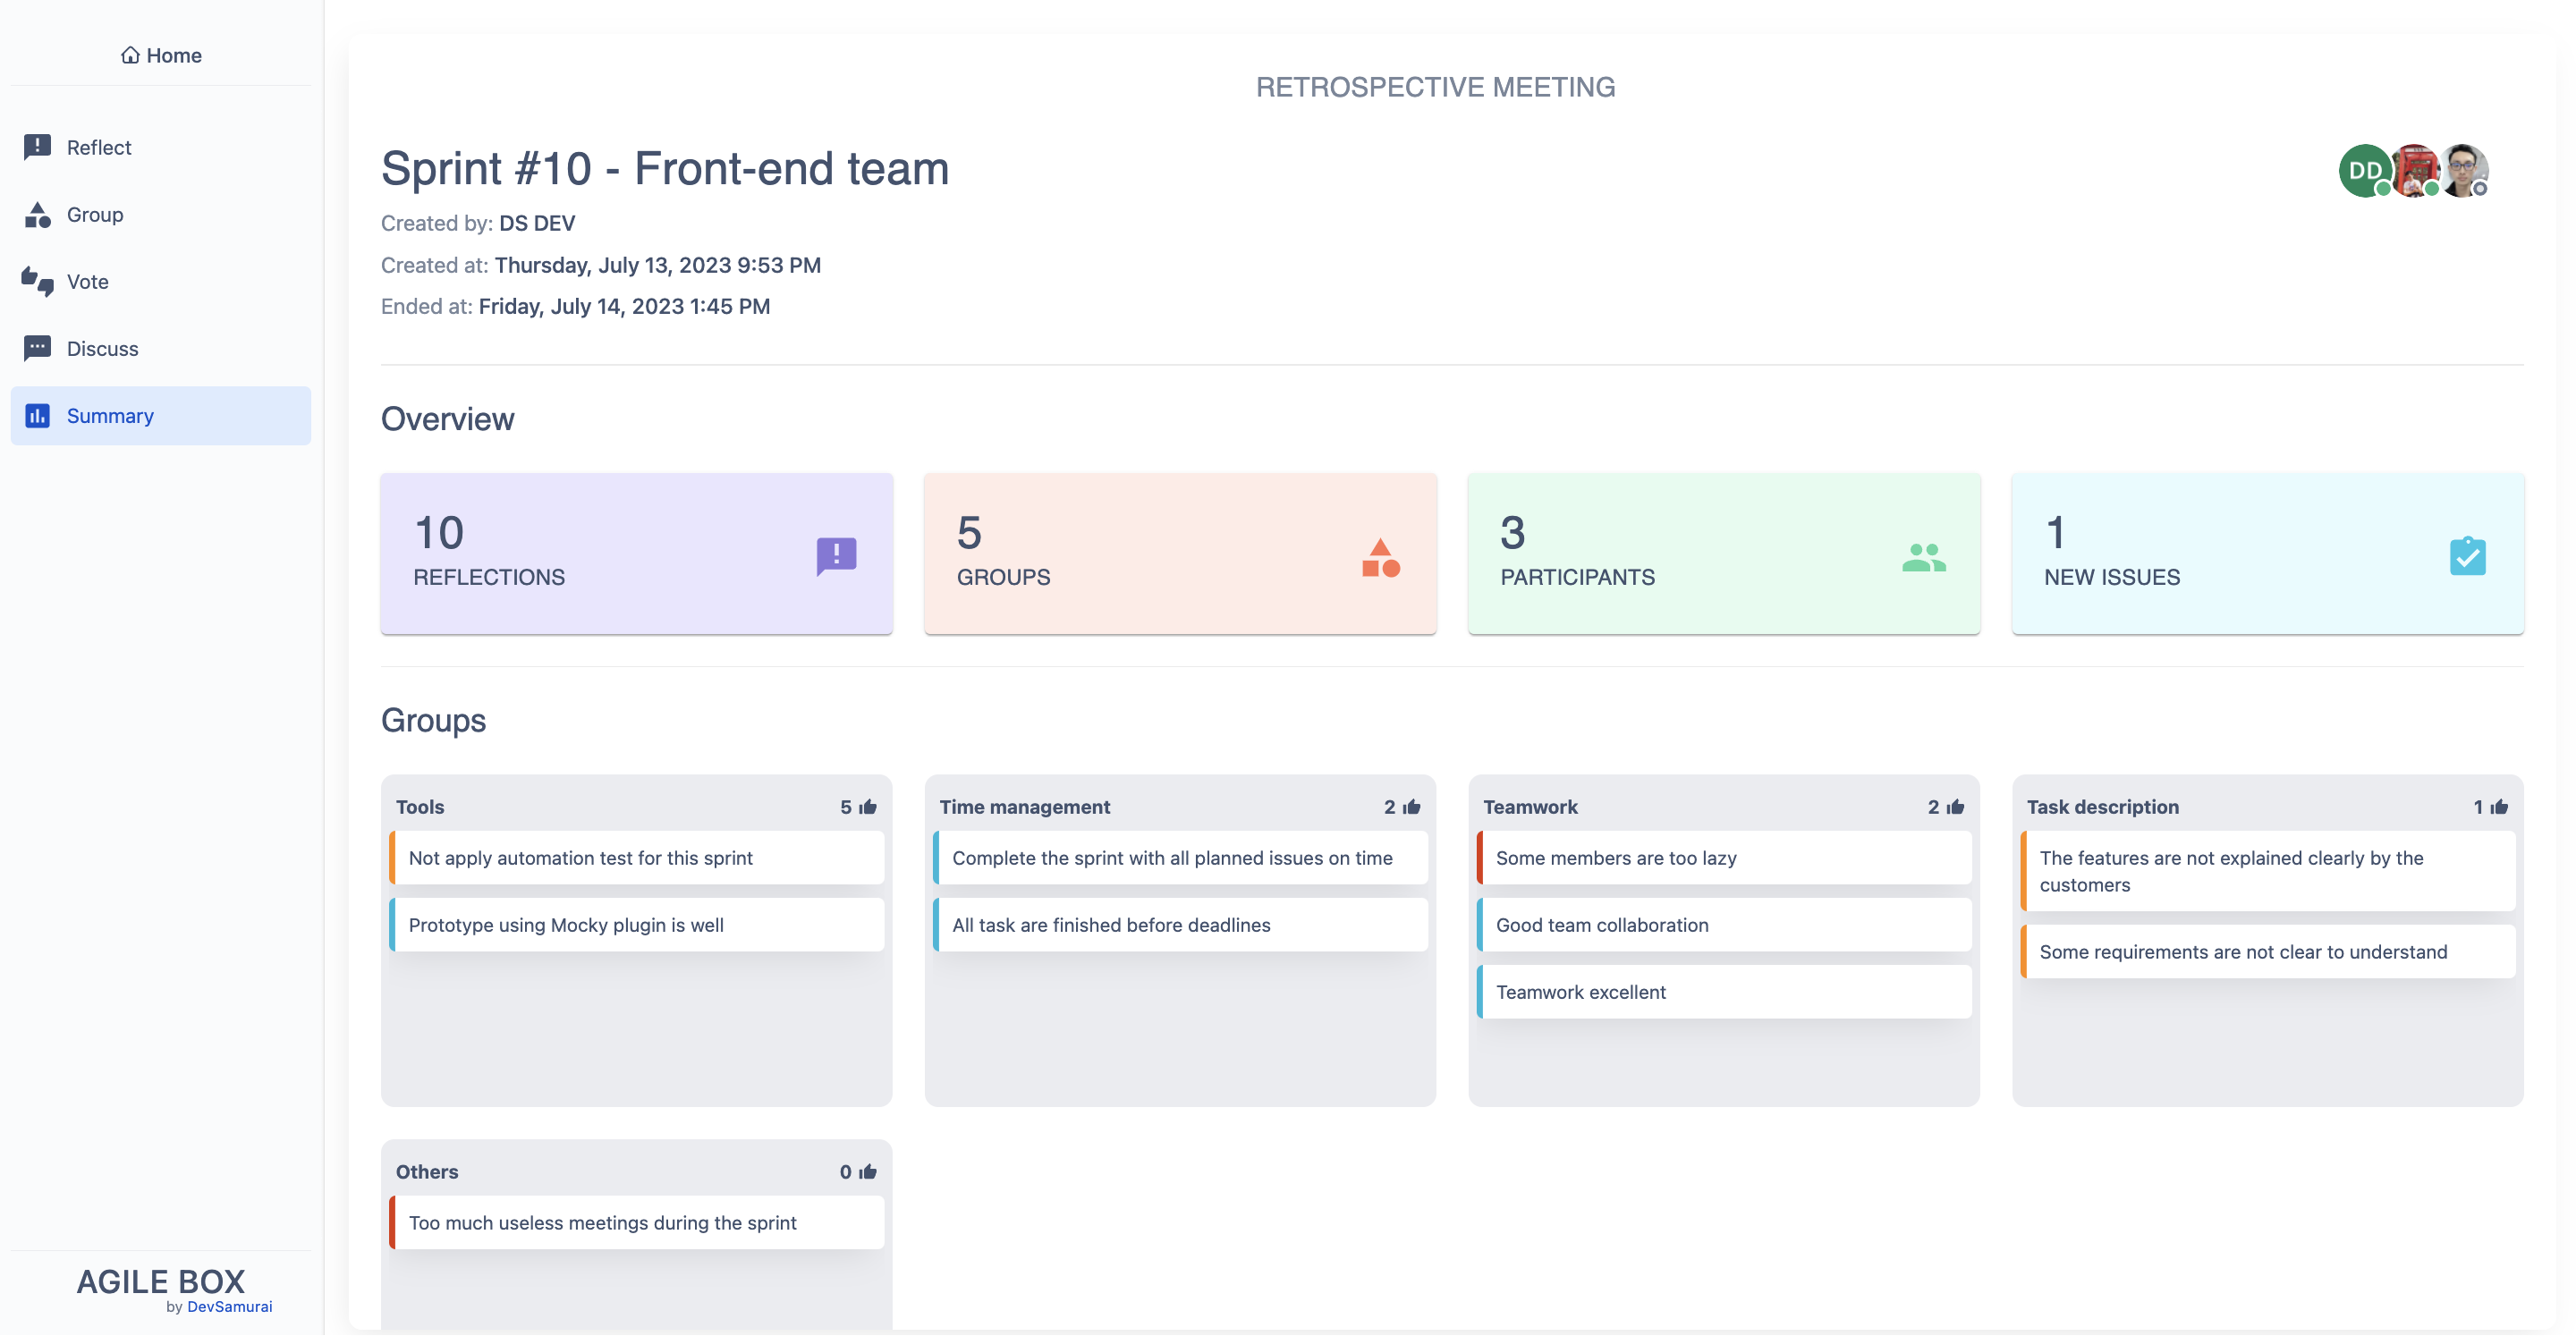
STEP 4. View the summary 📋
After finishing the retrospective session, everyone can see the summary of the meeting as below: