Creating Your First Asset
Navigate to Create New Asset
From the AssetIT dashboard, click on the 'Assets' tab. In the Assets screen, click on the 'Create New' button. This will take you to the 'Create New Asset' screen.

Fill in the Asset Details
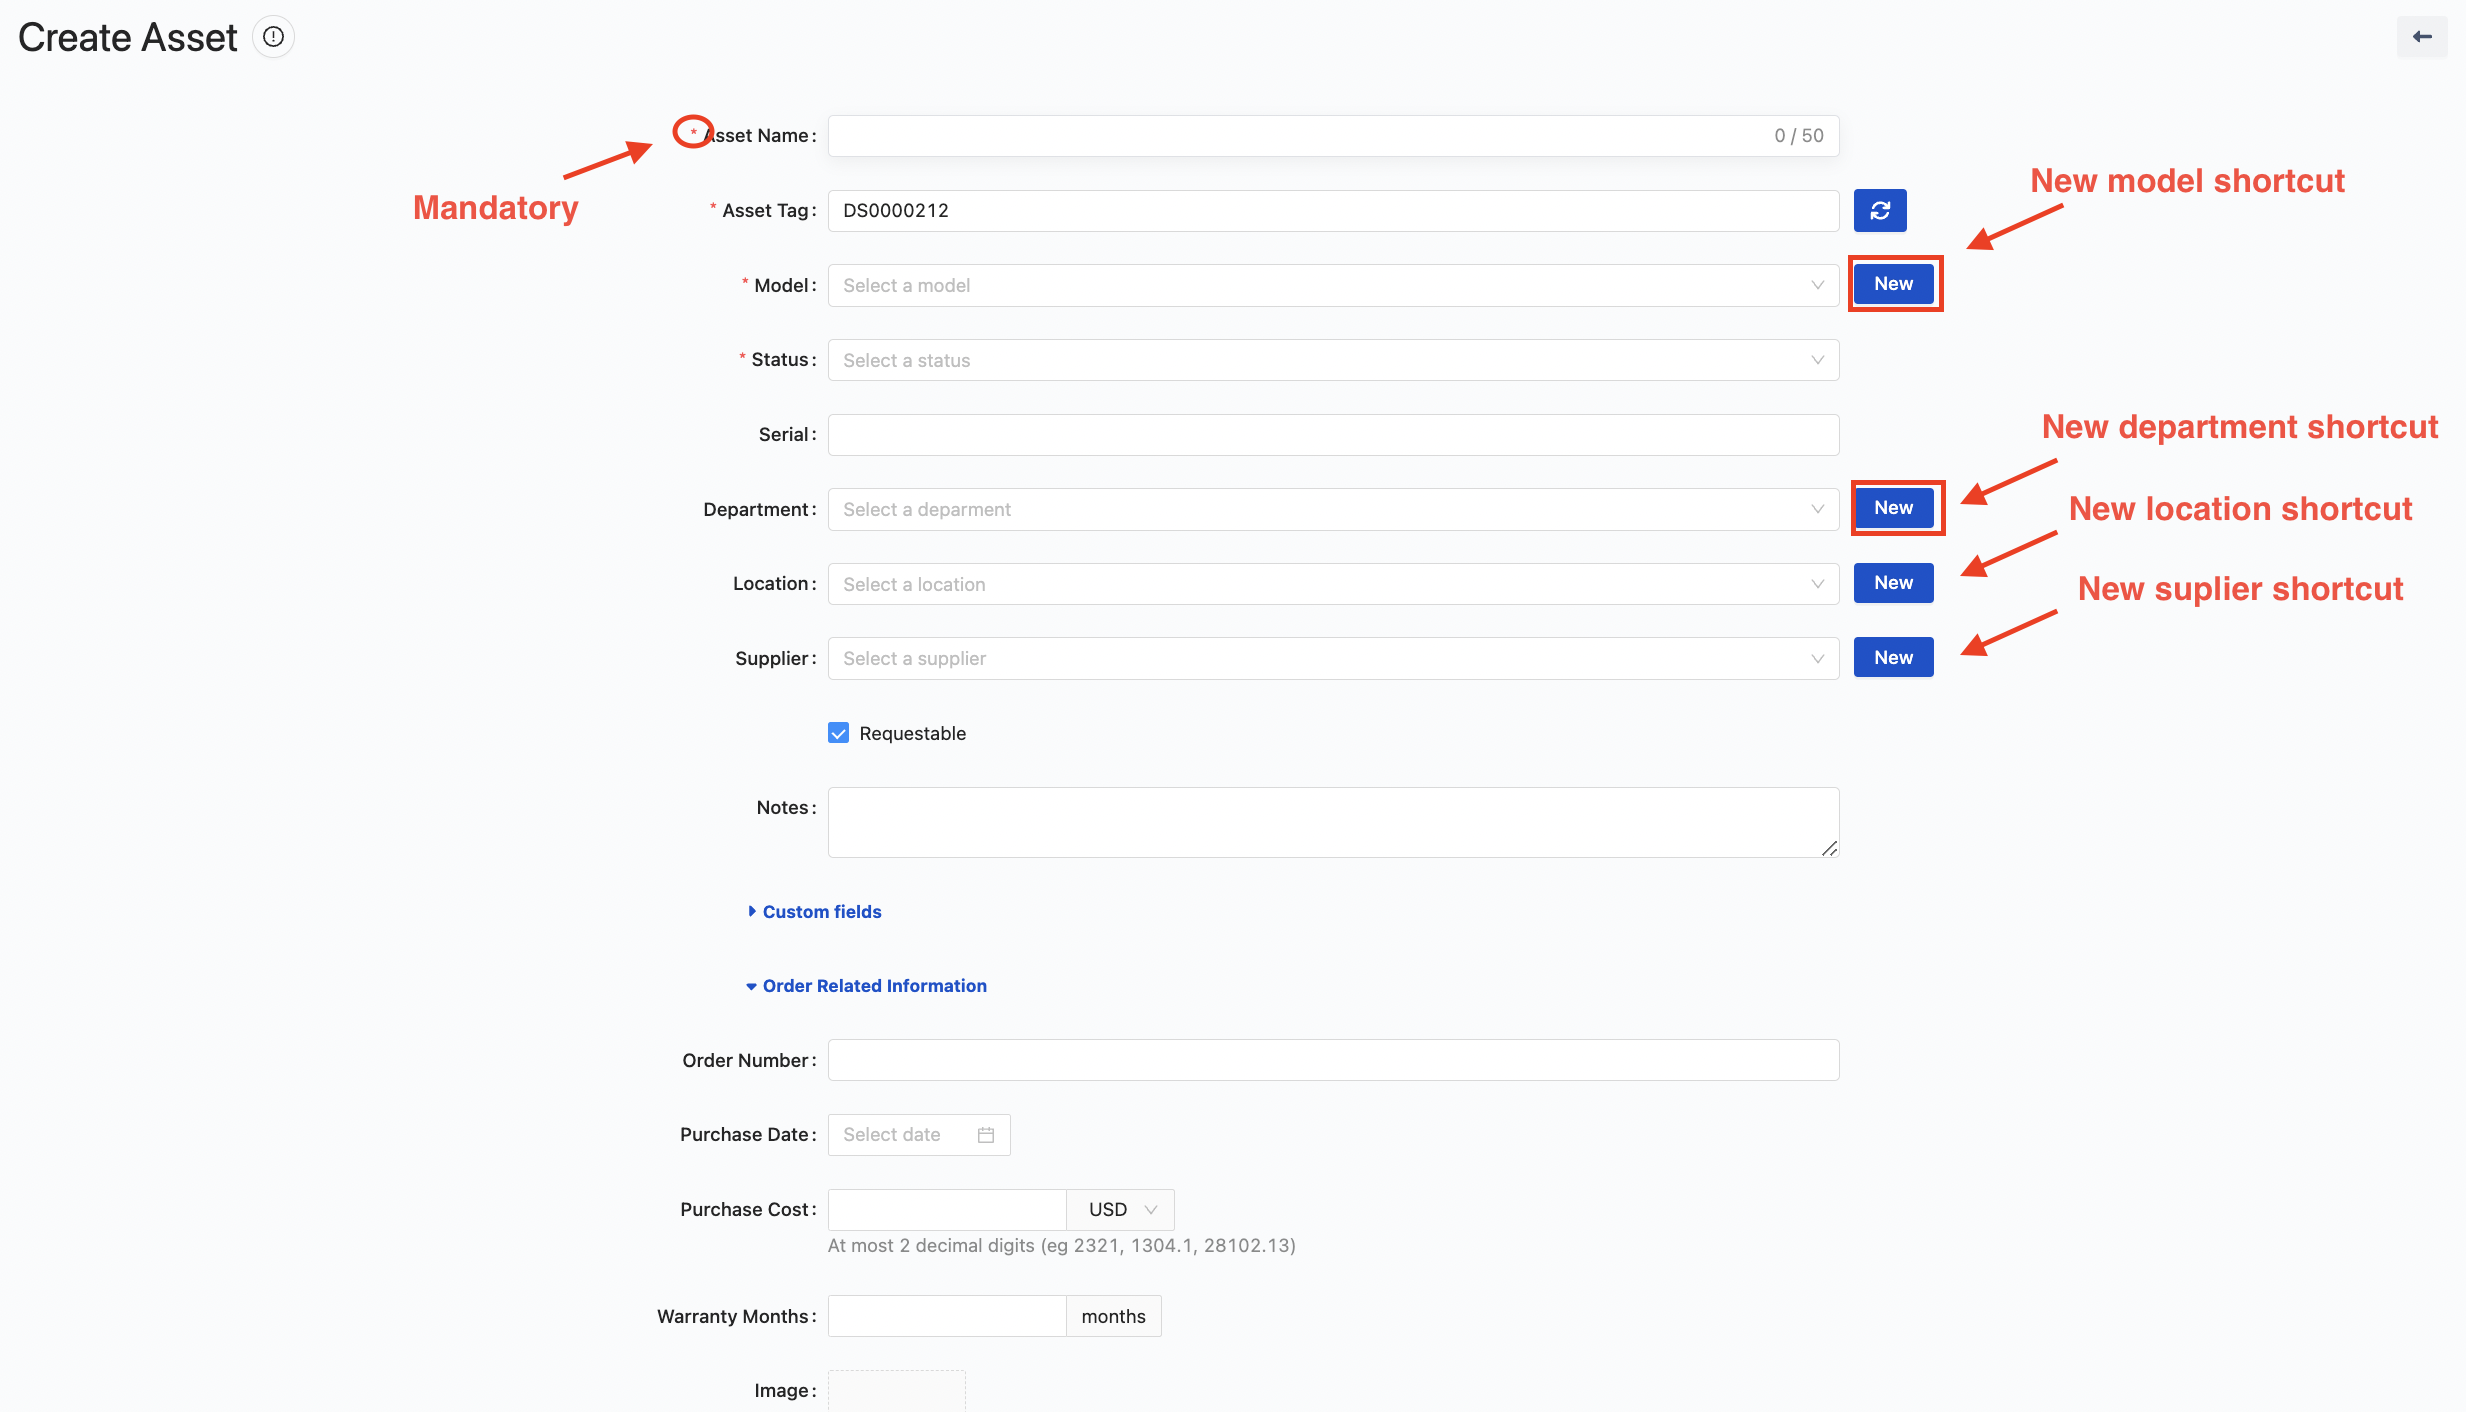
You'll be asked to input various asset-related properties and information in the Create New Asset screen. This typically includes:
Asset Name: Give the asset a unique identifier for easy tracking. This could be a descriptive name like "Office Laptop 1" or a simple asset ID number.
Asset Tag: Input the asset tag number if your organization uses asset tags to physically label and track assets.
Model: Specify the model of the asset, such as the make and model of a laptop or the version of the software.
Status: Indicate the current status of the asset. Common options might include 'In Use,' 'In Storage,' 'In Repair,' or 'Retired.'
Serial Number: Input the serial number of the asset. This is particularly useful for tracking hardware assets.
Purchase Date: Enter the date the asset was acquired.
Purchase Cost: Specify how much the asset cost when it was purchased.
Warranty: Include details about the warranty of the asset, such as the warranty period or expiration date.
Department: Indicate which department the asset belongs to or is used by.
Notes: Use this field to input any additional information or notes about the asset.
Location: Specify where the asset is located or assigned, such as a specific office or site.
Image: Upload an image of the asset. This can be particularly useful for quickly identifying physical assets.
Remember, the more detailed and accurate your asset records are, the easier it will be to manage your assets.
Fields with a red star prefix are mandatory and must be filled in before you can save the asset.
If the entry you need is not available in the dropdown list, click on the 'New' button next to the field. This allows you to add a new entry without leaving the asset creation screen

Submit the Form
Once you've filled out all the necessary information, click on the 'Submit' button at the bottom of the form.

The new asset is now created and added to your AssetIT, Asset Management for Jira’s system. It will be visible in the Assets tab, where you can manage it along with your other assets.

