1.1. Overview
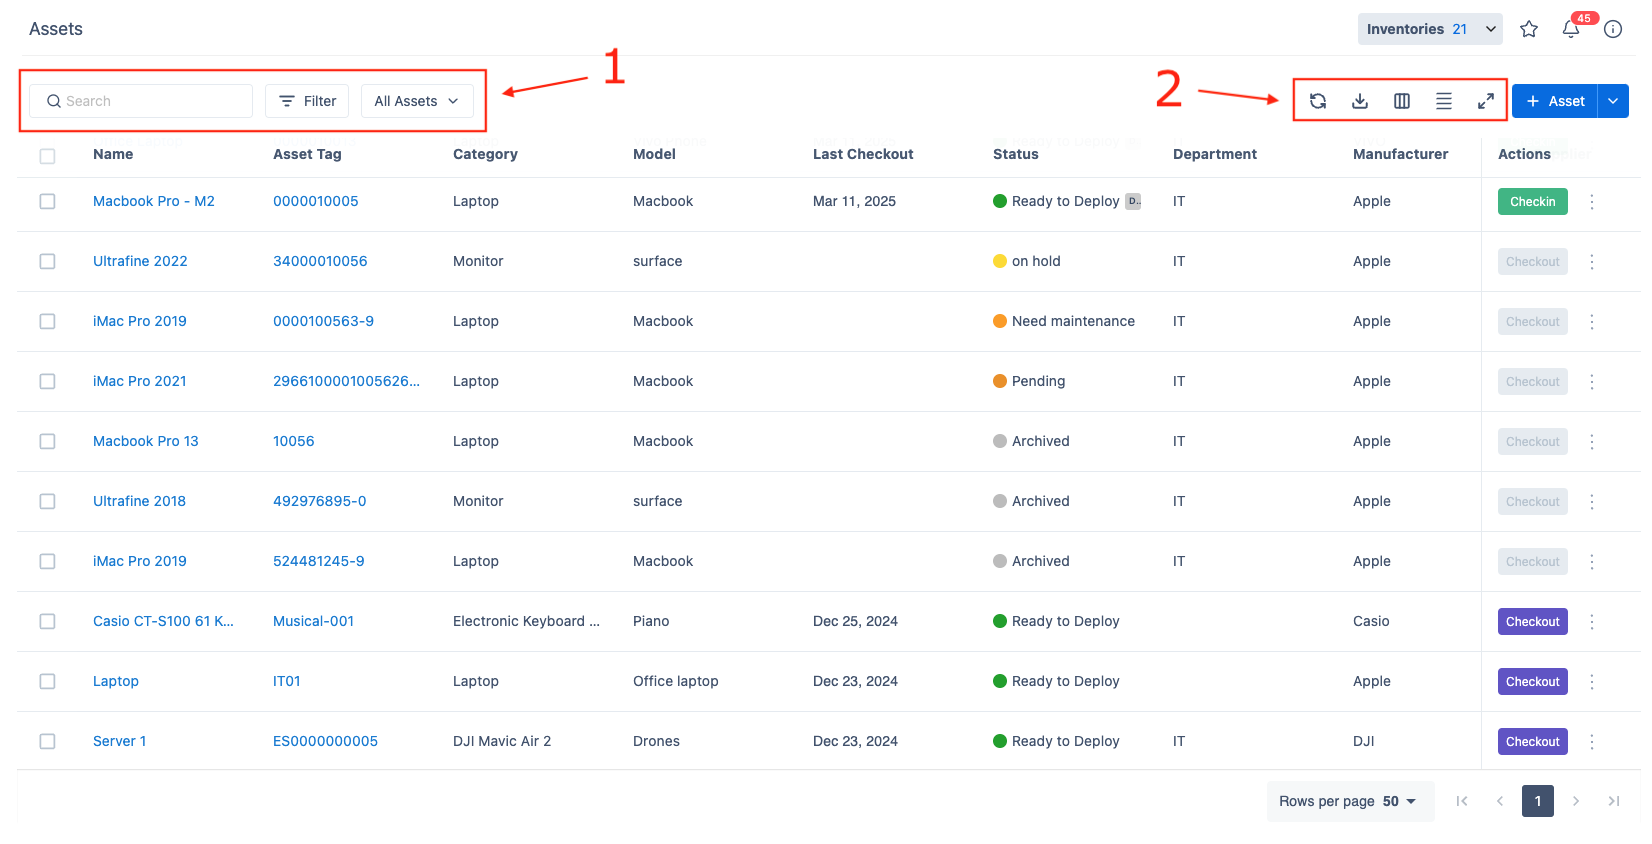
Assets in AssetIT are key items tracked via serial numbers or asset tags, serving as central items in AssetIT. All other resources can link to assets, and assets can also be interconnected.
An asset is a broad term that can refer to any main object that needs to be tracked and managed. It could be a laptop, a server, or even a bike. This allows AssetIT to adapt to the unique needs of any industry, whether you're managing IT equipment, vehicles, or specialized machinery.

Click on the asset name to view its details.
1. Filter and Categorize Assets
Search, filter, and organize your asset list in AssetIT.
 : Quickly find specific assets by asset names, asset tags, etc.
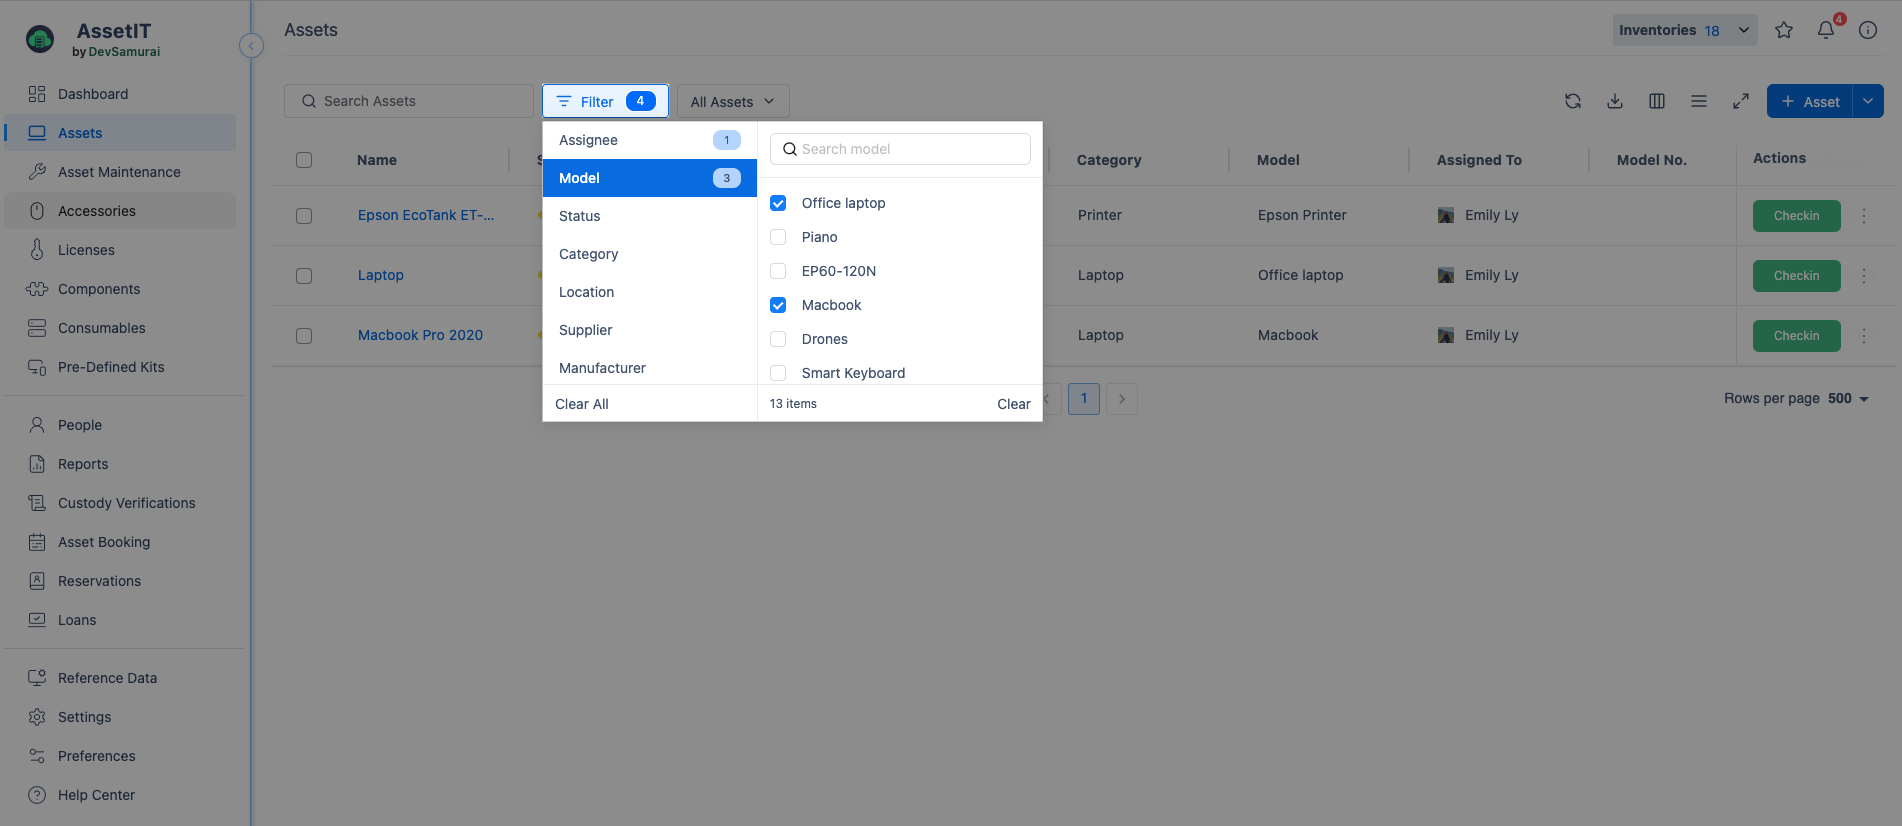
 : Refine the asset list by applying specific conditions, such as filtering by name, asset tag, or model.
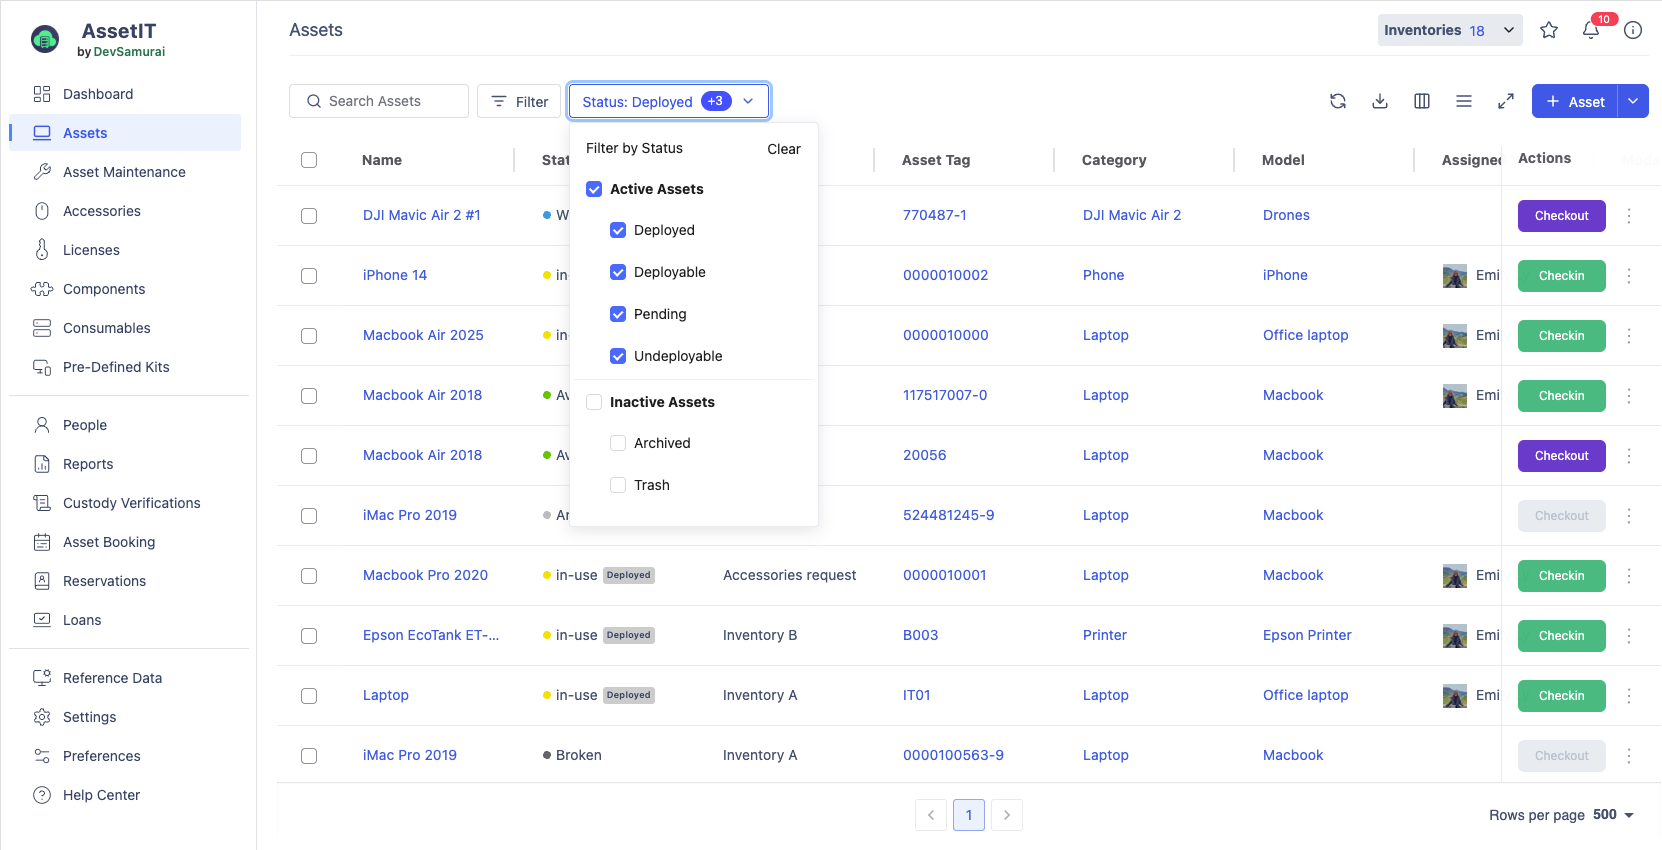
Asset Status Filter: The Asset Status Filter helps you quickly view assets based on their current lifecycle stage. By default, AssetIT shows all Active Assets, giving you an overview of everything currently usable or in circulation.

In which:
Active Assets: These are assets that are still part of your daily operations.
Deployed: Assets currently in use and eligible to be checked in.
Deployable: Assets that are ready and available to be assigned. They are in good condition and can be put into use immediately.
Pending: Assets that are not yet ready for deployment. They may be awaiting maintenance, configuration, repair, or other preparation steps.
Undeployable: Assets that cannot be assigned due to damage or other issues that make them unfit for use.
Inactive Assets: These assets are no longer part of active circulation.
Archived: Retired or no-longer-used assets. They remain stored for record-keeping and historical reference.
Trash: Assets marked for deletion. They can still be restored or permanently removed if needed.
2. Toolbar
 Refresh: Click this button to reload the asset list.
 Export: Use this button to download the asset data as a PDF or CSV file. You can choose to export all assets or just the selected ones.
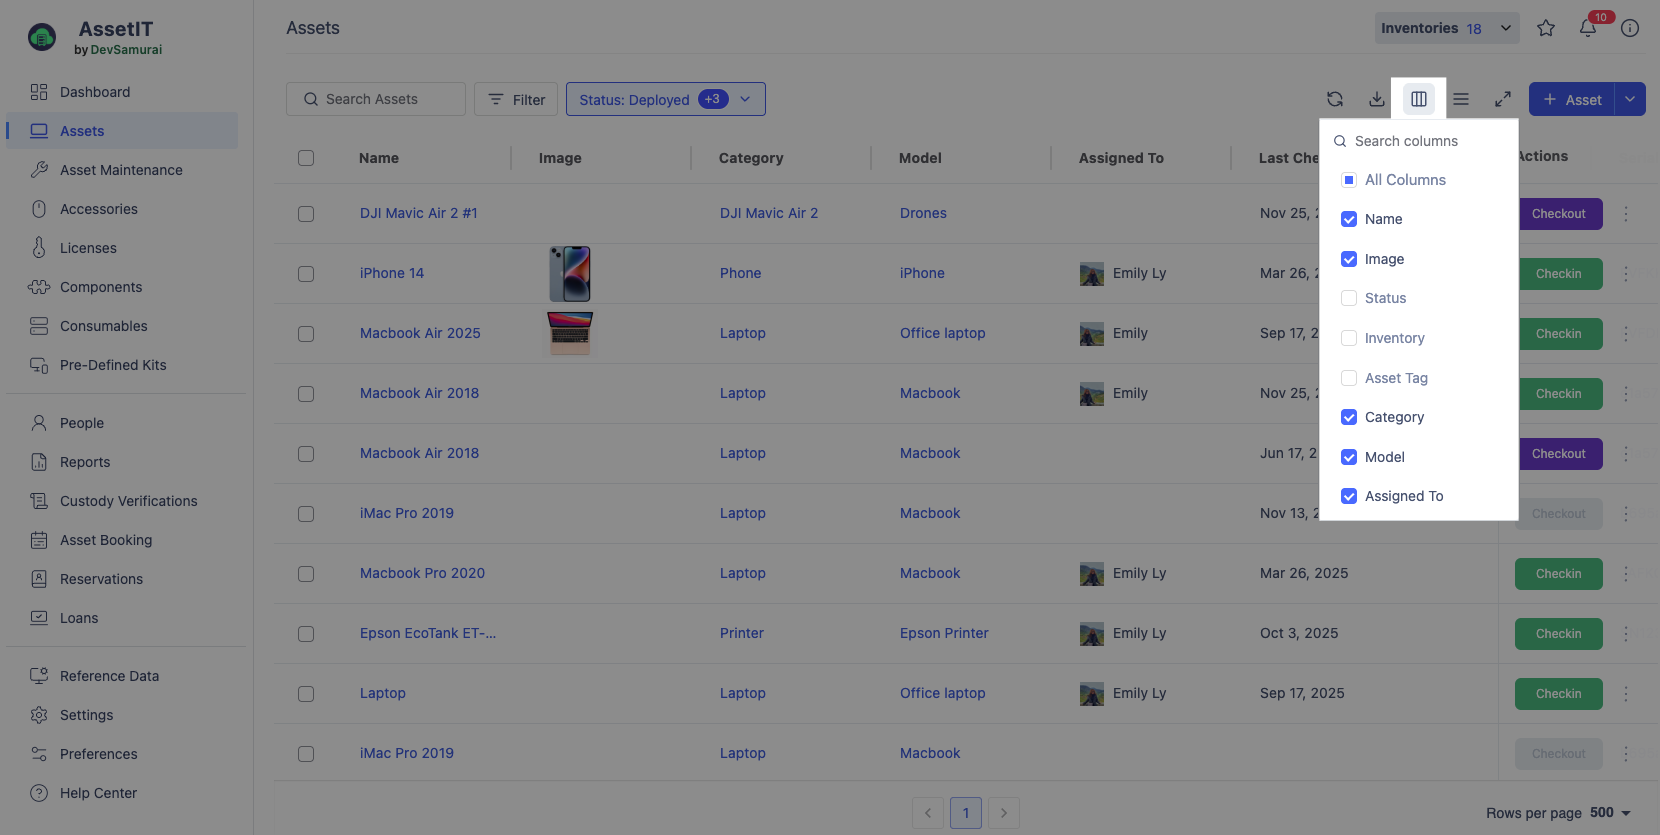
 Column: This button allows you to customize the asset list view by hiding, showing, or searching for a column.
 Density Modification: Use this button to adjust the row height of the asset list, giving you control over how much information is visible at once.
  Full Screen: Click this button to expand the asset list to full screen.
.png)