.png)
There are 02 ways to create new accessories: bulk import and manual set up .
Manual Set Up
On the top right of the Accessories page, click on 
-
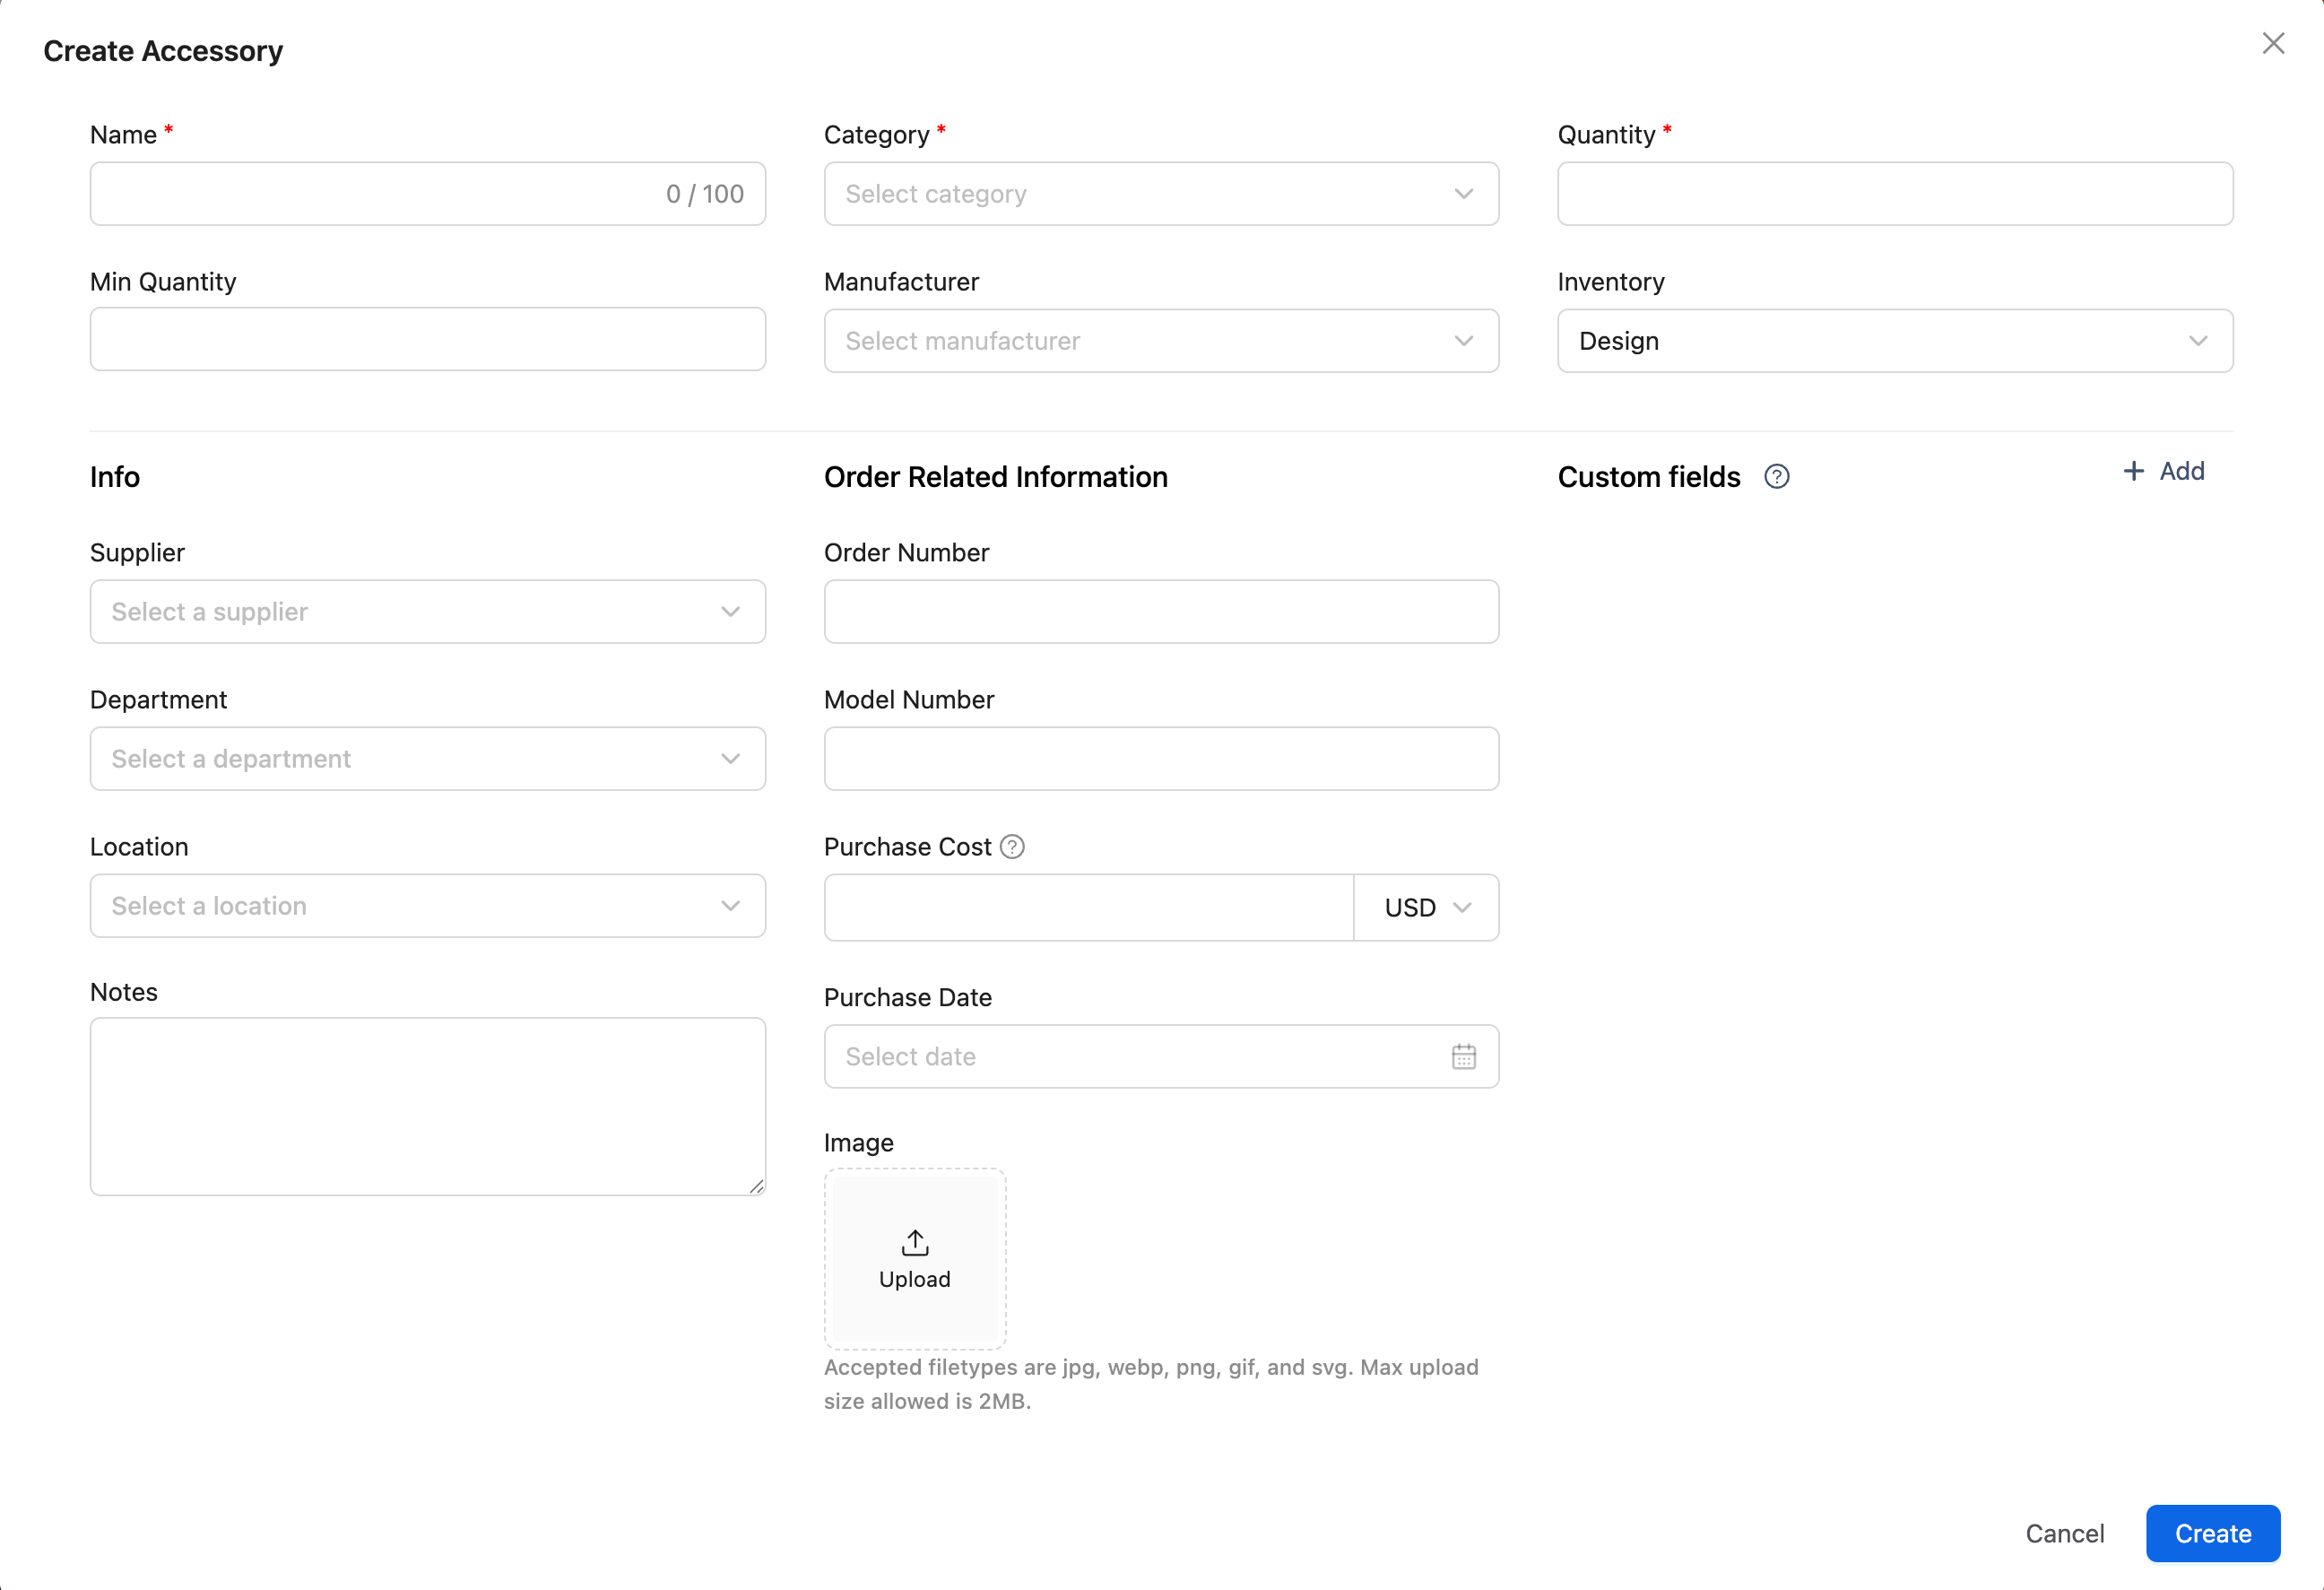
Fill in the Required Information:
-
Accessory Name: Enter a descriptive name for the accessory (e.g., "Wireless Keyboard").
-
Category: Select the category that best fits the accessory type (e.g., "Peripheral," "Office Supplies"). Use the

-
Quantity: Enter the total quantity of this accessory available for tracking.
-
-
Additional Fields (Optional):
-
Manufacturer, Supplier, Department, Location, Inventory: Use these fields to add further details about the accessory, such as the manufacturer or supplier, or to specify which department or location the accessory is associated with.
-
Min Quantity: Set a minimum quantity level to trigger alerts when the stock is low, ensuring you can reorder before running out.
-
Notes: Add any additional information that may be useful.
-
Bulk Import
-
On the top right of the Accessories page, click on the dropdown of
-
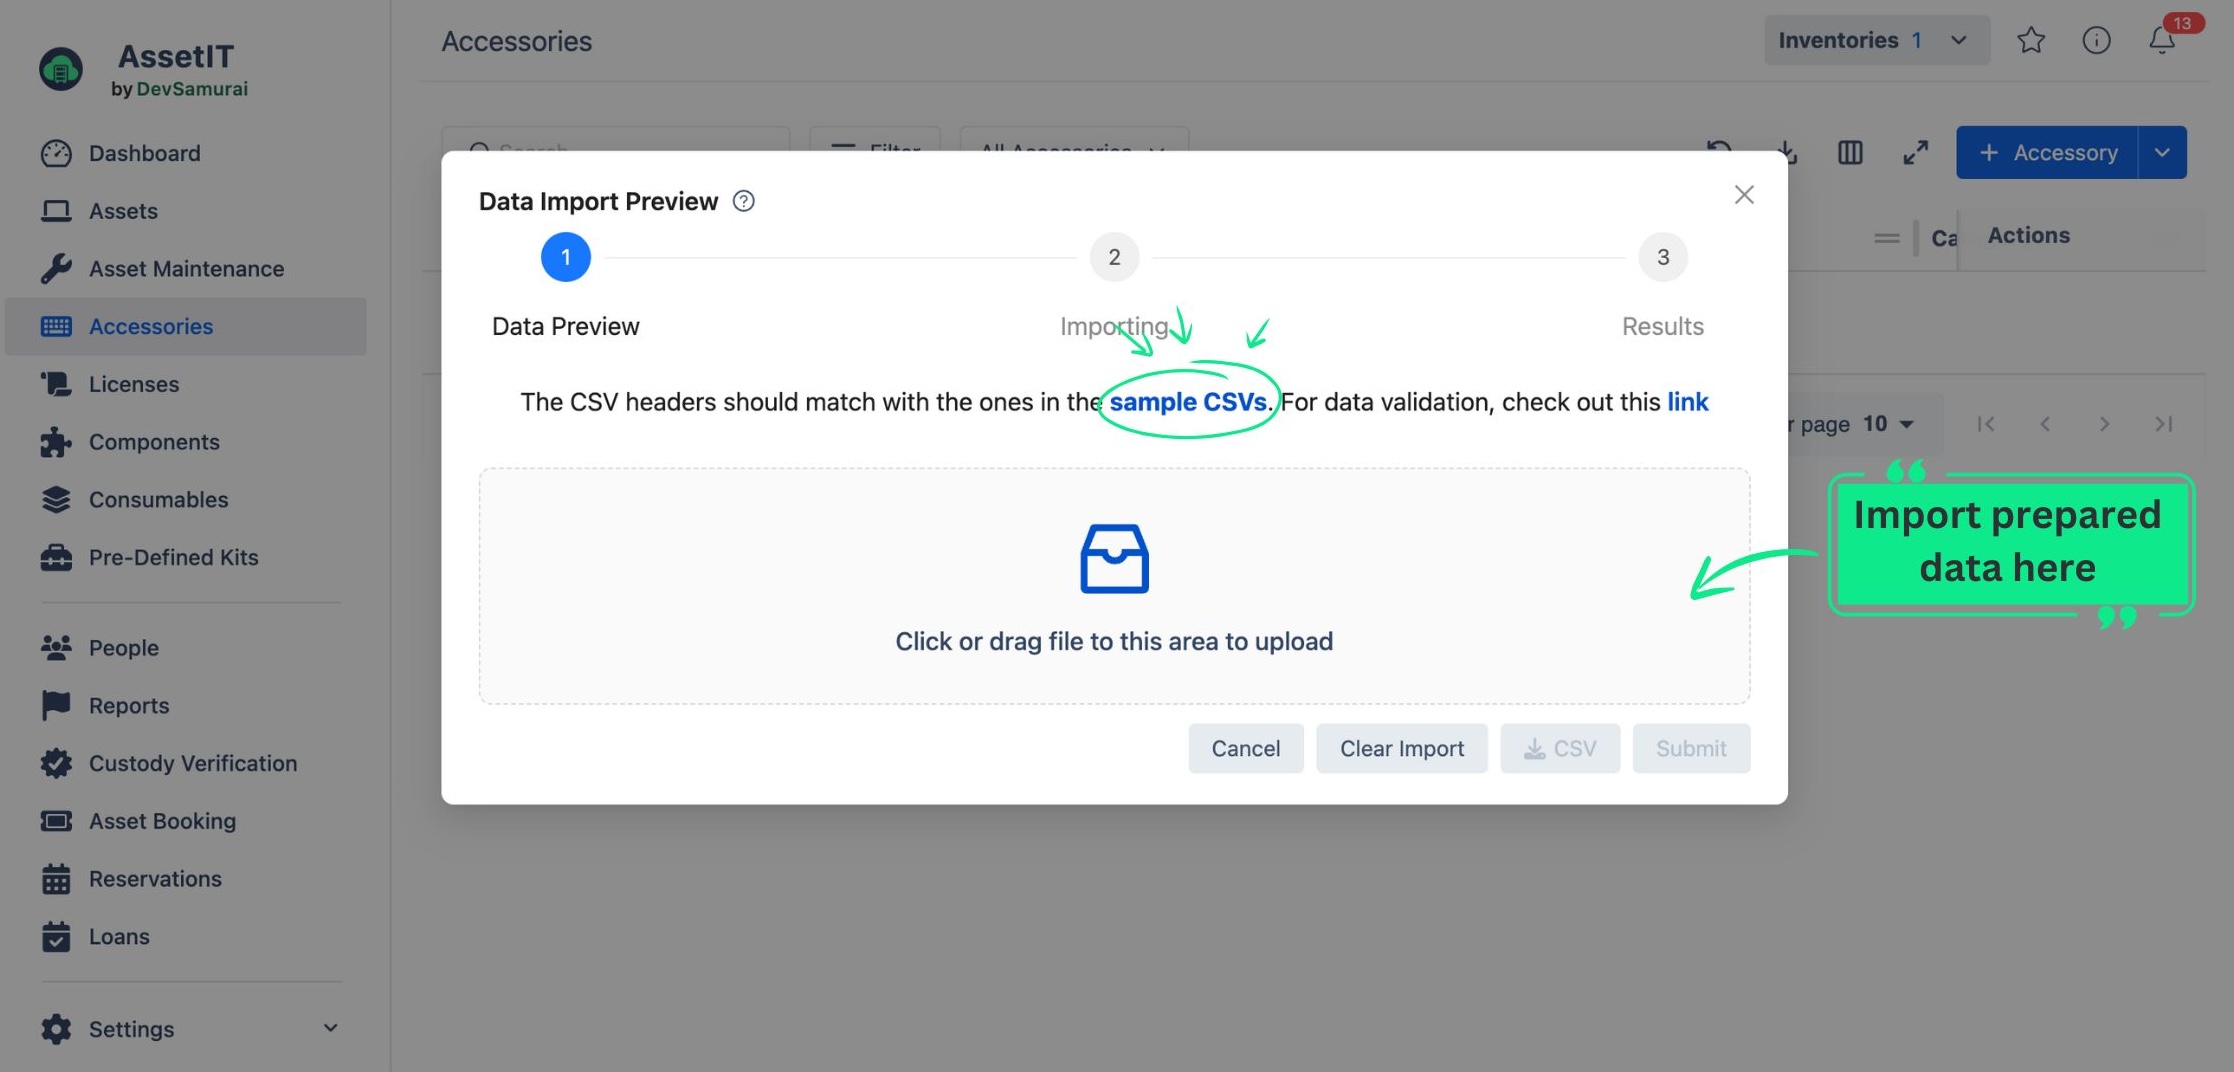
You will see a table that instructs you to use the sample CSV file for data preparation.
-
Once you finish preparing your data, import it into the app. You will then be taken to the Data Preview stage.
-
In the Data Preview stage, the app will highlight any fields with errors, allowing you to make adjustments directly.
-
To modify data information, click on the Edit button.
-
To automatically generate missing data for Department , Inventory , Category , Location , Supplier , Manufacturer , and Status Label , click on the “Generate Data” button.
-
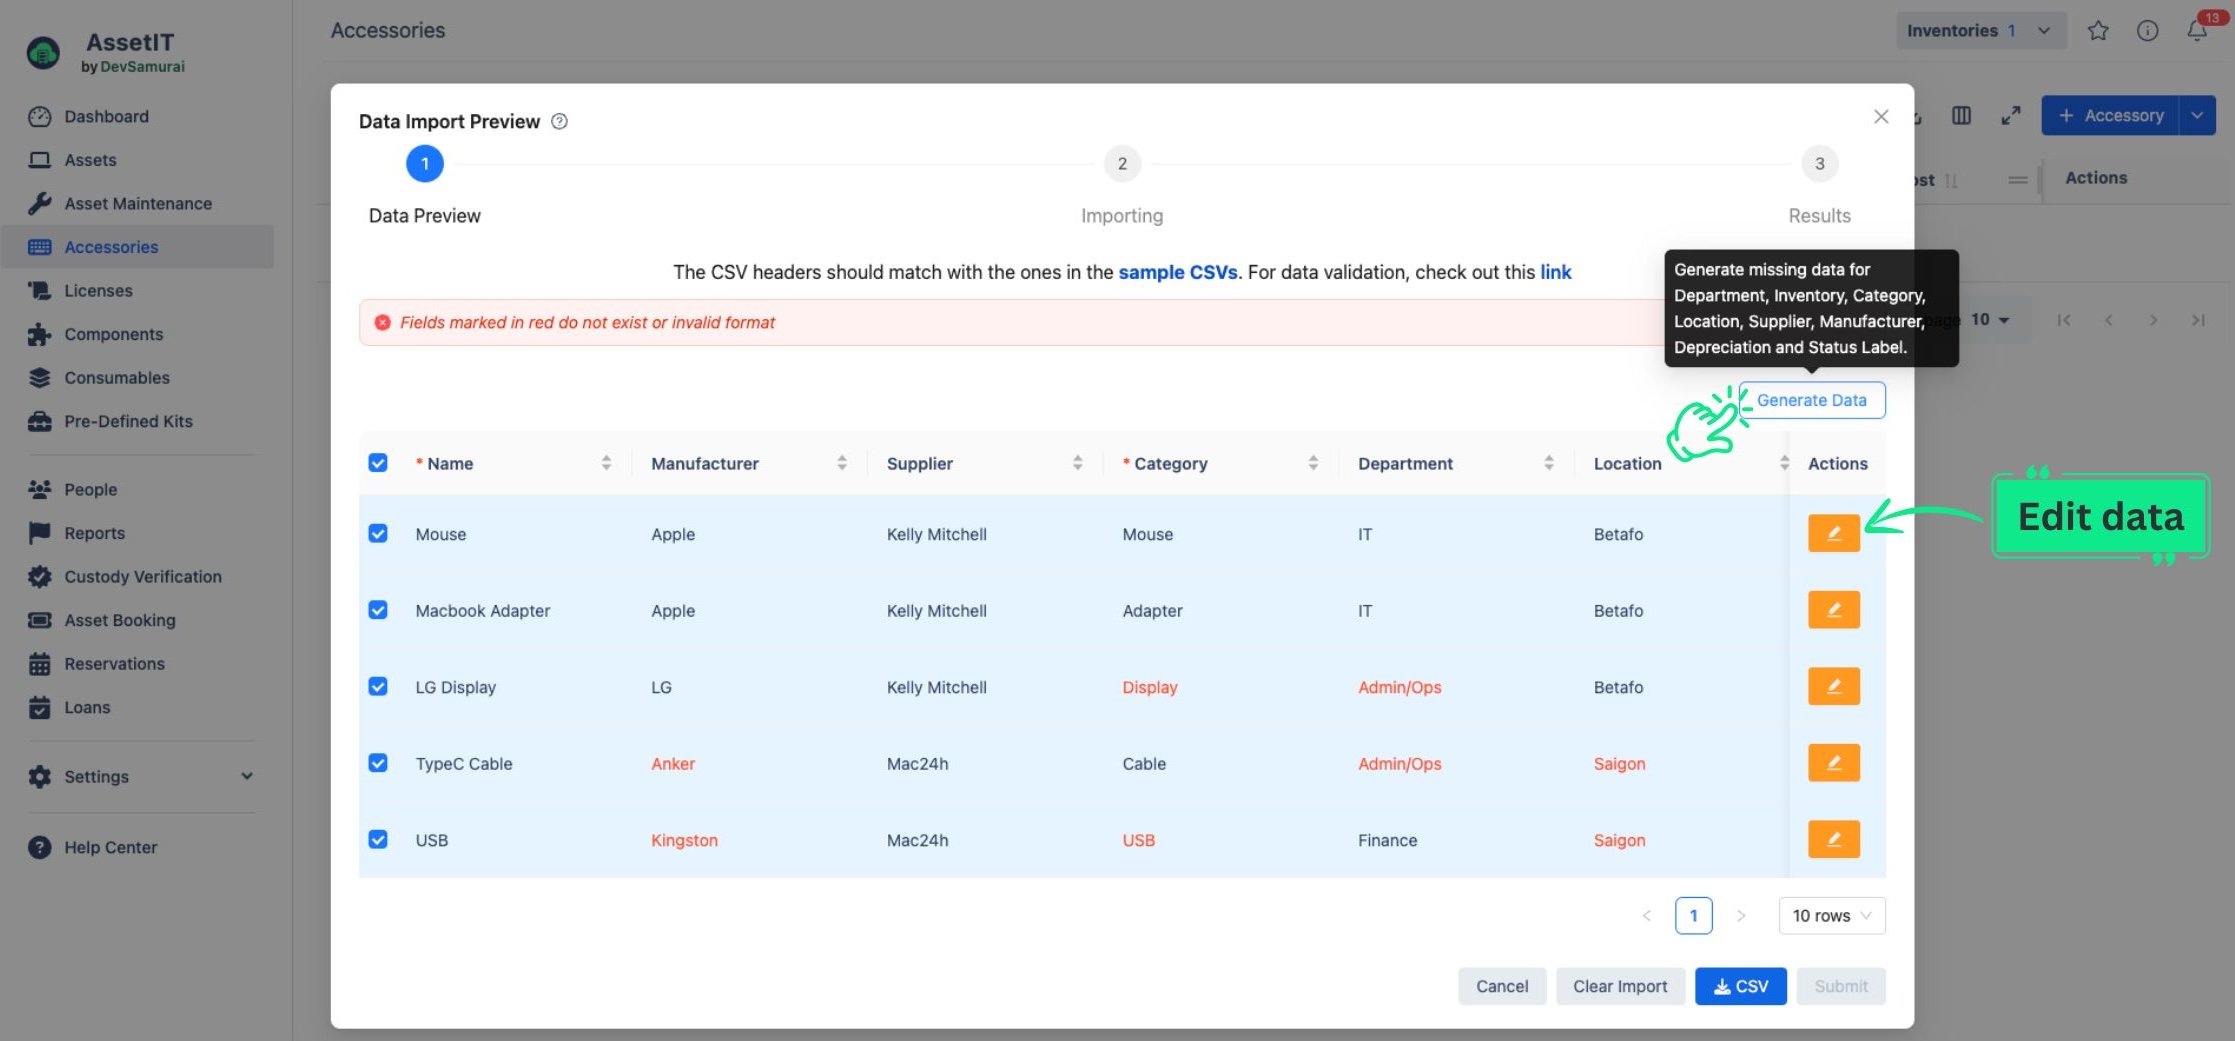
You can also download the most recently modified data into a CSV file for further customization by clicking the 
-
Click on Submit to finish importing your accessories.
-
You should now see a list of your accessories on the Accessories page.