Link assets to Jira issues using External Asset Platform
Prerequisites:
AssetIT version 1.1.0-AC or higher installed.
An Asset custom field configured on the Issue Screens in Jira.
Adding Asset Field to Jira Project:
For company-managed projects: https://support.atlassian.com/jira-service-management-cloud/docs/add-additional-asset-fields/
Go to Settings () > Issues.
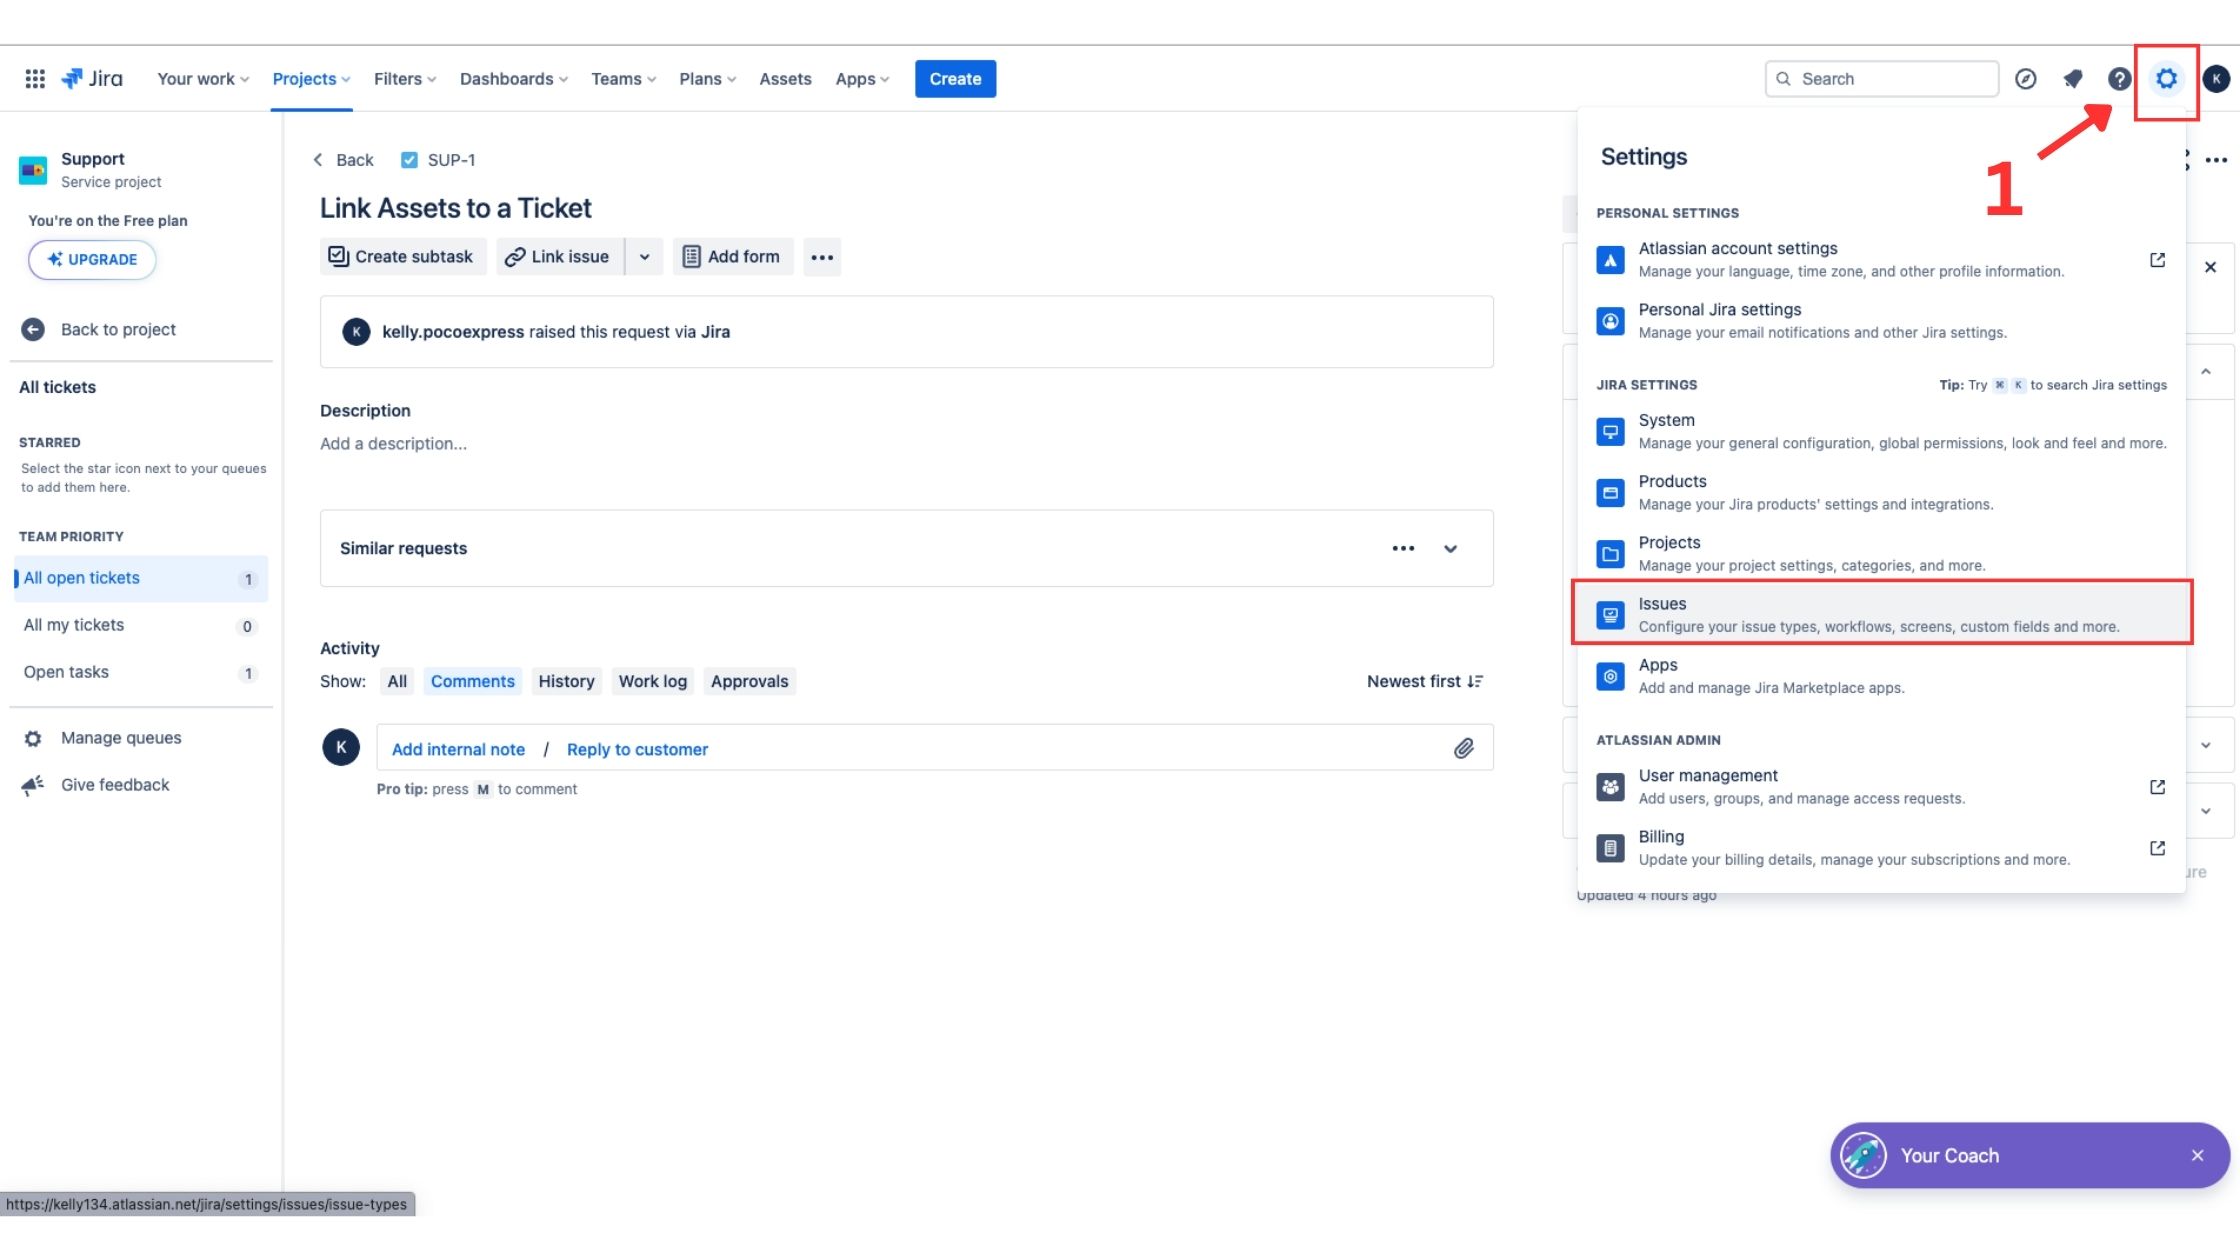
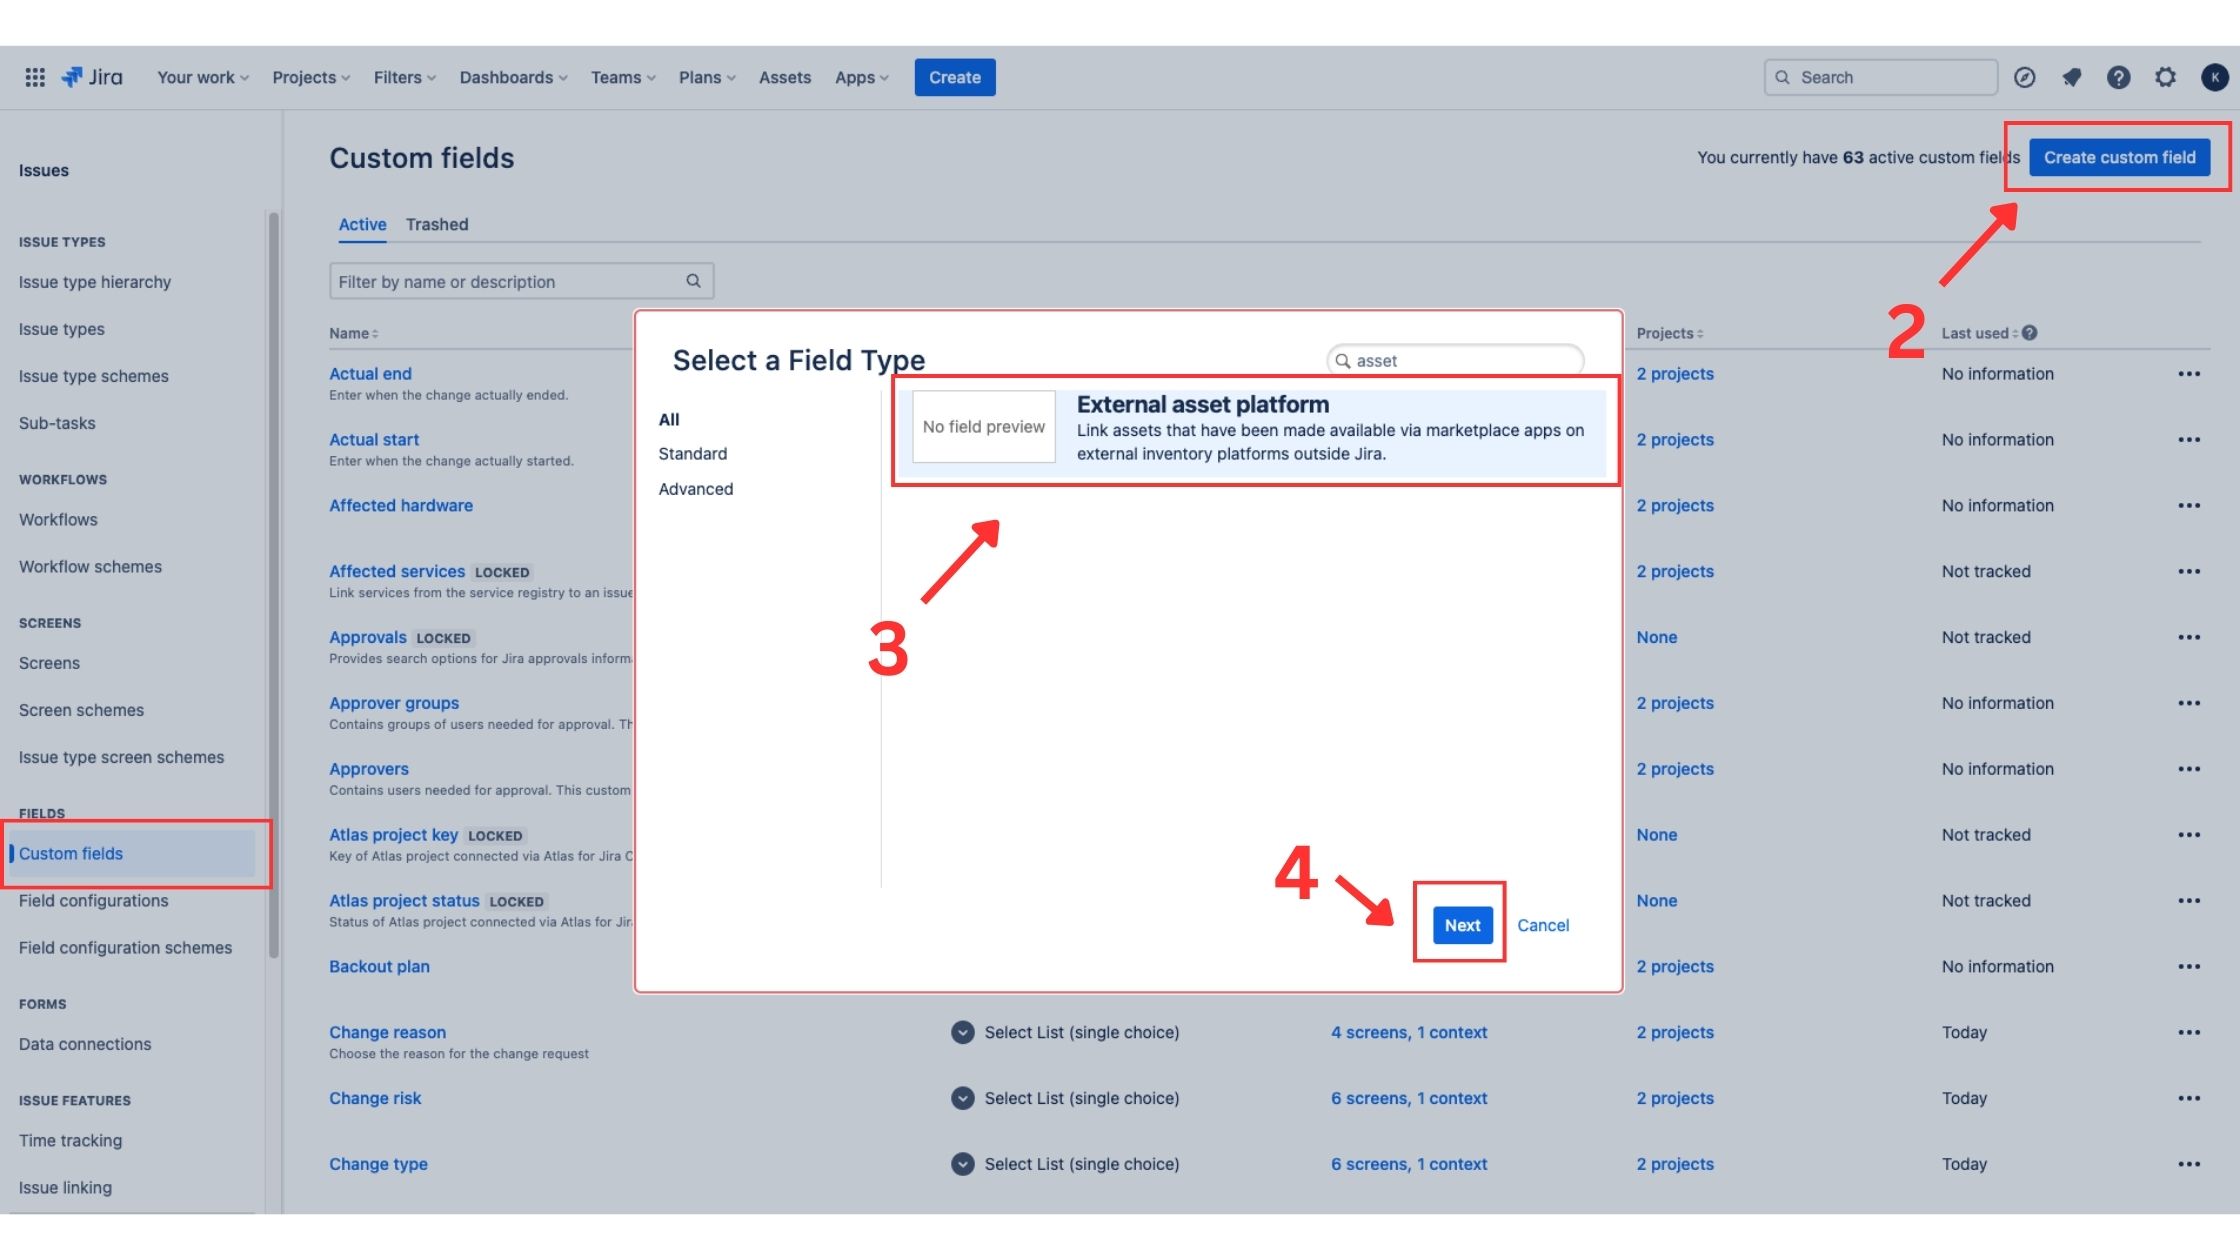
Click Add custom field.
Find and select the External assets platform field.
Select Next.
Enter a name and optional description. E.g: AssetIT
Select Create.
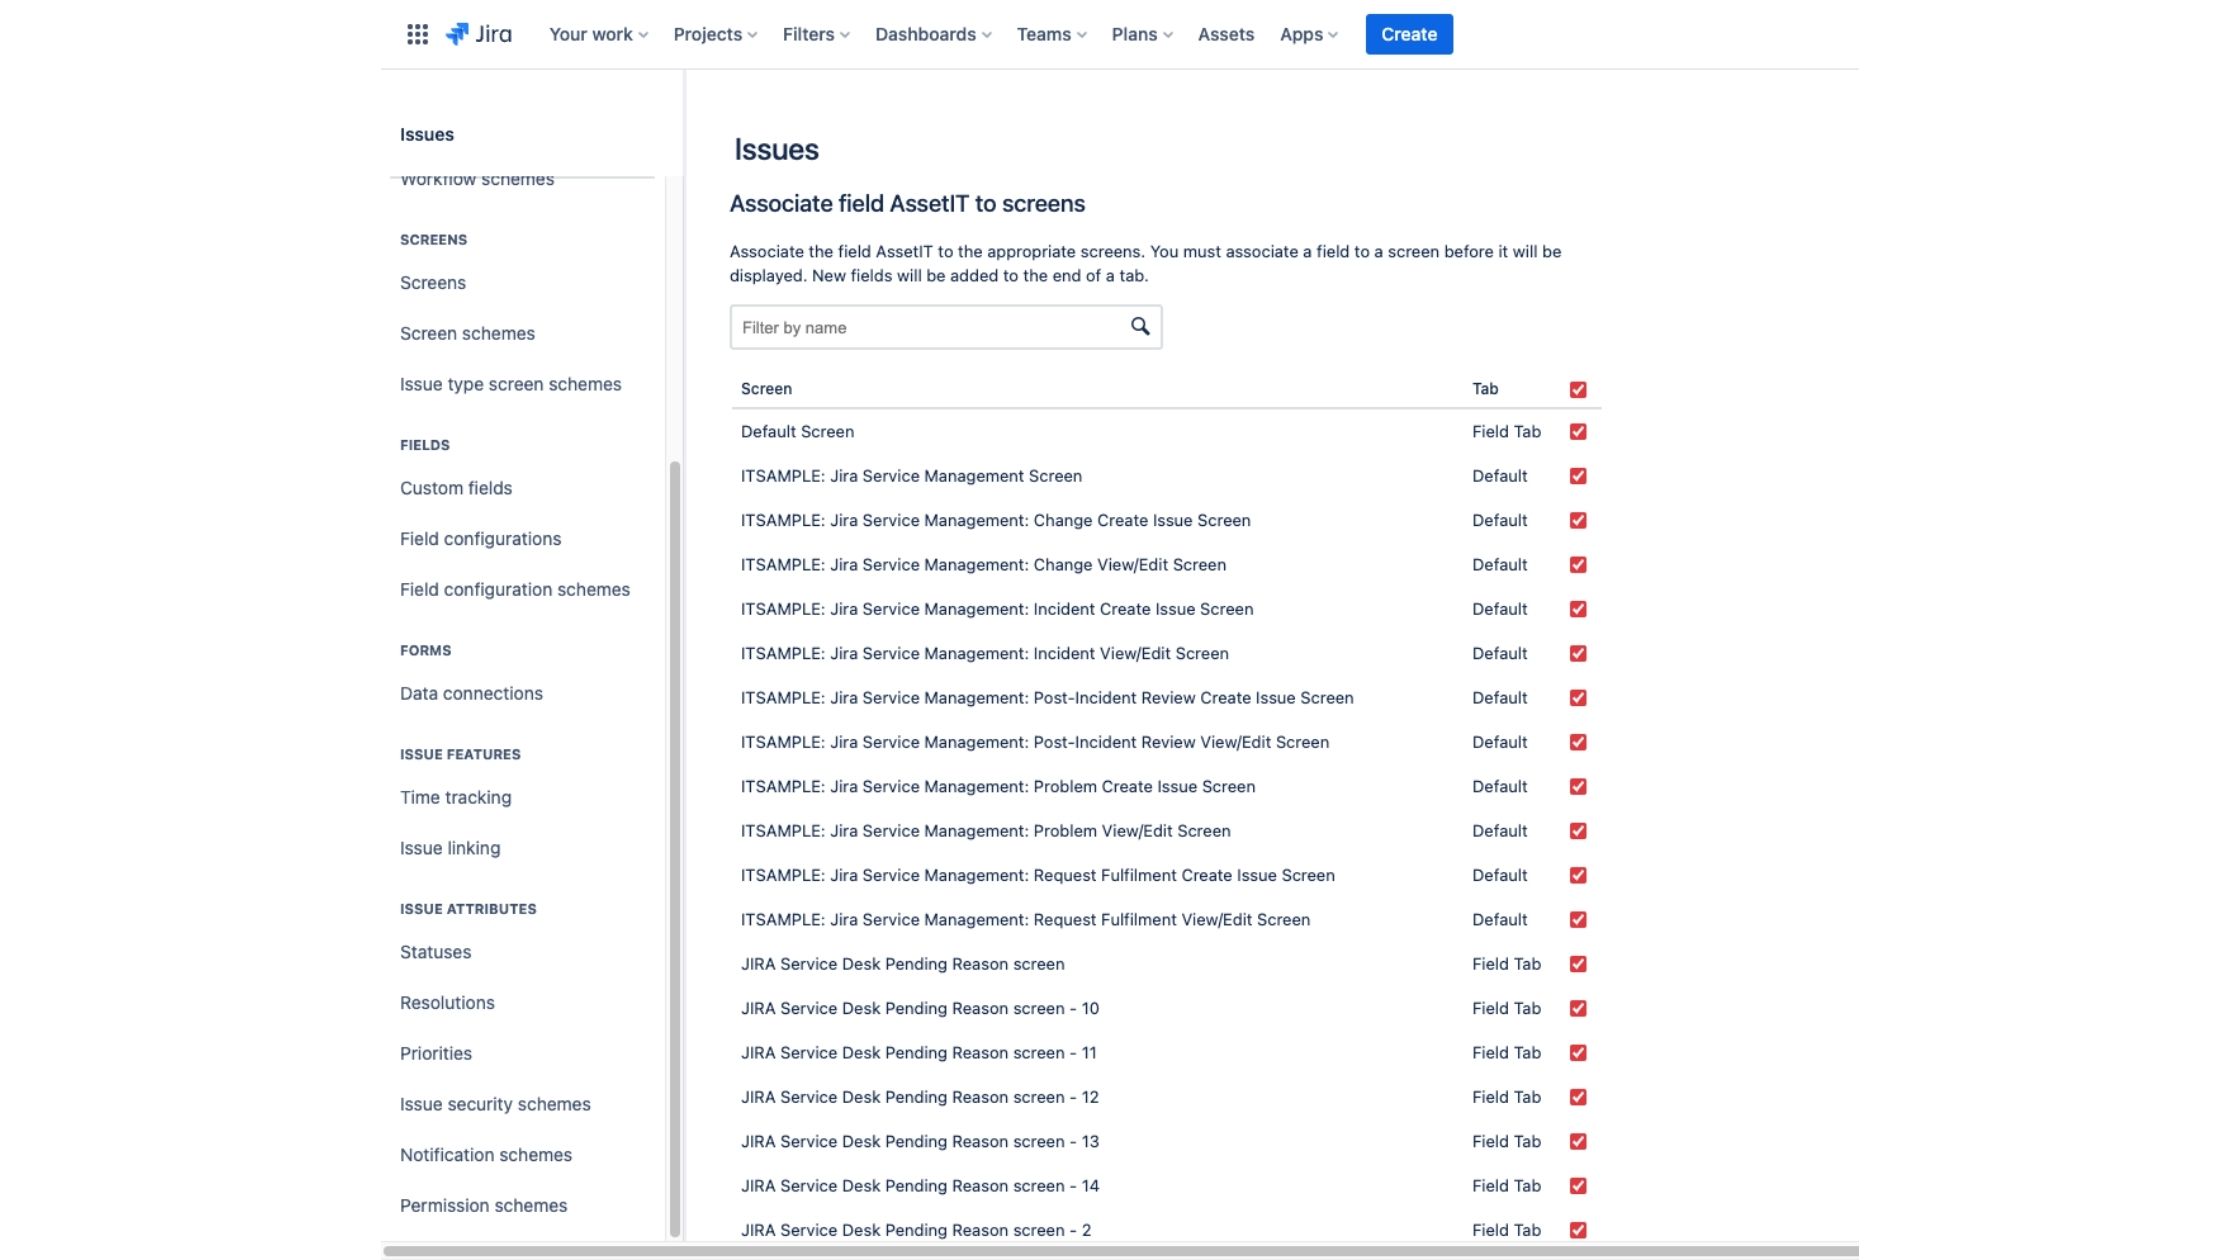
Select the screens you want this field to appear in > Scroll down and click Update.
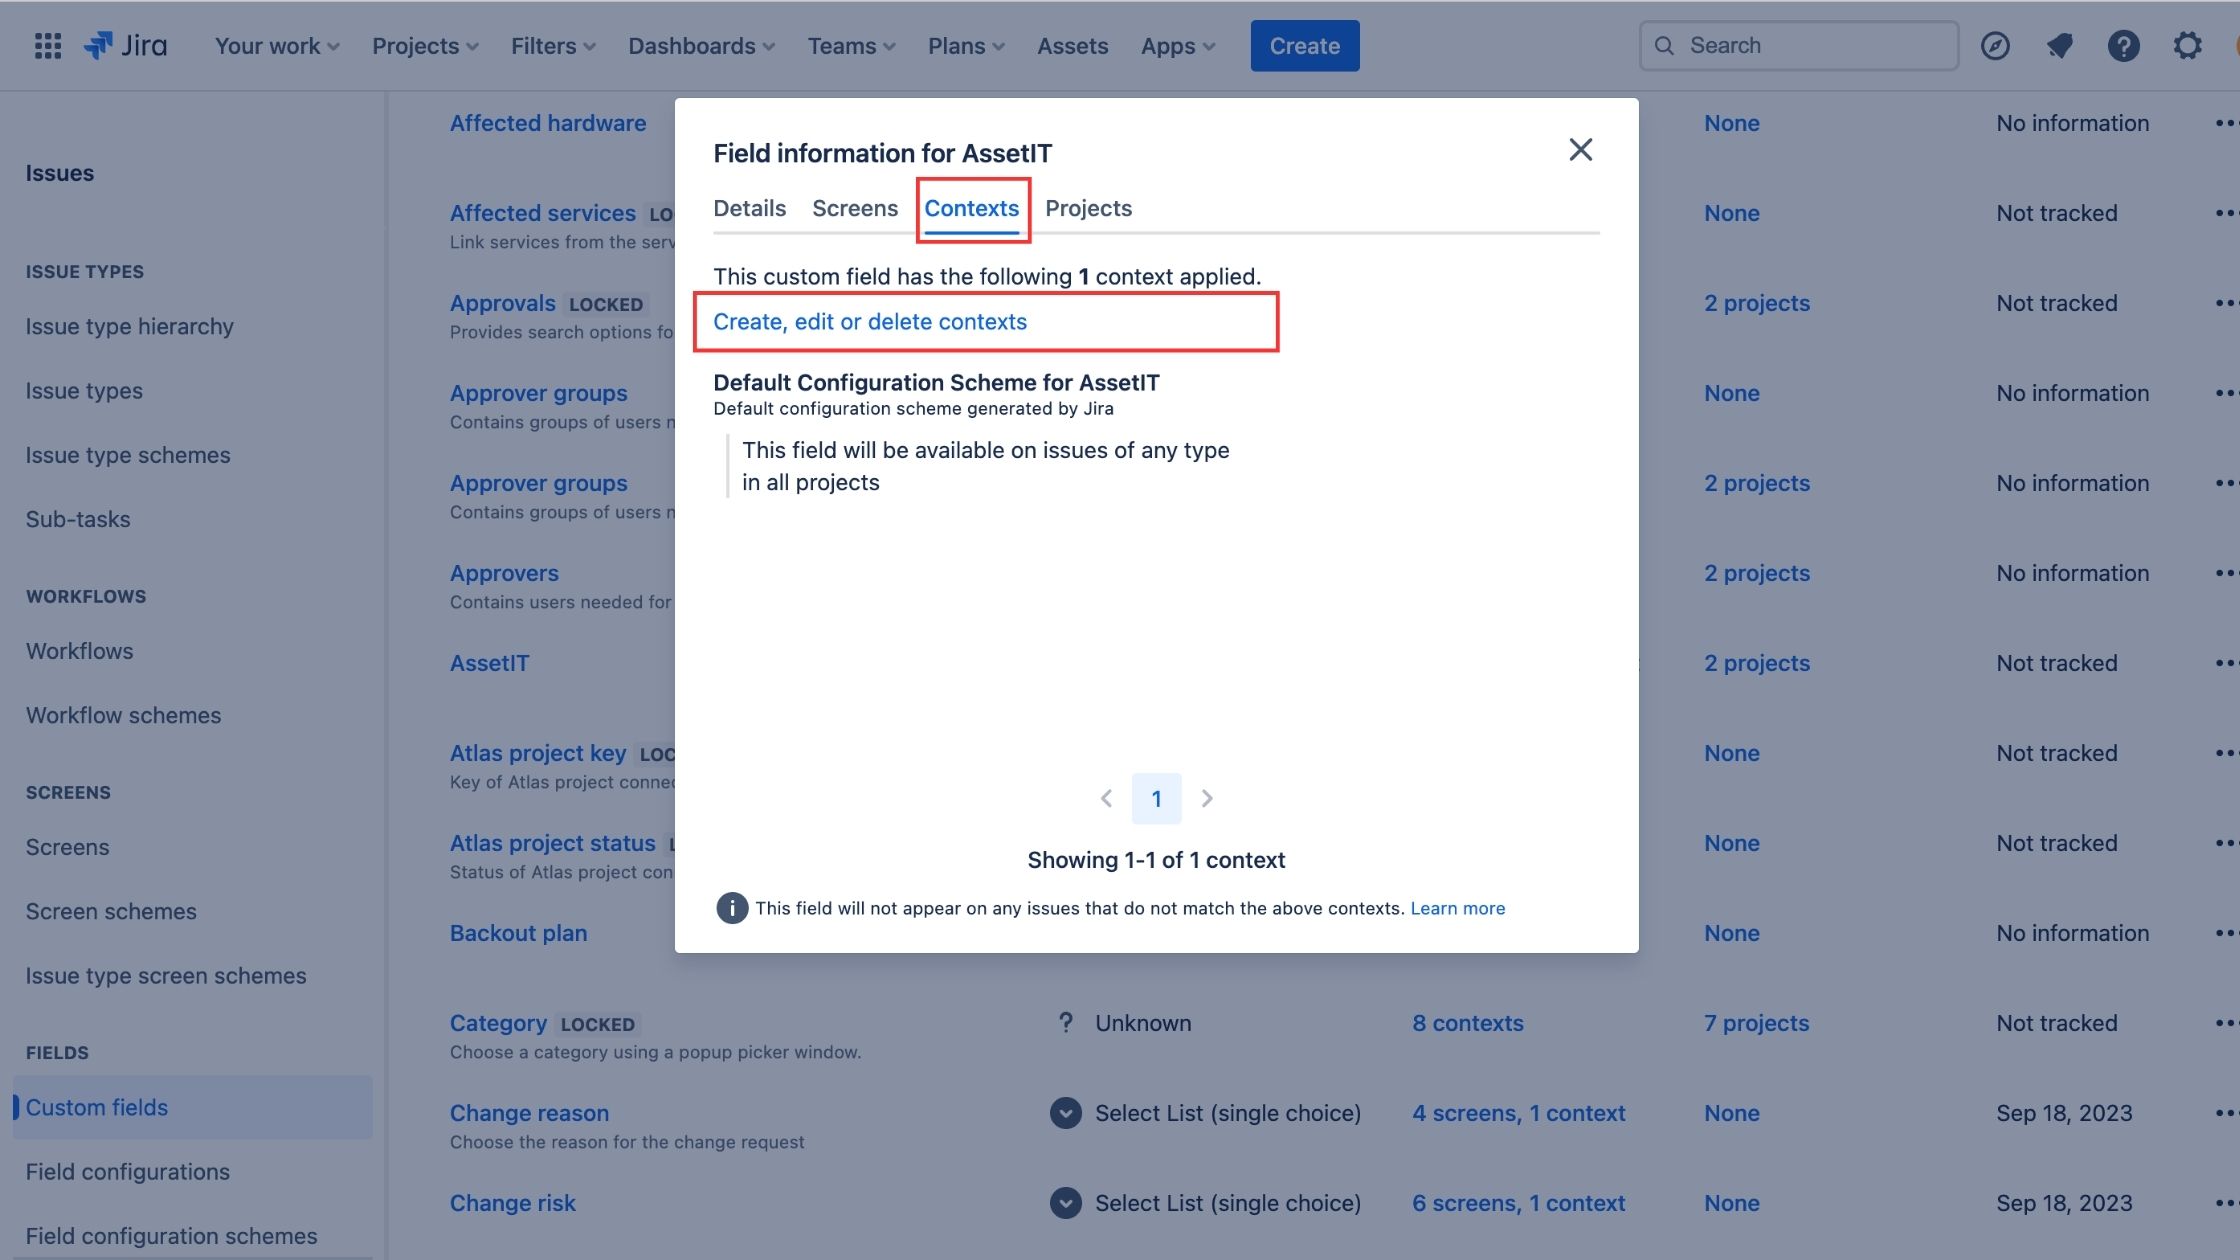
Go back to the Custom Fields list and choose the created AssetIT field > Choose Contexts tab.
Choose Create, edit or delete contexts.
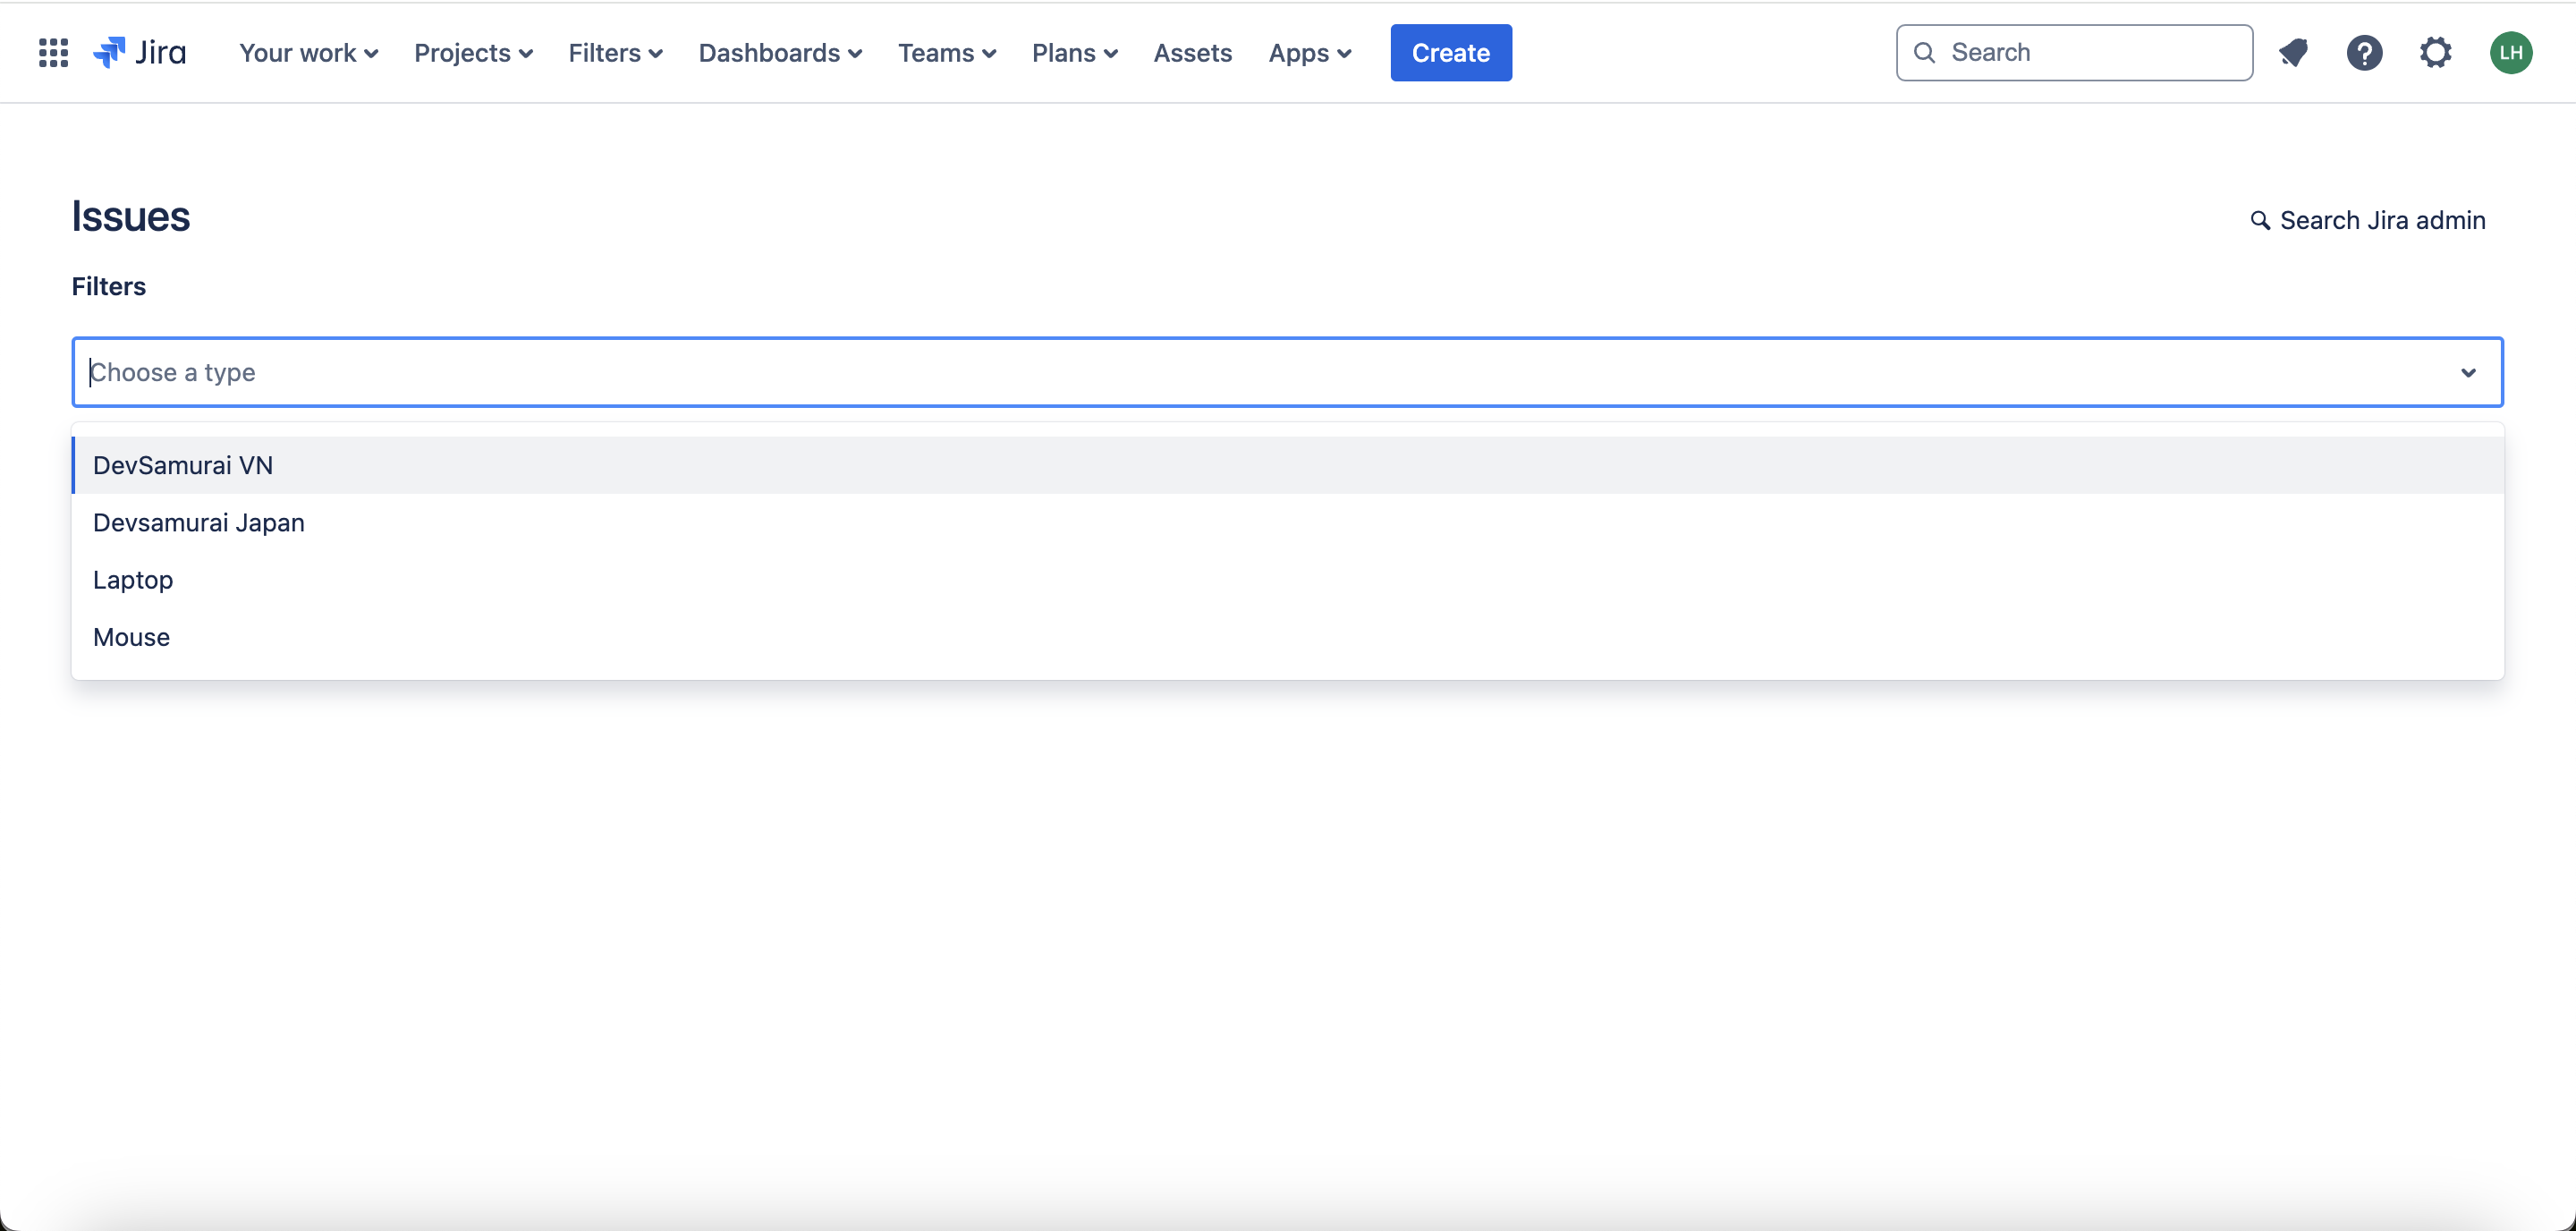
At the Default Configuration Scheme for AssetIT, click Edit Filters.
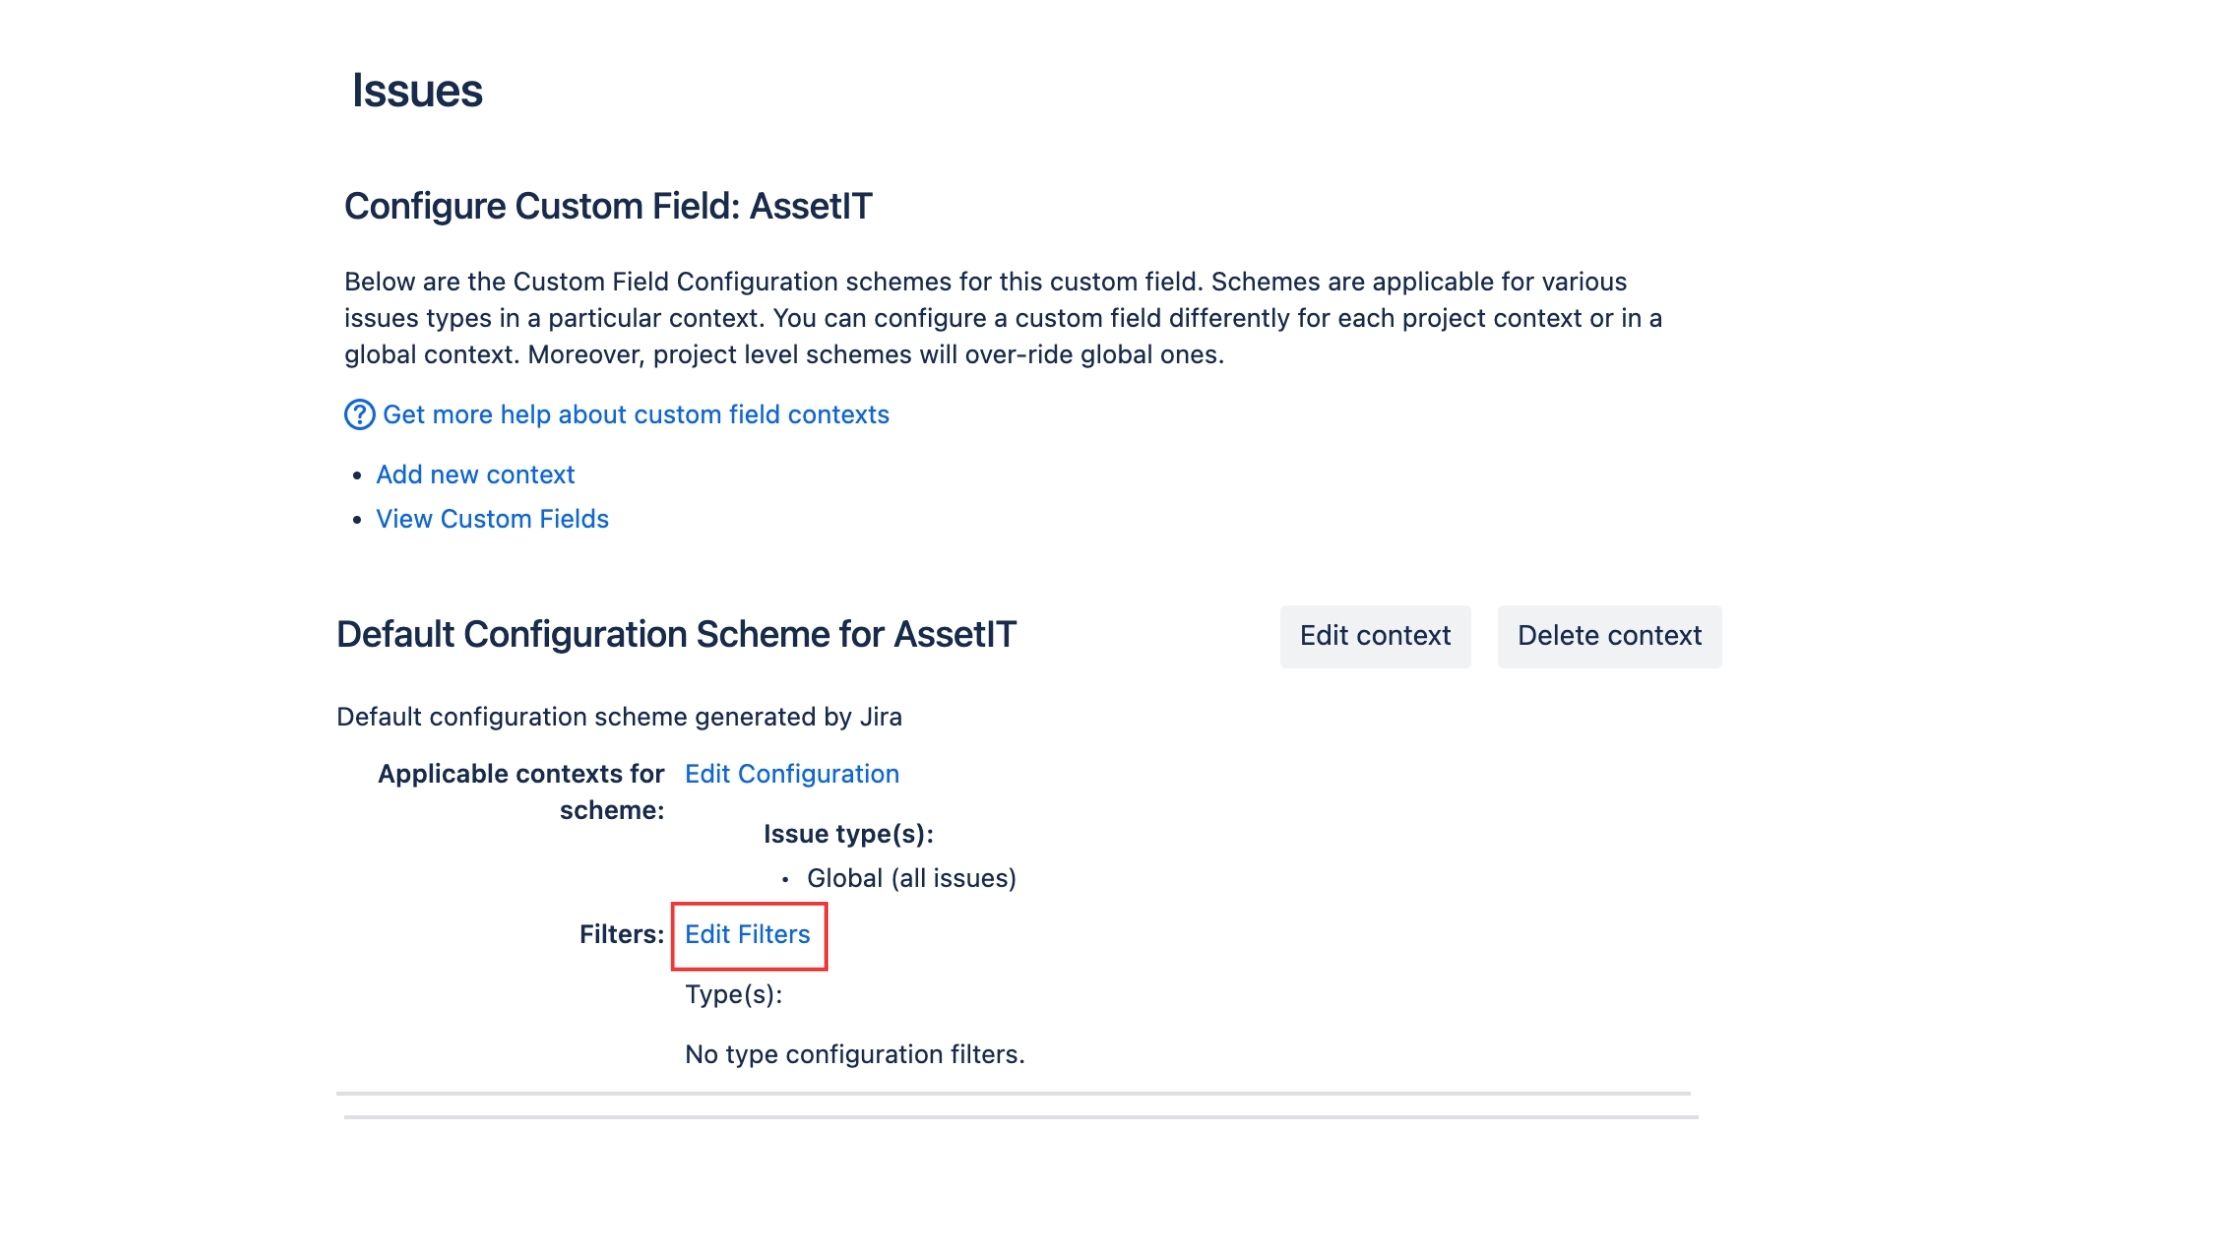
Choose Inventories that you want to be sorted > click Save.
For team-managed projects: https://support.atlassian.com/jira-service-management-cloud/docs/link-an-asset-to-a-request-in-team-managed-projects/
Field Type: “External asset platform”
Linking Assets to Jira Issue:
Once you have the Asset field added to your Jira project, you can link assets to a Jira issue using either of the following methods:
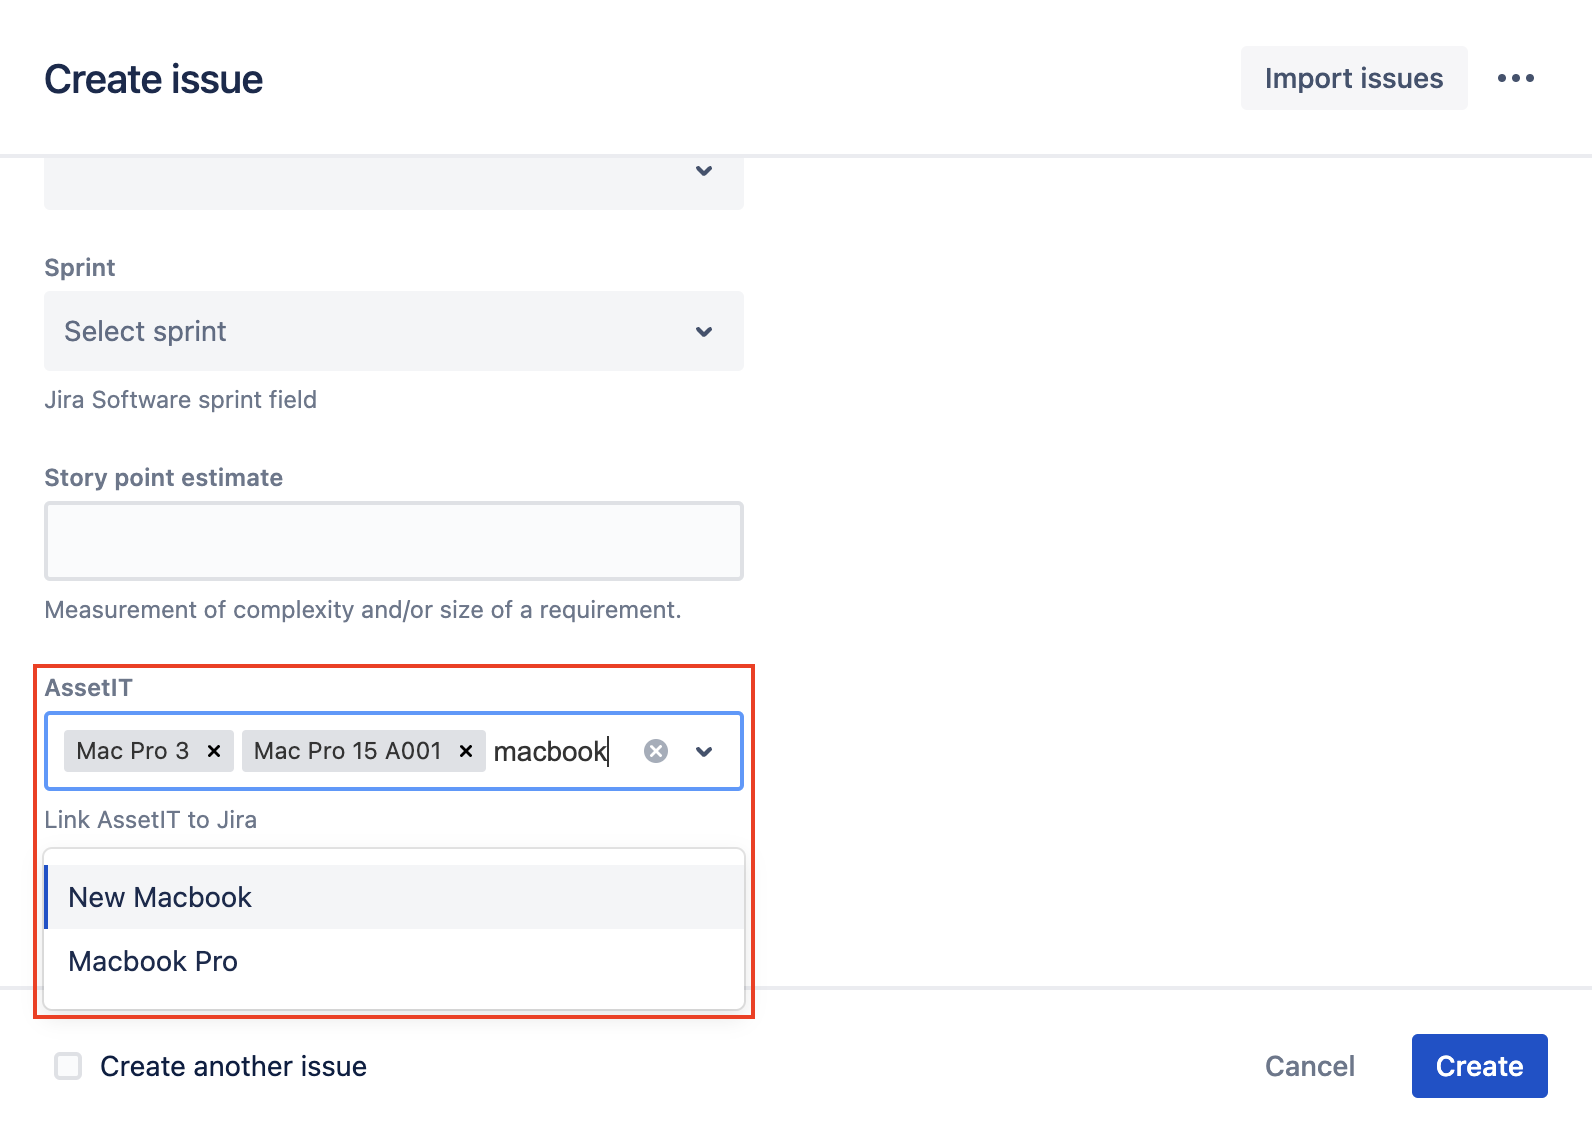
From Create Issue:
Open the Create Issue dialog in Jira.
Locate the Asset field and click on it.
Search for assets by name in the Asset field search bar.
Select one or multiple assets from the search results.
Proceed with creating the issue, and the selected assets will be linked to the issue.
From the Issue Details Screen:
Open the Jira issue details screen.
On the right panel, locate the Asset field.
Click on the "Link asset" option within the Asset field.
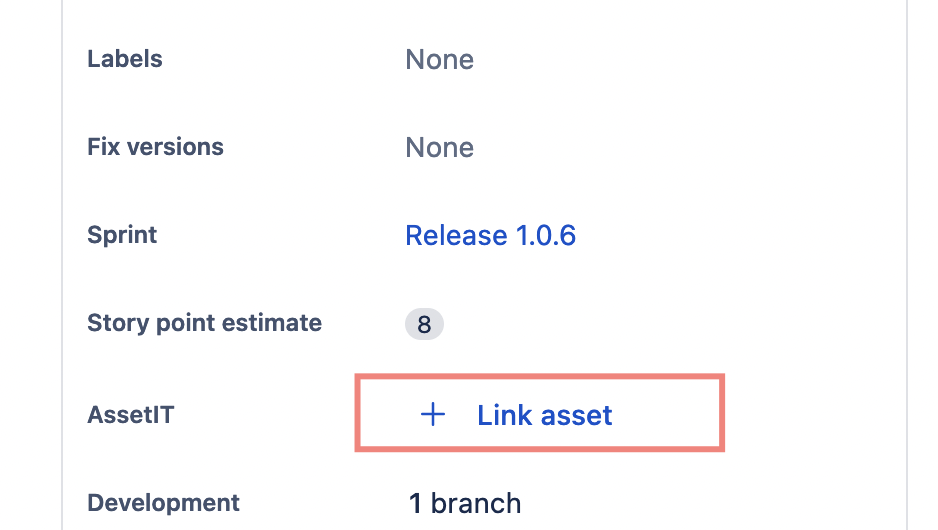
In the panel that opens, search for assets by name.
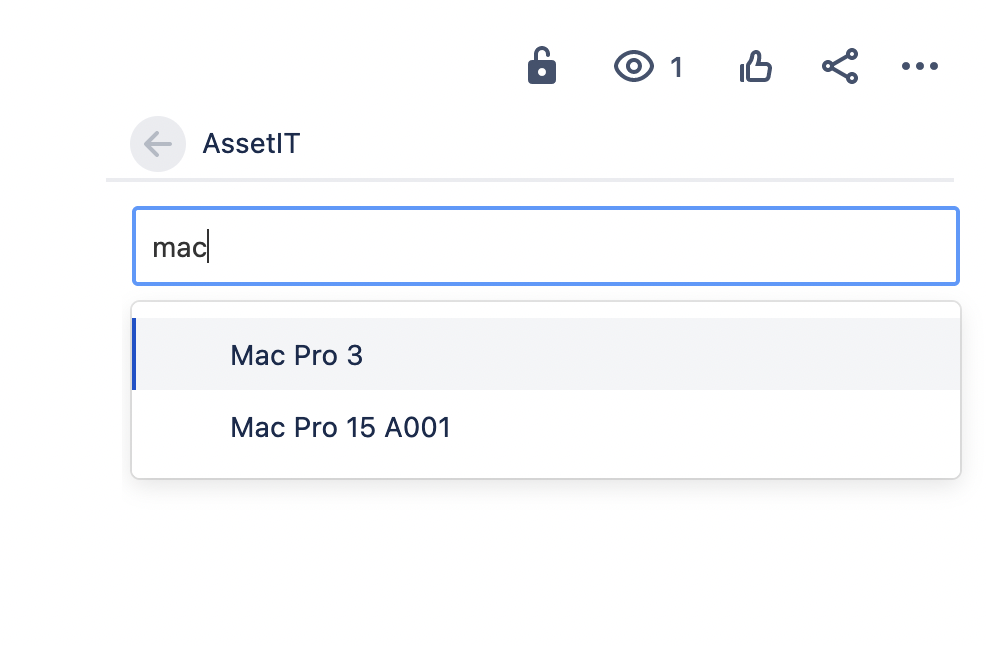
Select the desired assets and add them to the issue.
Asset IT Panel
The Asset IT Panel feature allows you to enable and utilize the AssetIT panel within your project for enhanced asset management for Jira.
1. Enable Asset Panel for Project
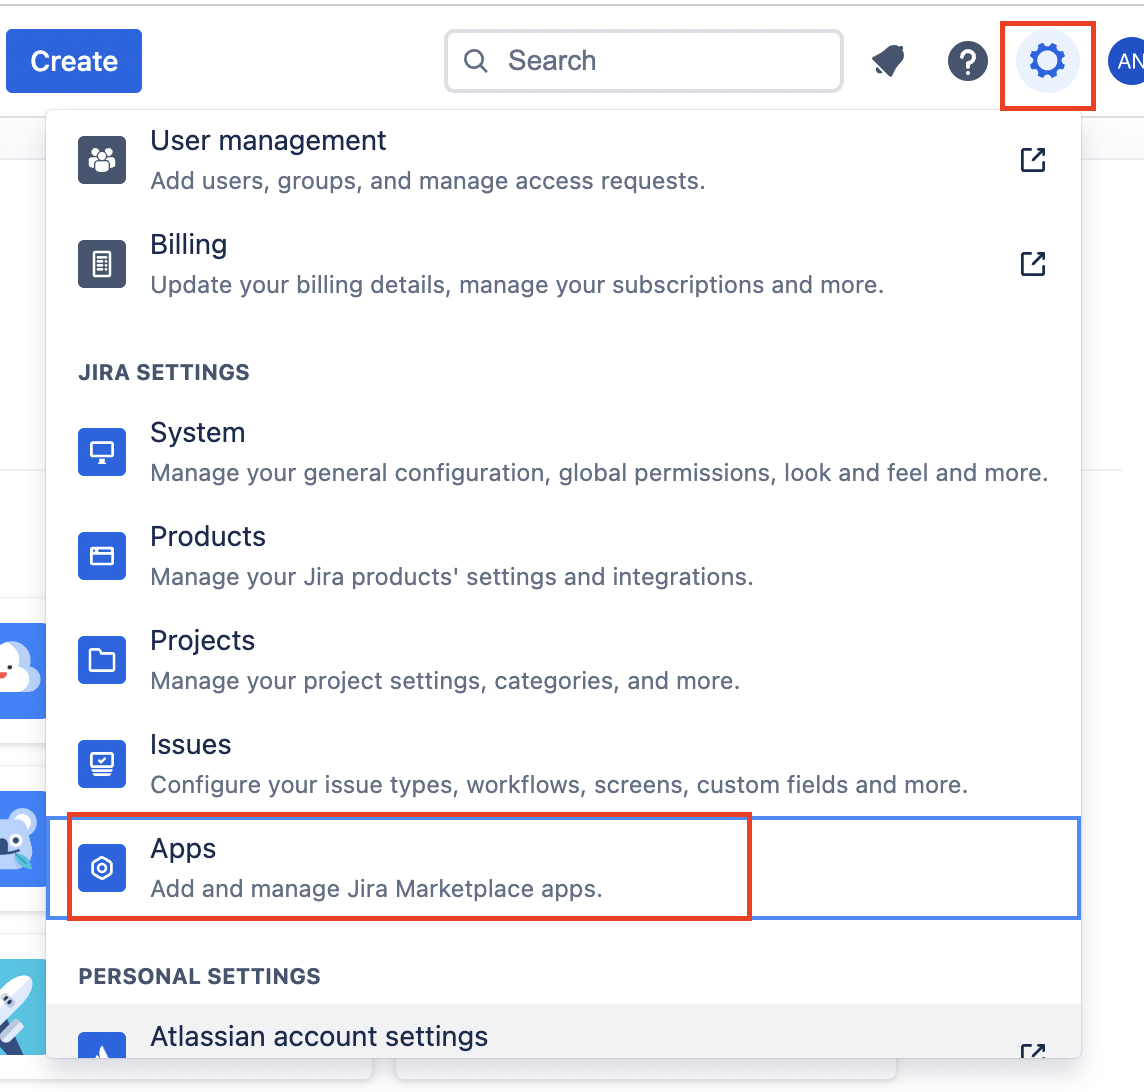
Access the settings section by navigating to "Settings" in the menu => Locate and select the "Apps" option.
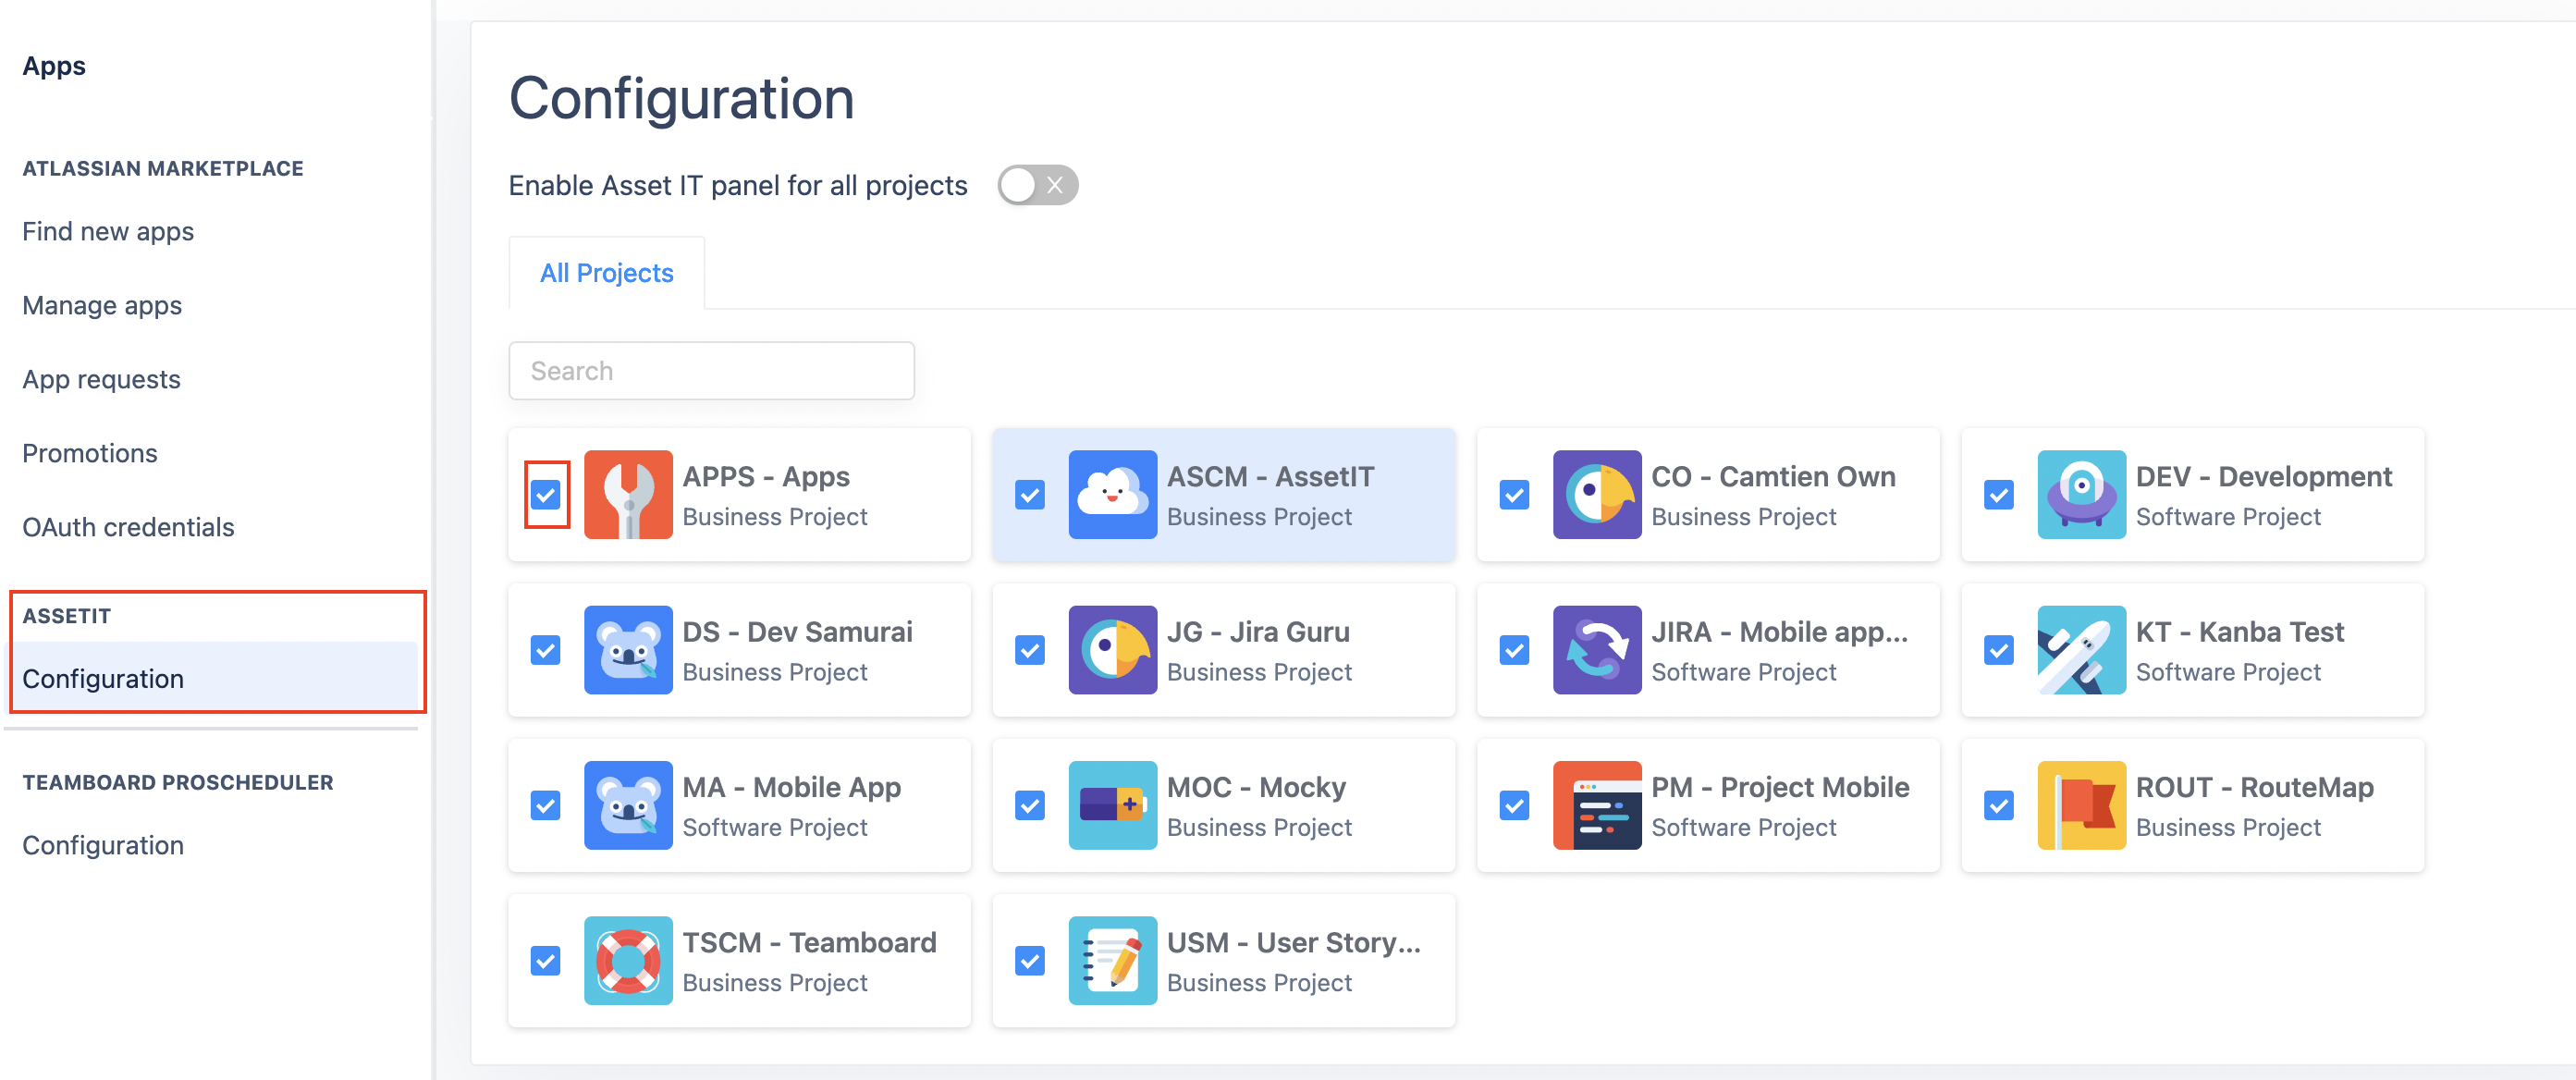
Look for the "AssetIT Configuration" and click on it => Select the project for which you want to enable the Asset Panel.
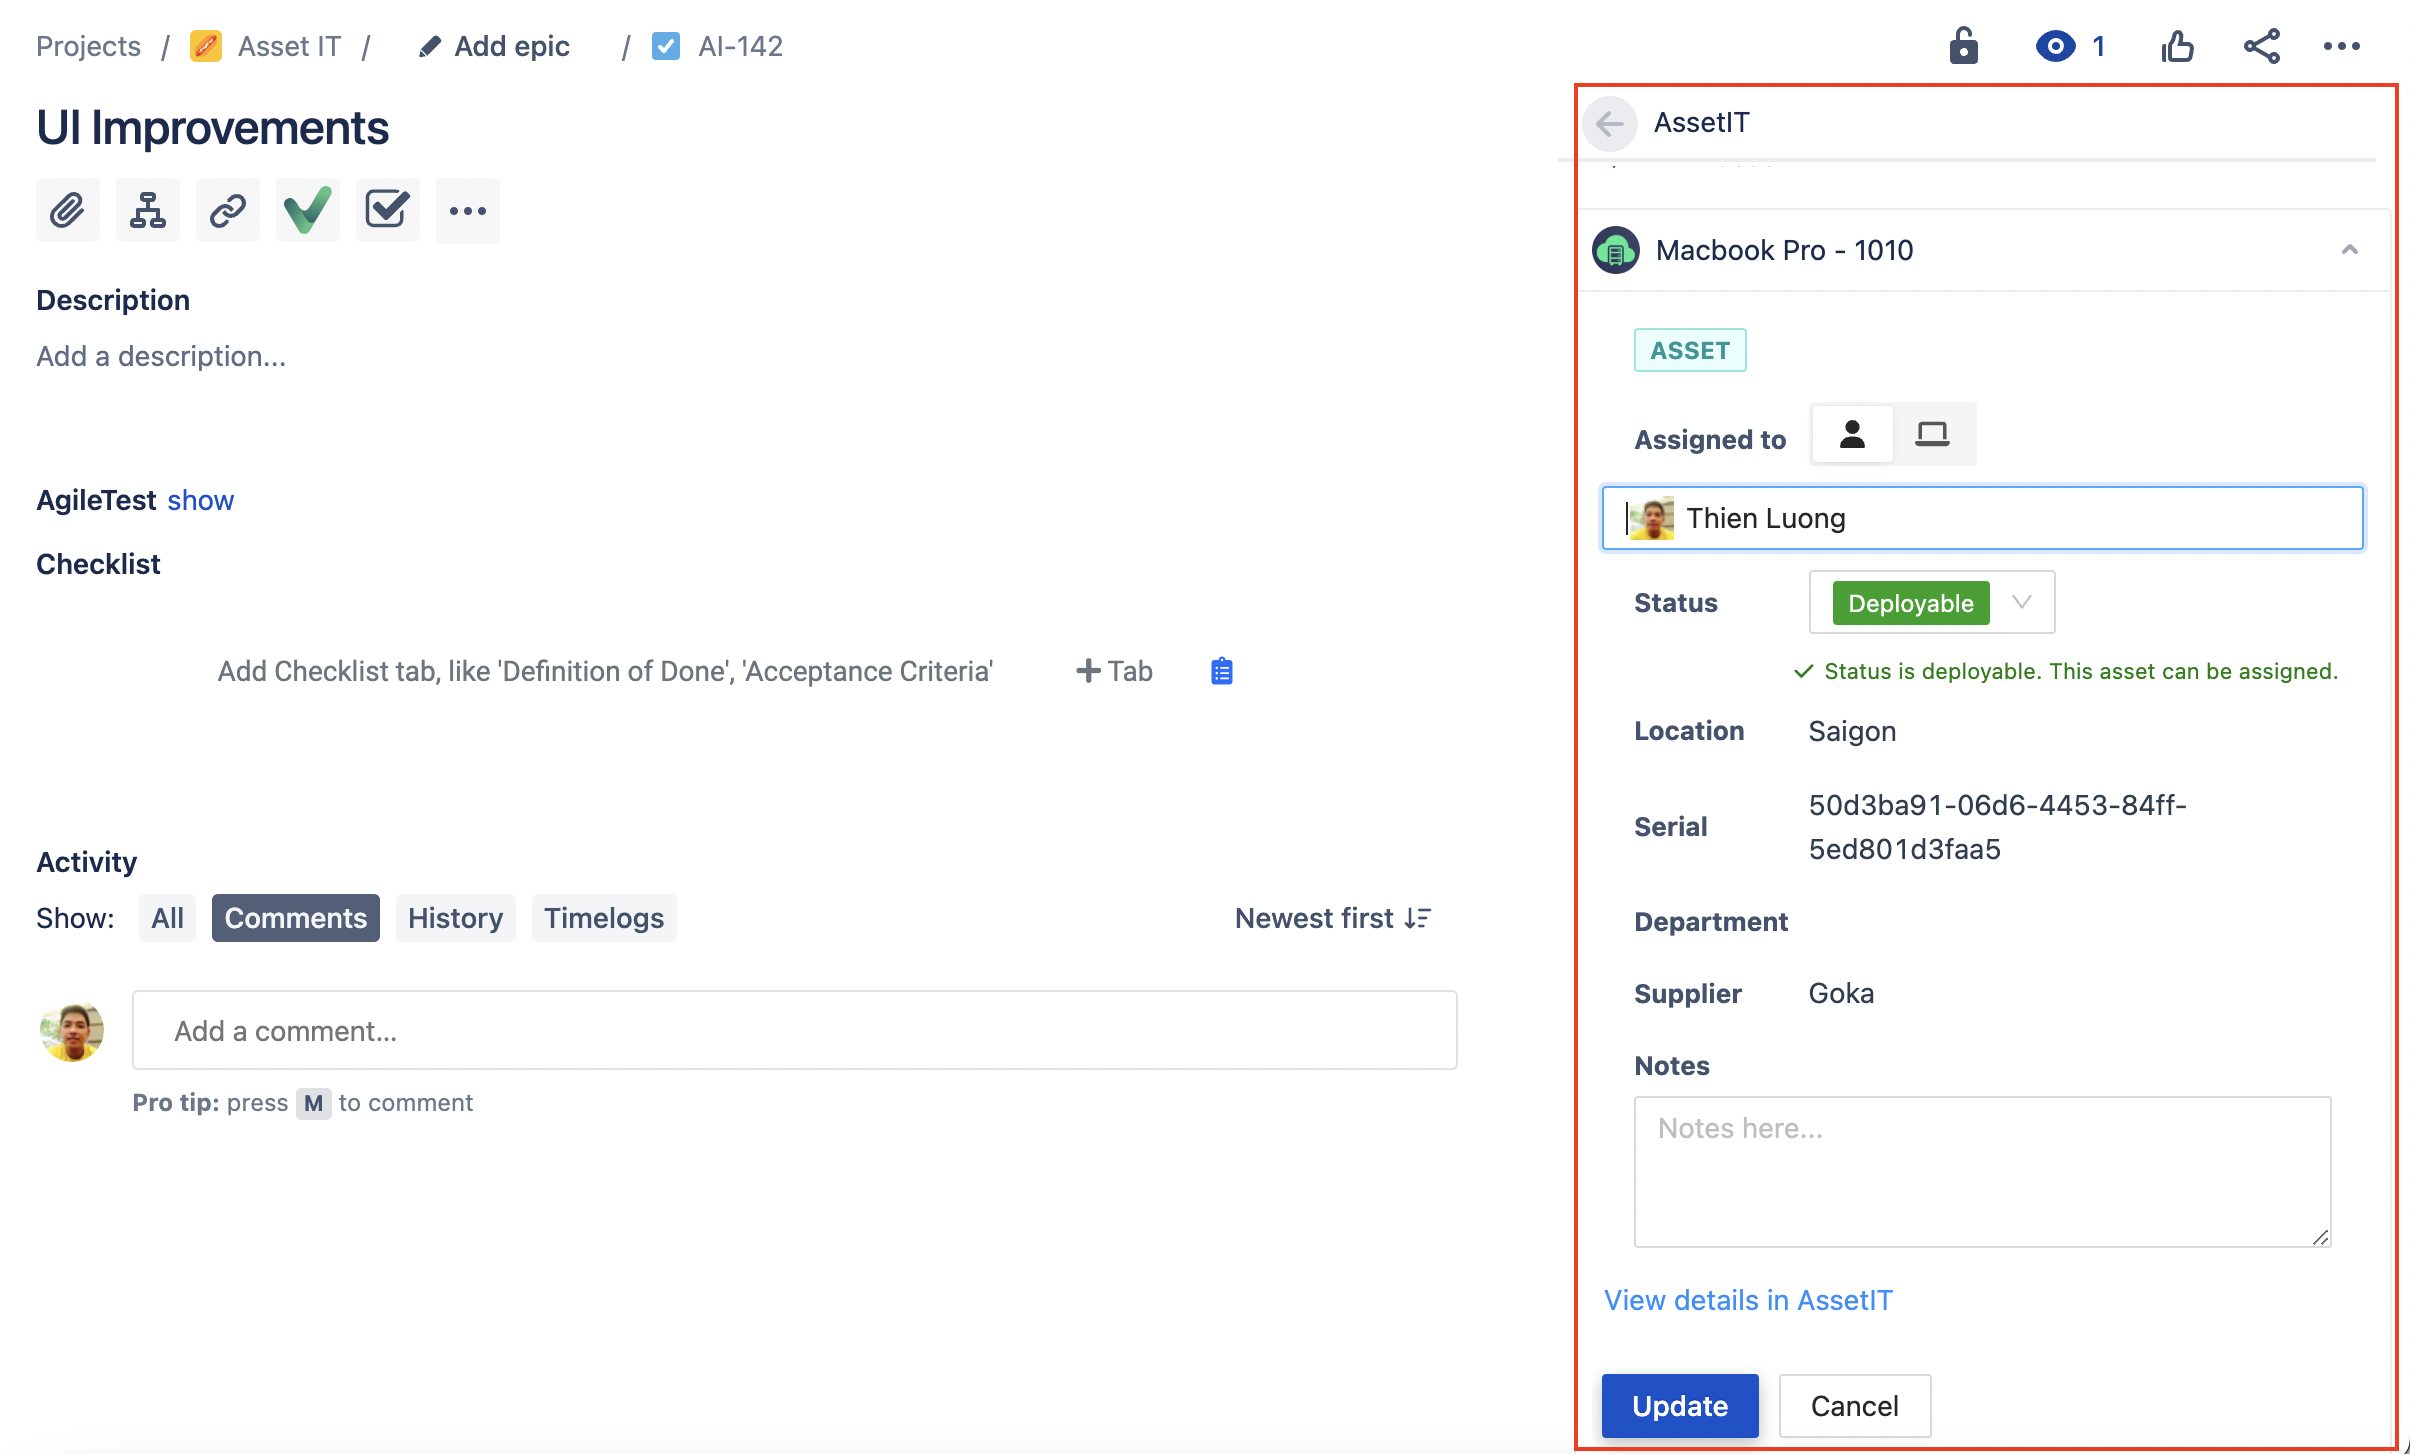
Step 2: Enable Panel in Issue Details
Navigate to the specific issue => Look for the three dots or ellipsis (...) icon
Click on the three dots to reveal a dropdown menu of additional options => From the dropdown menu, select the "AssetIT" option.
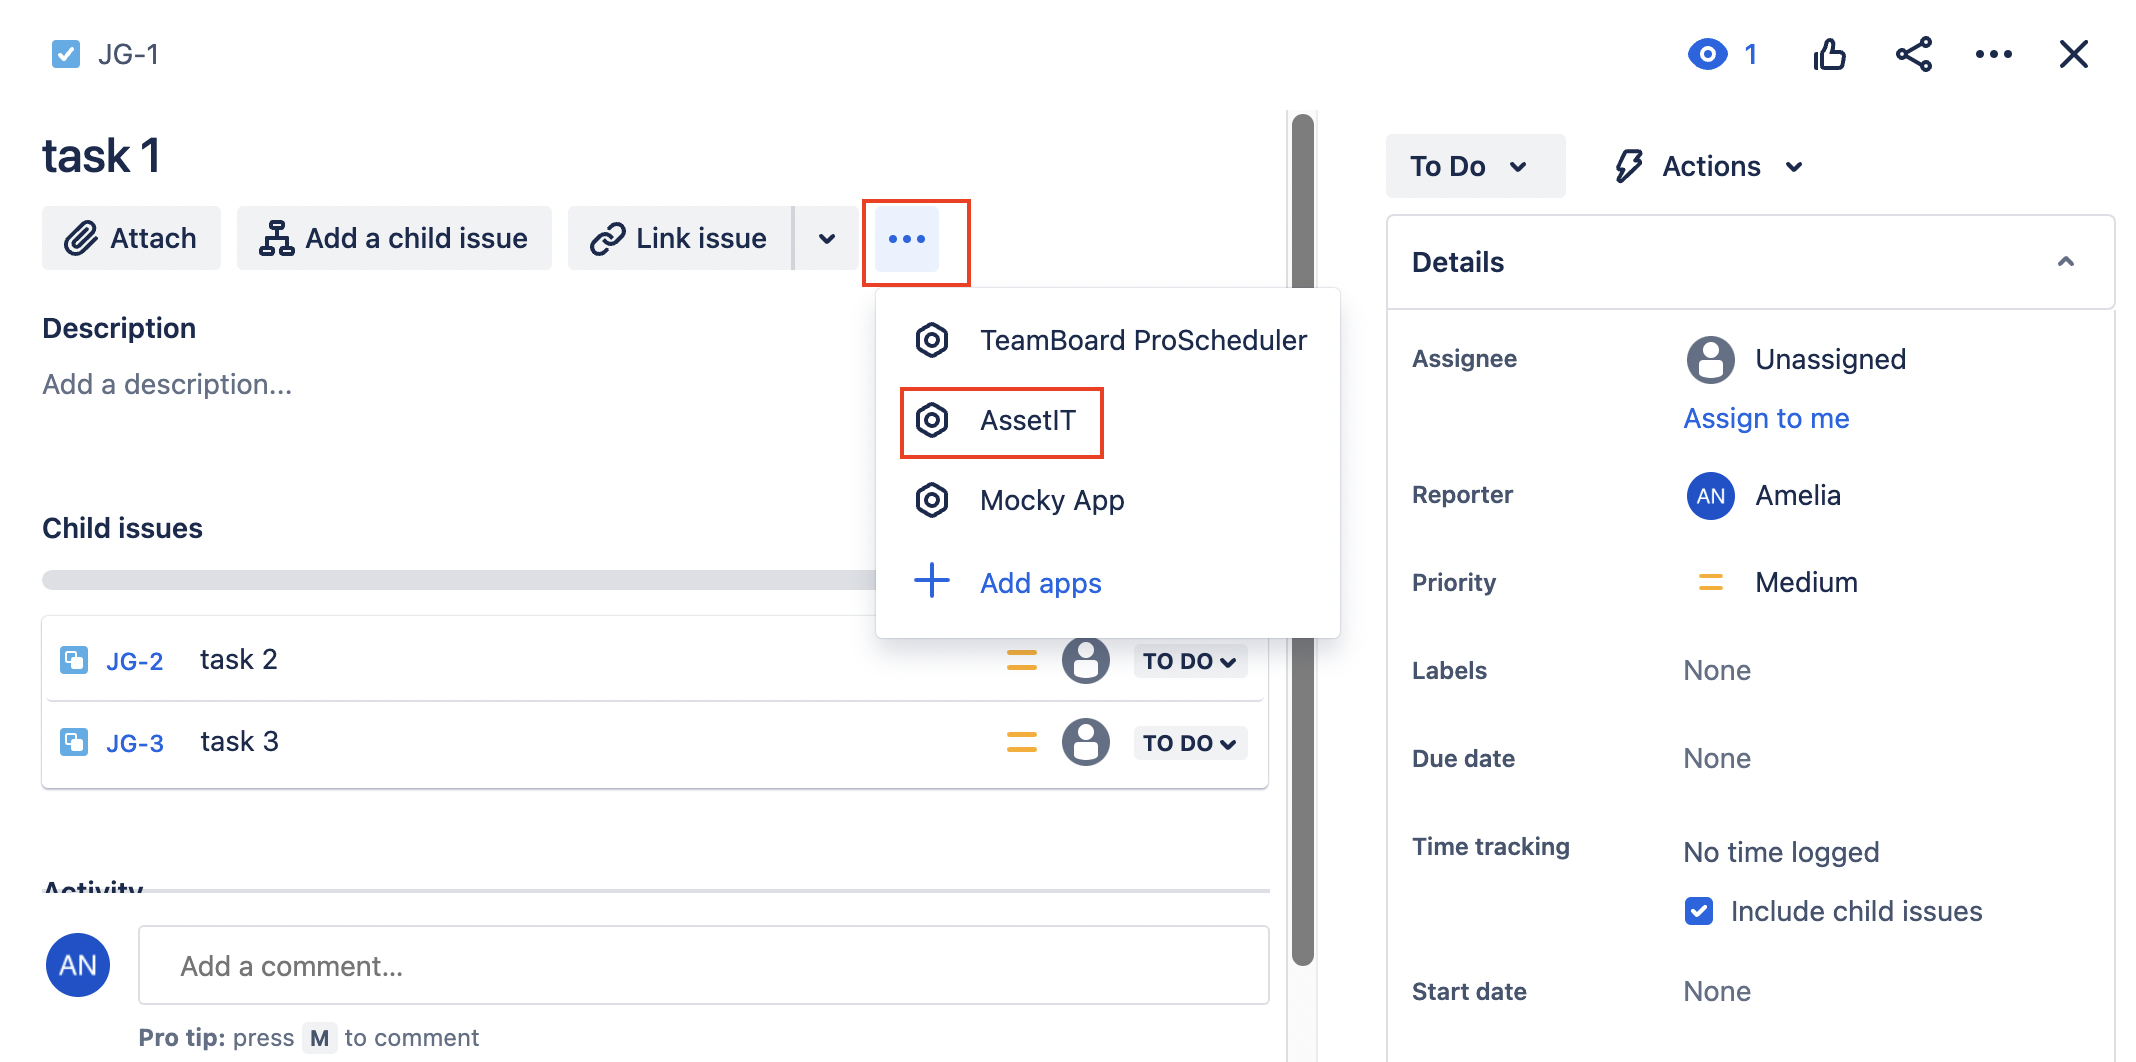
AssetIT Panel will now be visible within the issue details.
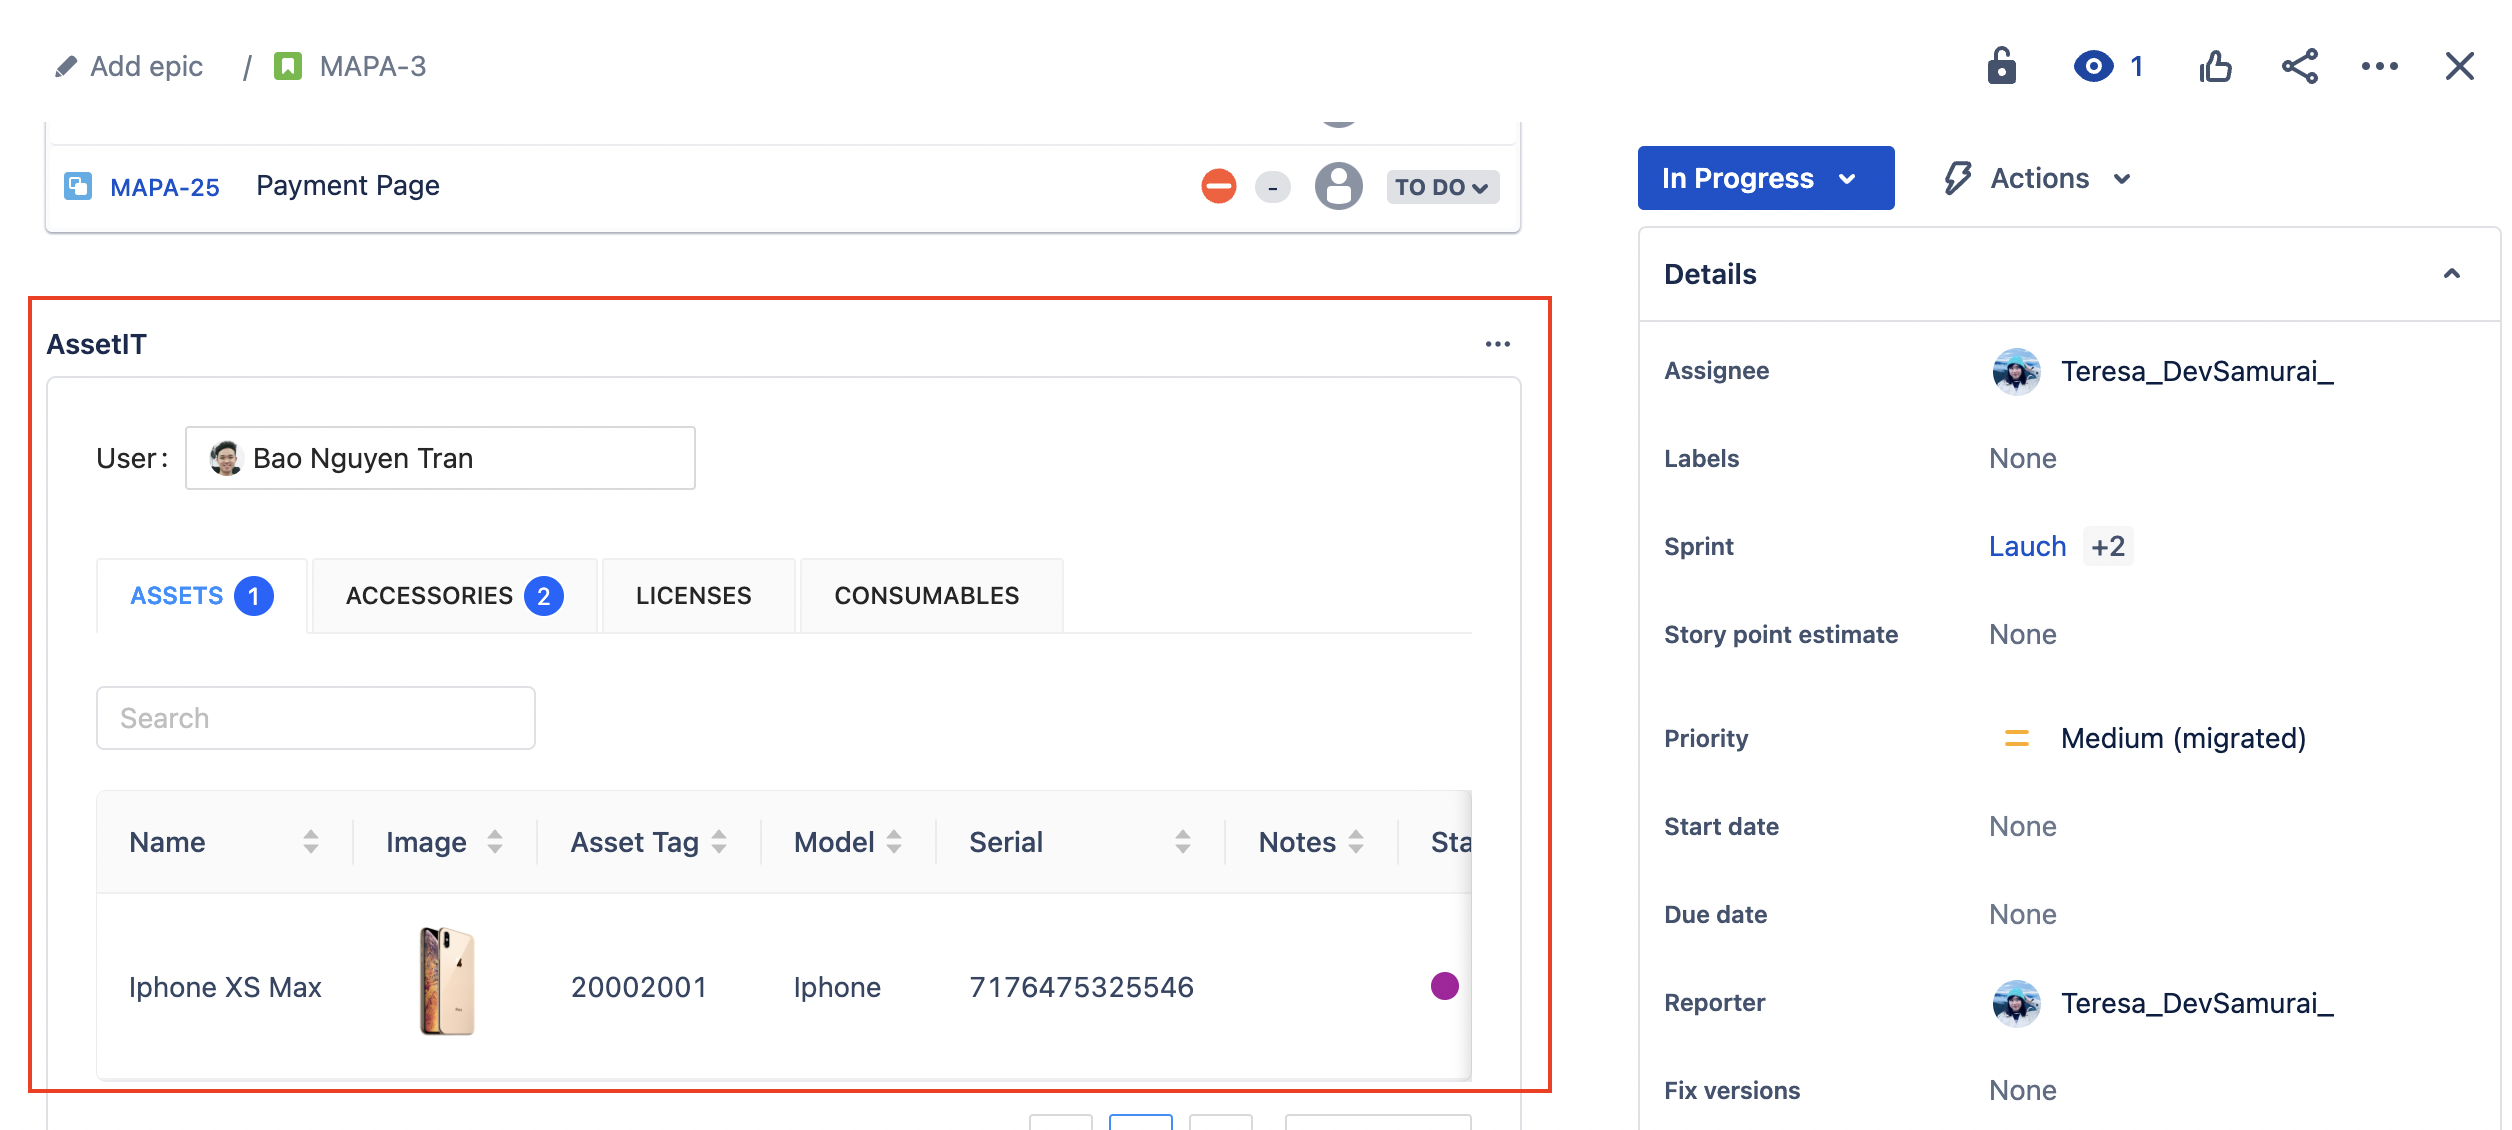
Please note that the Asset Panel is now enabled for the chosen project, and you can view and interact with it within the issue details. Repeat these steps for other projects or issues where you wish to enable the AssetIT panel for comprehensive asset tracking and management.