.png)
People provides a comprehensive list of all assigned users, meaning users who have resources currently assigned to them. It offers visibility into user assignments and allows easy search and filtering options. Other users from your Jira instance can be found by searching their names or IDs, even if they are not currently assigned to a resource.
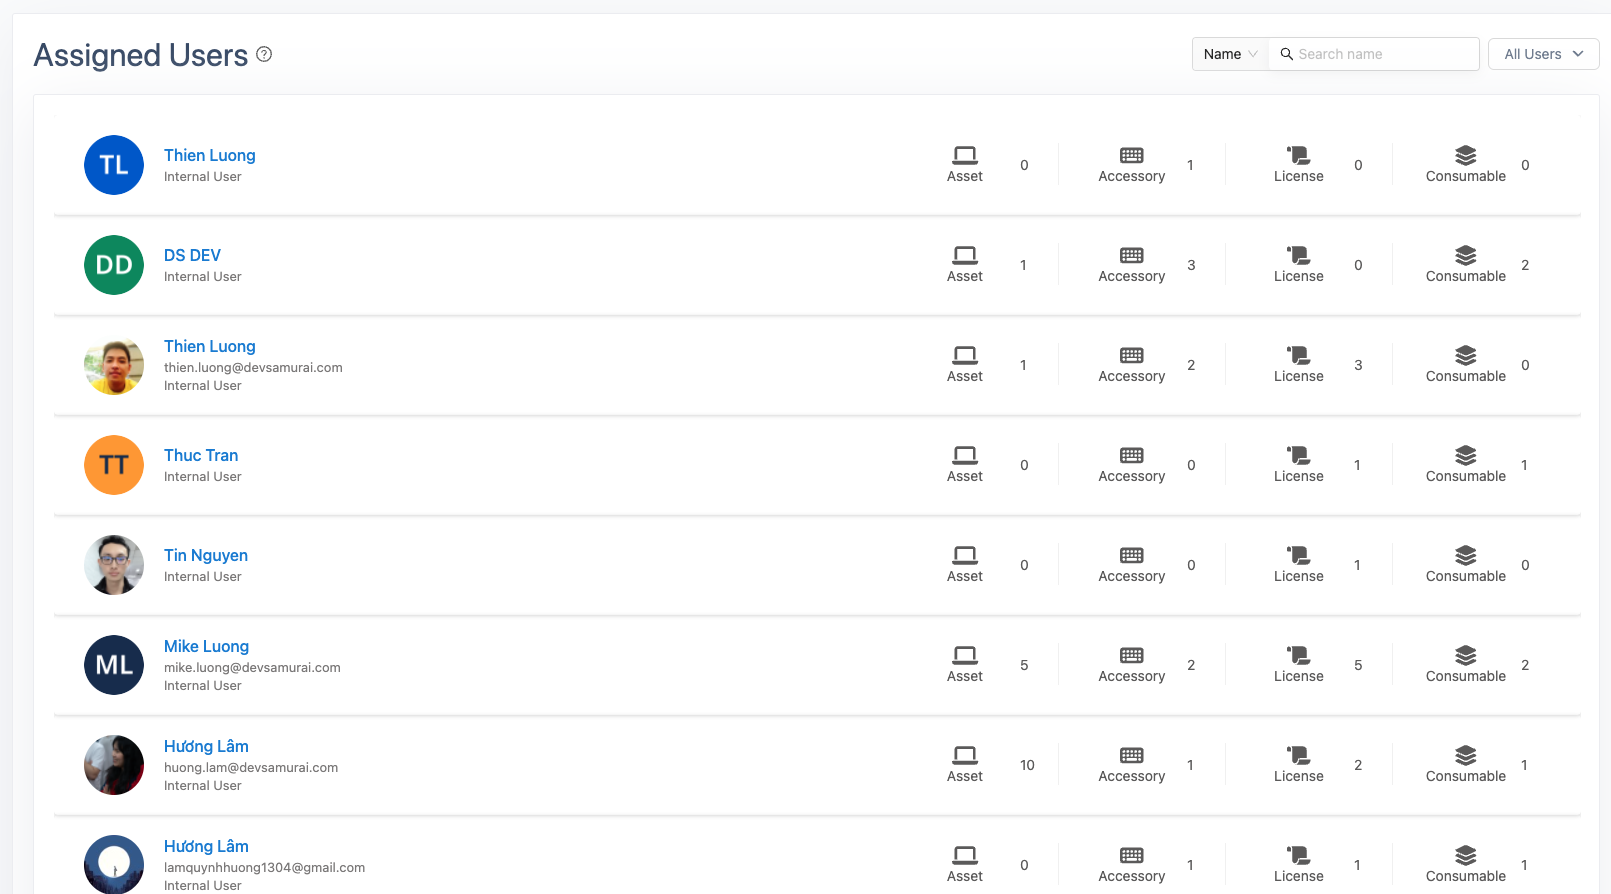
Users in AssetIT are synced with users in your Jira instance, ensuring consistent and up-to-date user information.
The list can be filtered by:
-
Internal Users: Users within your organization.
-
External Customers: Atlassian customers who are present in your Jira instance. (Learn more: How to manage customers on AssetIT?)

View User Details
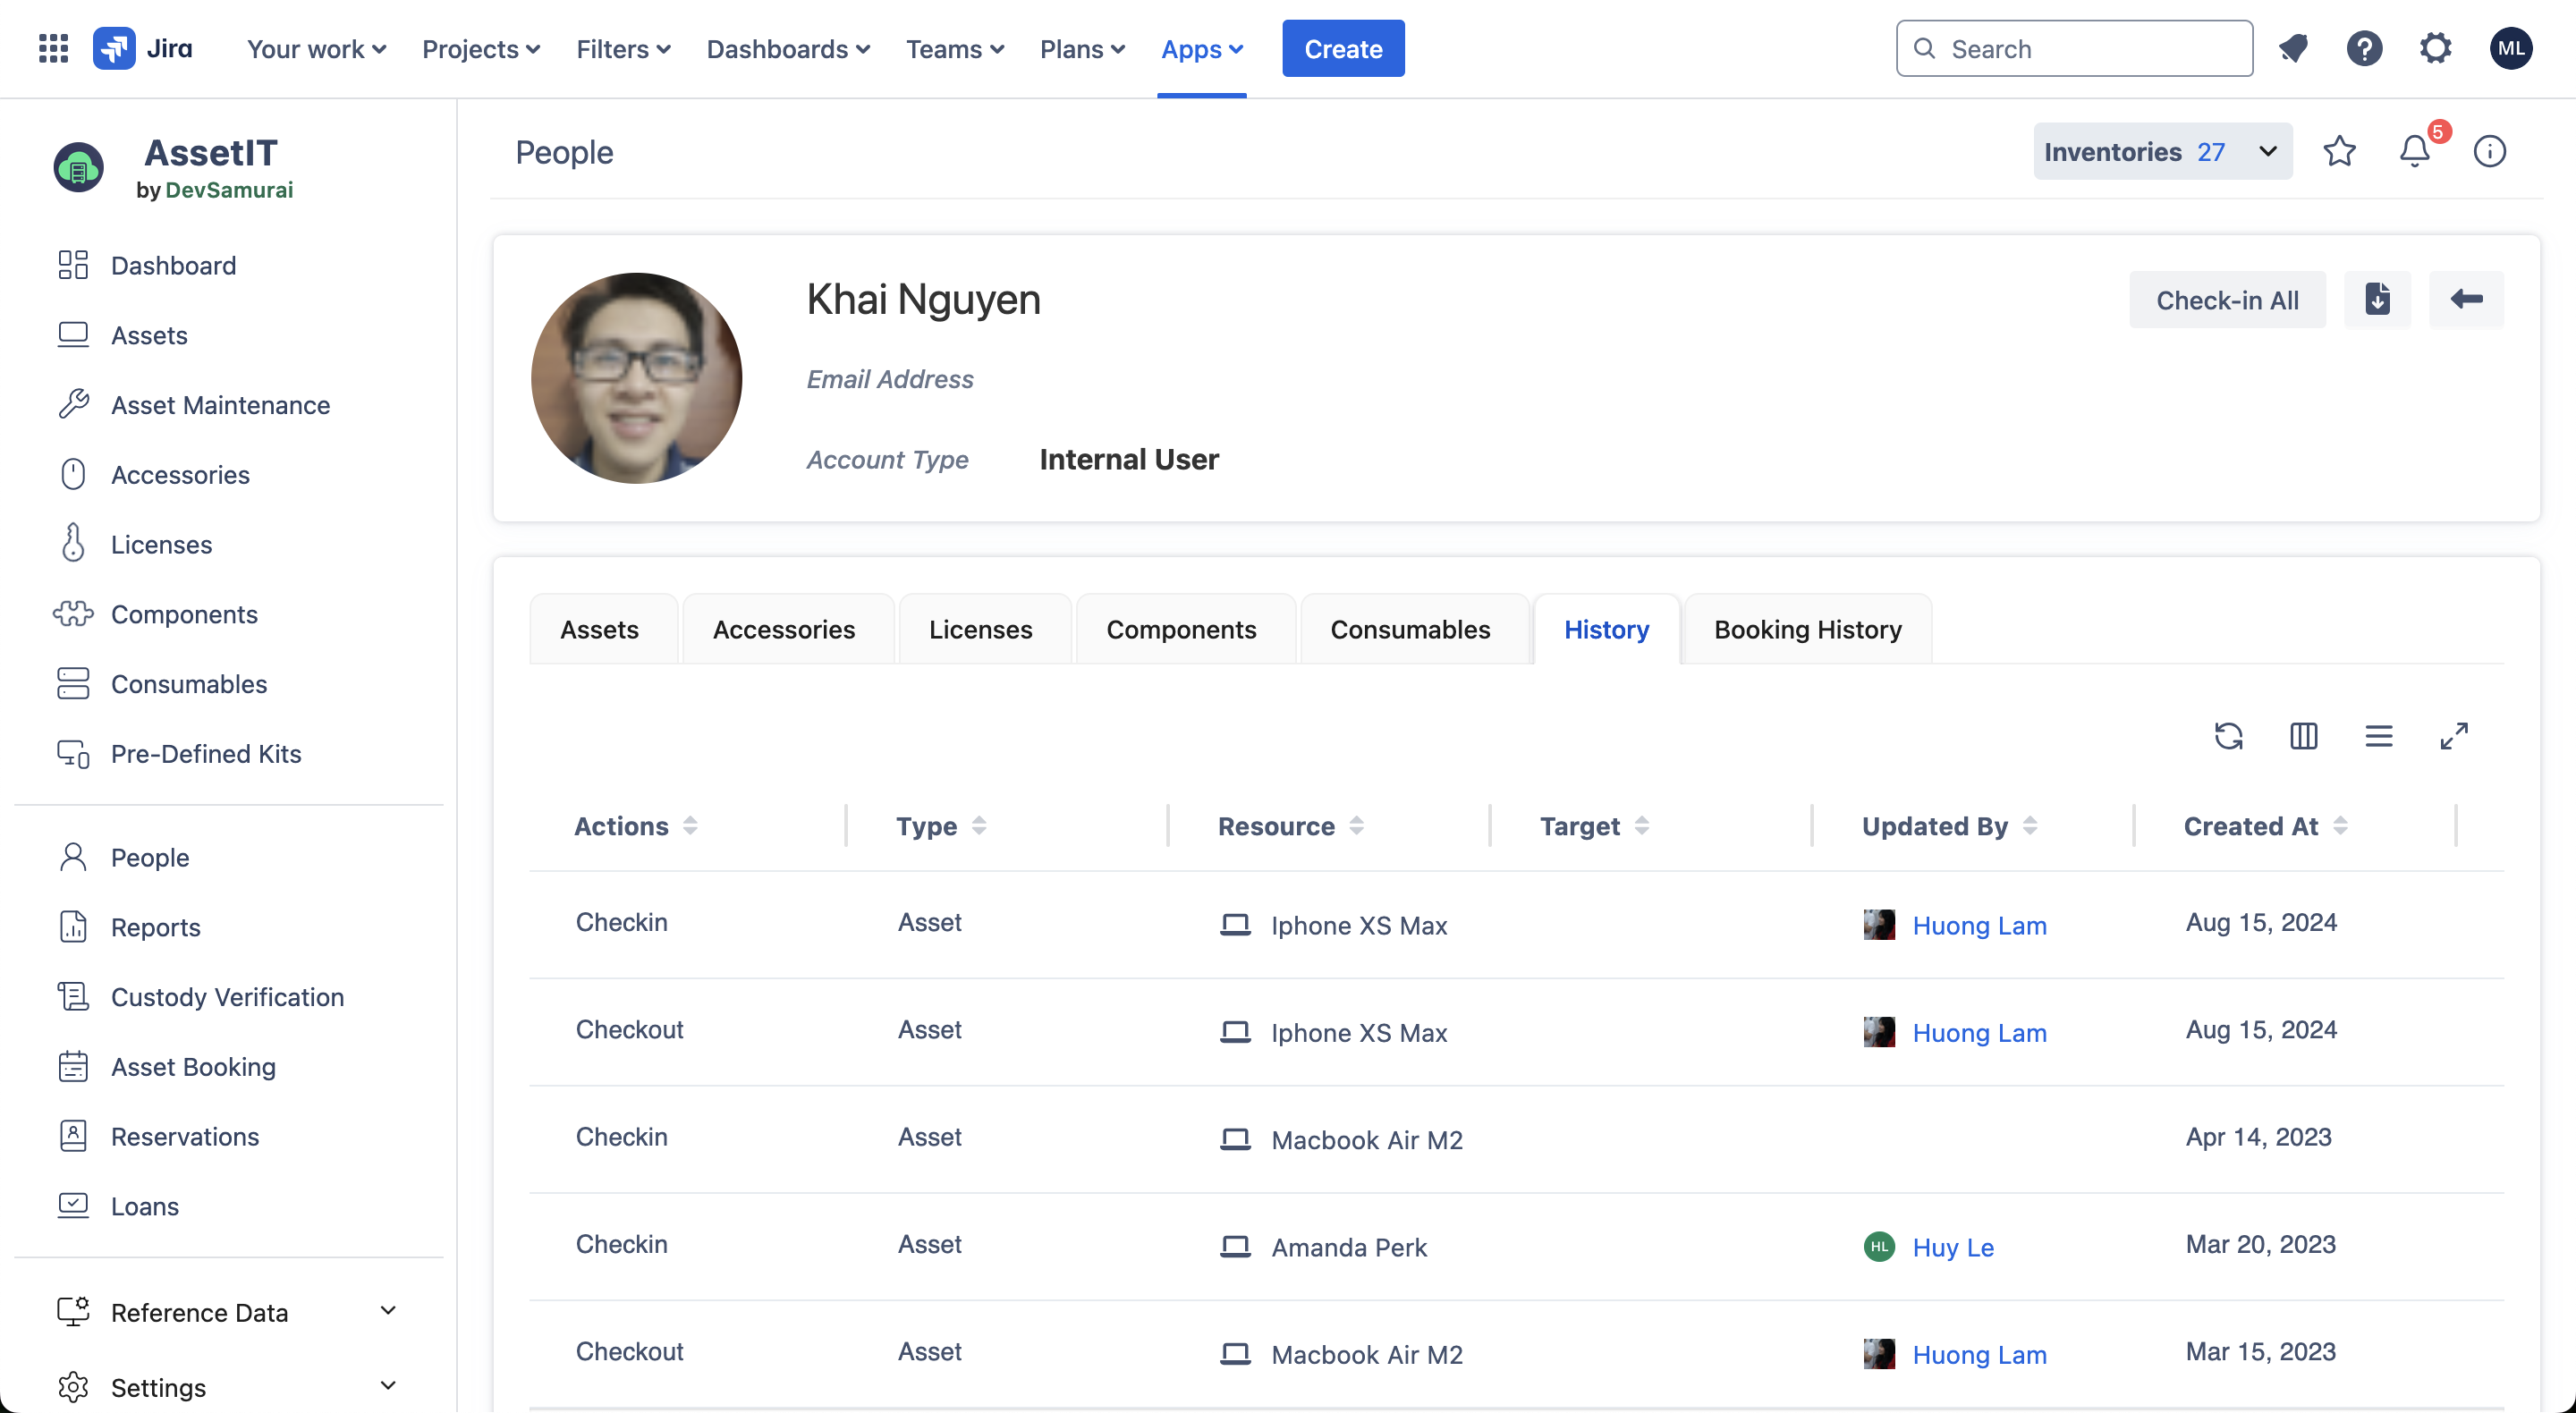
Click on a name or profile to view the details.
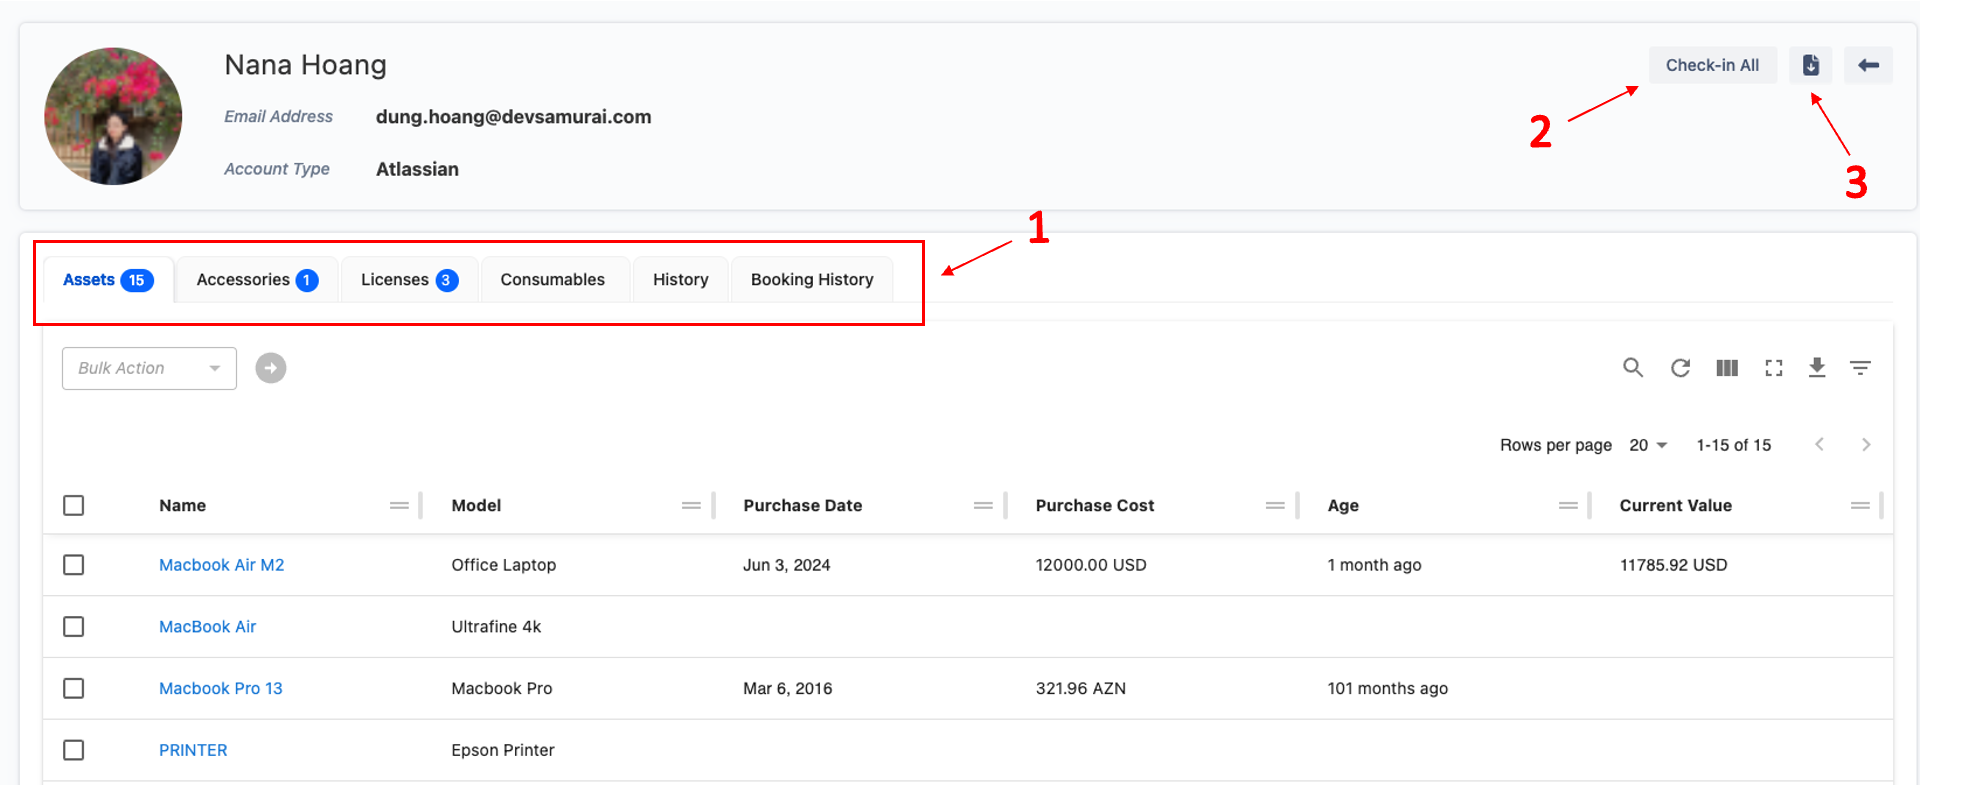
1. Information Tabs
-
In the user's profile, you will find comprehensive information such as:
-
Name
-
Contact details
-
Assets
-
Accessories
-
Licenses
-
Consumables
-
-
Additionally, you can see their activities in the History tab or their booking journey in Booking History.
2. Bulk Check-In
Easily check in all resources assigned to a user by clicking the Check-in All button.
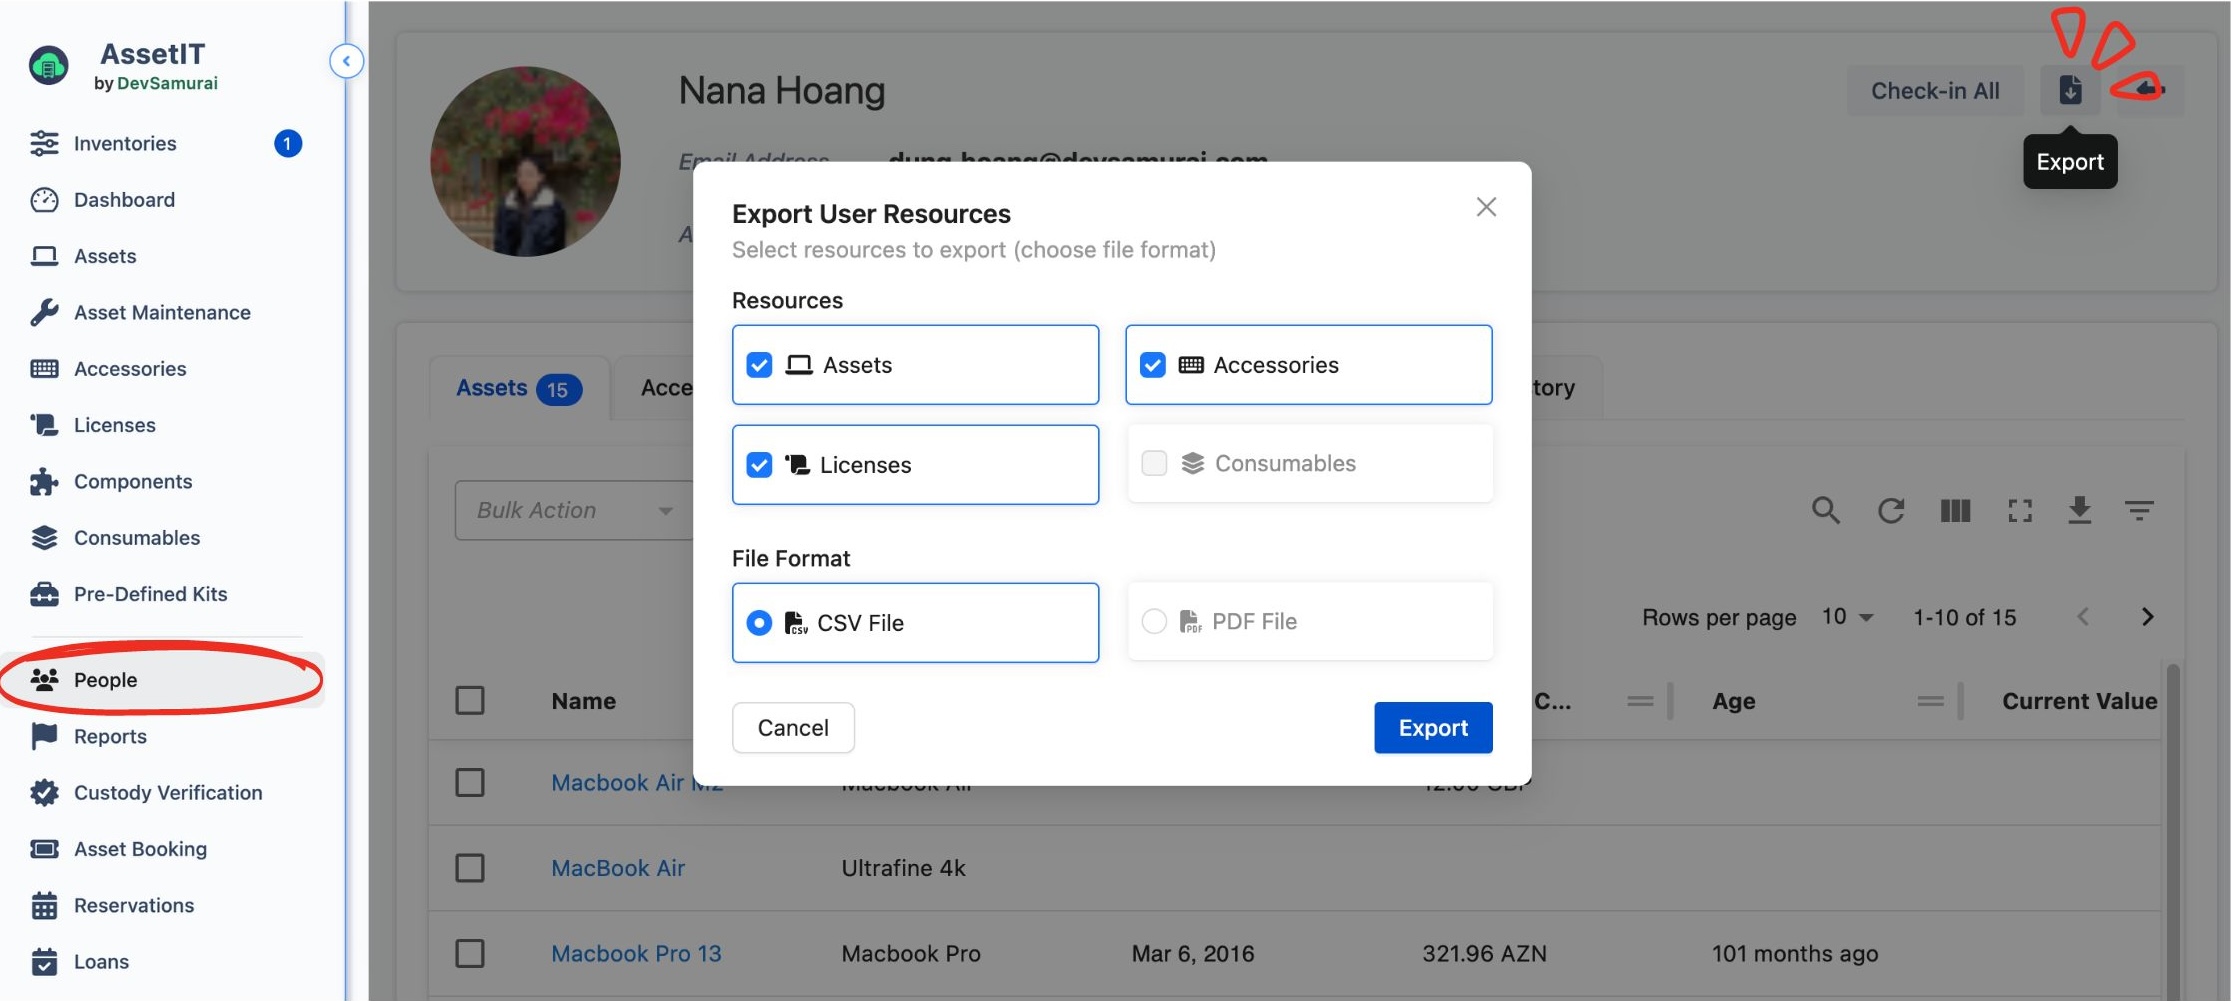
3. Export Resources
To export information about a user's resources:
-
Click the Export button.
-
Select the resources you wish to export.
-
Choose the desired file format.
-
Click Export to download the information.
Deactivated Accounts
When a user account is deactivated in AssetIT, all assets previously assigned to that account are automatically checked in (retrieved). As a result, the user no longer appears in the Assigned Users List under the People tab, since this list only includes users who currently have resources assigned.
This means you won’t be able to access the deactivated account’s activity log or other details through the standard user interface.
However, you can still search for and view a deactivated user’s history by using their Jira user ID.
View a Deactivated User’s Activity Log
Follow the steps below to locate and review a deactivated user's information:
-
Open your Jira User Management
-
Click

-
From the dropdown, scroll to the Atlassian admin settings section.
-
Select User management.
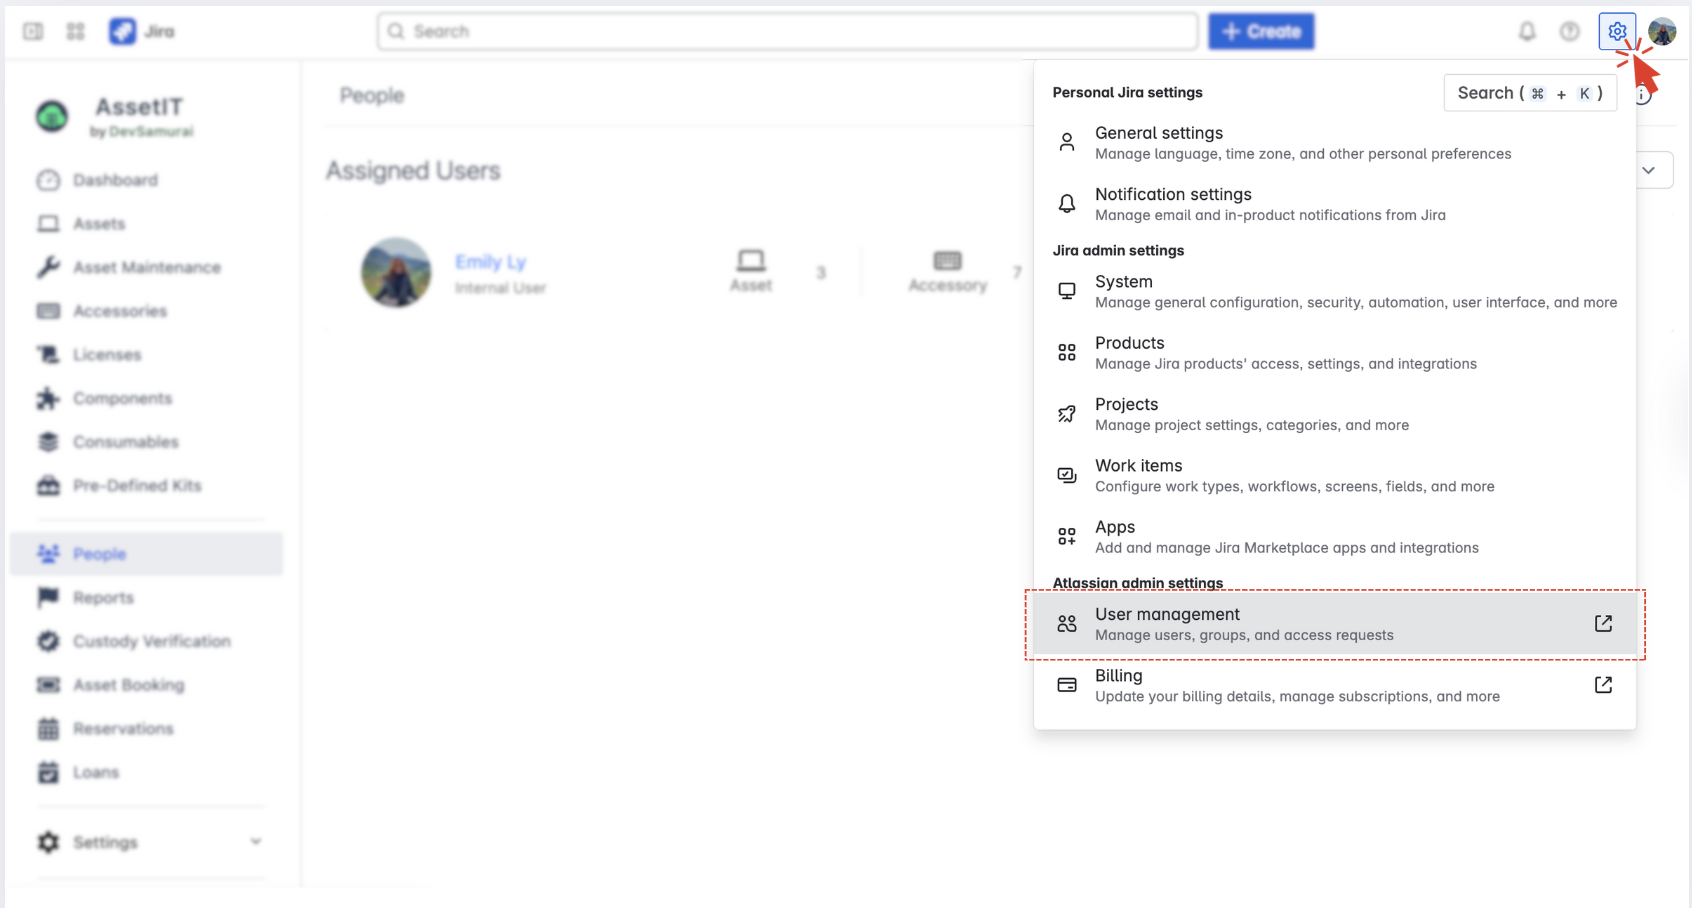
You must be an Org Admin or Site Admin to access this area.
-
Locate the deactivated account
-
Use the search bar to find the deactivated user account.
-
Click the user's name to open their profile.
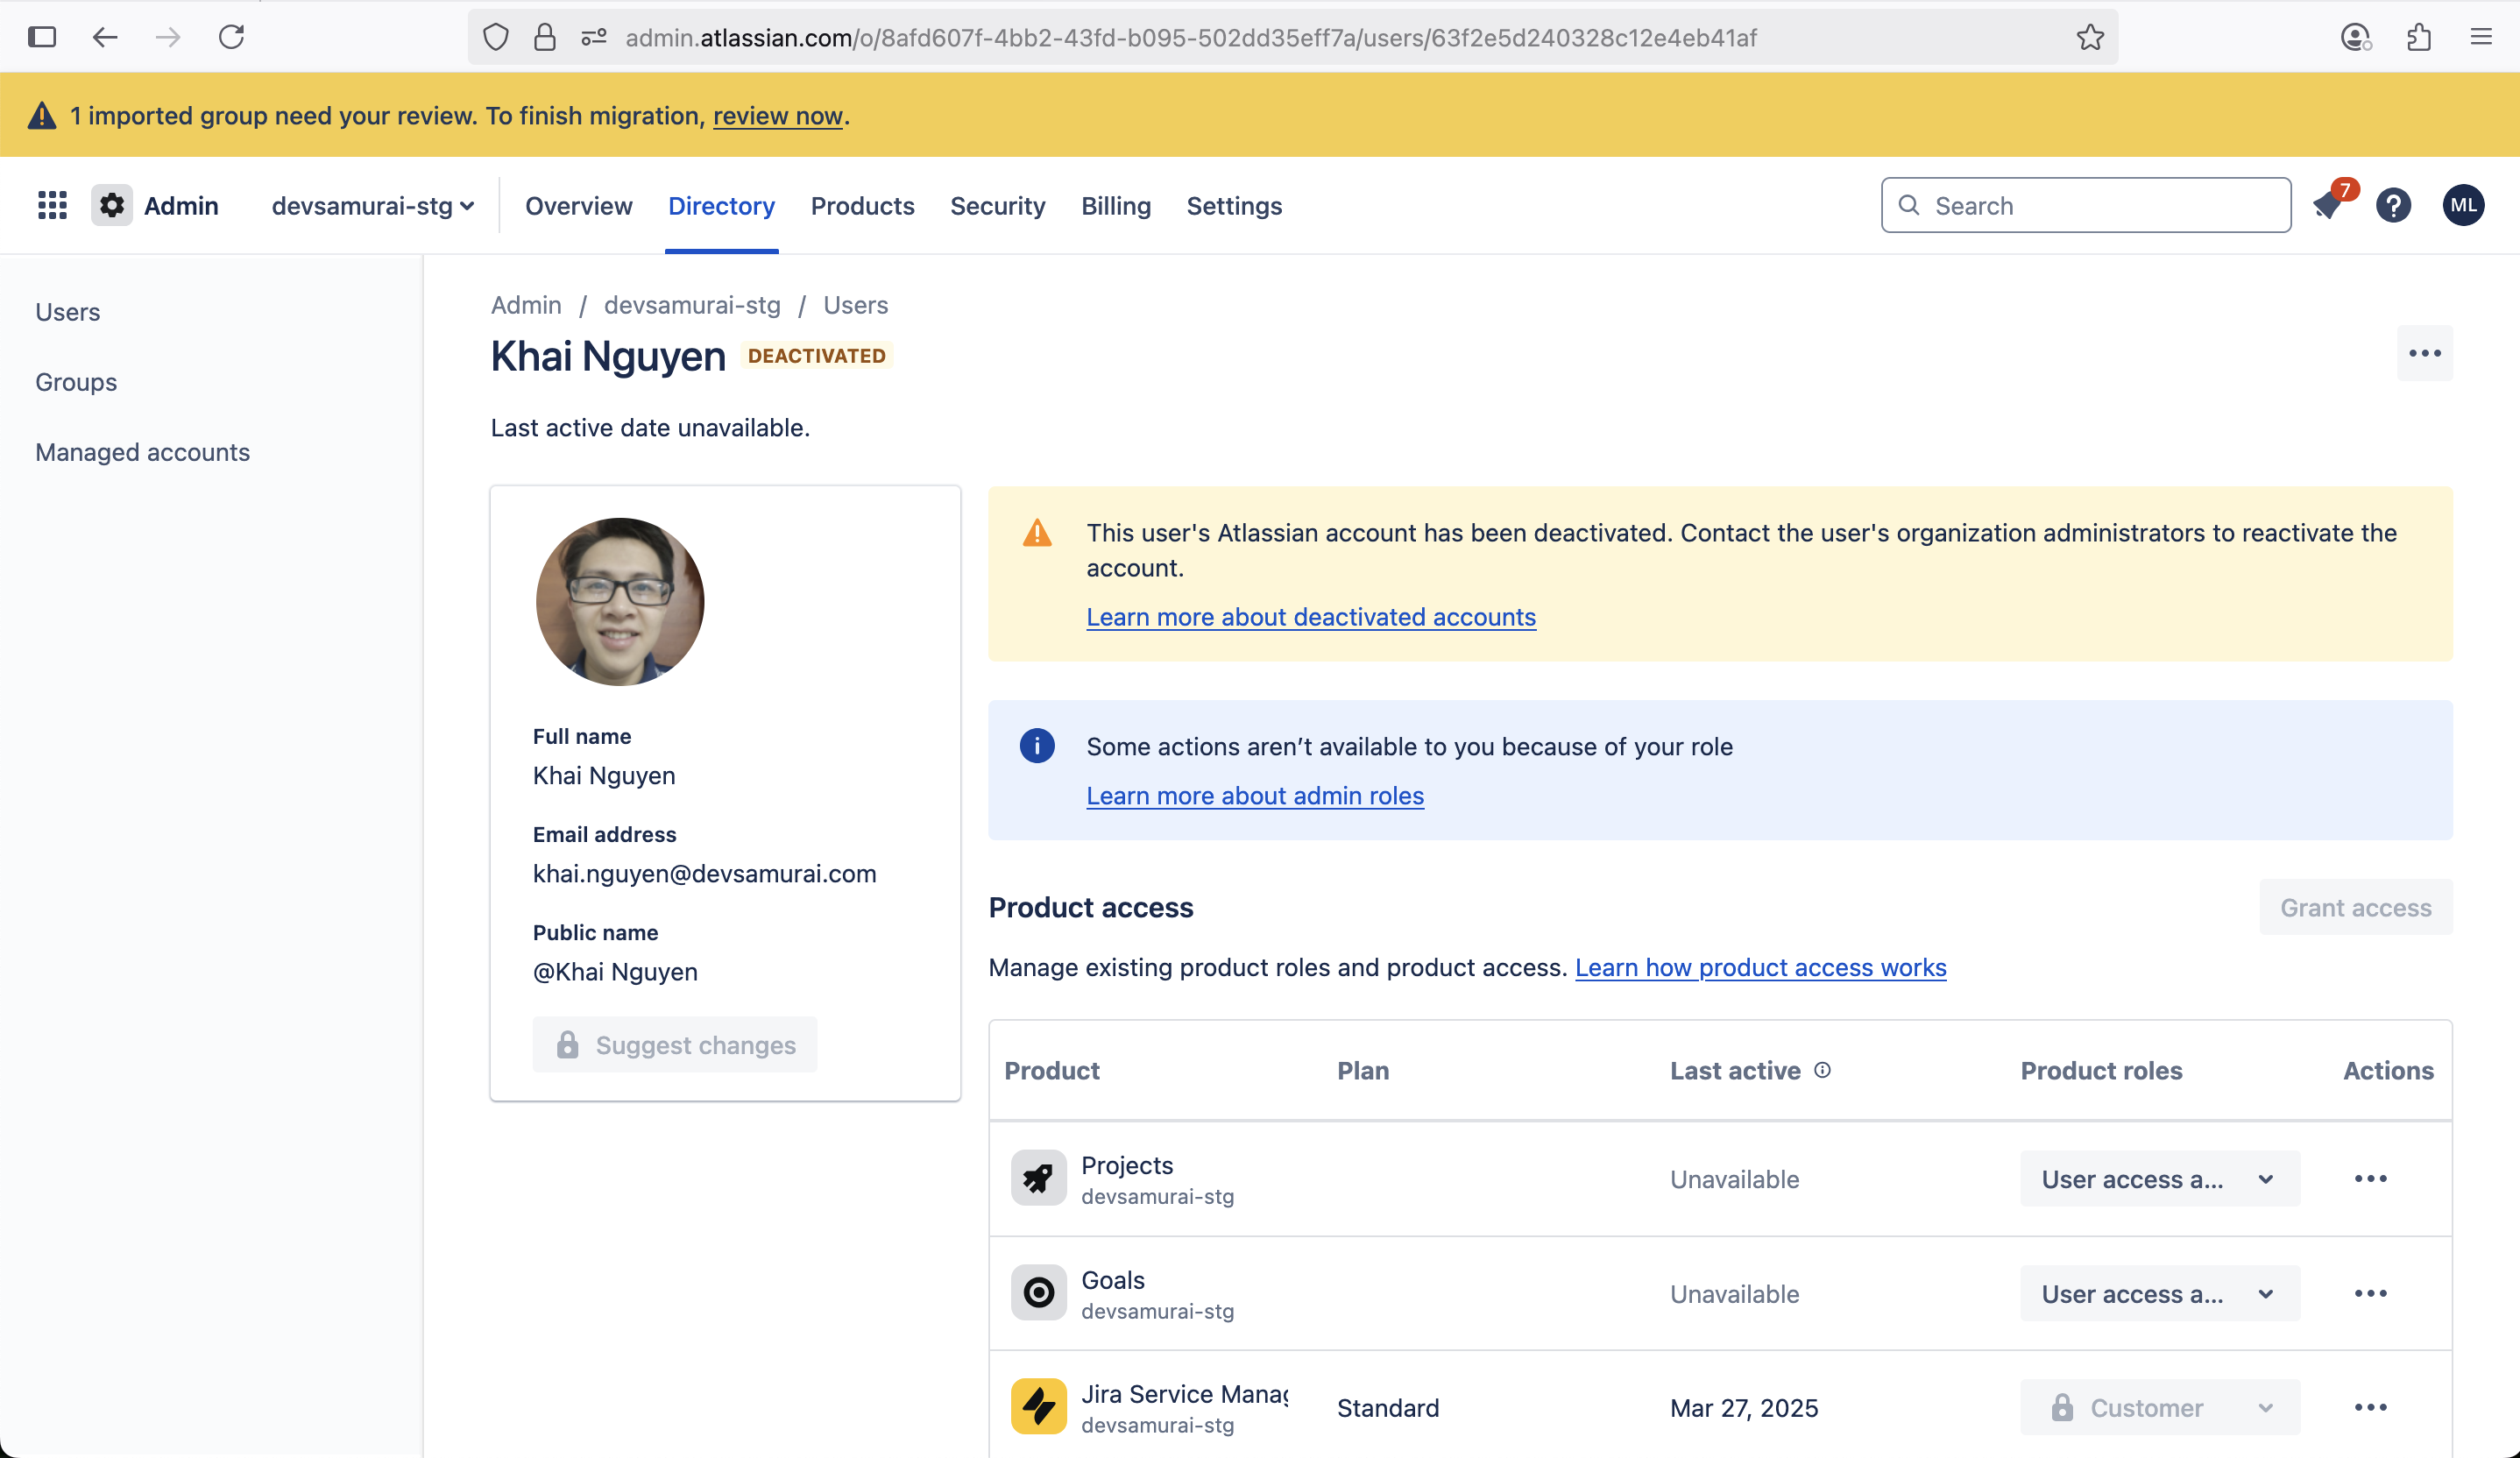
-
Copy the user’s Jira user ID
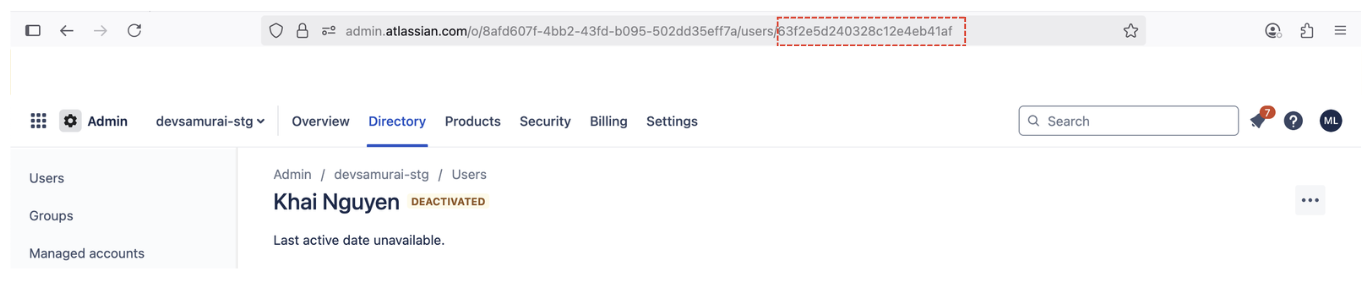
-
Look at the browser’s URL once you're on the user’s profile page.
-
Copy only the user ID portion of the URL, which follows
/users/.
For example, if the URL is:
https://admin.atlassian.com/o/337c123d-83k9-1a1k-664a-14a3d4aj51cc/users/712020:1680203a-2dbe-4818-a05c-a11d54d051c4
The user ID to copy will be:
712020:1680203a-2dbe-4818-a05c-a11d54d051c4
-
Search in AssetIT by User ID
-
Navigate to AssetIT and go to the

-
Paste the copied user ID into the search bar.
-
The deactivated account will appear in the results.
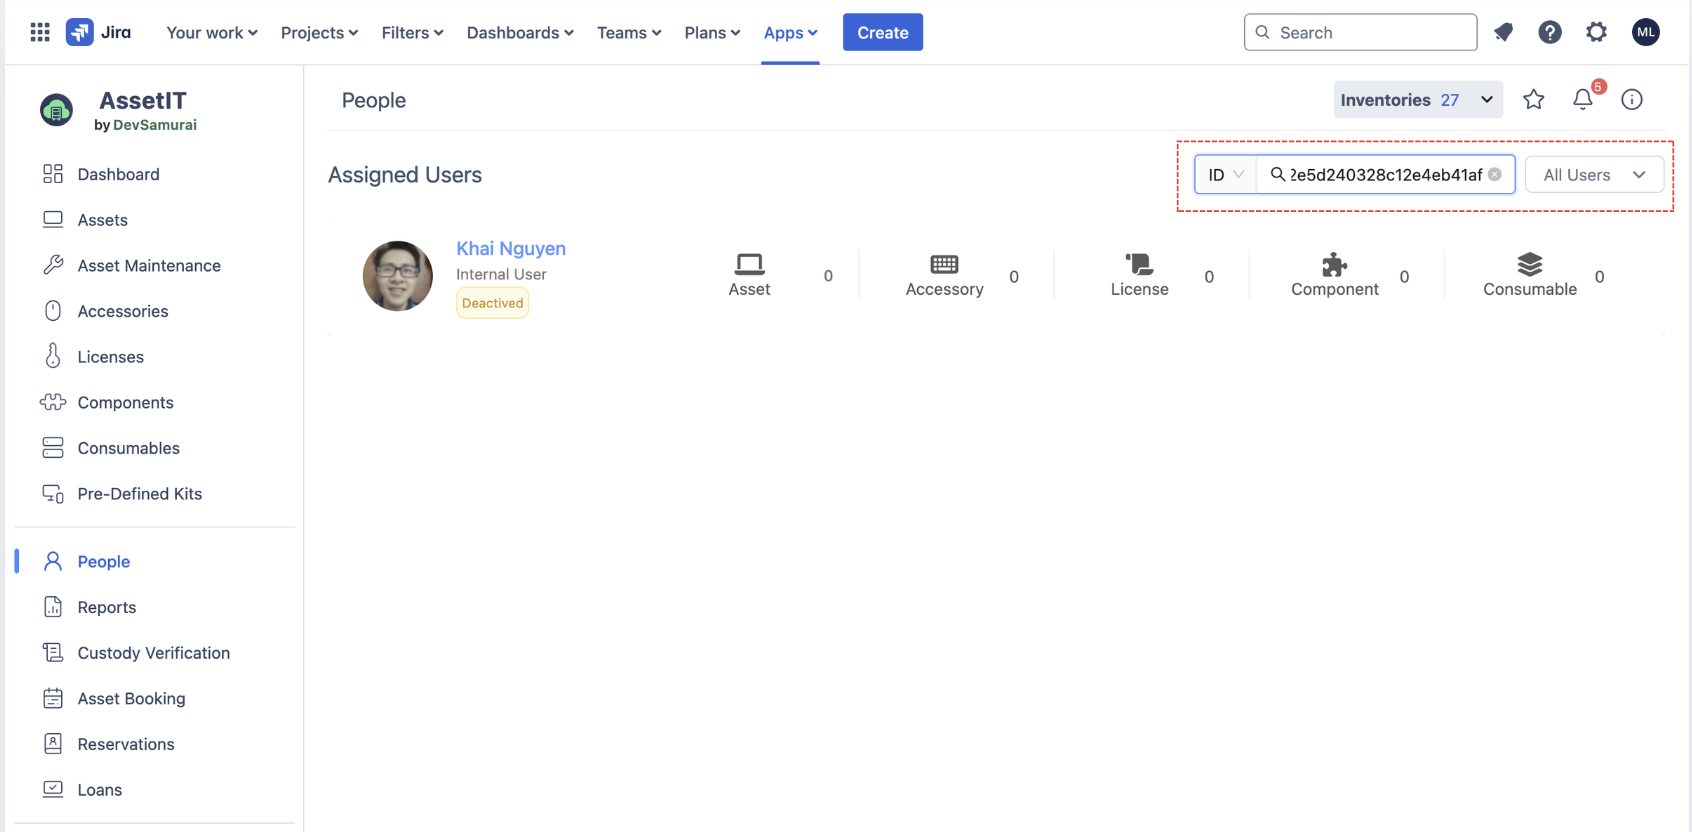
-
View Deactivated User Details
-
Click on the deactivated user's name to open their profile.
-
You can now view the historical data for that account in the