Reservations
The Reservation feature in AssetIT allows you to manage asset booking requests. When a user submits a booking form, the request is automatically added to the Reservations section. Authorized users can review and approve or decline the requests and complete the checkout process.
Reservation Statuses
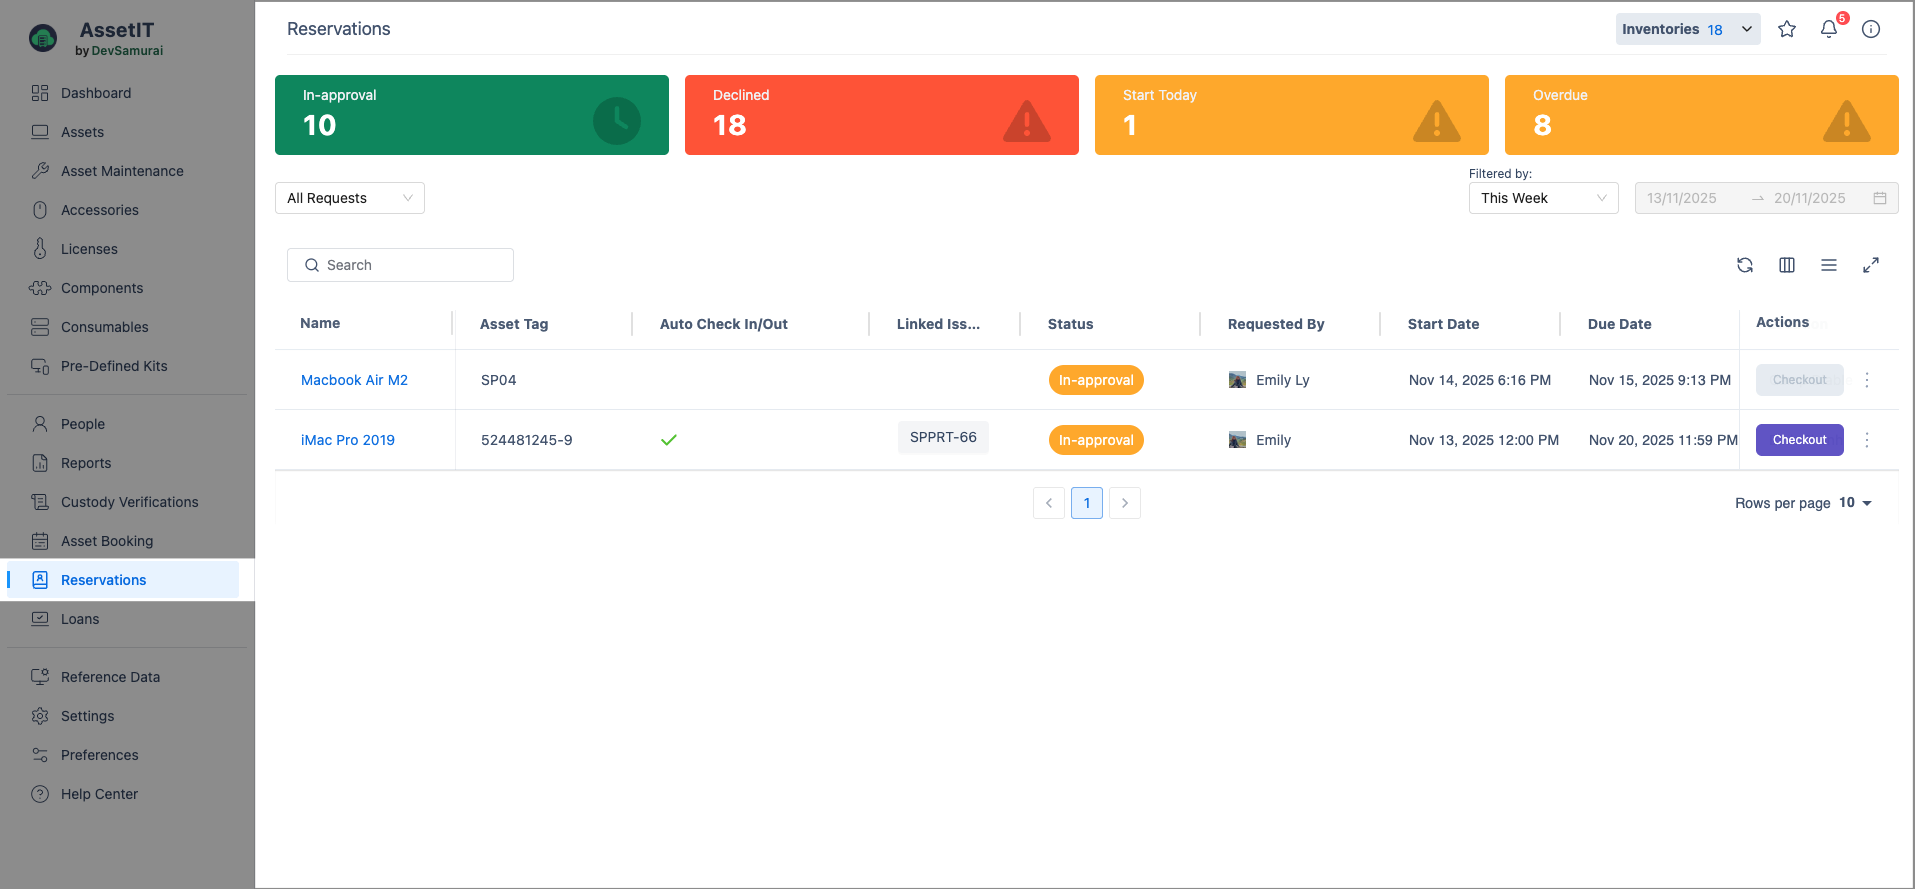
The Reservations page organizes asset requests into the following categories:
In-approval: These requests are awaiting approval from an admin or authorized user.
Declined: Requests that have been rejected and will not proceed.
Start Today: Requests scheduled to begin today.
Overdue: Requests that have passed their due date and need immediate attention.
Filtering Reservations
You can filter reservations by status to view specific types of requests. Simply select the filter you want to use from the options at the top of the page.
The available filters are:
In-approval: Displays requests that are still waiting for approval.
Declined: Displays requests that have been rejected.
Start Today: Displays requests that are scheduled to start today.
Overdue: Displays requests that have passed their due date.
Managing Overdue Reservations
Overdue reservations are marked in red. These are requests that have passed their due date and need to be addressed as soon as possible. Make sure to take action on overdue reservations promptly to ensure proper asset management.
Reservation Details
Each reservation entry shows the following information:
Name: The name of the requested asset.
Asset Tag: The unique identifier for the asset.
Auto Check In/Out: Shows whether the asset has automatic check-in/check-out enabled.
Linked Issues: Lists any related issues or support tickets associated with the asset.
Status: The current status of the request (In-approval, Declined, etc.).
Requested By: The user who made the request.
Start Date: The date the reservation is scheduled to begin.
Due Date: The date the reservation is scheduled to end.
Checkout Process
Once a reservation has been approved, authorized users can complete the Checkout process. To do this:
Find the reservation in the In-approval category.
Click on the Checkout button next to the approved reservation.
Complete the checkout process to finalize the reservation.
Checkout Priority: 4-hour window
Checkout Priority ensures an efficient process and equitable treatment for all users.
1. Priority Rule:
Assets with booking timing within the next 4 hours will receive priority for check-out.
Bookings within the 4-hour window can be checked out immediately before or after their scheduled time.
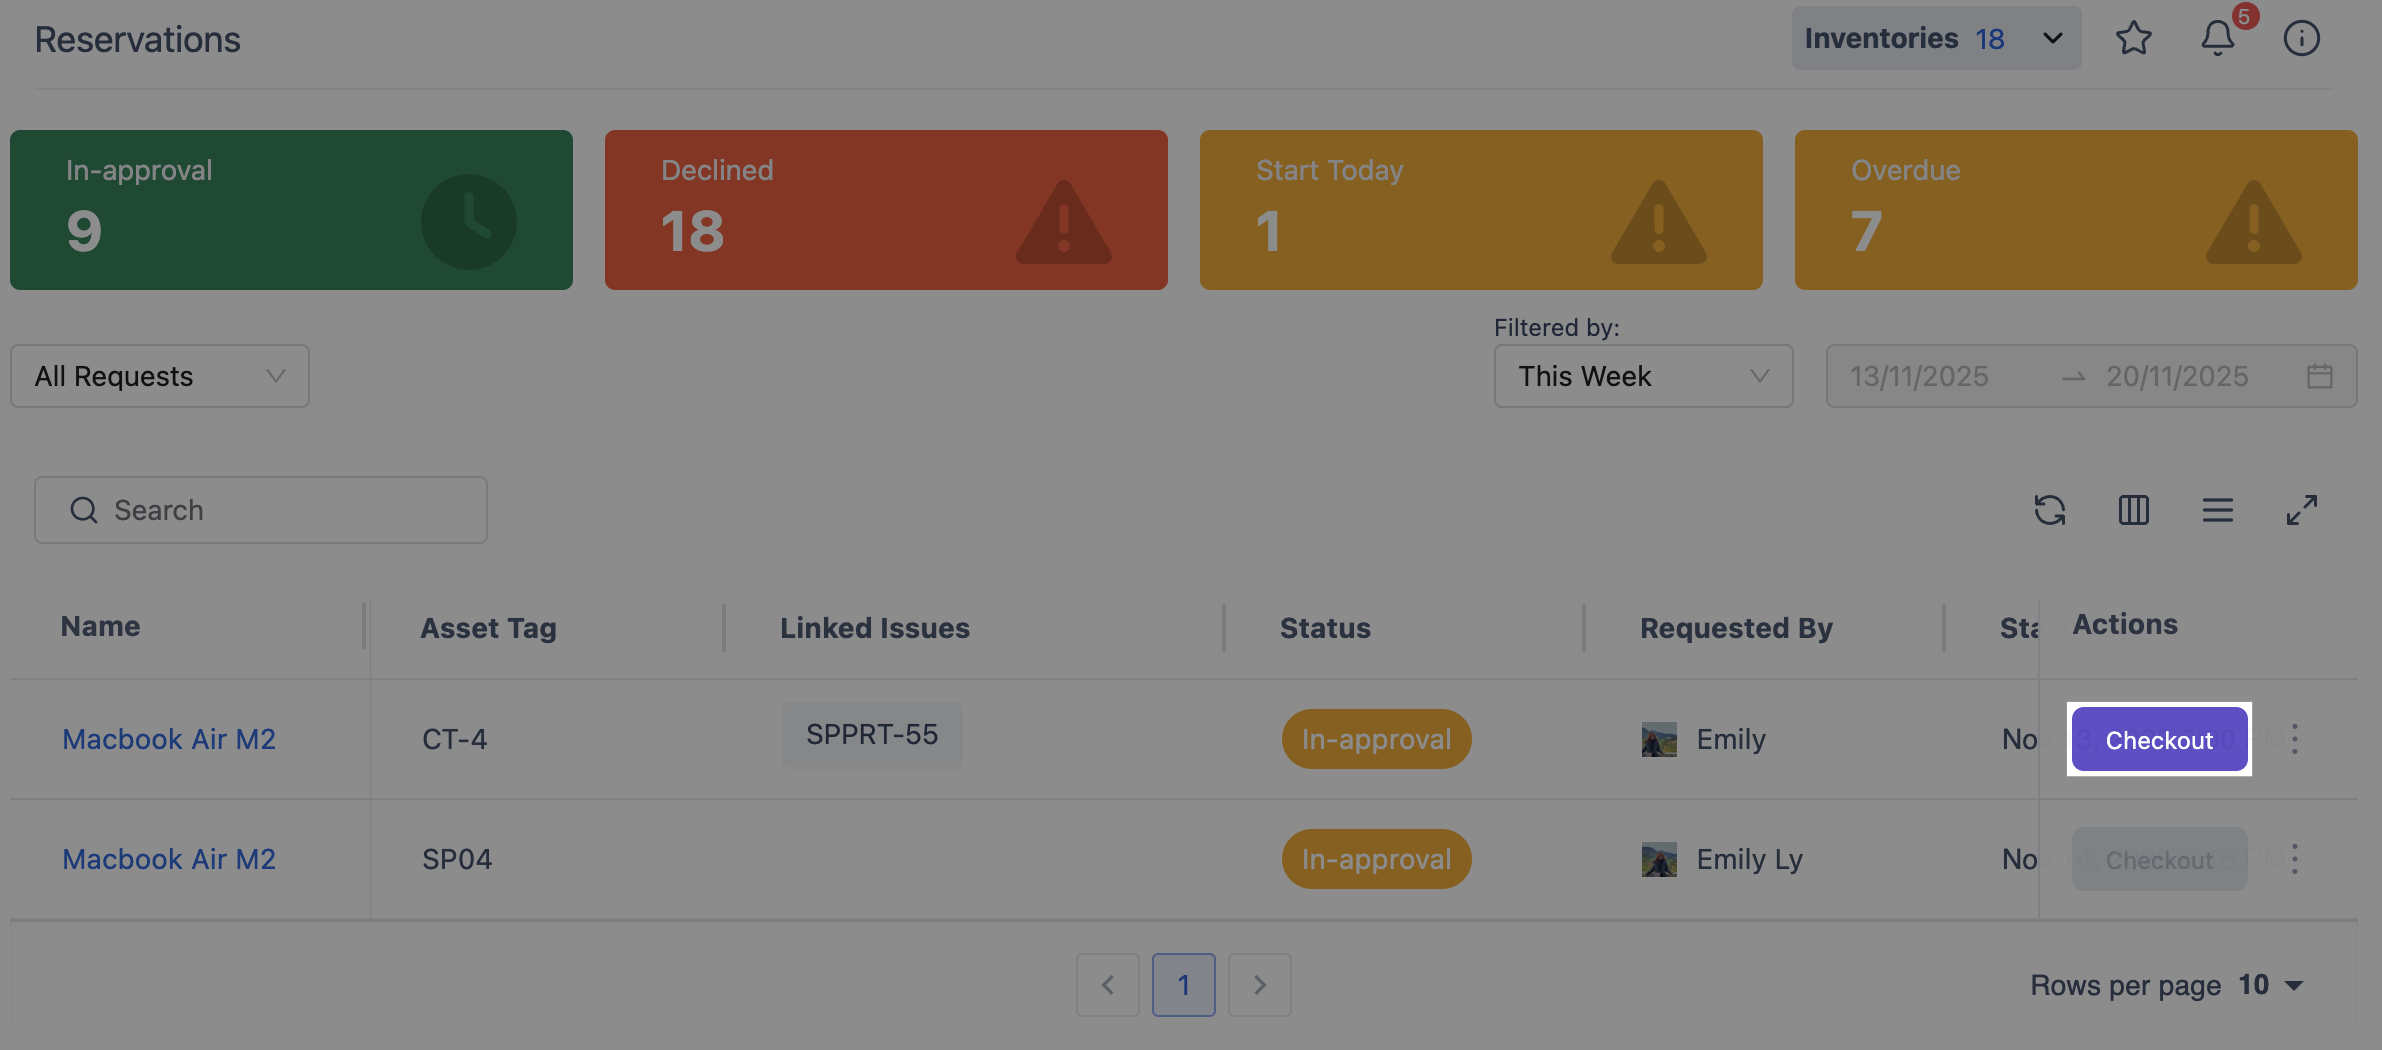
This asset can be checked out, as the booking timing is within the 4-hour window
2. Checkout Timing for Later Bookings:
Assets with booking timing beyond 4 hours cannot be checked out immediately.
Check-out is allowed when there are exactly 4 hours remaining before the scheduled booking time.
If the booking is at 8:00 PM, check-out is allowed from 4:00 PM.
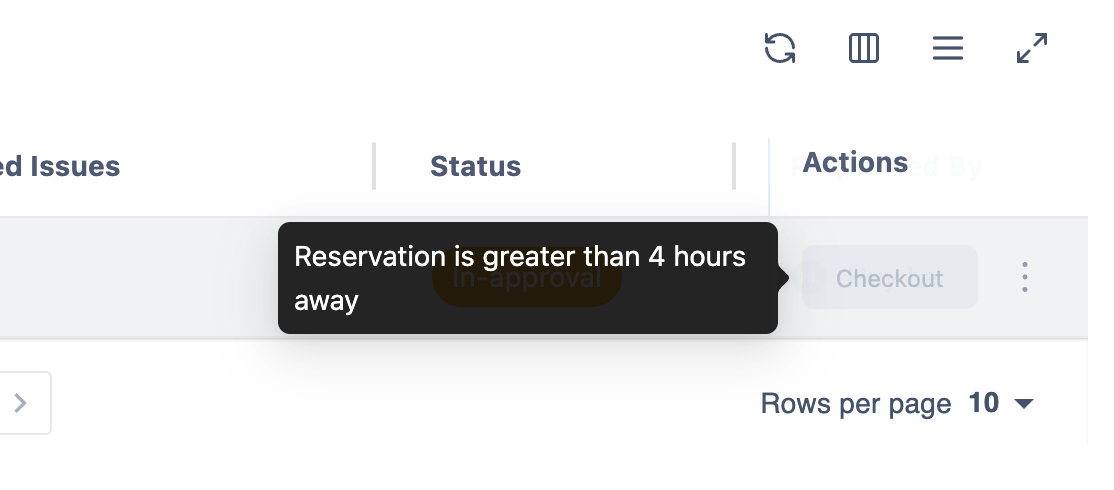
This asset is unable to be checked out, as the booking timing is out of the 4-hour window
Edit a Reservation
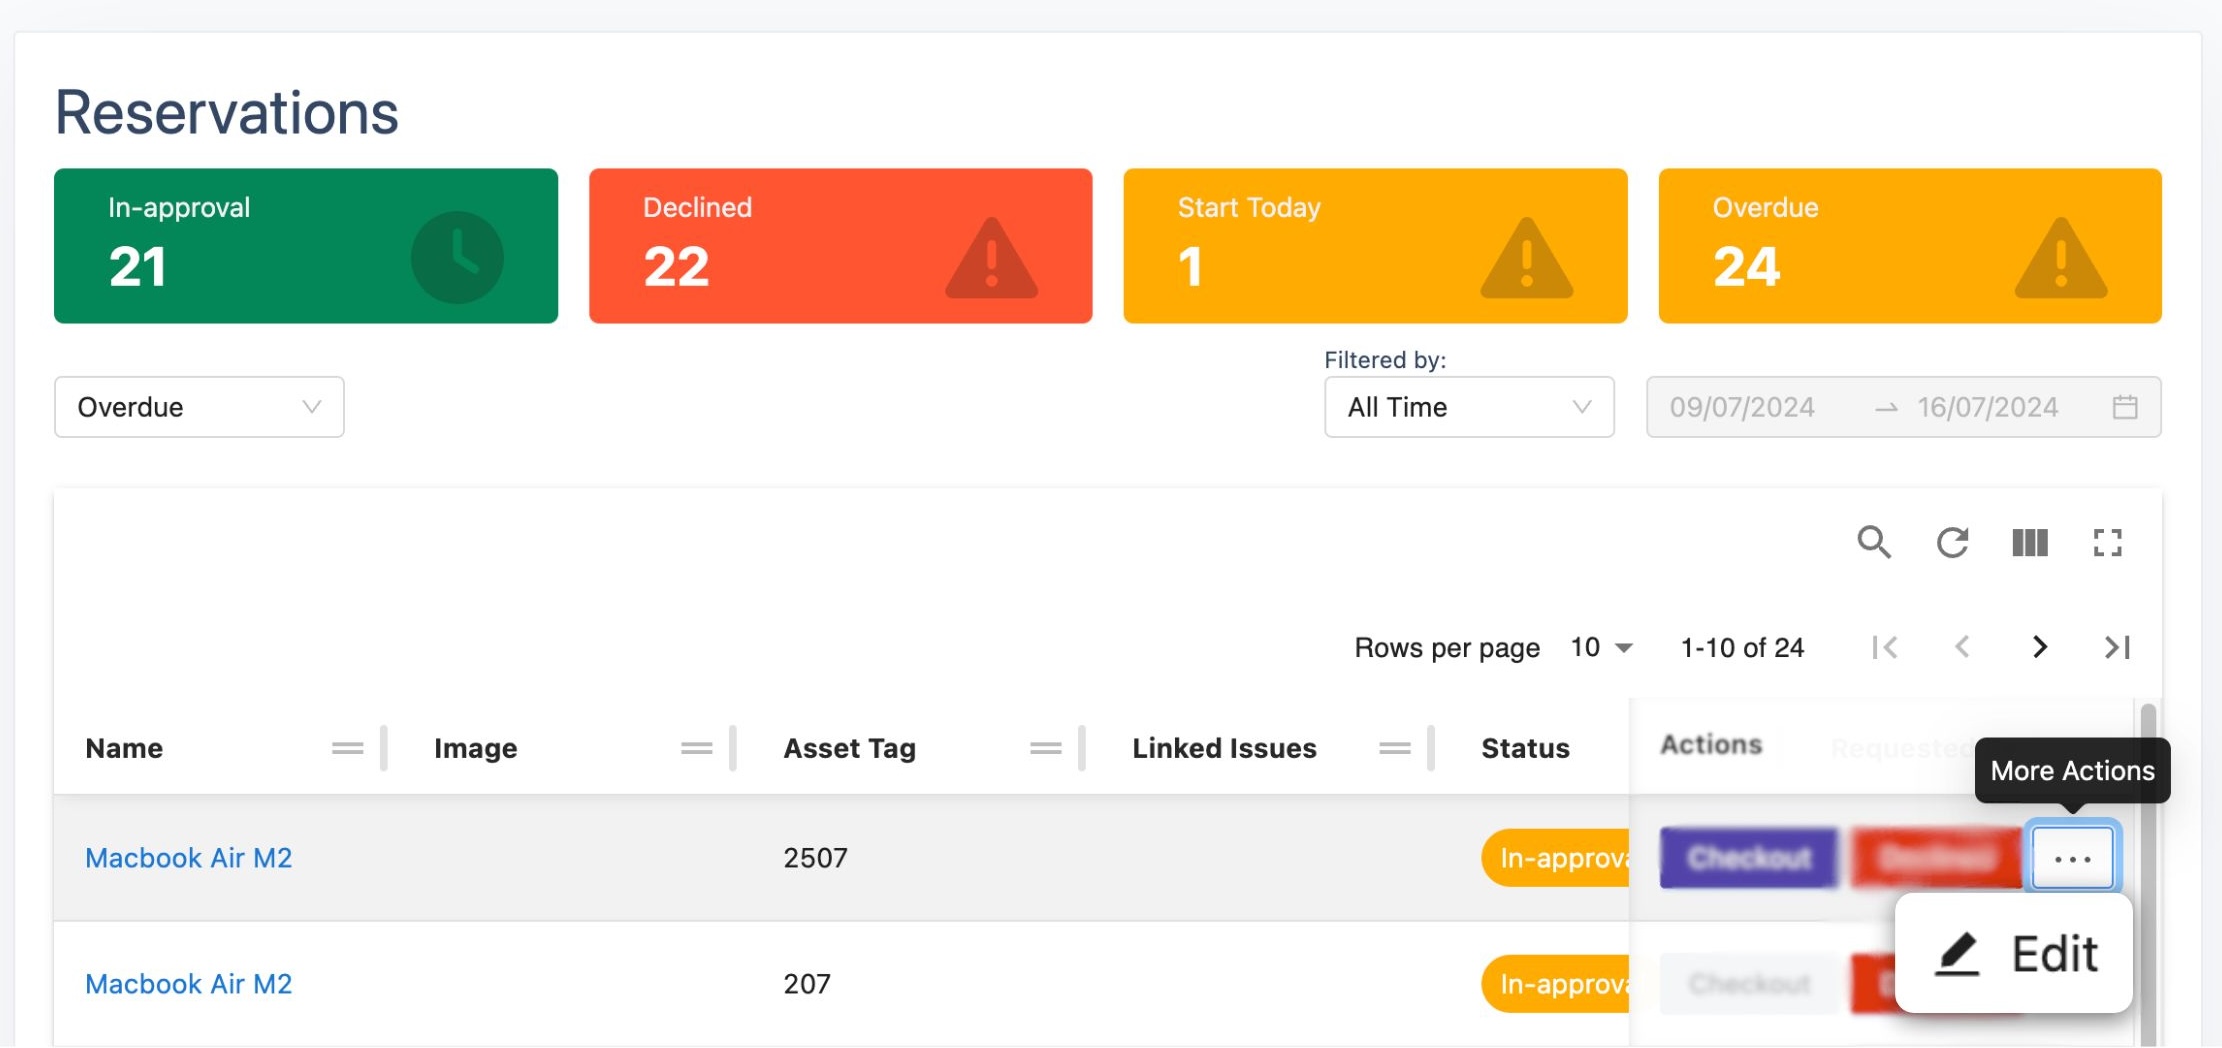
A reservation can be edited to change the time range. Follow these steps to edit a reservation:
More Options Button: Click on the more options button (…).
Edit: Select Edit from the dropdown menu.
Adjust Time Range: You will be navigated back to the booking form where you can adjust the time range as needed.
Submit: After making the necessary changes, click the Submit button to save the updated reservation.
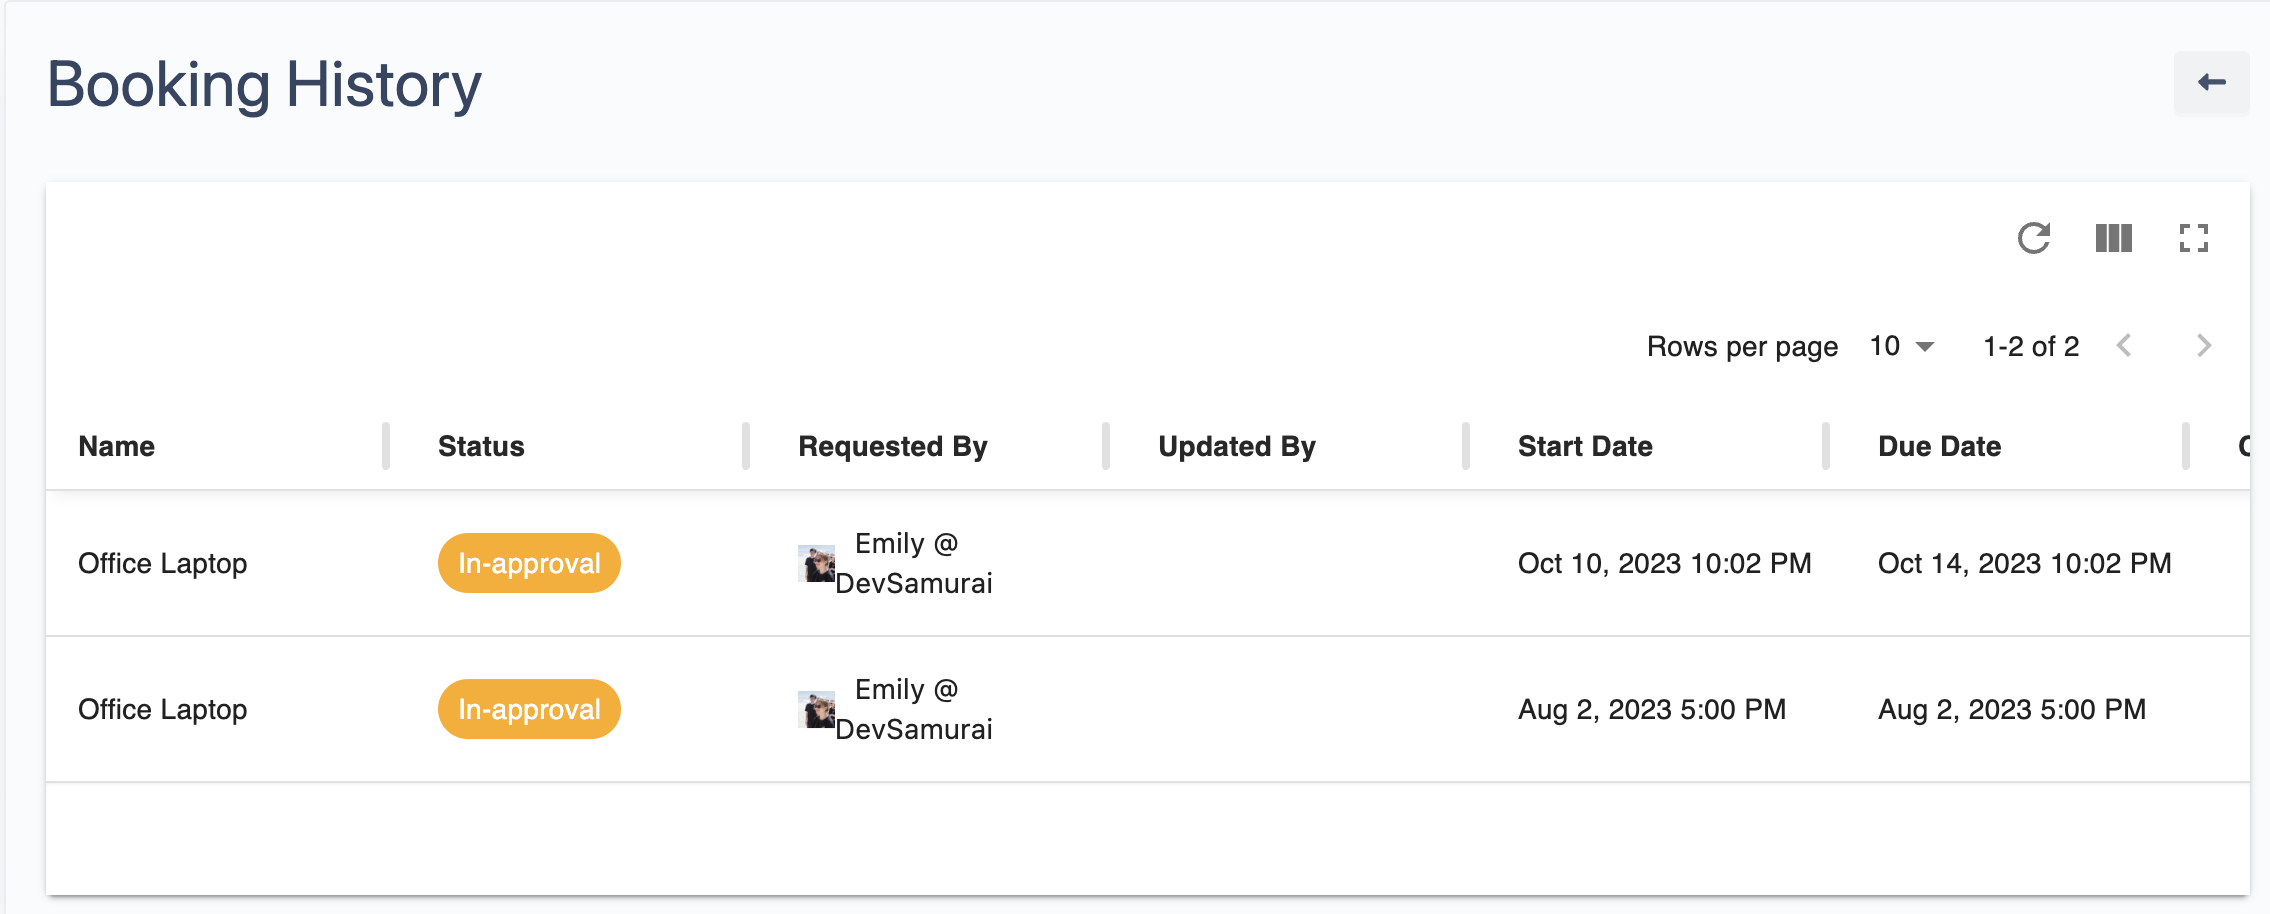
Booking History
Click on an asset in Reservations to see its booking history.
.png)