.png)
There are 02 ways to create new components: bulk import and manual set up .
Manual Set Up
On the top right of the Components page, click on 
-
Fill in the Required Information:
-
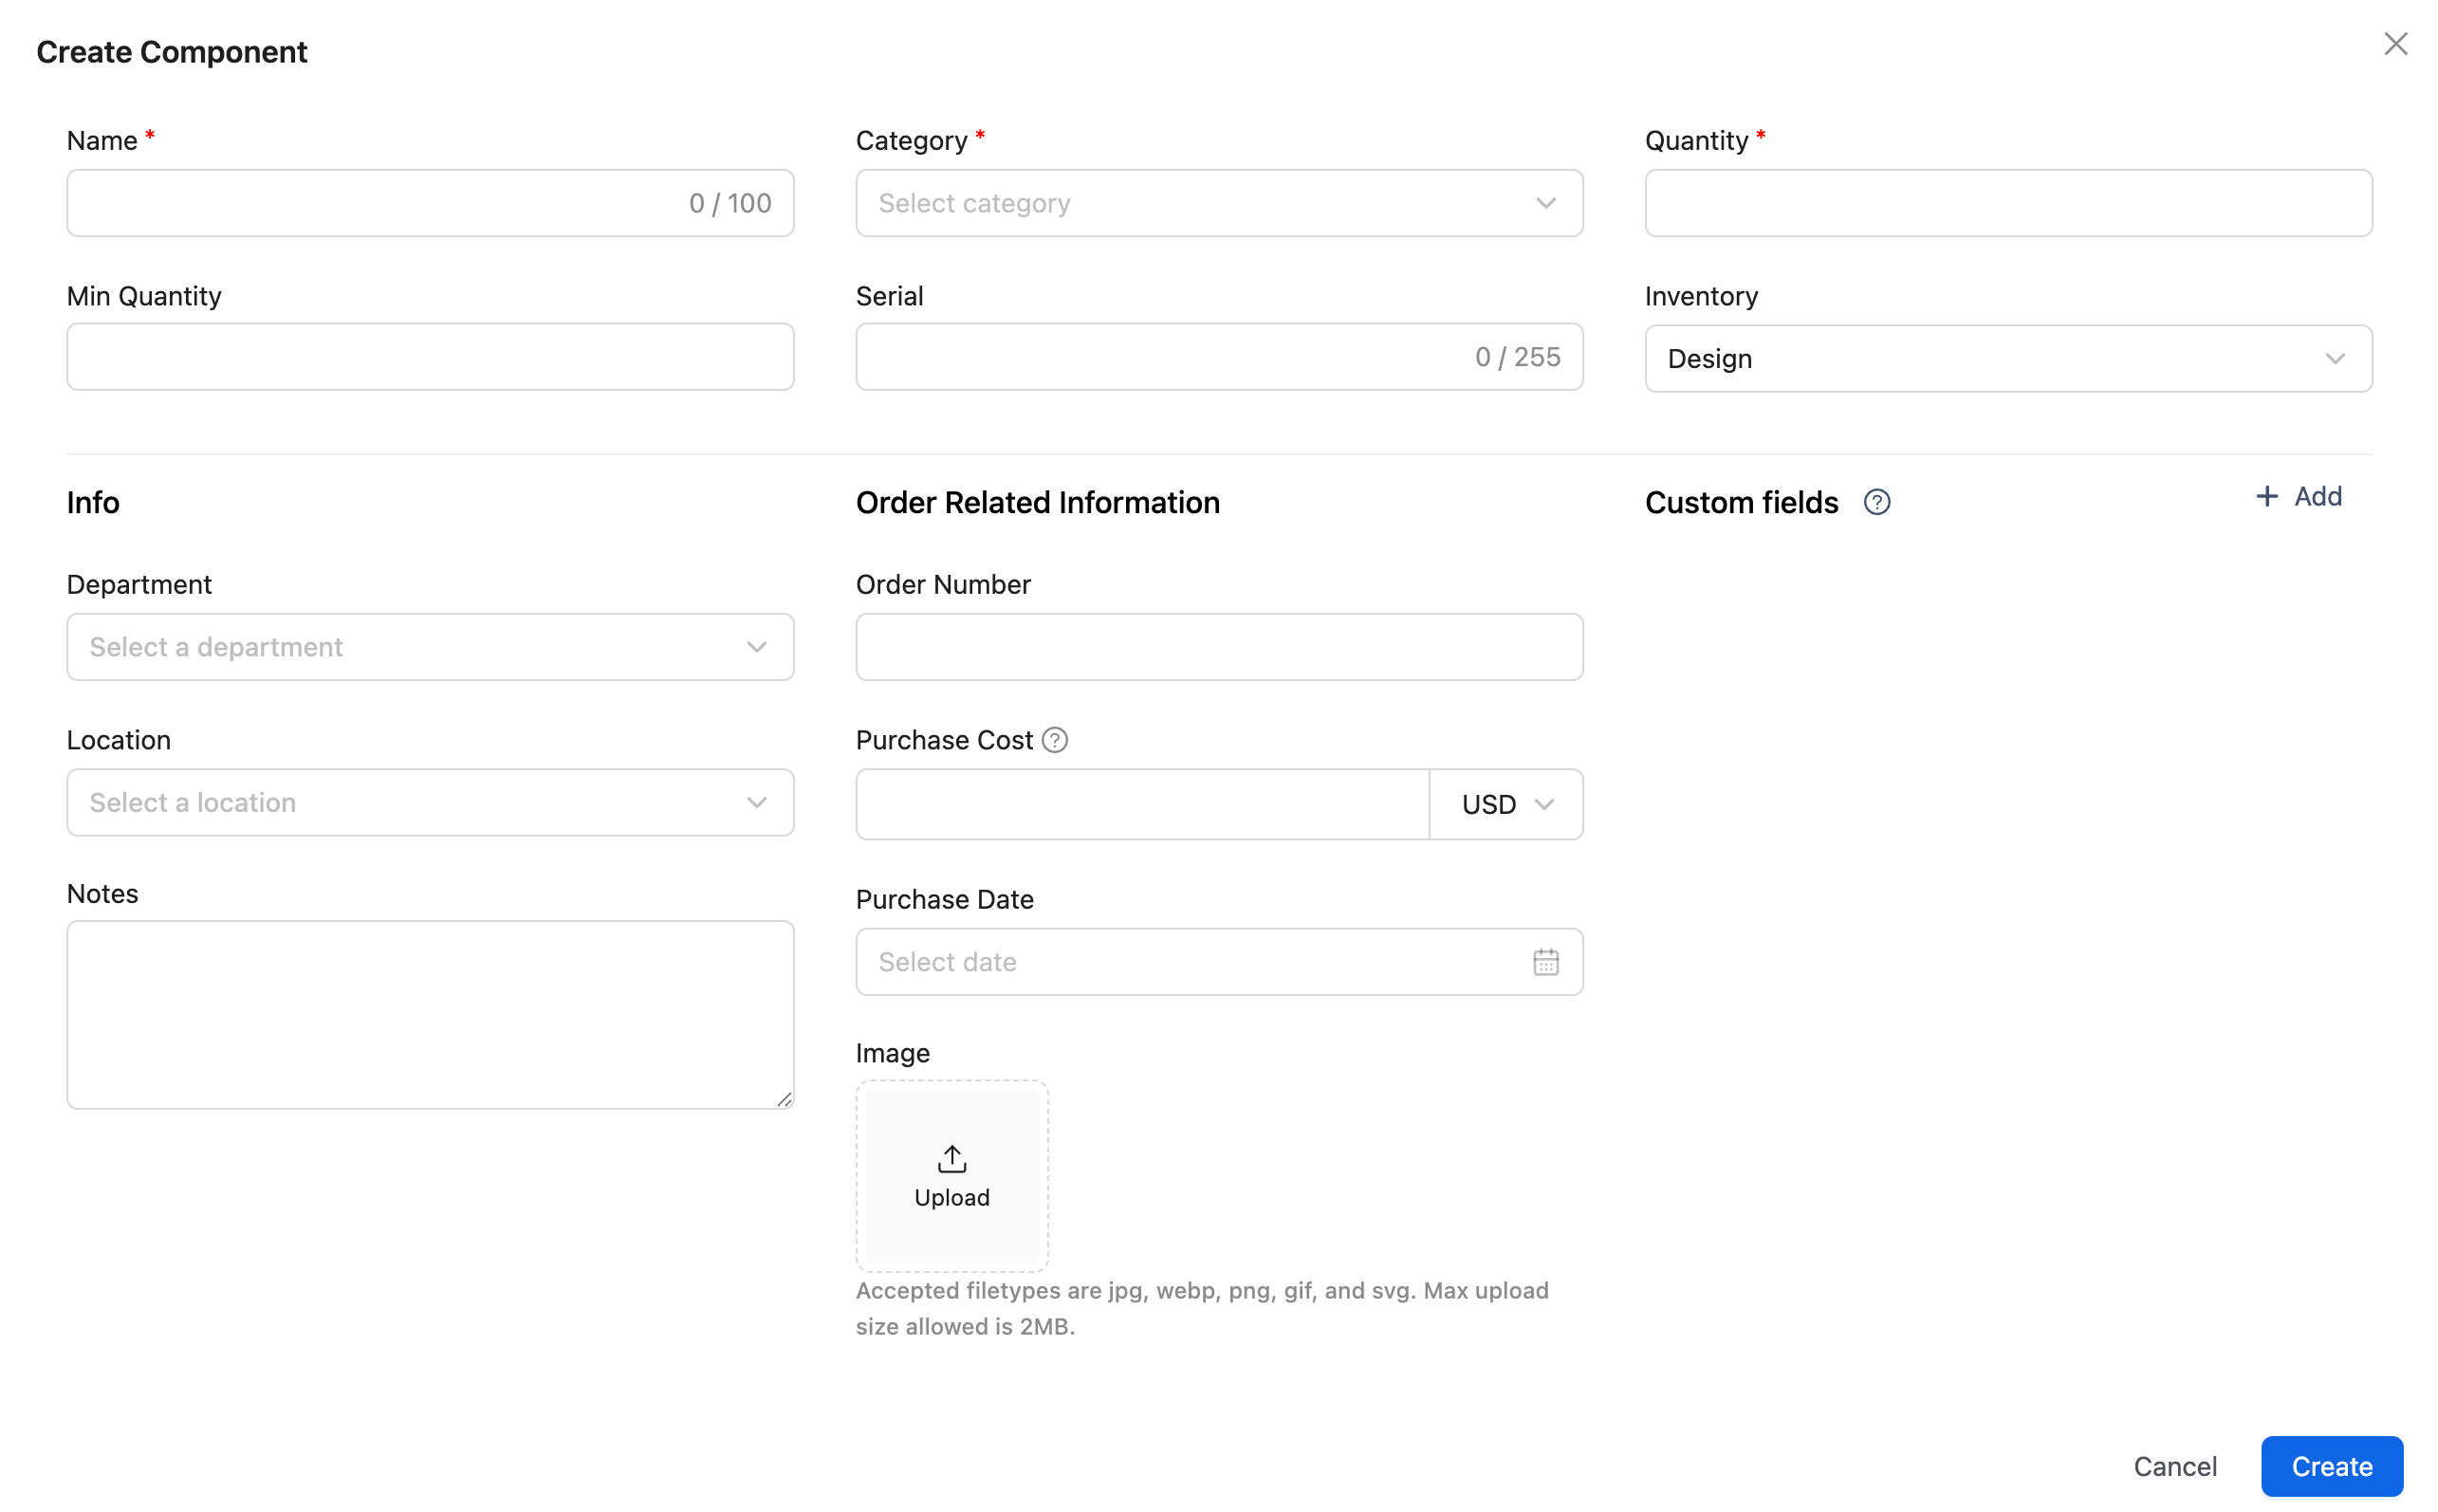
Component Name: Enter a descriptive name for the component (e.g., "Battery Pack - Model A1").
-
Category: Select the category that best fits the component type. Use the

-
Quantity: Enter the total quantity of this component available for tracking.
-
-
Additional Fields (Optional)
-
Serial: Enter the serial number for individual tracking, especially if each component needs unique identification.
-
Min Quantity: Set a minimum stock level. This feature will notify you when the stock level reaches this threshold, helping you reorder before you run out.
-
Department, Inventory, Location: Use these fields to assign the component to specific departments, inventory locations, or physical locations.
-
Notes: Add any relevant details, such as usage instructions, compatibility, or condition.
-
-
Order-Related Information
In addition to the component details, you can also provide order-specific information:
-
Order Number: Enter the order reference or invoice number related to this component purchase.
-
Purchase Date: Use the date picker to select the purchase date, allowing you to track the acquisition date.
-
Purchase Cost: Input the cost of the component, with support for up to two decimal places. Select the currency as required.
-
Image: Upload an image of the component for visual reference. Accepted file types include JPG, WEBP, PNG, GIF, and SVG, with a maximum size limit of 2MB.
Bulk Import
-
On the top right of the Components page, click on the dropdown of

-
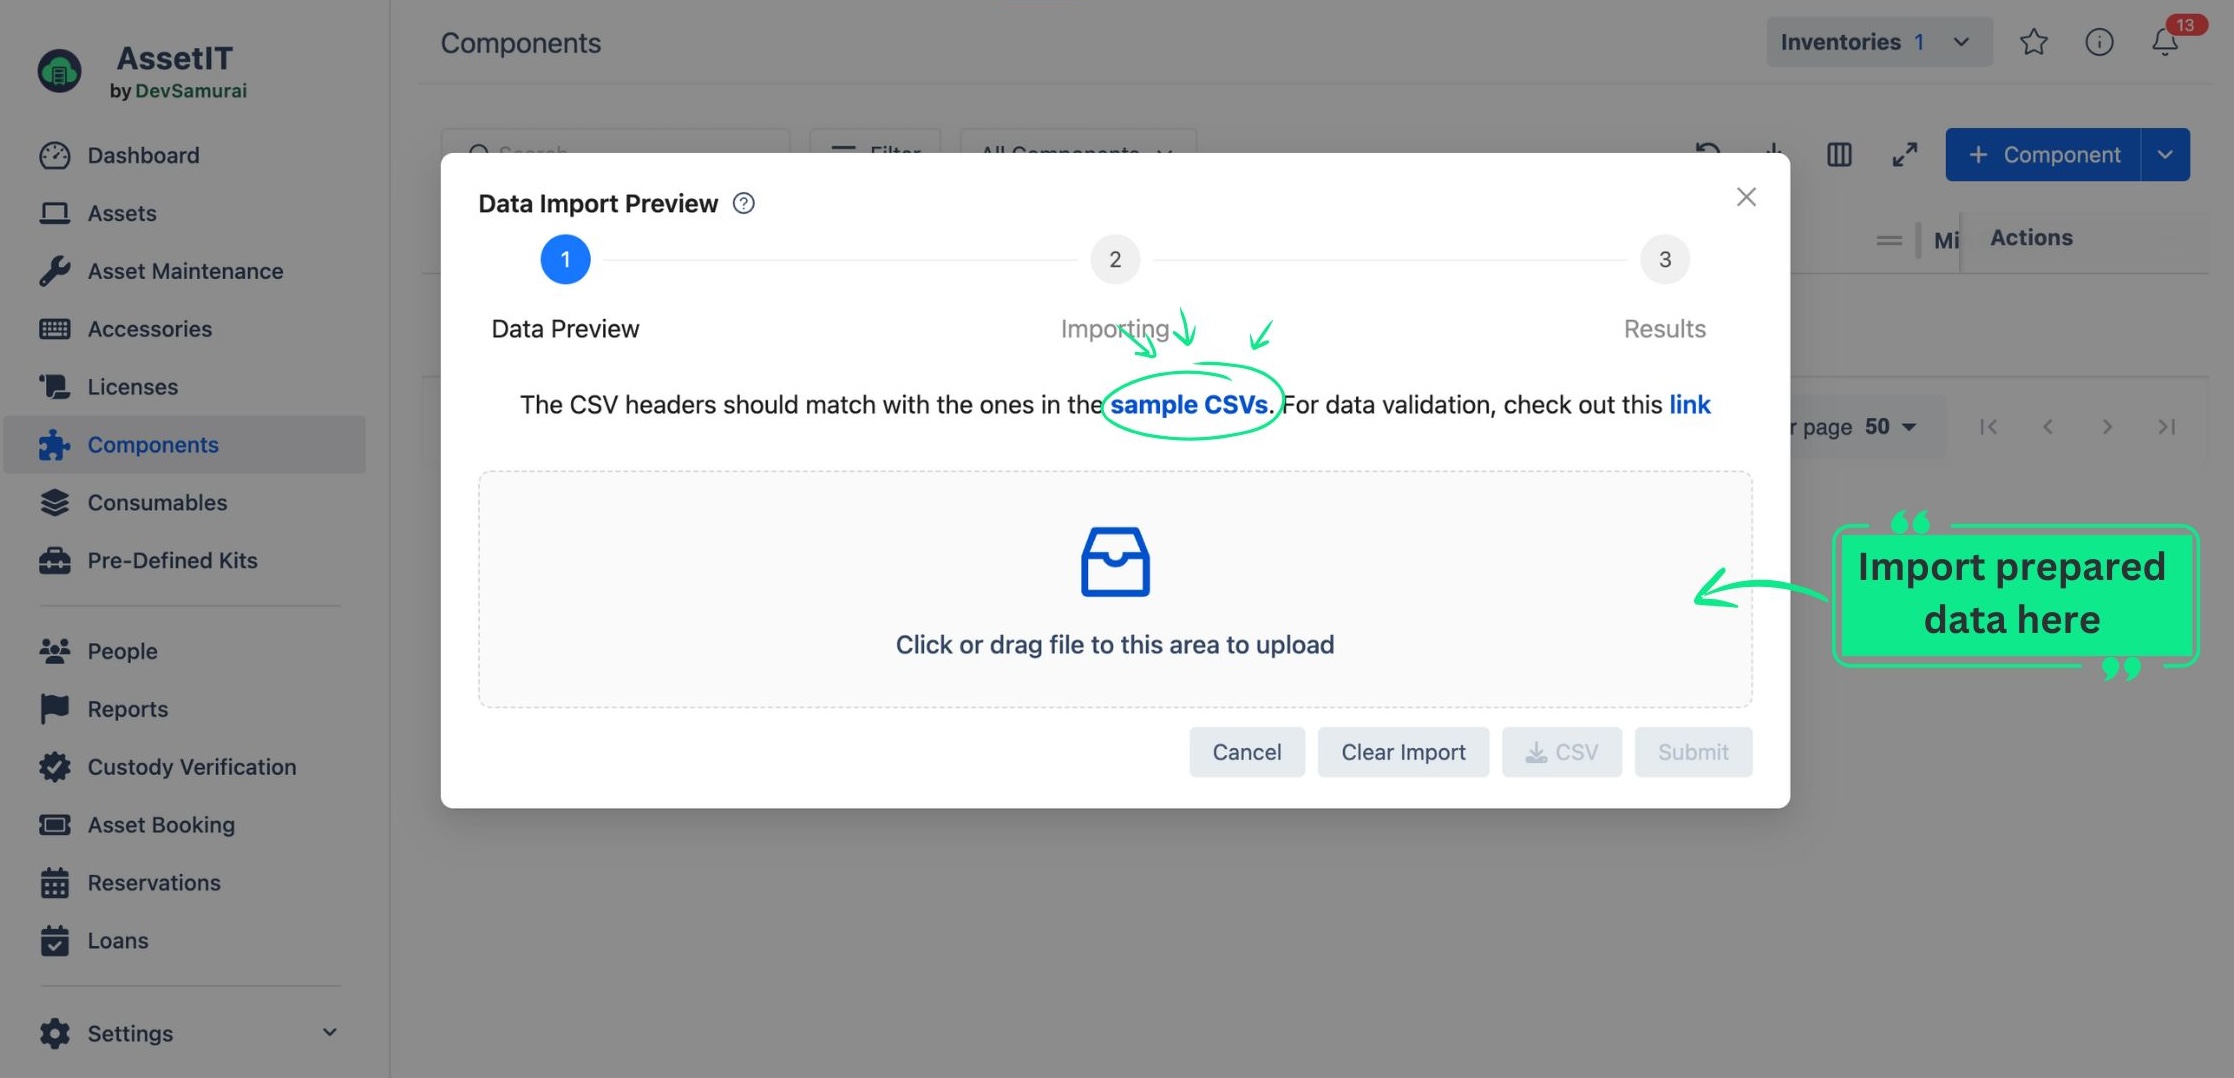
You will see a table that instructs you to use the sample CSV file for data preparation.
-
Once you finish preparing your data, import it into the app. You will then be taken to the Data Preview stage.
-
In the Data Preview stage, the app will highlight any fields with errors, allowing you to make adjustments directly.
-
To modify data information, click on the Edit button.
-
To automatically generate missing data for Department , Inventory , Category , Location , Supplier , Manufacturer , depreciation and Status Label , click on the “Generate Data” button.
-
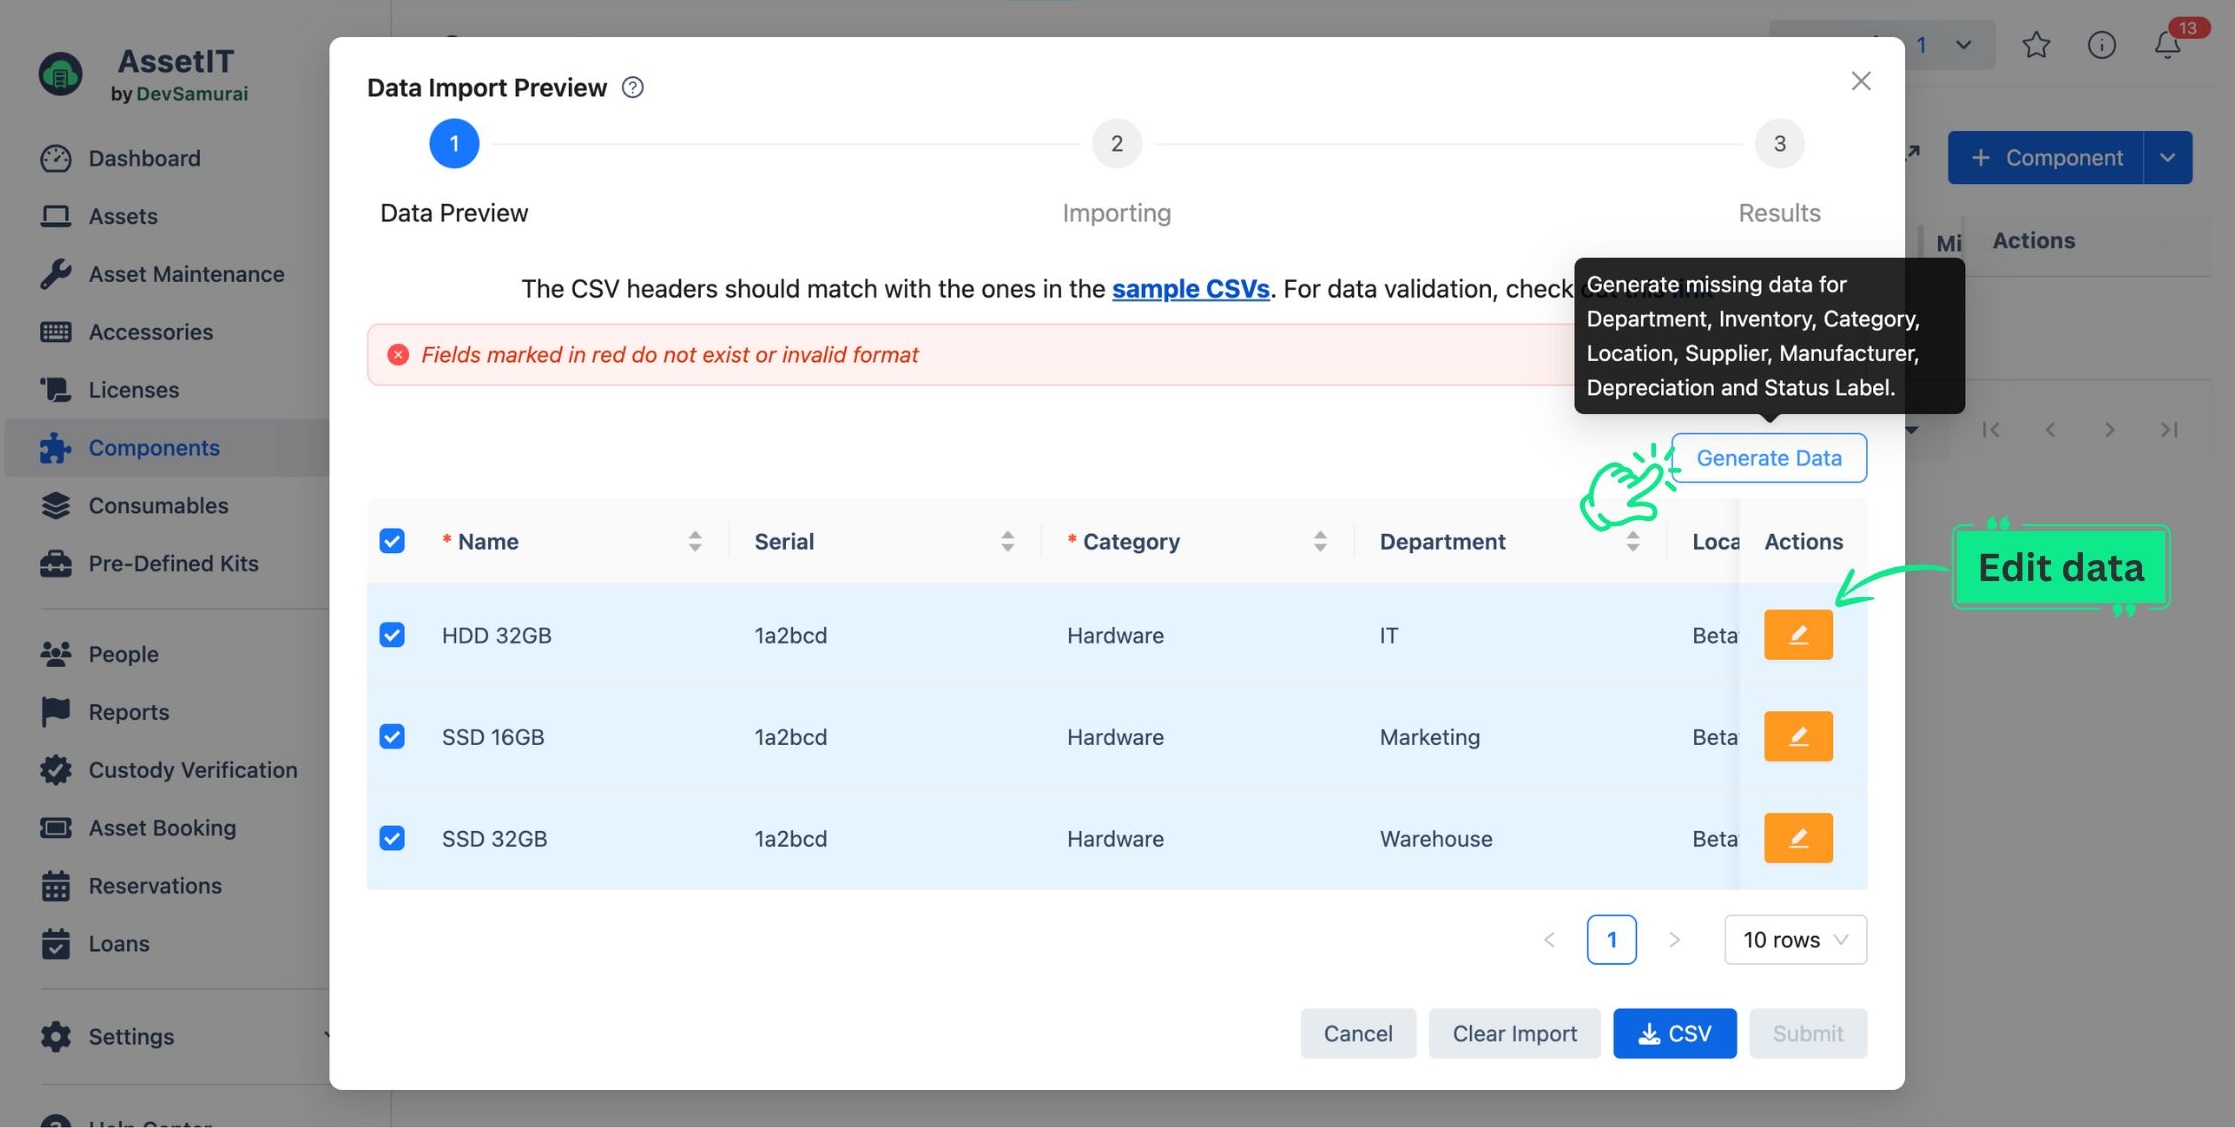
You can also download the most recently modified data into a CSV file for further customization by clicking the 
-
Click on Submit to finish importing your components.
-
You should now see a list of your components on the Components page.
Data validation for importing components
For data validation rules for Components, refer to the dedicated data validation page: Data validation for importing resources.