.png)
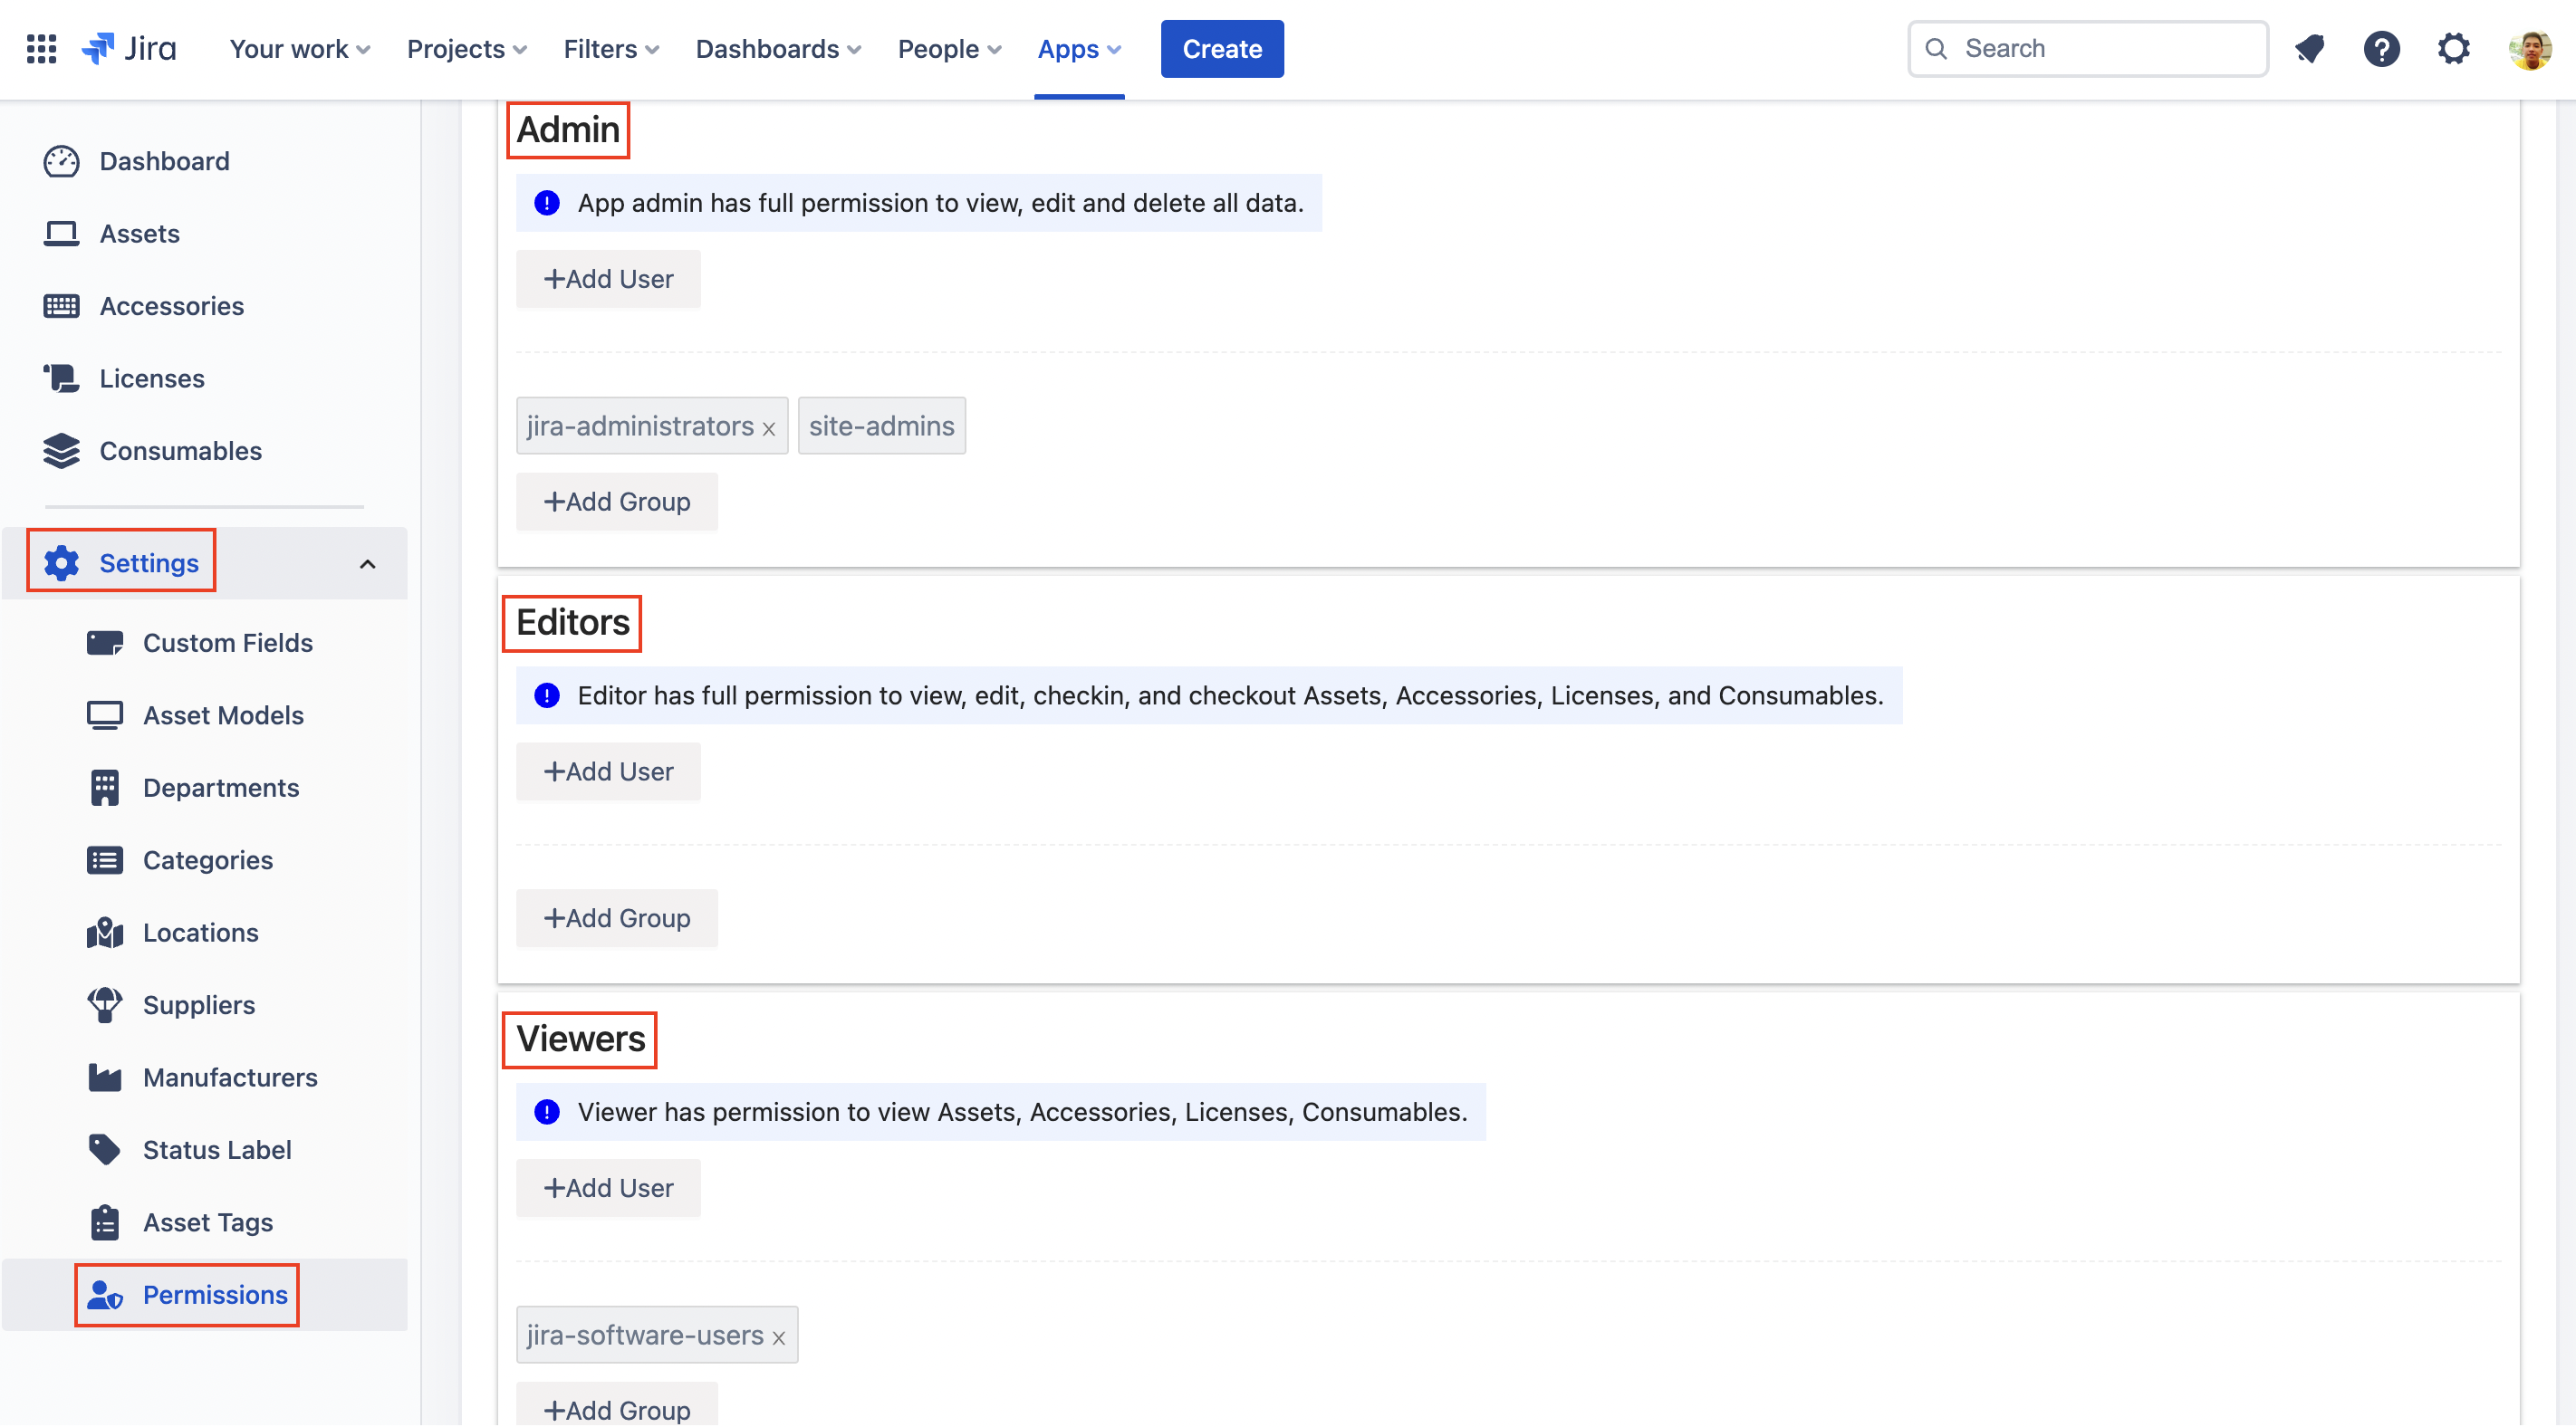
Permissions is the setting that admins use to manage the access levels of other members.
In order to manage Permissions, go to Settings → Permissions
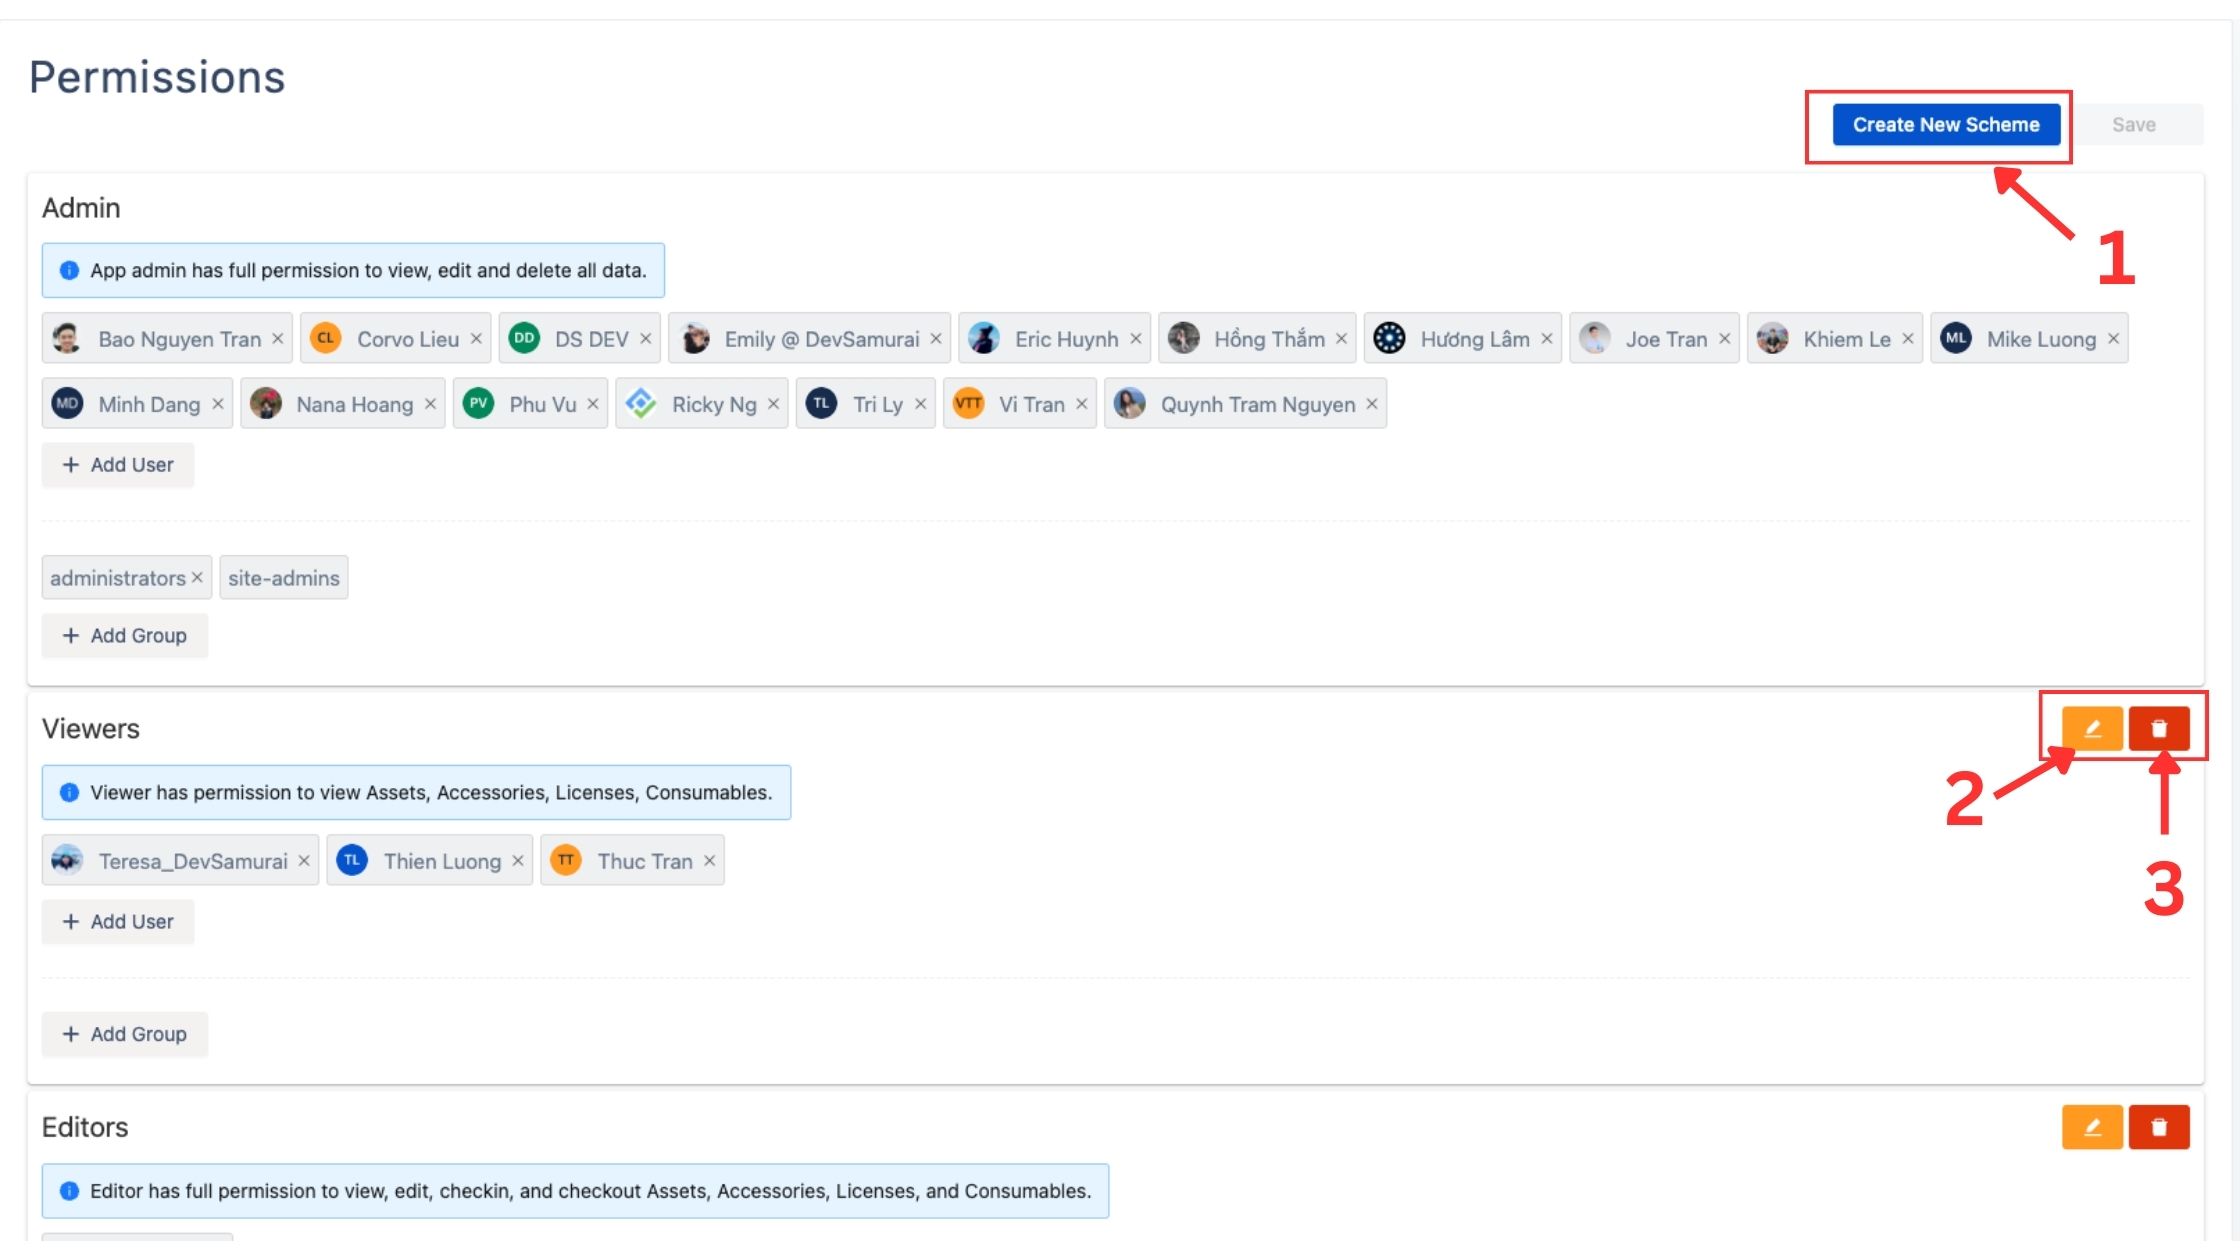
Manage Permission Schemes
AssetIT allows you to create (1), edit (2), and delete permission schemes (3) to control access to various inventories and asset information. Here's how to manage these schemes effectively:
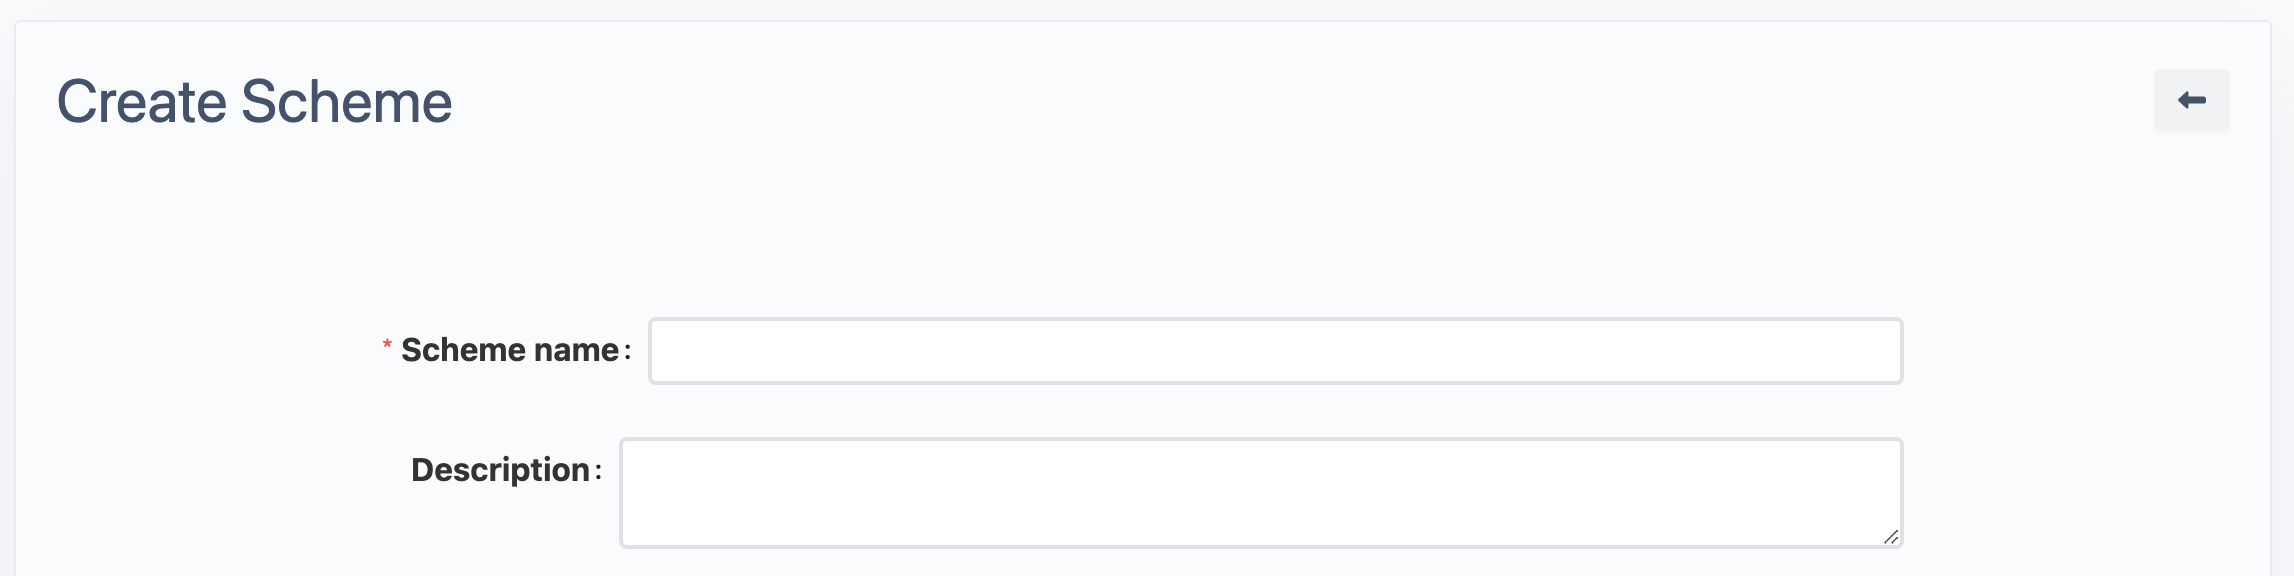
Creating a New Permission Scheme:
-
Select the option to create a new permission scheme.
-
Enter a name and description for the scheme.
-
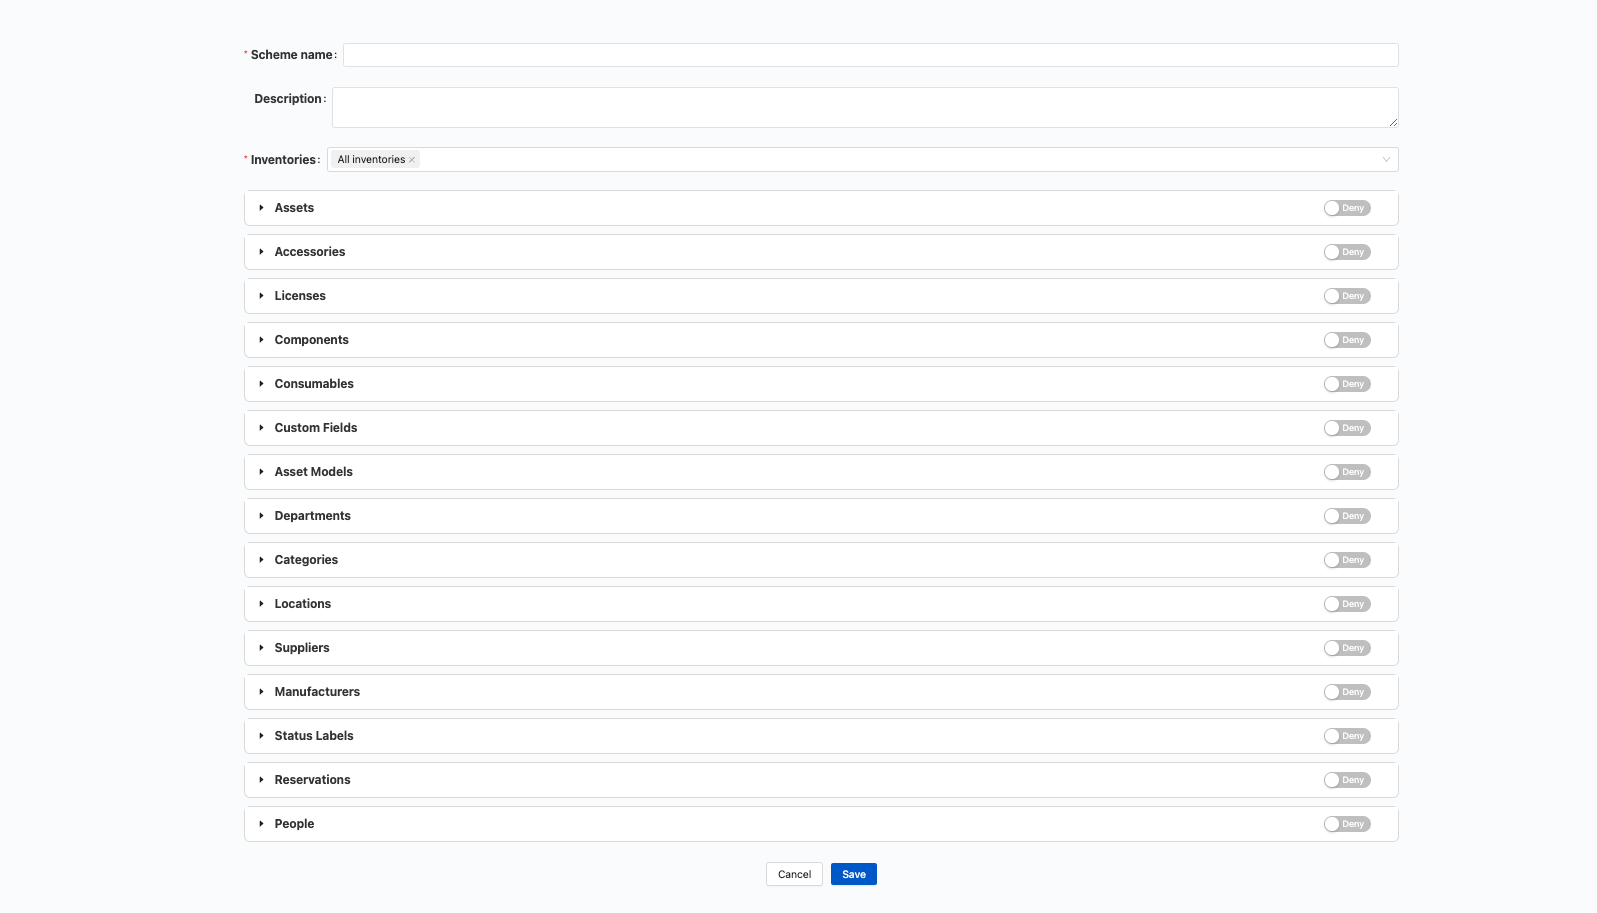
Set Detailed Access Permissions:
-
Inventory Access Permission: In this section, add the names of the inventories that you want the scheme to have access to. The selected inventories will be accessible under this scheme, while others will remain unseen or inaccessible.
For asset reservation, users included in a specific scheme are restricted to booking resources solely from the selected inventory.

-
Access Permission for other information:
-
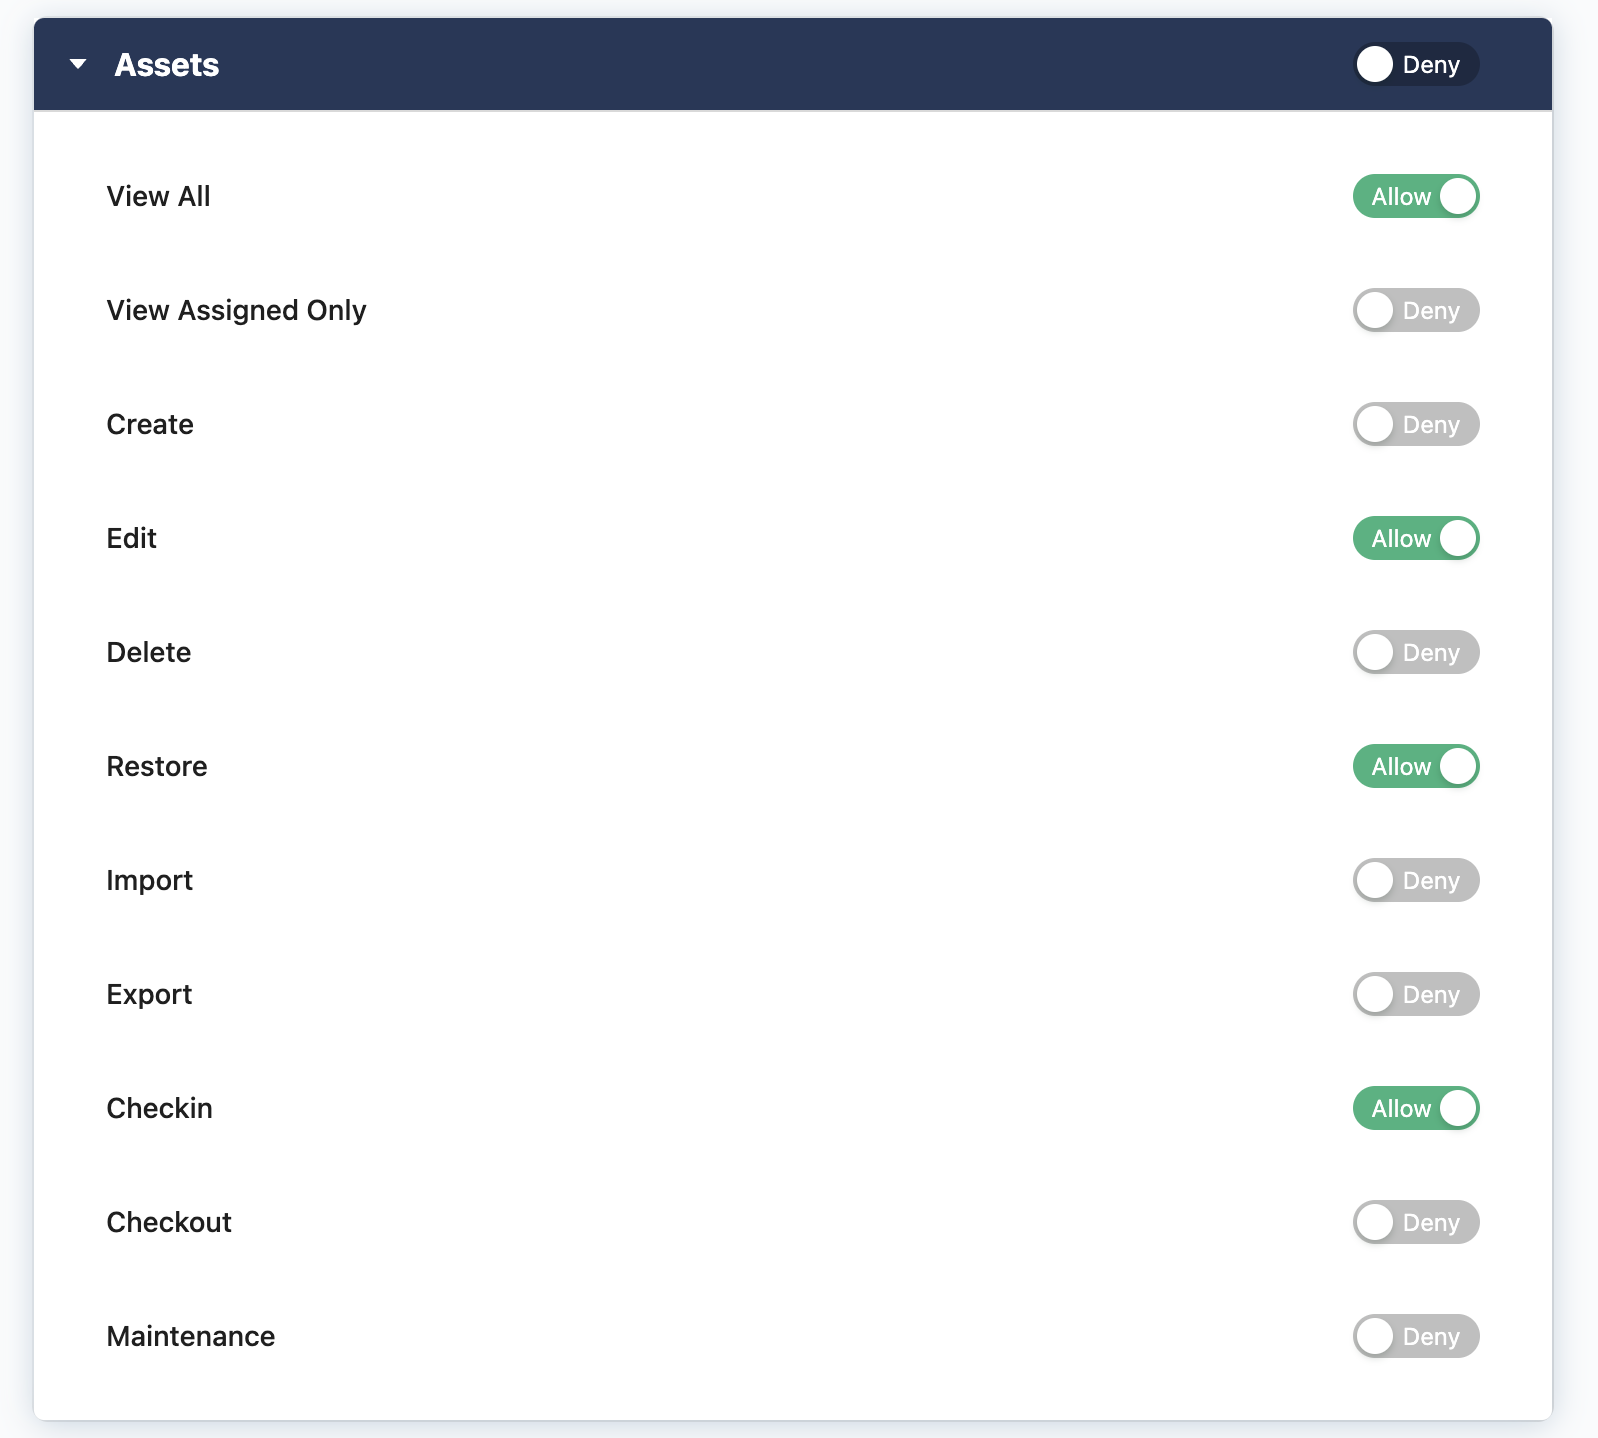
Navigate to specific entities, ranging from Assets, Accessories, Licenses, Components, Consumables, Custom Fields, Asset Models, Departments, Categories, Locations, Suppliers, Manufacturers, Status Labels, Reservations, to People.
-
For each entity, you can precisely control access by using toggles to allow or deny specific aspects of access for each entity. These aspects include:
-
View All: Allow or deny viewing all of the entities.
-
View Assigned Only: Allow or deny viewing assigned items only.
-
Create: Allow or deny the creation of new entries.
-
Edit: Allow or deny editing existing entries.
-
Delete: Allow or deny deletion of entries.
-
Restore: Allow or deny restoring deleted entries.
-
Import: Allow or deny importing data for the entity.
-
Export: Allow or deny exporting data for the entity.
-
Checkin: Allow or deny check-in actions.
-
Checkout: Allow or deny check-out actions.
-
-
-
Save your new scheme to implement it.
Editing a Permission Scheme in AssetIT:
-
Select a Scheme to Edit: Choose the permission scheme you want to modify from the list of available schemes.
-
Edit Scheme Details:
-
Name and Description: You can update the name and provide a description for the scheme, making it easy to identify and understand its purpose.
-
Inventory Access Permission: You can update inventories or delete them.
-
-
Edit Access Permissions for other information: Adjust the access of the scheme to the entities.
-
Save Changes: After making the necessary adjustments, save your changes to ensure that the permission scheme is updated with the new settings.
Important Considerations:
-
Ensure a thorough review of the permission settings for each scheme to maintain data security and operational integrity.
-
Regularly update and audit your permission schemes to align with changes in your organizational structure or policies.
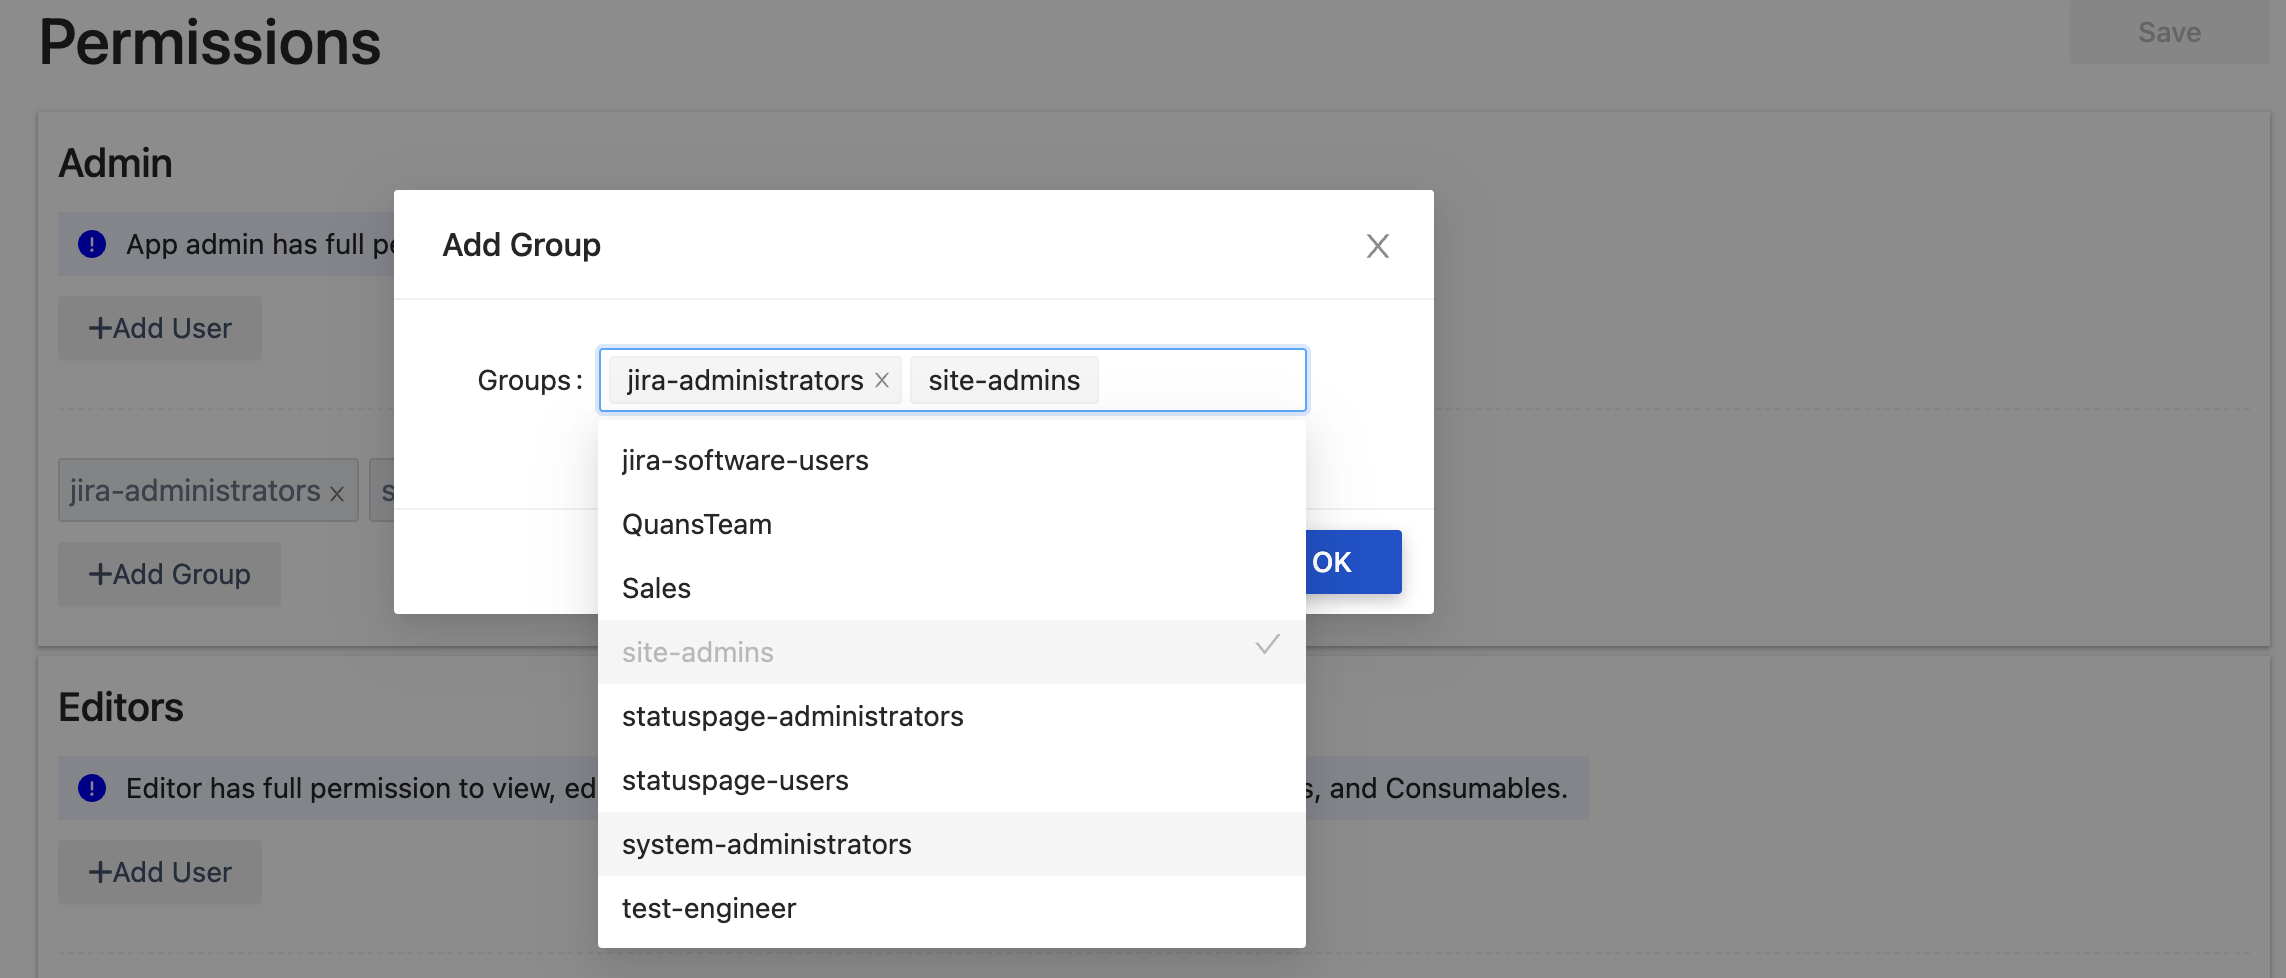
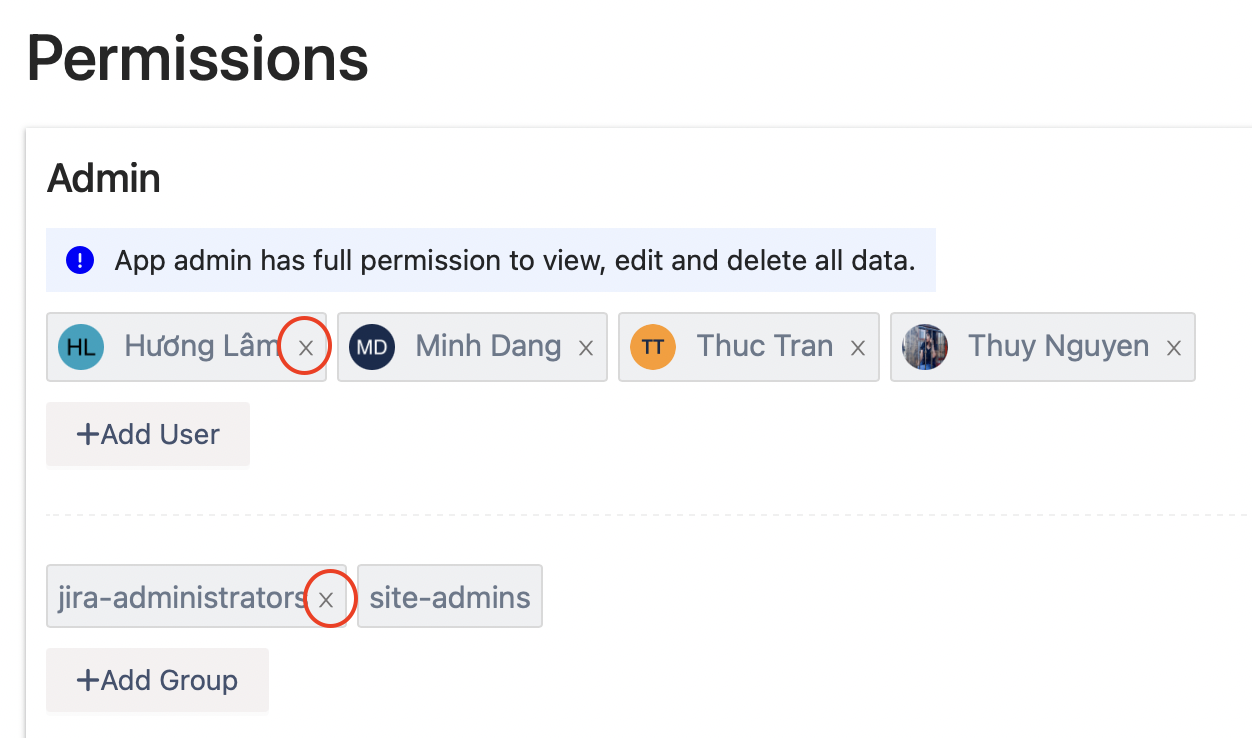
Admins can manage the access schemes by adding/removing Jira users and Jira groups from a specific scheme:
Add users

Add Jira groups
Remove user and groups
Click on x icons to remove users and groups that you want
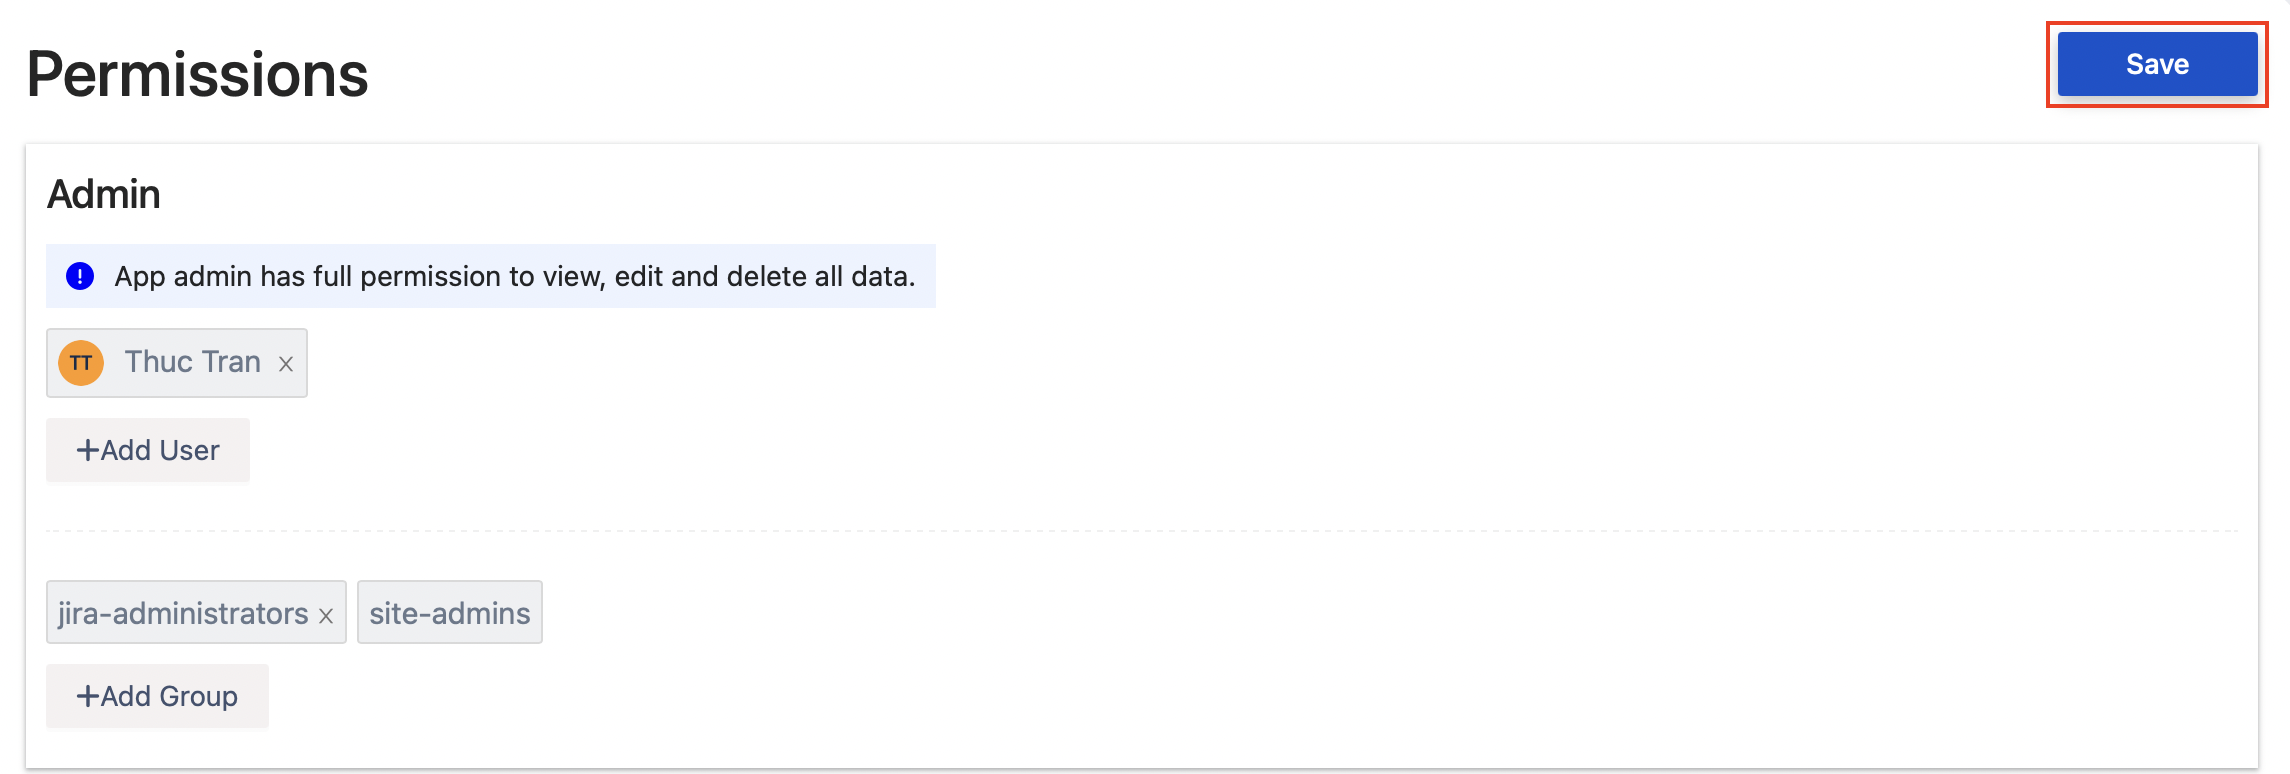
Save after adding/removing
After adding/removing users and groups, click on the Save button to save to updated information
AssetIT supports 3 access schemes by default:
Admin
An admin has full permission over the app including view, edit, request and delete all data. Permission Admins will also have a right to enable/disable the Email Notification Enabler in Preferences.
By default, jira-administrators and site-admins are added into this scheme.
Editors
An editor has full permissions over Asset items including Assets, Accessories, Licenses, Consumables and Components.
Editors have no permission to view Settings pages
Viewers
A viewer can only view all Assets, Accessories, Licenses, Consumables and Components.
Viewers also have no permission to view Settings pages.