.png)
Overview
AssetIT allows customization of asset data through Custom Fields and FieldSets.
To access Custom Fields and FieldSets:
-
Navigate to ⚙️ Settings > Reference Data > Custom Fields.
-
Use the Custom Fields tab to manage individual fields, and the FieldSets tab to manage grouped field sets.
What are Custom Fields? Custom Fields in AssetIT allow you to add additional data fields to asset records, enabling you to capture organization-specific information not covered by default fields.
What are FieldSets? FieldSets in AssetIT are groups of Custom Fields that can be bundled and assigned together.
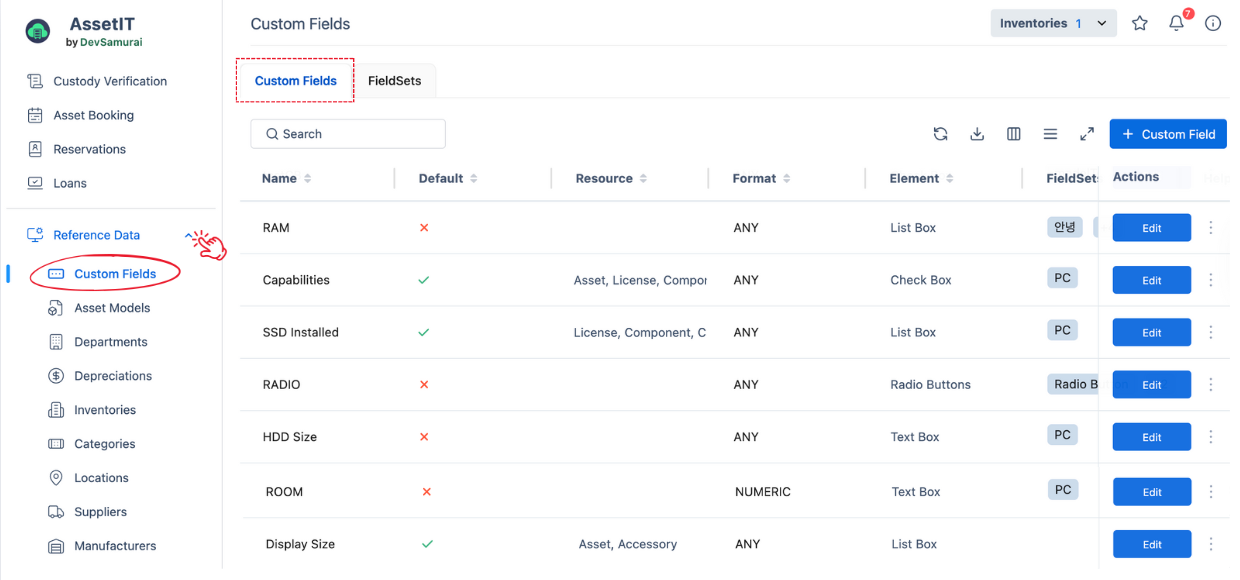
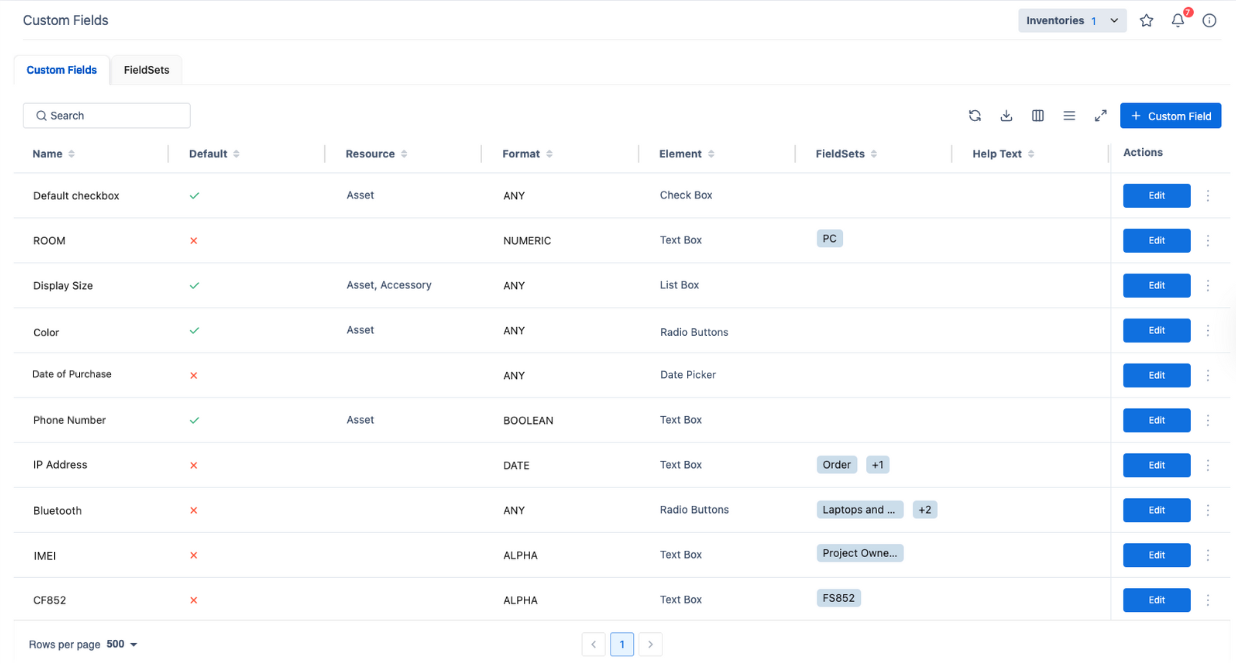
Managing Custom Fields
-
Custom fields allow you to track additional information about your IT resources that the default asset attributes don't cover.
-
In the Custom Fields tab, you can see a list of all existing Custom Fields, including:
-
Name: Displays the name of the custom field.
-
Default: Shows ✅ (yes) or ❌ (no), indicating whether the custom field is set as a default field that appears automatically when new assets or resources are added.
-
Resource: Specifies the type of resource the field is associated with, such as Asset, Accessory, License, Component, or Consumable.
-
Format: Shows the format of the data that can be entered in the field, which could be ANY, ALPHA, ALPHA-DASH, etc.
-
Regex: Includes regular expressions like
/^[a-z]{2,5}$/which set specific rules for what the field can accept. This particular example limits input to lowercase alphabetic characters with a length between 2 and 5. -
Element: Lists the type of UI element used for data entry, such as: Text Box, Check Box, List Box, Text Area, Date Picker, User Picker, Radio Buttons)
-
FieldSet(s): Indicates whether the custom field is part of one or more fieldsets.
-
Help Text: Provides a brief description or guidance on what should be entered in the field or how it should be used. This is particularly useful for ensuring data is entered correctly.
-
Actions to take on a set: Edit/delete
-
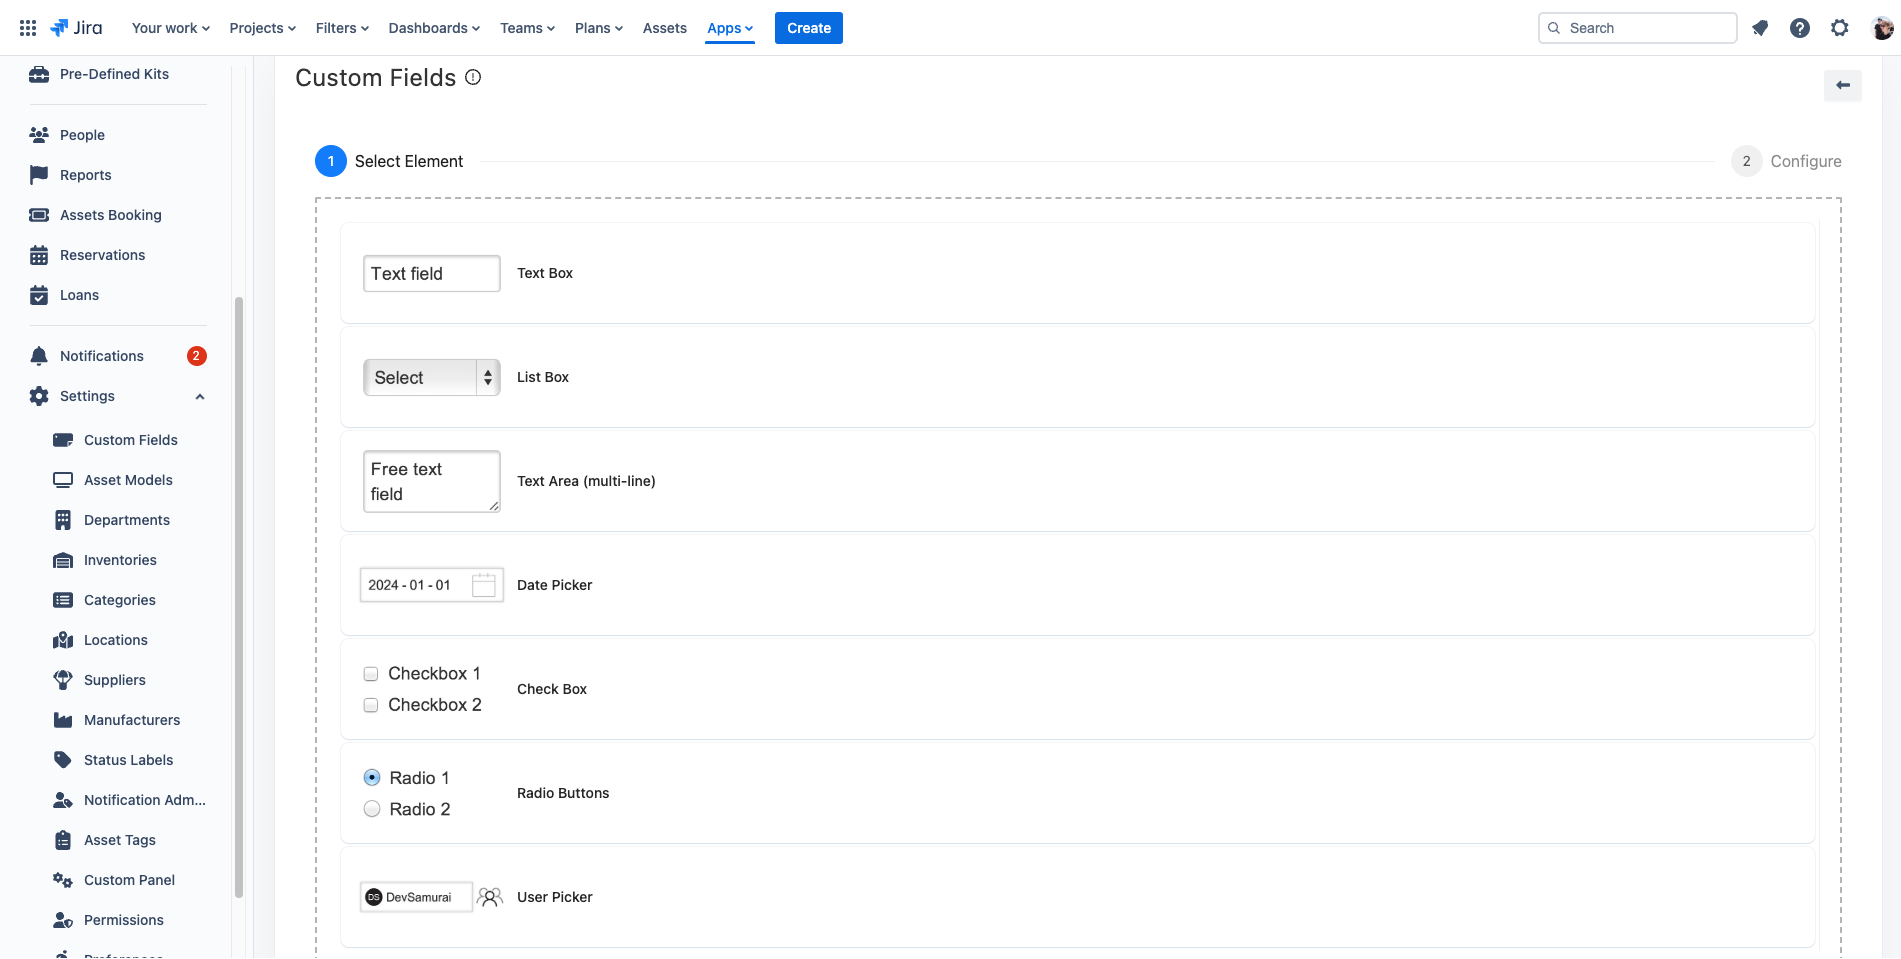
Create a New Custom Field
-
Click on

-
Choose Field Type: A selection window will appear, allowing you to choose from several field types, each suited to different kinds of data:
-
TextBox: A simple text input for one-line information.
-
ListBox: A dropdown menu allowing selection from multiple predefined options.
-
TextArea: A larger text box for entering more extensive data.
-
Date Picker: A tool to select a specific date.
-
Checkbox: A small box that can be checked or unchecked to make a binary choice.
-
Radio Buttons: Allows the selection of one option from a set of choices.
-
User Picker: Enables selecting user(s) from a list.
-
-
After selecting the desired type, click on


-
Fill in the necessary information along with the instructions.
-
Click

Custom Field Validation
AssetIT has pre-defined all the possible formats for your custom fields. When creating/editing a custom field, just select a format that matches your field the most.
Following is a list of pre-defined formats:
|
Format |
Description |
|---|---|
|
|
No input validation. Any text is acceptable. |
|
|
The field under validation must be entirely alphabetic characters. |
|
|
The field under validation may have alpha-numeric characters, as well as dashes and underscores. |
|
|
The field under validation must be numeric and limited to 9 numbers. |
|
|
The field under validation must be entirely alpha-numeric characters. |
|
|
The field under validation must be formatted as an e-mail address. |
|
|
The field under validation must be a valid date according to the |
|
|
The field under validation must be a valid URL. |
|
|
The field under validation must be an IP address. |
|
|
The field under validation must be an IPv4 address. |
|
|
The field under validation must be an IPv6 address. |
|
|
The field under validation must be a valid MAC address. |
|
|
The field under validation must be able to be cast as a boolean. Accepted inputs are true, false, 1, 0, "1", and "0". |
|
|
This field allows you to use a regex expression for validation. It should start with |
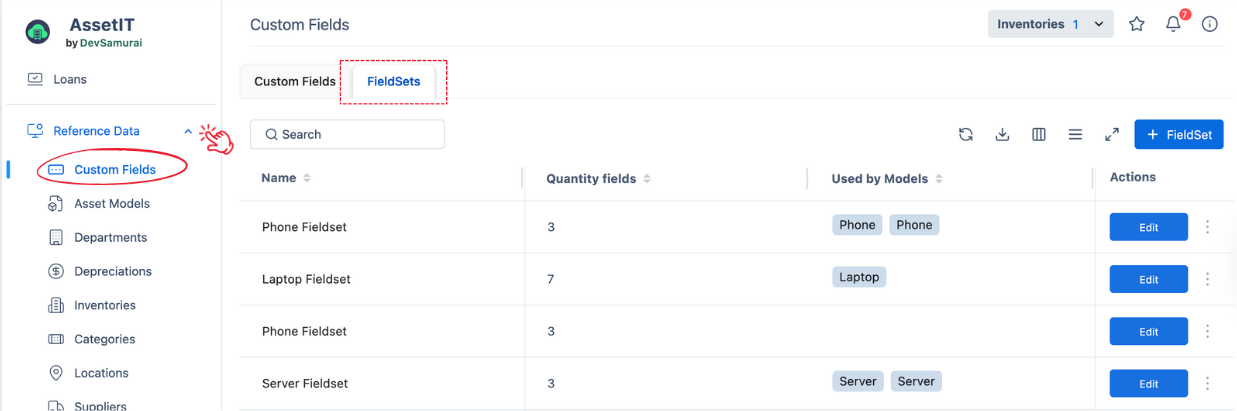
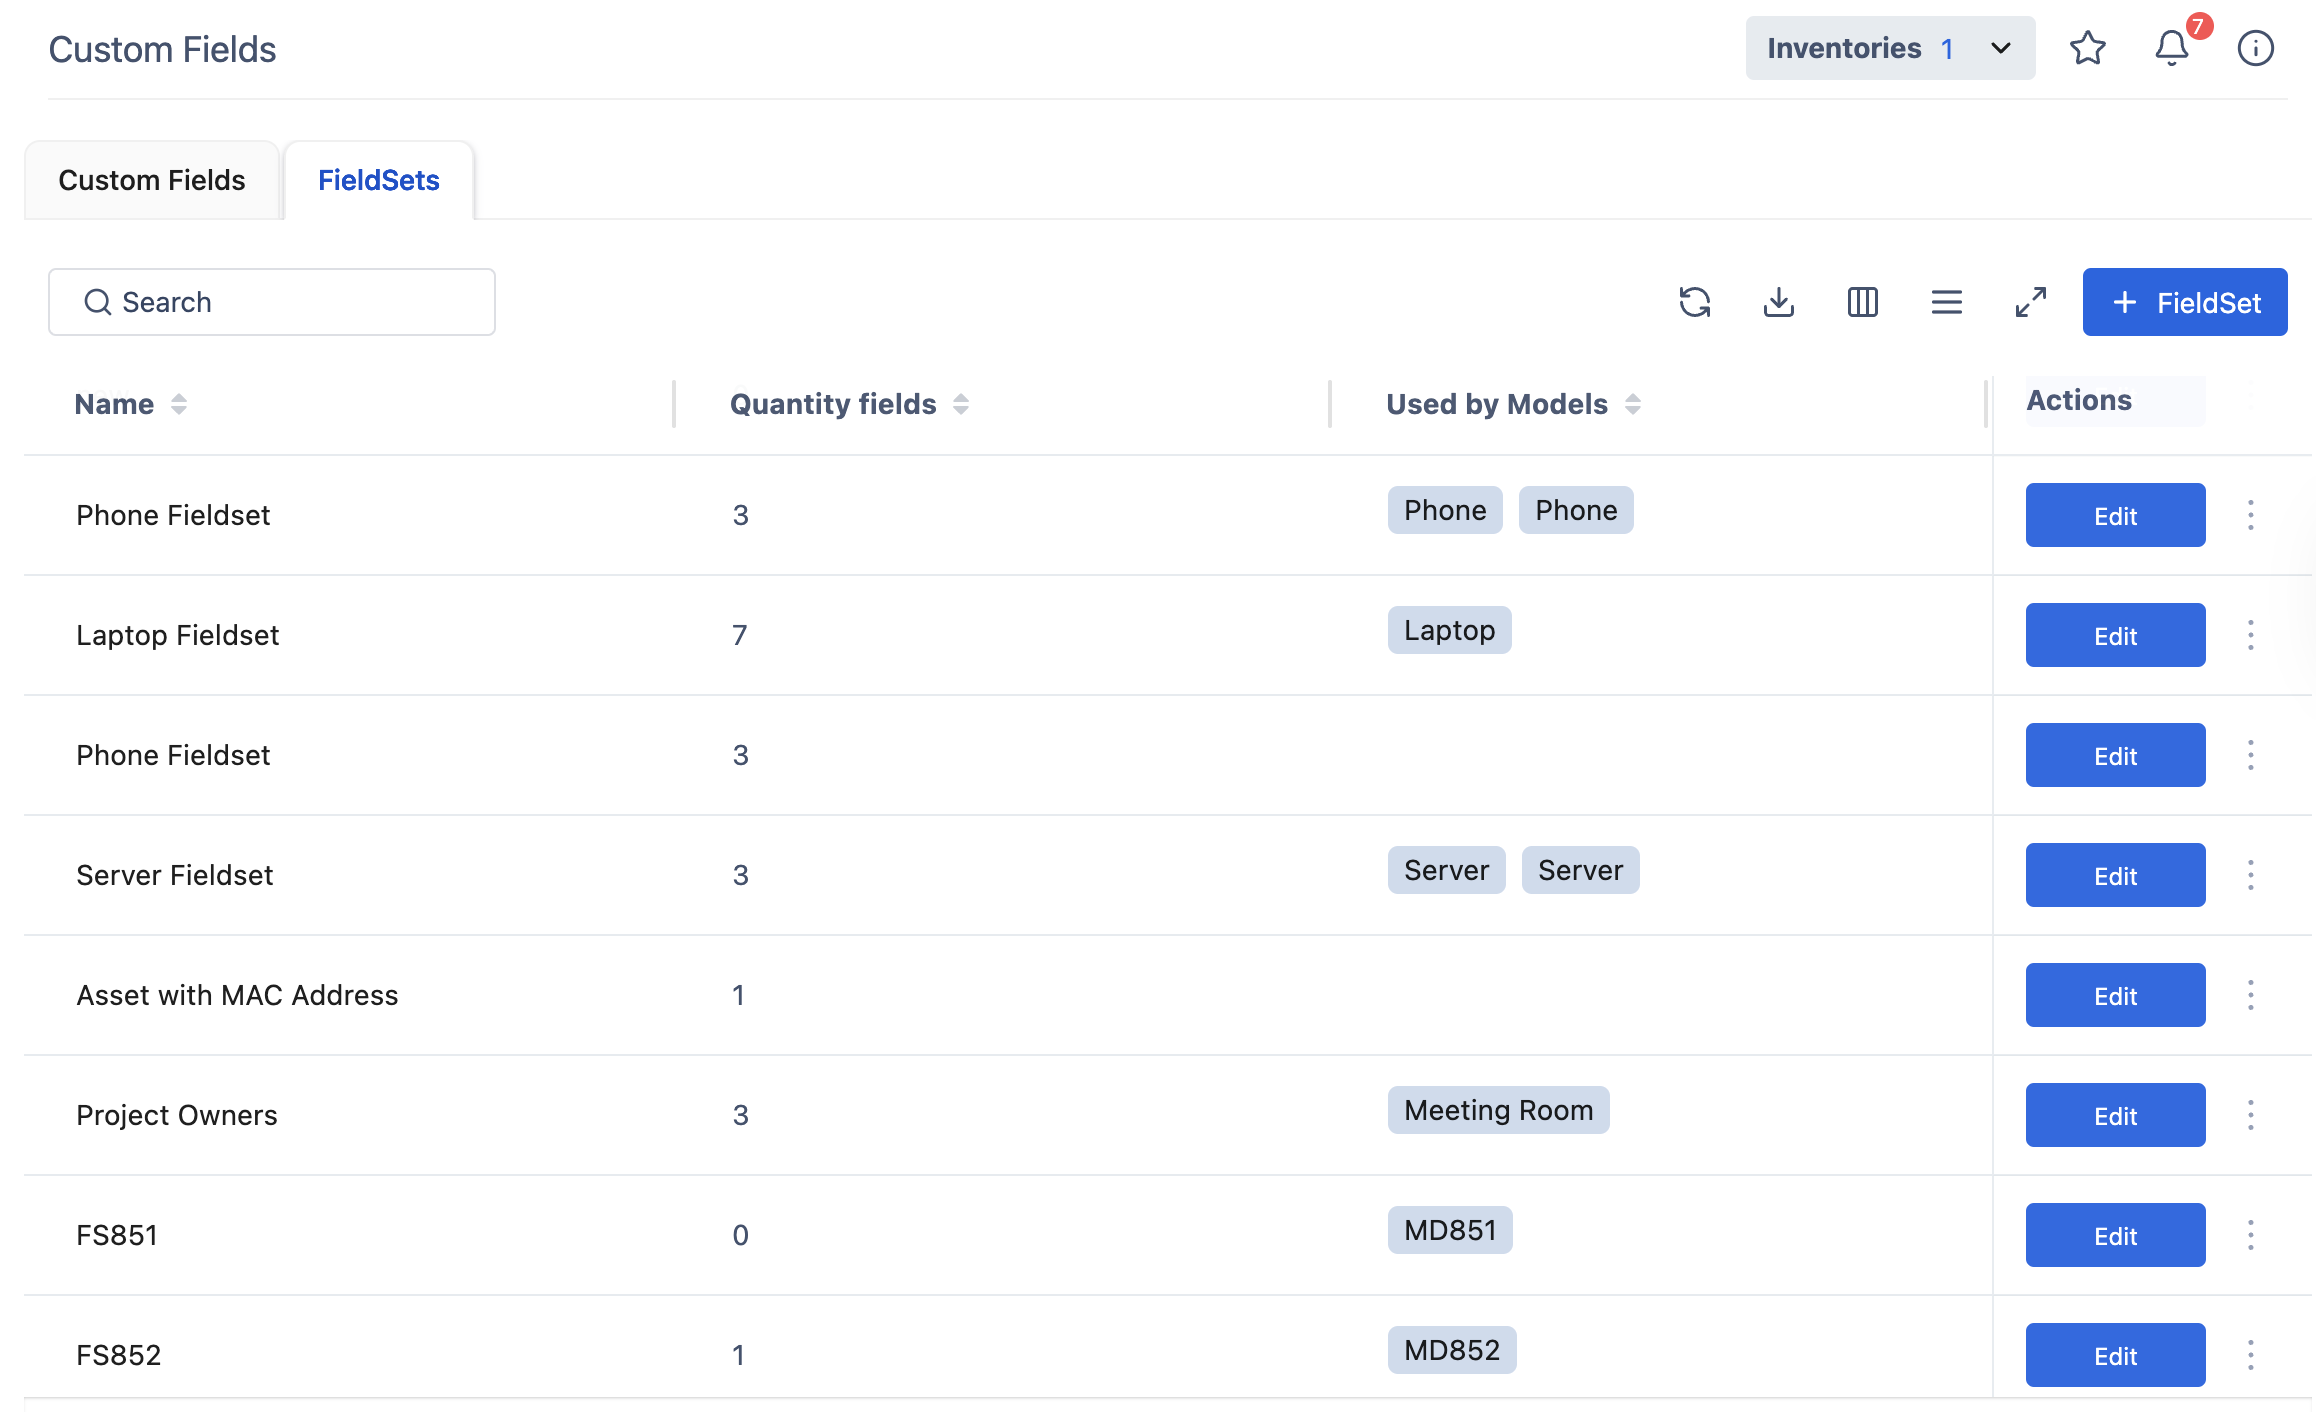
Managing FieldSets
-
A FieldSet is a group of Custom Fields.
A fieldset will be assigned at the Asset Model level.
For example, you want to track your phone as an asset. You could create custom fields “IMEI“, “SIM“, “OS“, etc which are not covered by default. You would then assign all of those mobile phone related fields to a new “Mobile Phones“ FieldSet, and use it for your mobile phone asset models (iPhone, feature phones, Android phone, etc).
-
In the FieldSets tab, you can see a list of all existing FieldSets, including:
-
Name of the set
-
Number of fields in that set
-
Name(s) of asset model(s) that is using that set.
-
Actions to take on a set: Edit/delete
-
Create a New FieldSet
-
Click on

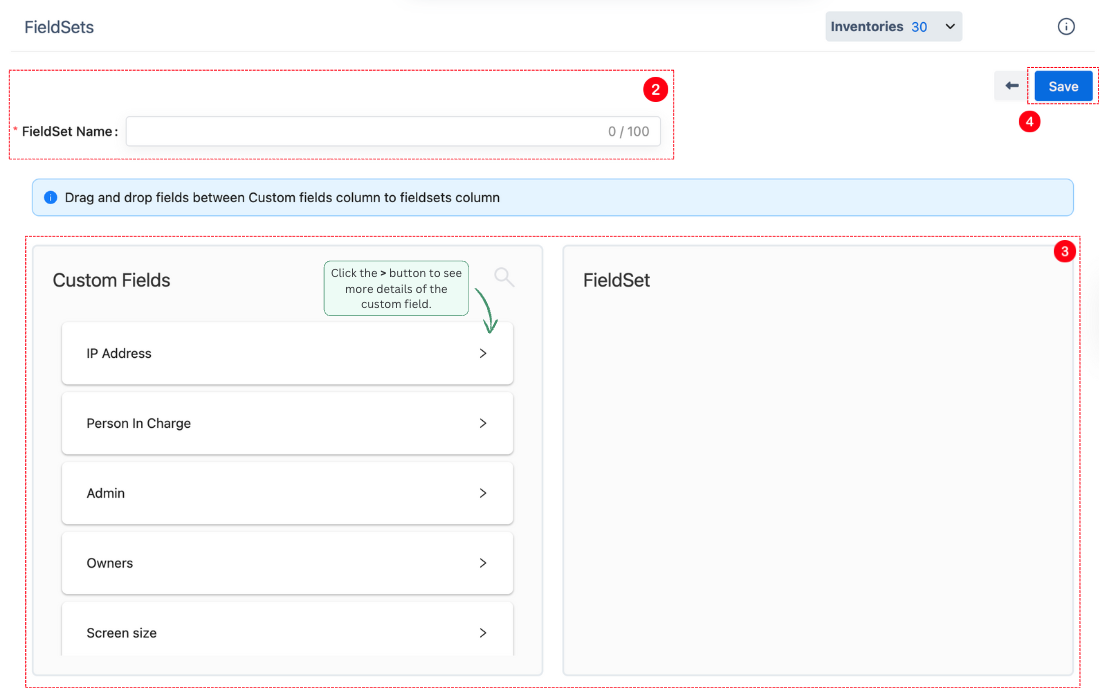
-
Enter a name for your FieldSet. Choose a name that clearly identifies the purpose or the type of assets the FieldSet will be associated with.
-
Select Custom Fields:
-
Drag & Drop Fields: You will see two columns. One lists available custom fields and their details, and the other is for the fields you choose to include in your FieldSet. Drag and drop fields from the available list to your FieldSet.
-
Mark Required Fields: For any field that is mandatory for the assets, click the “Required” checkbox next to that field. This ensures the field must be filled out when the FieldSet is used.
4. After selecting and organizing your custom fields and marking any as required, click the “Save” button to complete the creation of your new FieldSet.