.png)
Diagrams refer to visual representations of information or processes using shapes, symbols, and connectors. Diagrams help communicate complex ideas, relationships, and workflows clearly and concisely.
Mocky Diagrams library includes a wide range of designed diagrams, from simple shapes, flowcharts, networks to containers.
Browse a Diagram Library
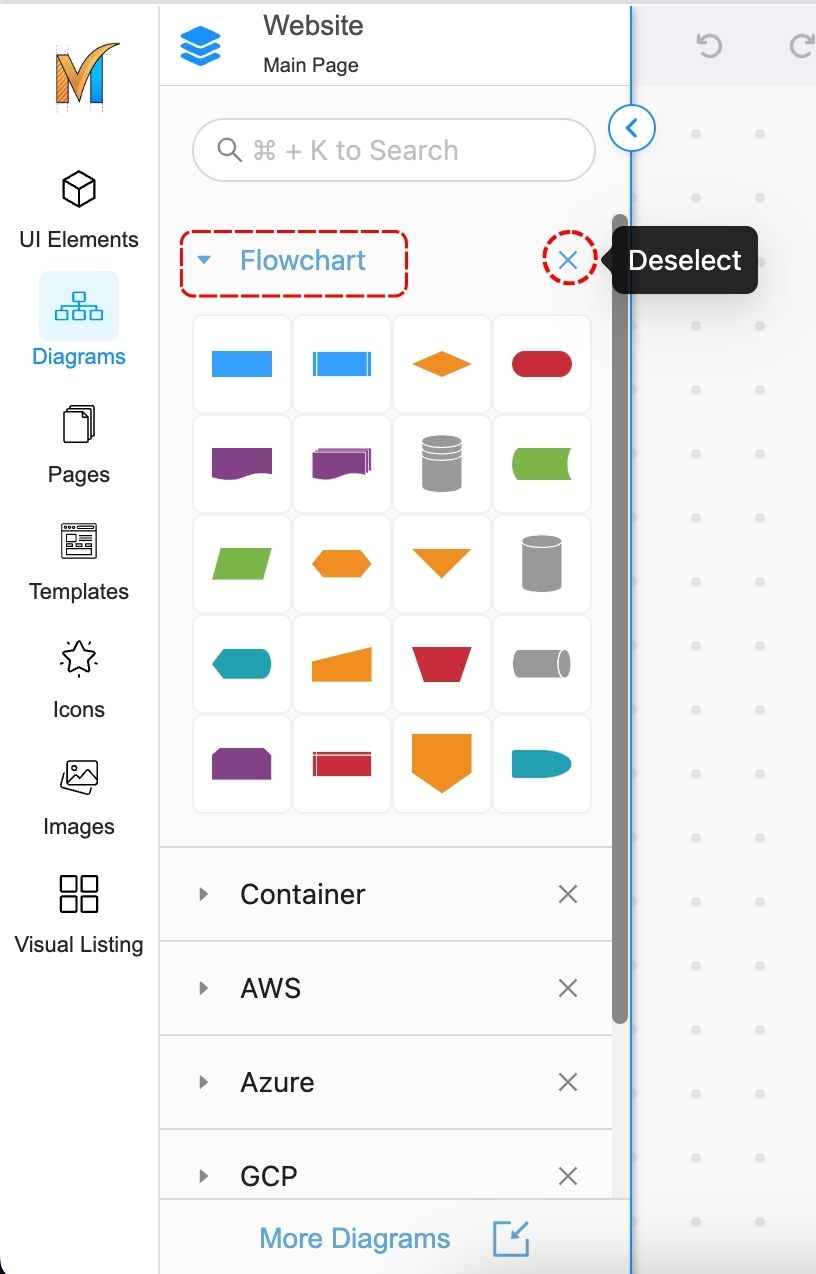
To browse the network library, navigate to the Left Sidebar and click on the Diagrams tab. The tab will be highlighted, and open the Diagrams panel.
As you scroll down, you will see the diagrams set grouped into categories.
-
These categories are collapsible, and by clicking on the category name, you can collapse/expand that section
-
You can also click the X button to deselect
Add Diagram Categories
You can also choose to add or remove diagram categories to only show desired ones.
To do that, you can:
-
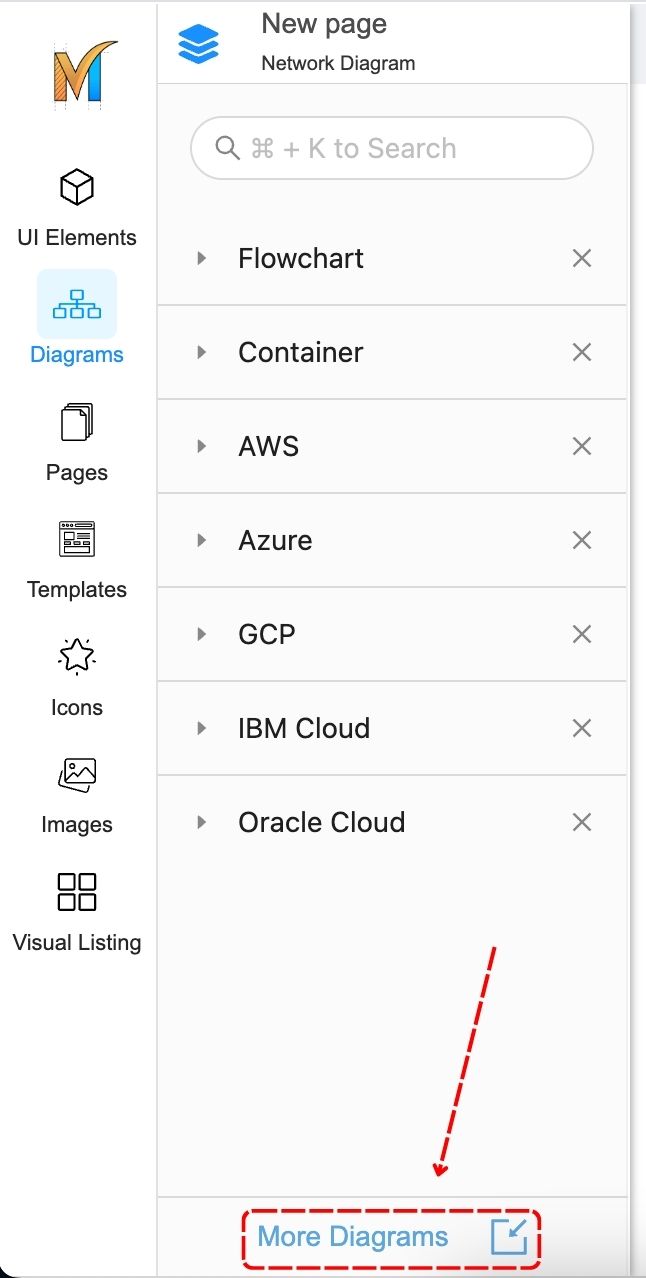
Click on the More diagrams at the bottom of the diagrams dropdown menu.
-
Then select or deselect the diagram categories to your preferences.
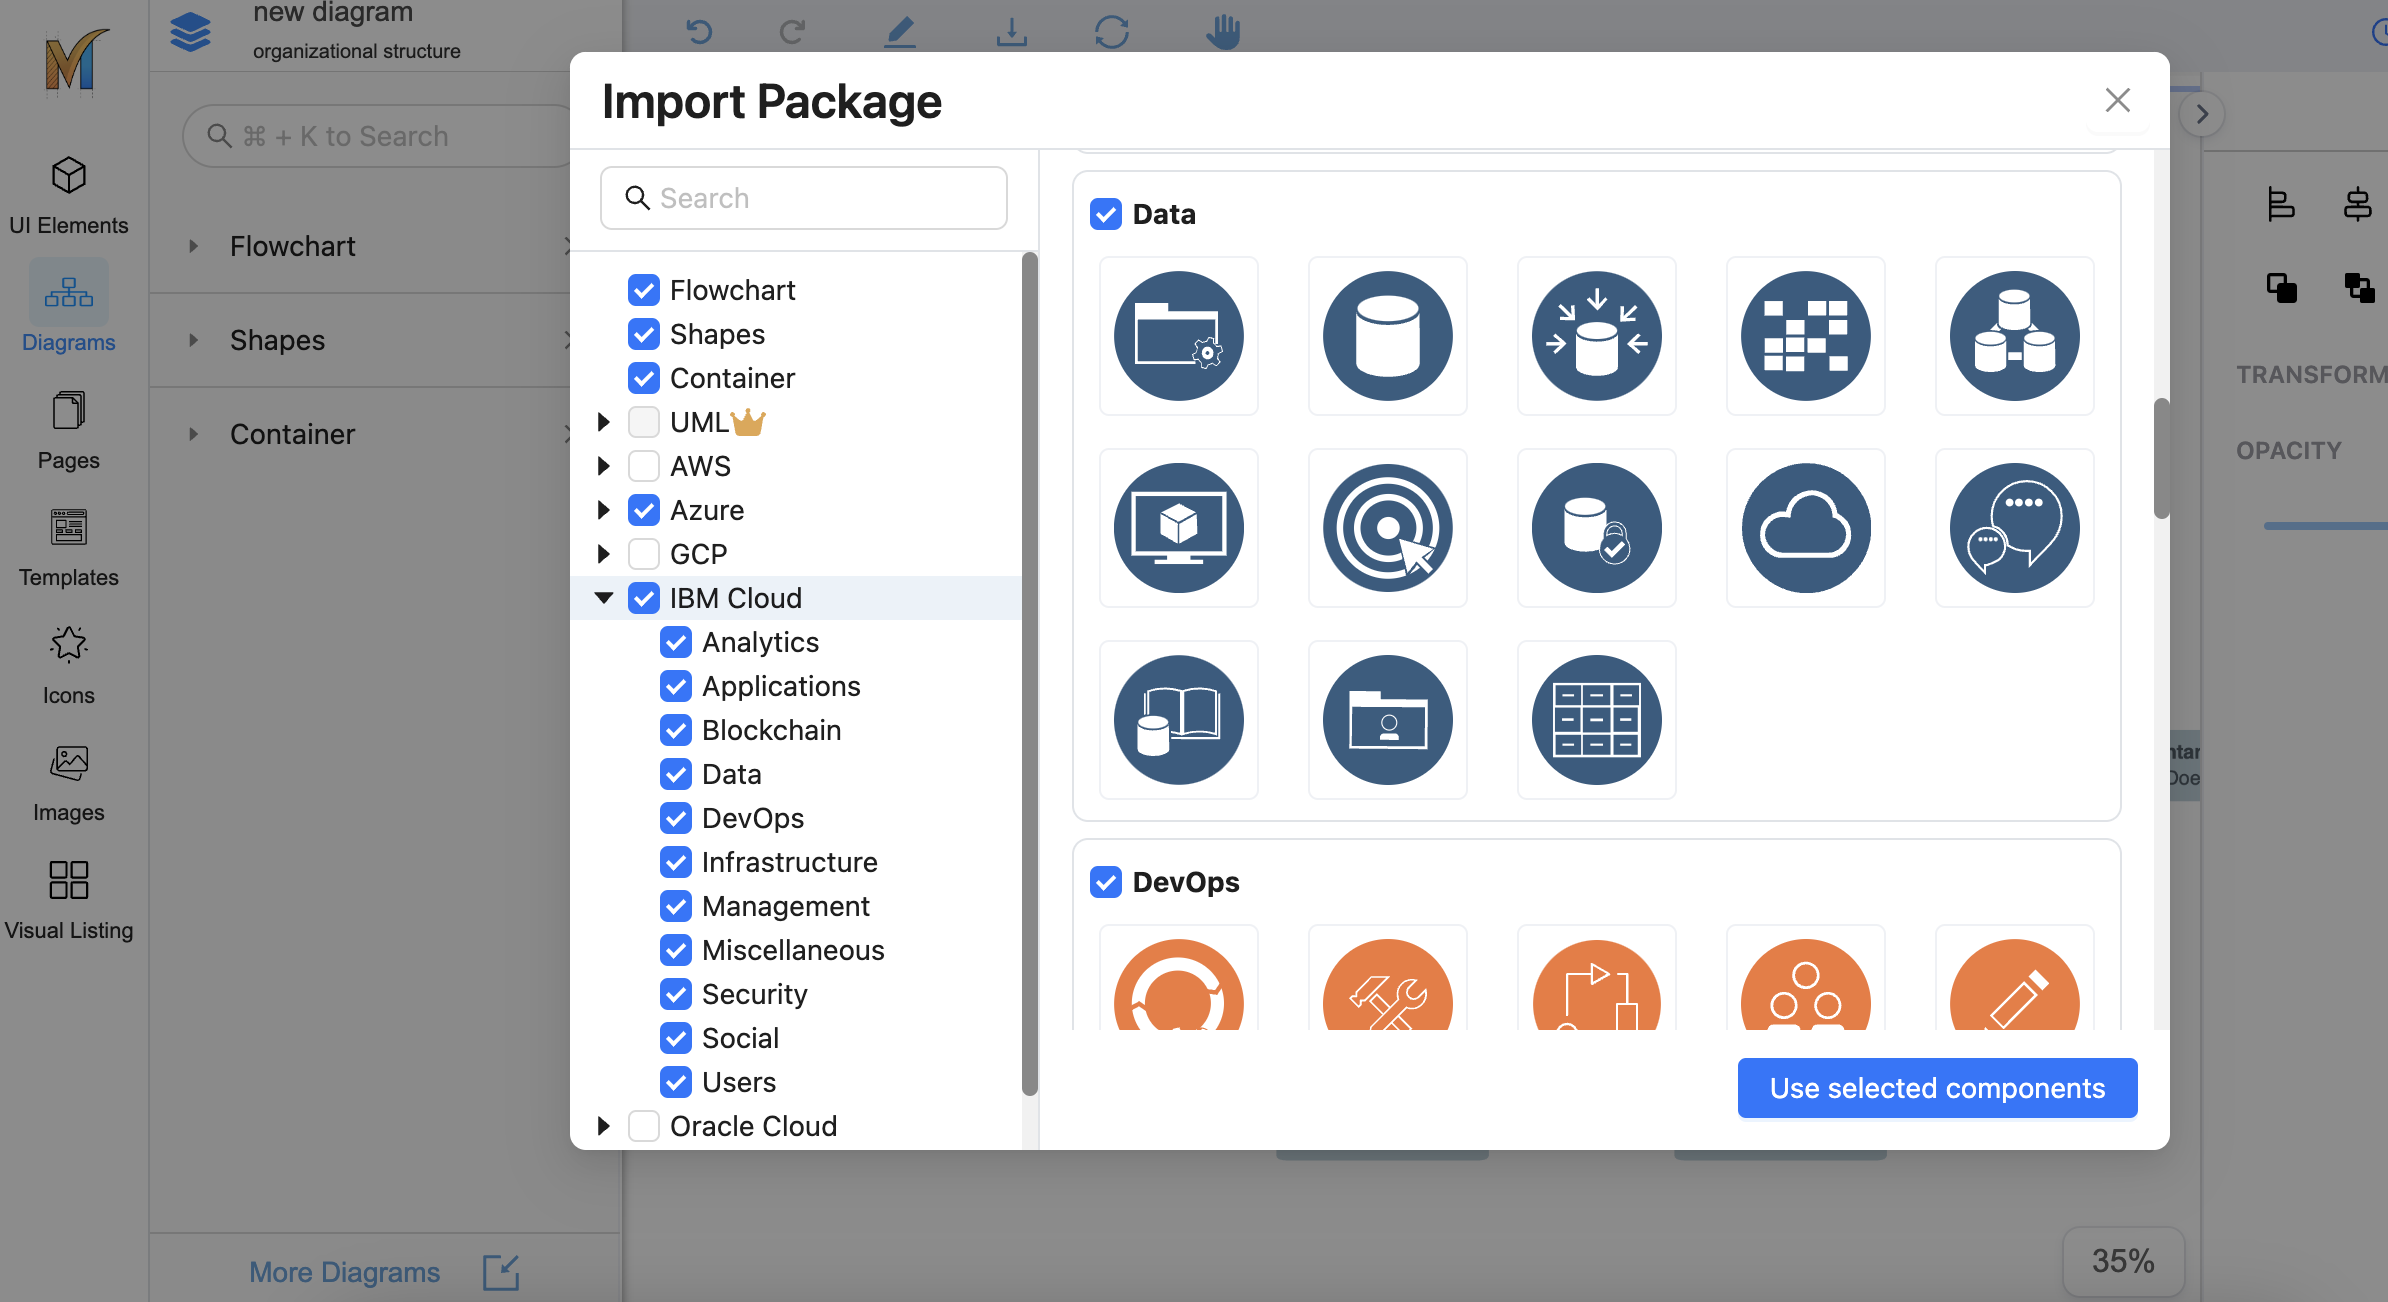
*Note: Currently, the UML diagram is a premium feature. Please begin the app trial for the best experience.
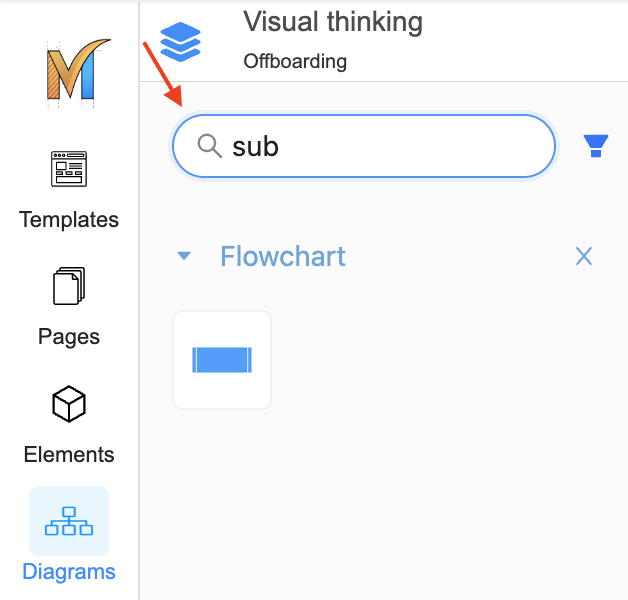
Search Diagrams
To search diagrams, use the search box at the top of the Diagram panel. Search will show the results of all the filtered categories
Add Diagrams to a Page
From the Diagrams panel, drag a diagram component to a desired location of a page to add that diagram component.
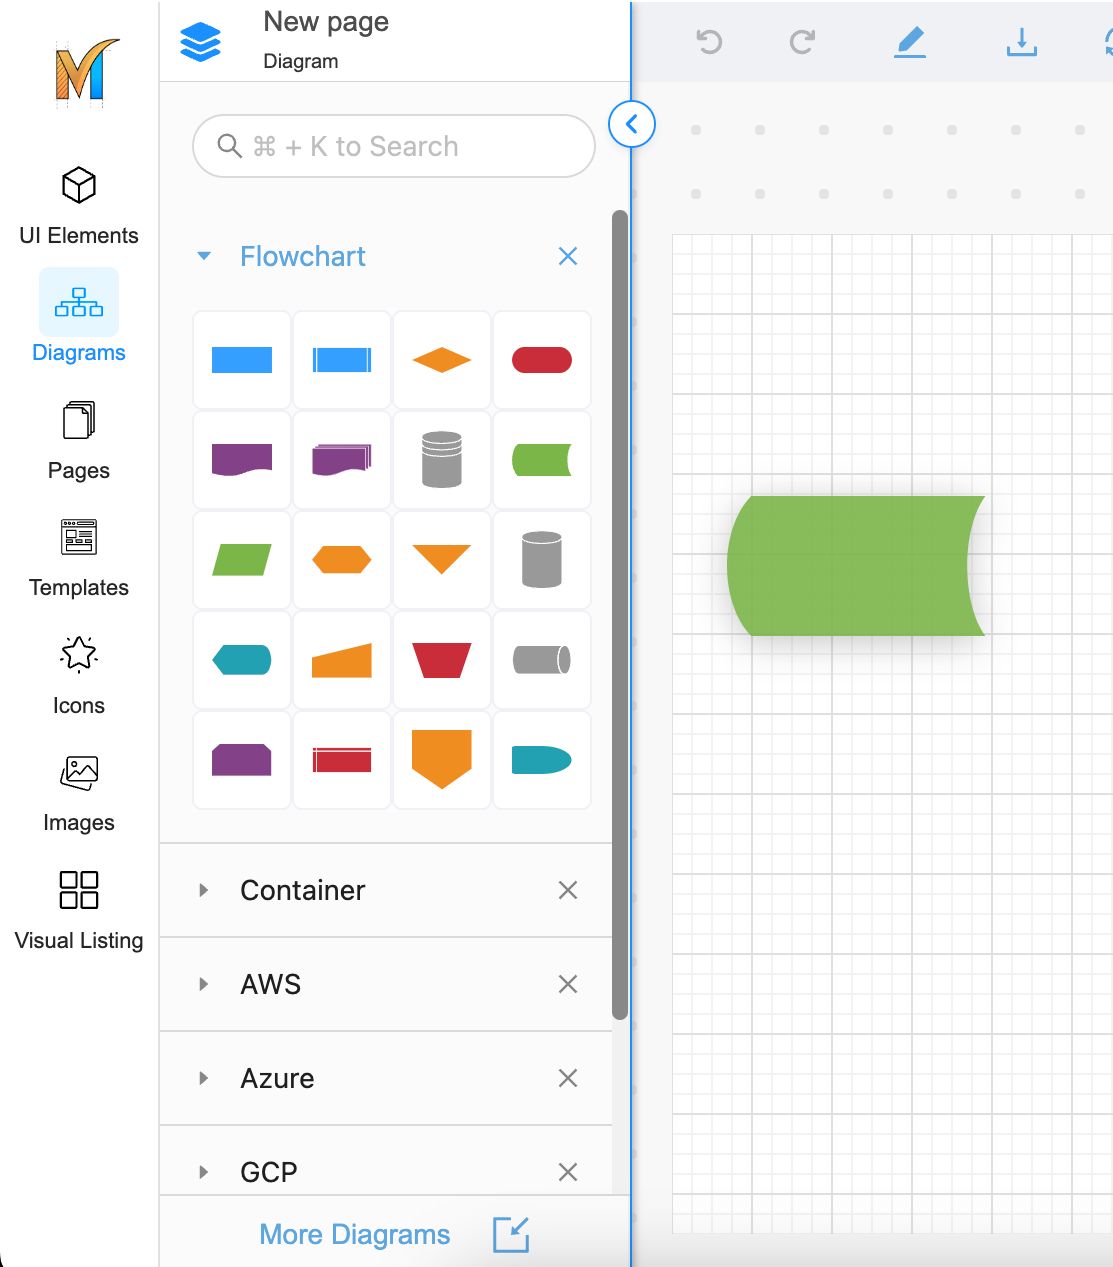
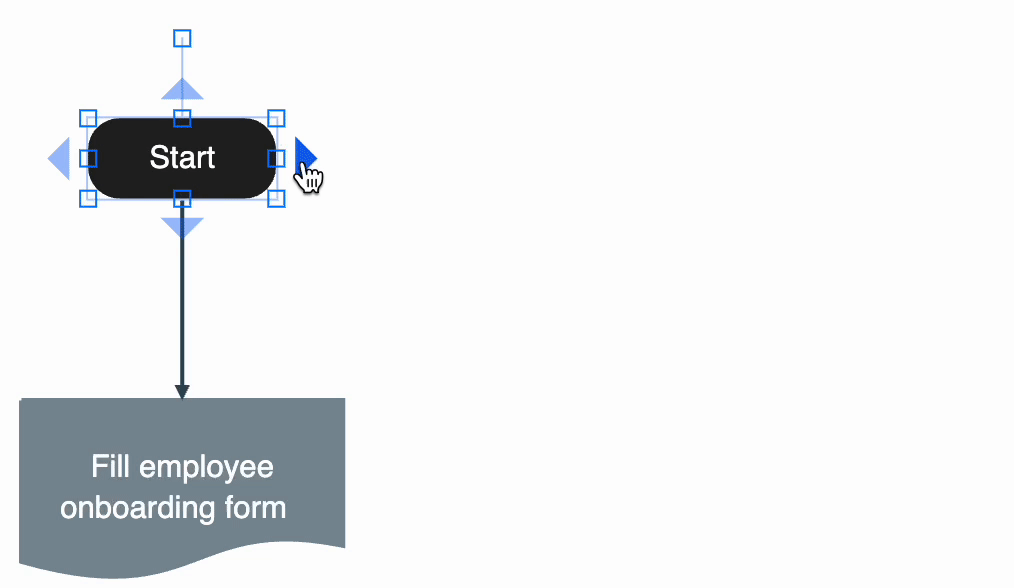
Diagram connectors
Diagram connectors are used to establish a connection or relationship between two or more shapes or objects within a diagram
To create a connector, simply click on a Diagram component, hover on an arrow, drag the line, and make a connection
Mocky also supports Next shapes suggestion that automatically suggests or recommends the next shapes or elements to use based on the context of the design project
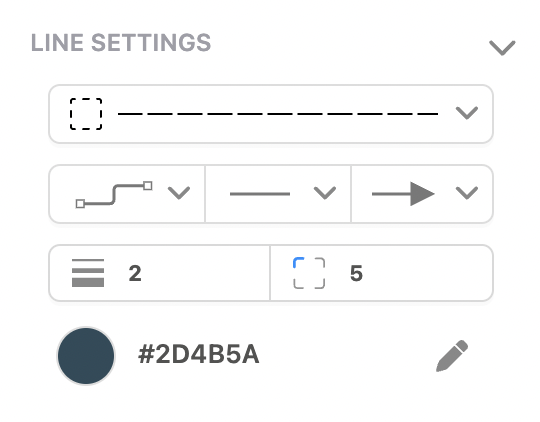
Connector styling
To customize and style a diagram connector, click on the line, and access the Line Settings in the Settings Panel. Here, you can set the stroke type, line shape, arrow tail, arrowhead, and line color according to your preferences