.png)
Once you’ve finished creating a new roadmap, you can now start working on the Issues Timeline Roadmap.
Issues timeline is the feature to help project managers and team leaders visualize their Jira issues and tasks on a timeline roadmap and manage them effectively. Users can also visualize issues from multiple Jira projects, dependencies, and milestones.
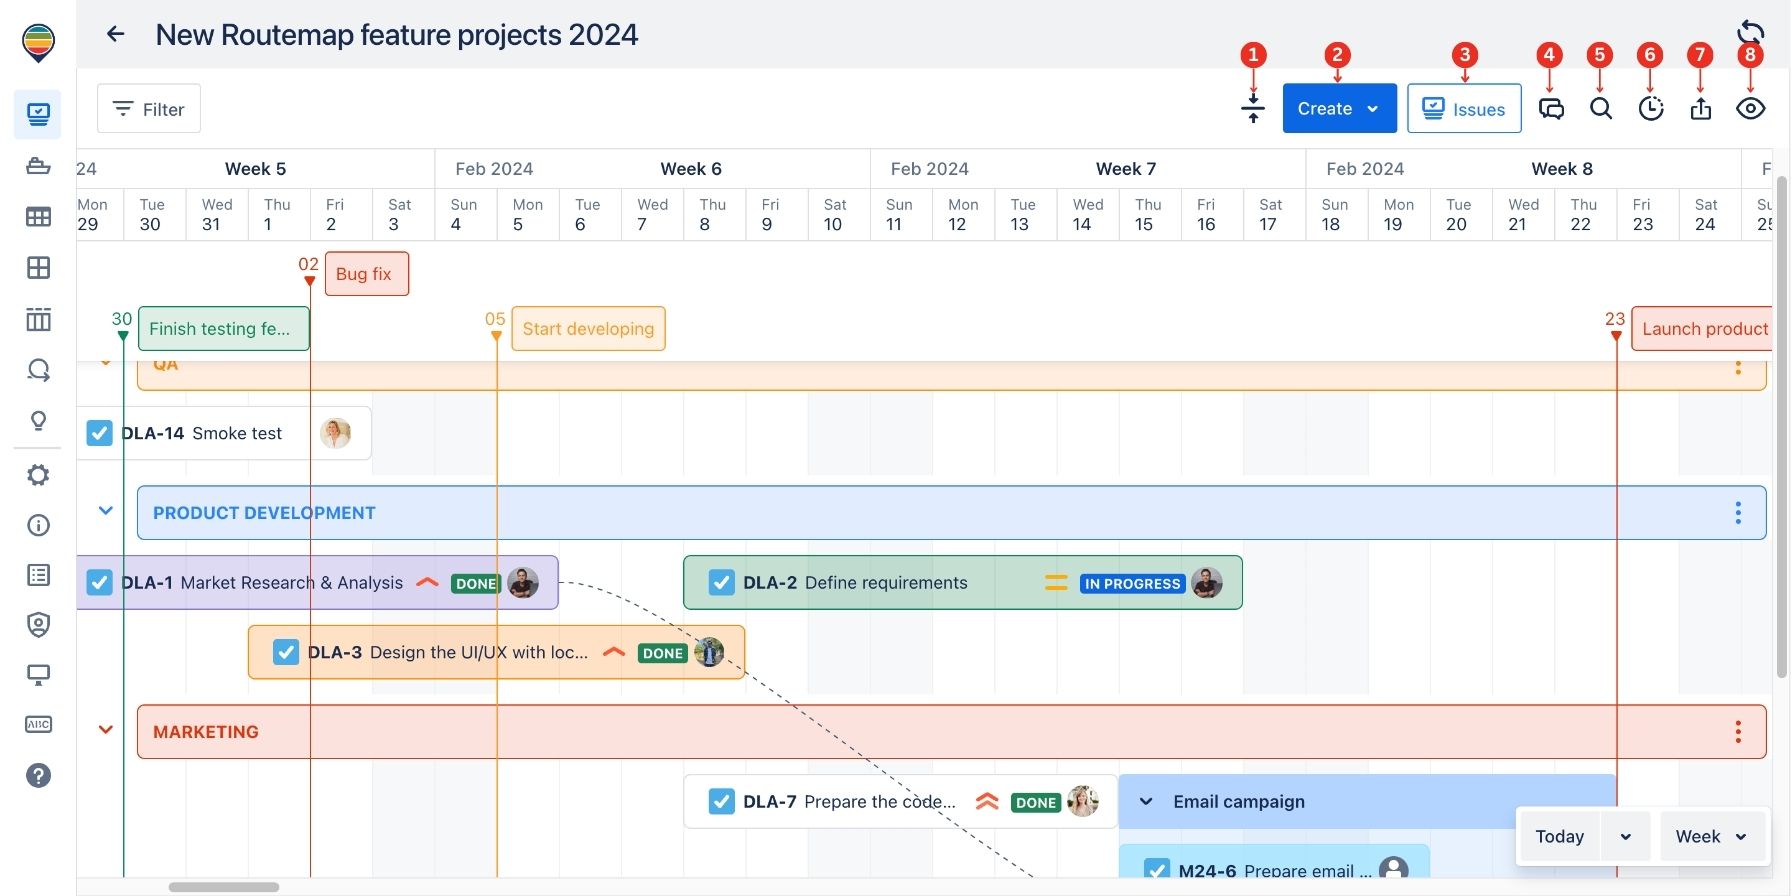
1. Menu bar
Let’s start with the Menu bar. We’ll go through them one by one in order:
|
1 |
Collapse/Expand all lanes |
This is an option to help you quickly collapse or expand all existing lanes in the roadmap. |
|
2 |
Create |
You can use this button to add Lanes, Milestones, and Containers to the roadmap. |
|
3 |
Issues box |
It allows you to add existing issues from your chosen projects to the roadmap. |
|
4 |
Comments |
This feature allows you and your team members or stakeholders to give feedback directly in the roadmap. |
|
5 |
Search issues |
It allows for finding a specific issue in a big roadmap more easily. |
|
6 |
Activities |
It works as a log history and records any action taken into the roadmap. |
|
7 |
Export |
You can use it to download the timeline roadmap as a PNG image for other uses. Here, you can choose specific elements to appear in the image. 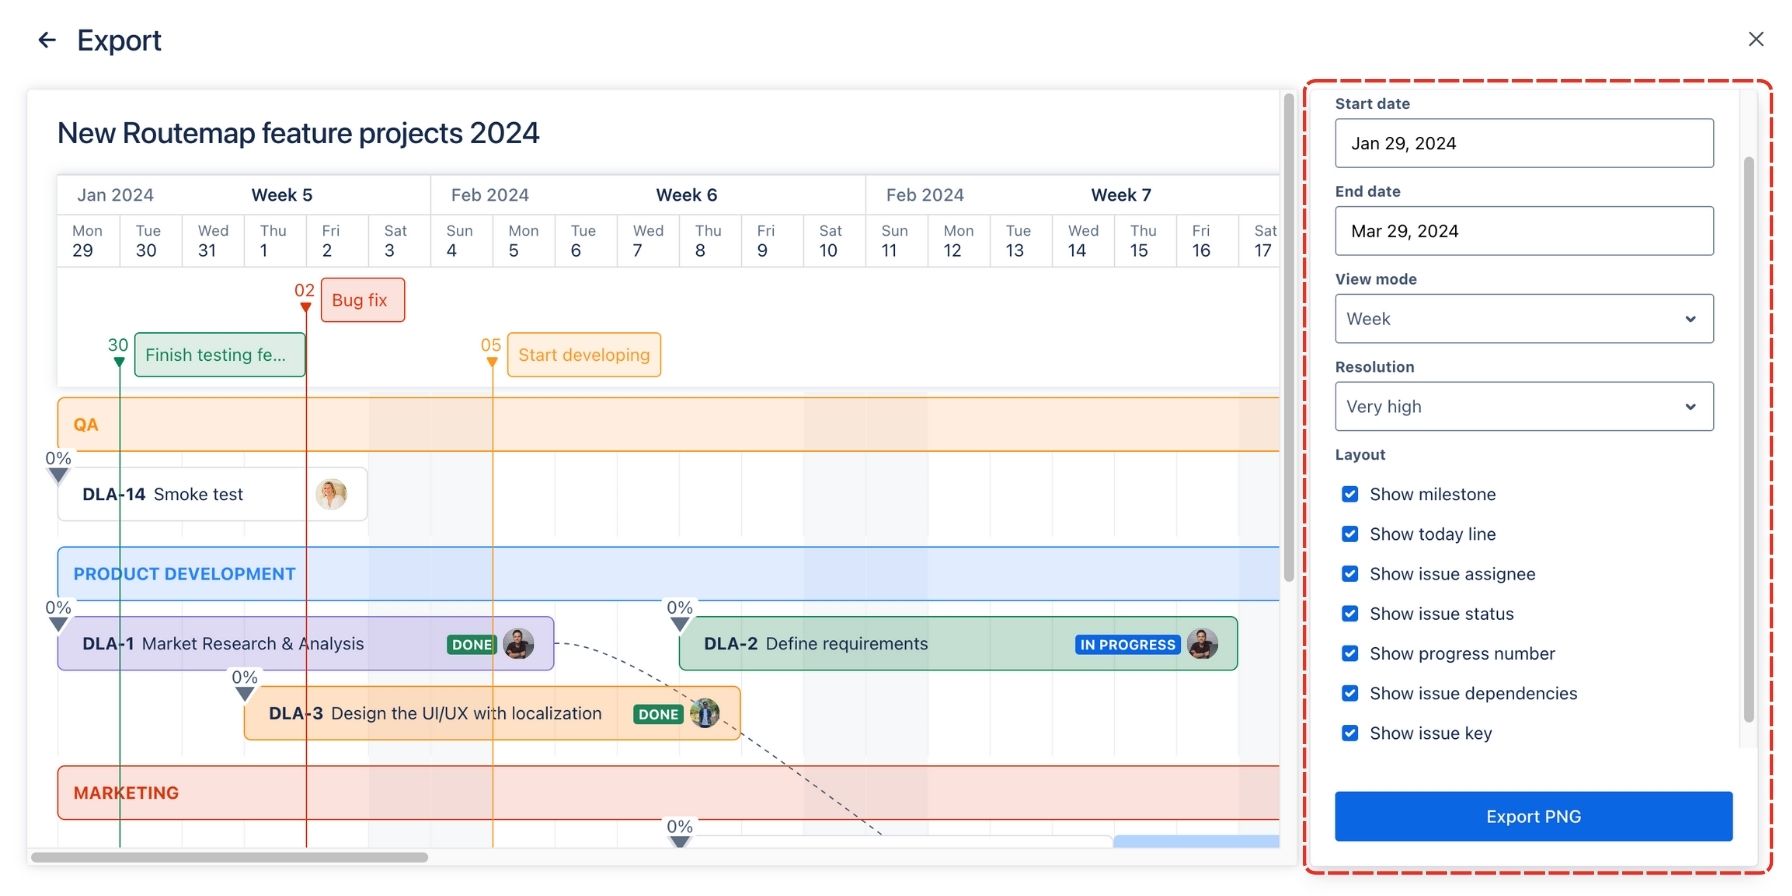
|
|
8 |
Display settings |
This allows you to decide how you want to render your roadmap view. .jpg?cb=5caca3abdffb0d6fc57d28845aca0adb)
|
2. View mode
Locating at the bottom right of the screen, you’ll find a setting to help you change the view mode of the roadmap by Day, Week, Month, Quarter, or Year accordingly.
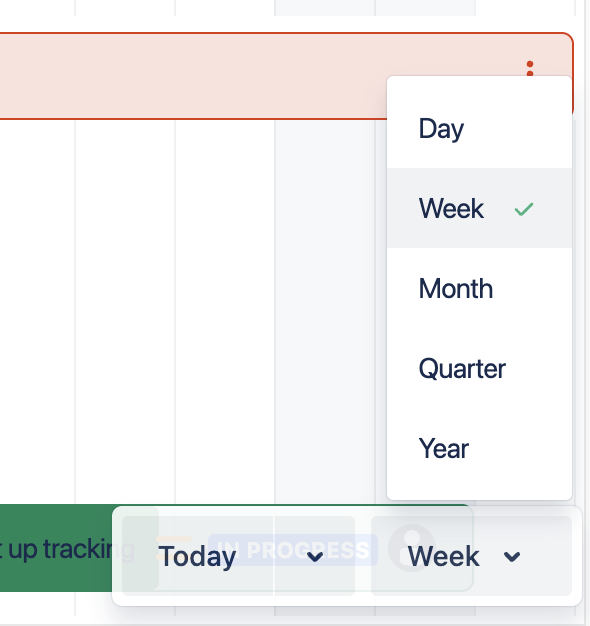
You can also use it to jump to today’s task location in the roadmap or jump to any specific date.
3. Adding lanes
To start working on the roadmap, you’ll have to add lanes first.
You can do it by using the Create button on the menu bar and choosing Lane, or clicking on the empty space on the roadmap.
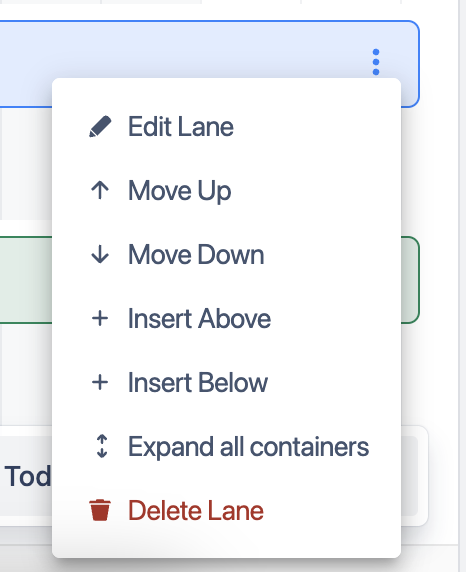
Once created, you can click on the 3 dots symbol at the end of the new lane to make any adjustments. You can Edit a lane (change its name and color), Move Up or Down (when there are multiple lanes), Insert Above, Insert Below, Expand/Collapse all containers inside that lane, and Delete it.
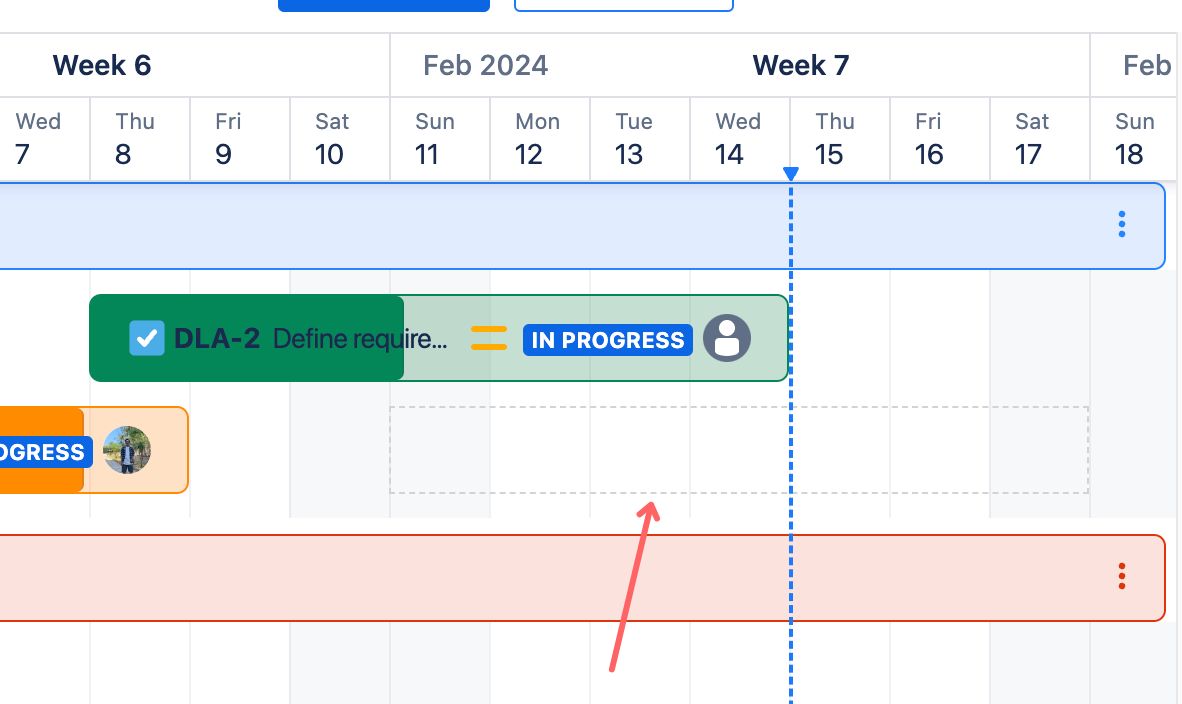
4. Adding issues
After adding lanes, you can now add issues to the roadmap.
You can use the Issues button on the menu bar, find the issue, and drag it to your roadmap.
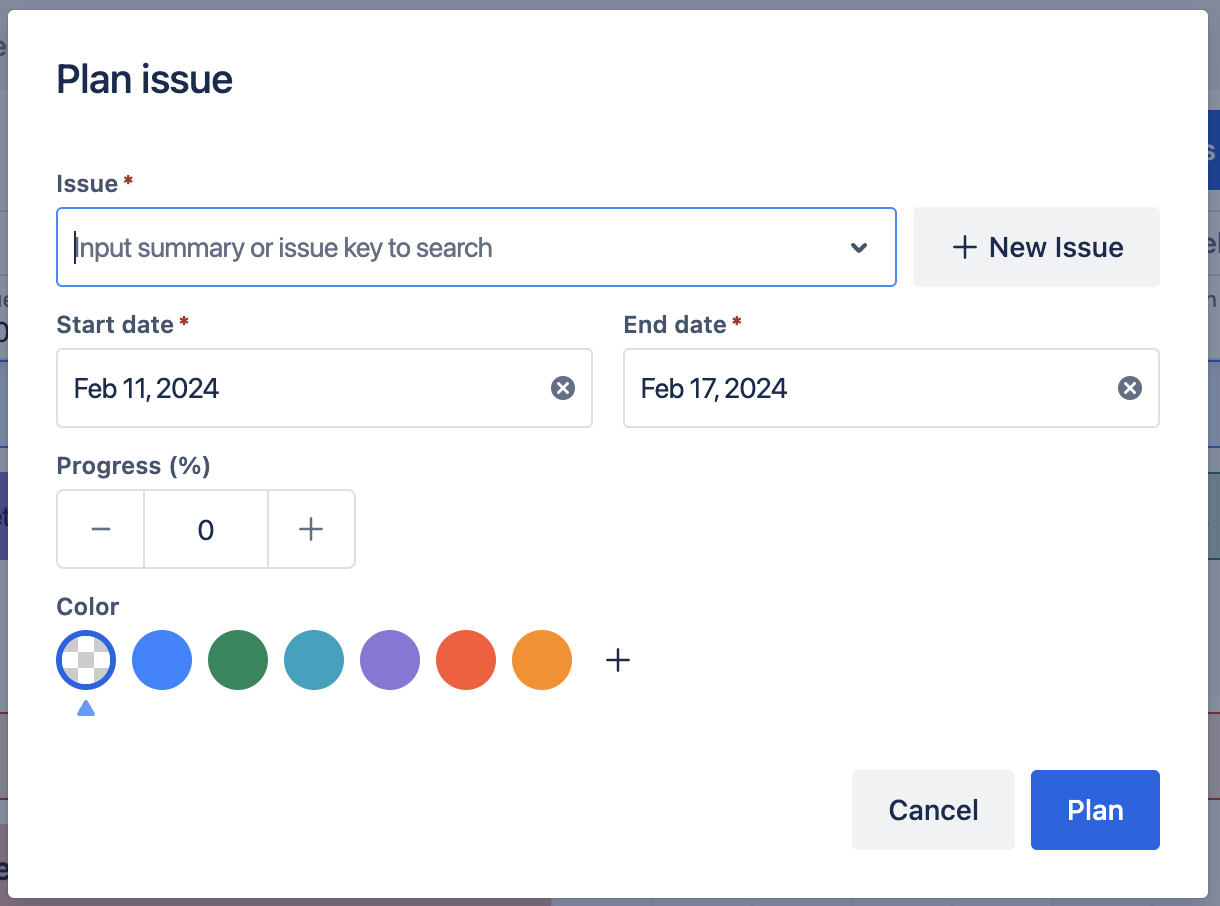
Or, you can simply click on the empty space.
Then, you can search for a specific issue or add a completely new one to your project.
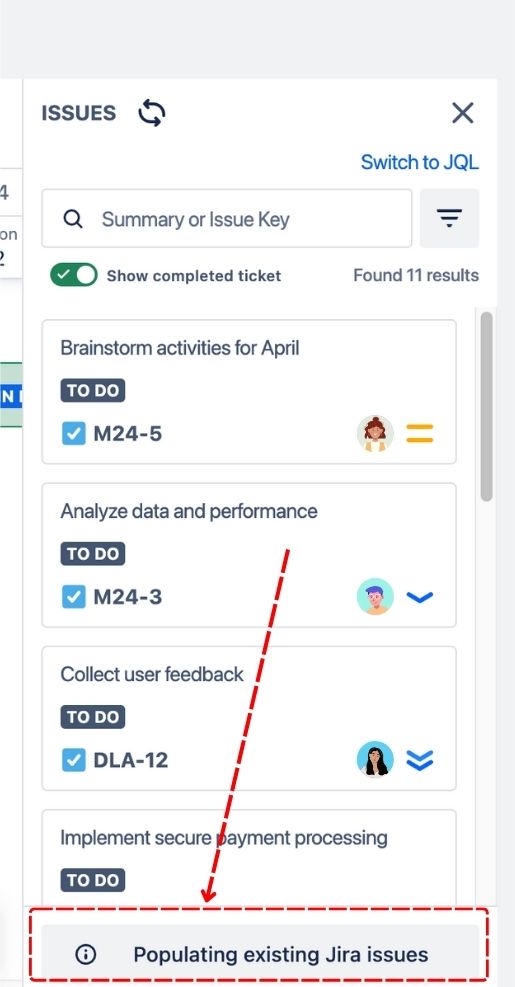
You can also choose to add all the issues in bulk in your project by using the Populating feature. You can locate it at the bottom of the issue box in the roadmap.
After choosing it, Routemap will automatically create bars for existing Jira issues with the Start date and End date from Jira (after mapping fields).
5. Adding containers
To add a container, you have to use the Create button on the menu bar.
Fill in its information, including the container’s title (name), which lane it belongs to, start and end dates, and its color.

Now, you can drag issues from the roadmap to this container for better management.
6. Adding milestones
Routemap also supports milestones to help you mark an important date or event on your roadmap.
To add a milestone, you can use the Create button or click on the roadmap timeline.
Fill in its name and date, choose a color, and click Create.
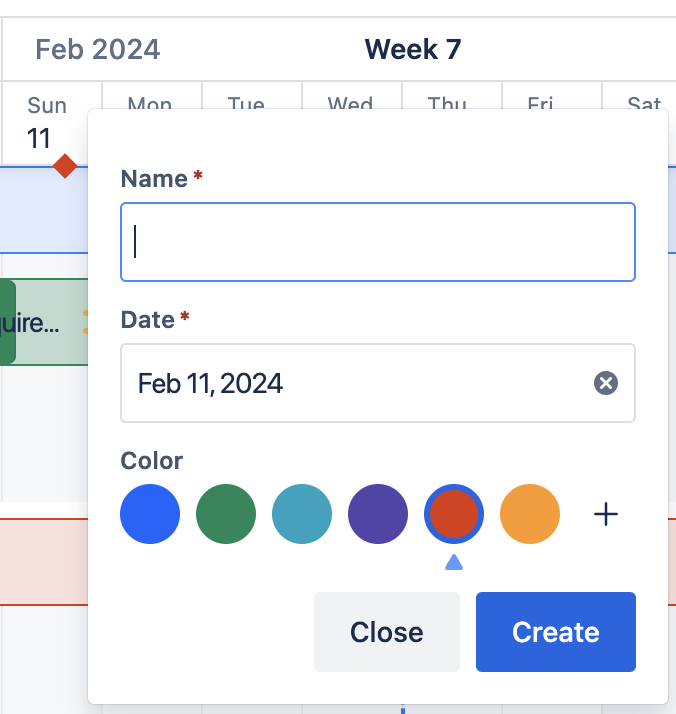
If you’re dealing with multiple milestones, you can stack one above another to avoid overlapping them. This will be particularly handy when changing to view monthly or quarterly view.
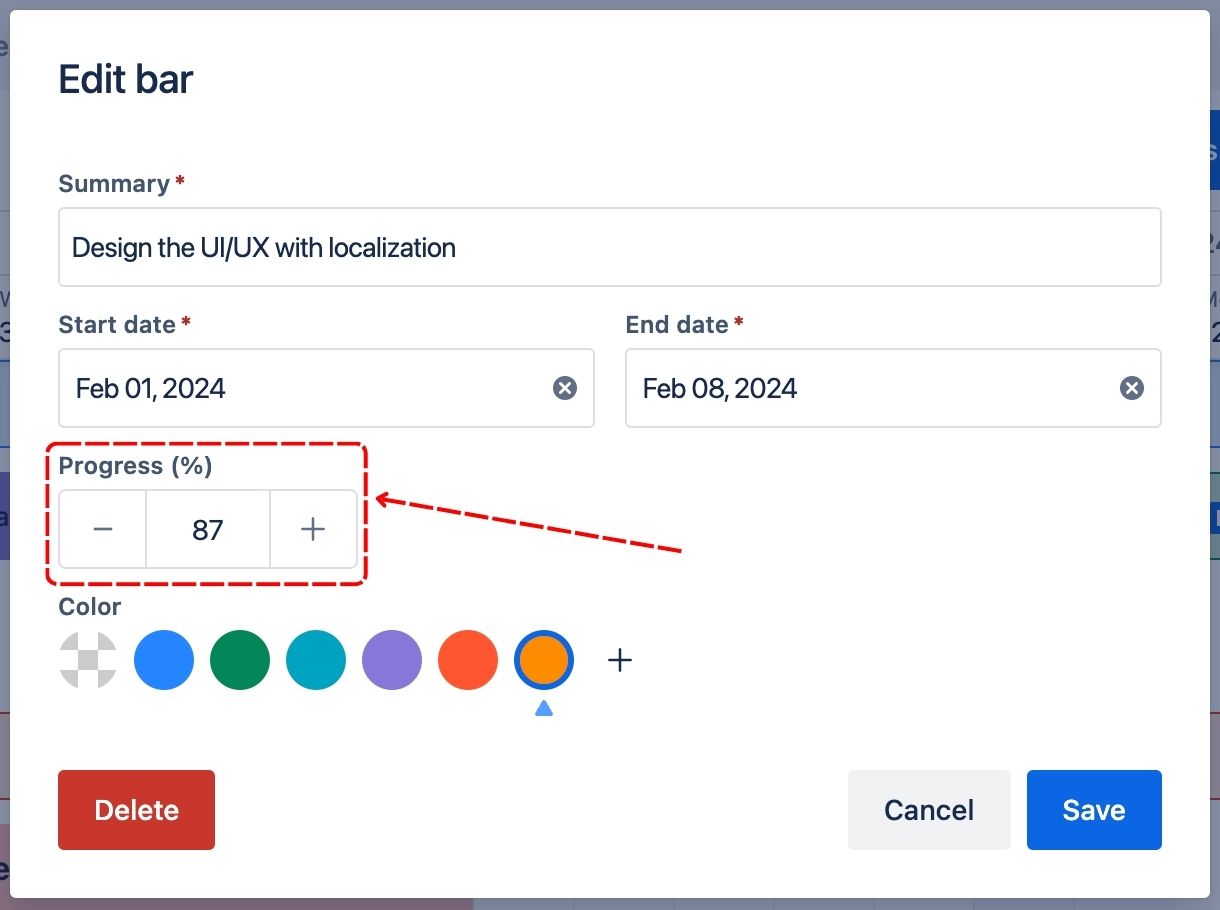
7. Task progress
Routemap supports visualizing and editing tasks’ progress. However, you can choose to disable it in the User settings.
To edit the progress of one issue, just hover your cursor over it and drag the handler.
Or, you can also adjust the progress in the Bar details by clicking the bar on the roadmap.
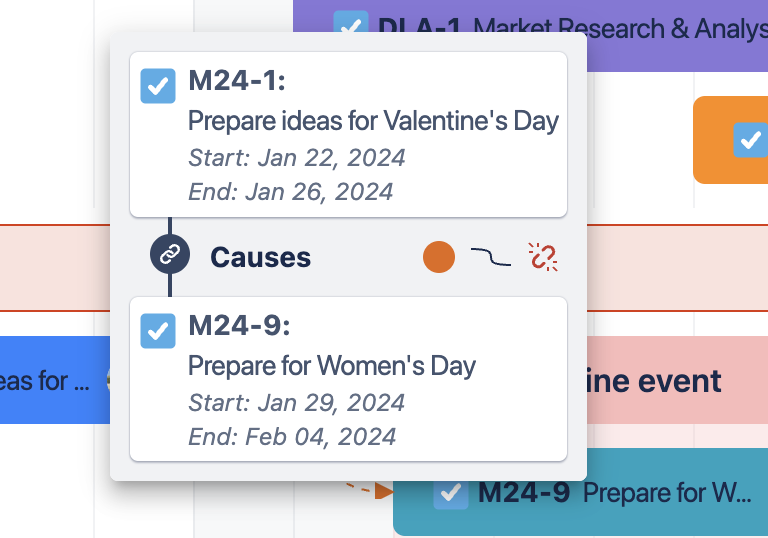
8. Task dependencies
The roadmap also visualizes and allows editing links between issues. Again, you can disable this feature in the user settings.
To link issues (or make dependencies), hover your cursor over the dot next to the issue bar then drag to the designated issue.
Next, you can select the issue link type to create the dependency.
After establishing the link, you can also edit the link’s colors and arrow shape, or delete it.