Manage Accounts
The Accounts board is where you manage the organizations that you do business with. Each Account is treated as a Jira work item of type :SalesForge_Account: SalesForge Account, and you can track its details, activities, and progress through the sales cycle.
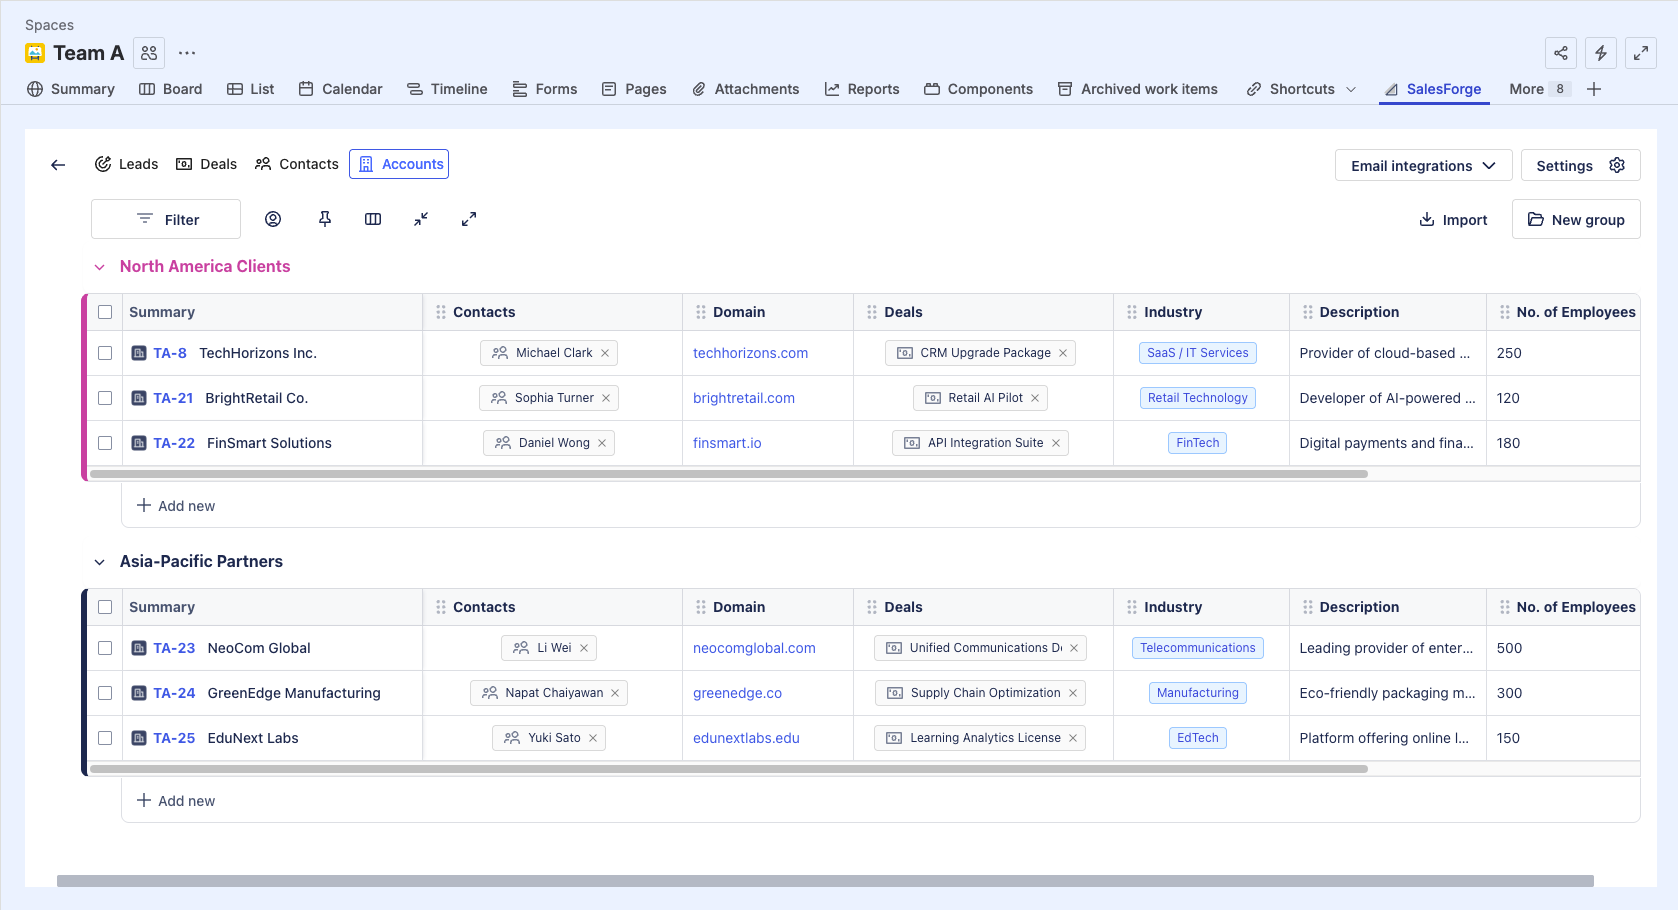
On the Accounts board, you can:
1. Filter & Customize Accounts Board

The toolbar provides several options to customize the view of your Accounts board, including:
 Set up Filter Rule: Filter Accounts based on the available columns on the board. You can add multiple filter rules and combine them using AND/OR conditions.
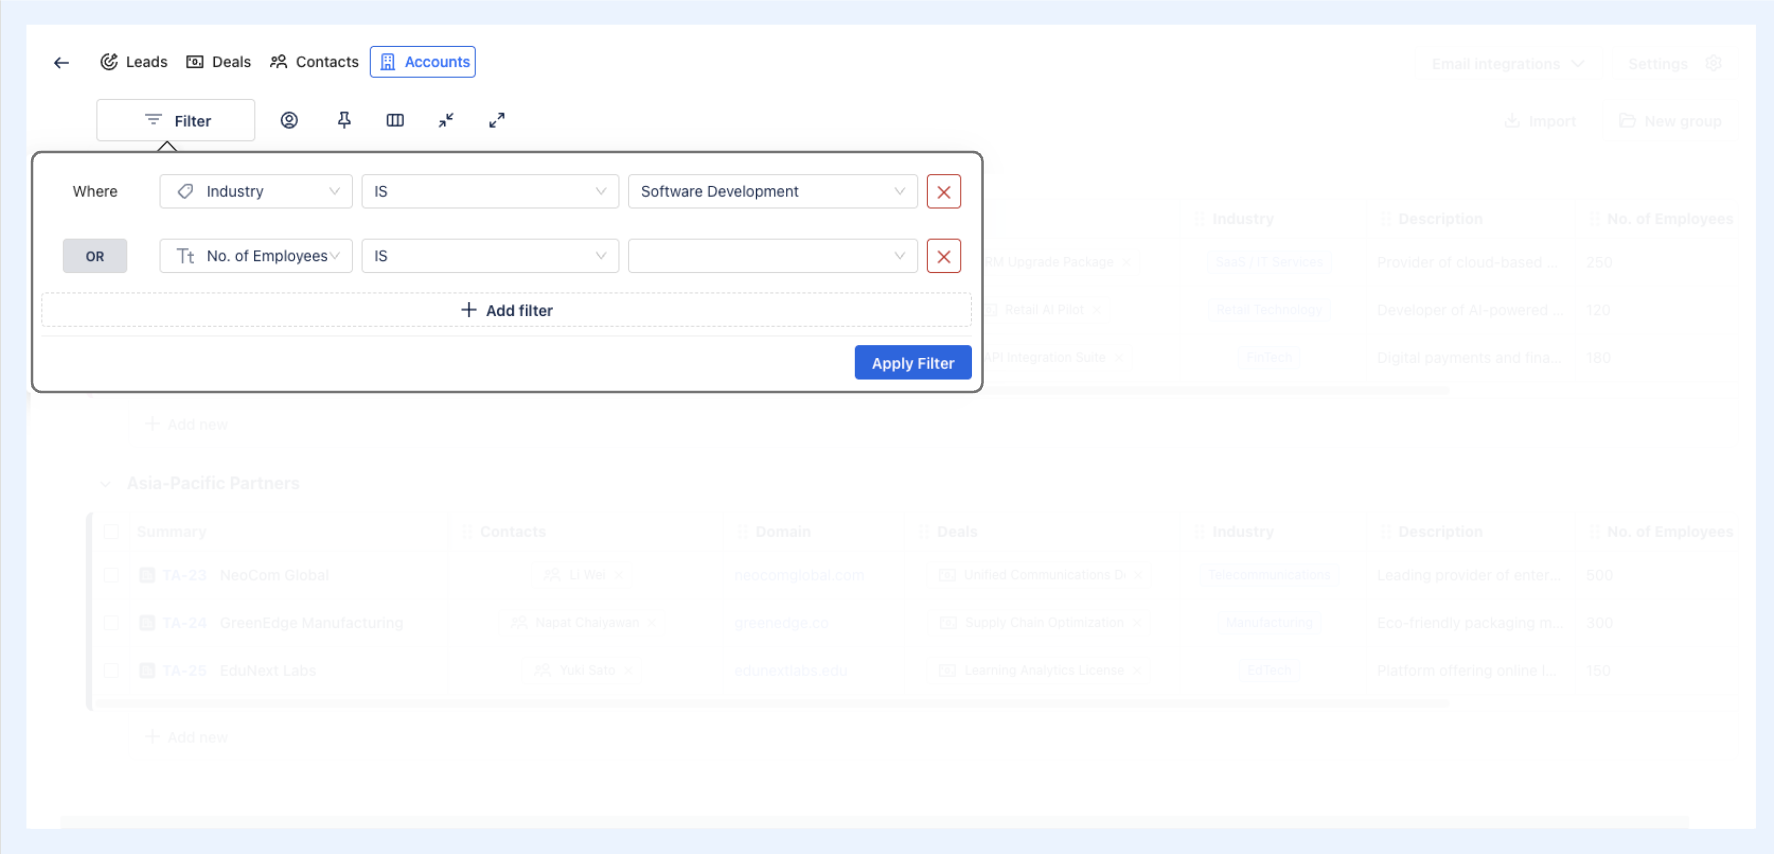
 Filter Accounts by Assignee: view Accounts that are assigned to specific team members.
 Pin Column(s): Uphold the visibility of one or multiple important columns as you scroll horizontally across the board.
 Hide/Show Columns: Temporarily remove columns that are not needed or bring back hidden ones.
 Collapse/
  Expand Groups: collapse or expand groups on the Accounts board to organize the view.
2. Categorize Accounts by Groups
Groups help you organize your Accounts into logical categories for better management. You can create groups based on region, account, campaign, or any category that suits your workflow.
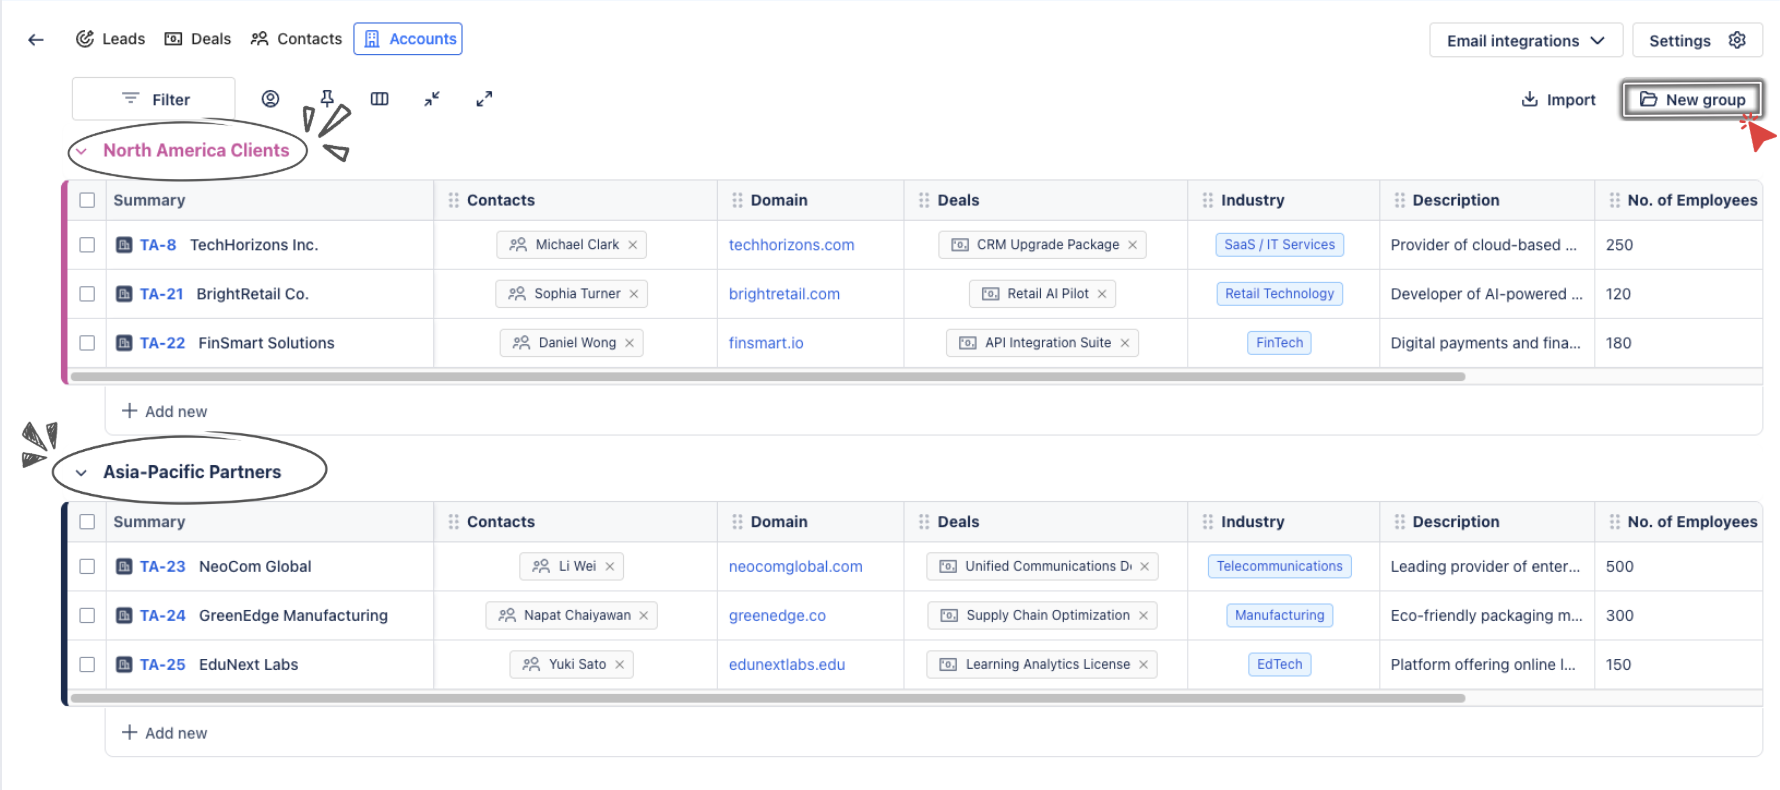
To manage Groups:
Simply click on
 to add a new group.
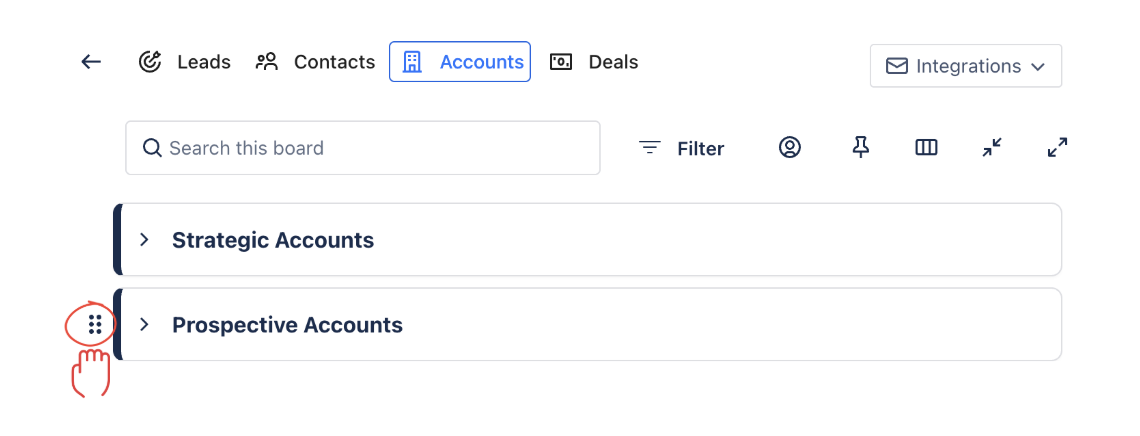
Groups can be reordered by dragging and dropping them into the desired position (
 ).
).
When you hover over a group name, a
 (More options) button appears. From here, you can:
Change Color – Assign a different color to the group for easier visual distinction.
Delete Group – Remove the group entirely. Note: deleting a group will also delete all Accounts contained within that group.

3. Track Key Information
Each Account row provides key information, such as:
Account Name: The name of the company or organization.
Contacts: The individuals associated with this Account.
Domain: The company’s website or domain name.
Deals: The active sales opportunities linked to the Account.
Industry: The sector or industry in which the Account operates.
Description: A brief description of the Account’s business.
Number of Employees: The size of the Account’s organization, helping you gauge the scale of the opportunity.
The Relationship Between Accounts, Contacts, and Deals
Accounts are typically organizations or companies you are doing business with, while Contacts represent individual people associated with those Accounts. Each Deal represents a sales opportunity that is tied to both a Contact and an Account.
In SalesForge:
Accounts are the main entity under which you associate Contacts (the individuals).
Deals are linked to both the Account and its respective Contact, ensuring all sales opportunities are clearly tracked.
3.1. Add More Columns to the Accounts Board
If additional information is required, you can add more columns:
Click
 (Add Column button).
Select from column types:
Text: Add general notes or comments about the interaction.
Number: Track numerical data.
Assignee: Assign the Accounts or task to a specific team member.
Date: Record the date of the interaction or event.
Email: Capture email correspondence with the Accounts.
Phone: Record phone call details or add a phone number for the Accounts.
Status: Update the Account’s current status.
Link: Add links to relevant resources, emails, or files.
Name the column and click
 to add it to your board.
3.2. Customize Columns
You can also customize the columns to suit your needs. Click the More options (...) icon next to any column header to see the available settings.
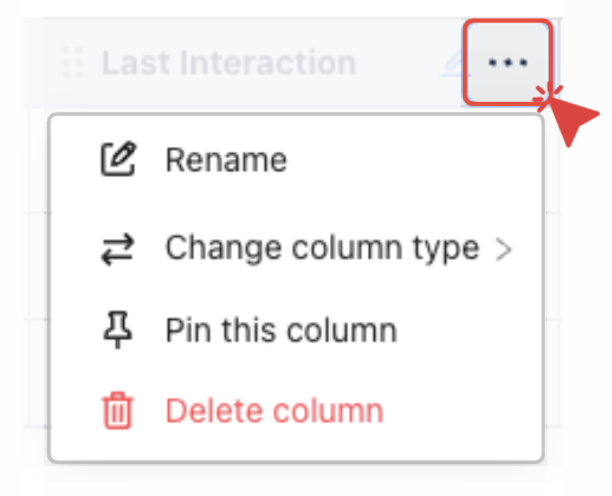
Here is what you can do:
a. General Actions (All column types)
Rename a Column: Click on the :pen: Edit button to change the title of the column header.
Change Column Type: Select
 to convert the data format (e.g., from Text to a Link).
Pin this Column: Select
 to keep a column fixed on the left while you scroll horizontally.
Delete a Column: Select
 to permanently remove the column and its data.
b. Specialized Column Settings
SalesForge allows you to customize how values are displayed in Number ![]() column, making it easier to represent currencies, percentages, or other numeric data in a clear and consistent way.
column, making it easier to represent currencies, percentages, or other numeric data in a clear and consistent way.
Here is how:
Locate a column with the Number
 type.
type.Click the More options (···) button next to the column header and select
 .
.
In the Customize Number Field dialog:

Select a Unit: Choose a preset symbol ($, €, £, %) or select Type your own to add a custom label (e.g.,
cmorseats).Set Position: Choose L (Left) to place the unit before the number (e.g.,
$50,000) or R (Right) to place it after (e.g.,75%).Click Save to apply the changes.
The selected format will be applied instantly to all values in that column.
.png)