.png)
The Leads board in Sales & CRM for Jira helps you capture, qualify, and track prospects before converting them into contacts. Each Lead functions as a Jira work item of type :SalesForge_Lead: Sales & CRM Lead and can be organized, updated, and progressed through your pre-sales process directly inside Jira.
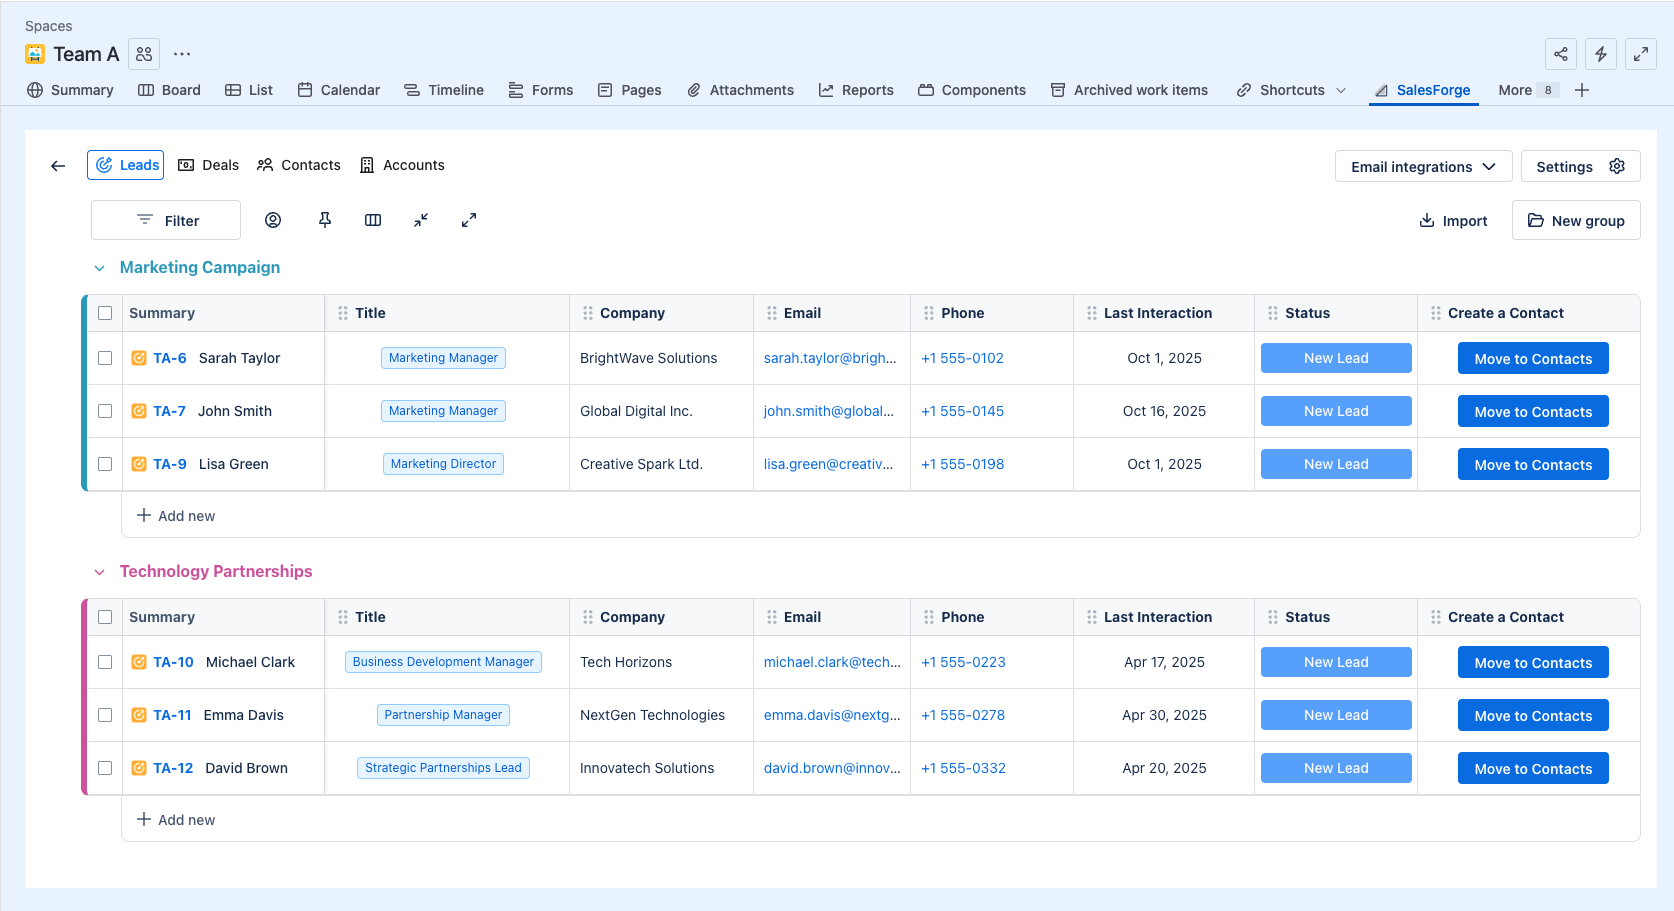
On the Leads board, you can:
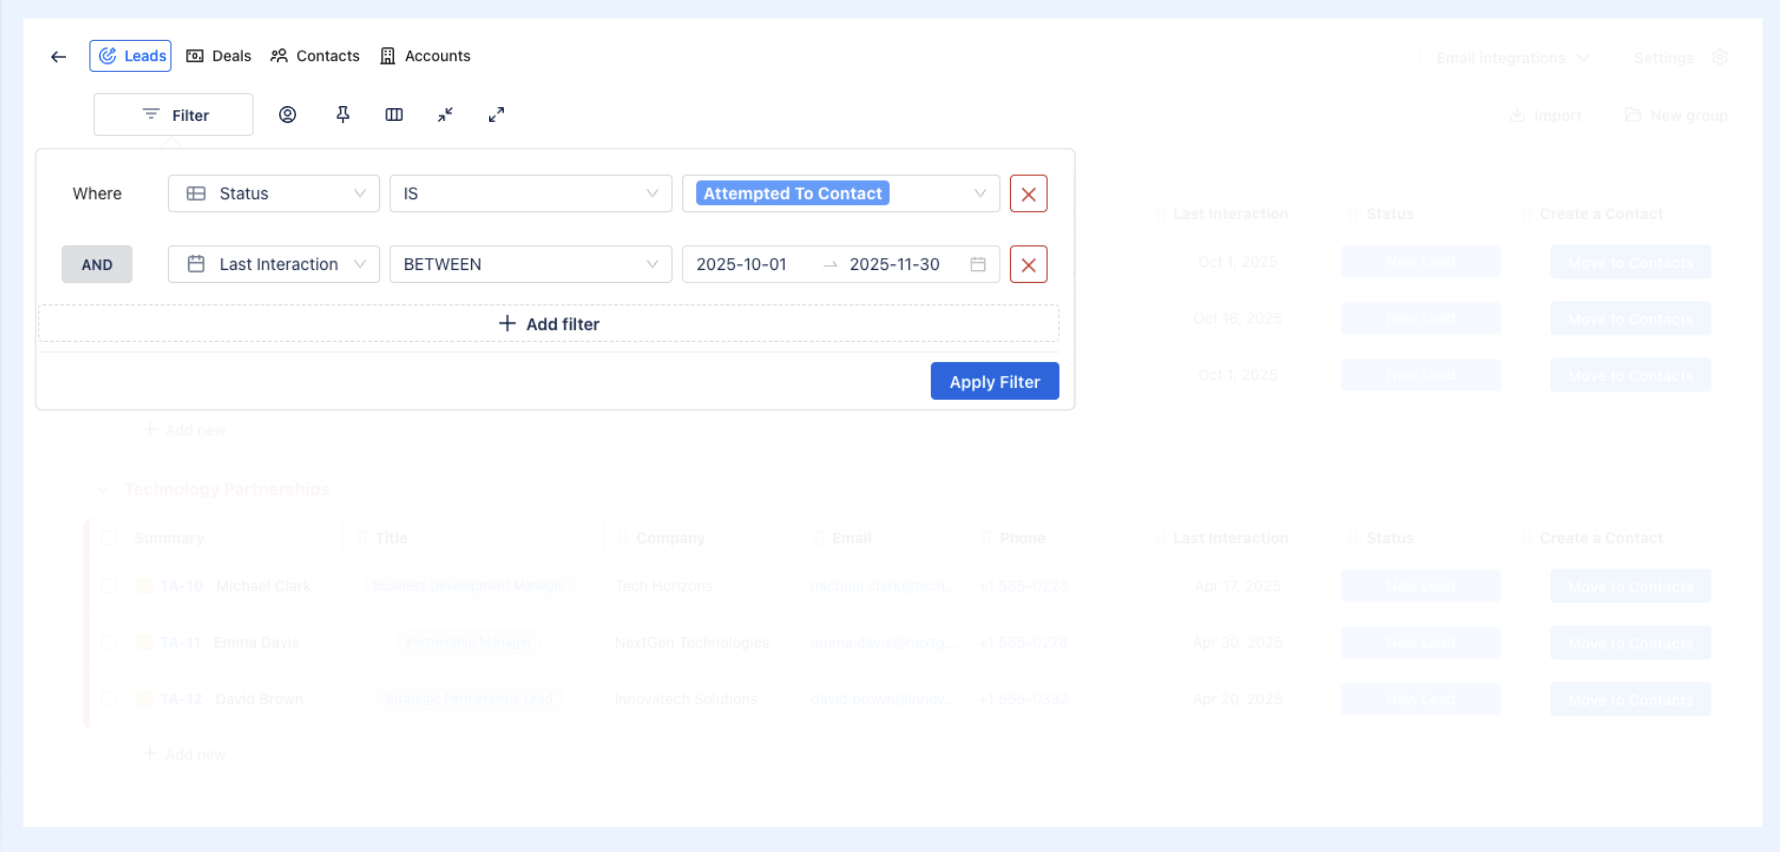
1. Filter & Customize Leads Board
The toolbar provides several options to customize the view of your Leads board, including:
1. ![]()
2. ![]()
3. ![]()
4. ![]()
5. ![]()
![]()
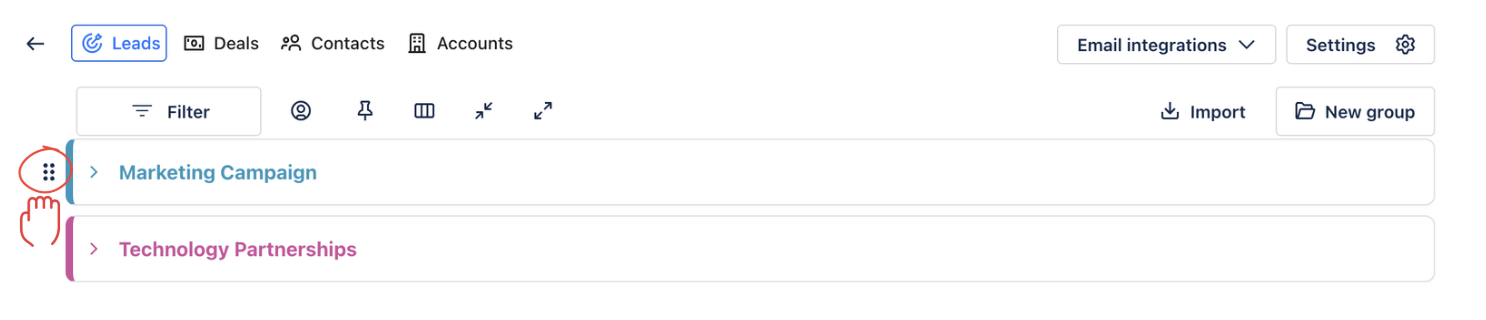
2. Categorize Leads by Groups
Groups are used to organize your Leads into logical categories. This feature helps you segment your Leads for easier tracking and management. You can create Groups based on region, campaign, owner, or any category that fits your workflow.
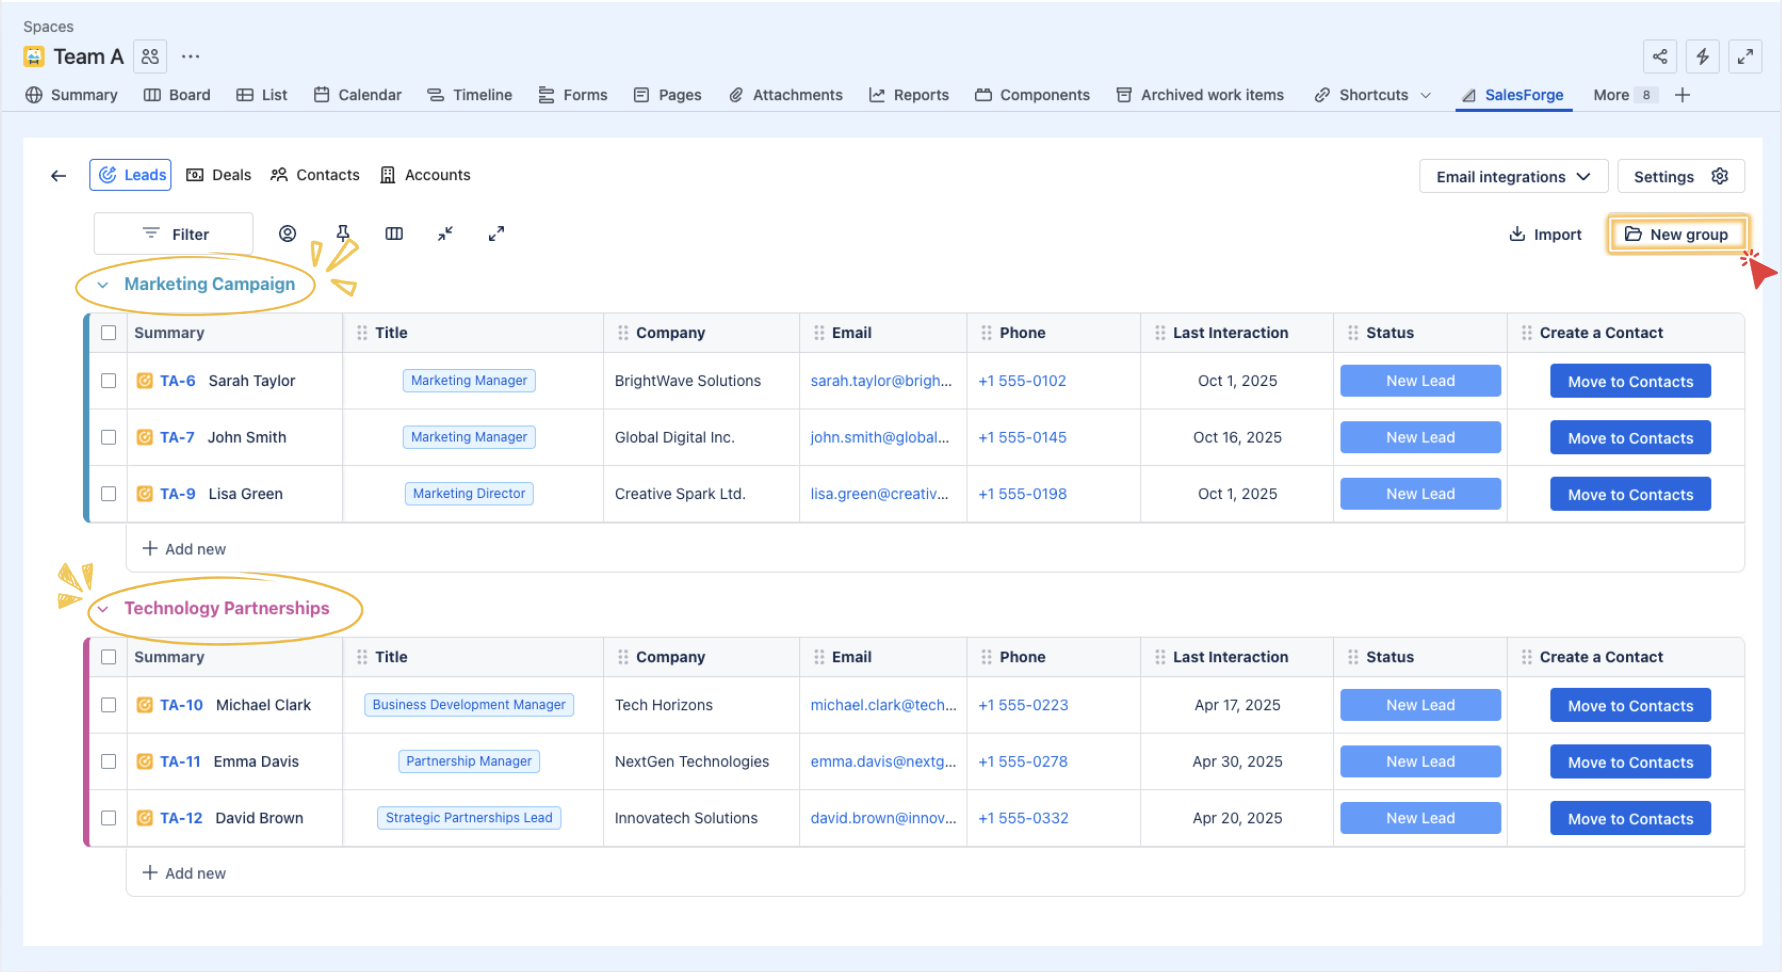
To manage a group in Sales & CRM for Jira:
-
Simply click on
-
Groups can be reordered by dragging and dropping (

-
When you hover over a group name, a


-
Change Color – Assign a different color to the group for easier visual distinction.
-
Delete Group – Remove the group entirely. Note: deleting a group will also delete all Leads contained within that group.
-
3. Track Key Information
The Leads board offers an overview of each Lead’s details by offering info columns. For example:
-
Company: The organization associated with the Lead.
-
Title: The role or job title of the Lead (e.g., Marketing Manager, Sales Director).
-
Email / Phone: Contact details for outreach, such as the Lead's email address and phone number.
3.1. Add More Columns to the Leads Board
If you need additional details about your Leads, you can add more columns to your board:
-
Click on

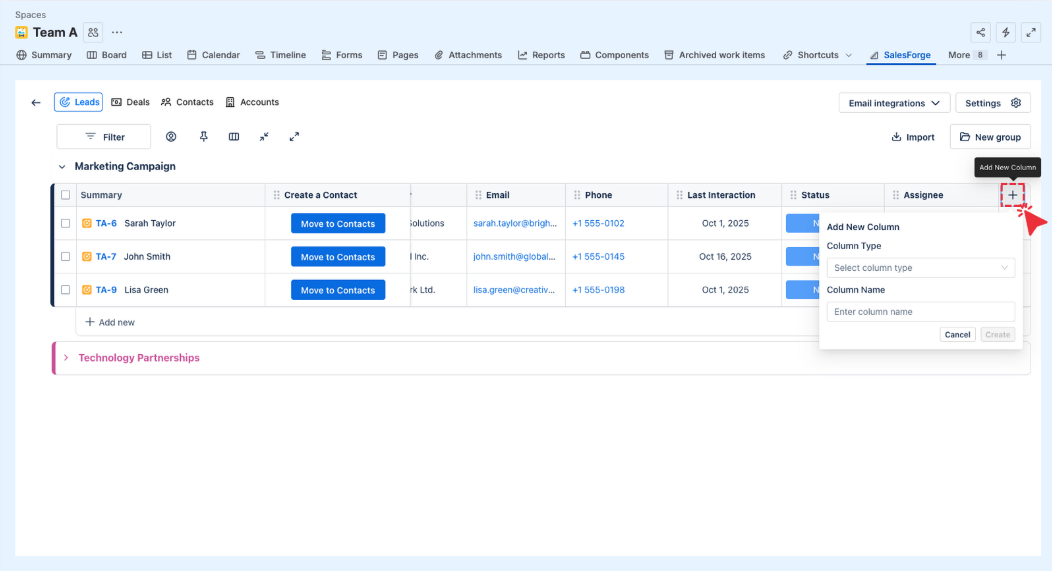
-
Select the column type you'd like to include from the following options:
-
Text: Add general notes or comments about the interaction.
-
Number: Track numerical data (e.g., Lead score, potential revenue).
-
Assignee: Assign the Lead or task to a specific team member.
-
Date: Record the date of the interaction or event.
-
Email: Capture email correspondence with the Lead.
-
Phone: Record phone call details or add a phone number for the Lead.
-
Status: Update the Lead’s current status (e.g., Contacted, Attempted to Contact).
-
Link: Add links to relevant resources, emails, or files.
-
-
Enter your desired column name and click

3.2. Customize Columns
You can also customize the columns to suit your needs. Click the More options (...) icon next to any column header to see the available settings.
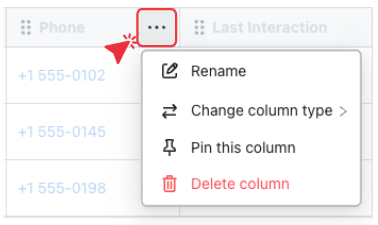
Here is what you can do:
a. General Actions (All column types)
-
Rename a Column: Click on the :pen: Edit button to change the title of the column header.
-
Change Column Type: Select

-
Pin this Column: Select

-
Delete a Column: Select

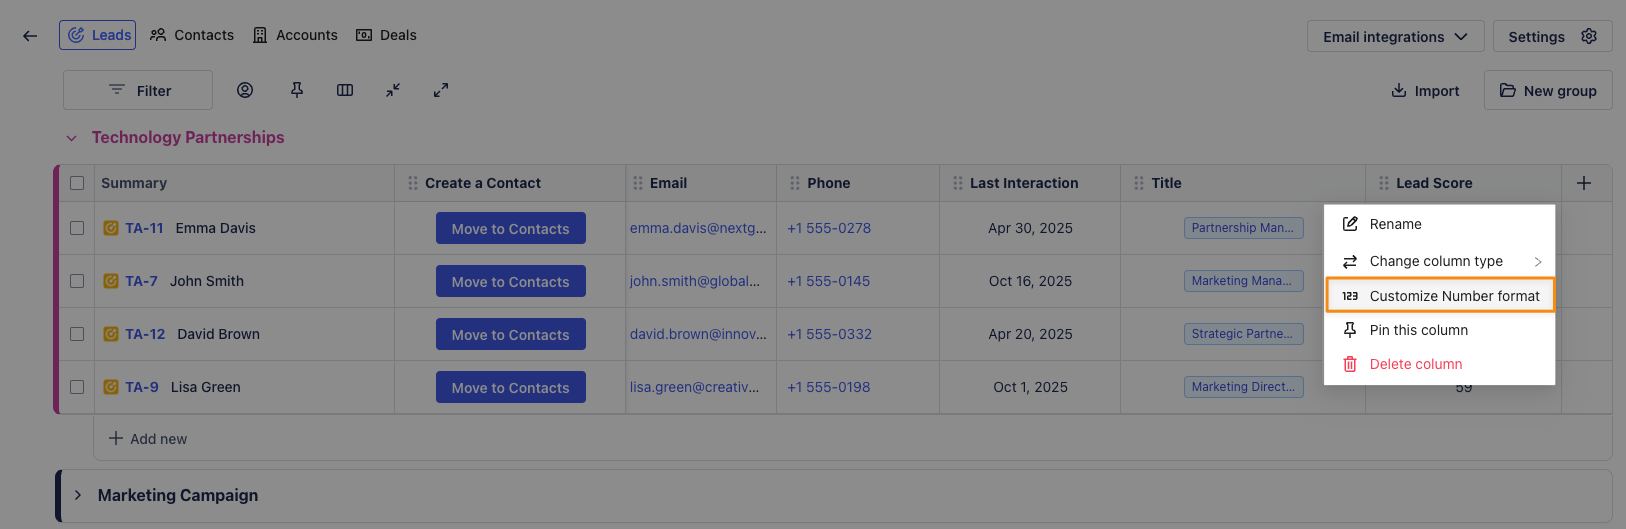
b. Specialized Column Settings
Sales & CRM allows you to customize how values are displayed in Number ![]()
Here is how:
-
Locate a column with the Number

-
Click the More options (···) button next to the column header and select

-
In the Customize Number Field dialog:
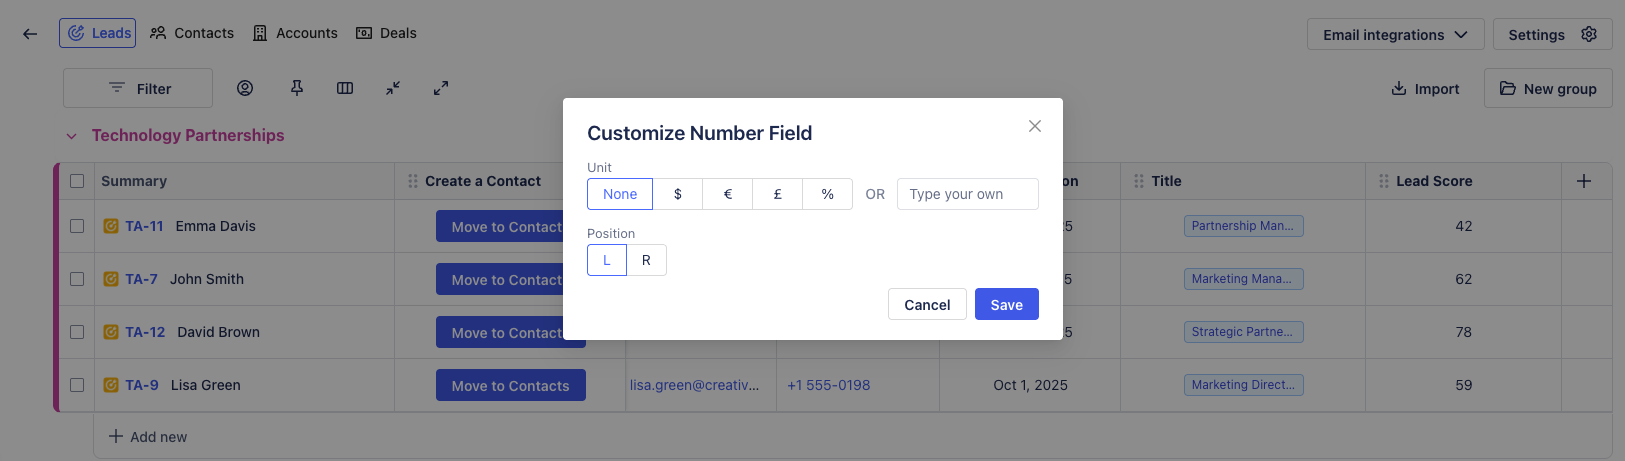
-
Select a Unit: Choose a preset symbol ($, €, £, %) or select Type your own to add a custom label (e.g.,
cmorseats). -
Set Position: Choose L (Left) to place the unit before the number (e.g.,
$50,000) or R (Right) to place it after (e.g.,75%). -
Click Save to apply the changes.
-
The selected format will be applied instantly to all values in that column.
3.3. Move a Lead to Contacts
Once a Lead has been qualified and is ready to move forward in the sales process, you can convert it into a :SalesForge_contact: Sales & CRM Contact. This allows you to track the Lead’s progress as a Contact, and associate it with an Account and Deal.
On the Leads board:
-
Find the Lead you want to move to Contacts.
-
Click on