.png)
1. Introduction
This guide is for users of ProScheduler Data Center edition who are looking to migrate to the Cloud edition.
1.1. Pre-migration Checklist
Before proceeding, please review the following official Atlassian documentation:
You will use the Jira Cloud Migration Assistant tool to migrate your data from Data Center to Cloud.
1.2. Data to be Migrated
|
Entity |
Field |
|---|---|
|
Holiday Calendar |
Name |
|
Description |
|
|
Holidays |
|
|
Is Default |
|
|
Daily Capacity |
Name |
|
Description |
|
|
Daily Capacity |
|
|
Is Default |
|
|
Vacation/Leave Type |
Label |
|
Description |
|
|
Color |
|
|
Pay Percent |
|
|
Is Default |
|
|
Event |
Title |
|
Description |
|
|
Guests |
|
|
Creator |
|
|
Start At |
|
|
End At |
|
|
Color |
|
|
Event Position |
|
|
Jira Issue |
Issue Id |
|
Project Id |
|
|
Hour |
|
|
Issue Position |
|
|
Plan History |
Issue Id |
|
Actor |
|
|
Action |
|
|
Log Meta |
|
|
Time Off |
Leave Type |
|
Assignee |
|
|
Hour |
|
|
Date |
|
|
Notes |
|
|
Matrix |
|
|
Time Off Position |
|
|
People Profile |
Account Id |
|
Introduction |
|
|
Seniority |
|
|
Note |
|
|
Department Id |
|
|
Position Id |
|
|
People Setting |
Account Id |
|
Rate |
|
|
Daily Capacity |
|
|
Is Default Capacity |
|
|
Daily Capacity Id |
|
|
Is Default Vacation |
|
|
Is Default Holiday |
|
|
Holiday Calendar Id |
|
|
Notifications |
|
|
Vacation Allocation Per Year |
|
|
Team Priority |
|
|
Team |
Name |
|
Members |
|
|
Owner |
|
|
Daily Capacity Id |
|
|
Holiday Calendar Id |
|
|
Program |
Is Private |
|
Name |
|
|
Projects |
|
|
Project Ids |
|
|
Members |
|
|
Teams |
|
|
Owner |
|
|
Is Delete |
|
|
Is Migrate |
|
|
Board Setting |
Board Id |
|
Admin Users |
|
|
WBS Gantt Settings |
|
|
Settings |
|
|
Task |
Issue Key |
|
Assignee |
|
|
Start Date |
|
|
End Date |
|
|
Hour |
|
|
Task Position |
|
|
Project Key |
|
|
Issue Id |
|
|
Project Id |
|
|
Color |
|
|
Task Note |
Task Id |
|
Note |
|
|
Creator |
|
|
Is Edited |
|
|
Baseline |
Tittle |
|
Description |
|
|
Board Id |
|
|
Data |
|
|
Creator |
|
|
User Setting |
Board Id |
|
Account Id |
|
|
Settings |
|
|
Quick Filter |
Name |
|
JQL |
|
|
Description |
|
|
Rank |
|
|
Is Default |
|
|
Board Id |
|
|
Admin Setting |
Enable Vacation Approval Process |
|
Admin Users |
|
|
Billing Admin Users |
|
|
Vacation Allocation Per Year |
|
|
Is Accumulate |
|
|
Accumulate Number |
|
|
Description |
|
|
TBPS Admin Users |
|
|
Workload View Type |
|
|
General Settings |
|
|
Color Schemes |
|
|
Gantt Settings |
|
|
Color Method |
|
|
Project Setting |
Project Id |
|
Auto Assign Setting |
|
|
Use Jira Date Fields |
|
|
Date Fields Map |
|
|
Created At |
|
|
Updated At |
2. Migration Steps
Ensure you have the latest versions of ProScheduler software to avoid any issues during migration.
2.1 Install ProScheduler on Cloud Site
Make sure you have the latest version of ProScheduler installed on your Cloud site before beginning the migration process.
2.2 Audit apps for your migration to Cloud
Before planning your app migration, it's important to review the apps you currently use. Understanding your existing apps will help you make informed decisions on how to transition them to your new system.
2.3 Assess the Data Center Apps
As part of the migration process, we'll need to assess existing apps to determine their suitability.
Go to Jira Admin → System → Migrate to Cloud to open the Migration Assistant home
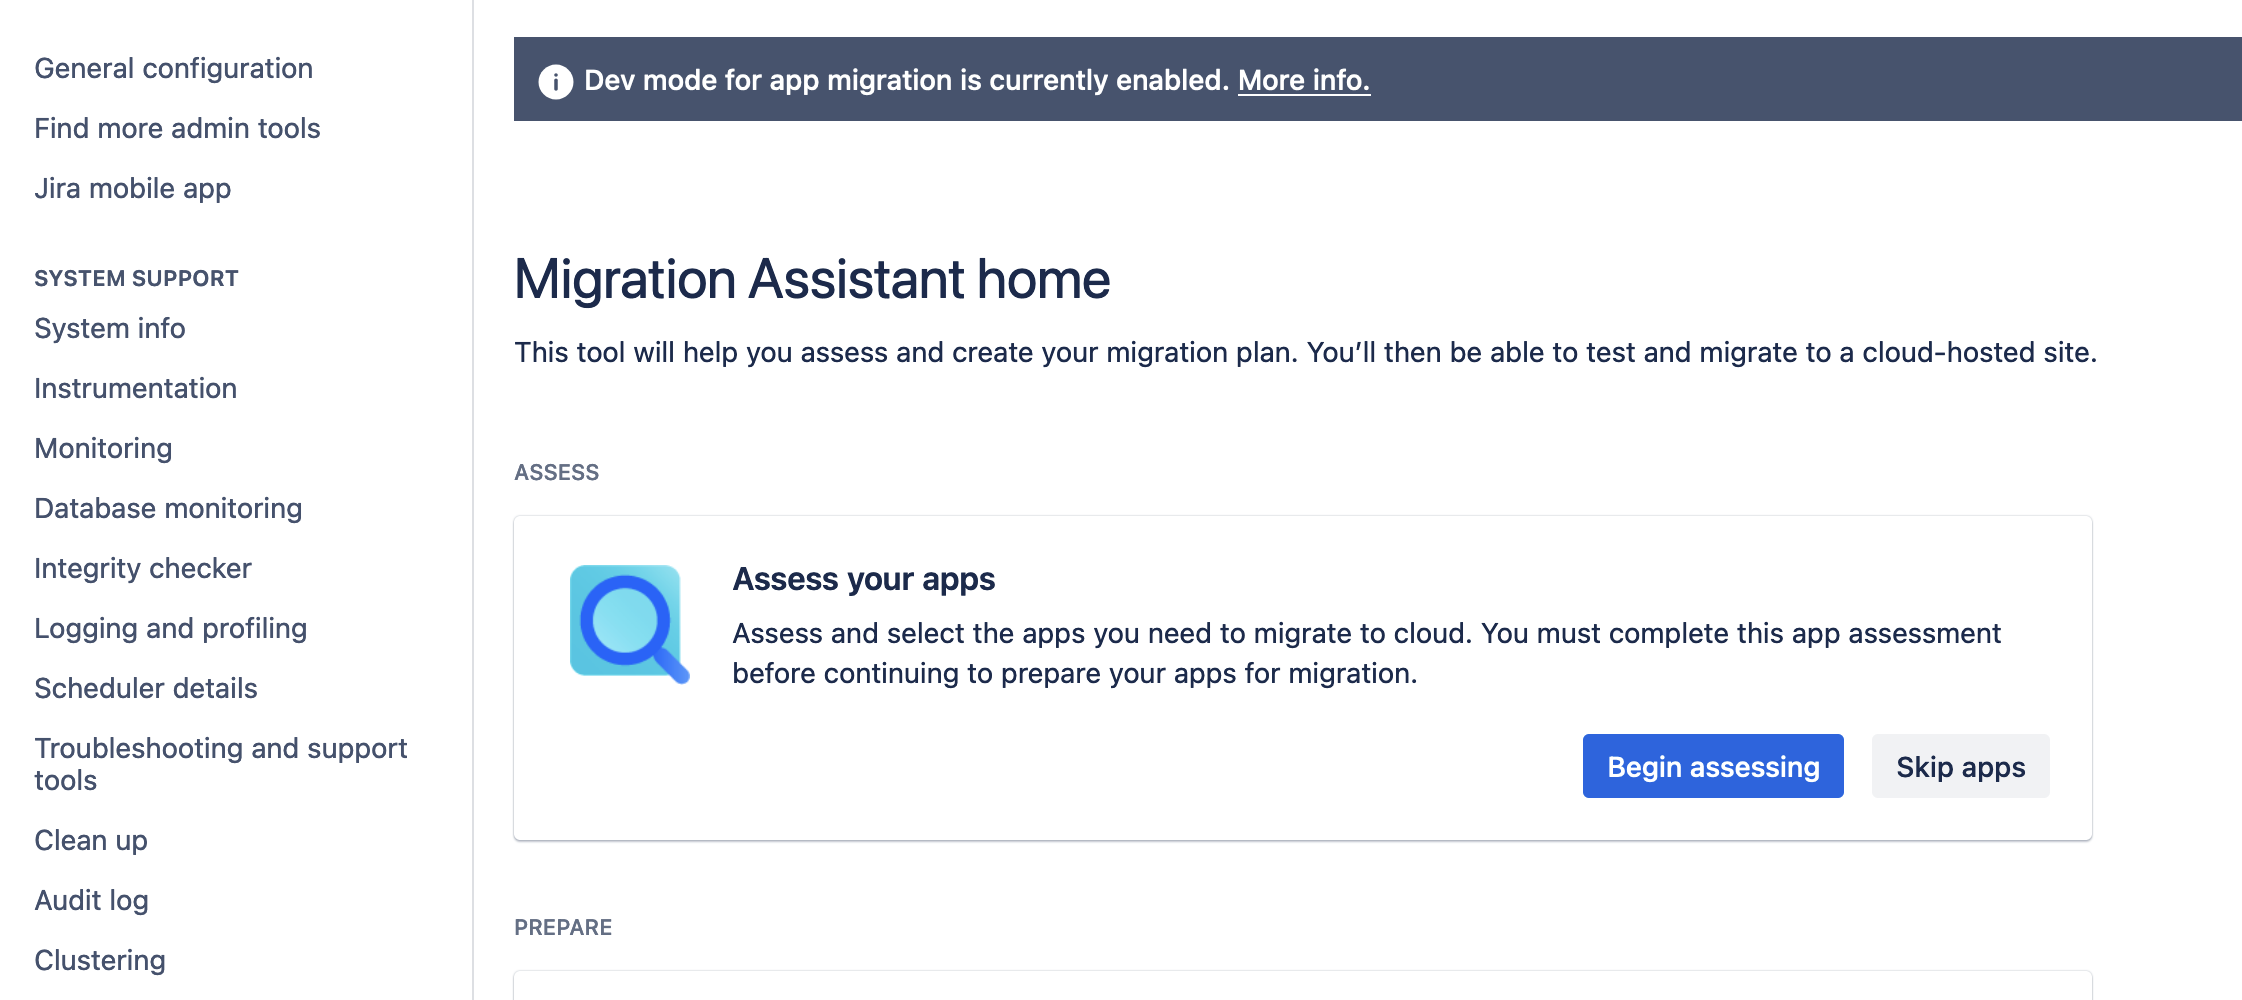
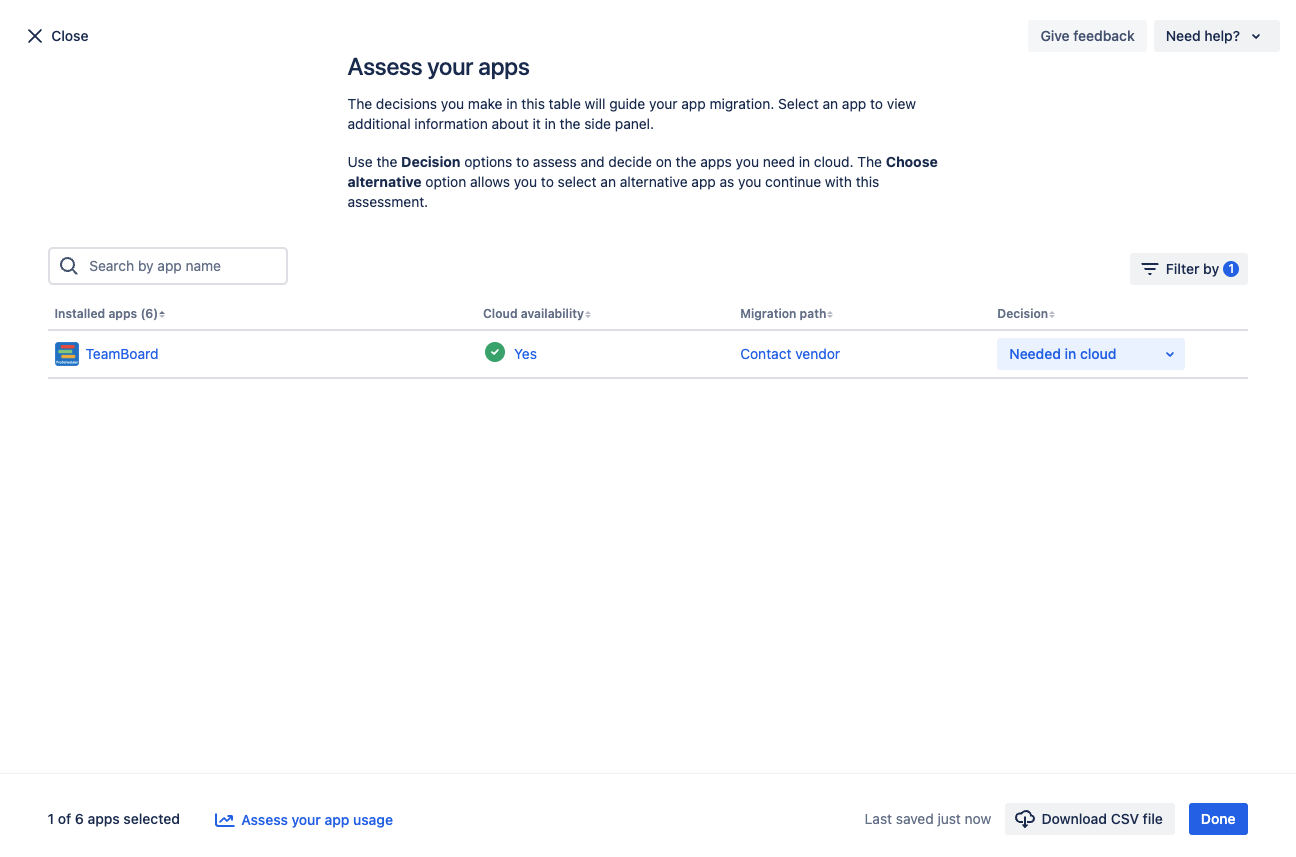
The app assessment table displays all the apps on your Data Center instance. If you have a large number of apps, loading may take a moment. Click on any app to view additional details in the side panel. Review each app carefully, evaluate the criteria, and assign a status to make your decision.
Note: Confluence and Jira migration assistants look slightly different because they measure different things.
For more details please take a look at:
2.4 Run the Migration
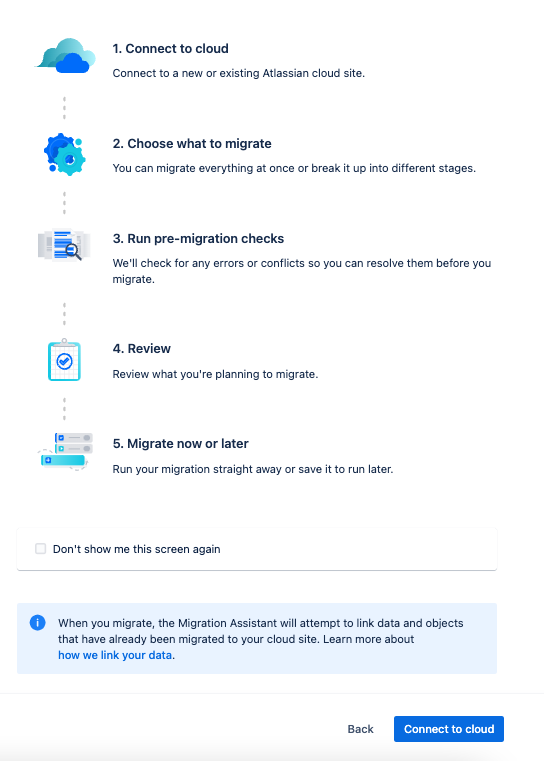
There are five steps to set up and run your migration from Data Center to Cloud
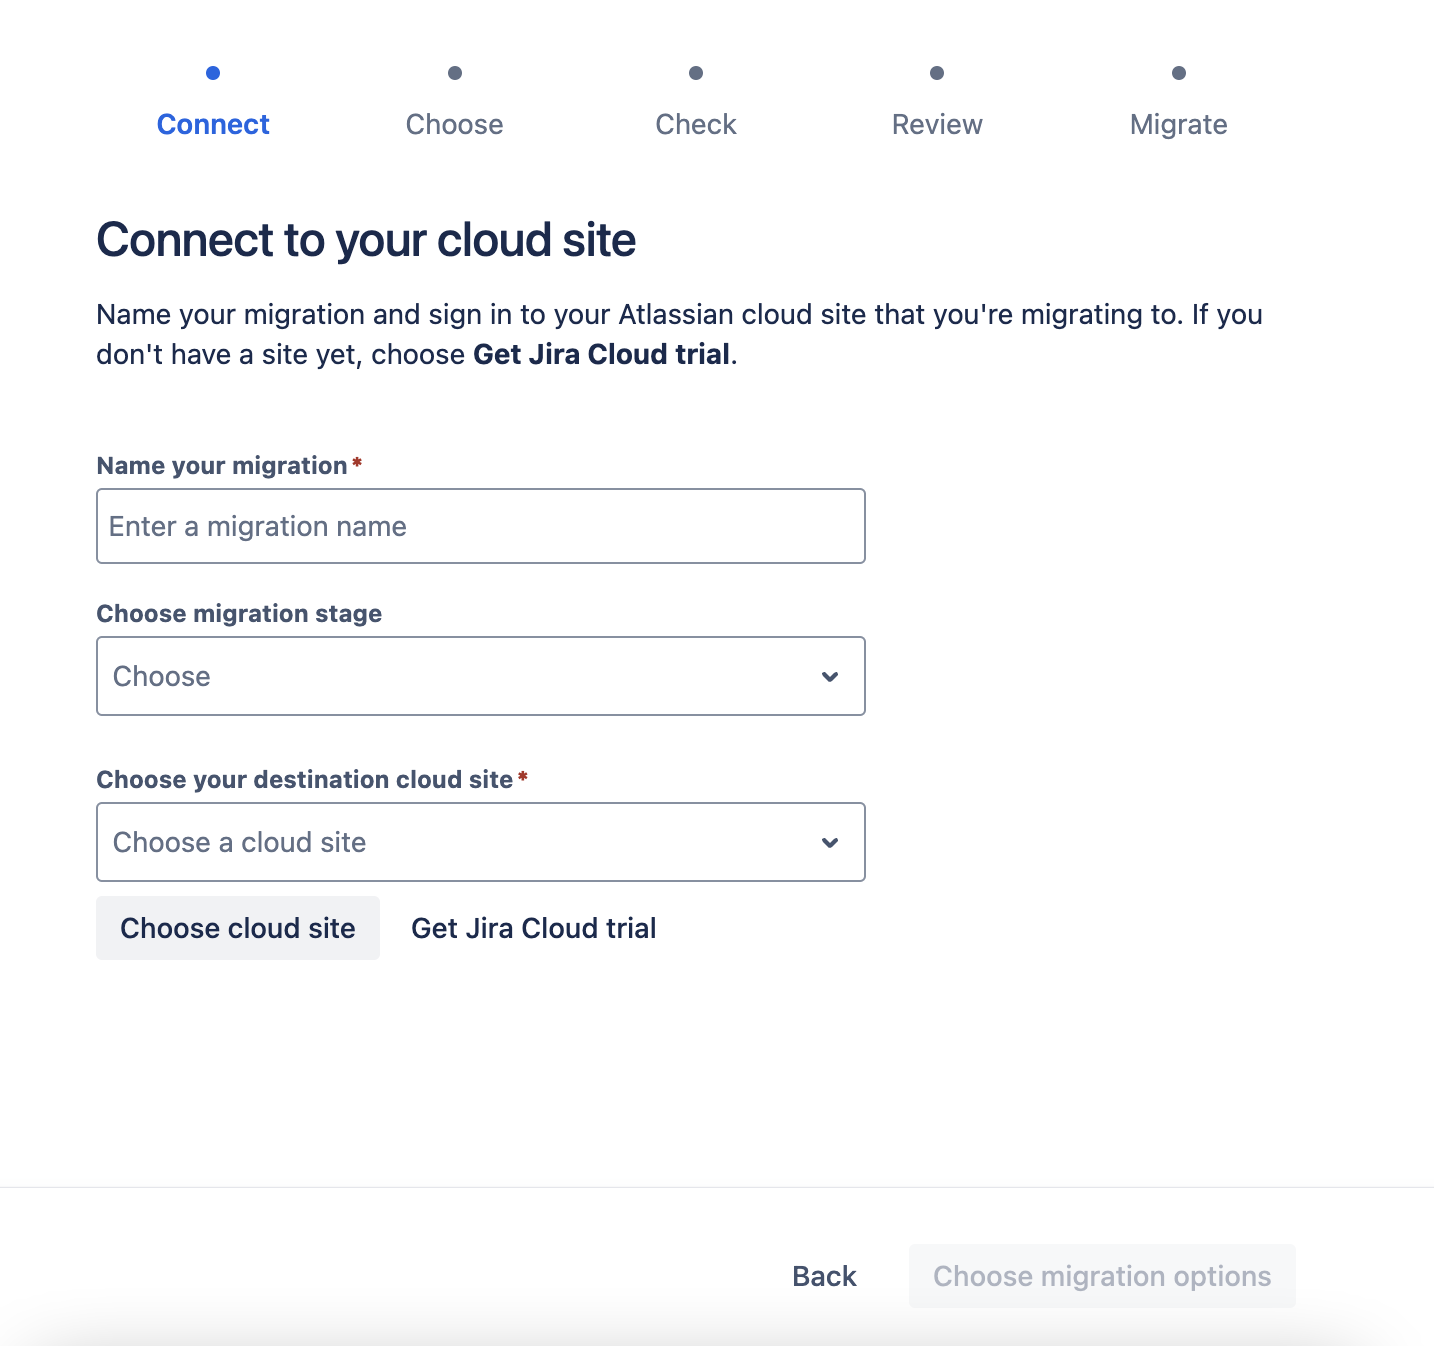
2.4.1 Connect to cloud
You can link your chosen cloud instance at this step.
If you already have a Cloud site, select Choose cloud site or choose it from the drop-down.
If you don’t have a Cloud site yet, select Get Jira Cloud trial to try one for free.
Learn more about Cloud migration trials
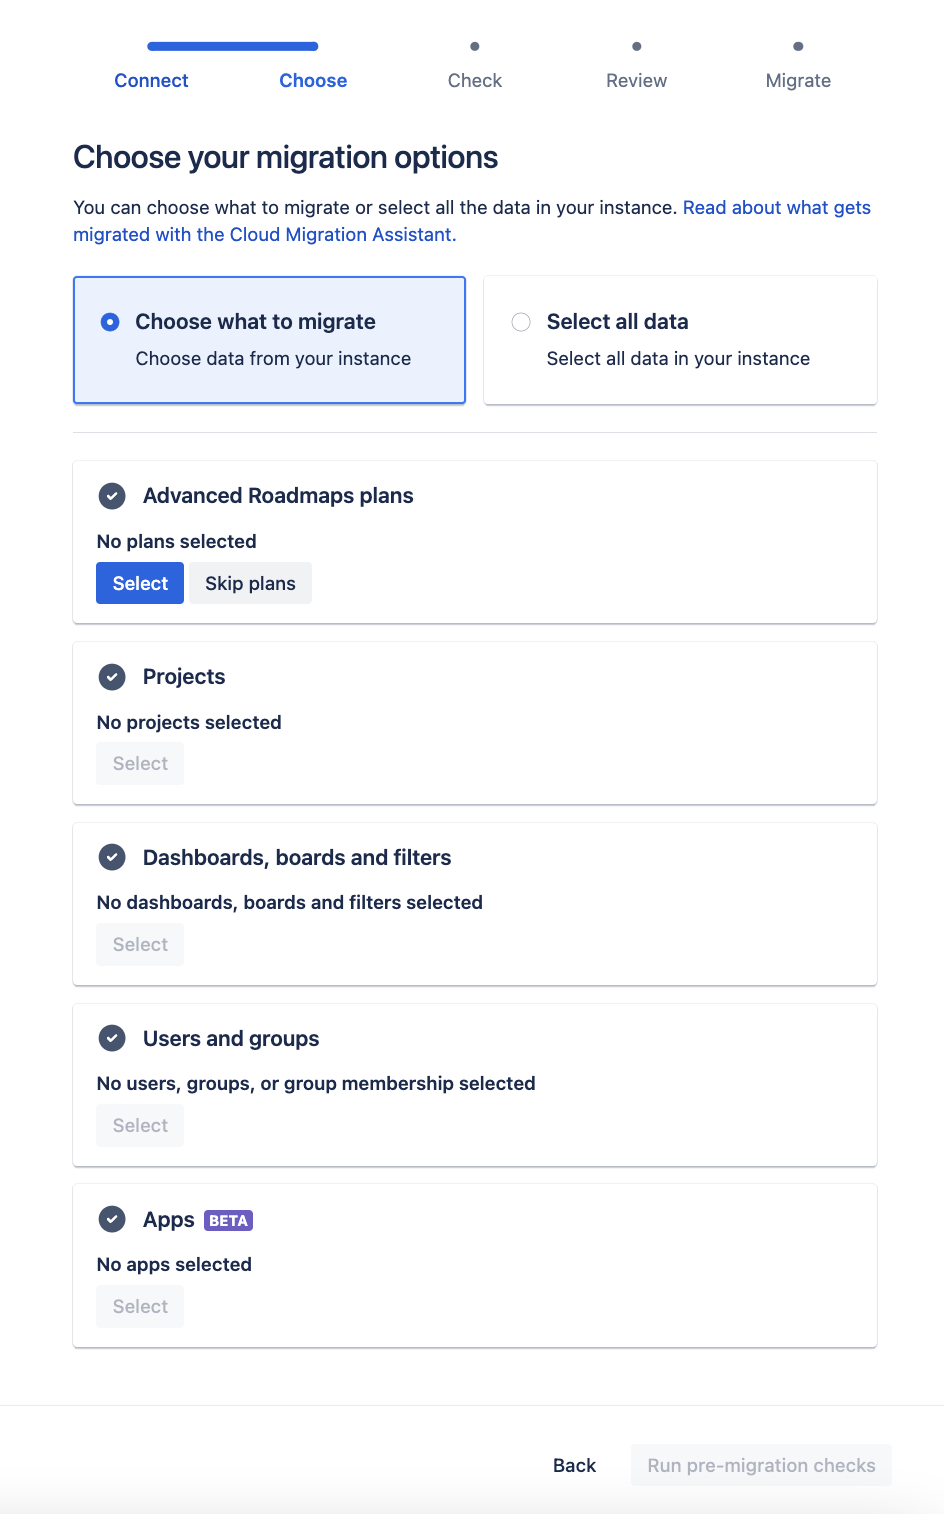
2.4.2 Choose what to migrate
You can migrate everything together or break it up into phases.
You can choose:
-
Advanced Roadmaps plans or skip migrating plans
-
All or some of projects
-
All dashboards, boards and filters at once or only those related to selected projects, or none
-
All users and groups from the Jira directory
-
All apps that you marked as Needed in Cloud when assessing your apps
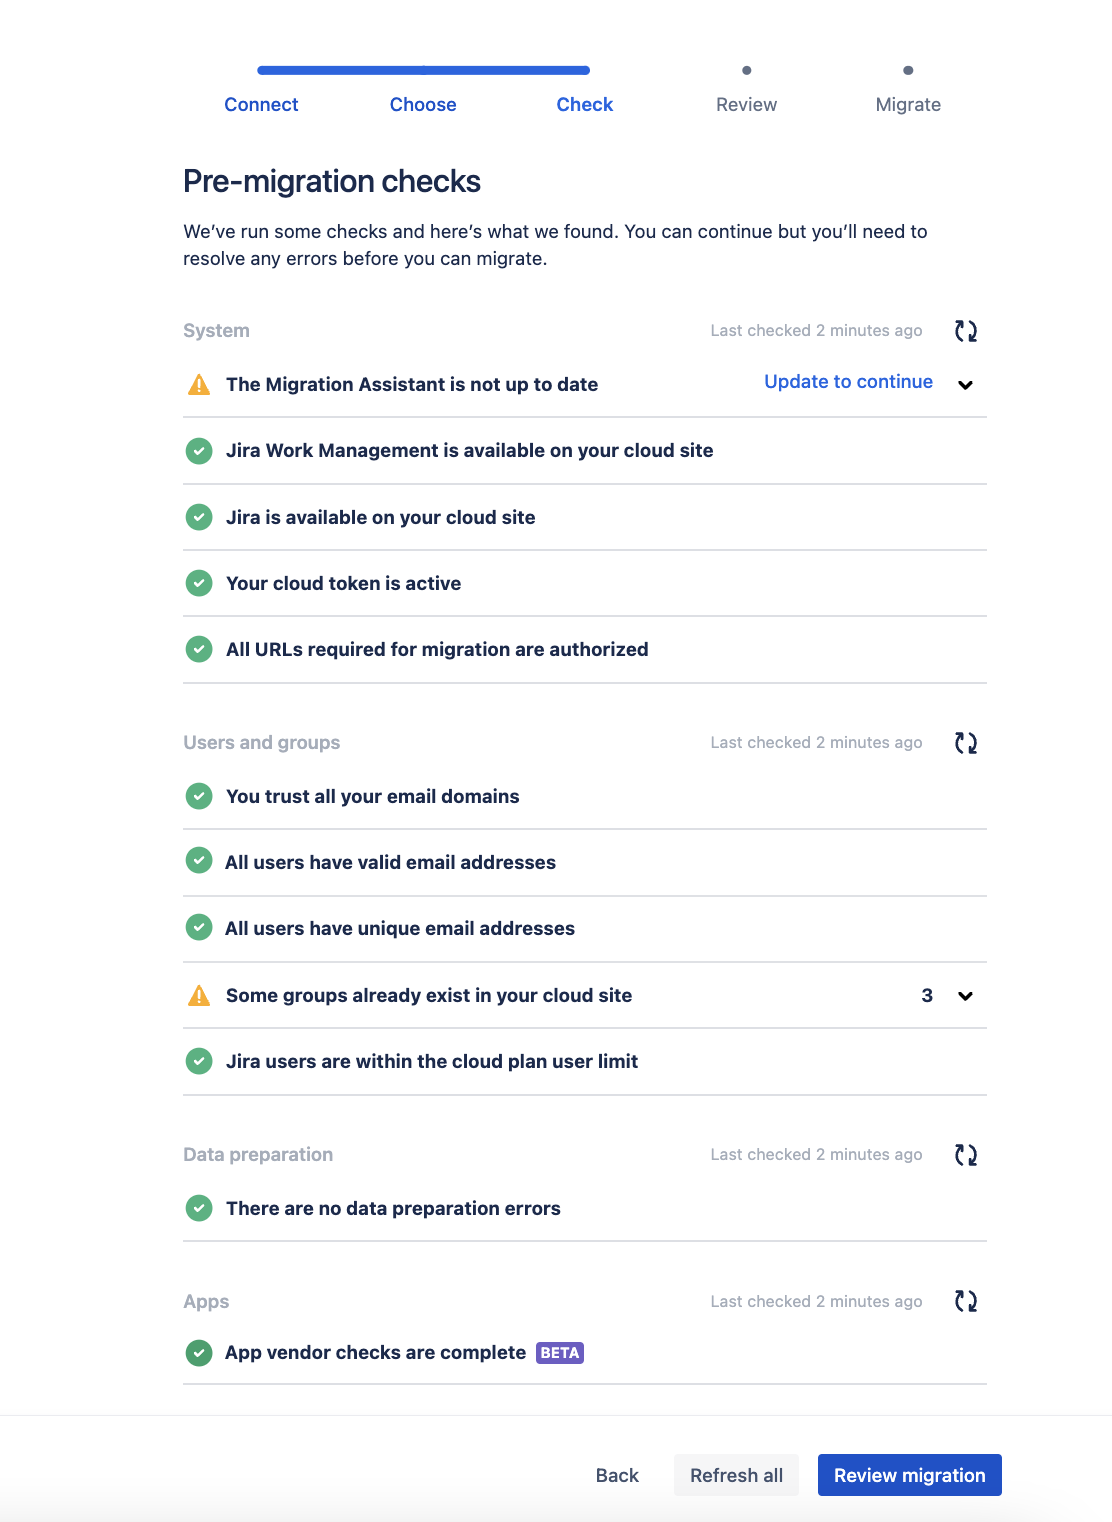
2.4.3 Check for errors
In this step, Cloud Migration Assistant looks for warnings or errors it should display as it runs pre-migration checks on the following groups:
-
System
-
Users and groups
-
Data preparation
-
App
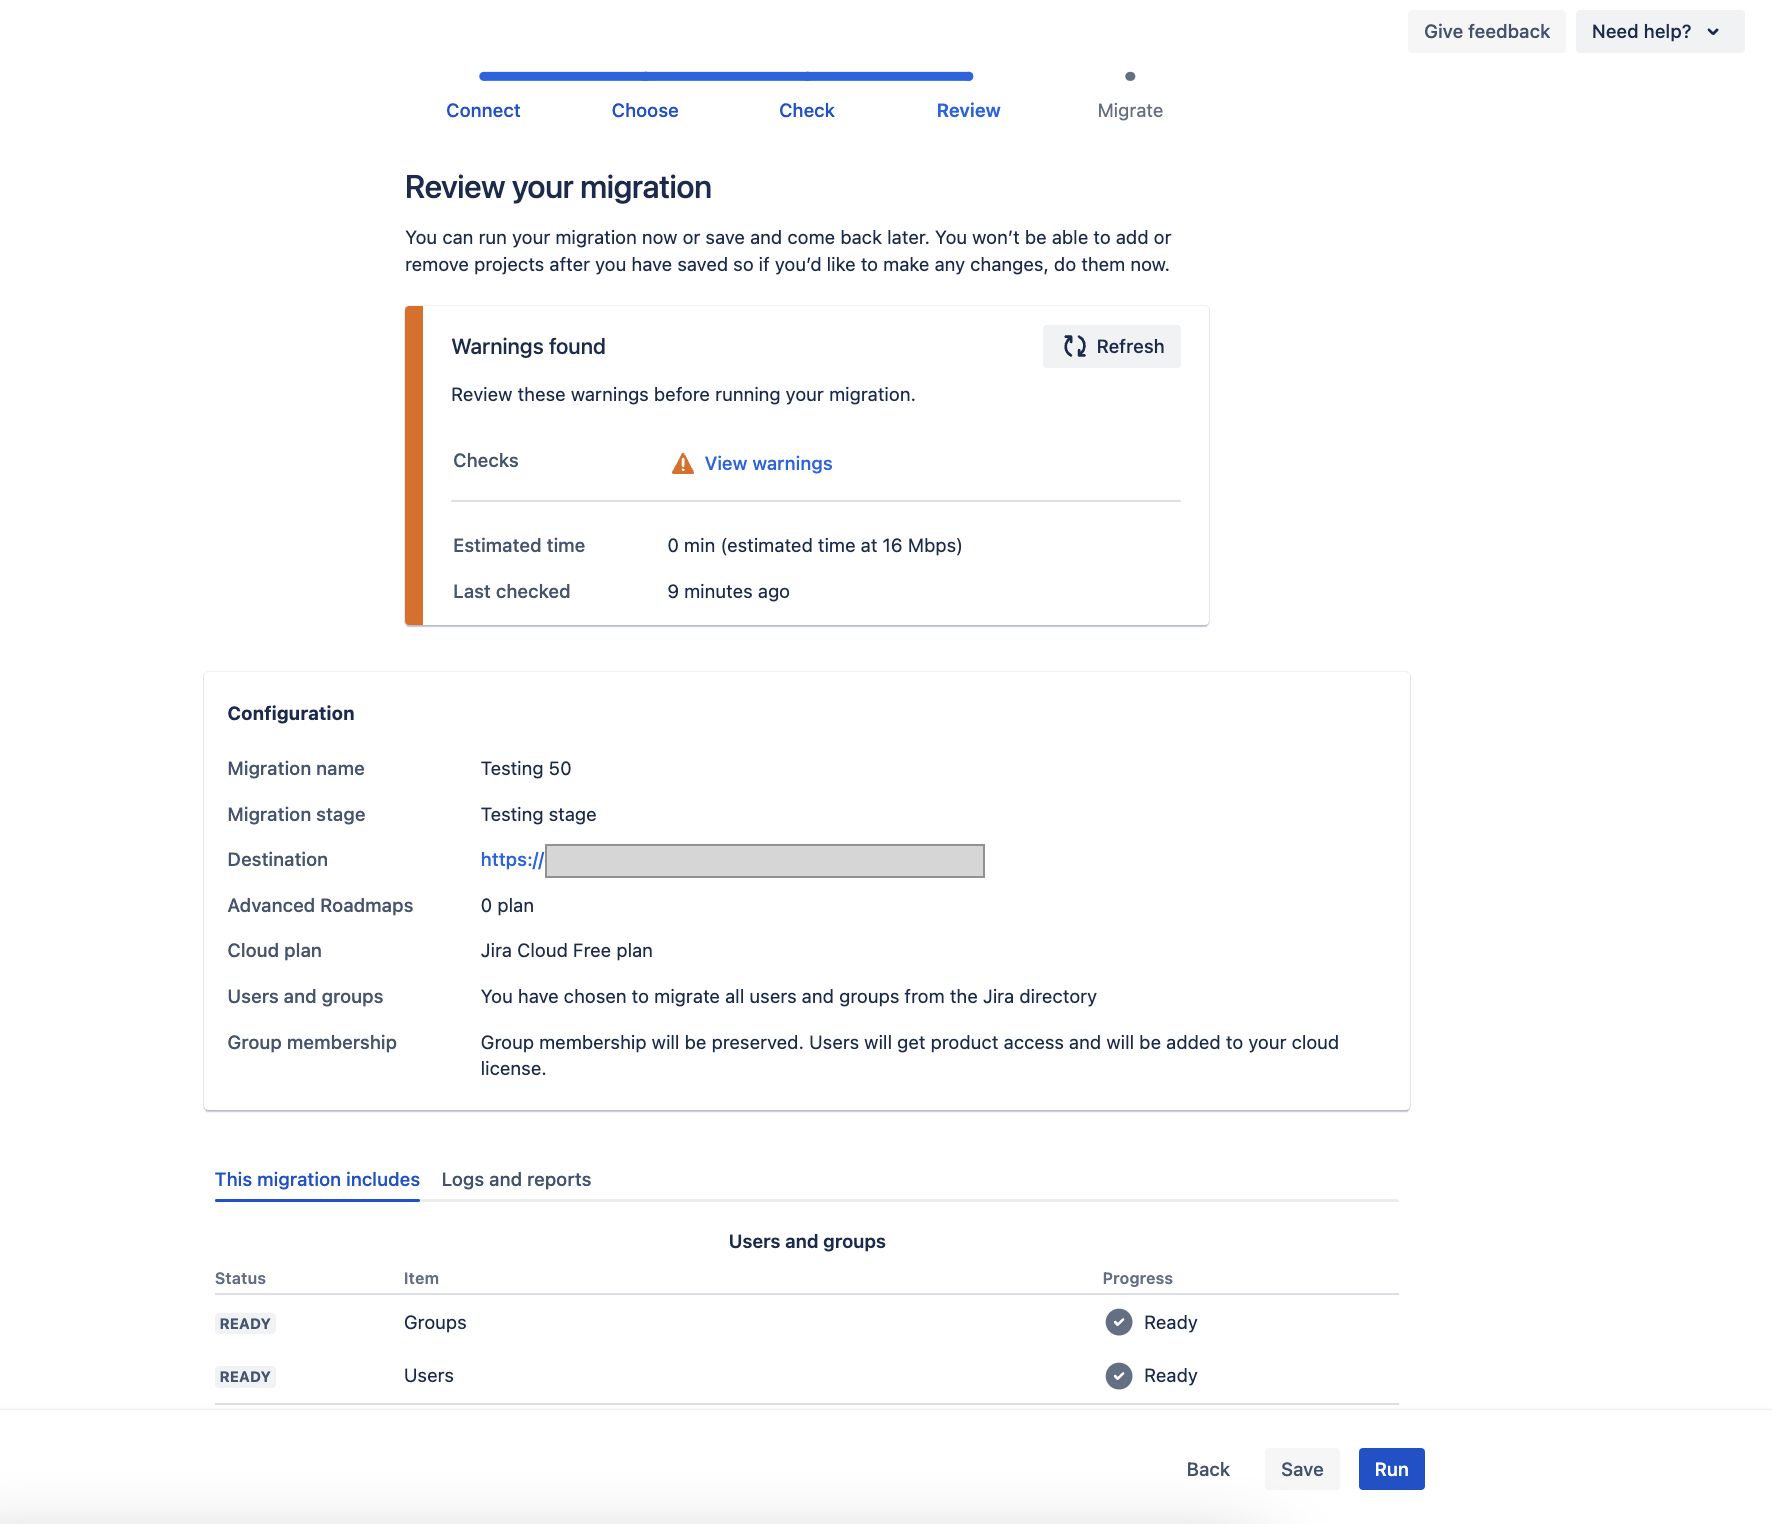
2.4.4 Review your migration
If everything looks correct and you want to start your migration, click Run now. If you would like to start your migration later or you still have errors to fix, click Save. If you choose to run your migration, it will still be saved to your dashboard. There, you can view the progress and details of all your migrations.
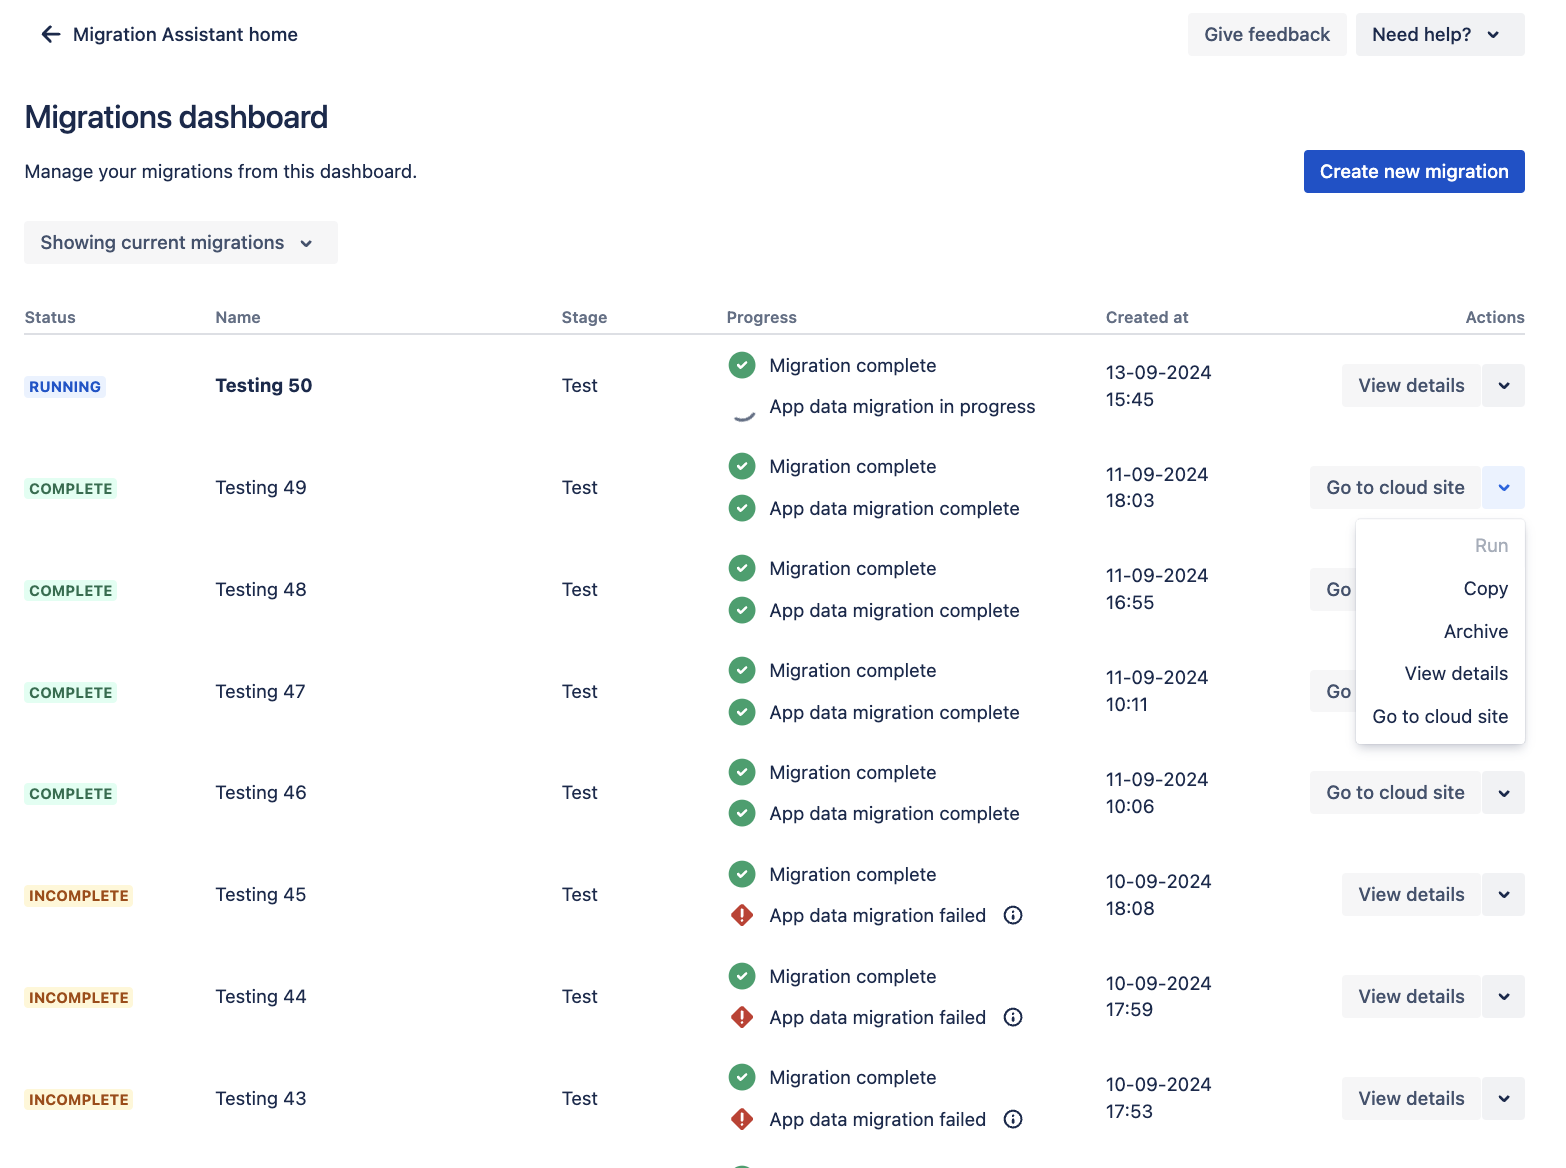
2.4.5 Manage and run your migrations
Your saved migration will be listed on the migration dashboard, where you can View details, Run, Copy, Archive, Go to cloud site.
Cloud Migration Assistant will keep you informed about the progress of your migration. You can see if your migrations are Saved, Running, Finished, Stopped, Incomplete, or Failed.
2.5 Verify that Data Migrated
After the migration is complete, please verify and confirm that the data is as expected. The data to be checked includes:
-
Work Schedule: Holiday Calendar, Daily Capacity.
-
People Information: People Profile, People Setting, Team, Time Off, Vacation/Leave Type.
-
Structure & Processes: Program, Board Setting, Task, Task Note, Baseline, Jira Issue, Plan History, Event.
-
System Settings: User Setting, Quick Filter, Admin Setting, Project Setting.
3. Unsuccessful Migrations
If the ProScheduler migration is unsuccessful during the Jira Cloud migration process, we strongly advise that you attempt it again.
4. Known Limitations
We do not support the migration from two ProScheduler DC applications hosted on two separate servers to a single cloud-based application.
5. Migration Notes
-
Enable Logging: We recommend enabling logging by adding the log category
com.devsamuraiat the 'info/debug' level on your Jira Data Center logging page. -
Test Before Production: Always test the migration in a test environment before applying it to your live production instance.
-
Avoid Data Changes: Please notify all users, and do not make any changes to data during the migration process. Any updates or modifications could cause the migration to fail.
-
Linked Projects: If you have multiple projects that are connected to the app, make sure they are migrated together in the same migration process.
-
Check Time Zones: Before migrating, confirm that the time zone settings on your Jira Cloud instance match those on your server or data center instance.
-
Retry if Migration Fails: If the migration fails, you can try running it again. However, before retrying, ensure that the cloud project from the previous attempt has been removed.
-
Performance: We recommend re-indexing the Jira server before migration to enhance performance and reduce data collection time.
6. Conclusion
By following these steps and using the Jira Cloud Migration Assistant, you can successfully migrate your Jira system to the cloud and continue using ProScheduler without interruption. If you have any questions or need further assistance, please don't hesitate to contact us.