.png)
Only users with App Admin role can access and manage Rate and Cost settings.
Setting up Rates and Costs lets TimePlanner calculate how much time costs across people, teams, and projects.
It helps you:
-
Track the cost of work accurately.
-
Compare costs between people, teams, or projects.
-
Estimate budgets before work starts.
-
Report on actual costs after work is done.
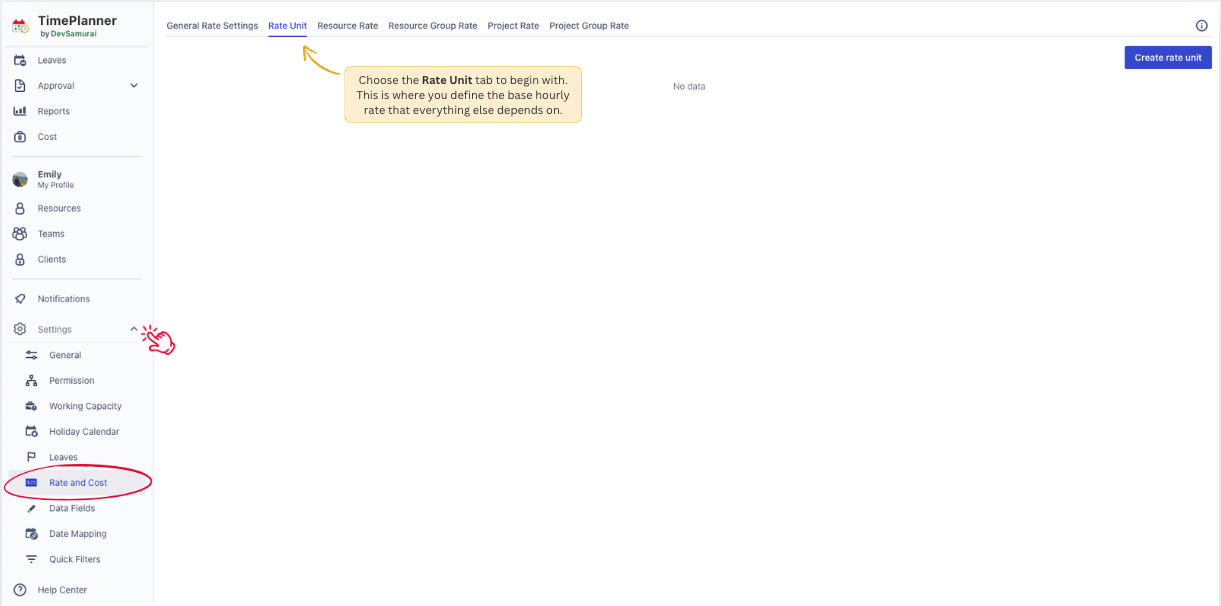
To set up rates and costs, go to Settings → 
Recommendation:
Choose the Rate Unit tab to begin with. This is where you define the base hourly rate that everything else depends on.
Set Up Rate Unit
A Rate Unit defines how much 1 hour of work costs. It’s a reusable pricing rule you can apply to resources, groups, or projects.
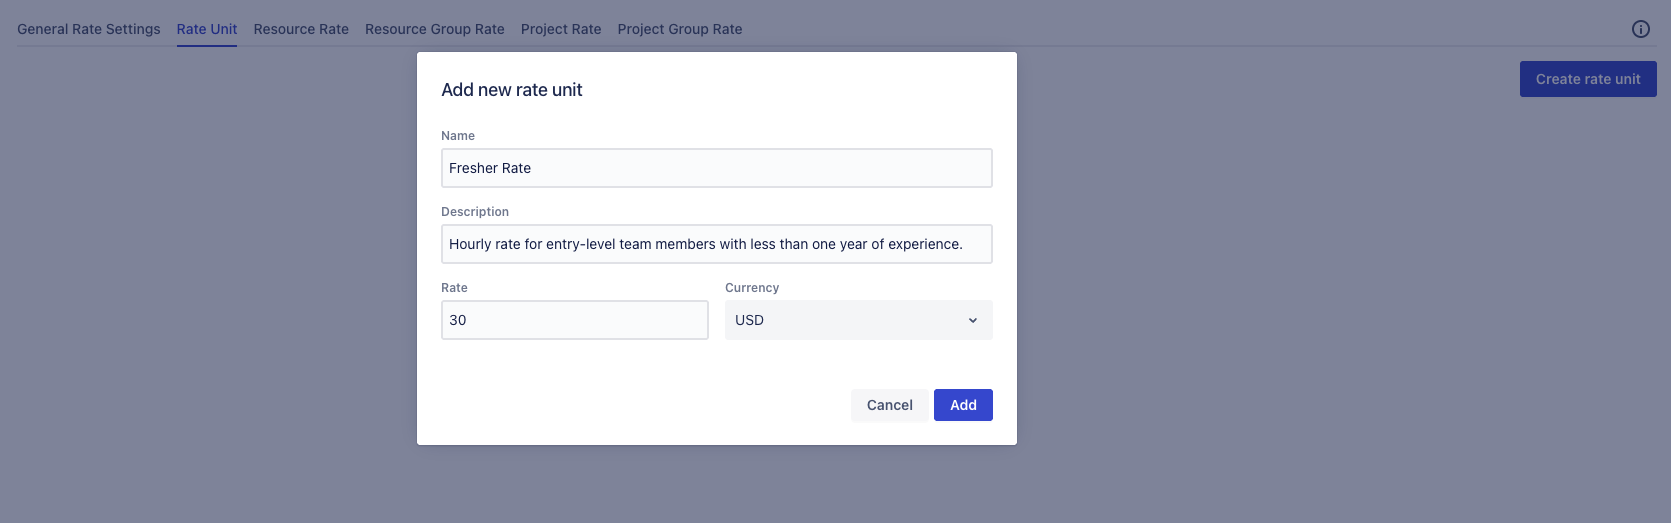
To create a Rate Unit:
-
In the Rate Unit tab, click

-
In the popup form:
-
Name: Enter a clear label (e.g., Fresher Rate, Senior Rate).
-
Description: (Optional) Add notes for clarity.
-
Rate: Enter the hourly amount (e.g., 30).
-
Currency: Select from the dropdown.
-
If the currency list is empty, or you need another one, click 
-
Click

Set Up Resource Rate
A Resource Rate is the hourly cost assigned to one specific person. It’s often used to reflect their salary or billing rate per hour.
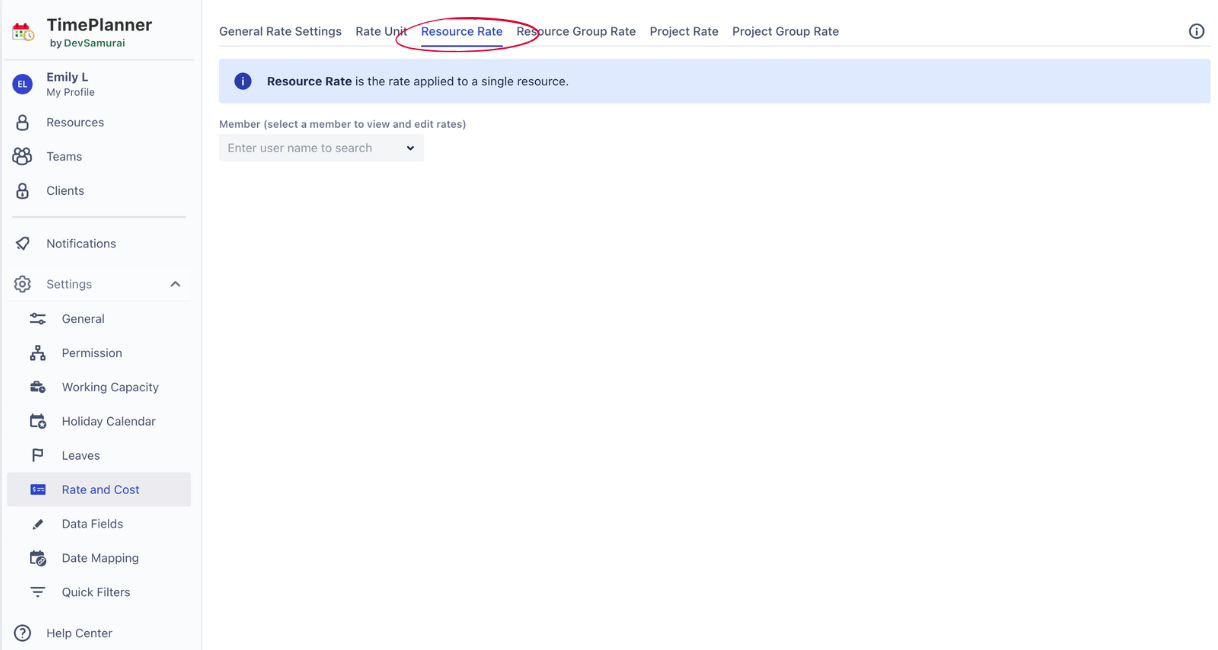
To assign a Resource Rate:
-
Members: Use the Member search bar to choose a member to assign the rate to.
-
Click

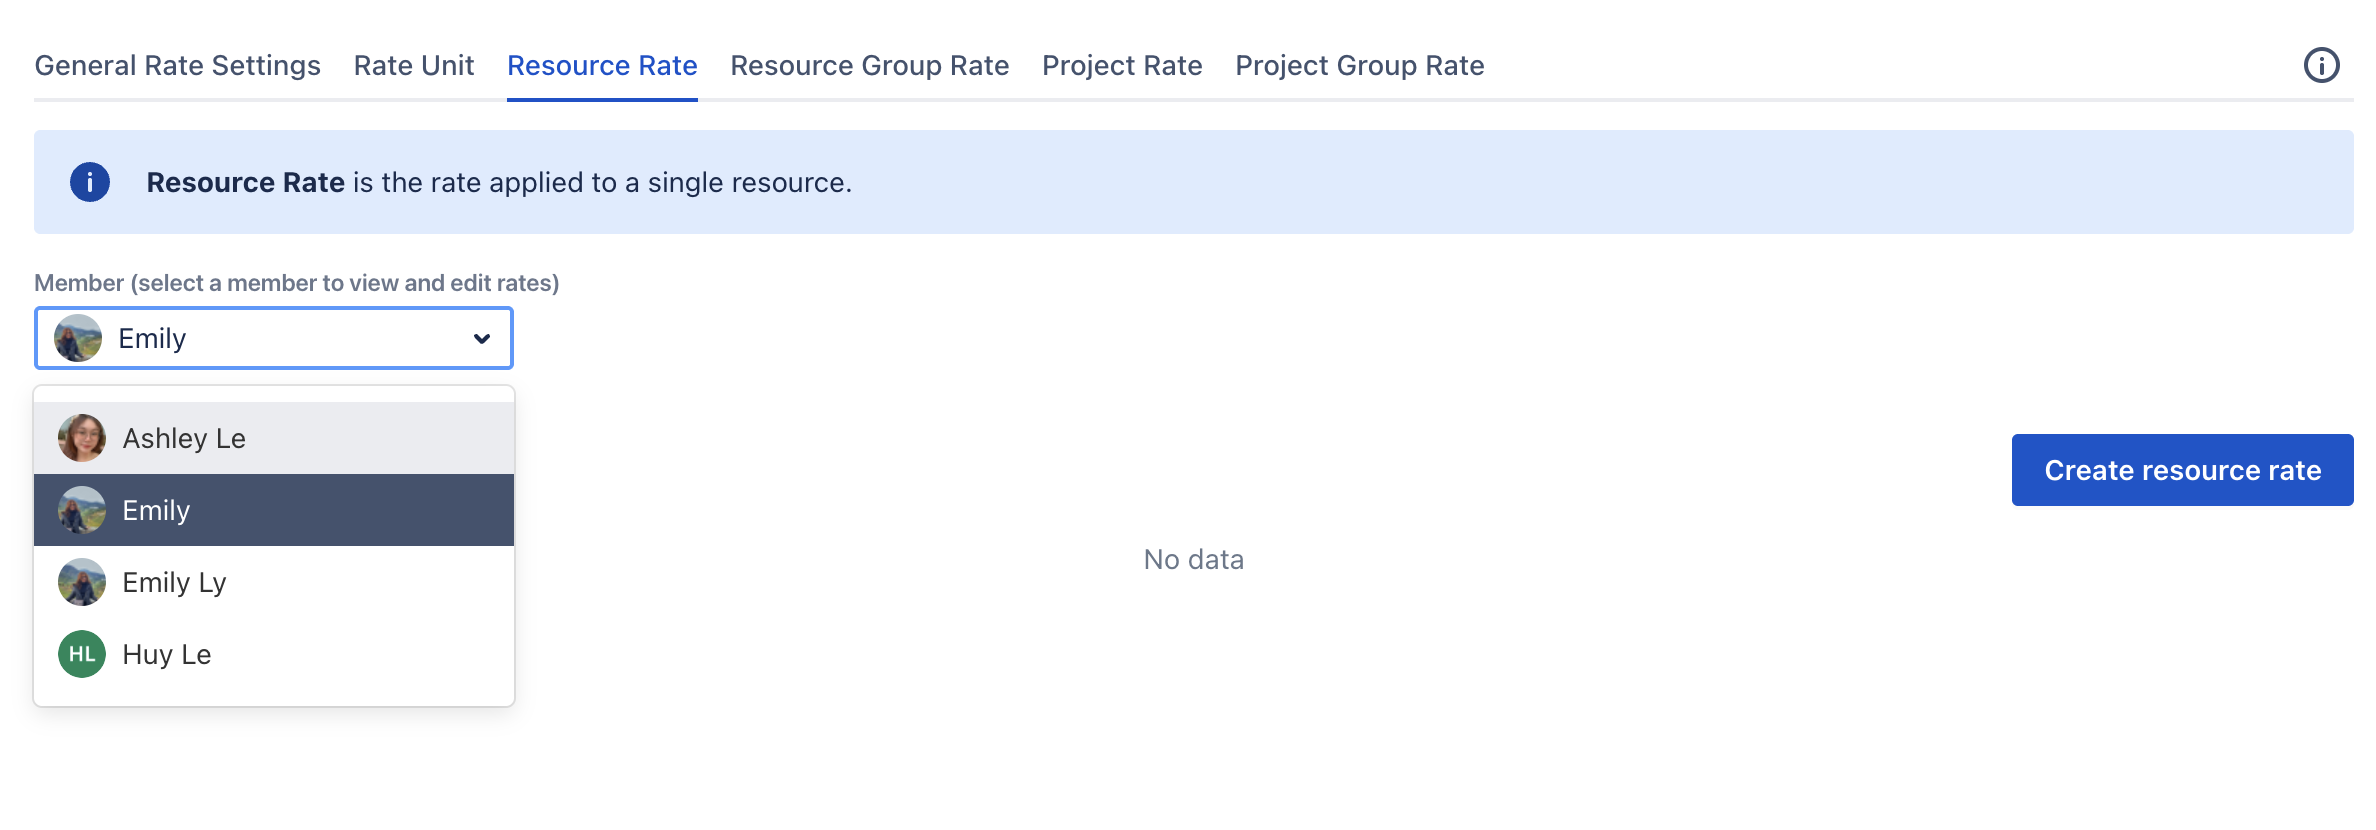
You’ll see a form to enter rate details.
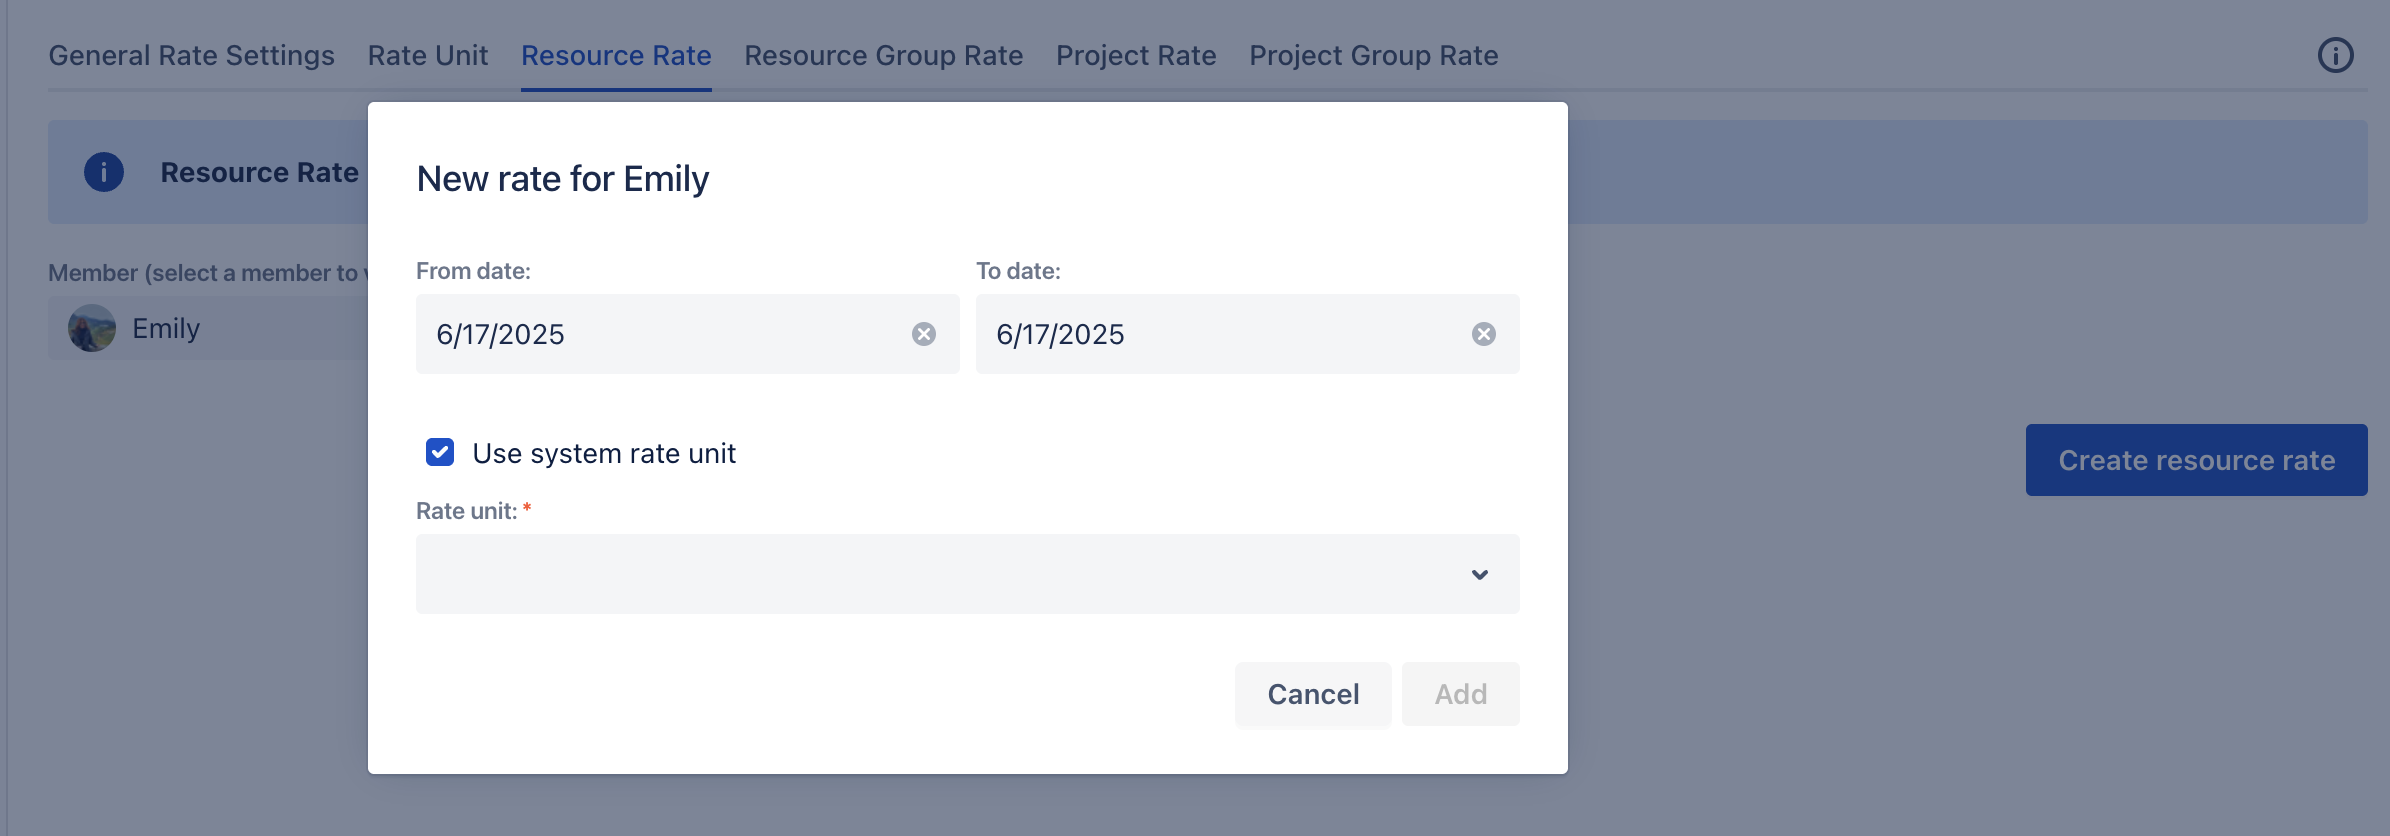
-
Set the date range the rate should apply to.
-
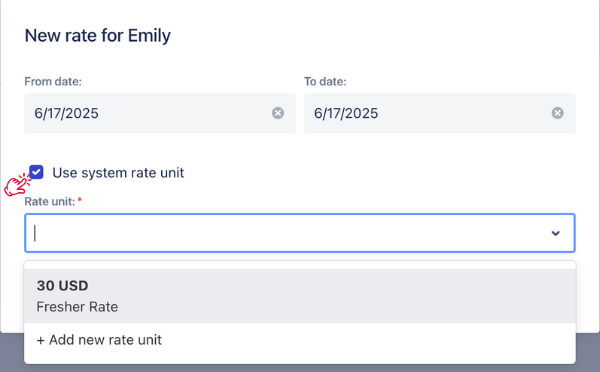
Check/uncheck the

✅ Use system rate unit:
Select a rate from the Rate unit dropdown to assign to this member; else, select 
⬜ Don’t use system rate unit:
-
Enter the rate manually in Rate per Hour.
-
Select a Currency from the dropdown.
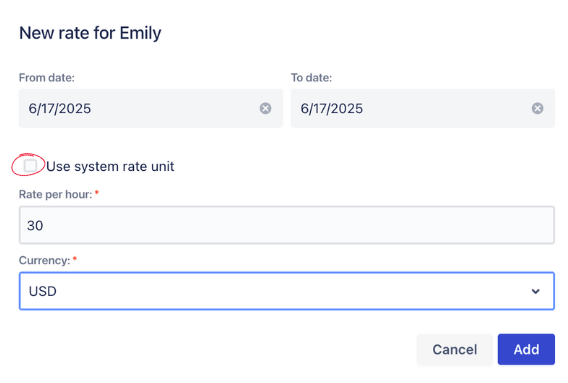
-
Click