.png)
Only users with Jira Admin and App Admin roles can access and manage Date Mapping.
What Is Date Mapping? Date Mapping in TimePlanner allows you to automatically sync the task’s start and end dates between Jira and TimePlanner. This ensures that when you plan the start and end dates of a task in TimePlanner, they are reflected in Jira, and vice versa, making it easier to manage project timelines across both platforms.
How it works:
-
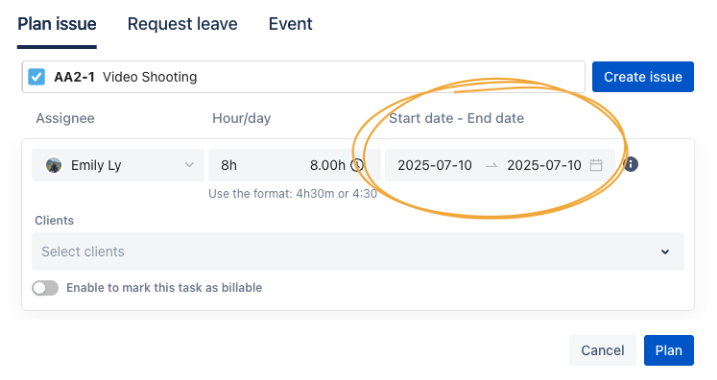
Plan in TimePlanner: When you set the start and end dates in TimePlanner, they are automatically synced to the corresponding date fields in Jira.
-
Plan in Jira: When you set the start date or end date in Jira, those changes are reflected in TimePlanner.
TimePlanner supports mapping for fields in Jira with the field types Date Picker or Date & Time Picker.
What Are Date Fields in TimePlanner?
In TimePlanner, the primary date fields you will interact with are:
-
Start Date: This is the date when the task is planned to begin.
-
End Date: This is the date when the task is planned to be completed.
These date fields are used for scheduling and tracking task timelines within TimePlanner.
Before You Proceed:
-
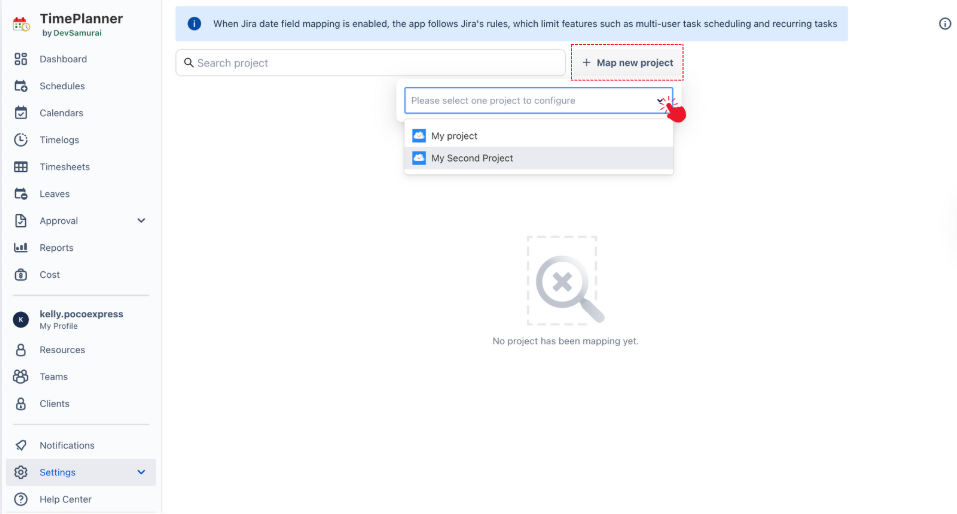
Mapping Date Fields will limit TimePlanner’s advanced features:
When mapping date fields to Jira fields, TimePlanner follows Jira’s specifications. As a result, some advanced features are not supported, including:-
Planning one task for multiple assignees
-
Assigning the same task multiple times
-
Creating recurring tasks
-
-
Ensure Jira Field Availability:
Before you map Jira date fields to TimePlanner, ensure that your desired Jira fields (e.g., Start Date or End Date) are already available in your Jira project or issue type.
How to Map Jira Date Fields in TimePlanner
To get started with mapping Jira date fields, go to the ⚙️ Settings in the left-side menu to find and click on ![]()

-
Add Jira Projects and Enable the Mapping Dates Function
-
Click the

-
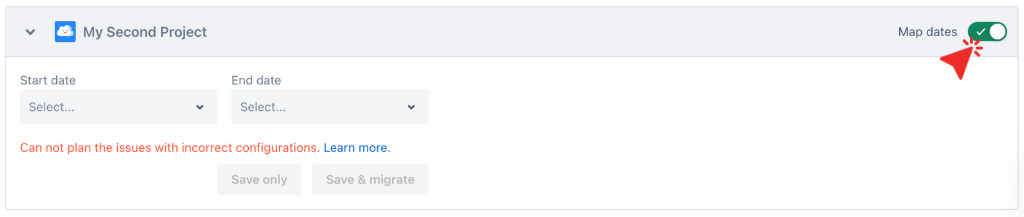
Toggle the

-
-
Choose the Jira date fields you wish to map to the Start Date and End Date fields in TimePlanner.

Warning:
If a red cross (❌) appears next to any field, it means that the selected field does not exist for that issue type in your project configuration. As a result, TimePlanner cannot map the fields to your Jira fields.
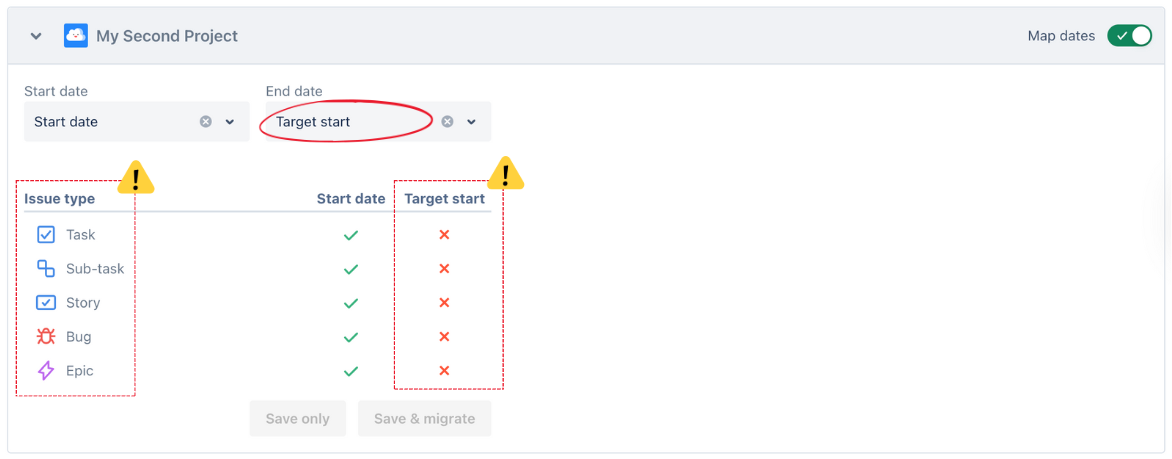
=> You will need to reconfigure your Jira project to make sure that your desired Jira fields are already available in your issue type.
For troubleshooting steps, read this: How to add date fields to your Jira Projects.
-
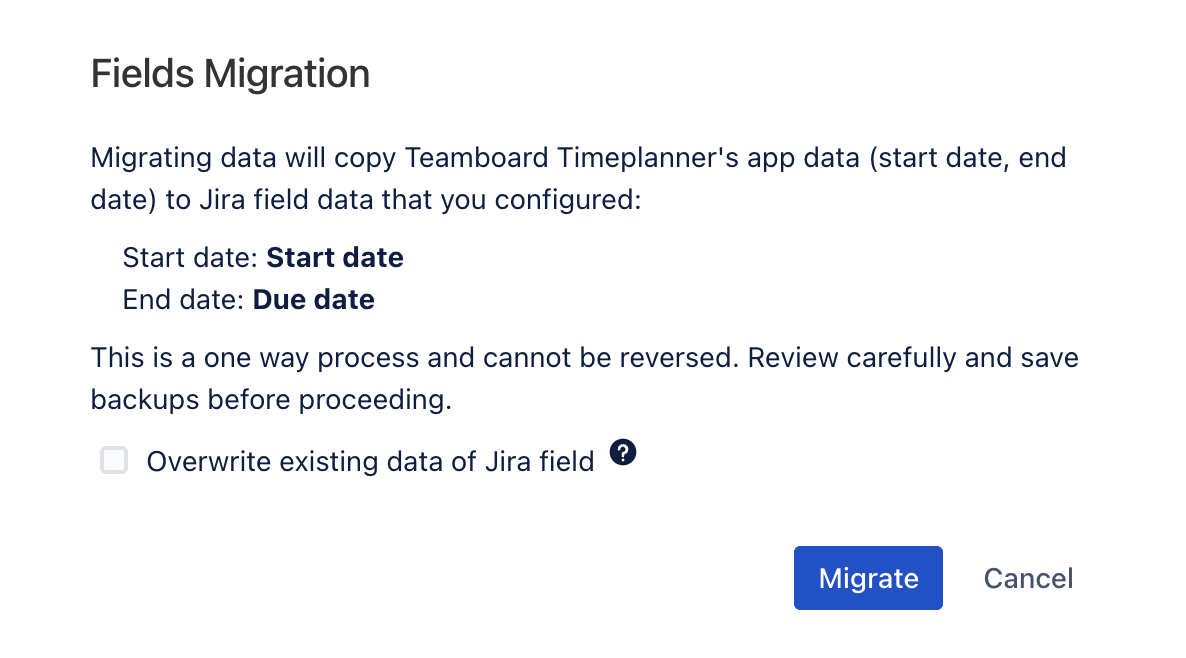
Finish Mapping
There are 2 options to complete the mapping:
-

-