.png)
Only users with App Admin role can make changes to the Holiday Calendar settings.
What is Holiday Calendar? The Holiday Calendar in TimePlanner lets you manage holidays for your team based on location, religion, or company policy. You can assign different calendars to different groups of people.
How to Set Up Holiday Calendar
Navigate to ⚙️ Settings → ![]()
1. Create a New Holiday Calendar
-
To create a new calendar, click

-
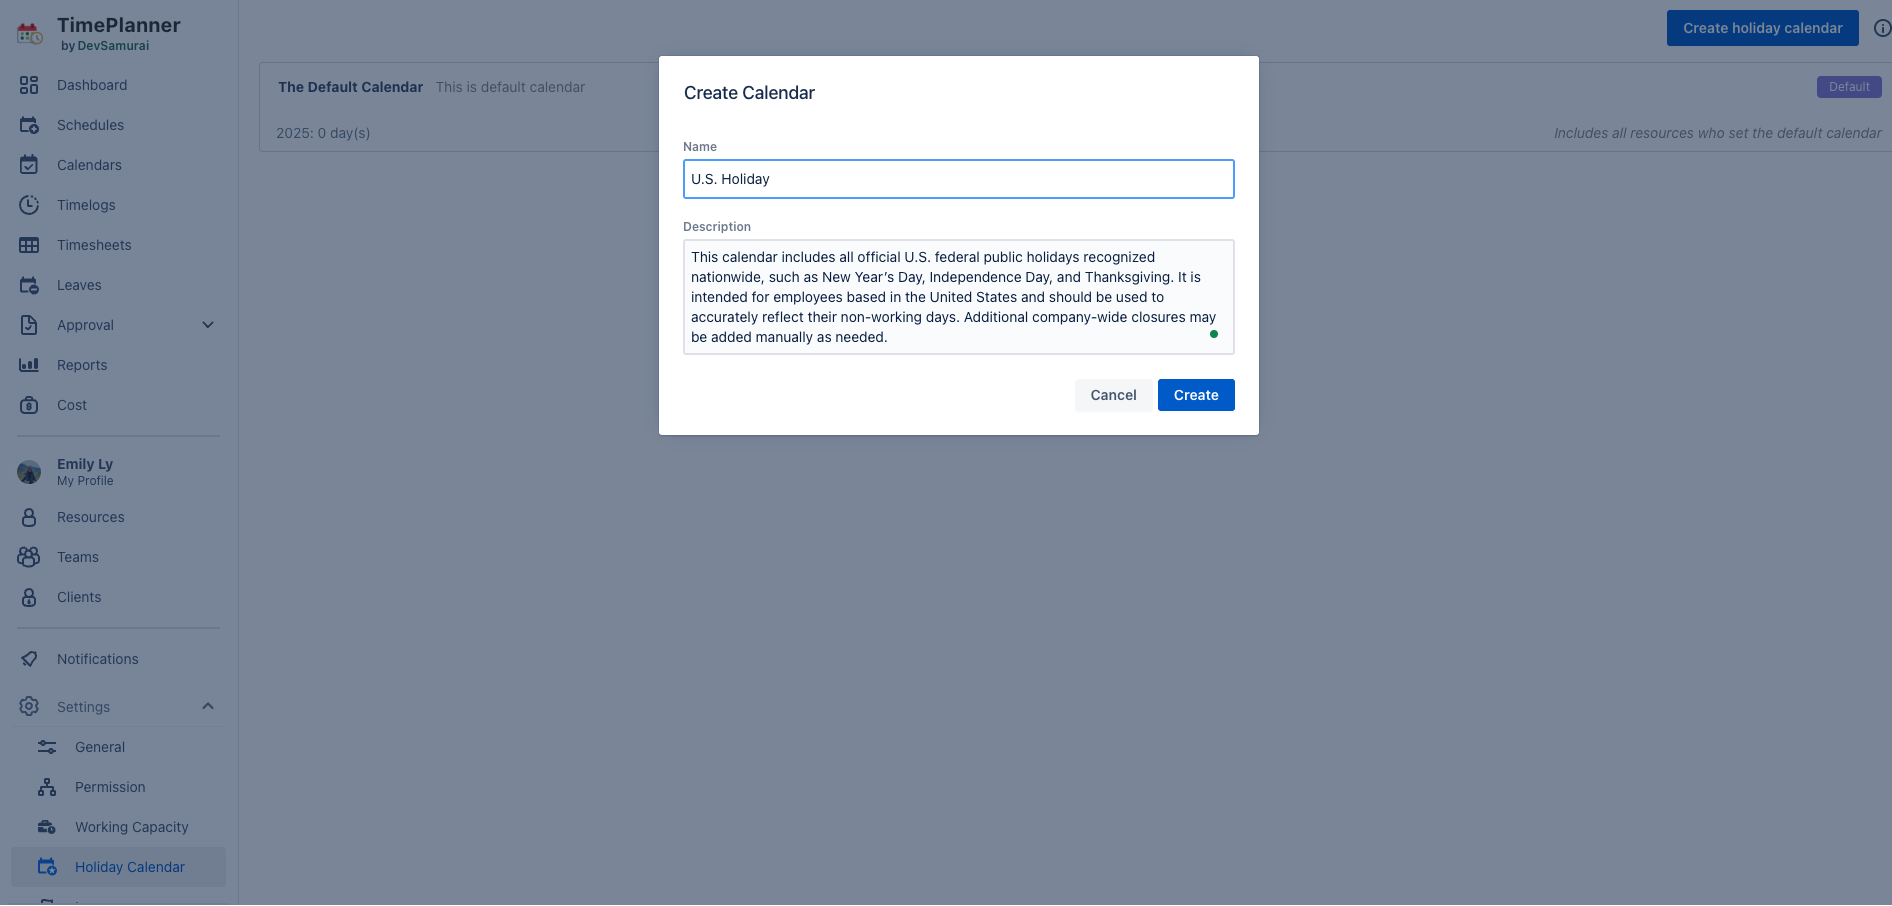
Enter Name and Description for the new holiday calendar.
-
Click

To view or edit a holiday calendar, hover over the calendar row and click the down arrow icon ![]()
2. Populate Holidays
There are two ways to add holidays to a calendar: Add Holidays Manually or Import Official Holidays.
Approach 1: Add Holidays Manually
-
Use this method to enter custom dates not included in official lists.
-
Steps:
-
Expand the desired calendar.
-
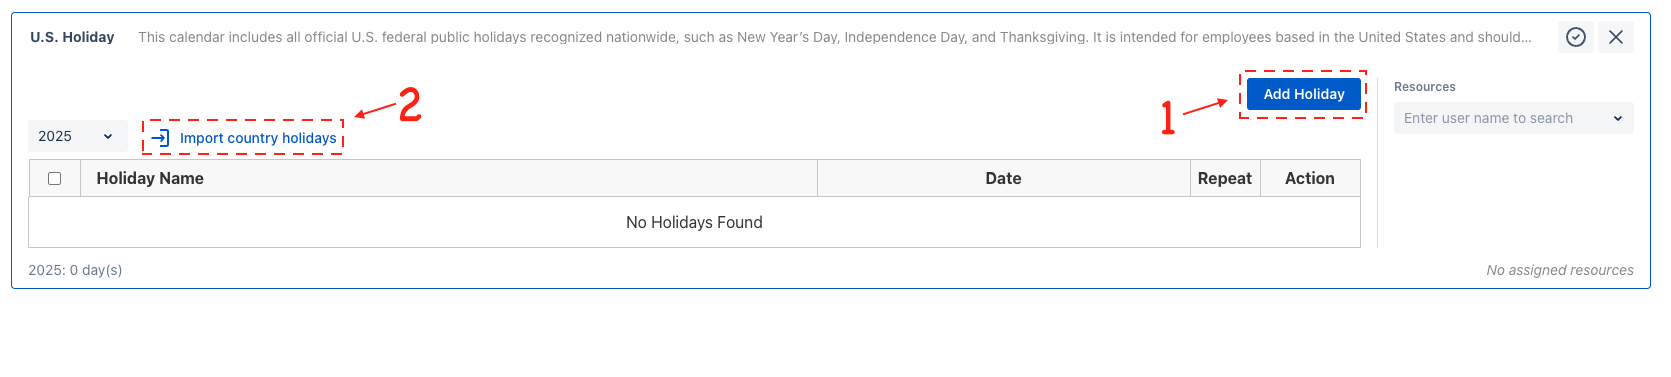
Click

-
Complete the form:
-
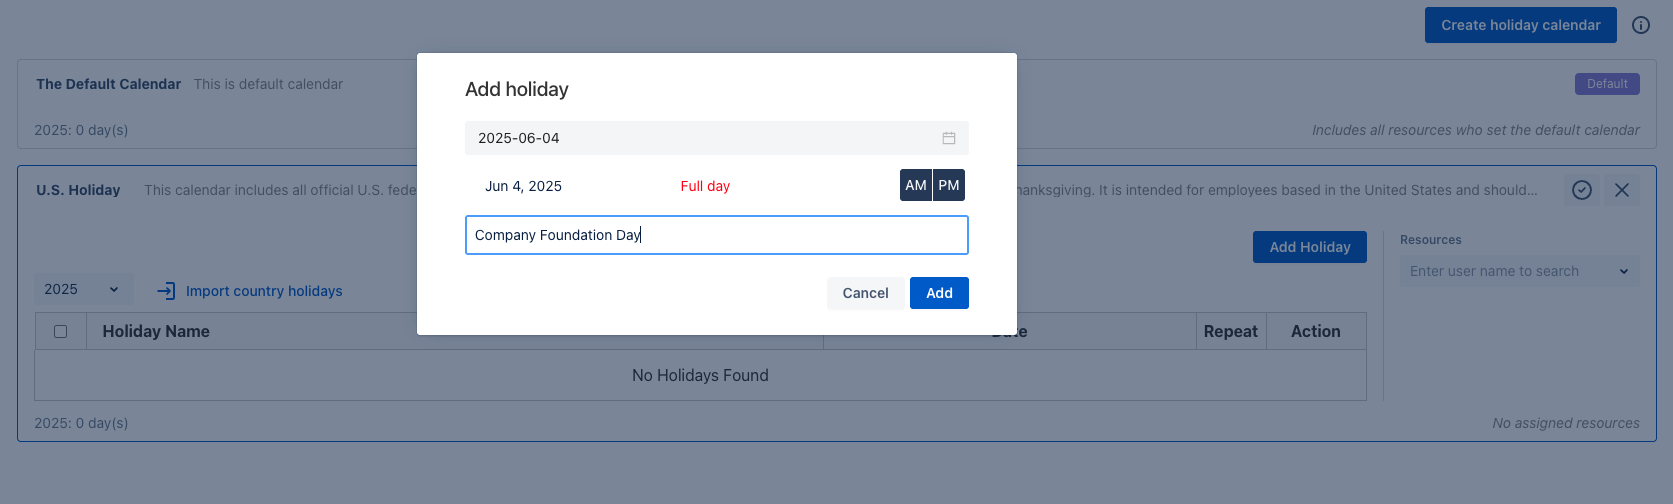
Date: Choose the holiday date.
-
Holiday Name: Provide a clear label (e.g., Company Foundation Day).
-
-
Click

-
Approach 2: Import Official Holidays
-
To save time, you can import a predefined list of holidays by country or religion.
-
Steps:
-
Expand the desired calendar.
-
Click

-
Choose the following:
-
Country: Select the relevant country (e.g., United States).
-
Year: Pick the applicable year.
-
-
Click

-
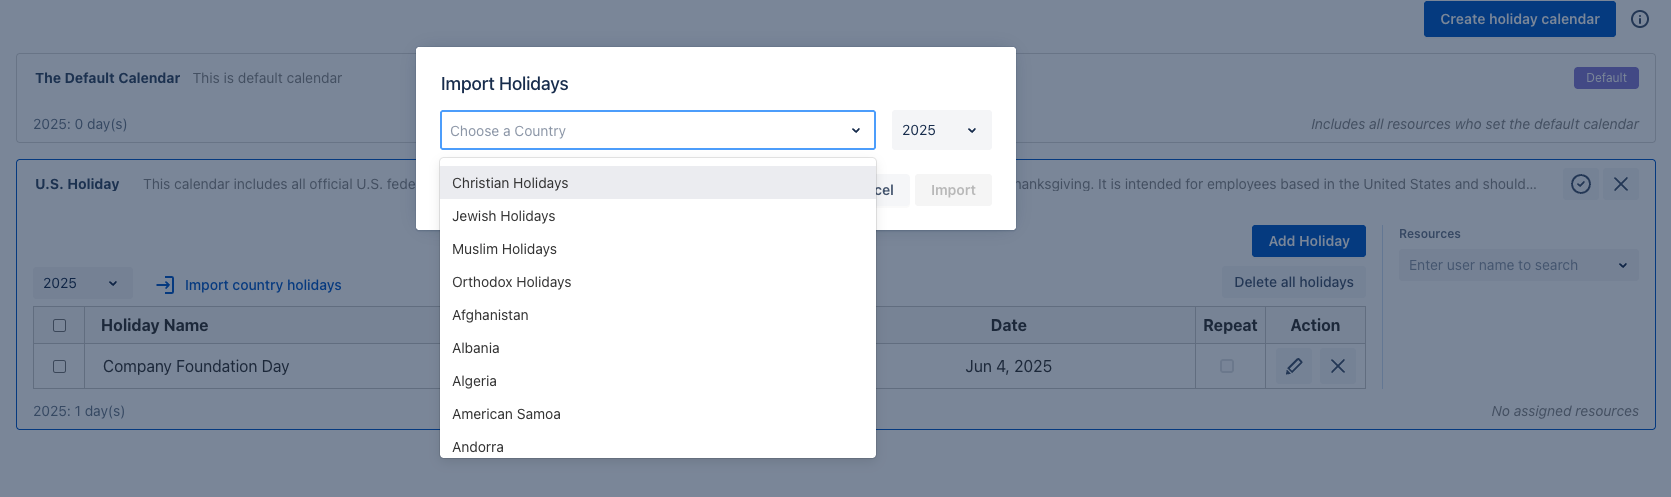
Religious holidays (e.g., Christian, Muslim, Orthodox) can also be imported using the same steps.
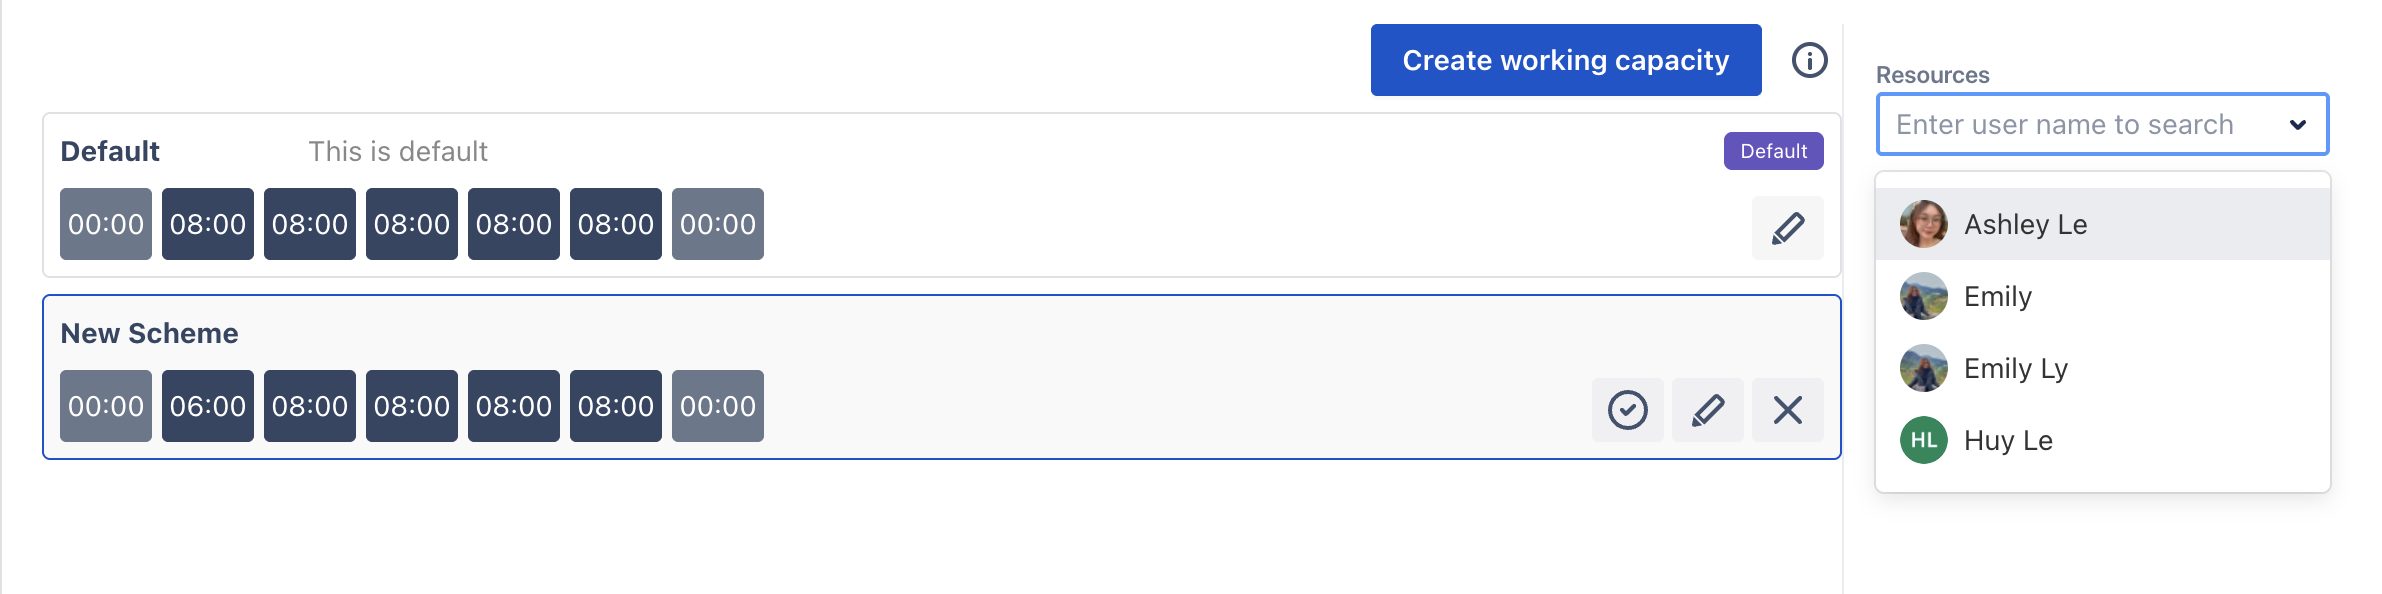
3. Assigning People to a Holiday Calendar
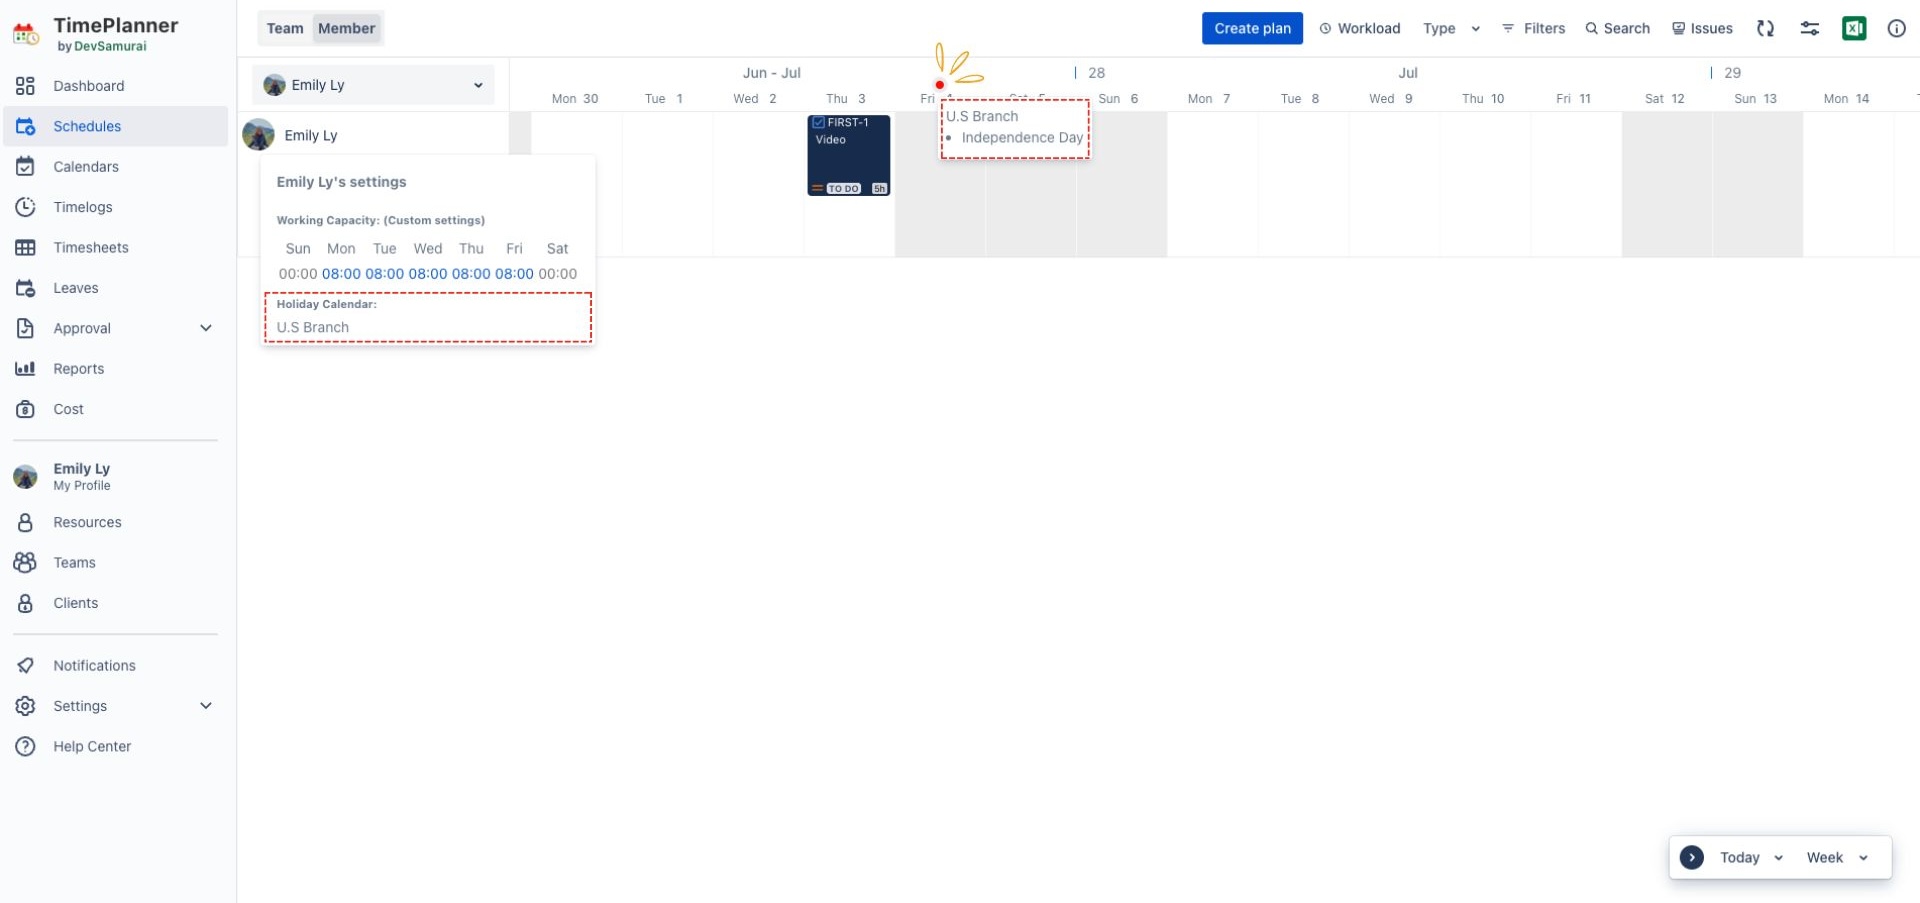
Assigning users to a holiday calendar ensures TimePlanner accurately calculates their availability, work hours, and leave balances.
Steps:
-
Expand the relevant holiday calendar.
-
A search panel labeled Resources will appear on the right.
-
Use the search bar to find and assign users to the calendar.
4. Default Holiday Calendar
The default holiday calendar is applied to all members who are not added to any other calendars.
To mark a calendar as default, simply click on the Set as Default ![]()
