.png)
Only Jira admins have permission to manage Agile Test general settings.
The App General Settings page allows administrators to configure system-level settings that support the overall operation of AgileTest within Jira projects. These settings help ensure that the application runs properly and that testing activities are organized consistently across the projects.
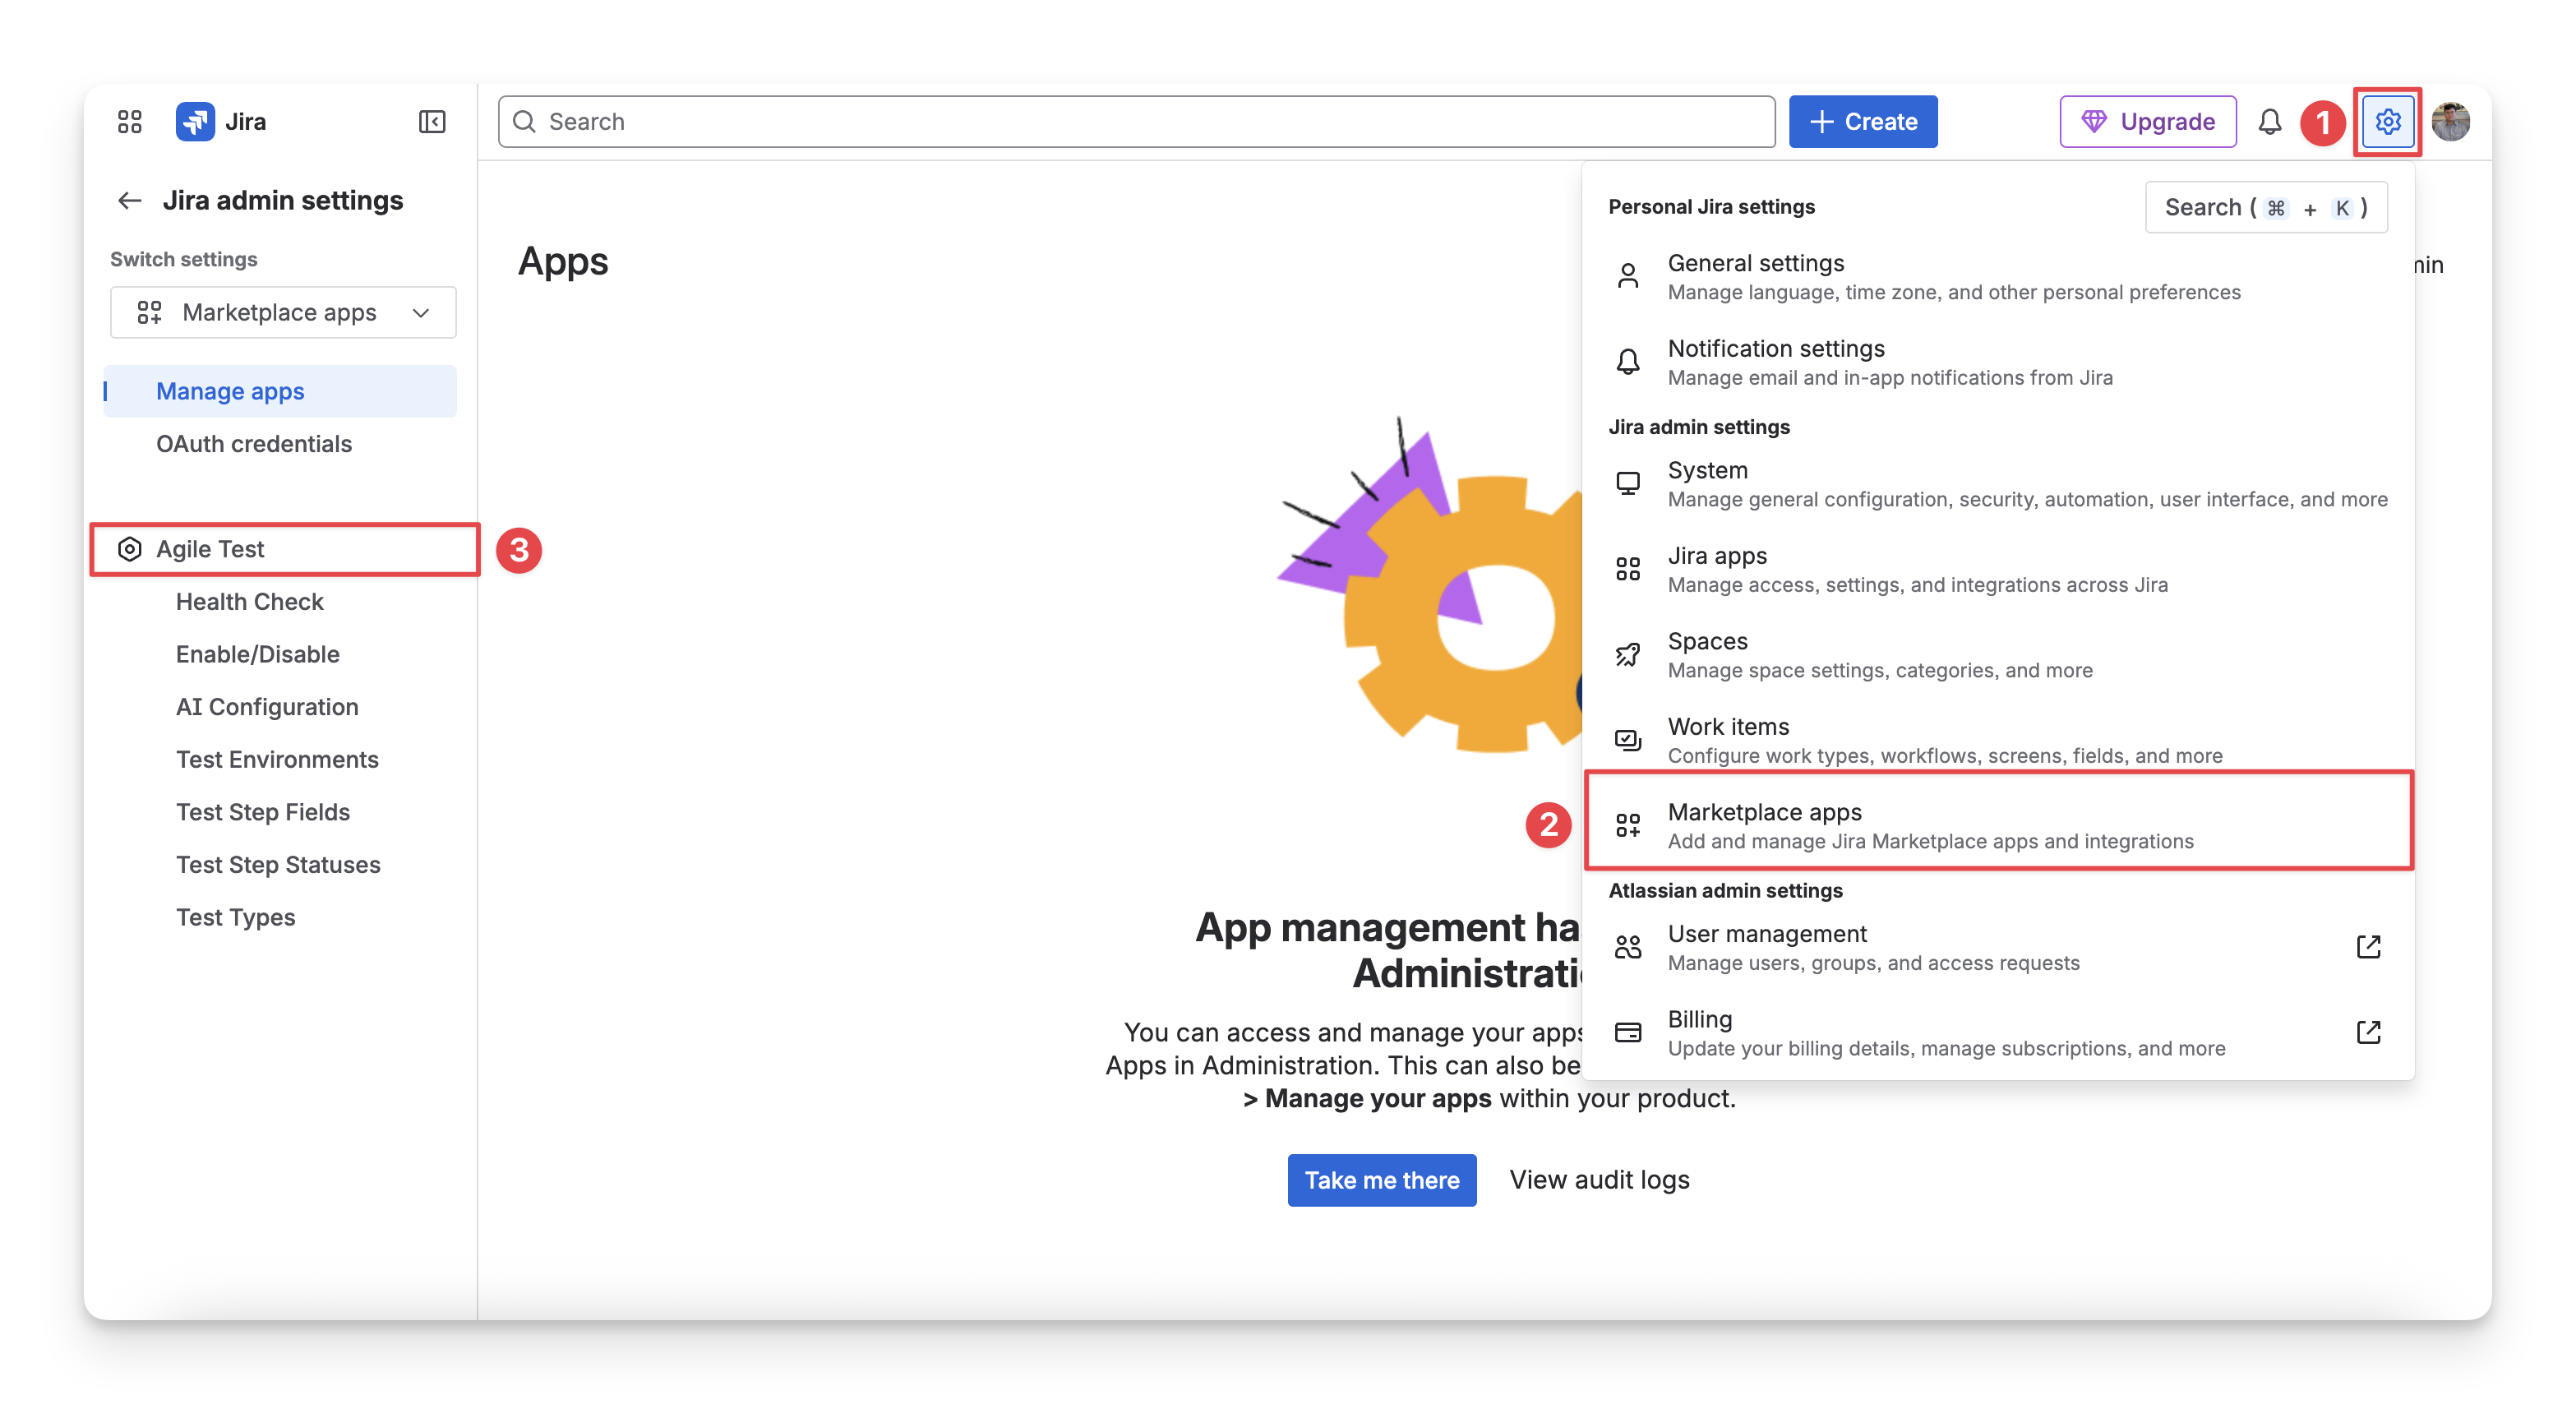
To access App Settings, you can:
-
Select the wheel icon (⚙️) in the top-right corner to open Jira administration.
-
Select Marketplace Apps.
-
Find Agile Test on the left panel.
You can also access this setting from the Global page → Settings.
In this screen, you can navigate across the left-side panel to conduct the following settings:
1. Health Check
The Health Check feature in AgileTest ensures that all necessary configurations are correctly set up in your Jira instance. You can run the Health Check to ensure everything is in place for AgileTest to function smoothly, especially when you:
-
Encounter errors: If AgileTest is not working properly, it might be due to missing or incorrectly initialized entities.
-
Make changes to the configuration: If any settings were accidentally deleted or modified, this could cause issues with AgileTest. Health Check can help confirm if anything is misconfigured.
-
See AgileTest features aren’t working as expected: If certain features are missing or malfunctioning, run a Health Check to verify if all necessary configurations are present.
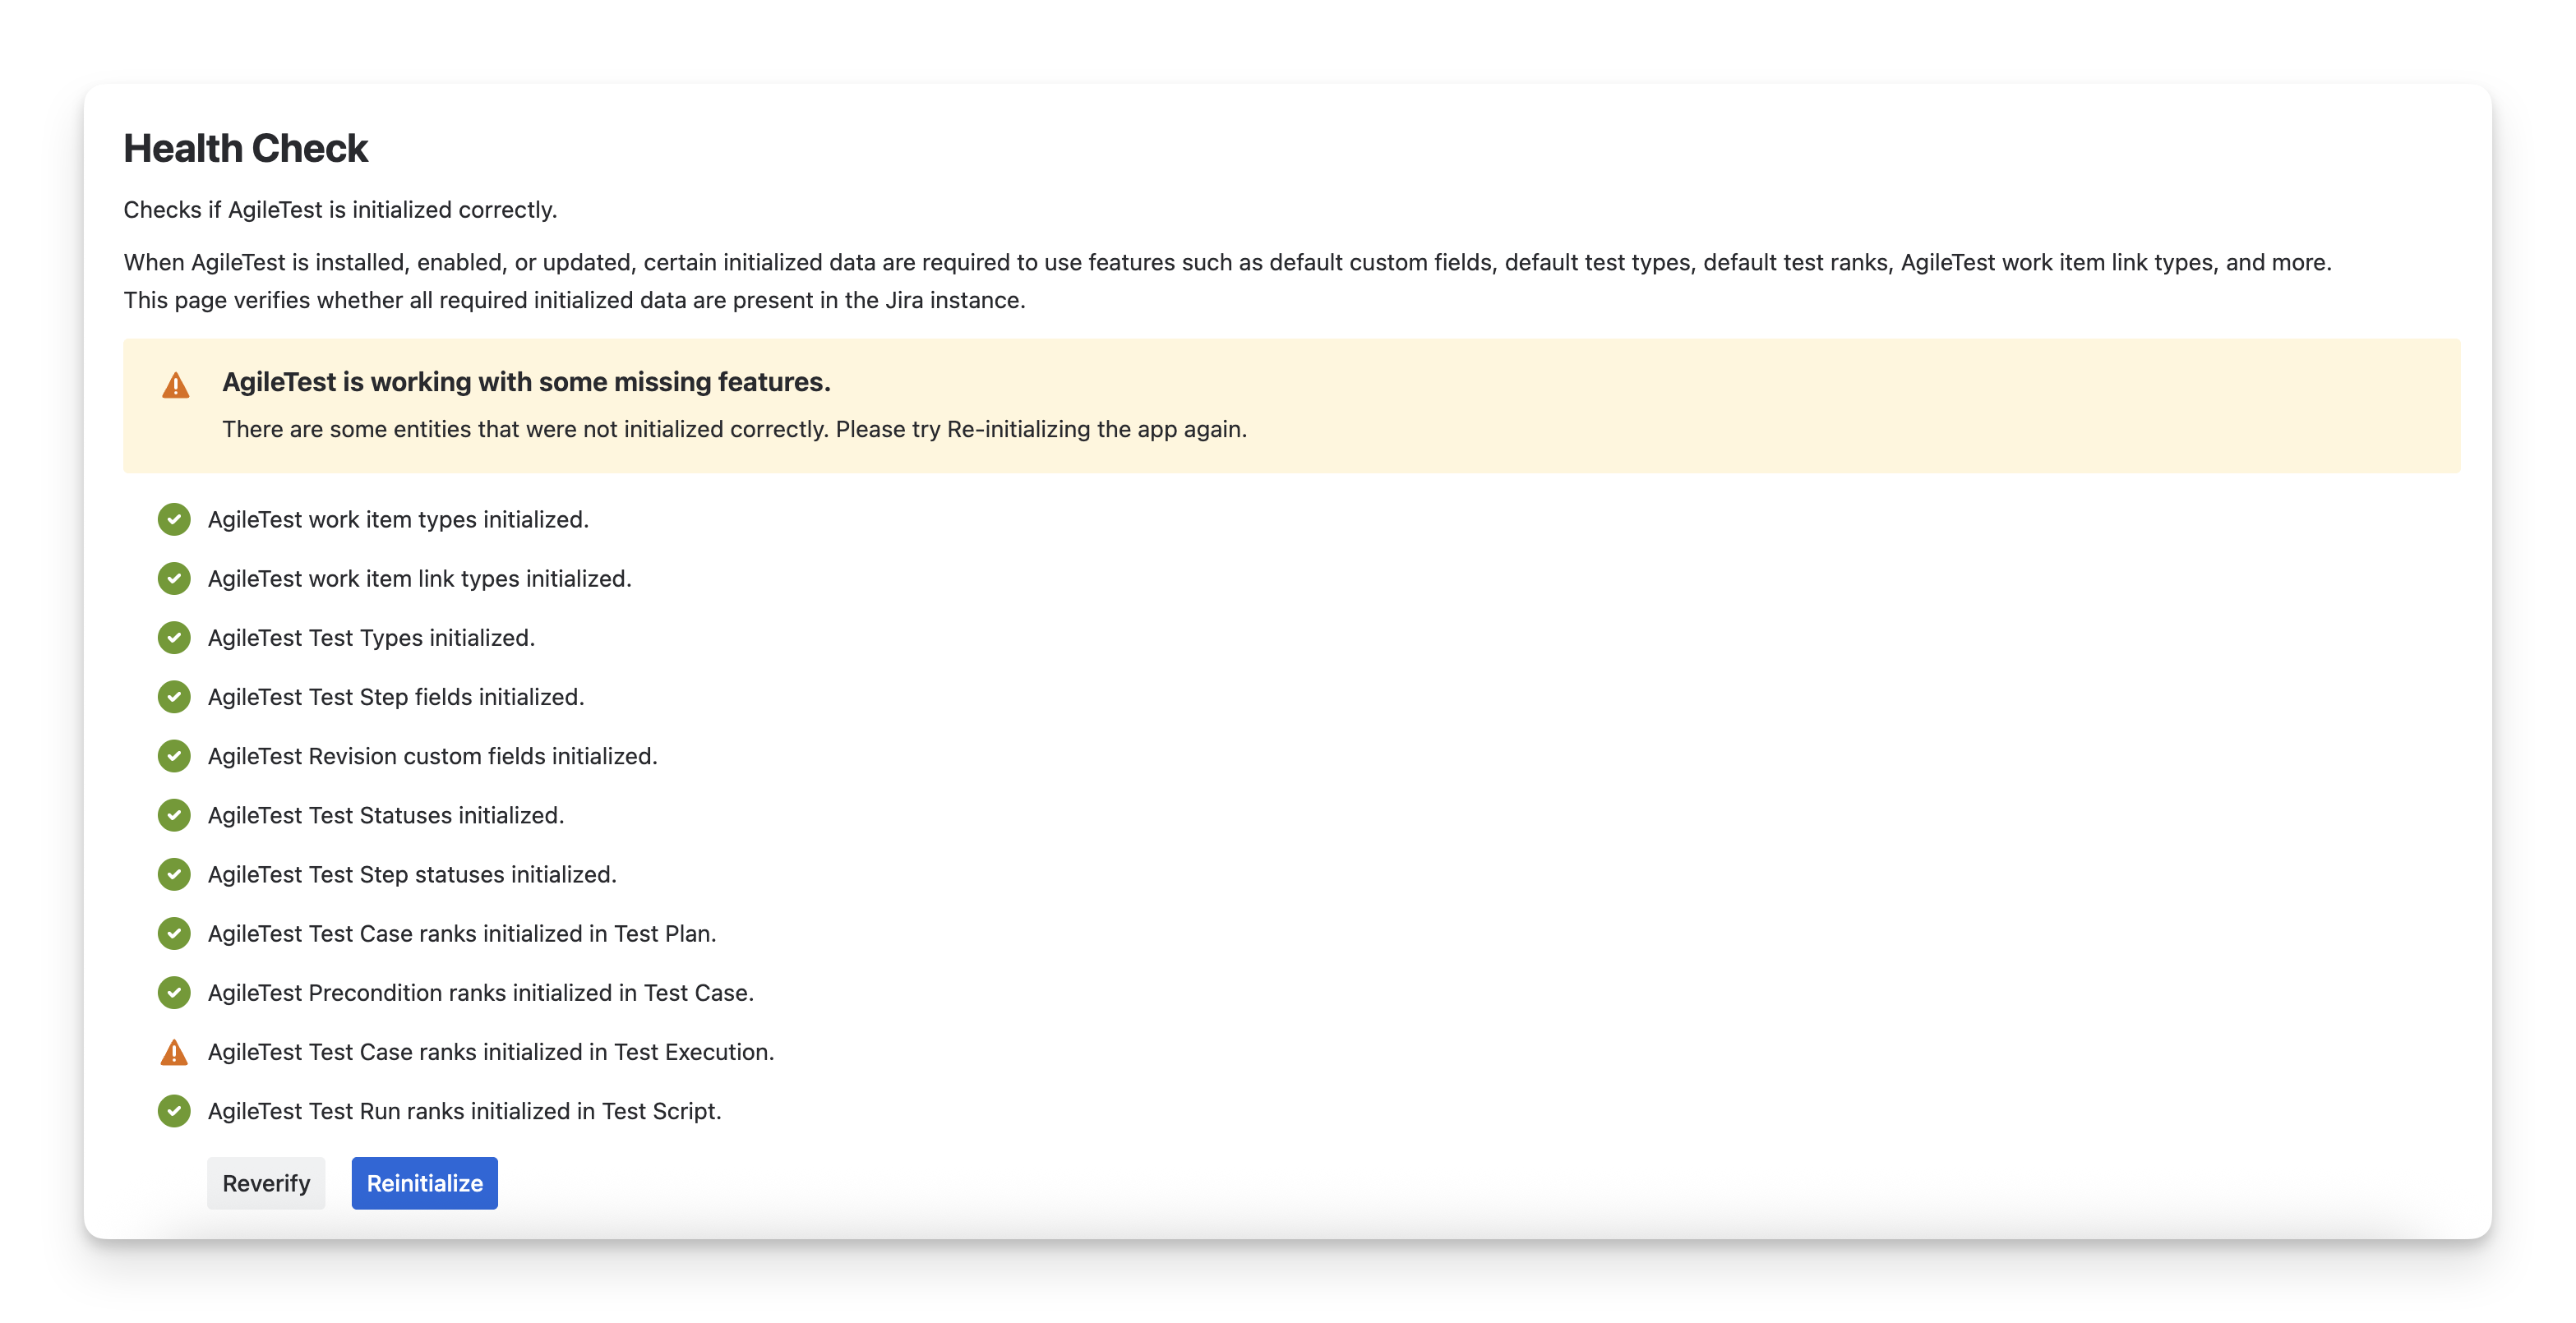
The Health Check feature helps you monitor the following entities:
-
Work Item Types: Make sure test plans, test cases, and other work items are properly configured.
-
Test Types, Test Steps, Test Statuses: Verify that all test configurations are initialized and available for use.
-
Custom Fields & Revision Fields: Ensure that the necessary custom fields for test cases and revisions are initialized correctly.
-
Test Case Ranks and Test Execution: Check that test case ranks and execution statuses are set up correctly.
It will show the status after checking these entities, as follows:
-
✅ - Green Checkmarks: Everything works well! The entity has been initialized correctly.
-
- Orange Warnings: Something’s missing or not initialized properly. This could affect certain features.
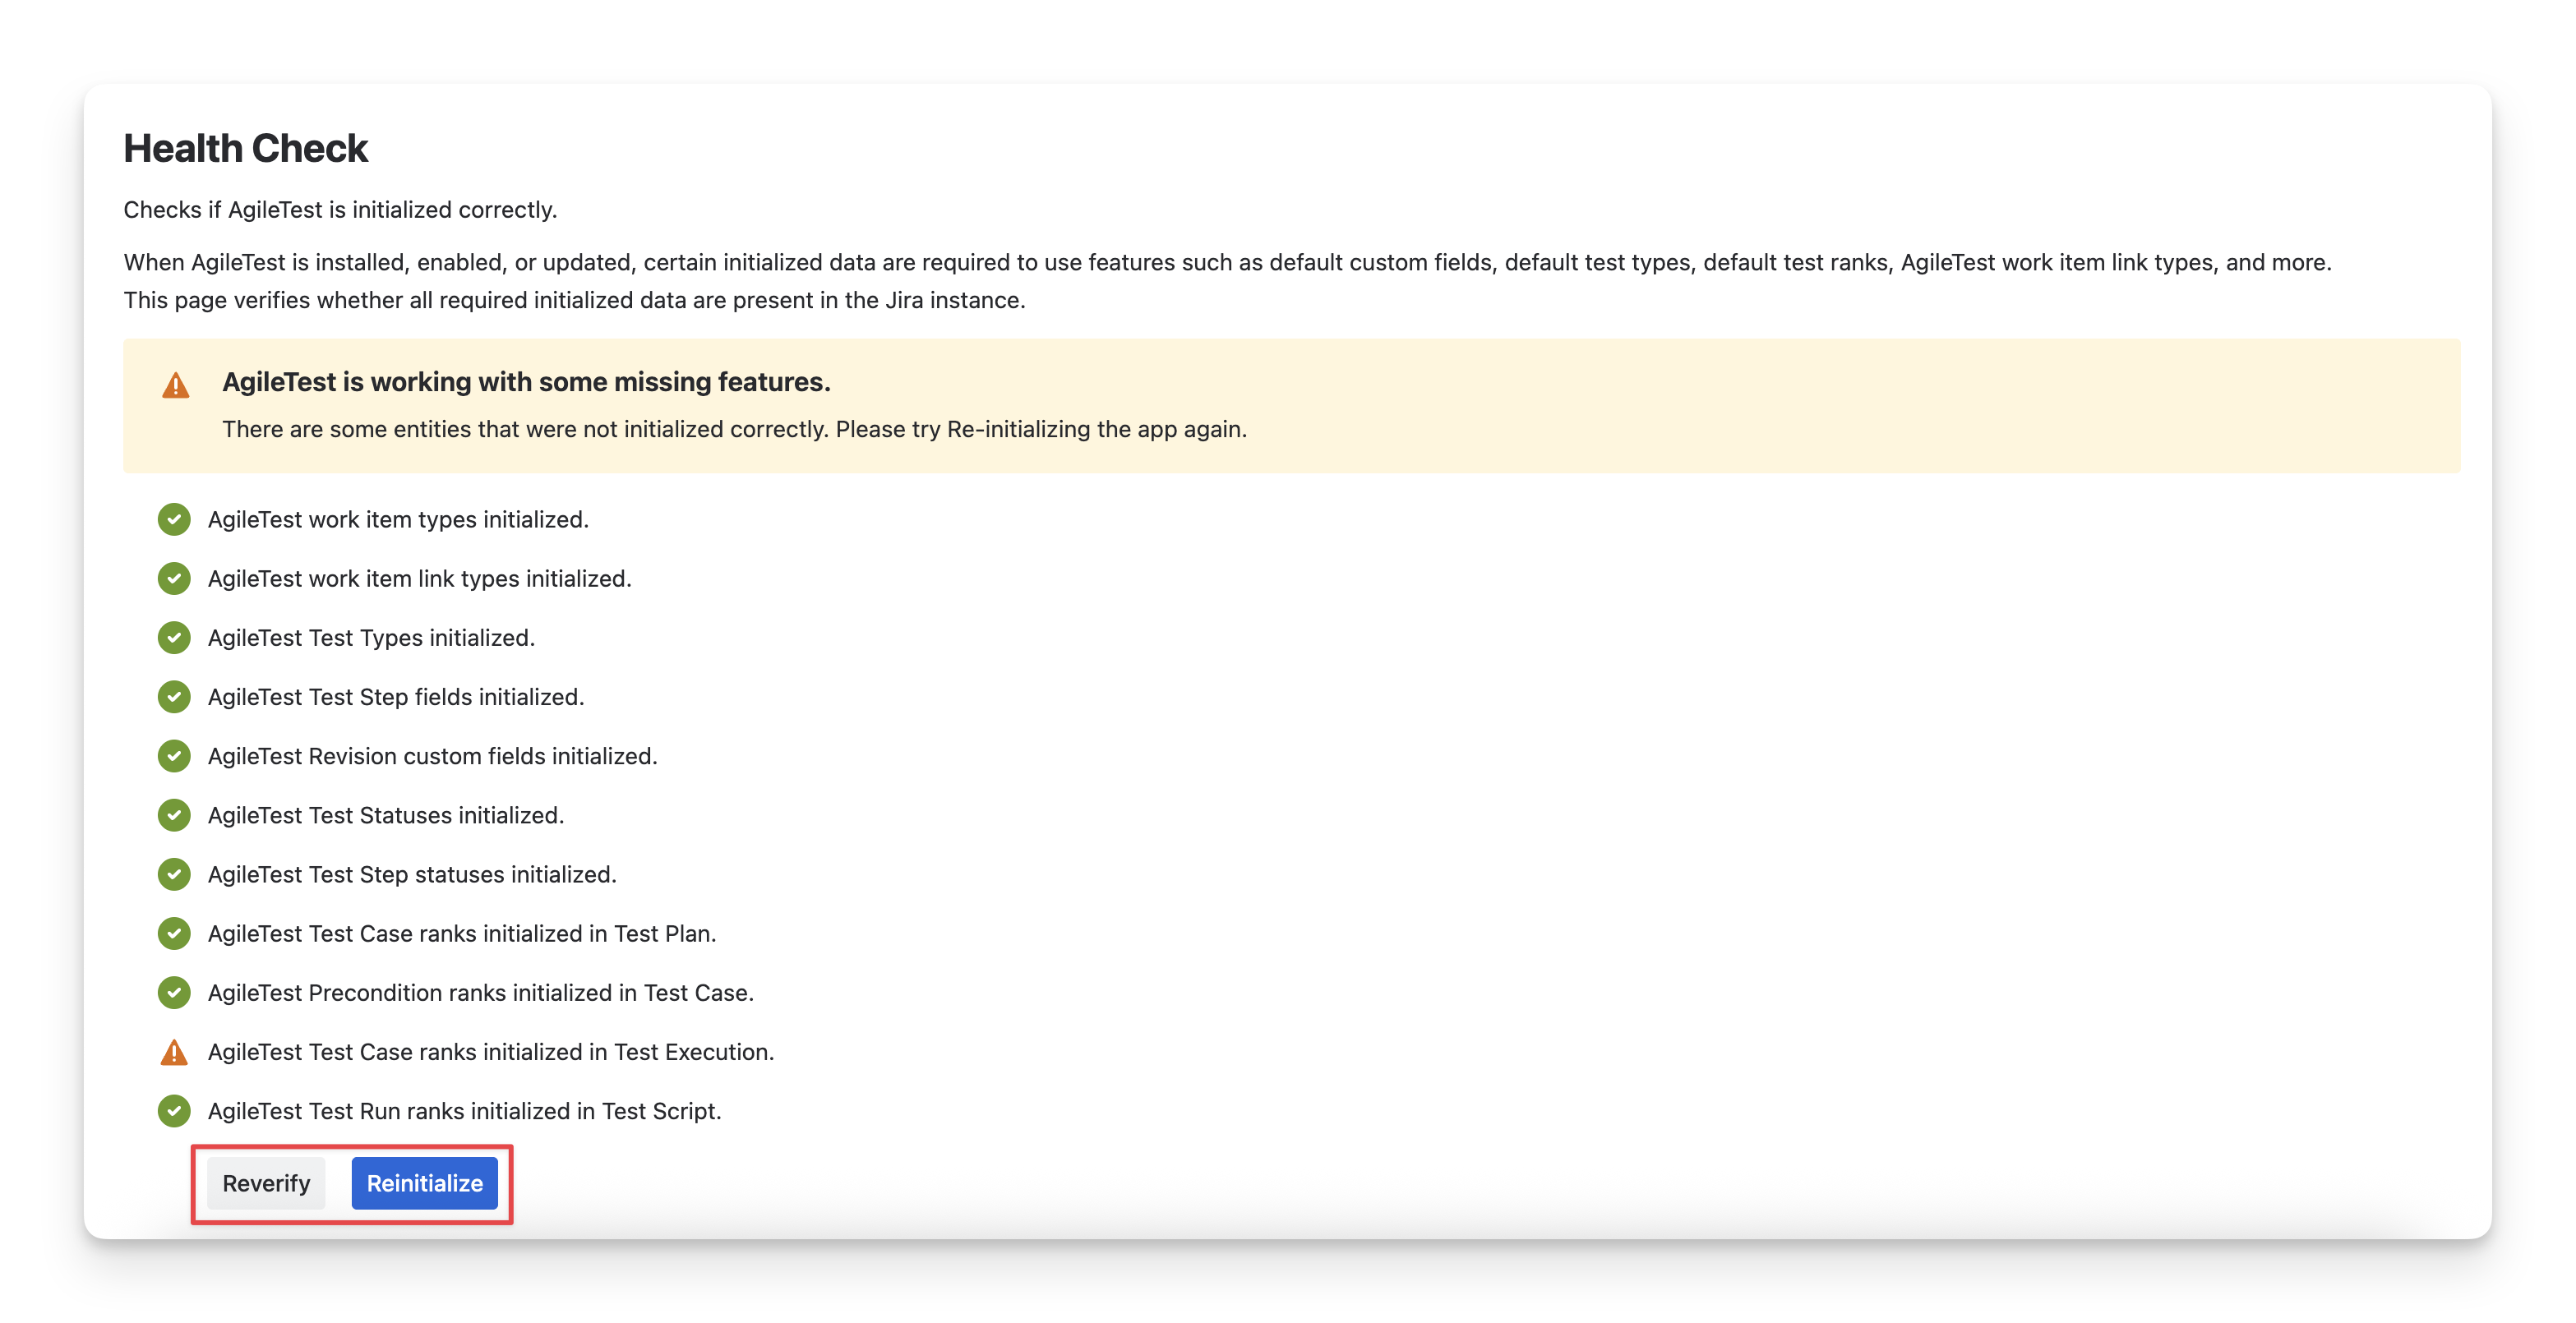
At the bottom of the Health Check screen, you can see 2 buttons:
-
You can click the Reverify button to double-check the initialization status after making changes.
-
You can click the Reinitialize button to restore the missing or
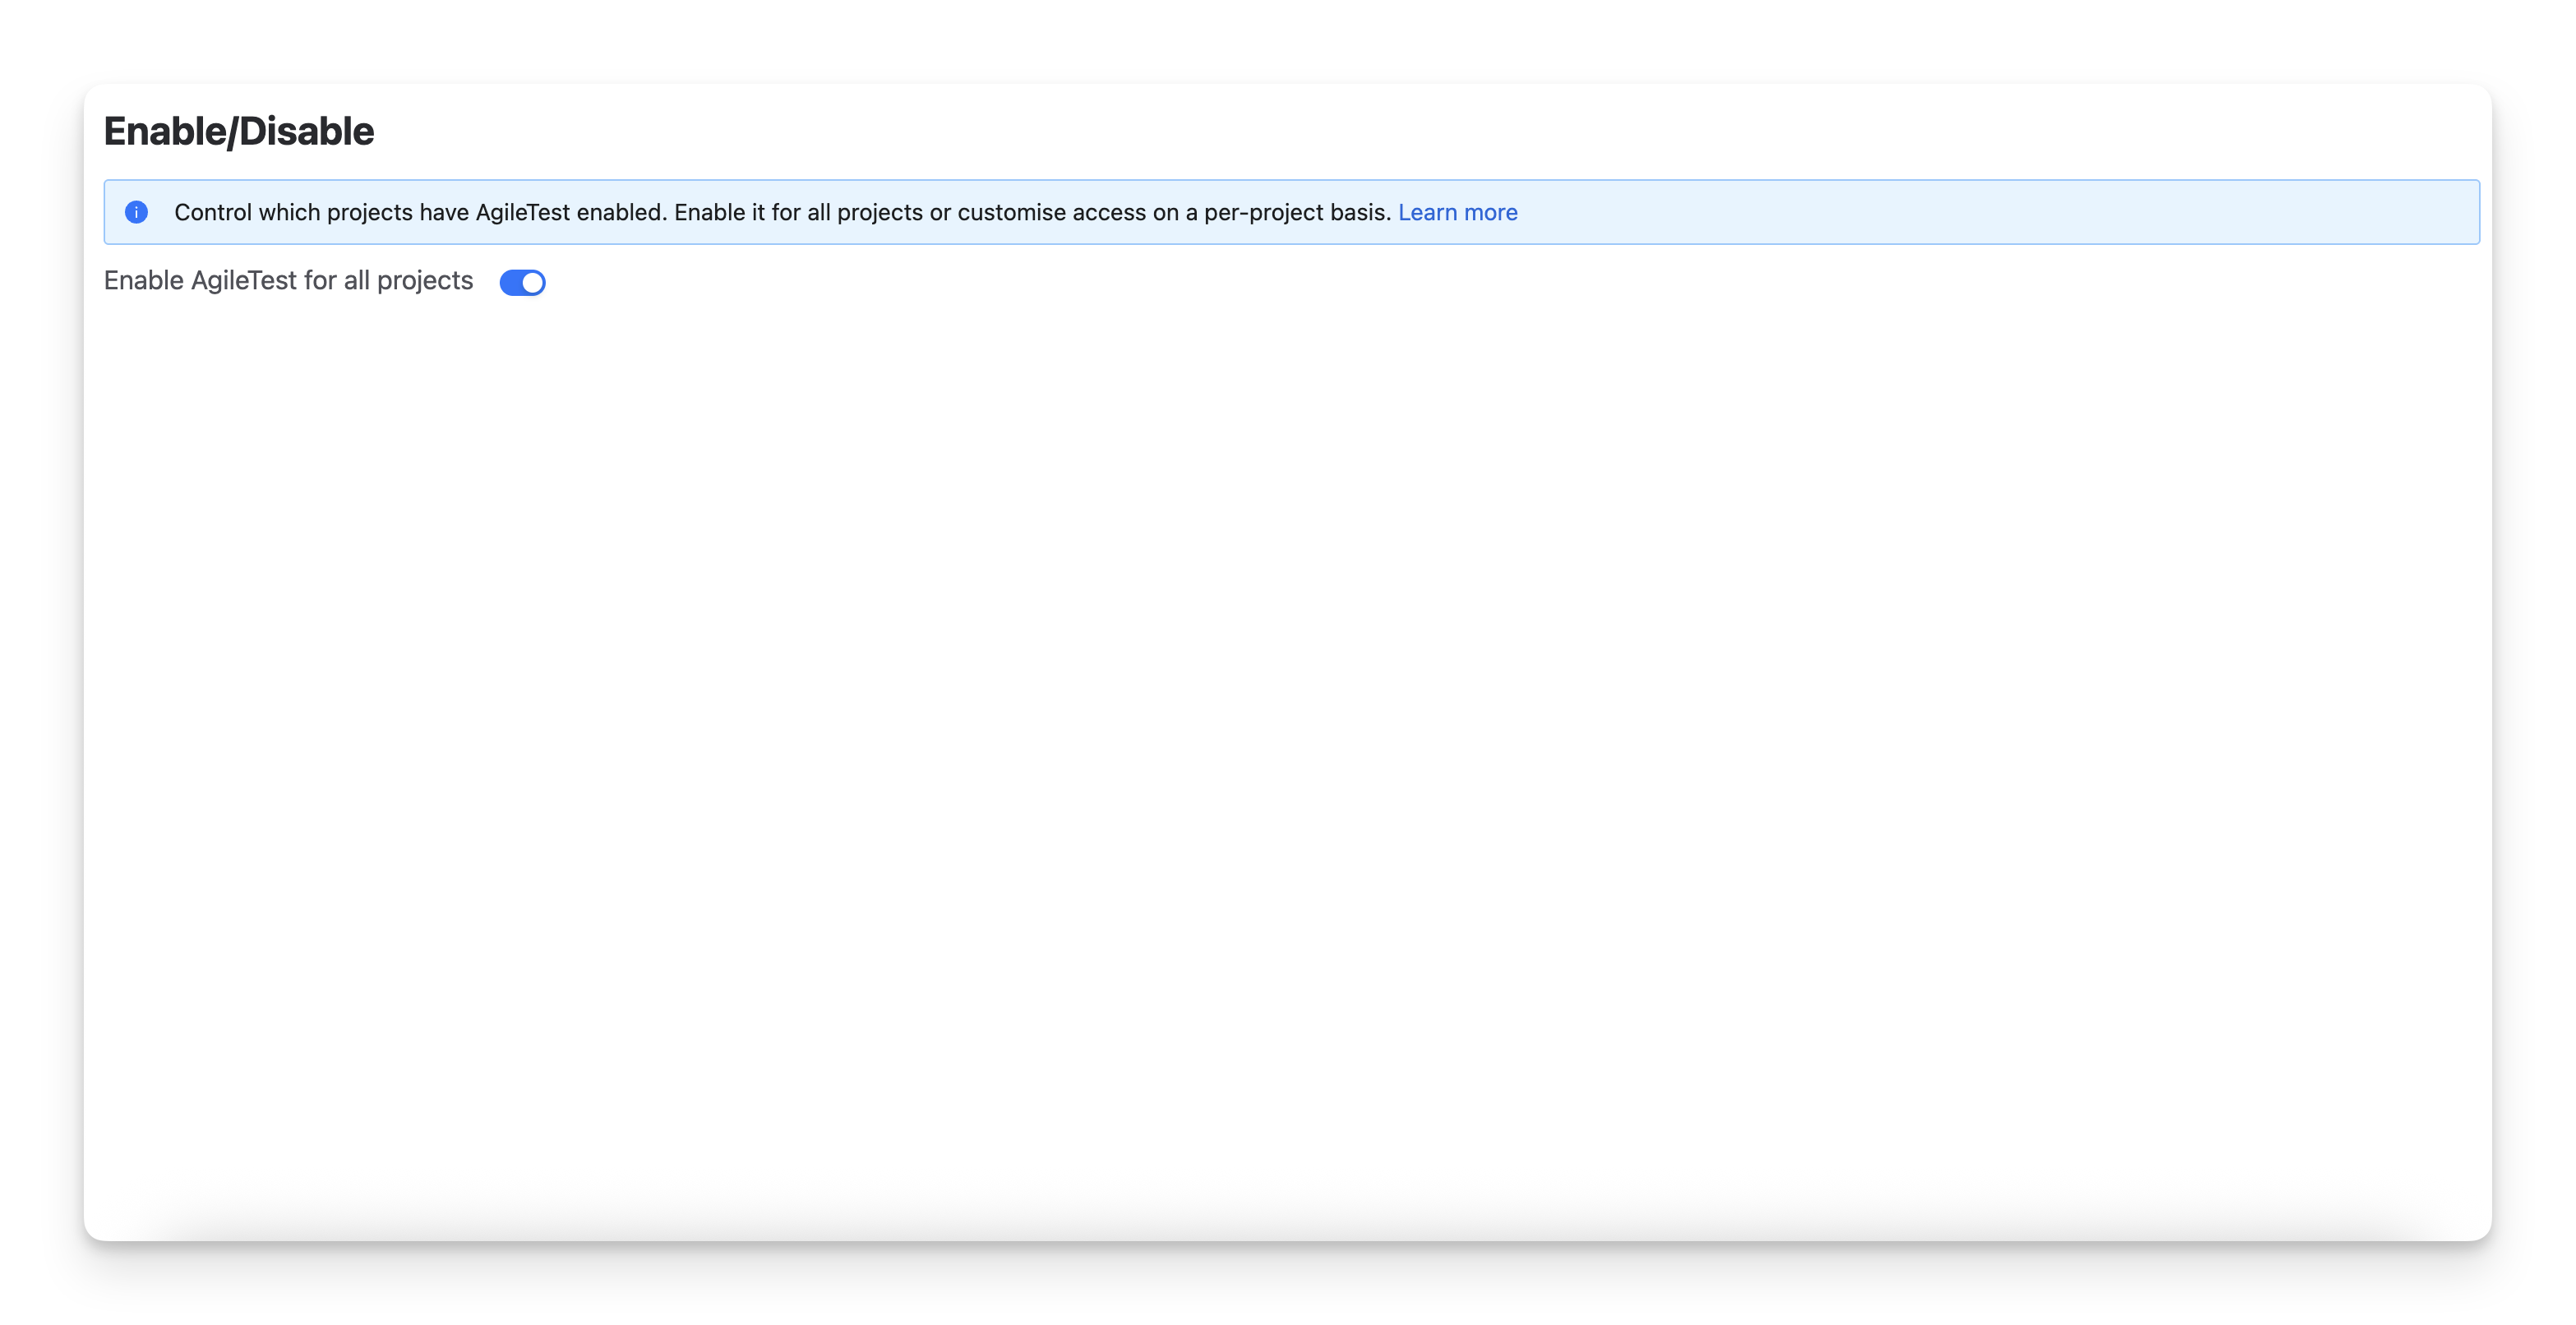
2. Enable AgileTest for Projects
On the Enable/Disable AgileTest, you can activate/deactivate the Agile Test plugin for specific projects. By default, AgileTest is enabled for all projects from your instance.
To disable a specific project, you can:
-
Turn off the “Enable AgileTest for all projects” button.
-
Navigate to the specific projects and uncheck the checkbox.
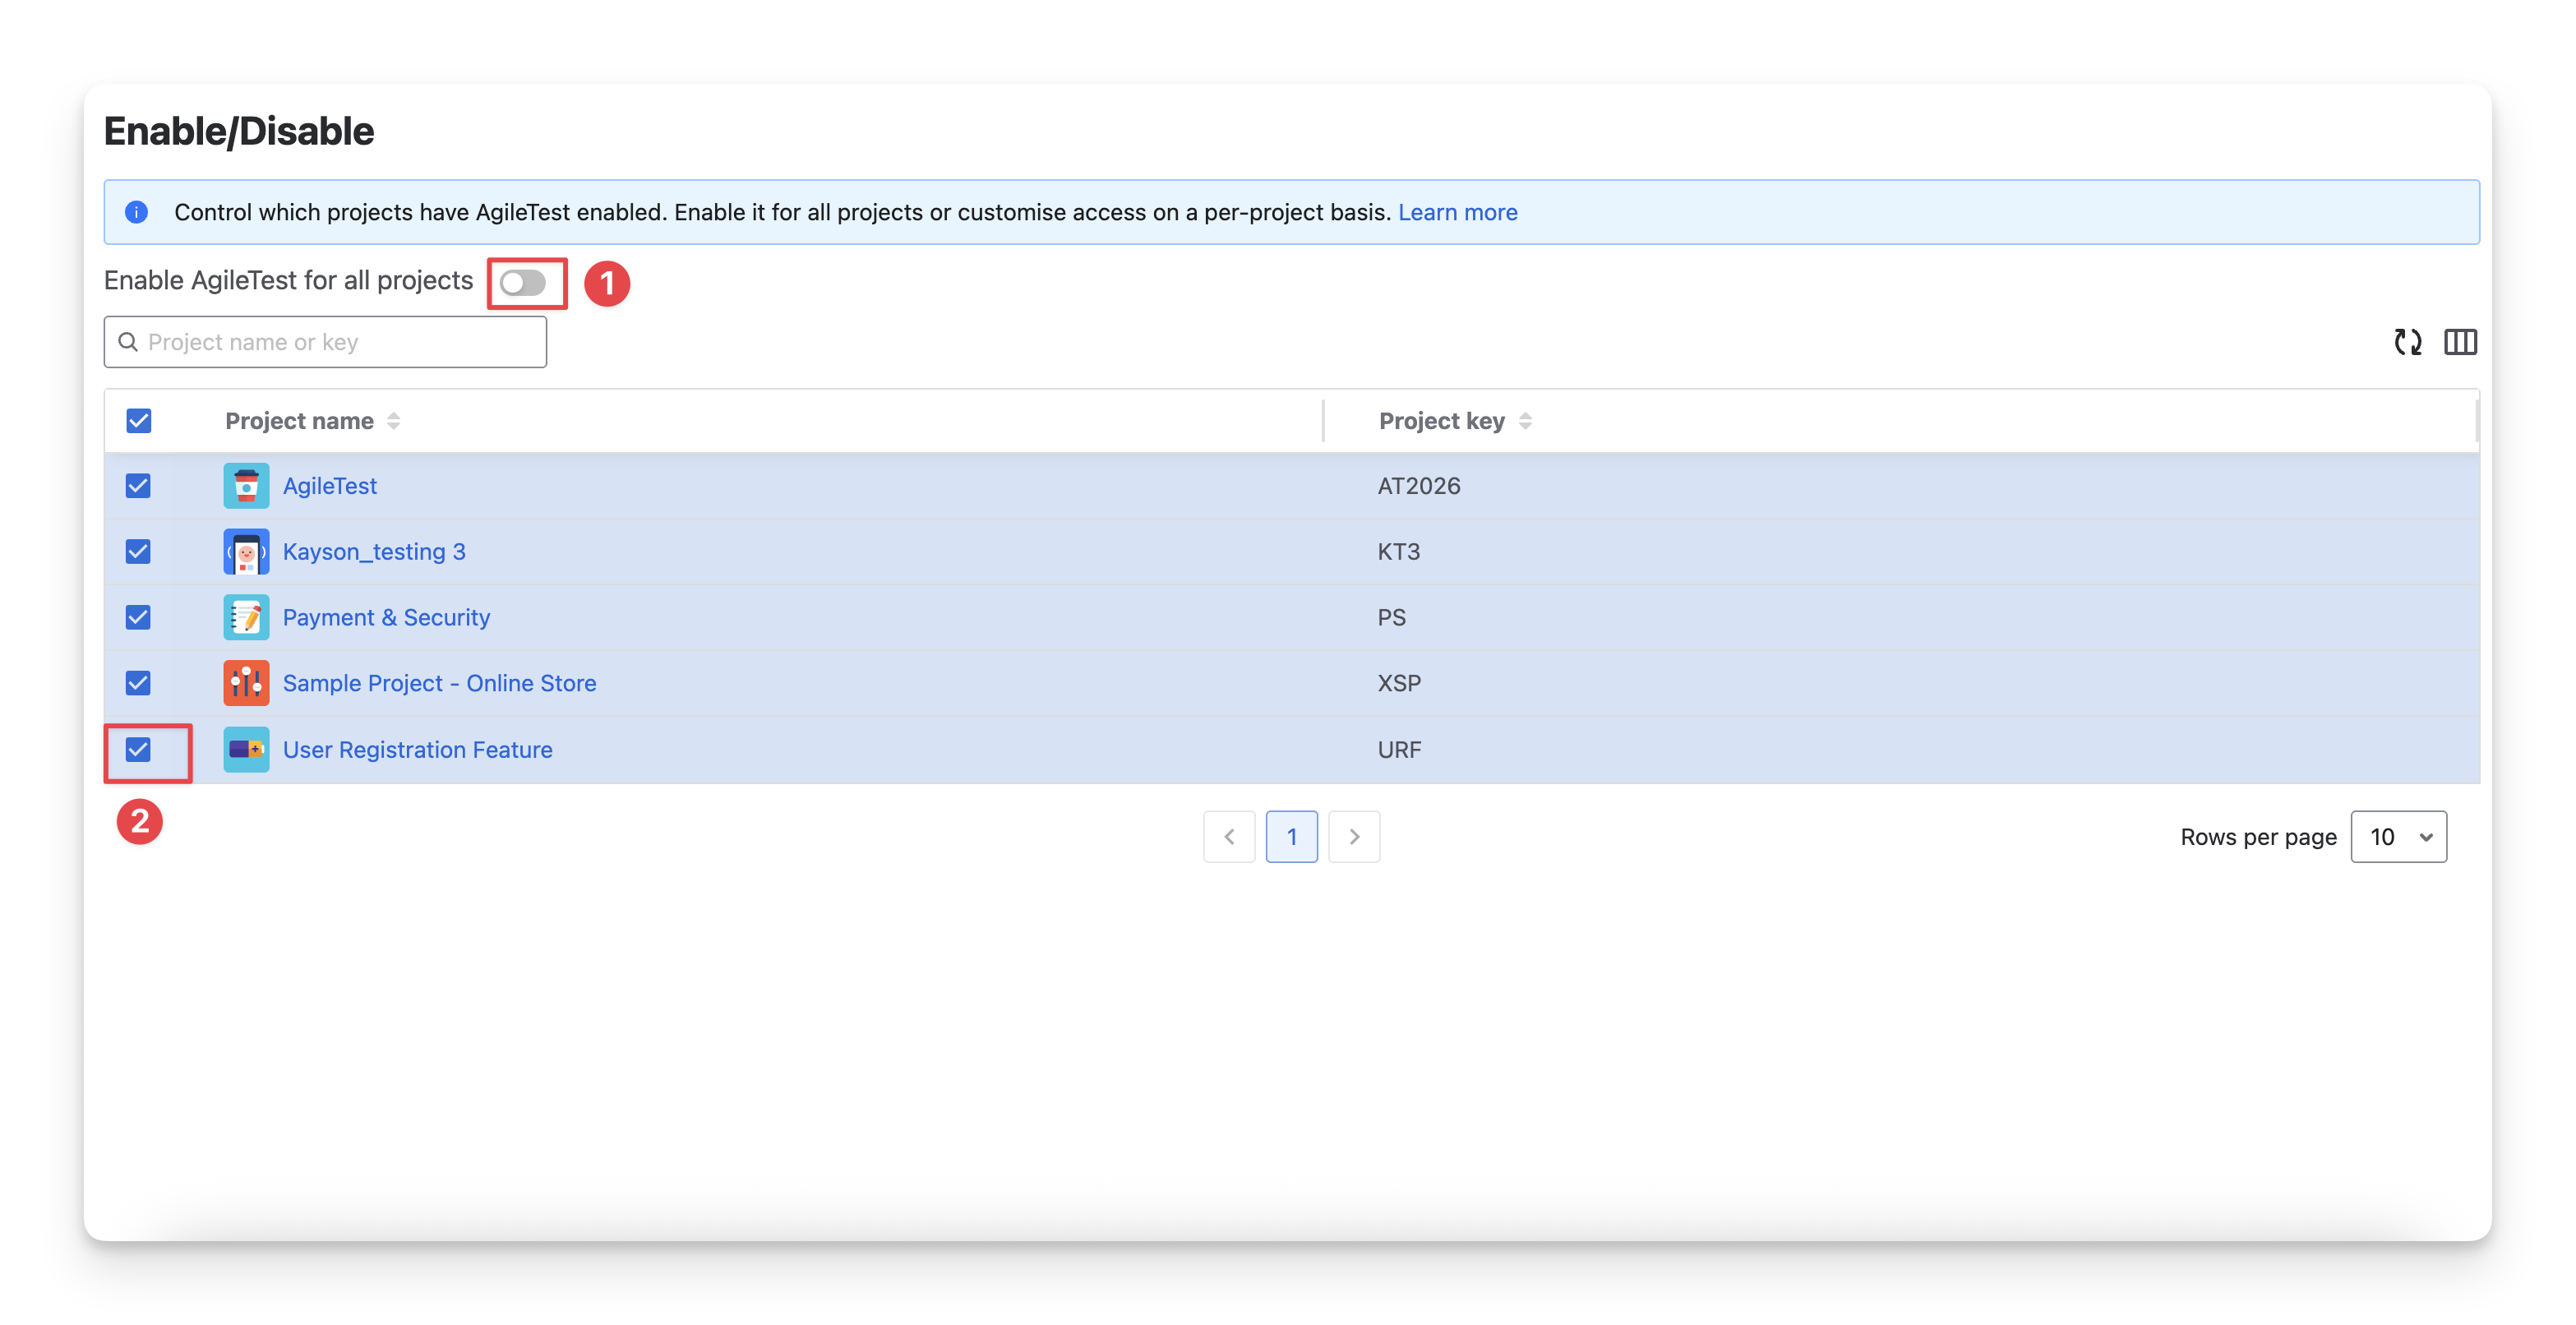
Once disabled, the project no longer appears on the Agile Test main page, and users cannot access the app from the project screen. Your data remains intact, and you can enable AgileTest again to continue.
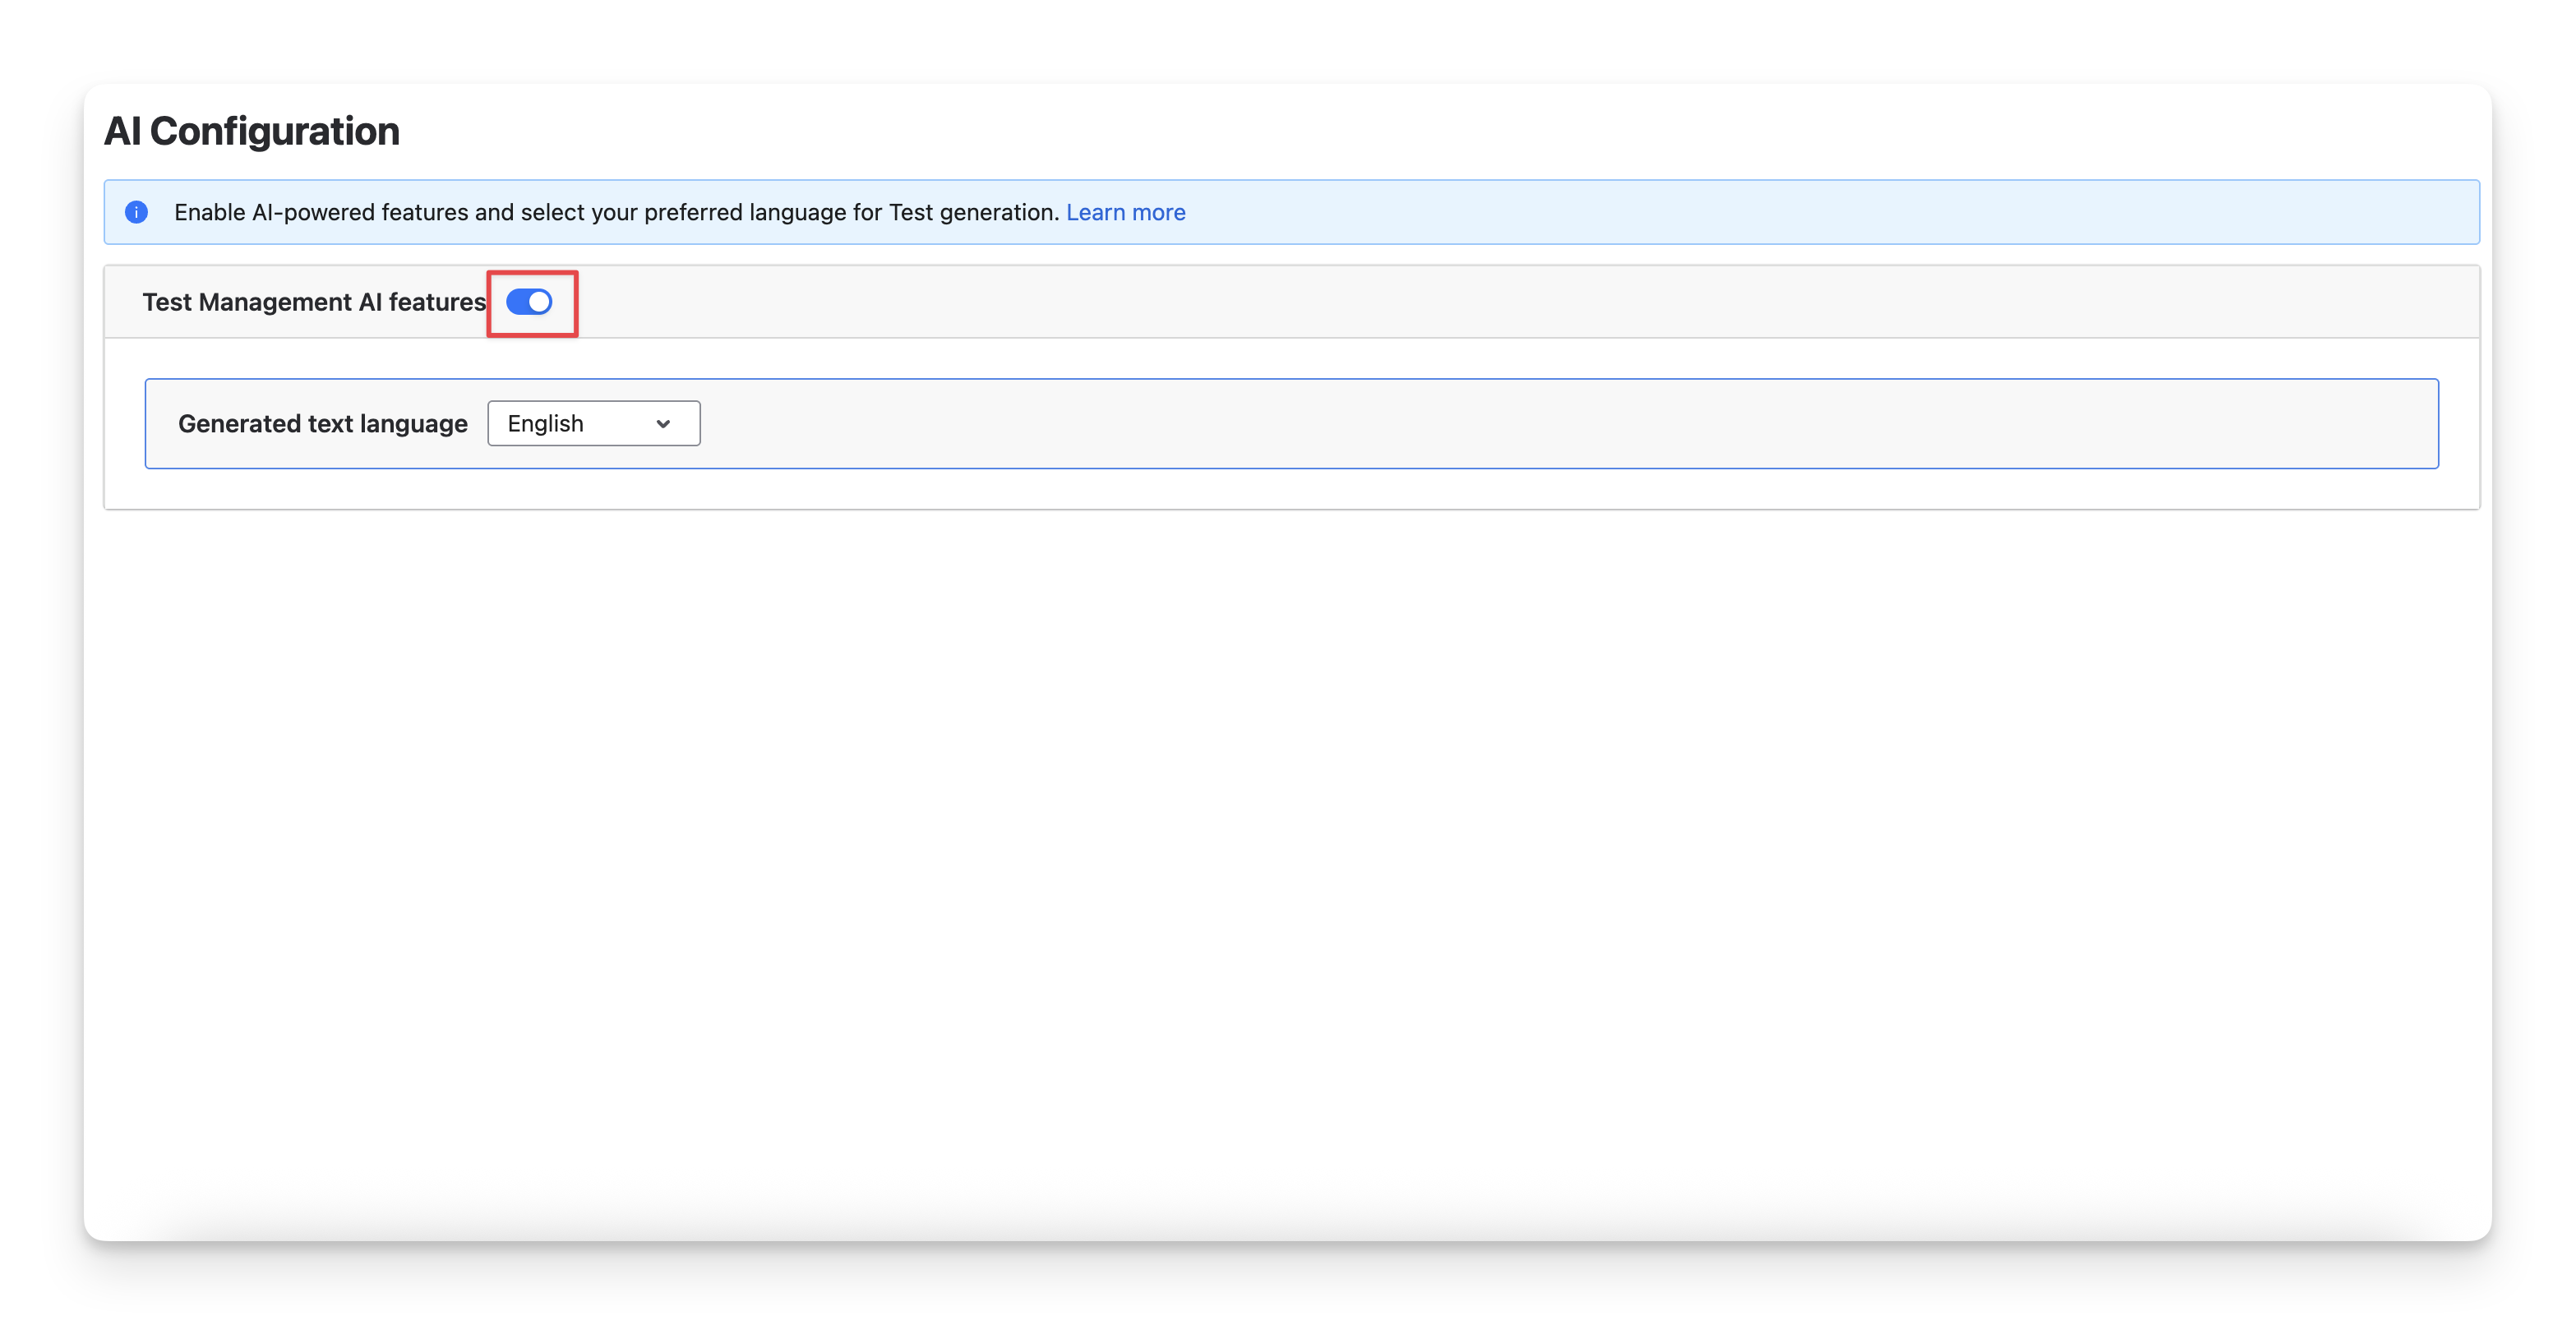
3. AI Configuration
The AI configuration screen allows you to turn on/off the in-app AI Generator feature and select supported languages for AI responses.
To enable/disable the AI Generator, turn on/off the “Test Management AI features” button.
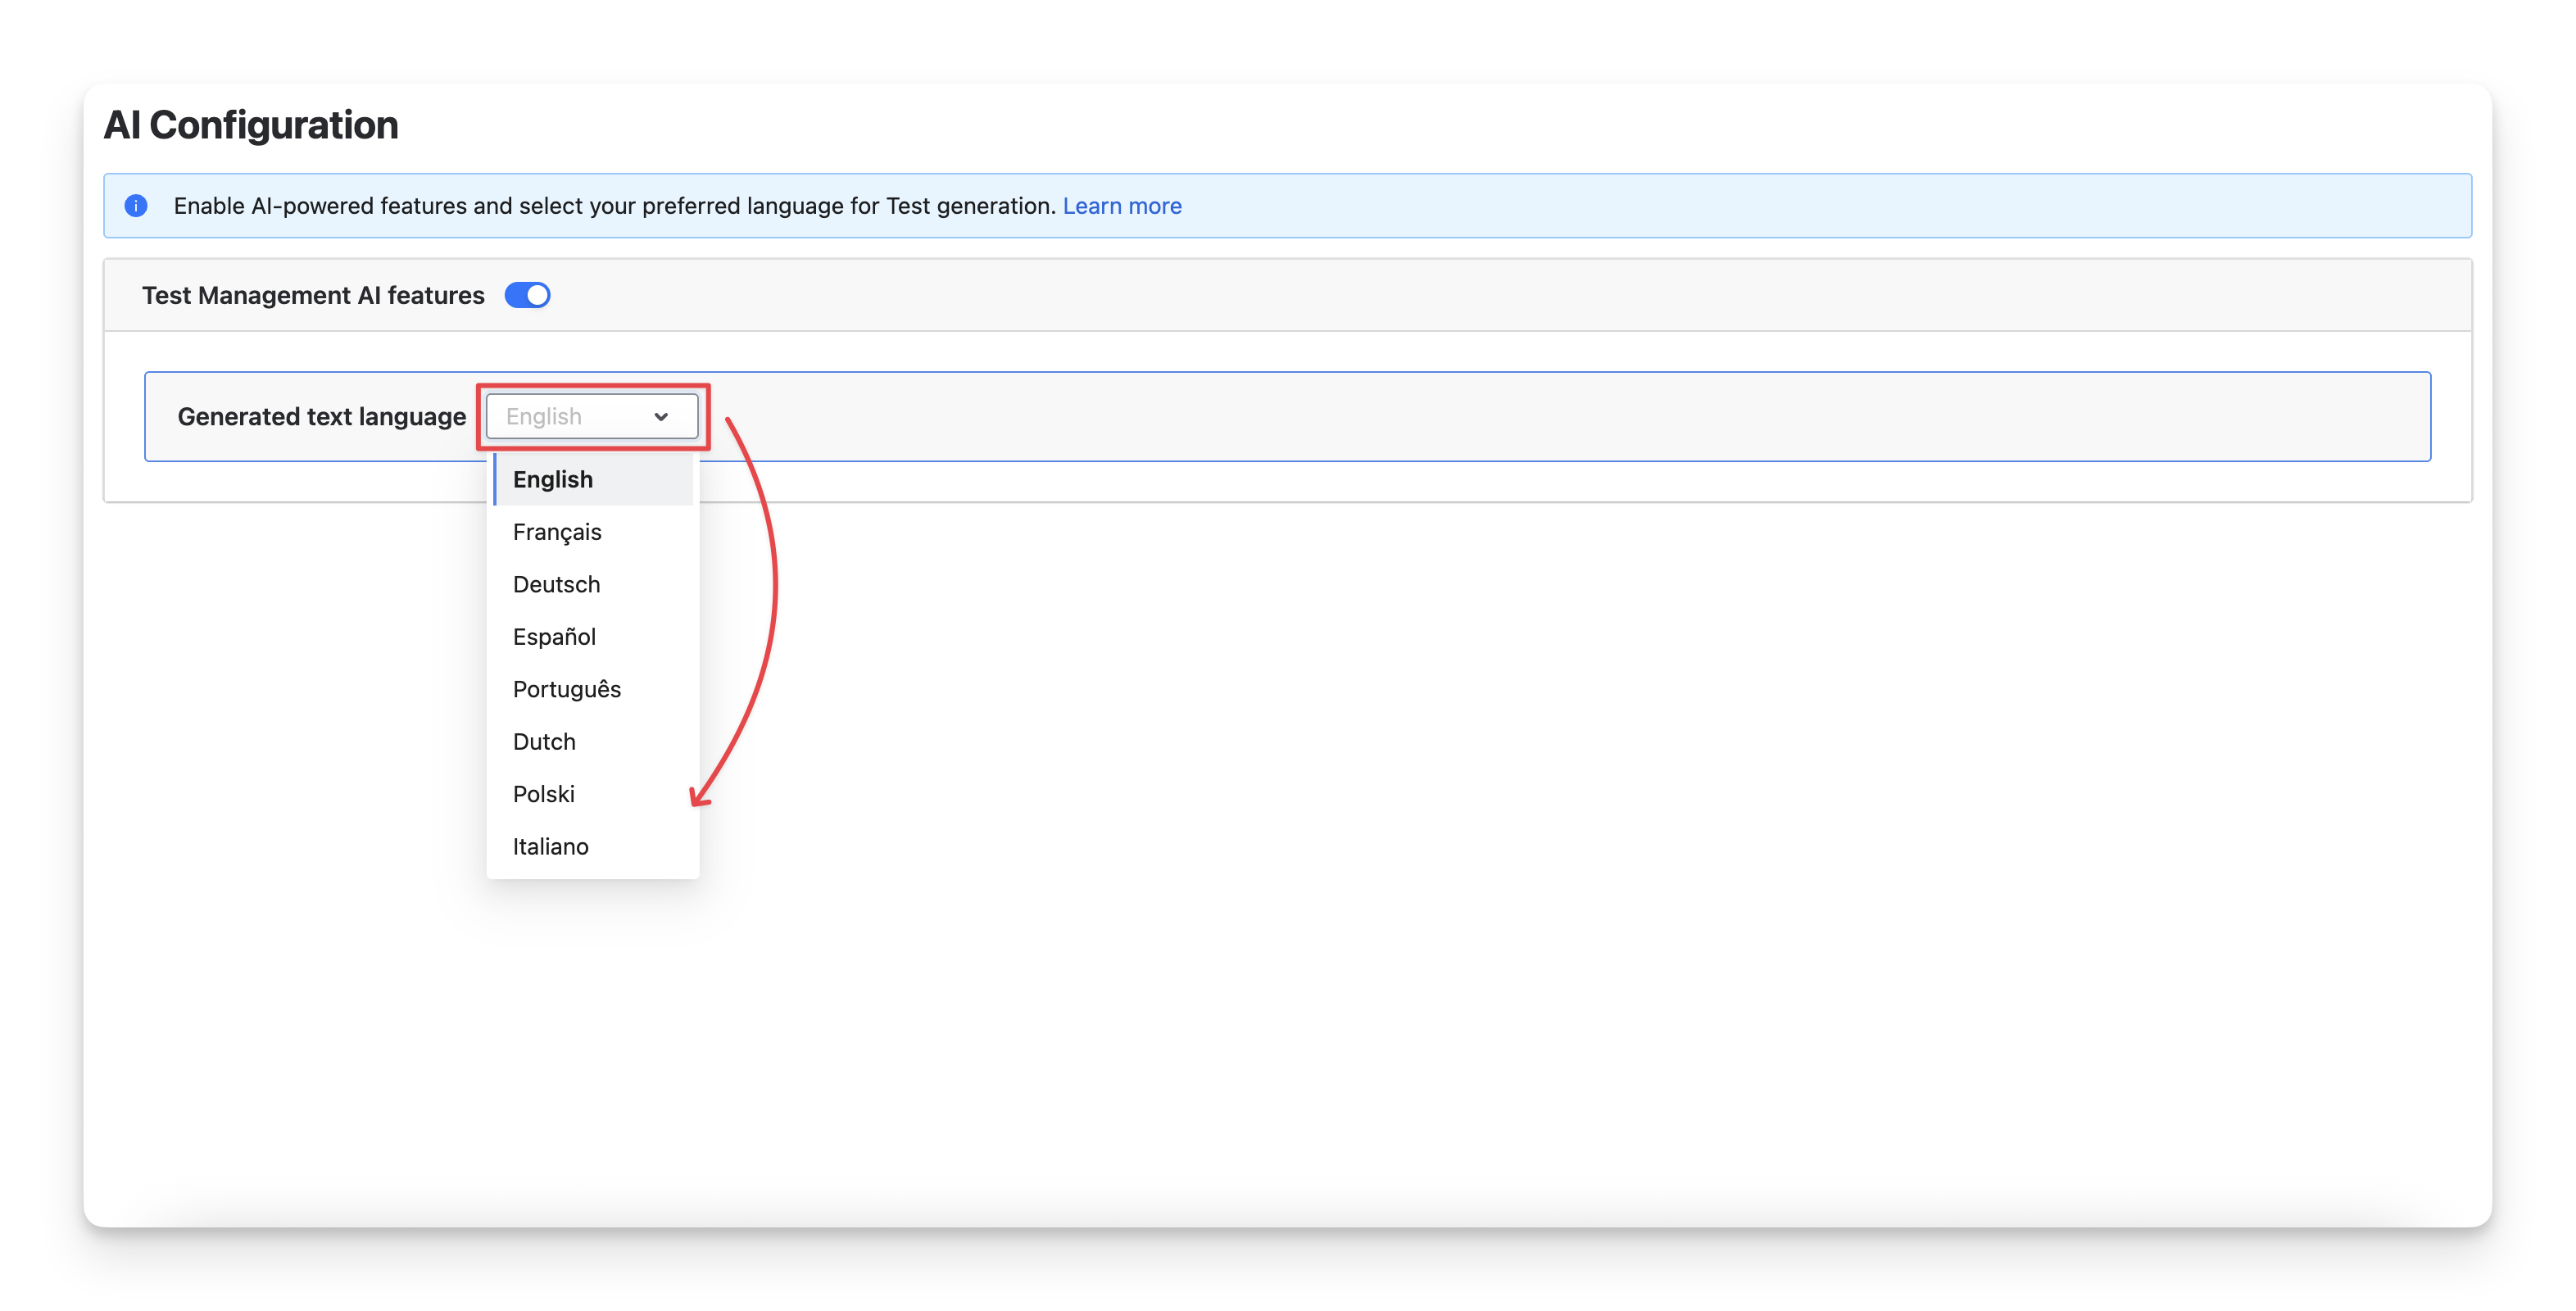
The default language for AI generation is set to English. If you prefer a different language, simply select one from the Generated text language dropdown list. Supported languages include English, French, German, Spanish, Portuguese, Dutch, Polish, Japanese, Korean, and Chinese.
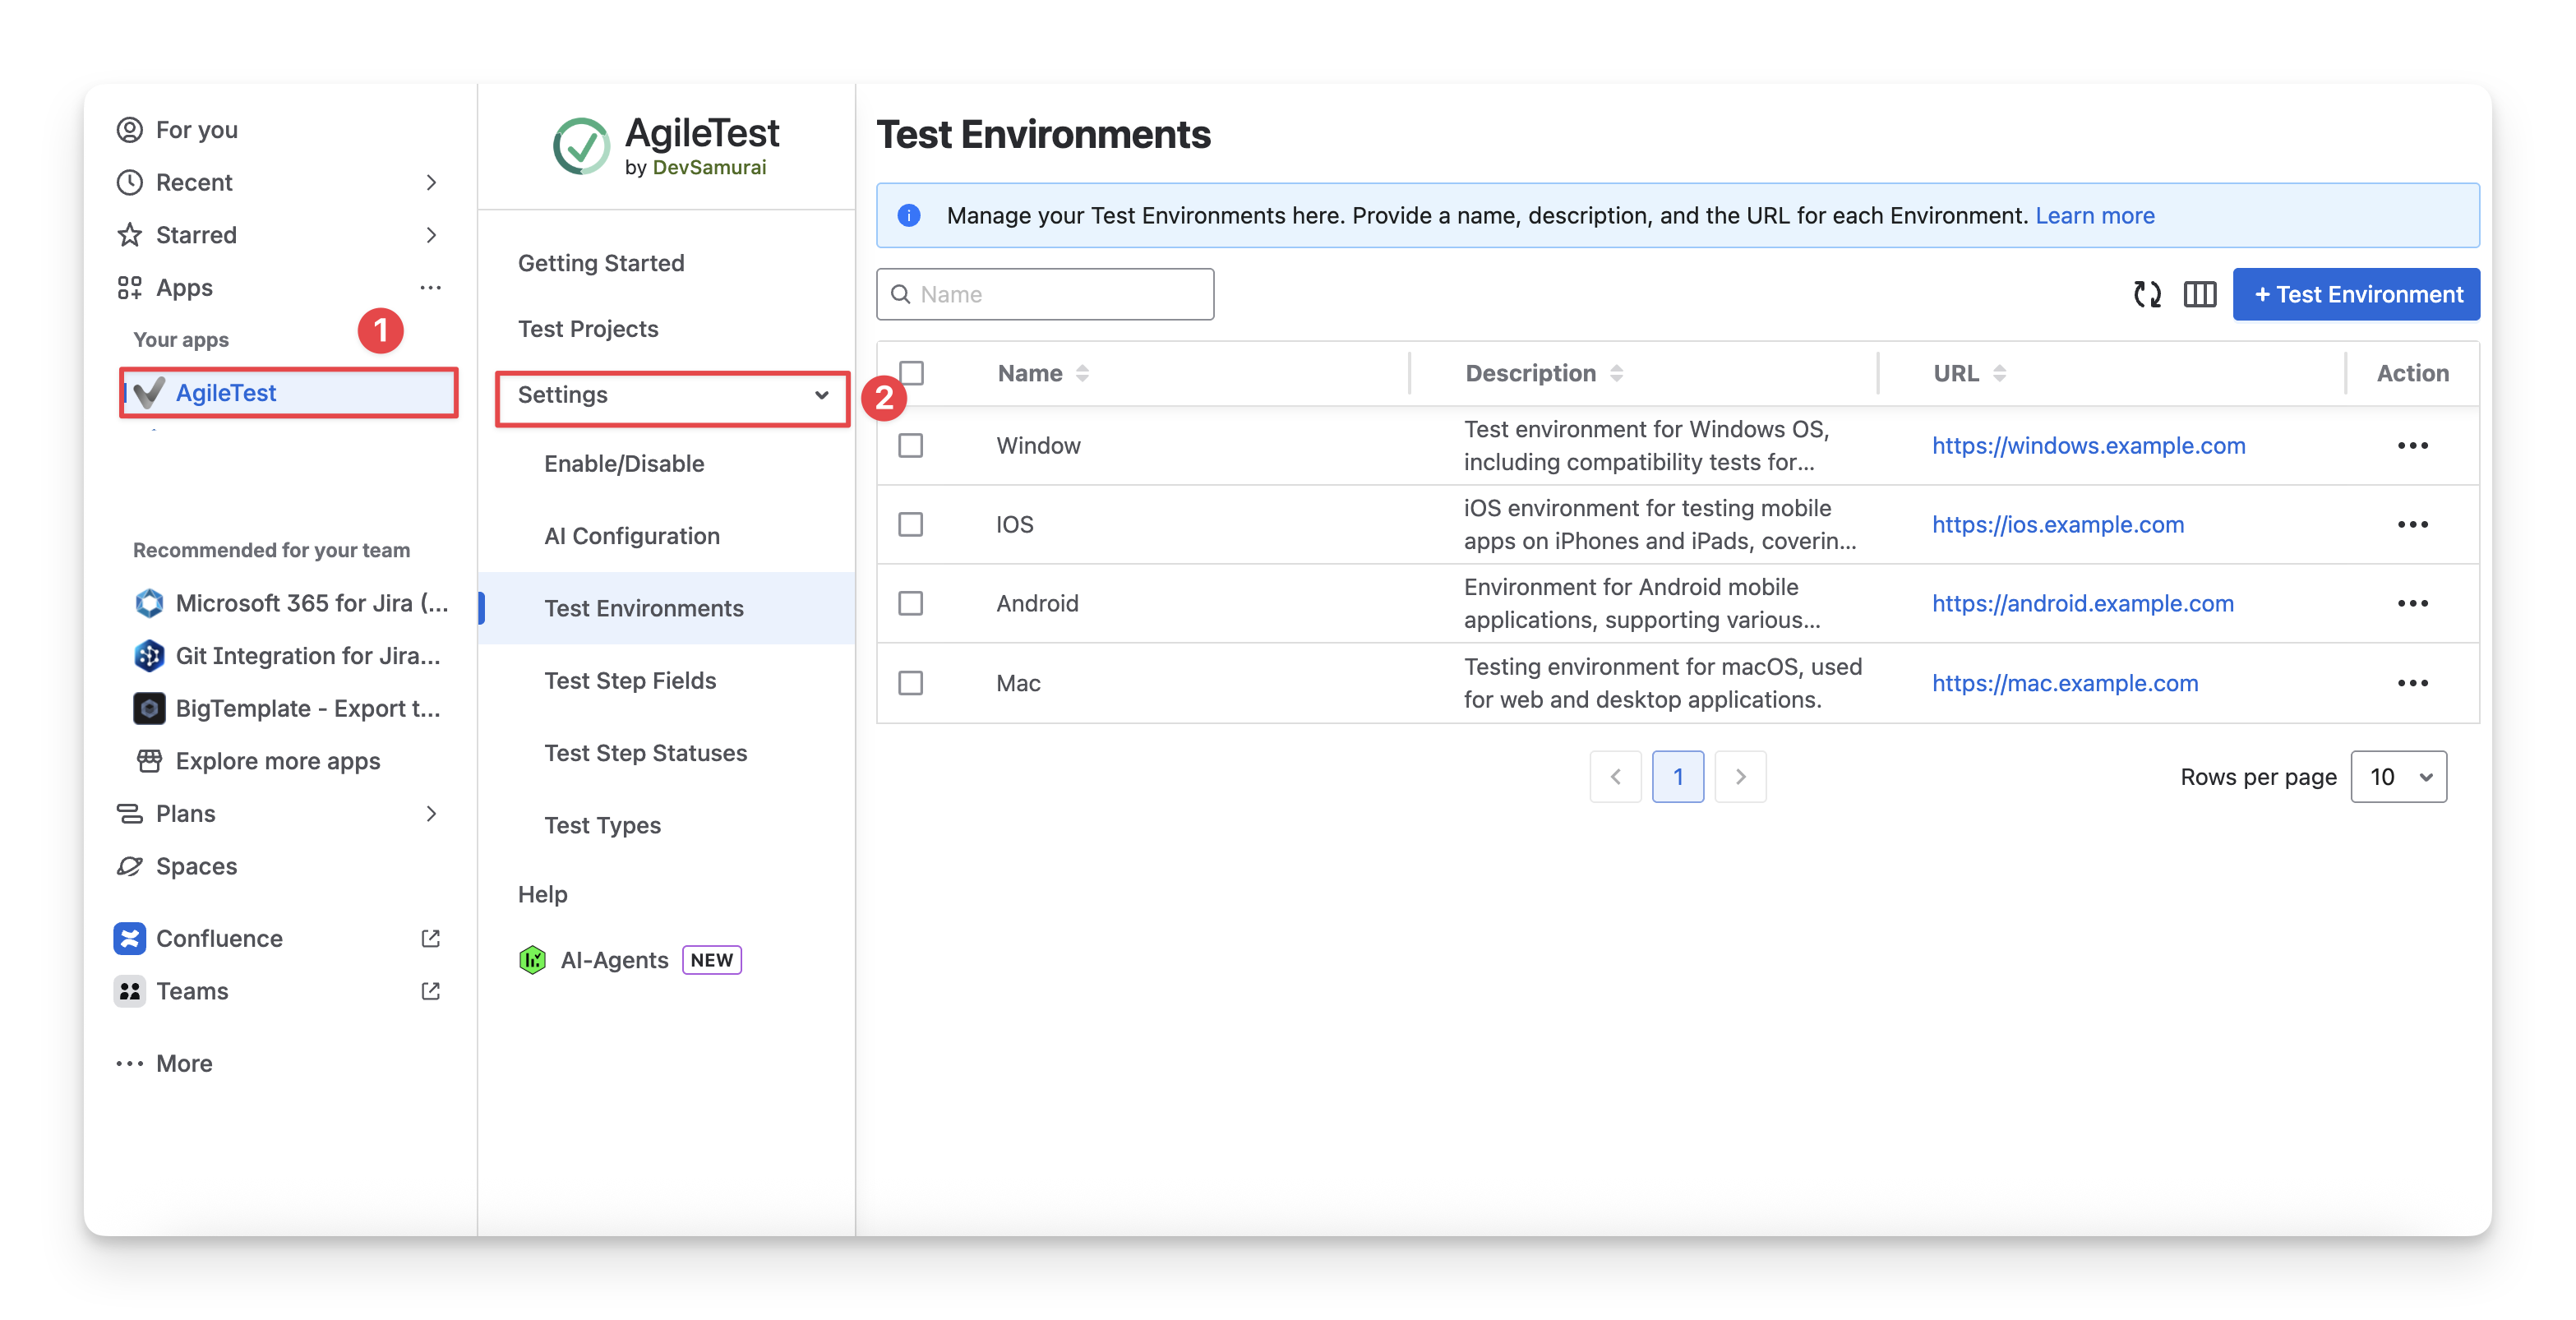
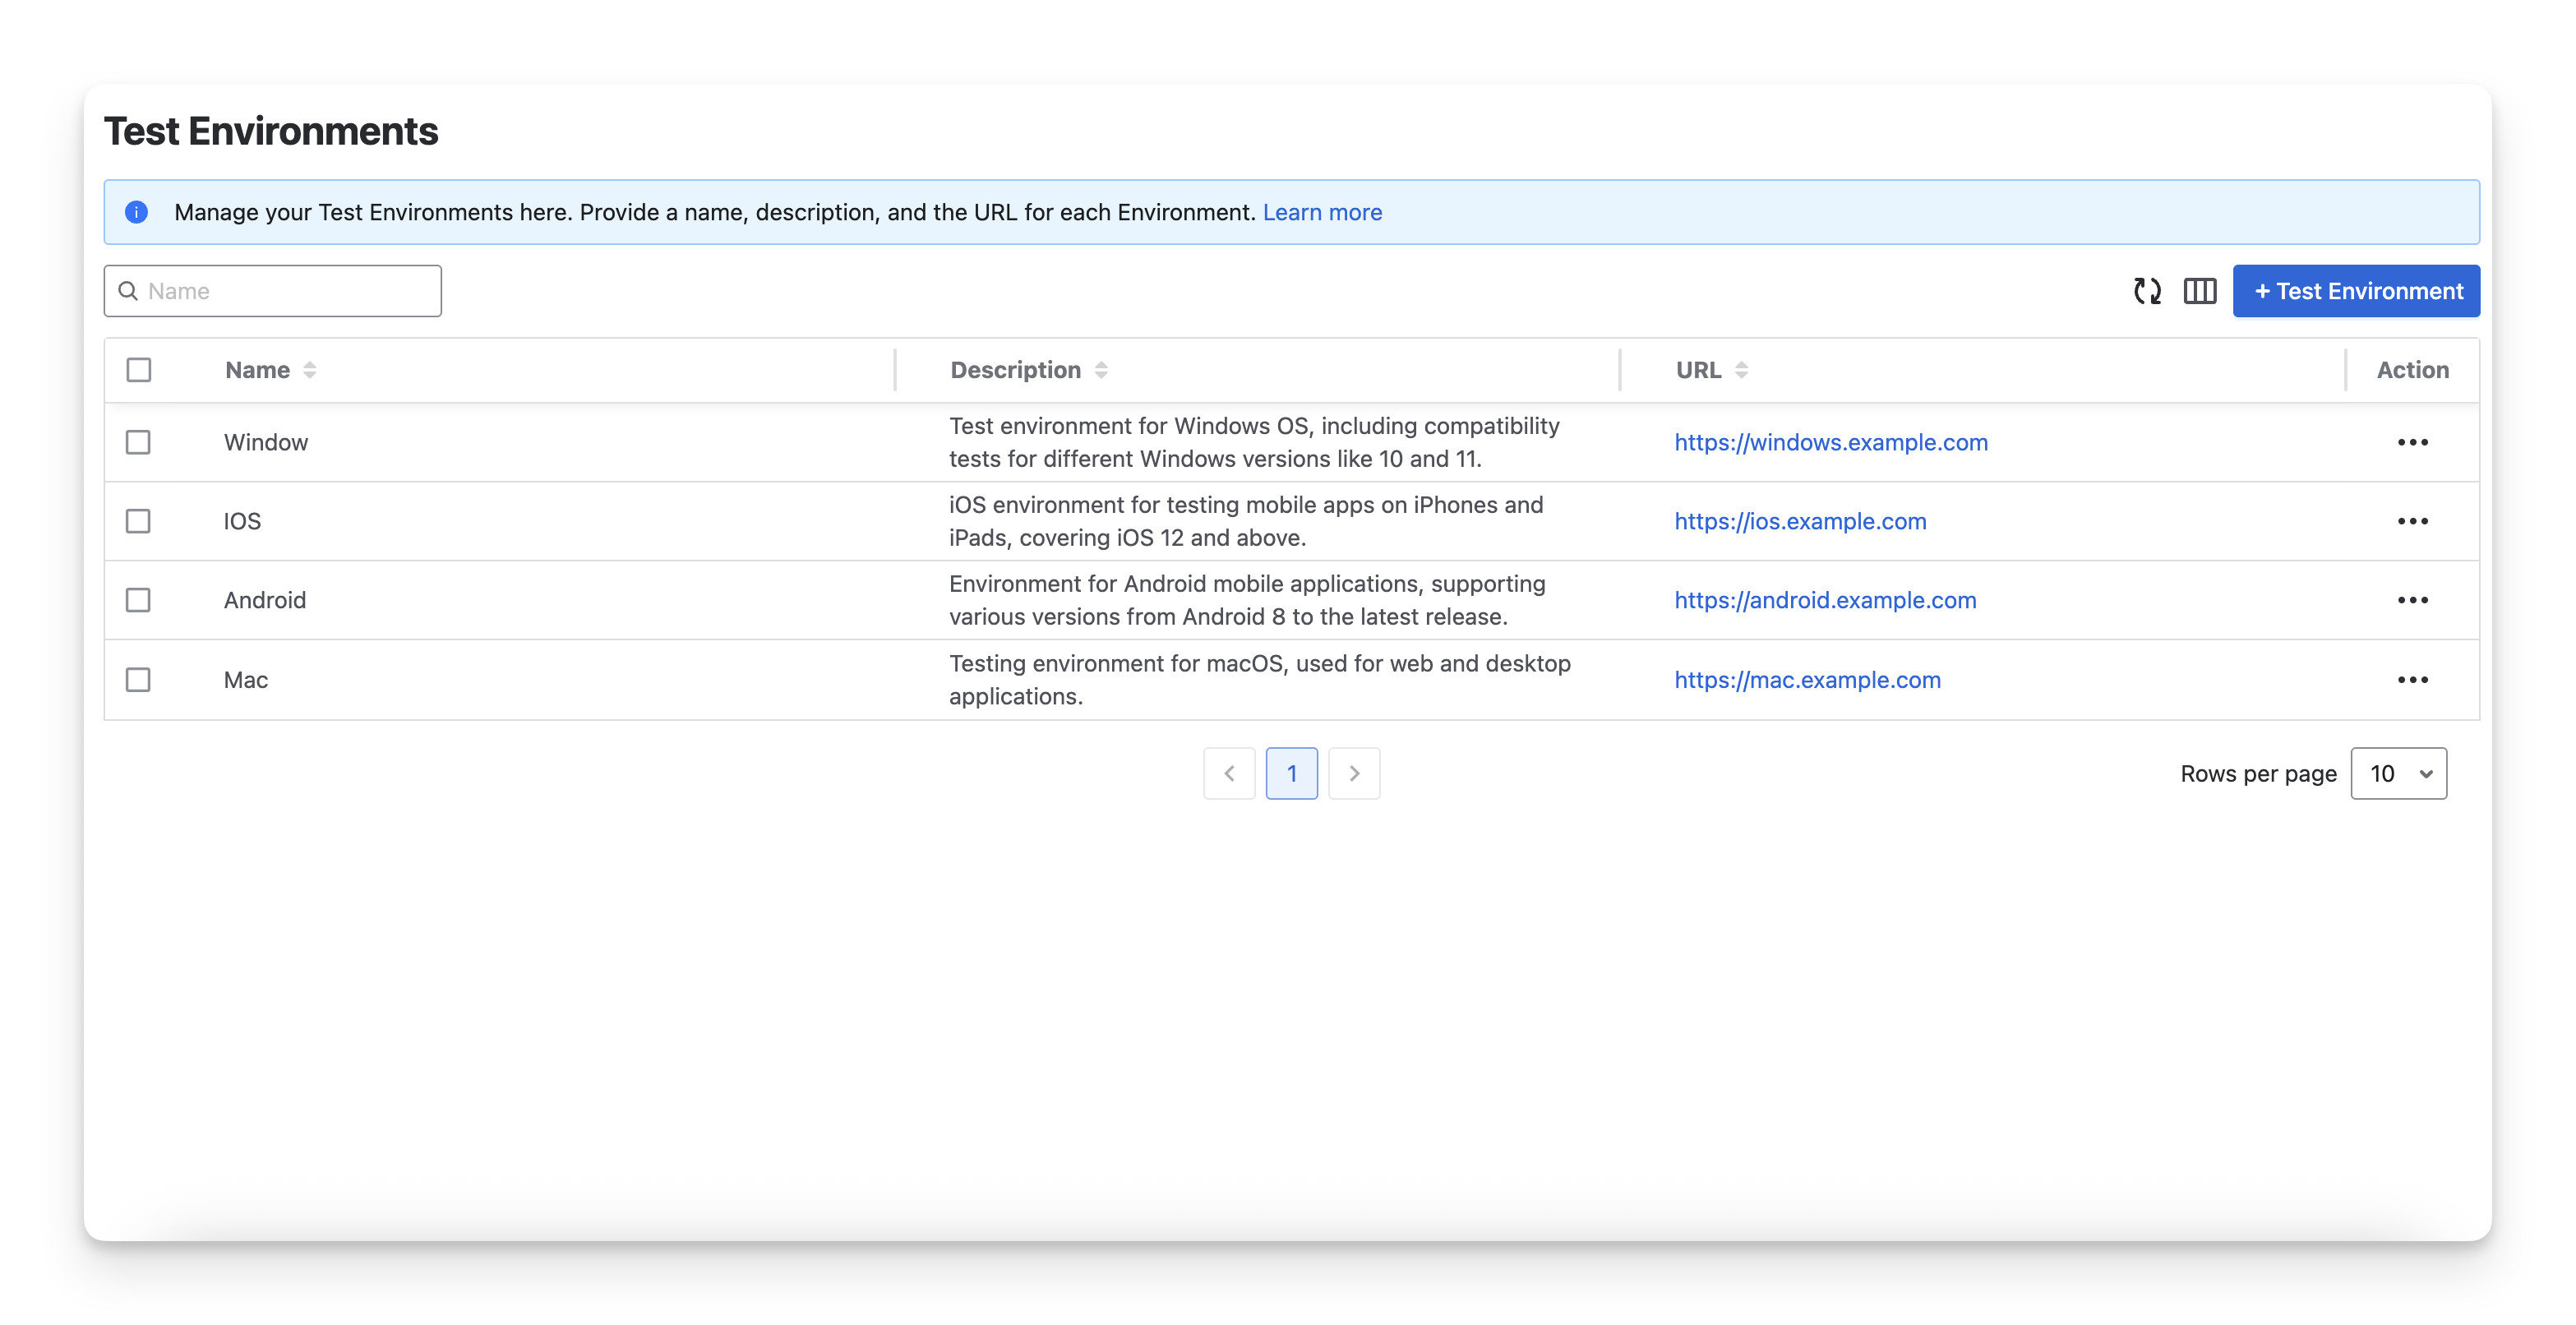
4. Test Environments
A Test Environment in AgileTest represents the platform or setup where testing activities are performed. It defines the specific environment in which a Test Execution runs, such as a browser, operating system, device, staging server, or other testing infrastructure.
The Test Environment screen allows administrators to add the environments used during testing.
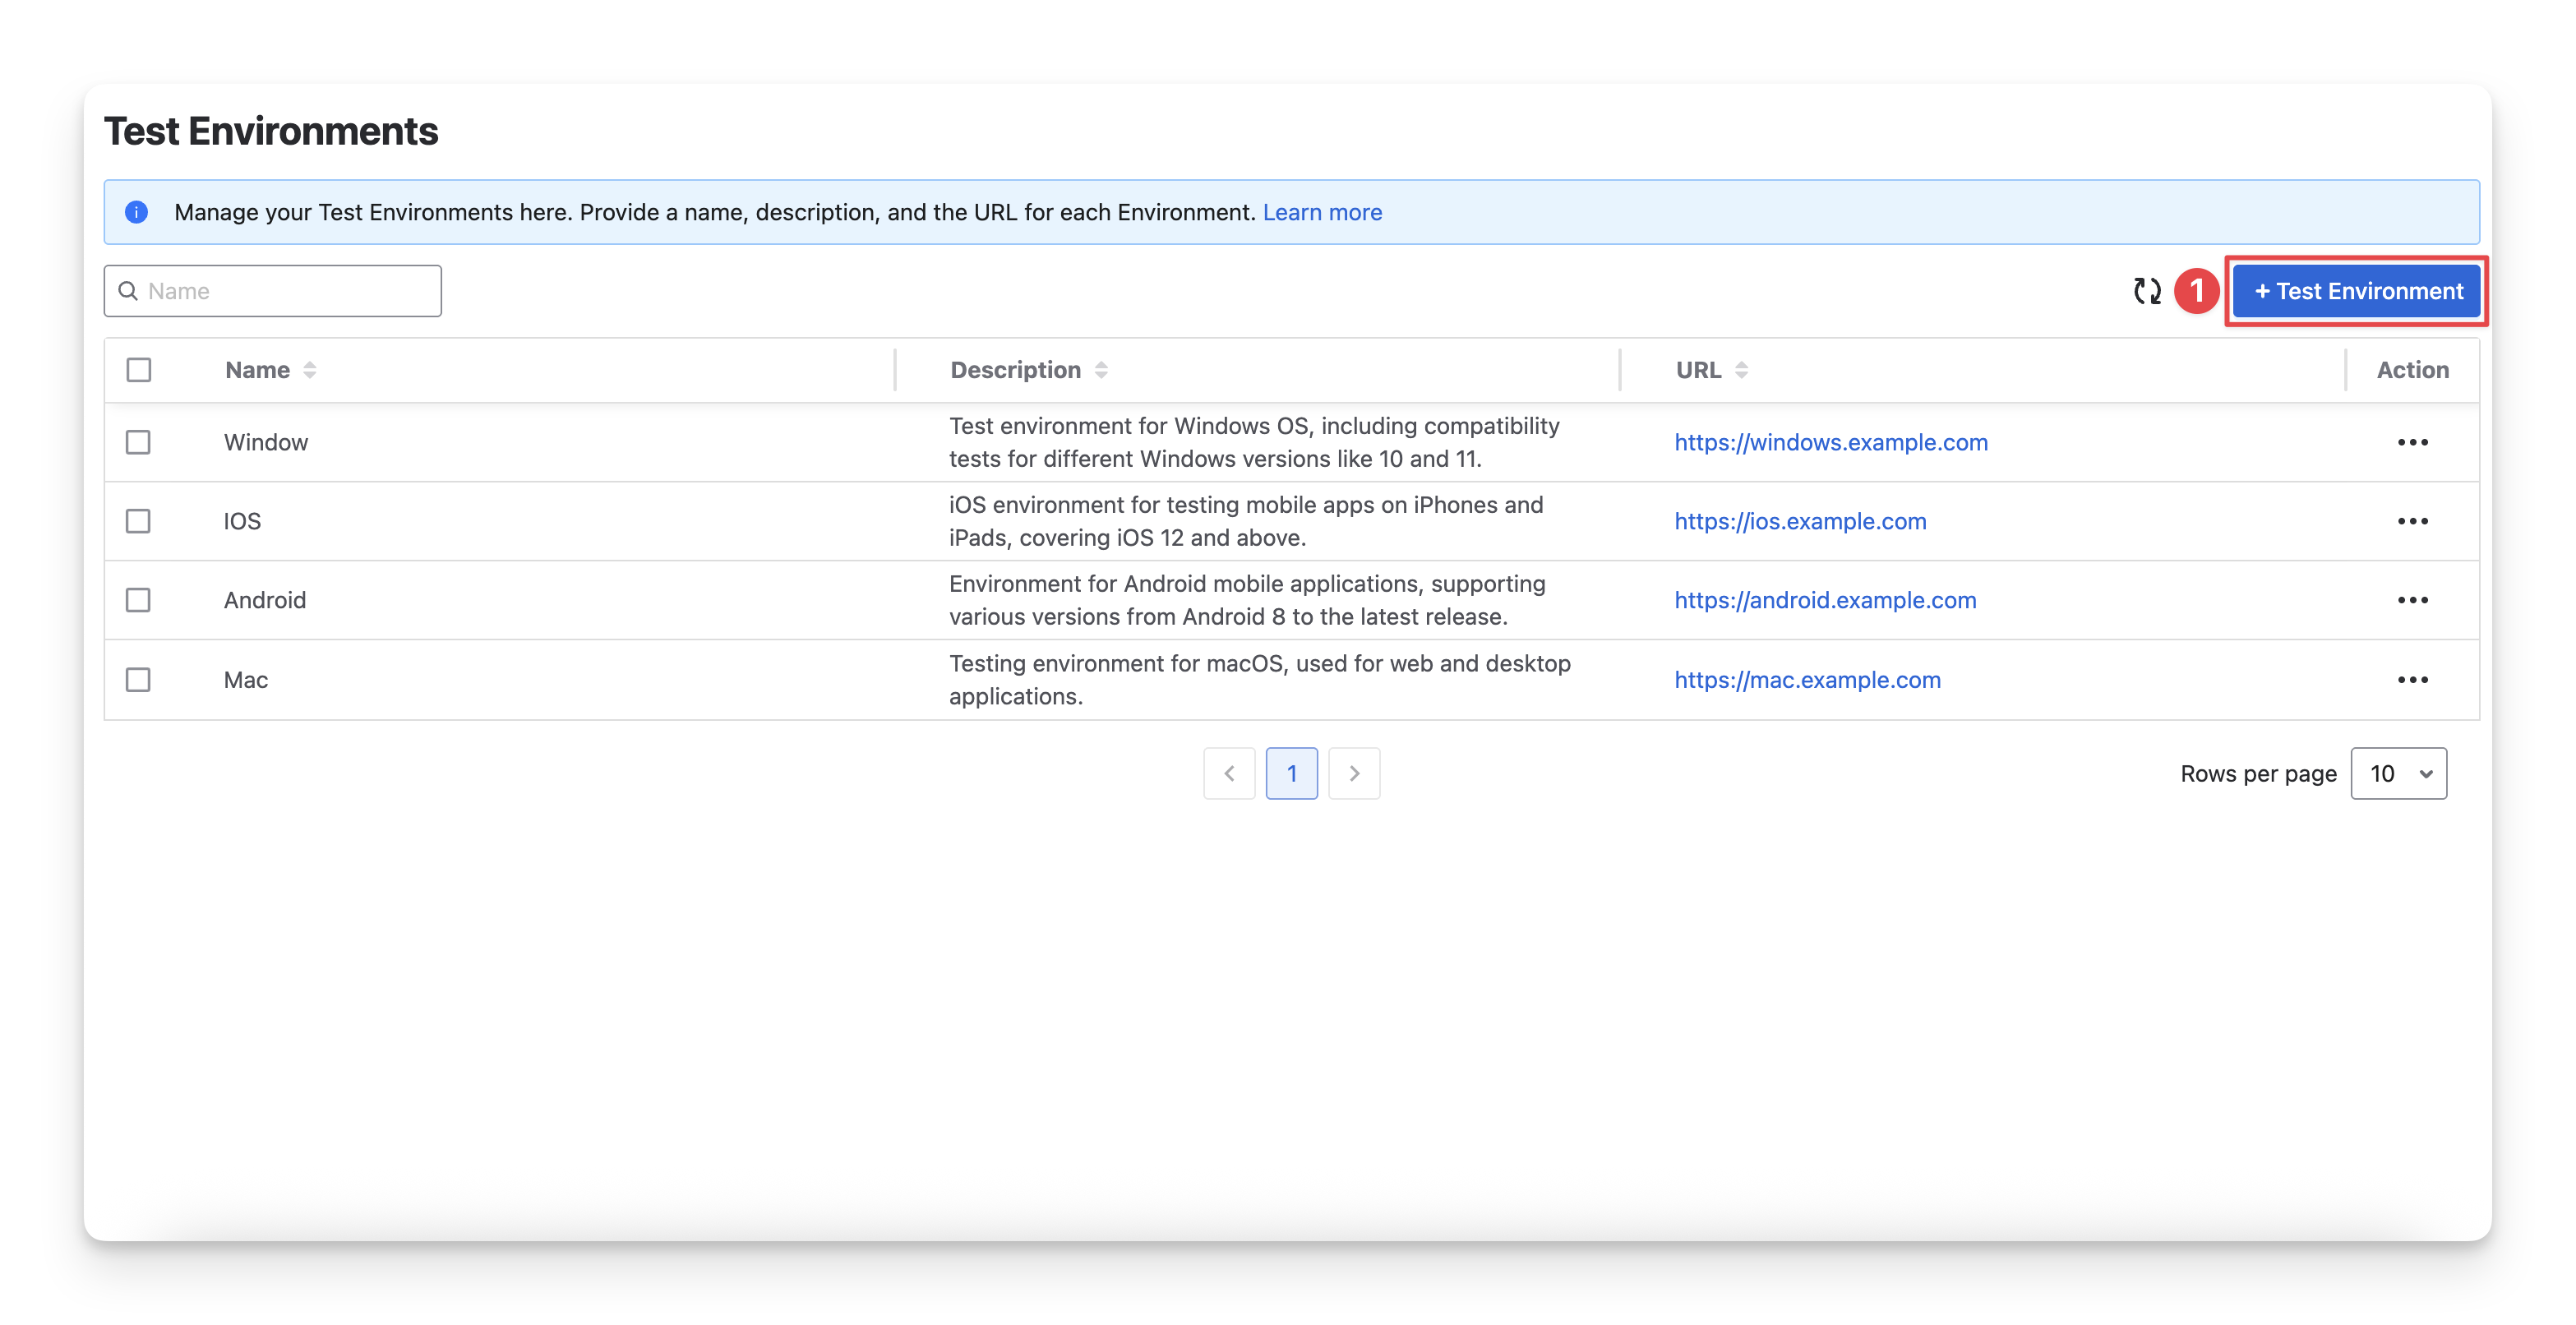
To create a new test environment, follow these steps:
-
Click on the “+ Test Environment” button.
-
Fill in the Test Environment details.
-
Name: The name of the test environment
-
Description: Summary provides additional information about the environment, such as its purpose, configuration, or testing scope.
-
URL: The web address associated with the environment, if applicable
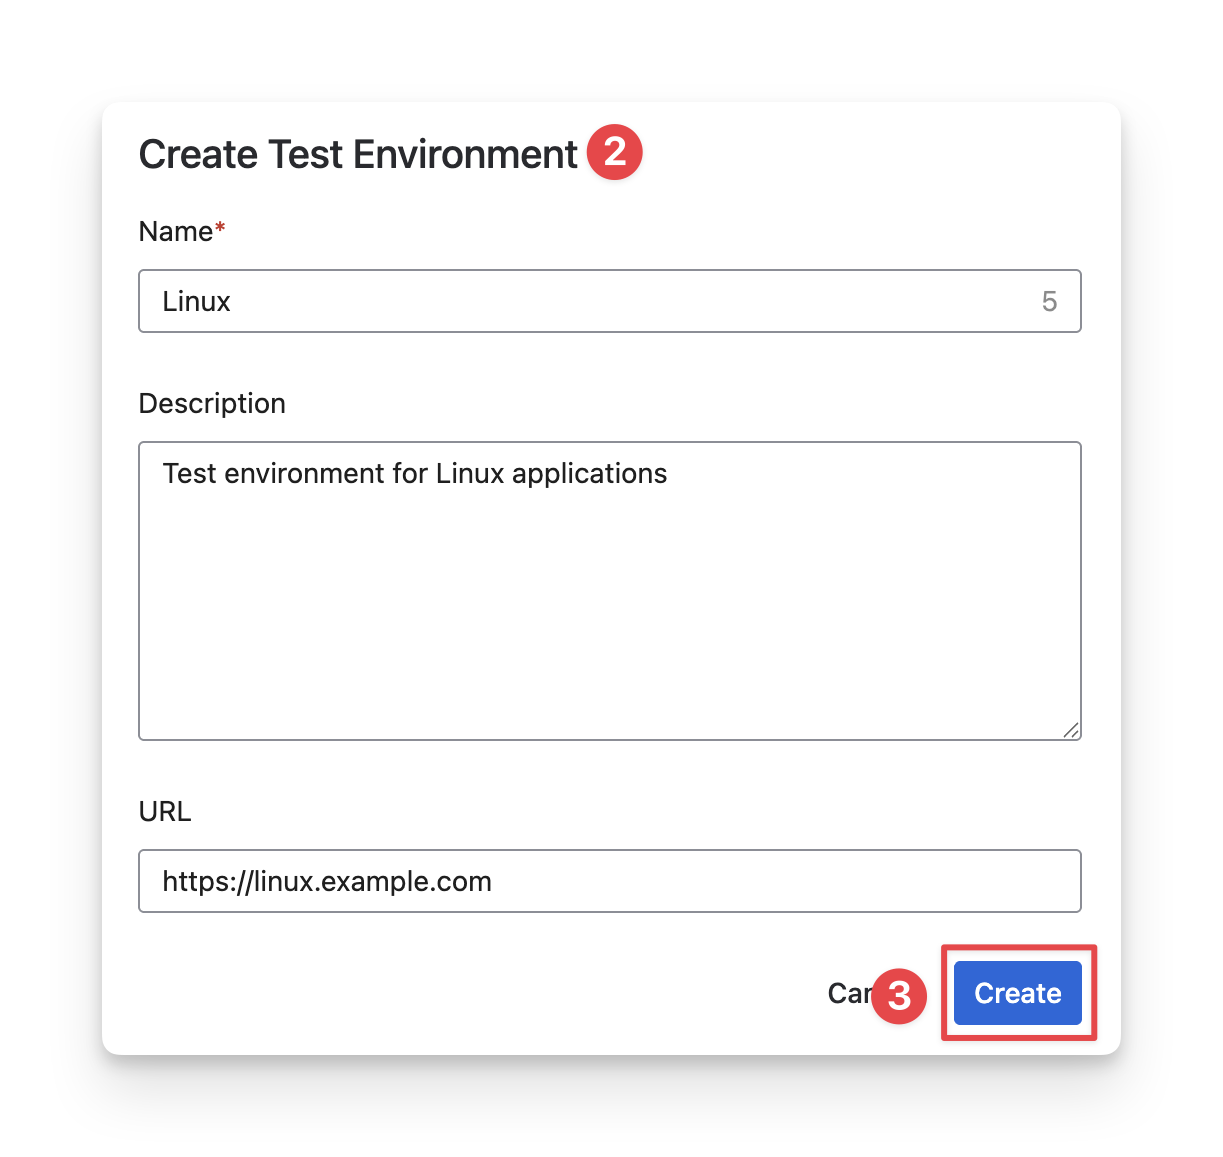
-
Click “Save” to finish.
5. Test Step Fields
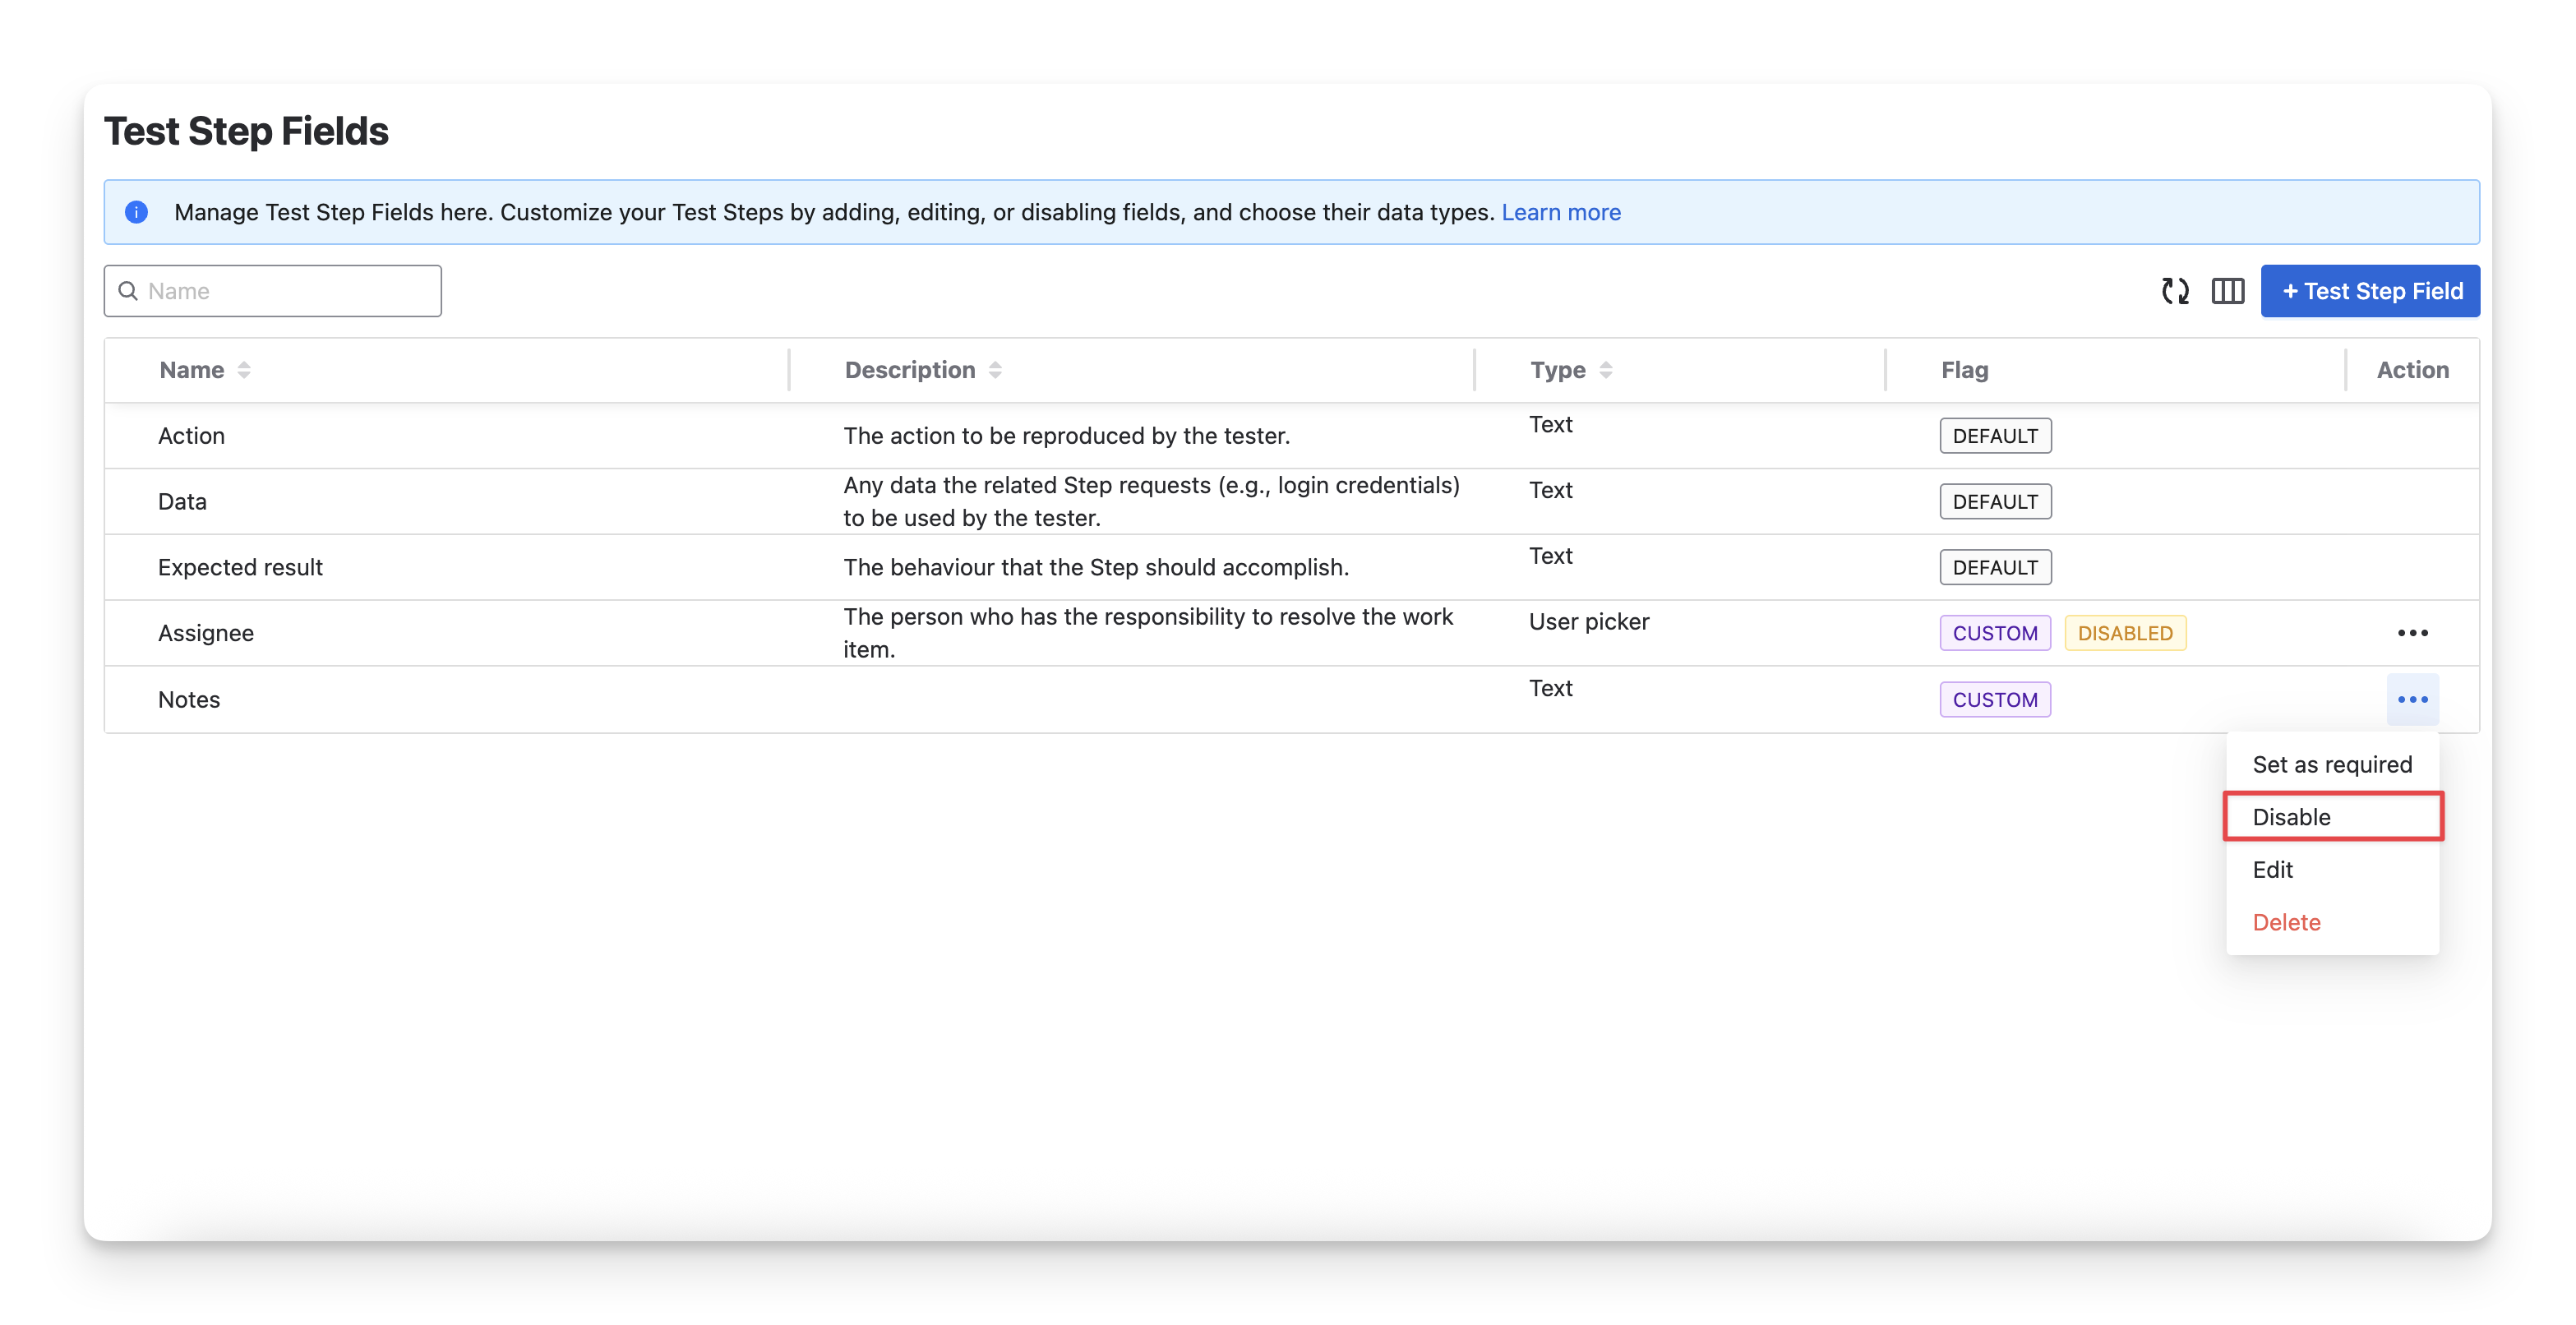
The Test Step Fields section allows administrators to configure the fields used in test steps for manual test cases.
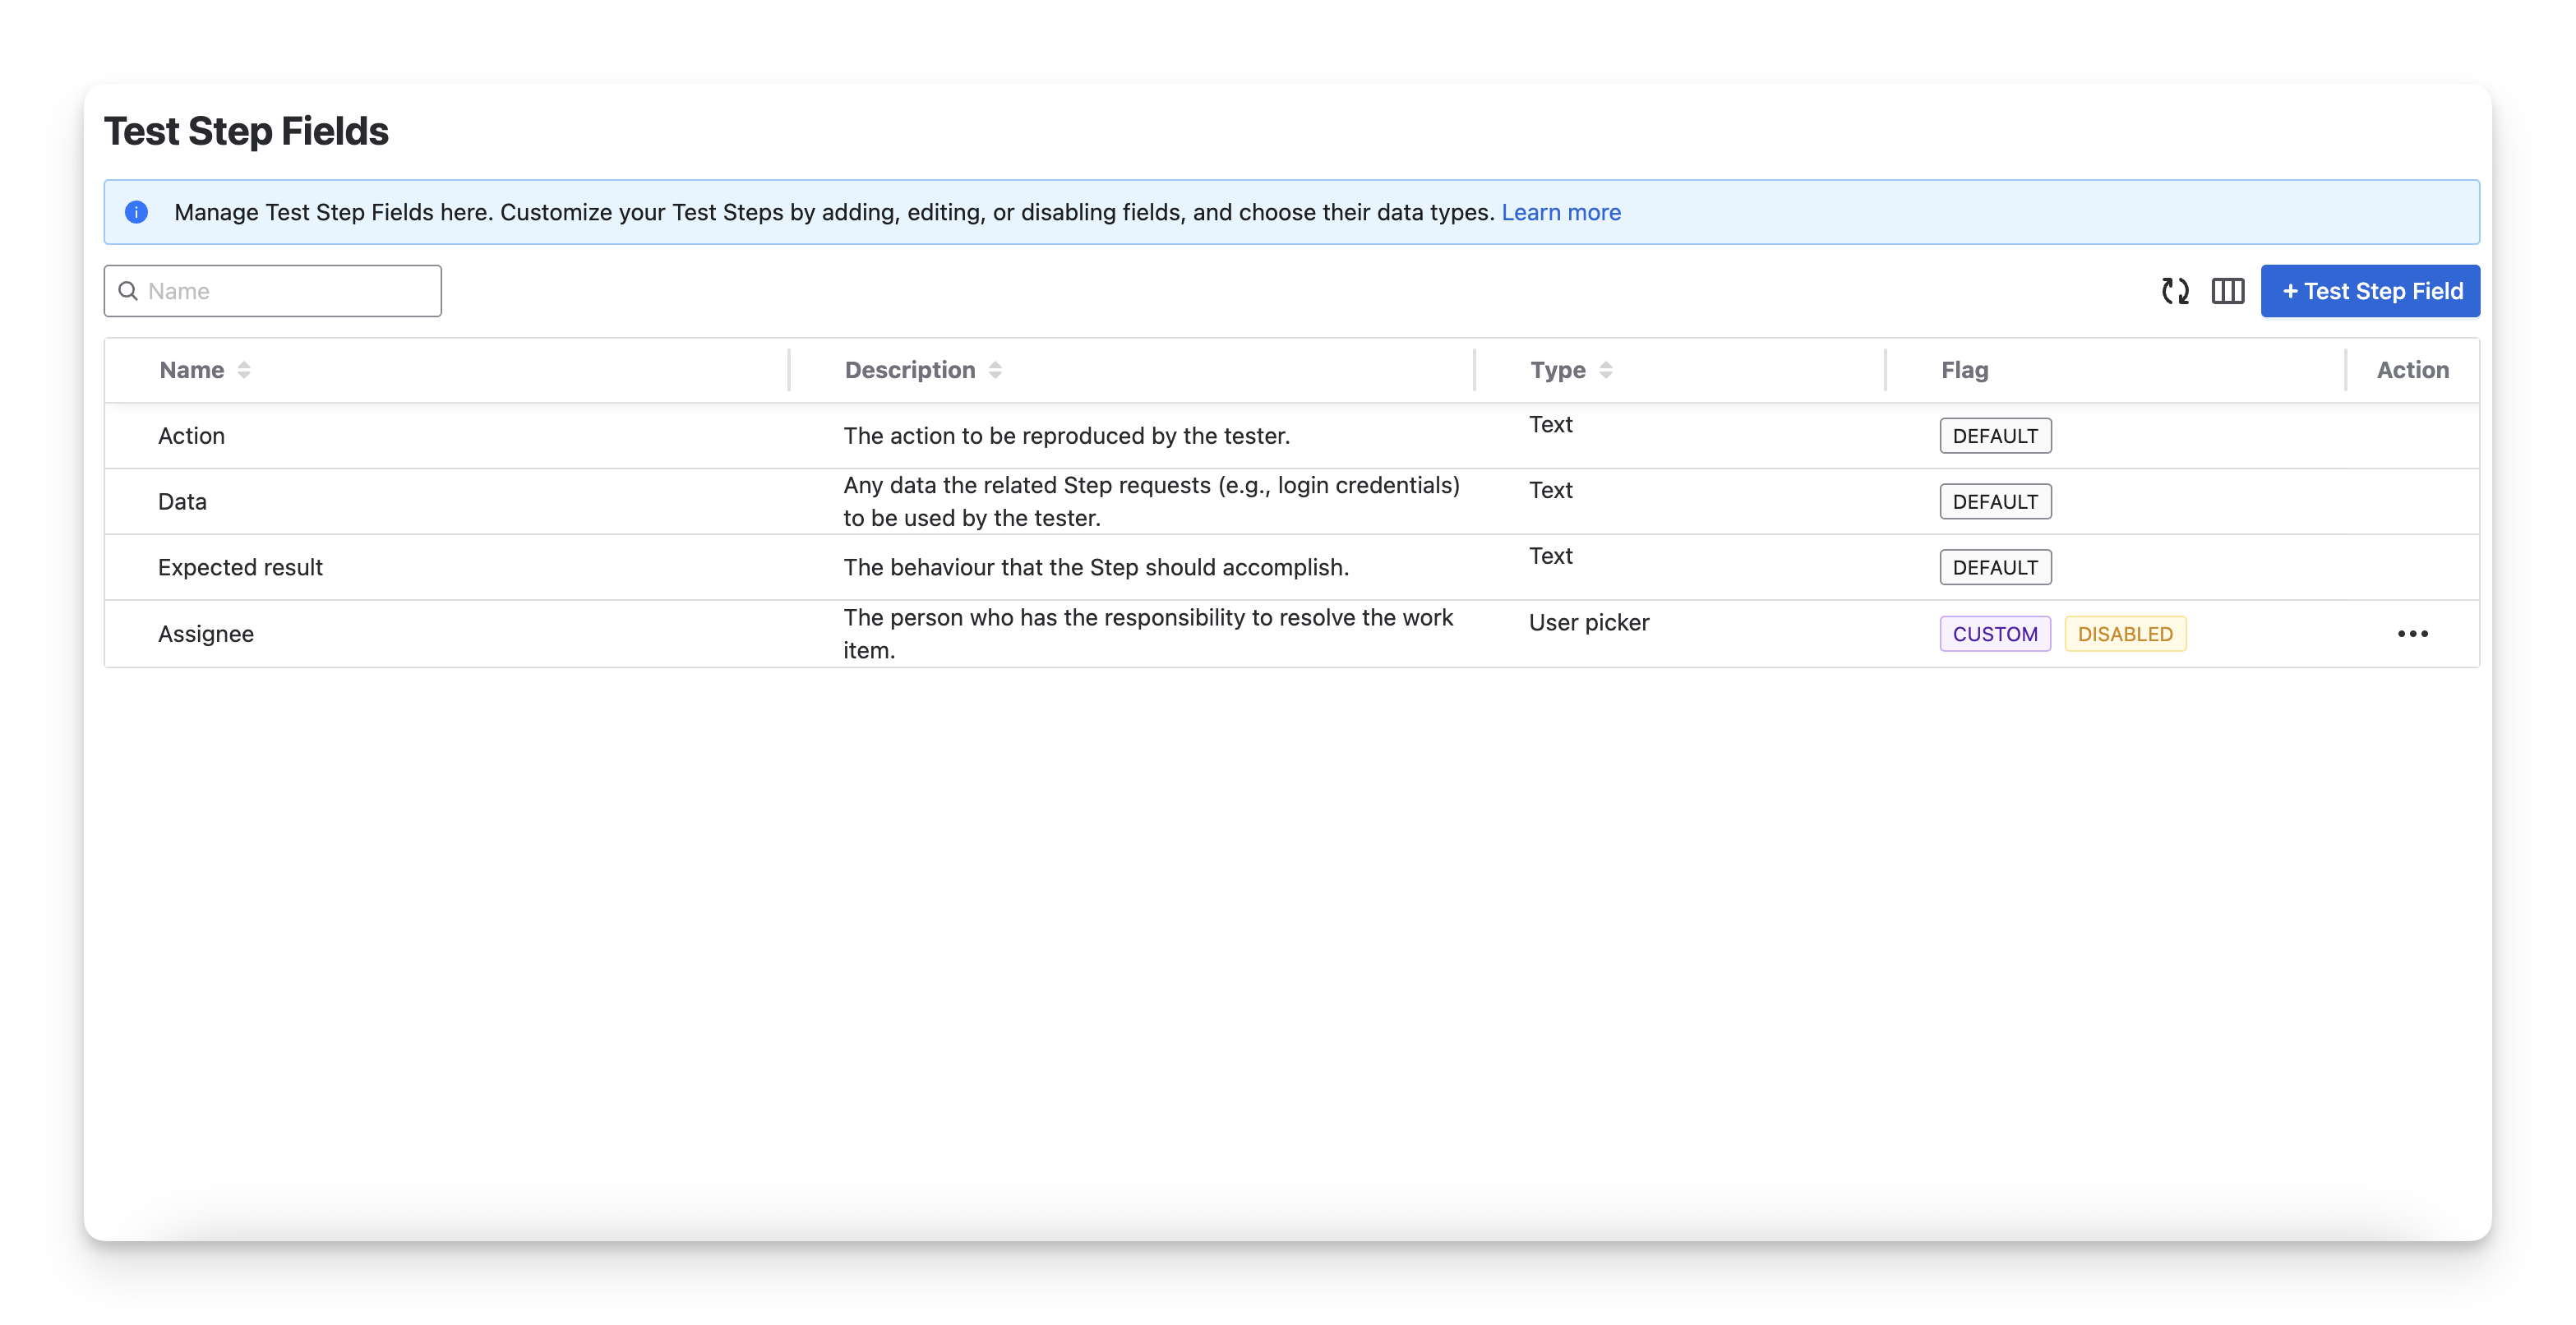
Agile Test provides 3 default test step fields: Action, Data, and Expected Result. These step fields are flagged as default and cannot be edited.
In case these 3 step fields may not always be enough to fully define your test steps. You can create up to 6 Custom step fields. To do this, follow the steps:
-
Choose “ + New Test Step Field ” on the top right-hand corner.

-
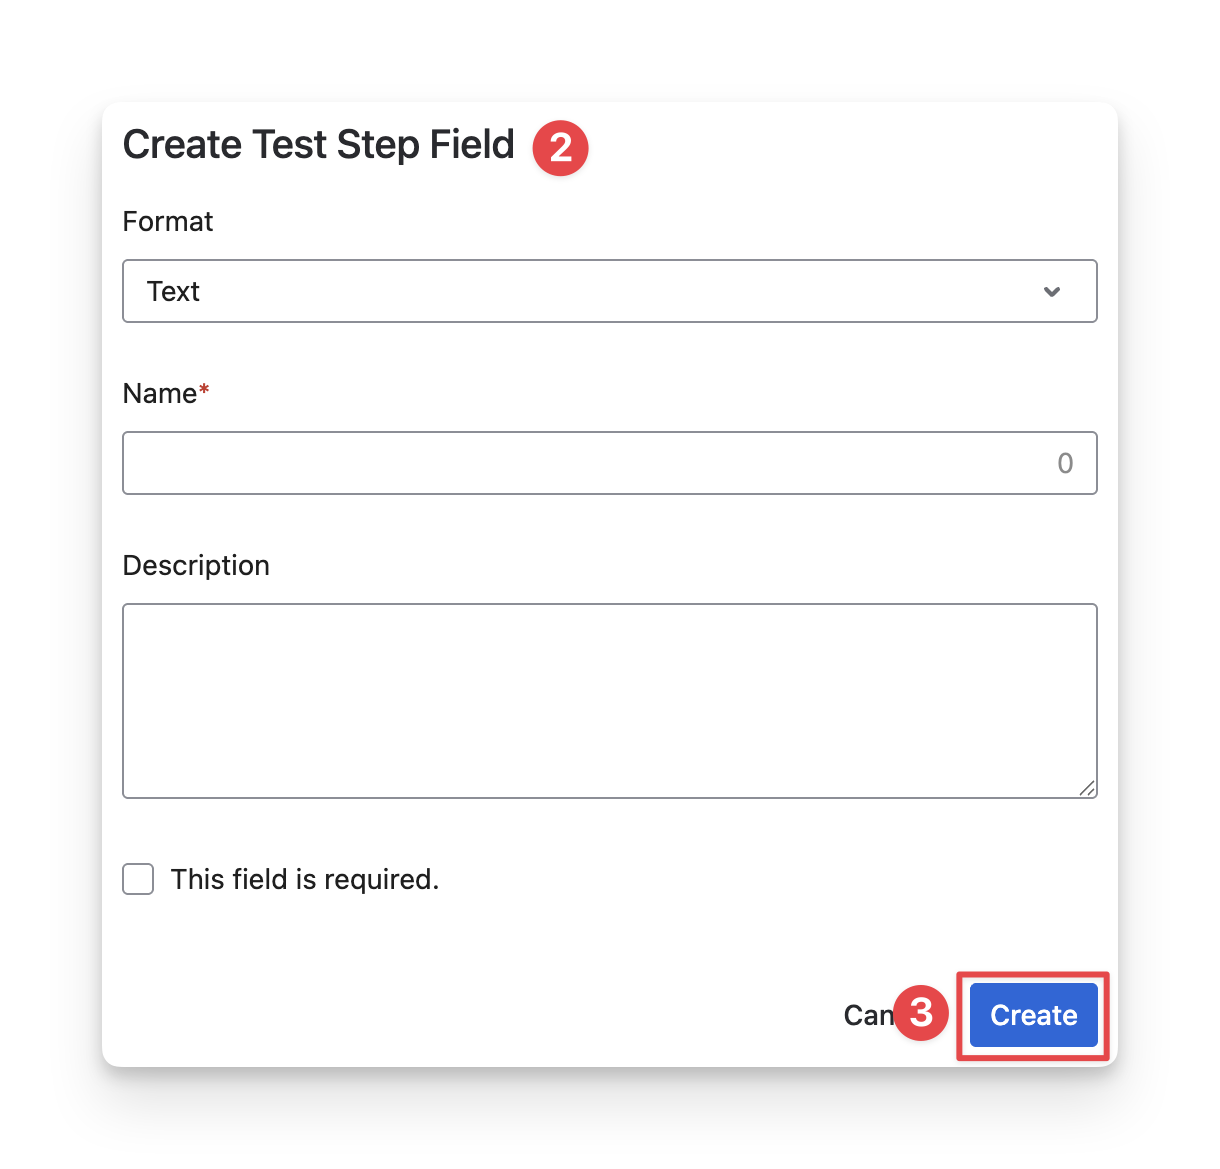
Fill in the “Test Step Field” information.
-
Format: Select the data format for the field. This determines how the information will be displayed and entered in the test step.
-
Name: Enter the name of the field.
-
Description: Provide a description to explain the purpose of the field or guide users on what information should be entered.
-
Select as required: Enable this option if the field must be completed when creating or editing test steps. When marked as required, your team will need to fill in this field before saving the test step.
-
Click “Create” to finish.
Now, an additional test step field has been added to your manual test cases.
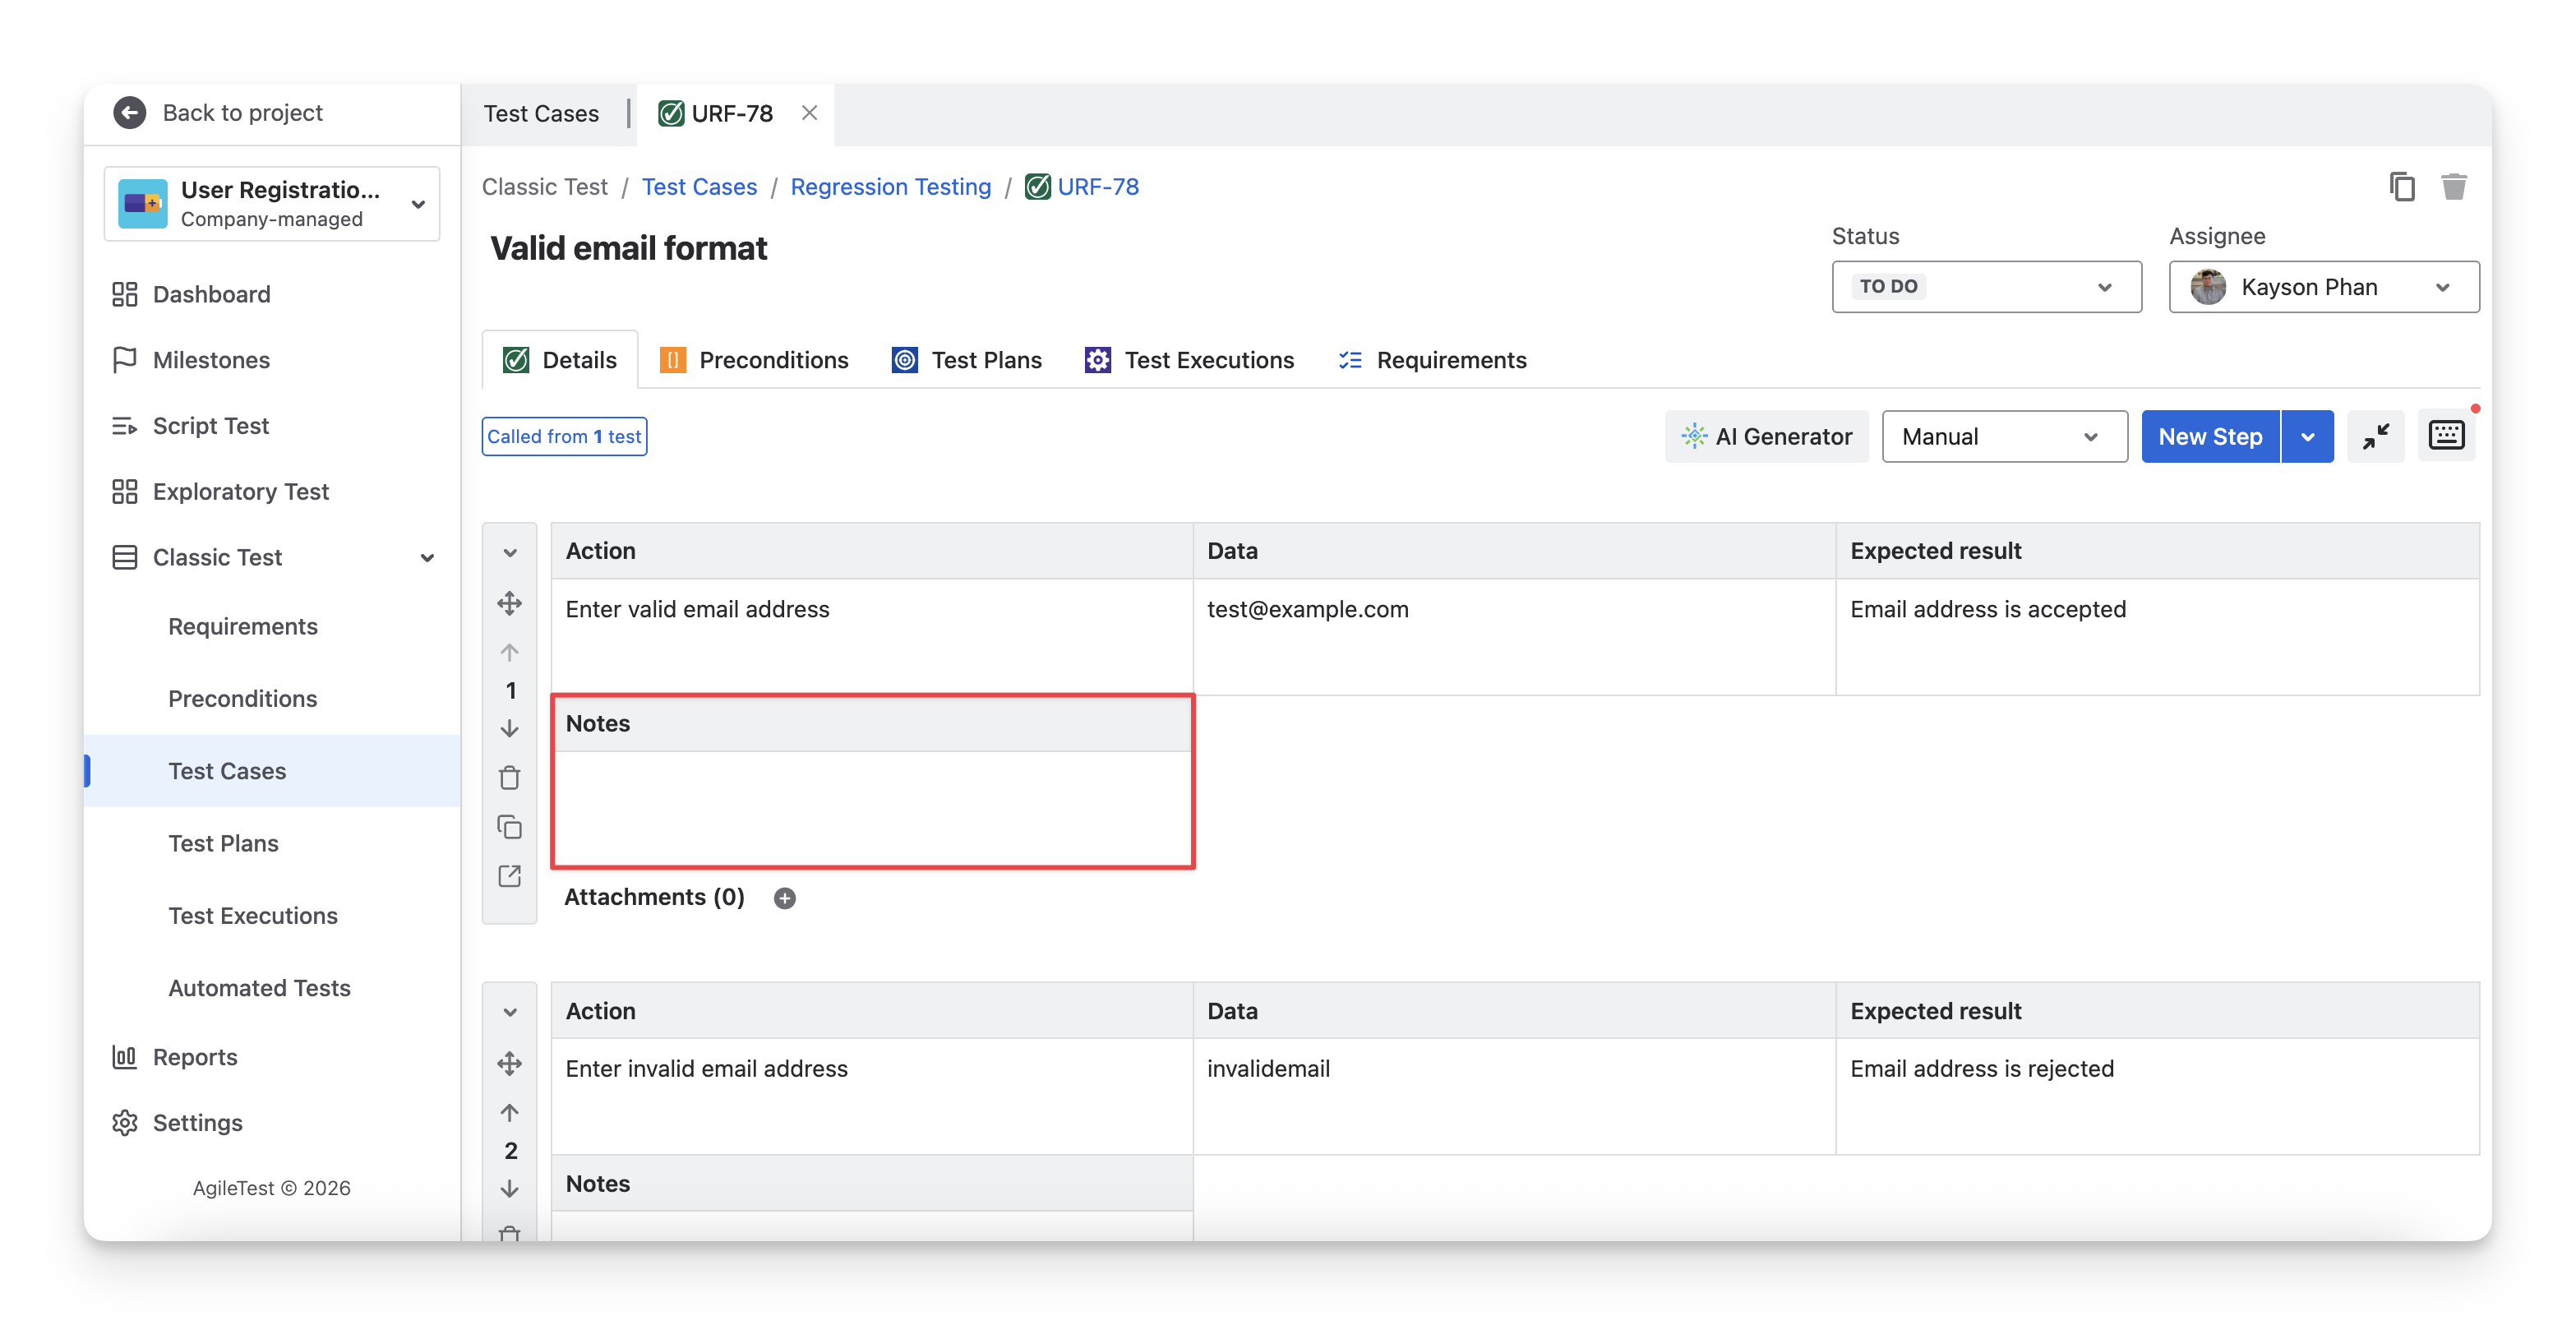
If you want to remove these Custom fields, you can disable them. However, Assignee is a Custom field created by the system and is not editable.
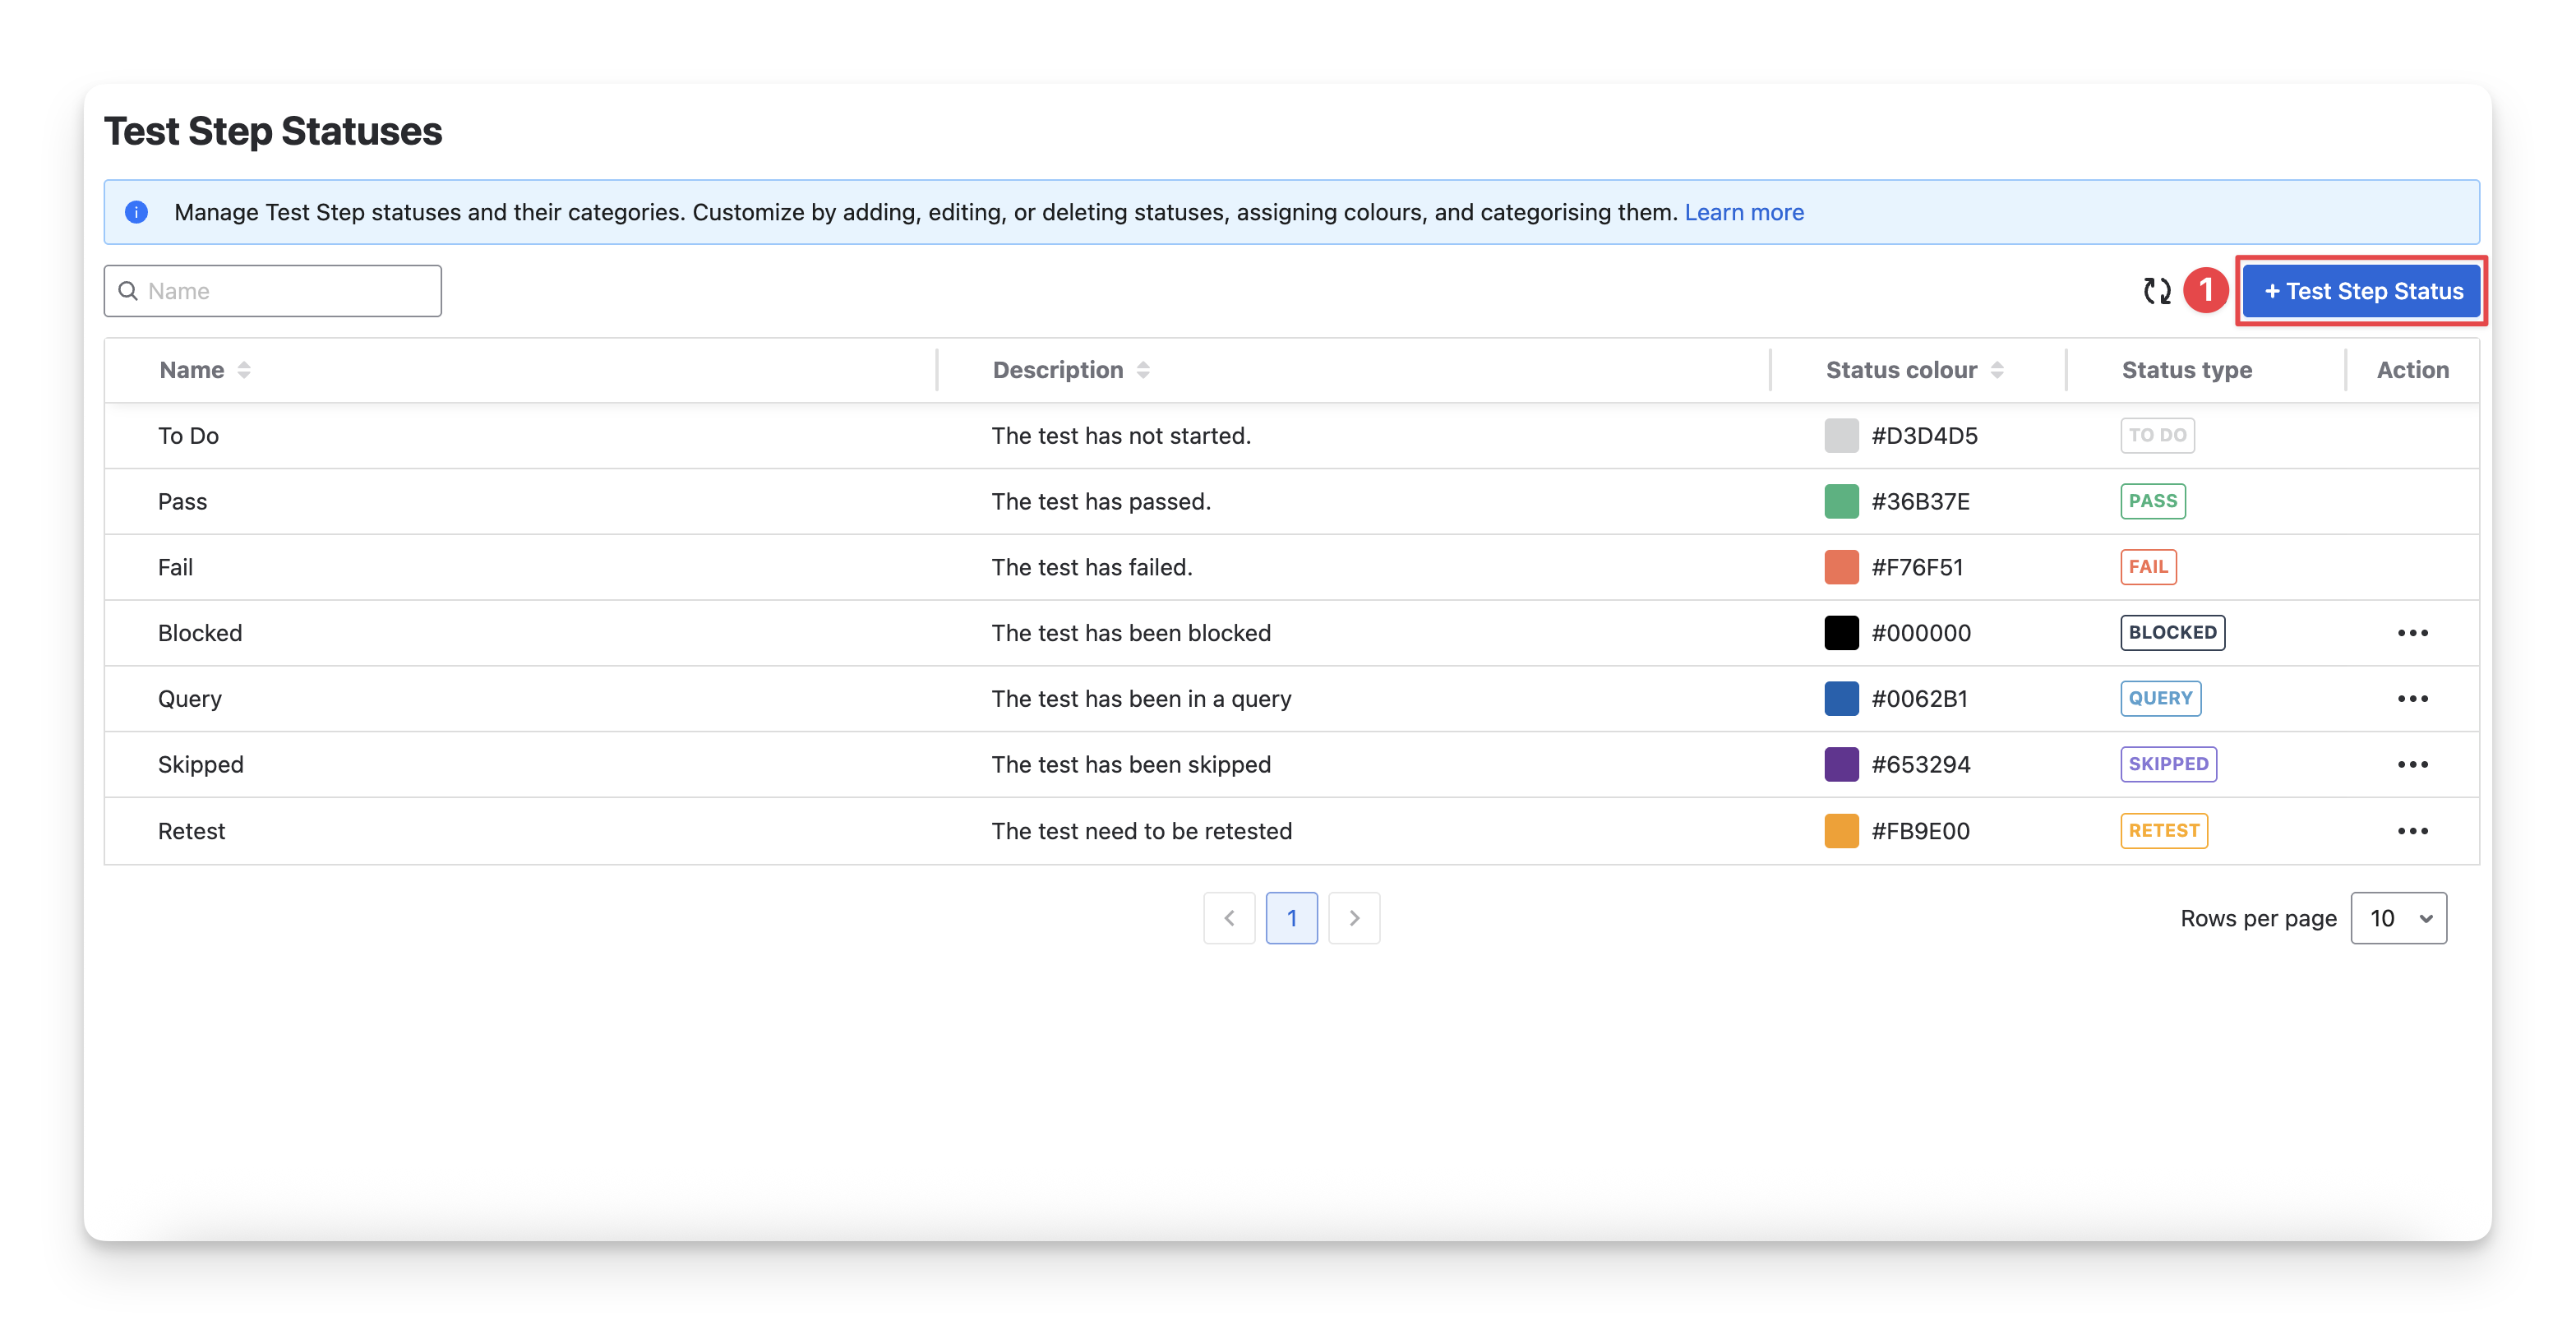
6. Test Step Statuses
The Test Step Statuses screen allows administrators to configure the available statuses used when executing test steps. This setting allows you to create a new name and description, and map it to a supported test status.
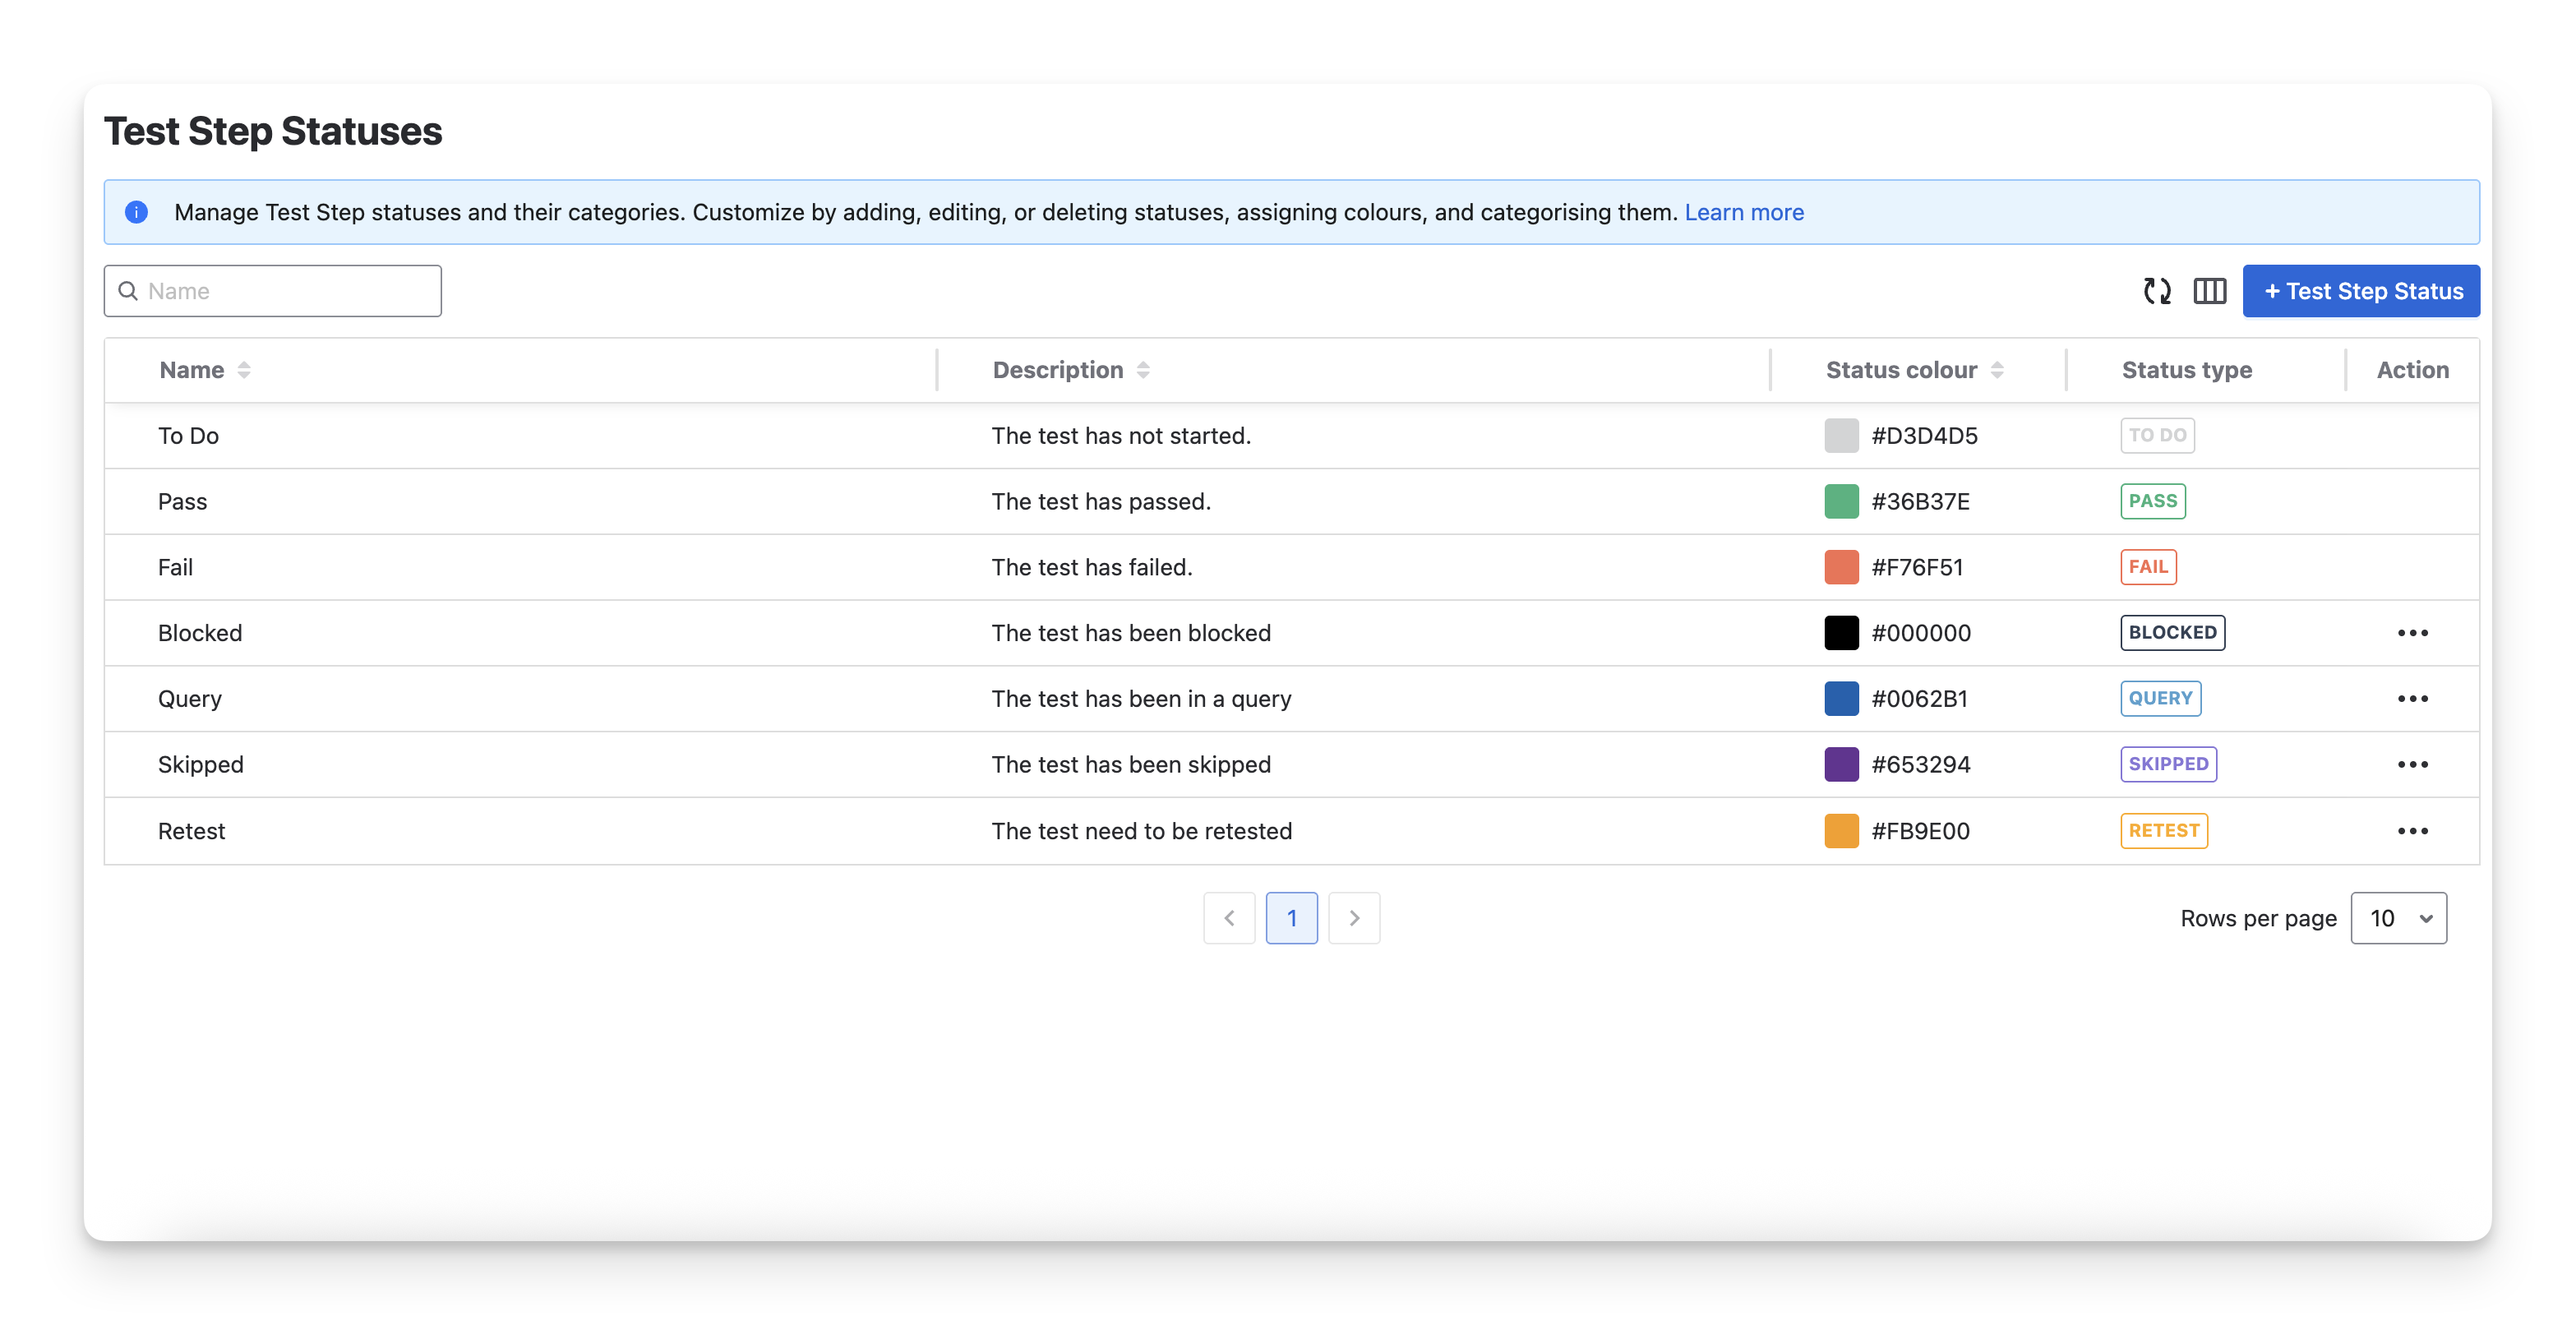
By default, there are only 3 default statuses: todo pass fail . You can add other custom status by:
-
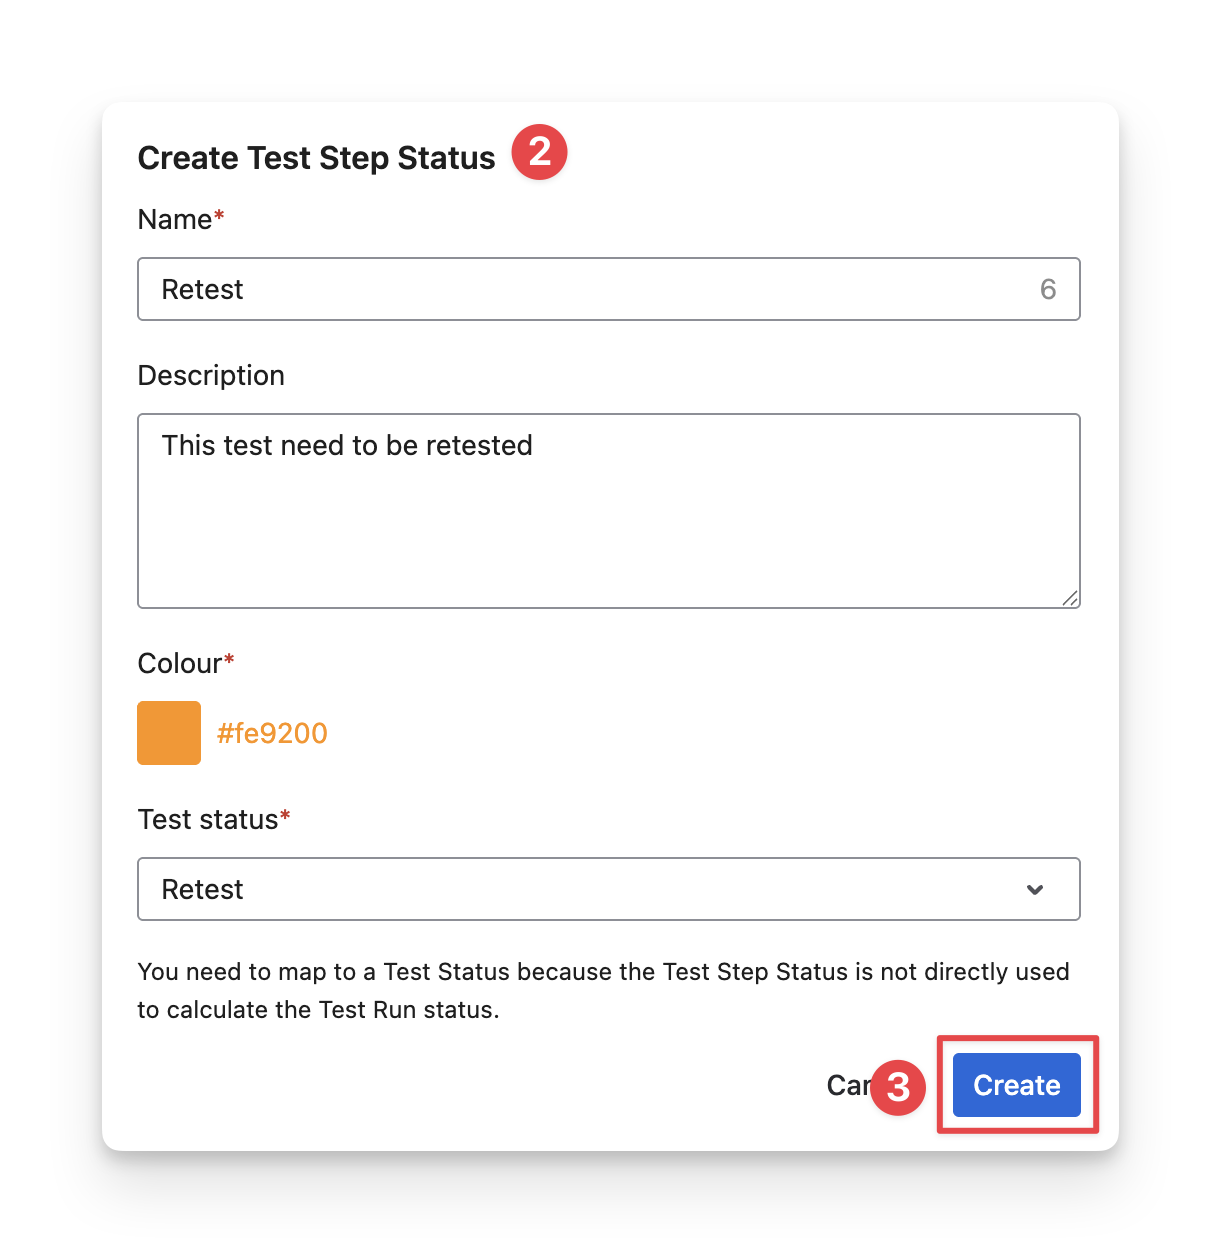
Click on the button “ + Test Step Status ”.
-
Fill in the Test Step status details.
-
Name: Enter a descriptive name for the test step status
-
Description: Provide a brief description of what the status represents.
-
Color: Choose a color to visually differentiate the status in the test execution.
-
Test Status: Select one of the supported statuses for the test step.
Remember to map the new status to one of built-in statuses. Doing that will ensure your test statistics are compiled and used to calculate the final Test execution result.
-
Click “Create” to complete.
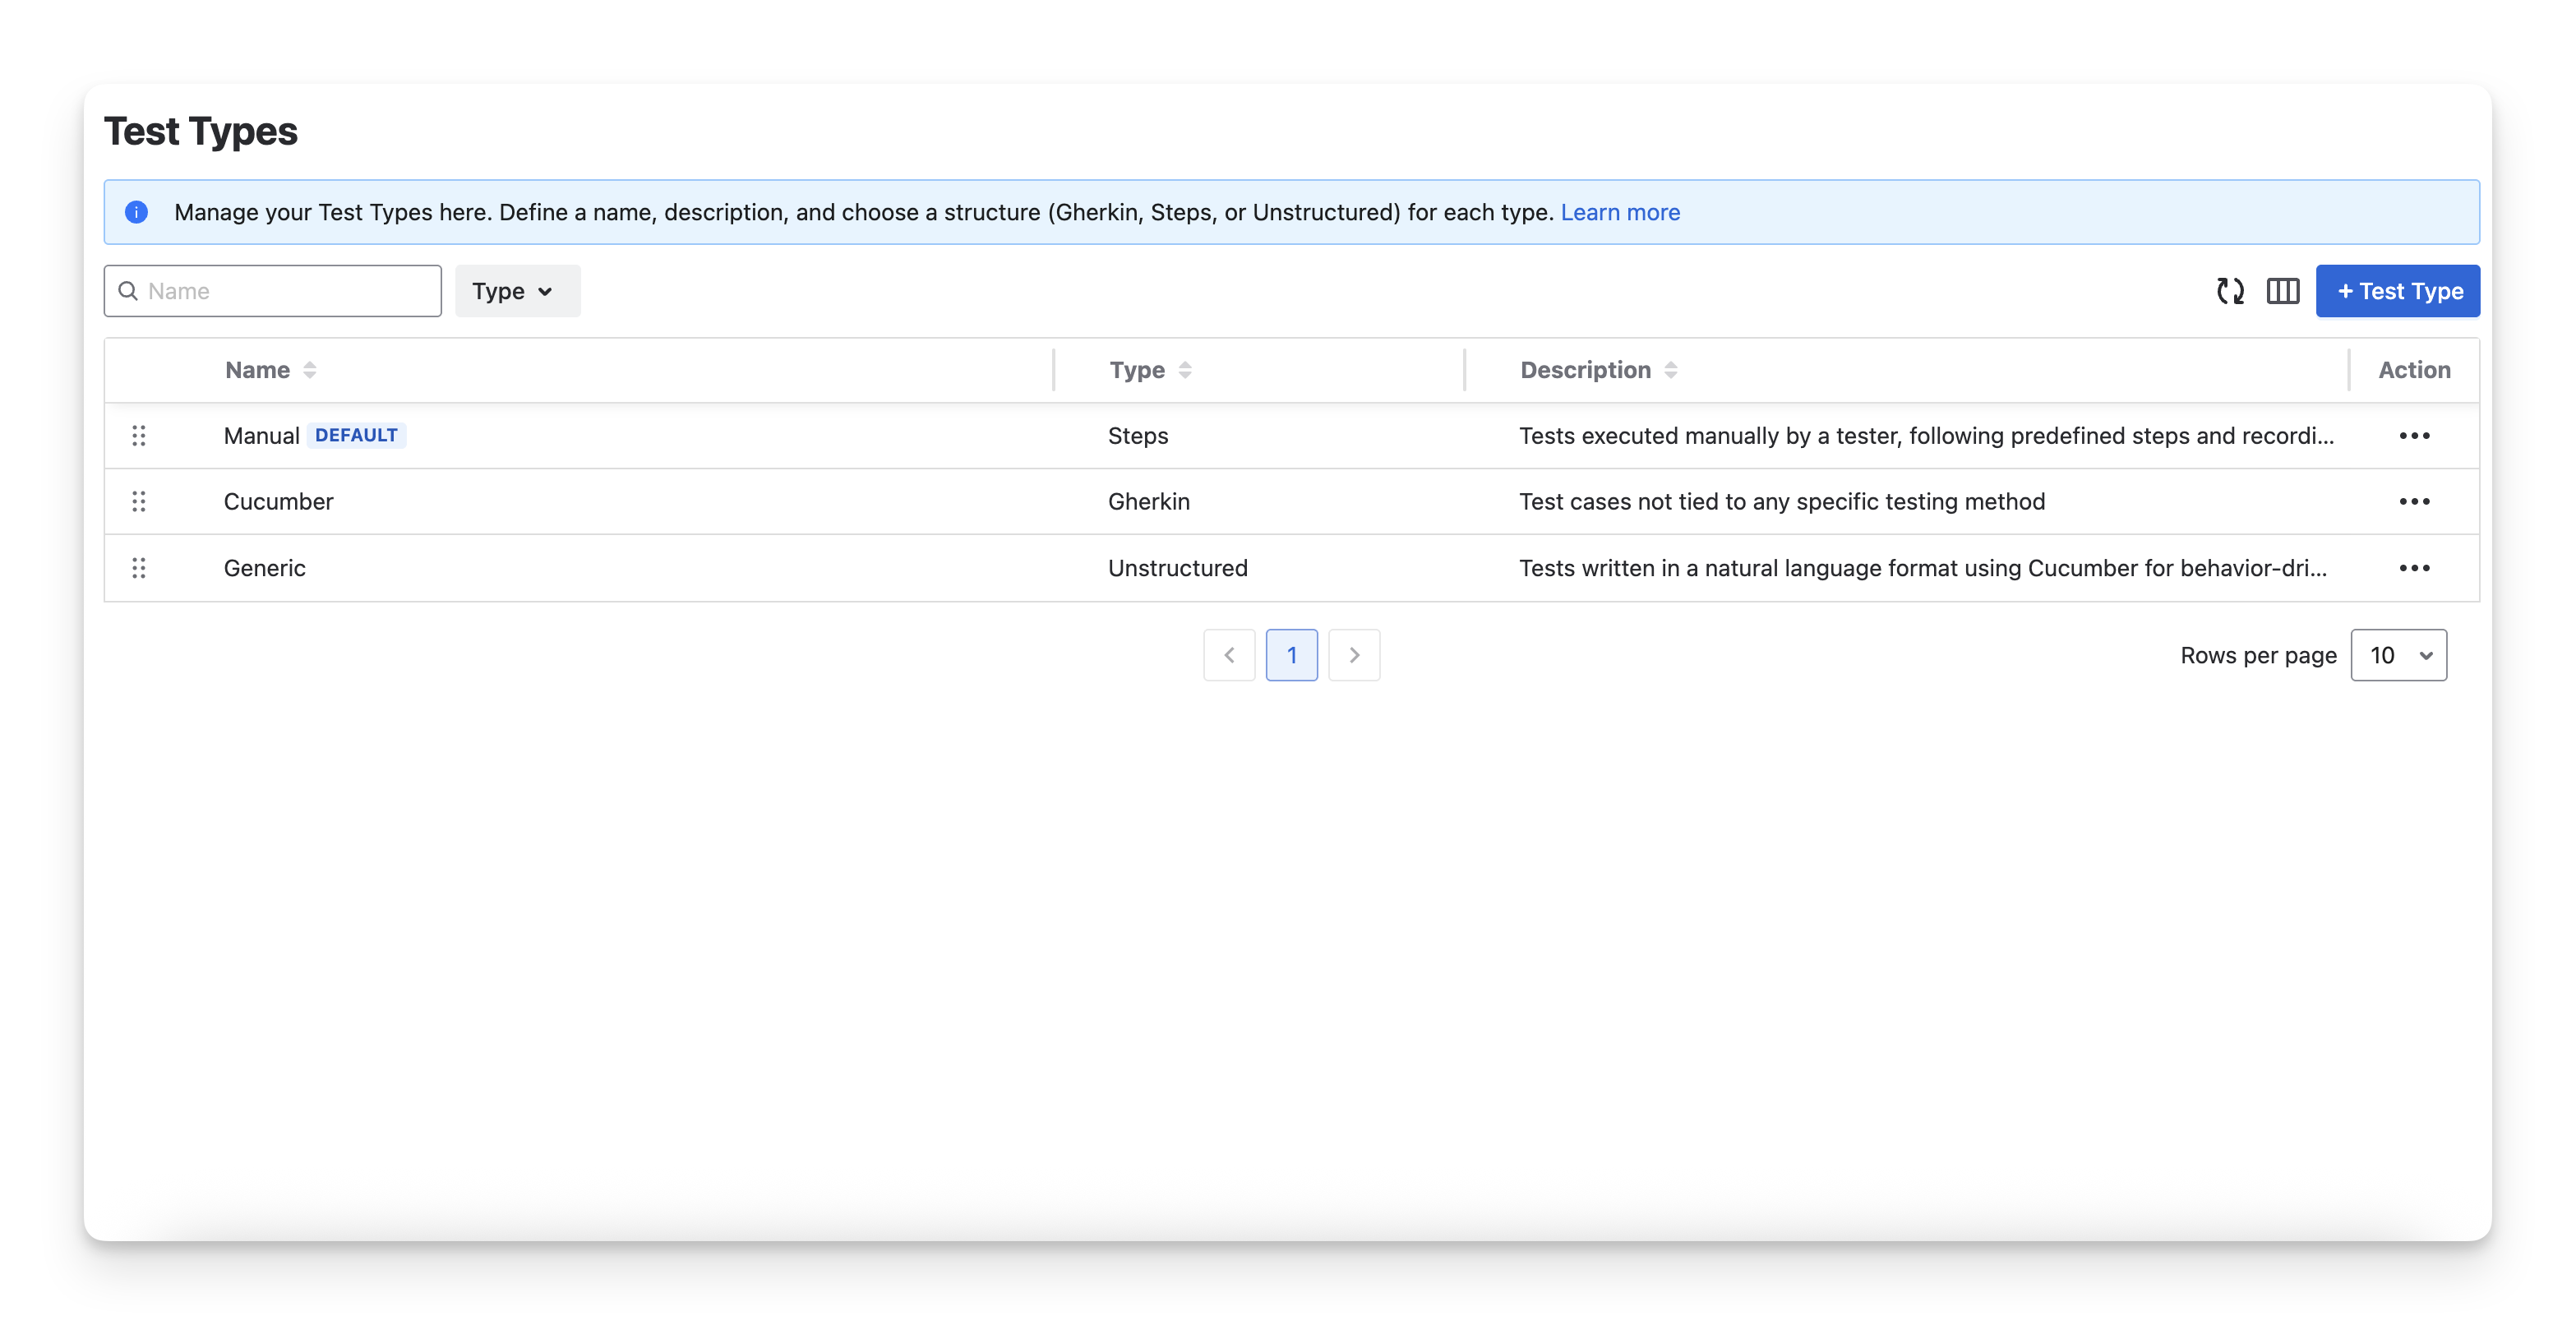
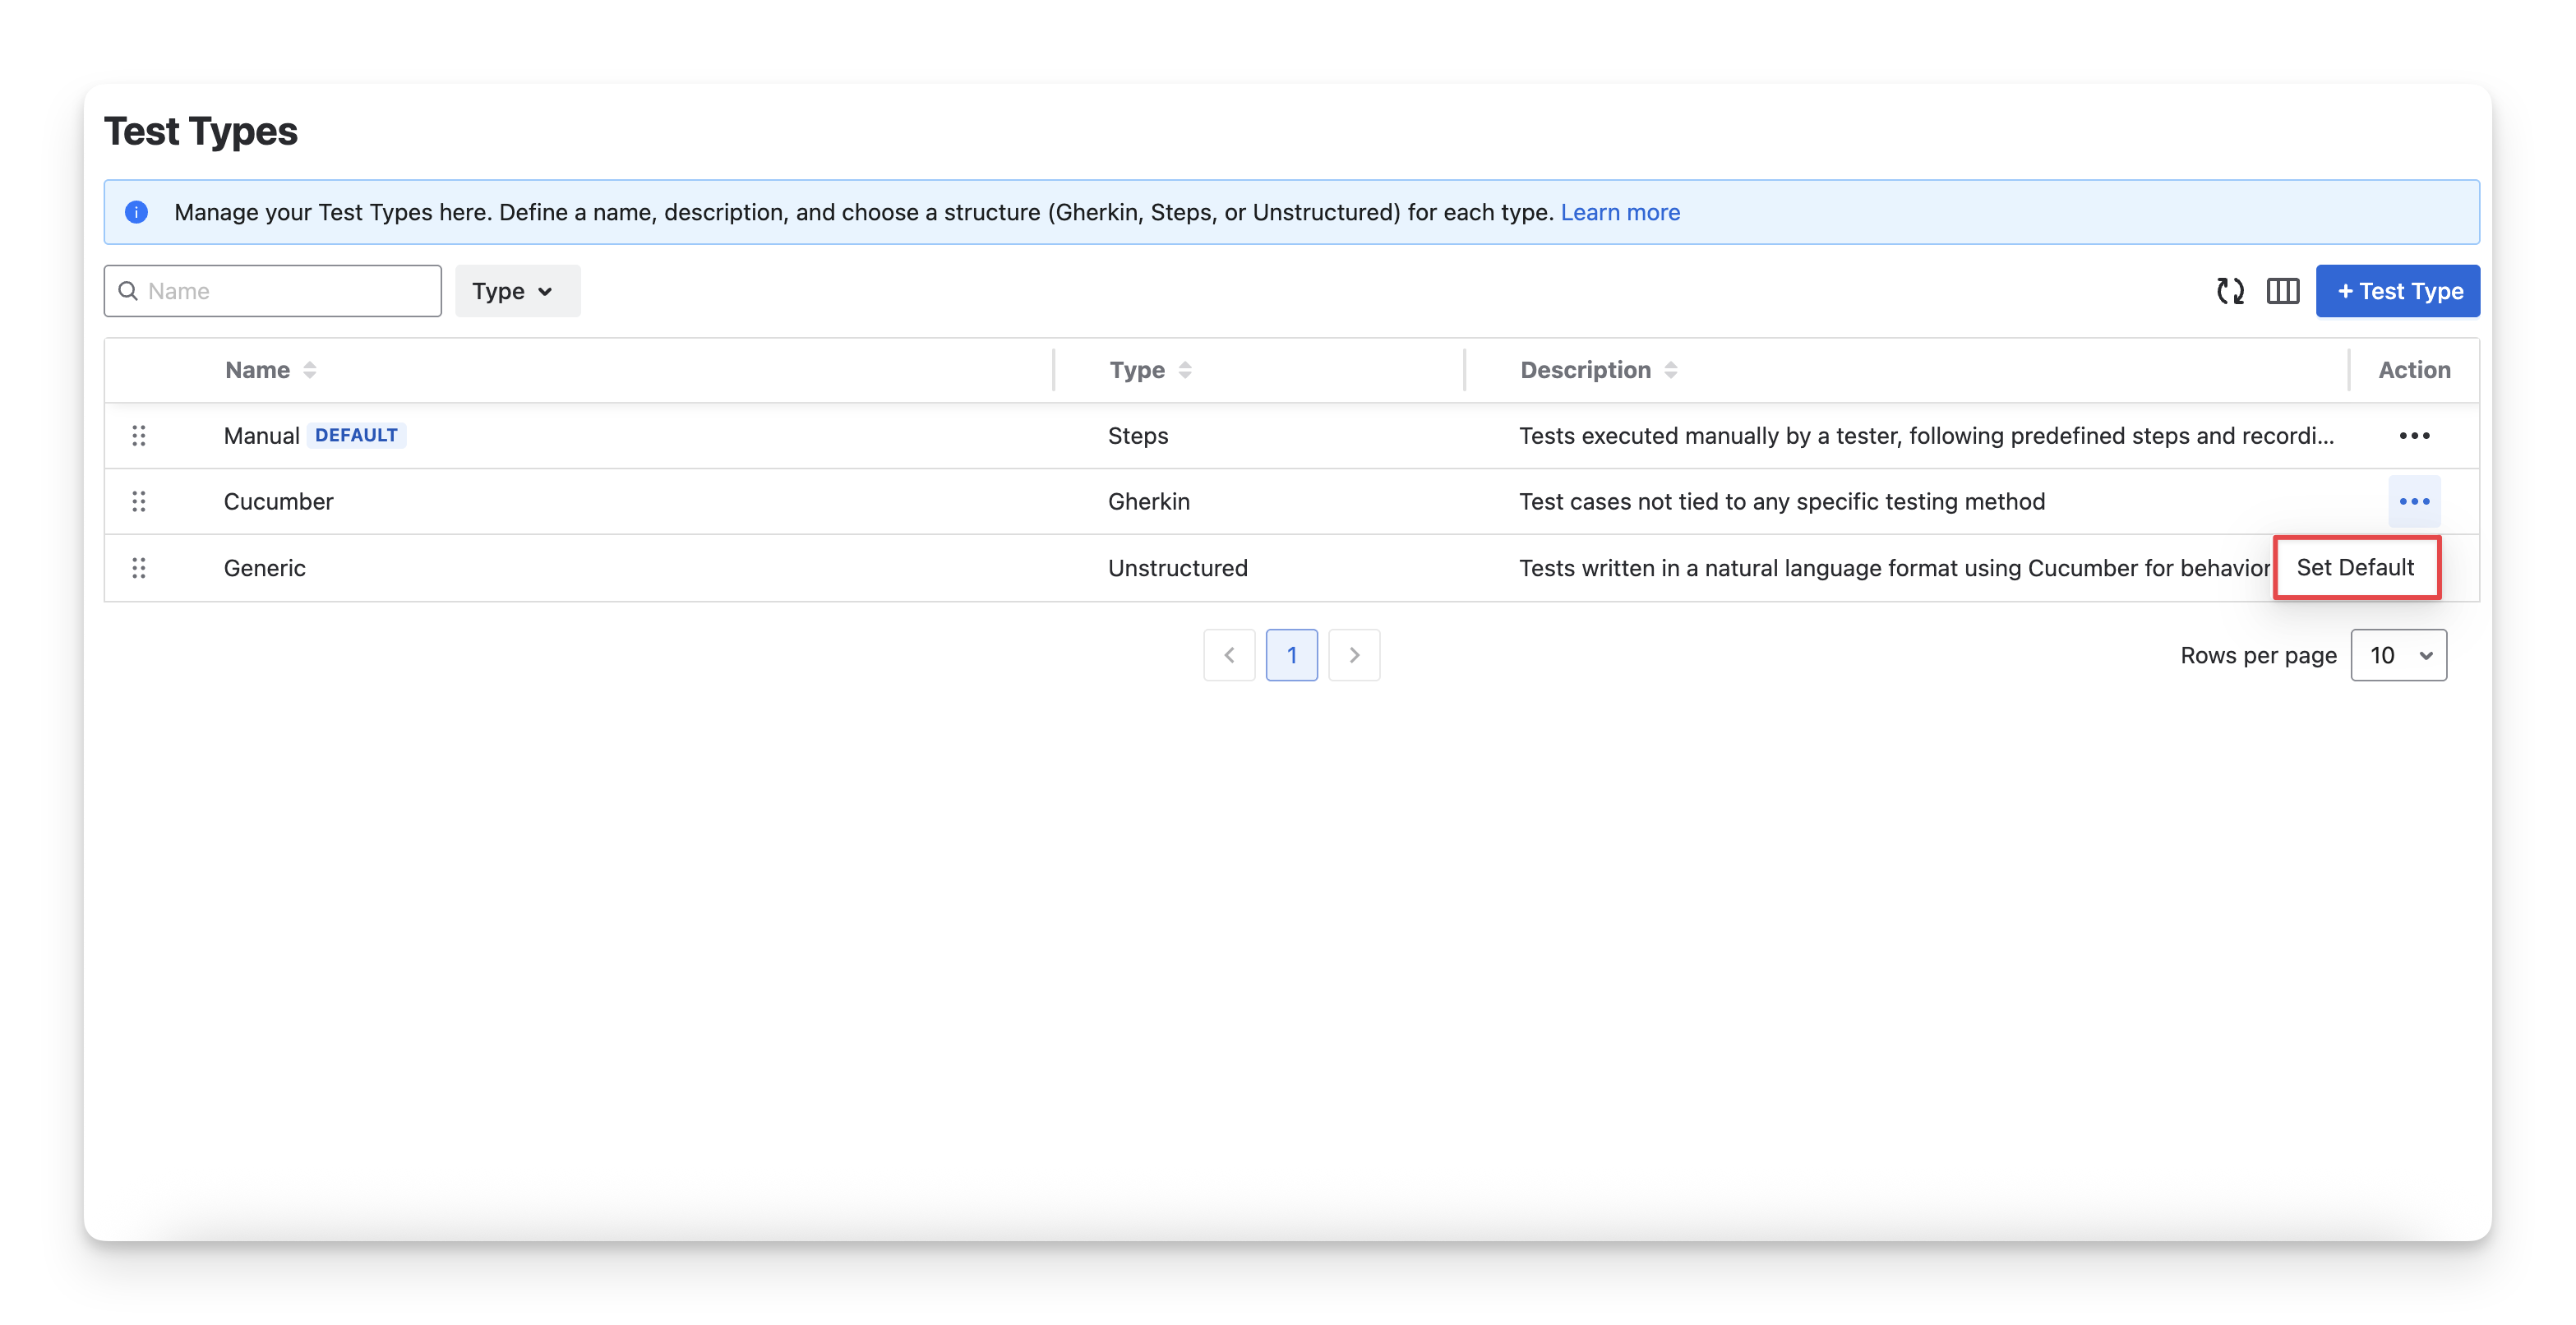
7. Test Types
The Test Type feature allows you to update the name and description of existing test types to better fit the terminology and workflow of your organization
In Agile Test, there are 3 default test types: Steps, Gherkin, and Unstructured. Each has a display name in the app: Manual, Cucumber and Generic, respectively.
|
Type |
Display Name |
Description |
Best used for |
|---|---|---|---|
|
Manual |
Include all the key elements of a test case, such as actions, input data, expected results, and attachments. |
Manual testing, regression testing, and scenarios where precision and repeatability are important. |
|
|
Cucumber |
Include a series of Given, When, and Then statements. |
Exploratory testing, early feature validation, or scenarios where strict steps are unnecessary but testing insights are still valuable. |
|
|
Generic |
Include only a description text field. |
Automated frameworks like Cucumber, SpecFlow, or Behave, or collaborative contexts where both technical and non-technical stakeholders need to understand the test scenarios. |
Read more: Understand Test Case Type
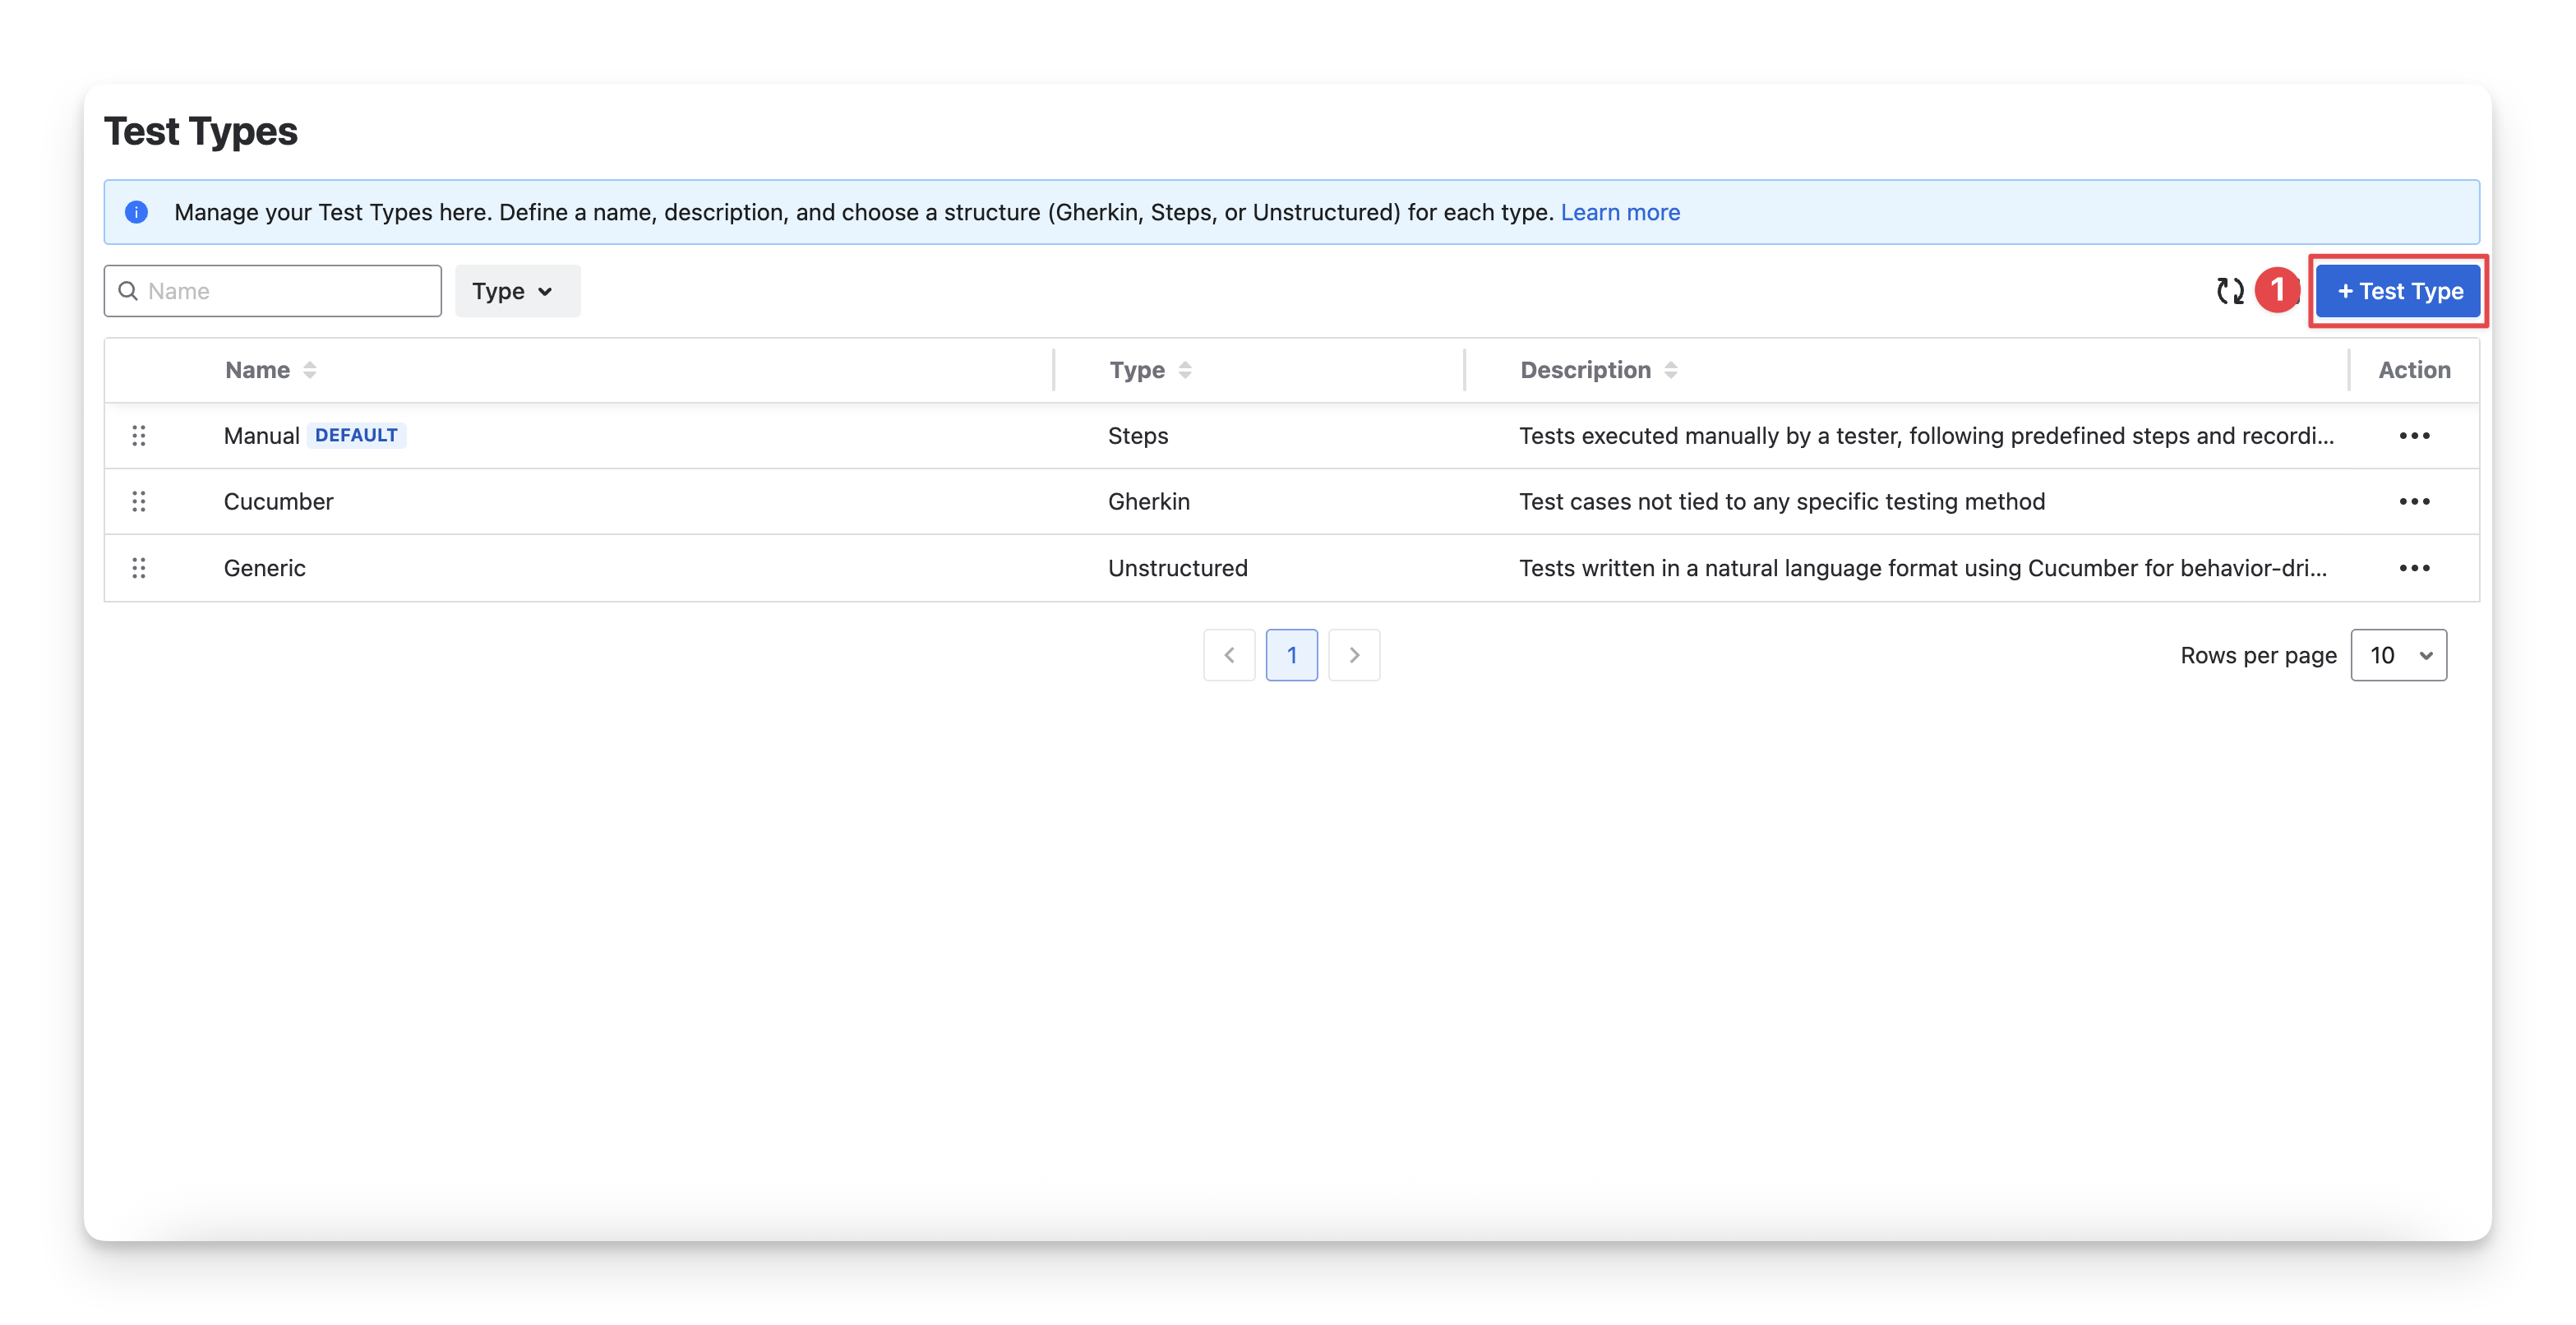
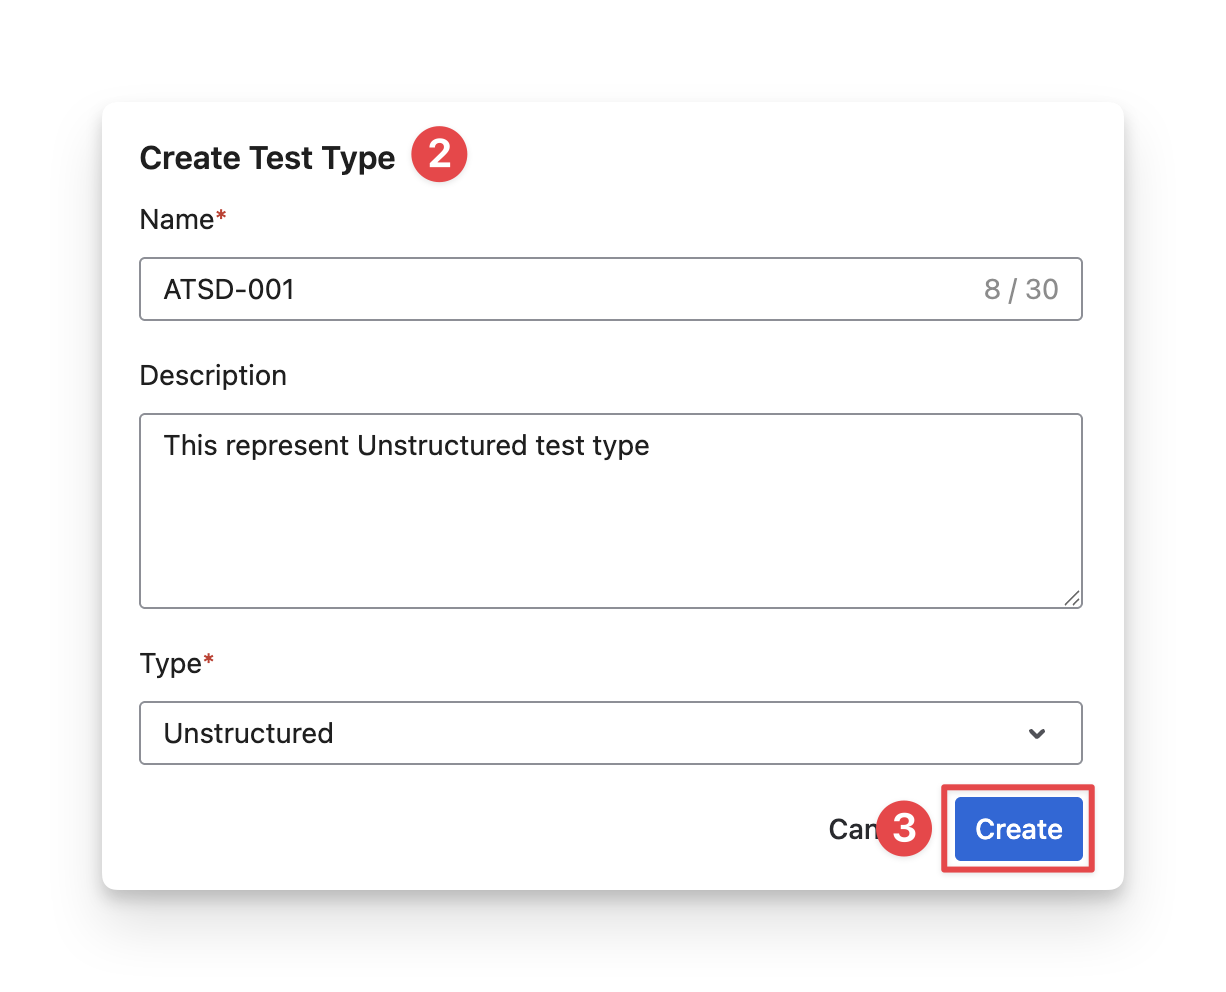
To customize a test type, follow these steps:
-
Click on the “ + Test Type ” button.
-
Fill in the Test type information.
-
Click “Create” to finish.
Additionally, you can select a test type to become default . When a test type is marked as default , any test case created manually will automatically use this test type. This helps standardize the structure of newly created test cases and ensures they follow the preferred testing format defined by your team.
Should you need any assistance or further AgileTest inquiries, contact our 24/7 Support Desk.