.png)
In this guide, you will learn how to configure the following settings for your first project:
You can refer to this video to configure AgileTest for the first time on your project.
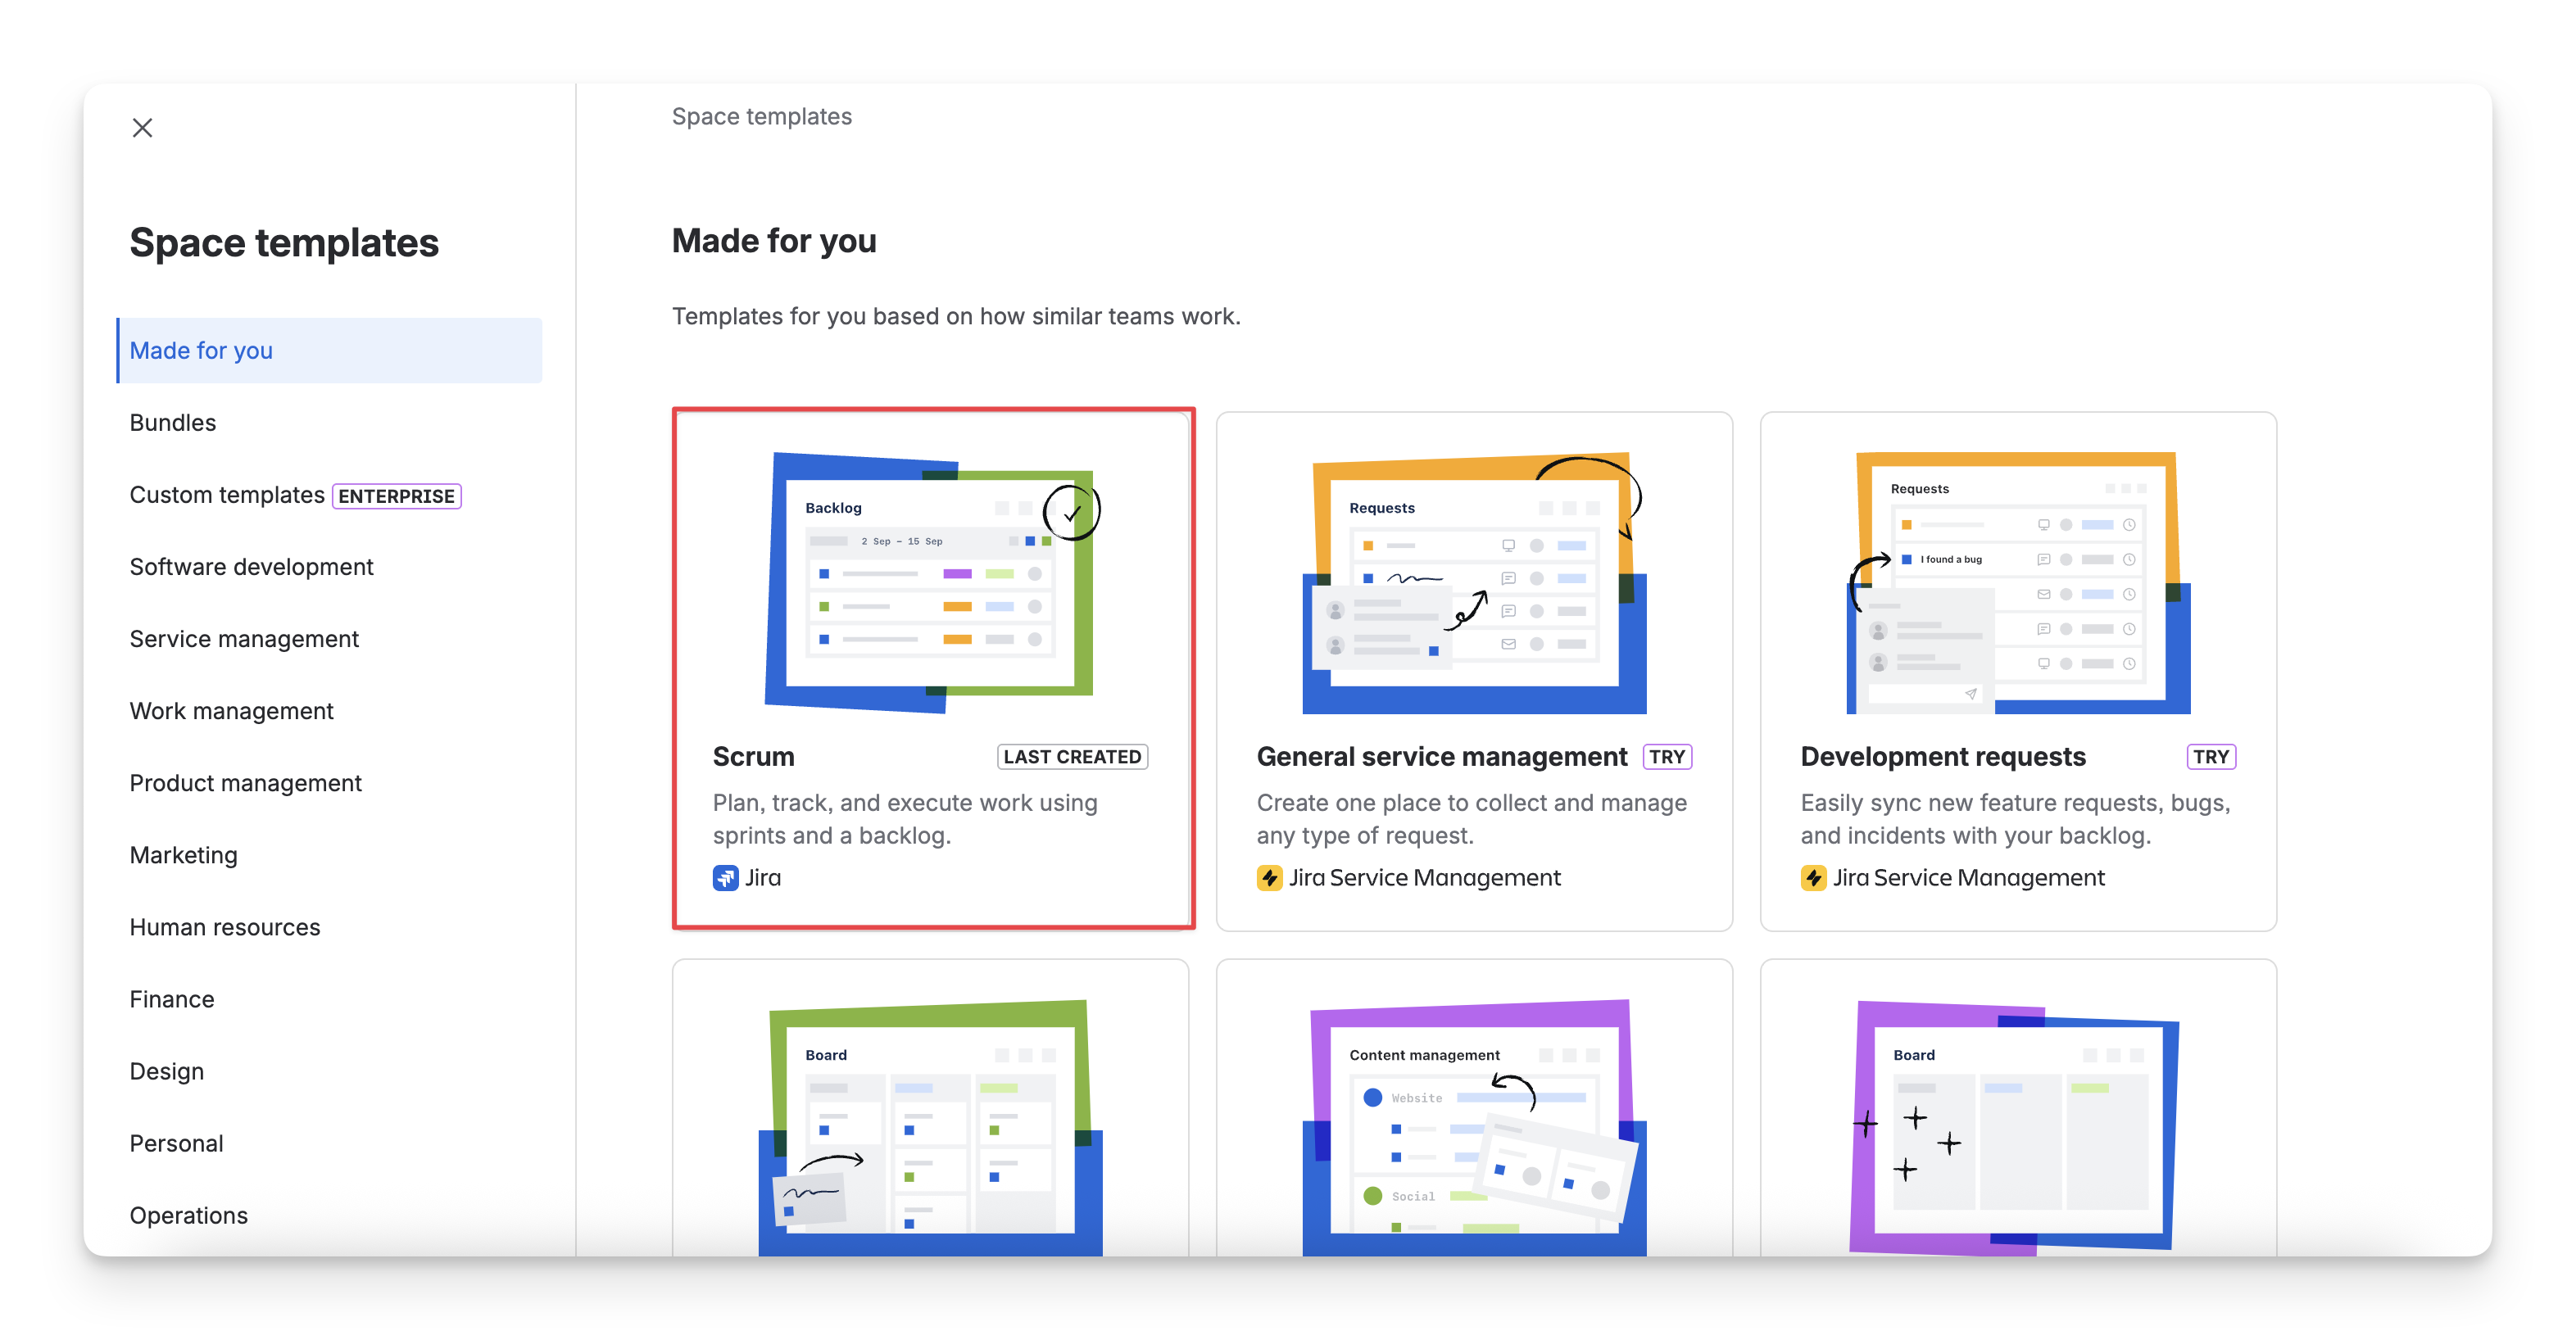
Before any configuration, you need to prepare a Jira project.
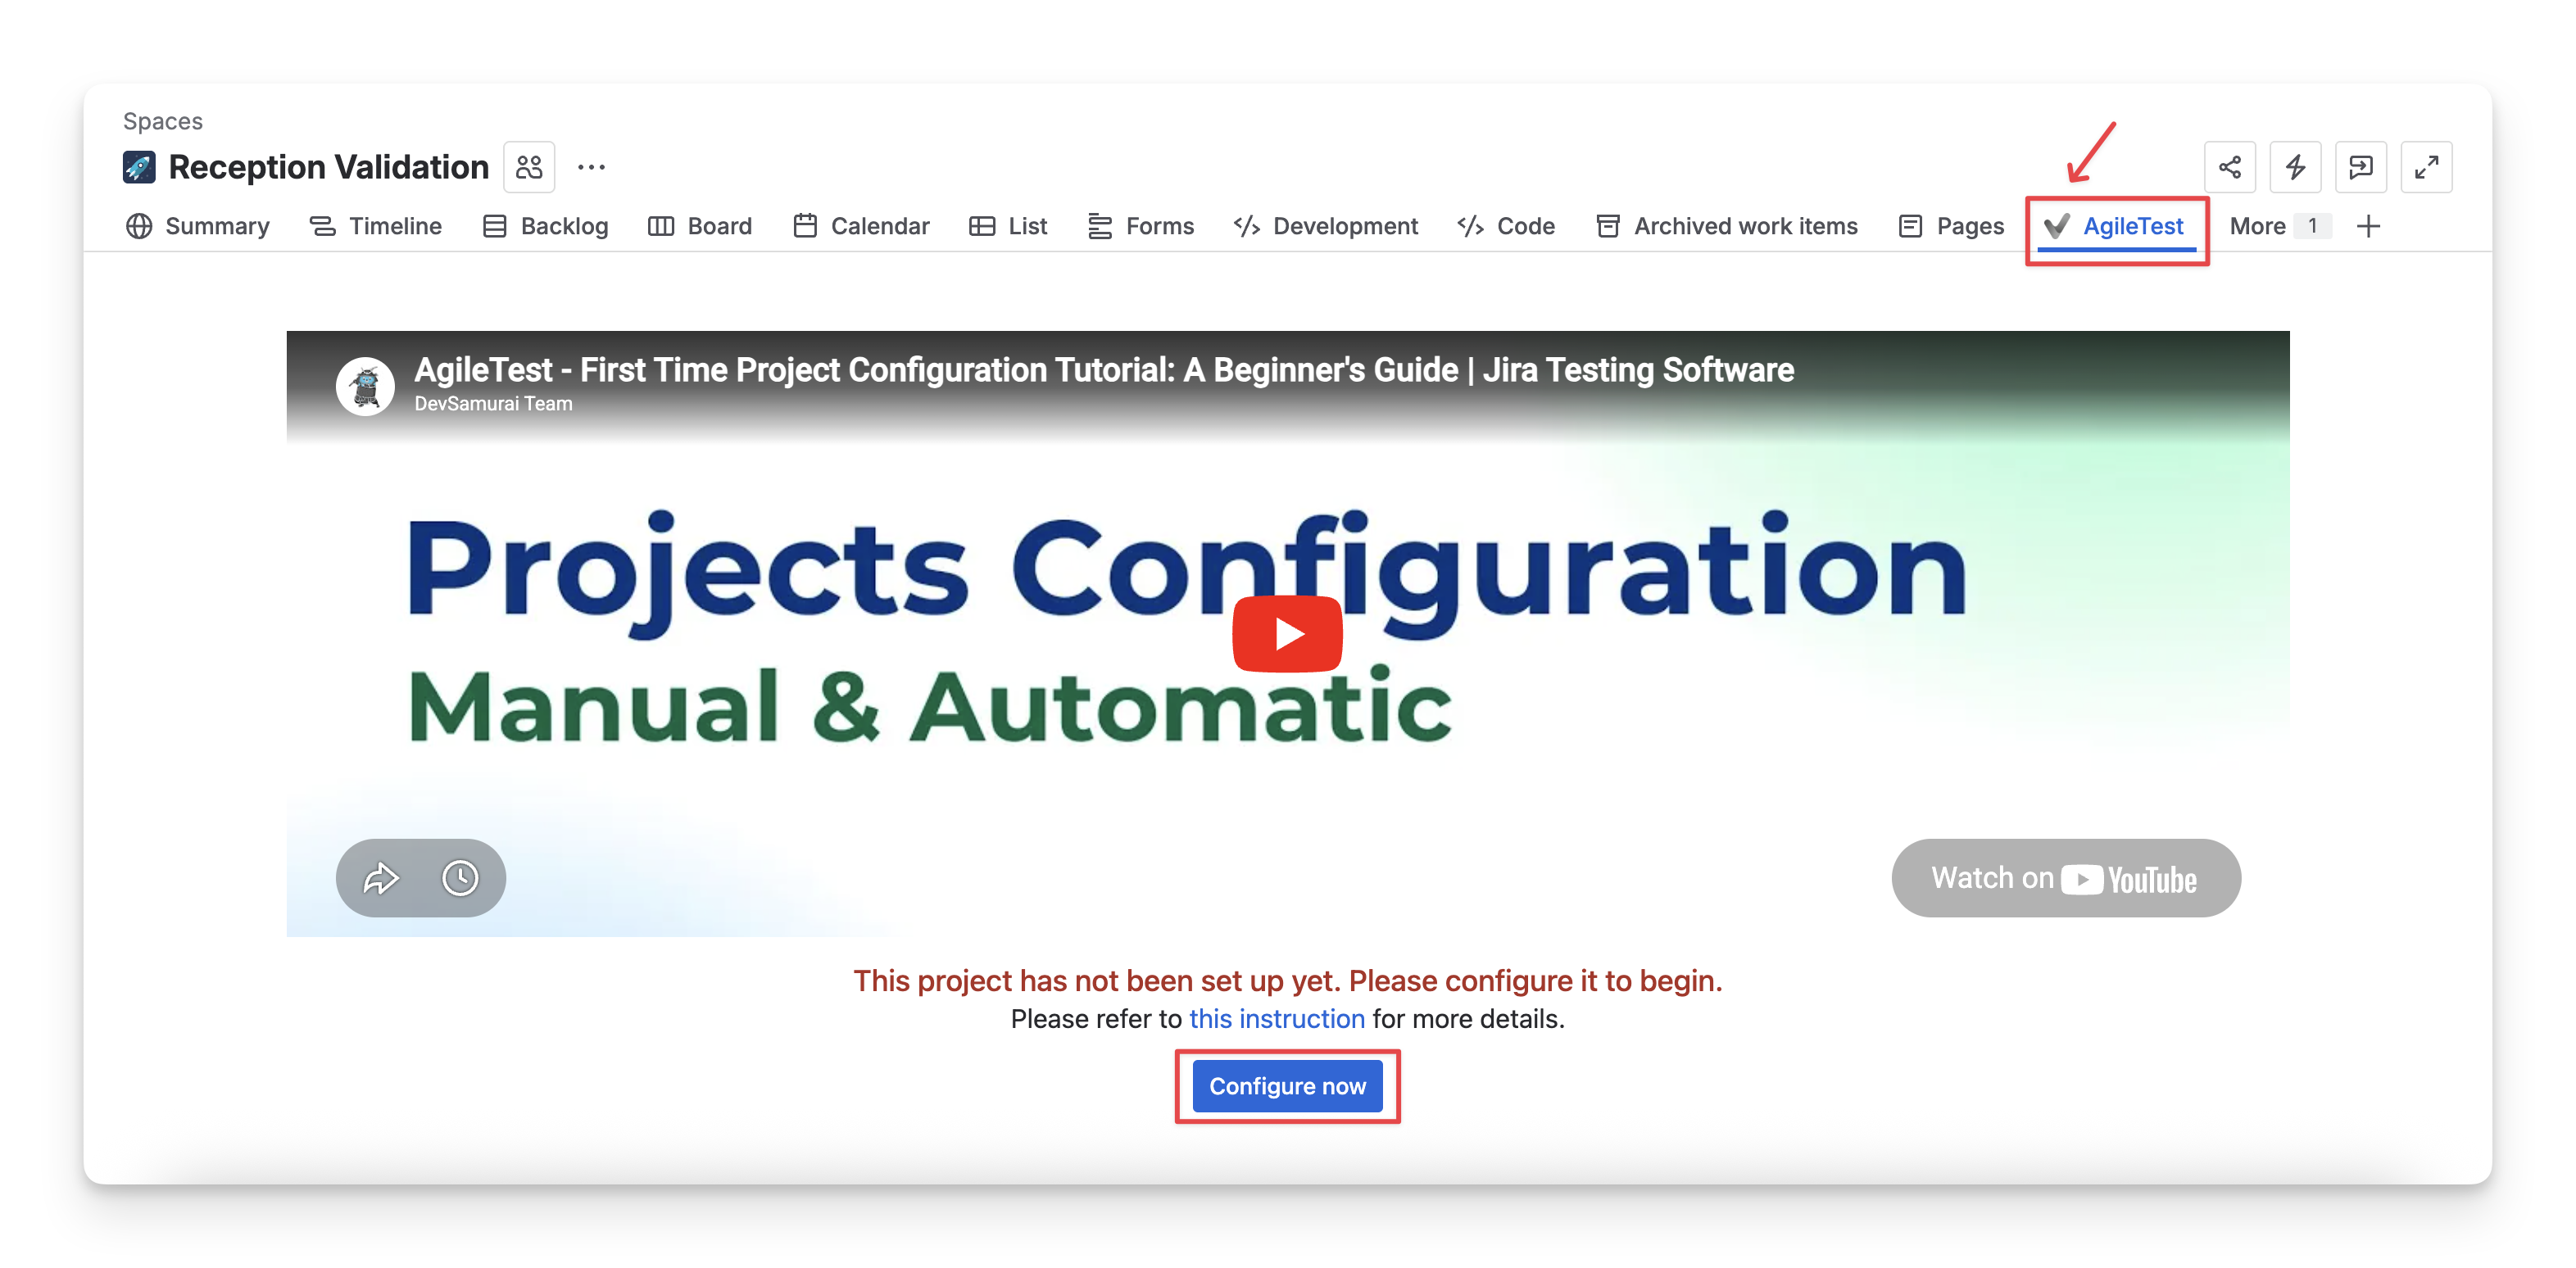
After creating your project and accessing AgileTest for the first time, you will be directed to the following screen to begin the configuration process. Here, you can click on the “Configure now” button to redirect to the settings screen.
Then, you will see the setup screen with four tabs, representing the main configurations for each new project.
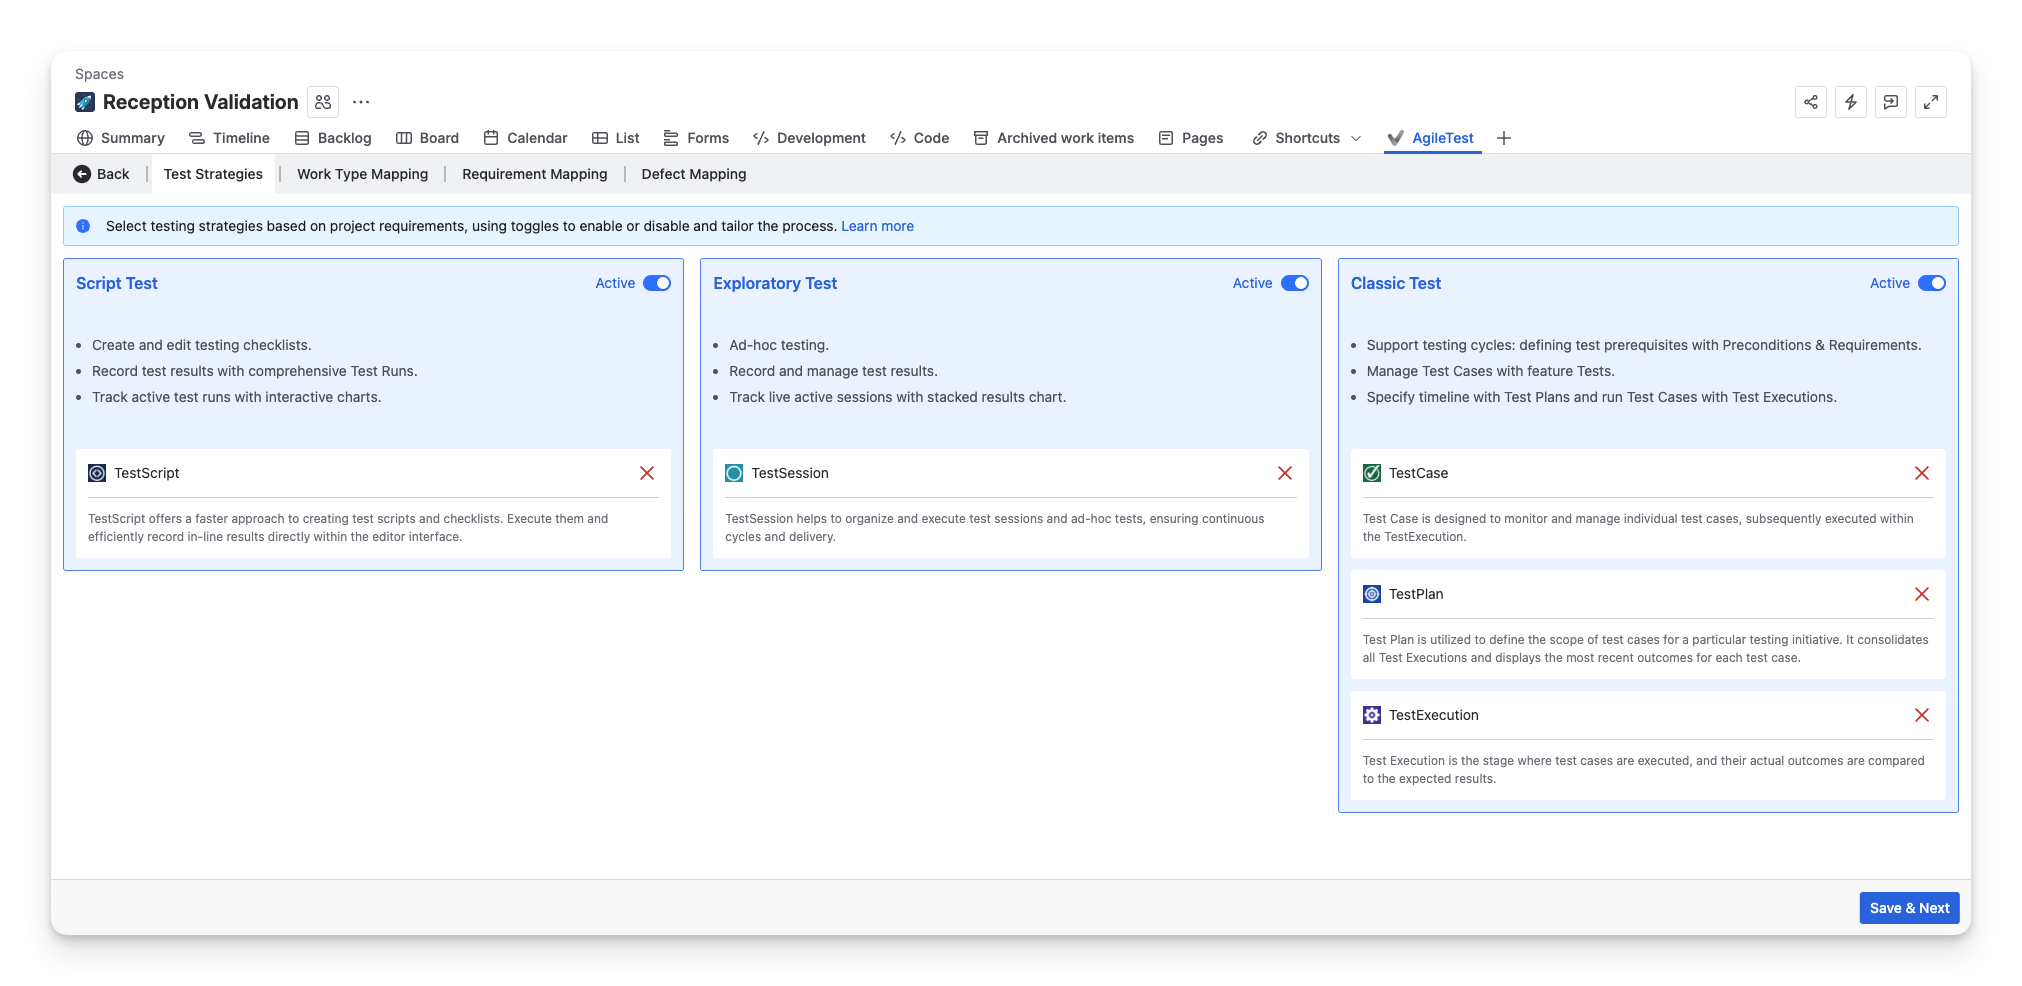
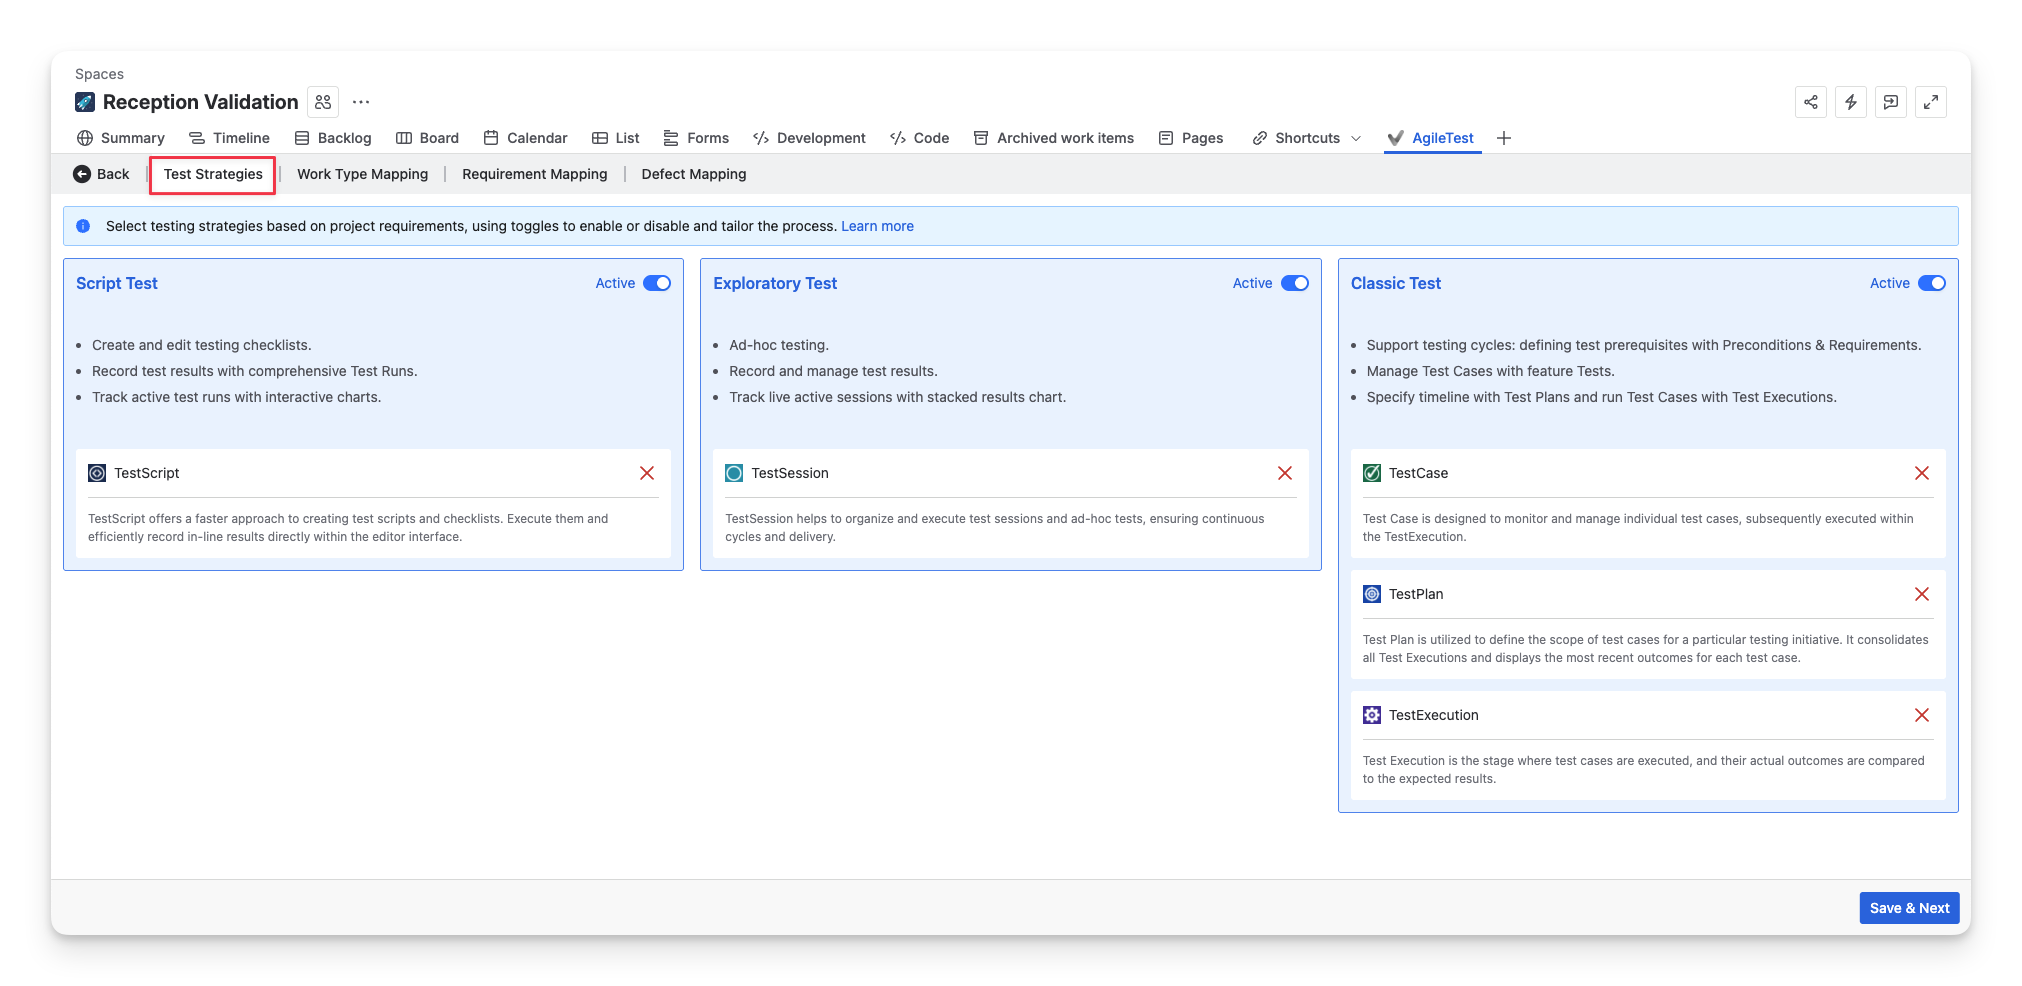
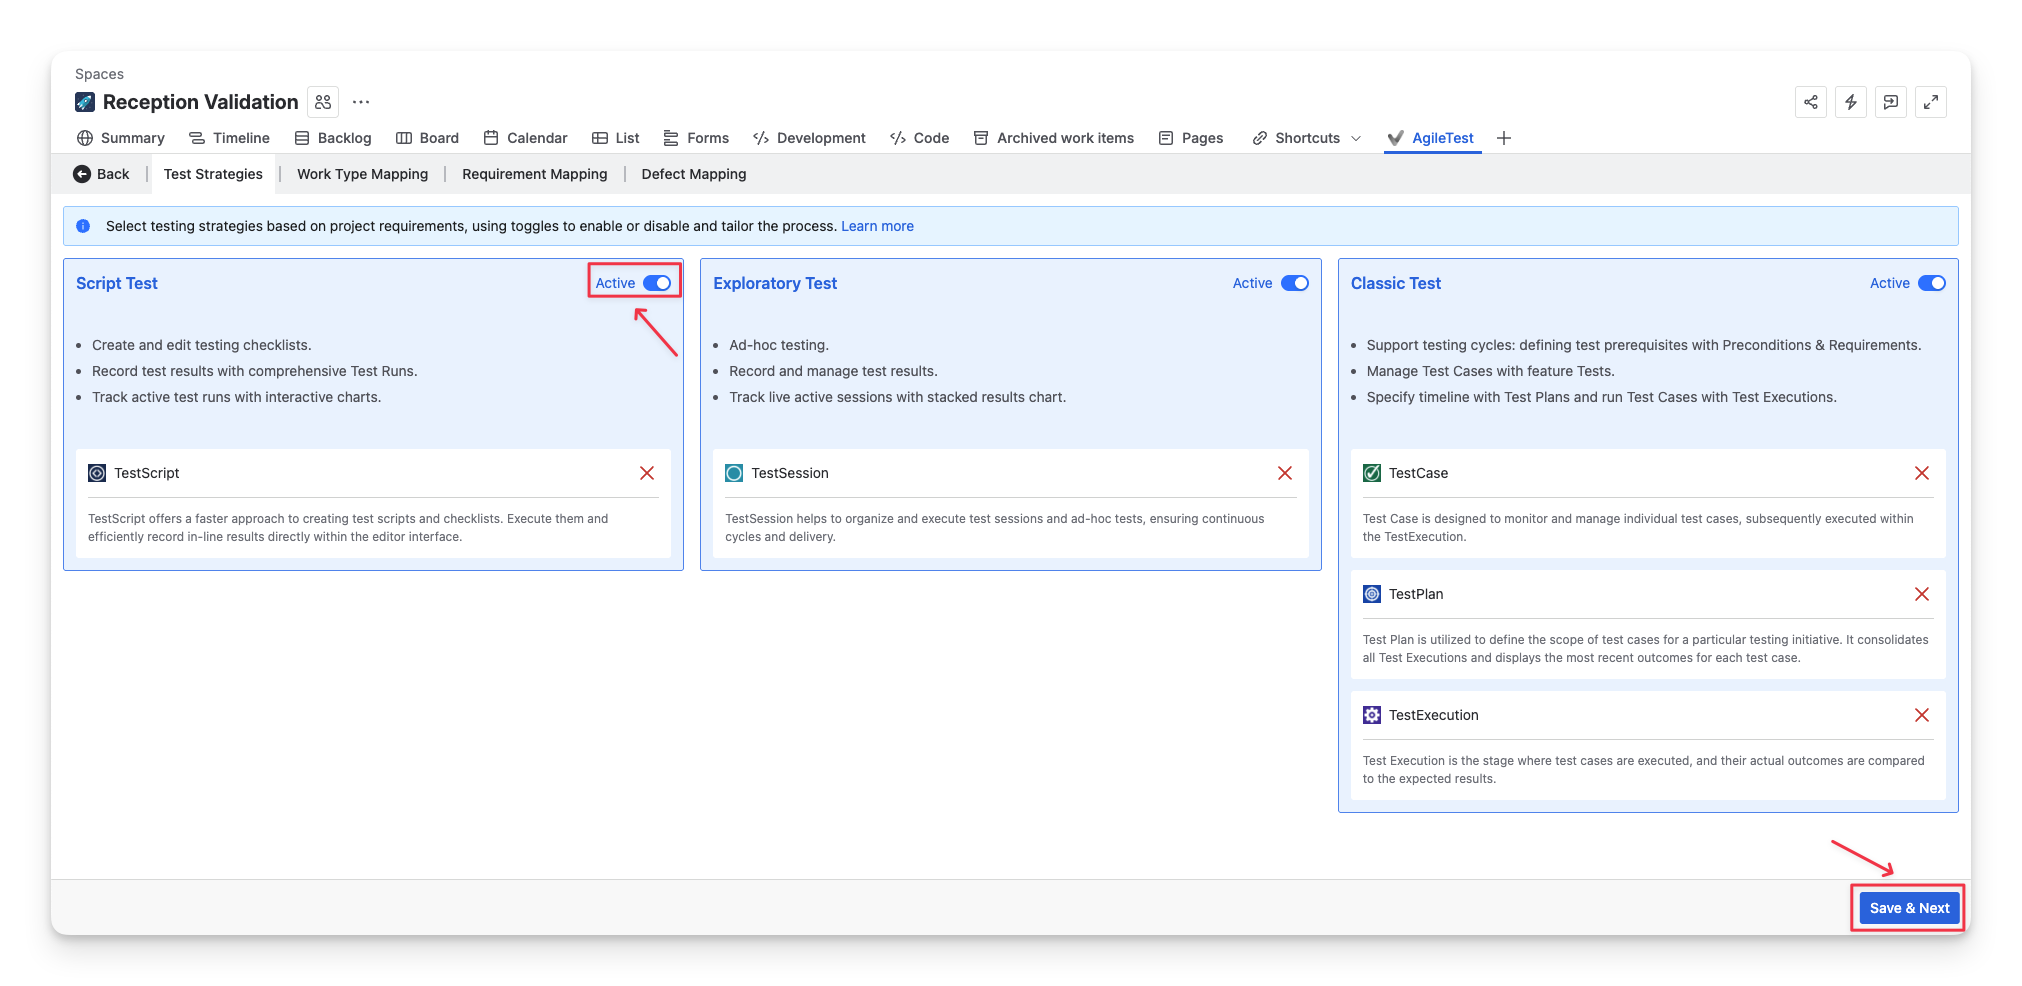
1. Test Strategies
The first thing to consider is test strategies. AgileTest supports three different strategies: Script Test, Exploratory Test, and Classic Test.
-
Script Test: enables teams to create and manage test scripts with checklists, then execute them through Test Runs.
-
Exploratory Test: supports ad-hoc testing sessions where testers can freely explore the application while recording findings and results during live test sessions.
-
Classic Test: provides a traditional testing workflow where teams manage Test Cases, organize them into Test Plans, and execute them through Test Executions with defined timelines and requirements.
Learn more about: Script Test | Exploratory Test | Classic Test.
By default, all three strategies are enabled. If your team doesn’t have any specific restrictions, we recommend clicking “Save & Next” to proceed with these default settings.
Read more: Test Strategies configuration.
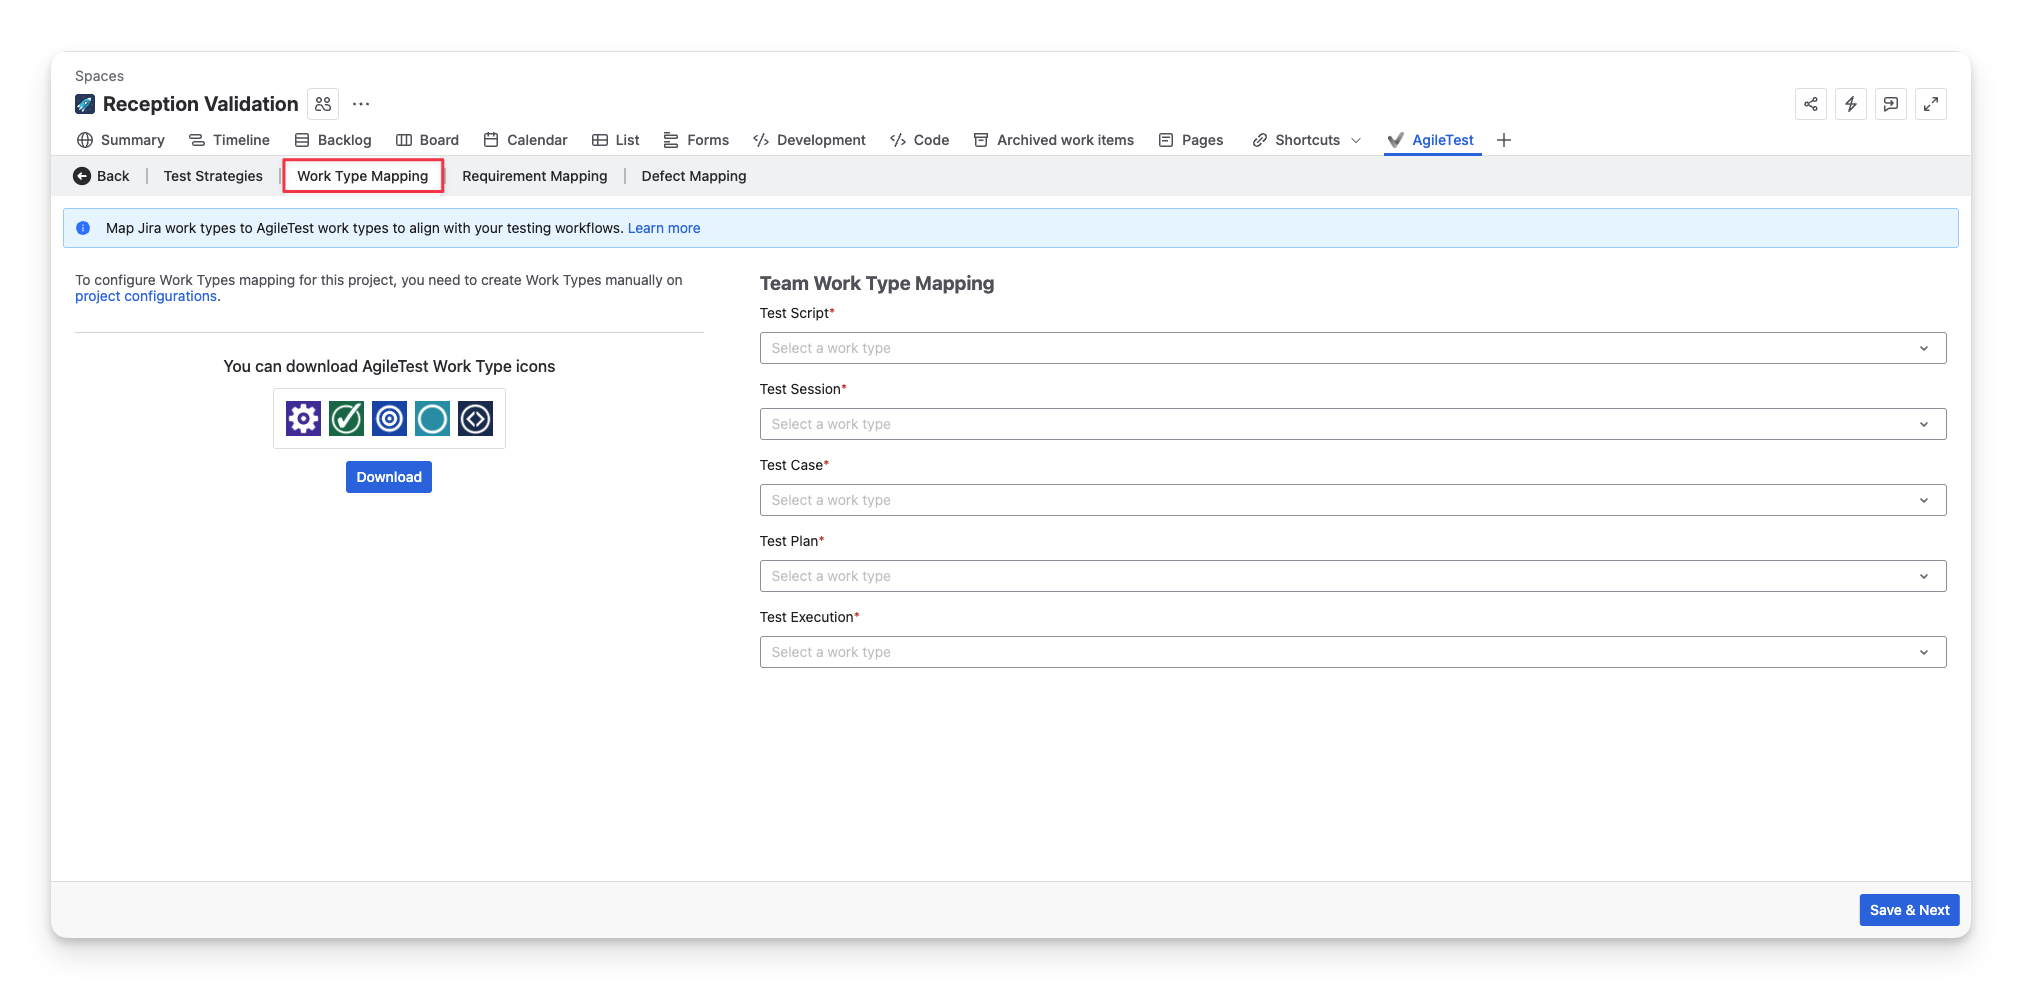
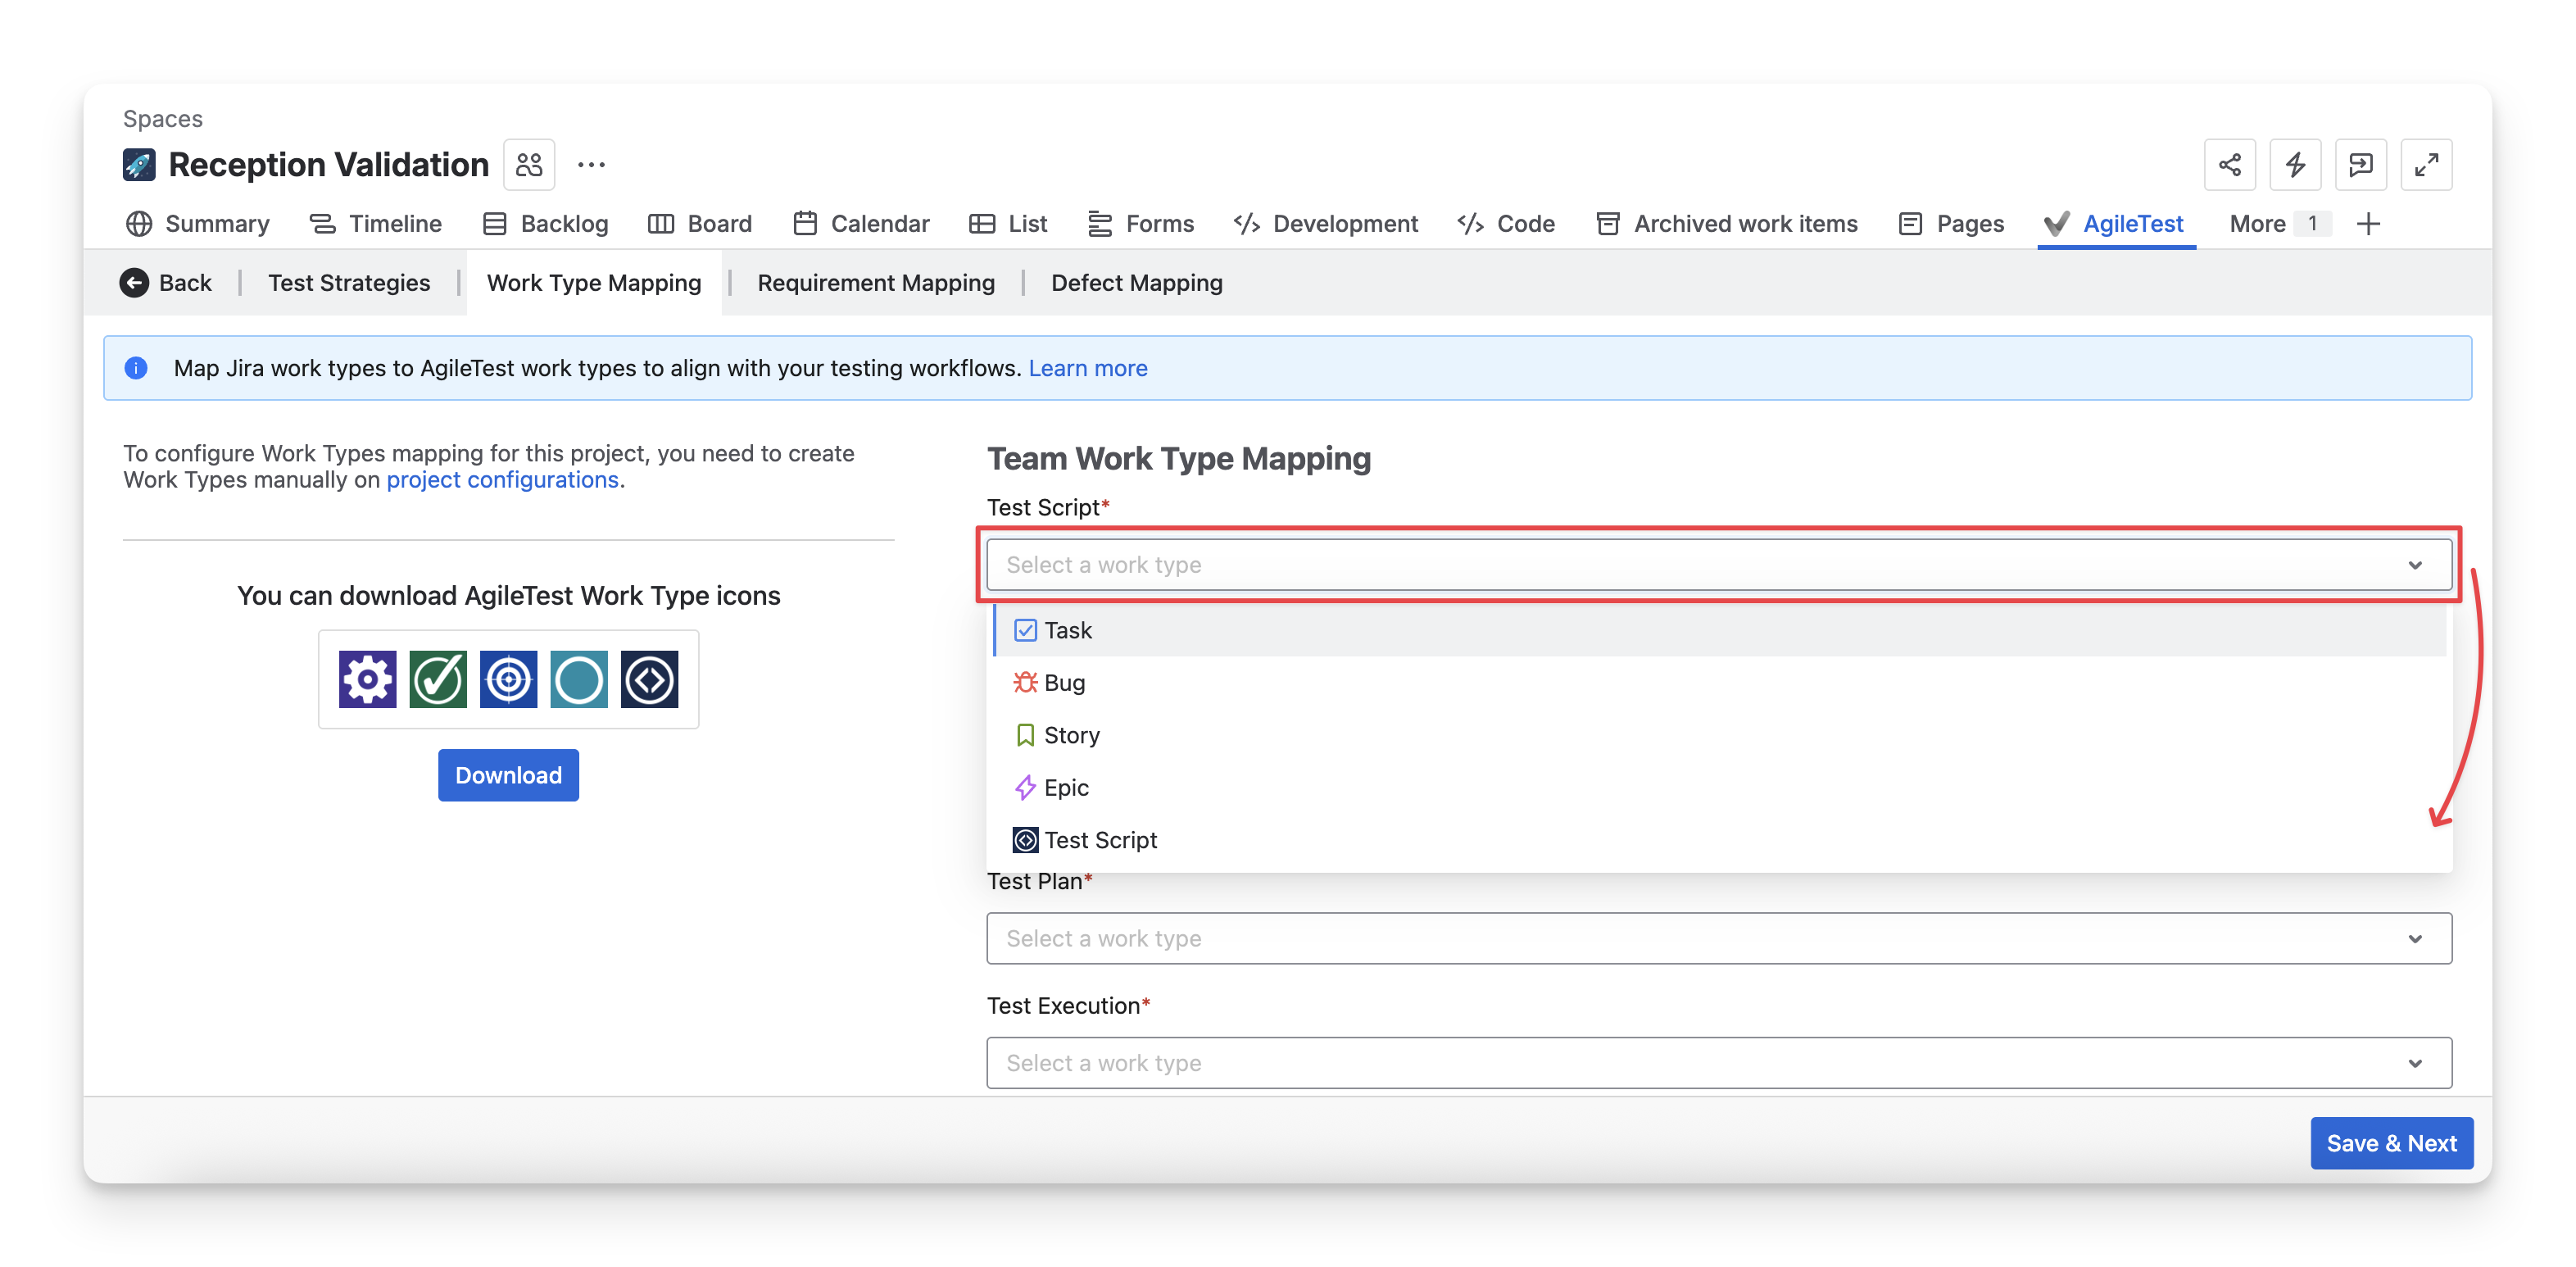
2. Work Type Mapping
After choosing the test strategies, you will proceed to map the Jira Work Item Types to AgileTest work types. They include:
-
Test Script for Script Test strategy
-
Test Session for Exploratory Test strategy
-
Test Case, Test Plan, and Test Execution for Classic Test strategy
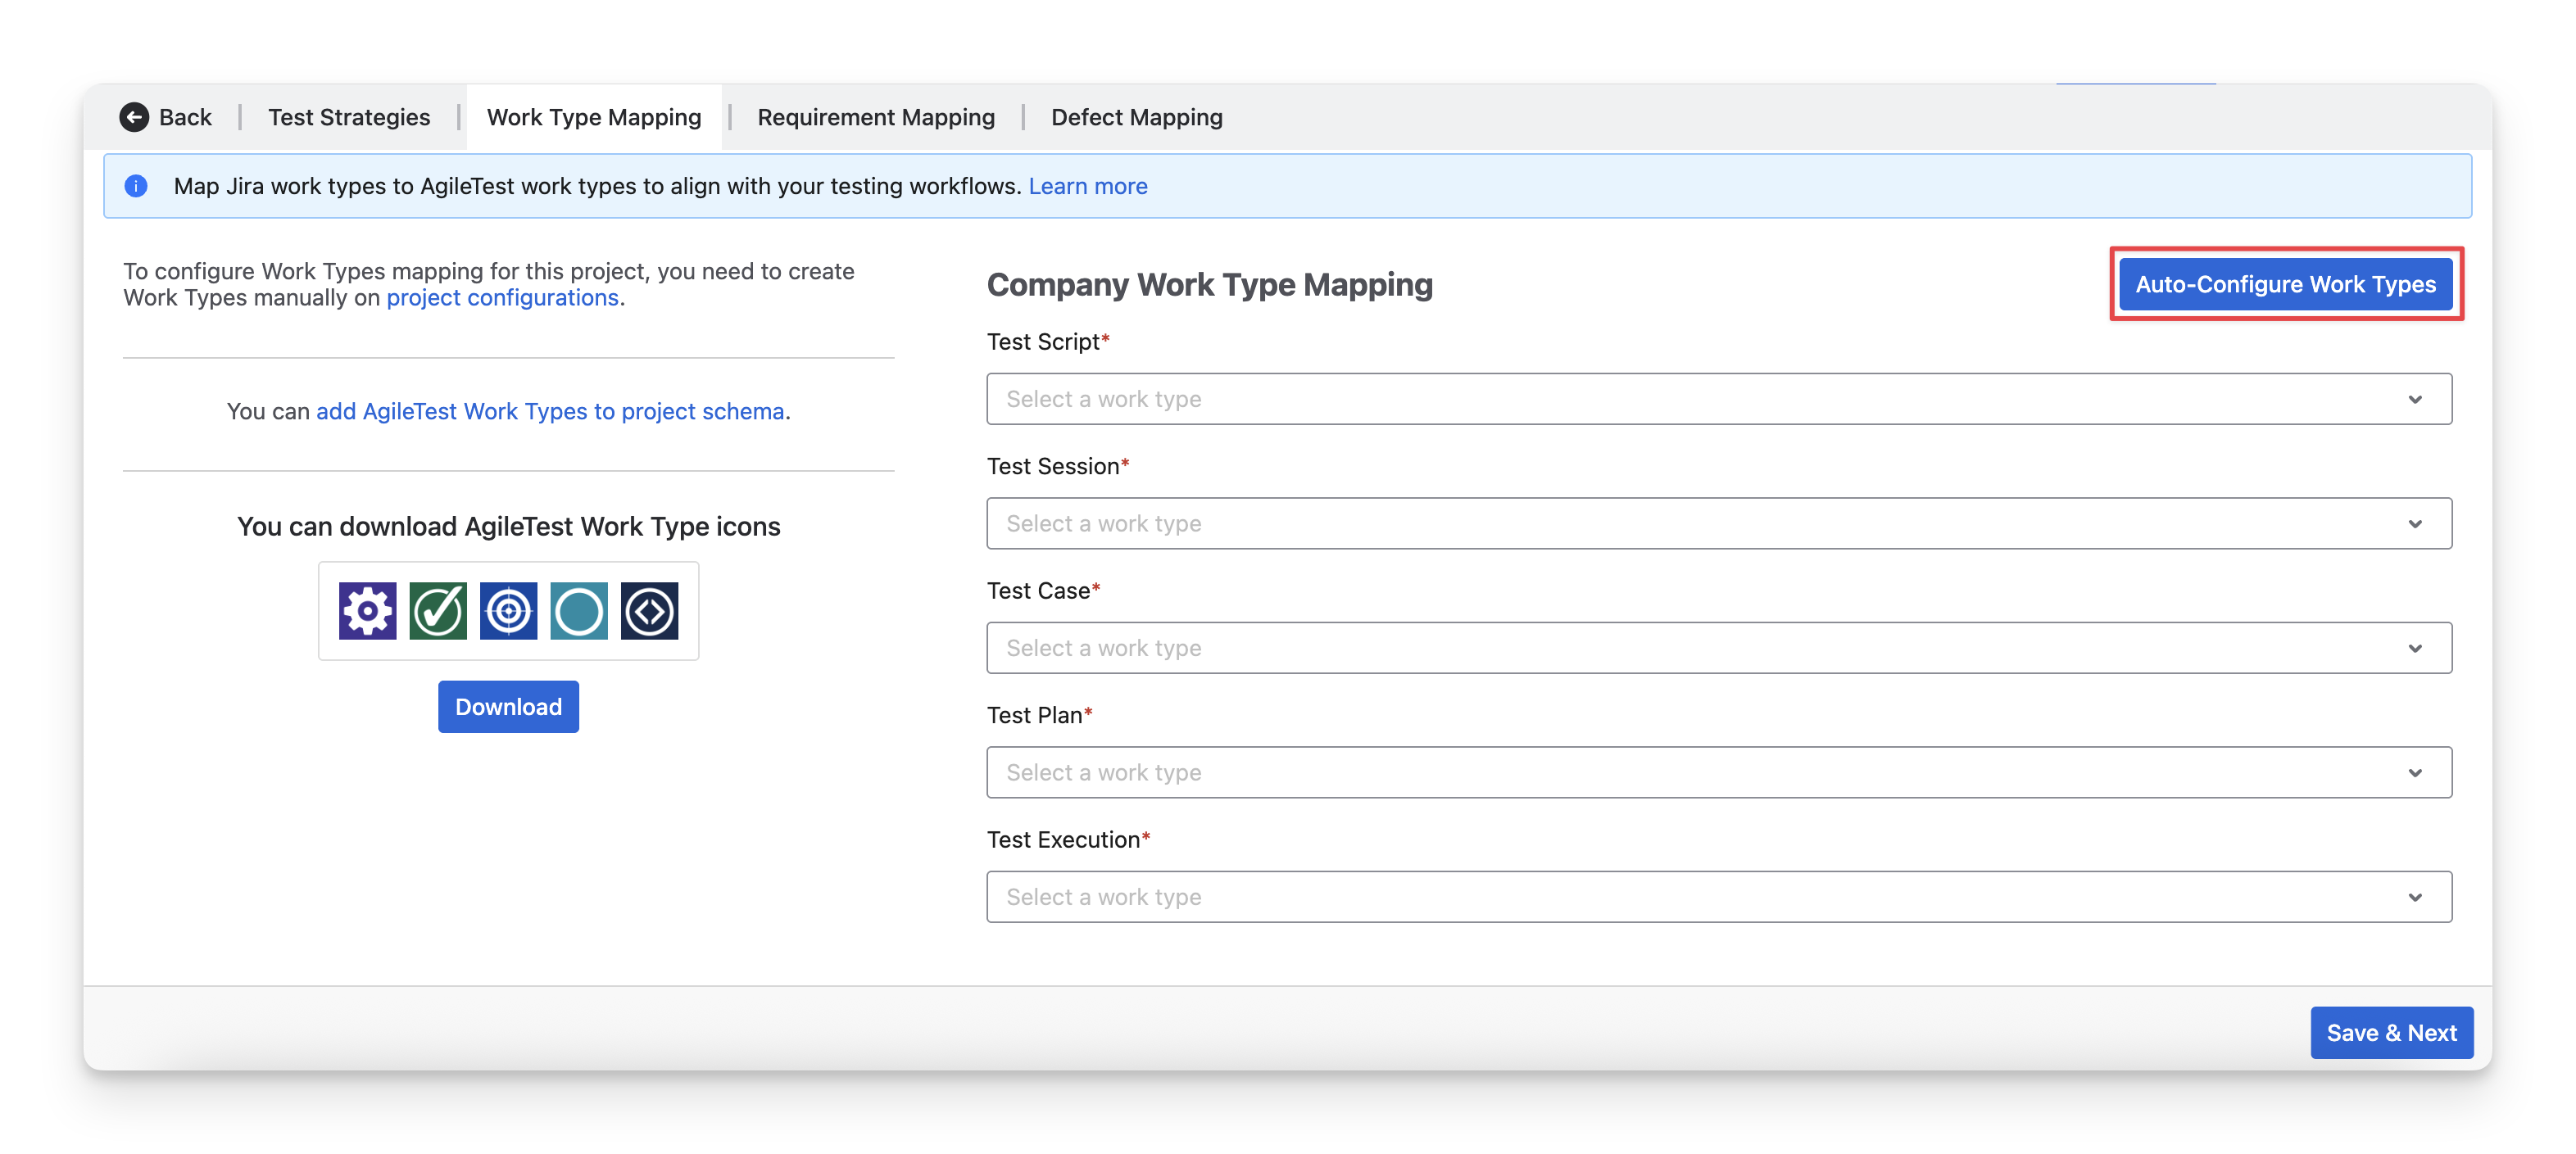
2.1 For Company-managed projects
For Company-managed projects, you can click on Auto-Configure Work Types. AgileTest will automatically configure the mappings with the appropriate Jira work types for each AgileTest item.
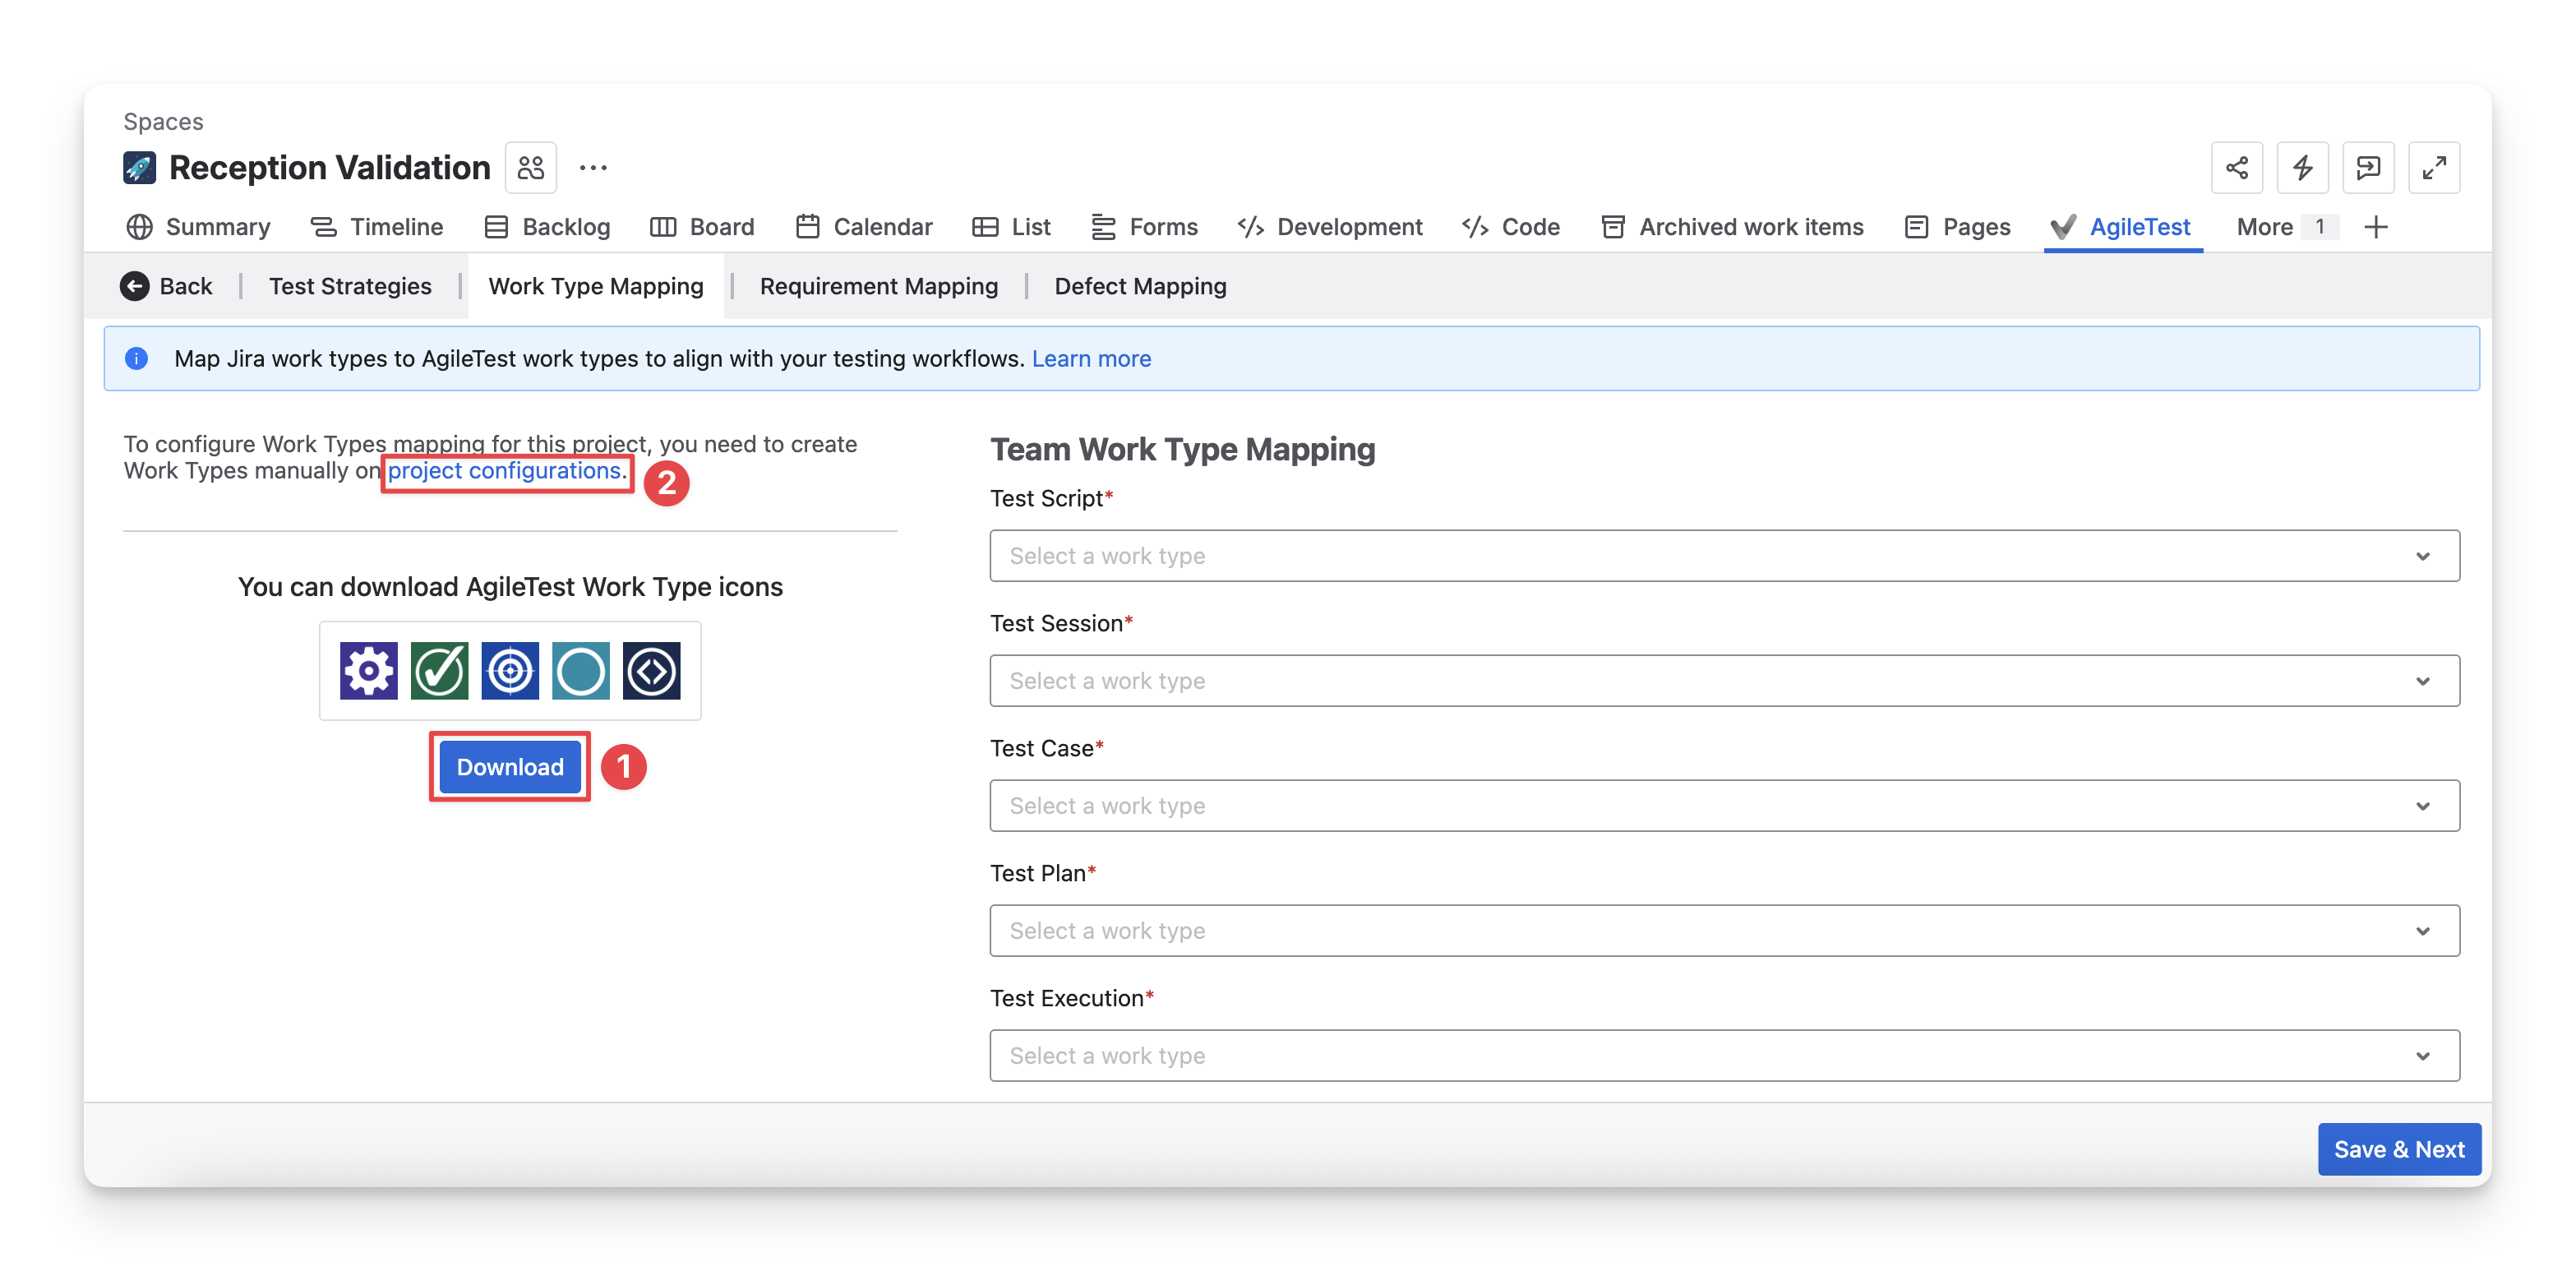
2.2 For Team-managed projects
For Team-managed projects, you need to create and map work types manually. To do this, follow these steps:
-
Download AgileTest work type icons.
-
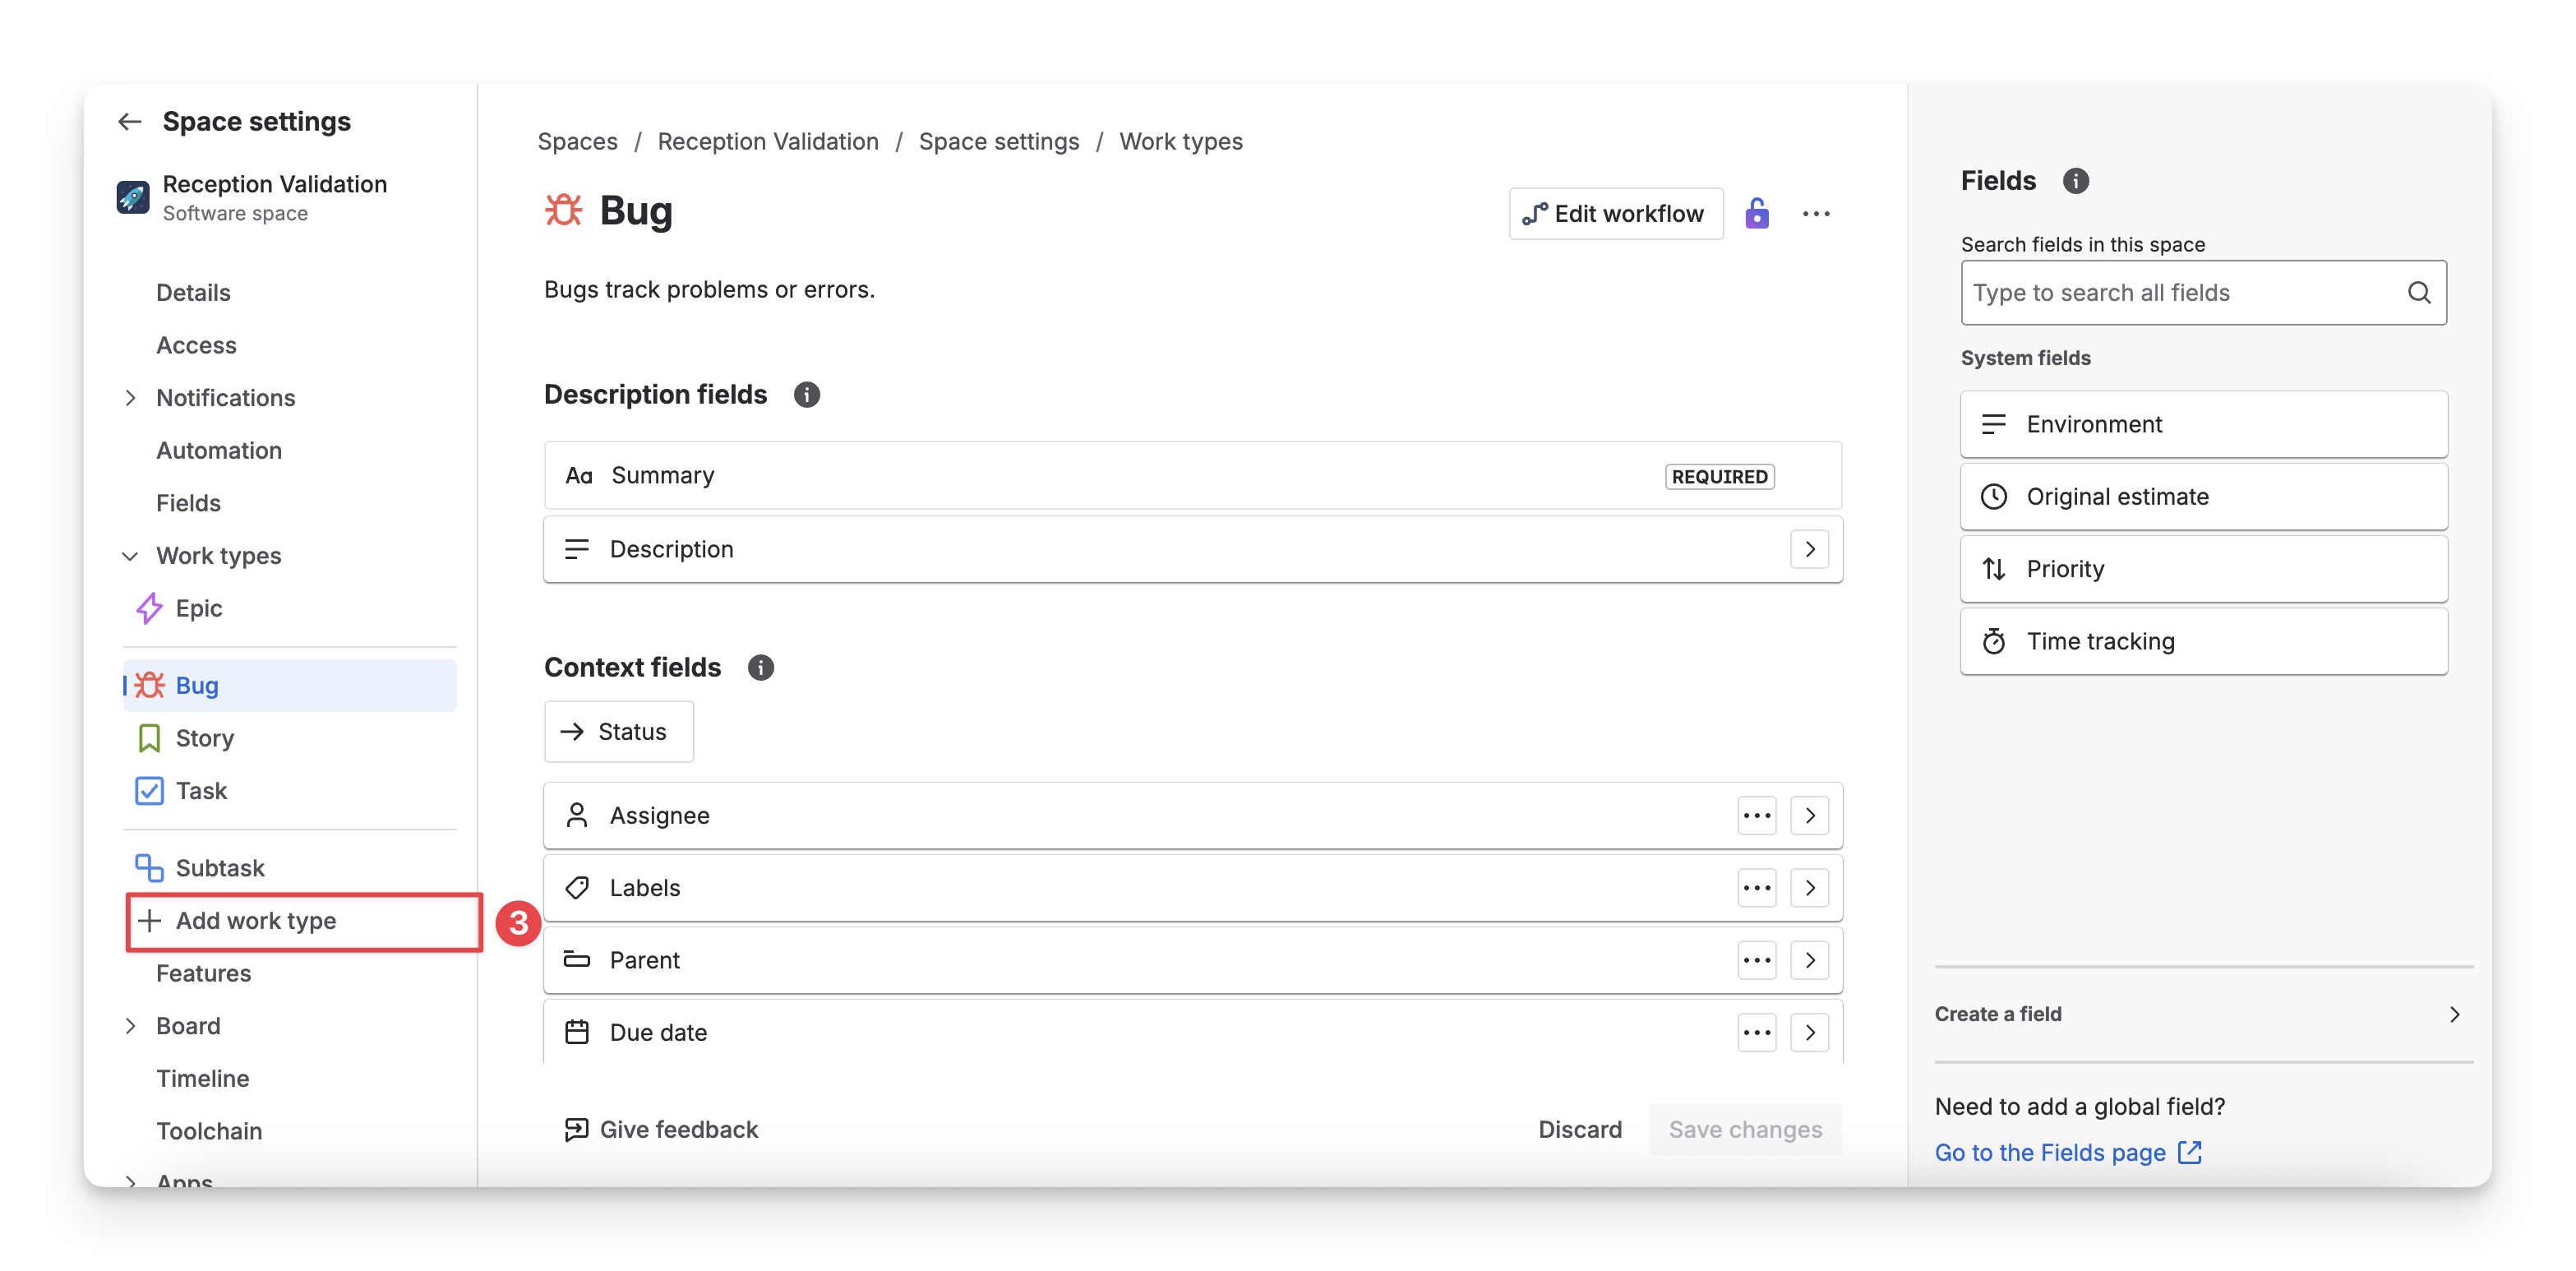
Navigate to the Work Type configuration screen.
-
Select “+ Add work type” button.
-
Fill in the work type information. We recommend that you use the same work type Name and Icon that AgileTest provided to avoid confusion. Click “Save” to complete this process.
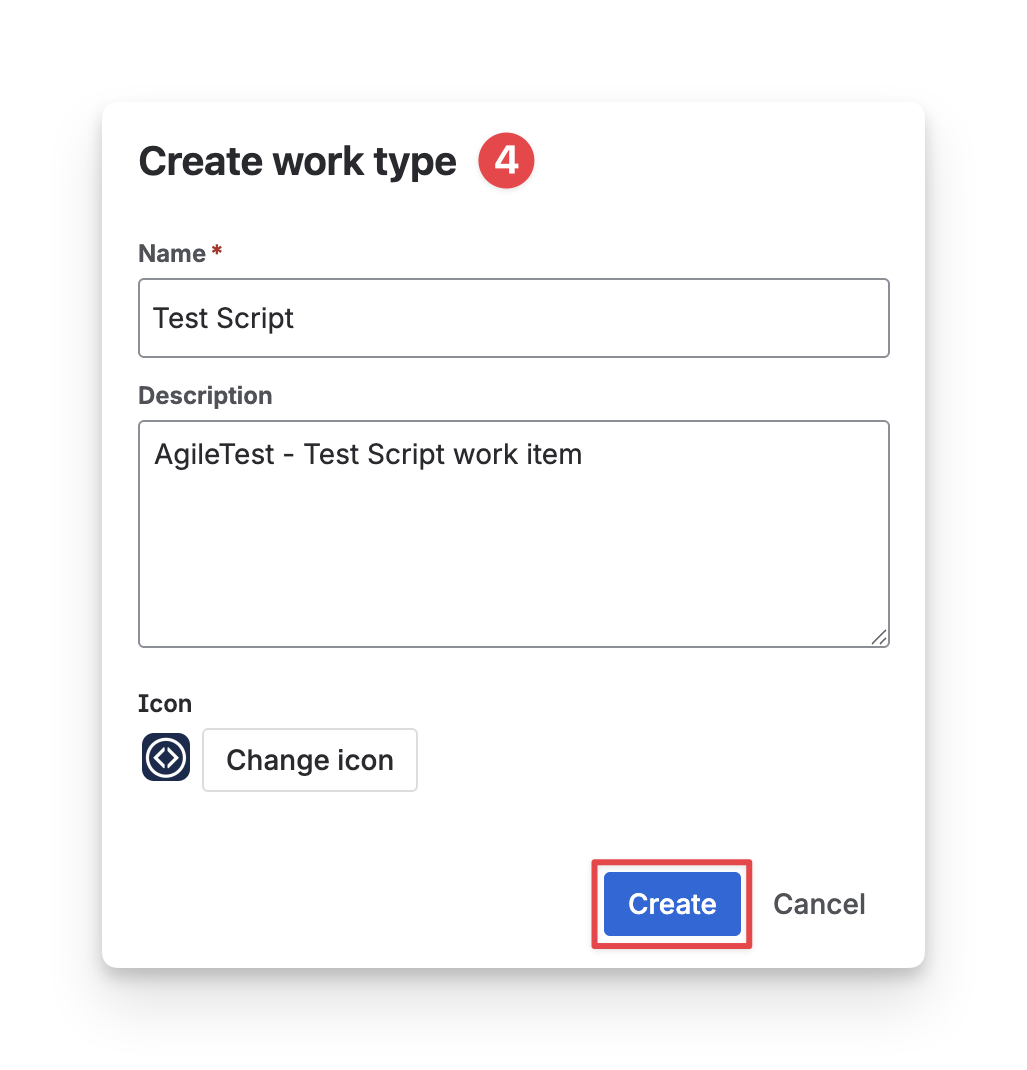
Repeat this creation step for the four remaining work types.
-
After creating AgileTest work types, return to the Work Type Mapping tab to select and map them.
Read more: Work Type Mapping
3. Requirement & Defect Mapping
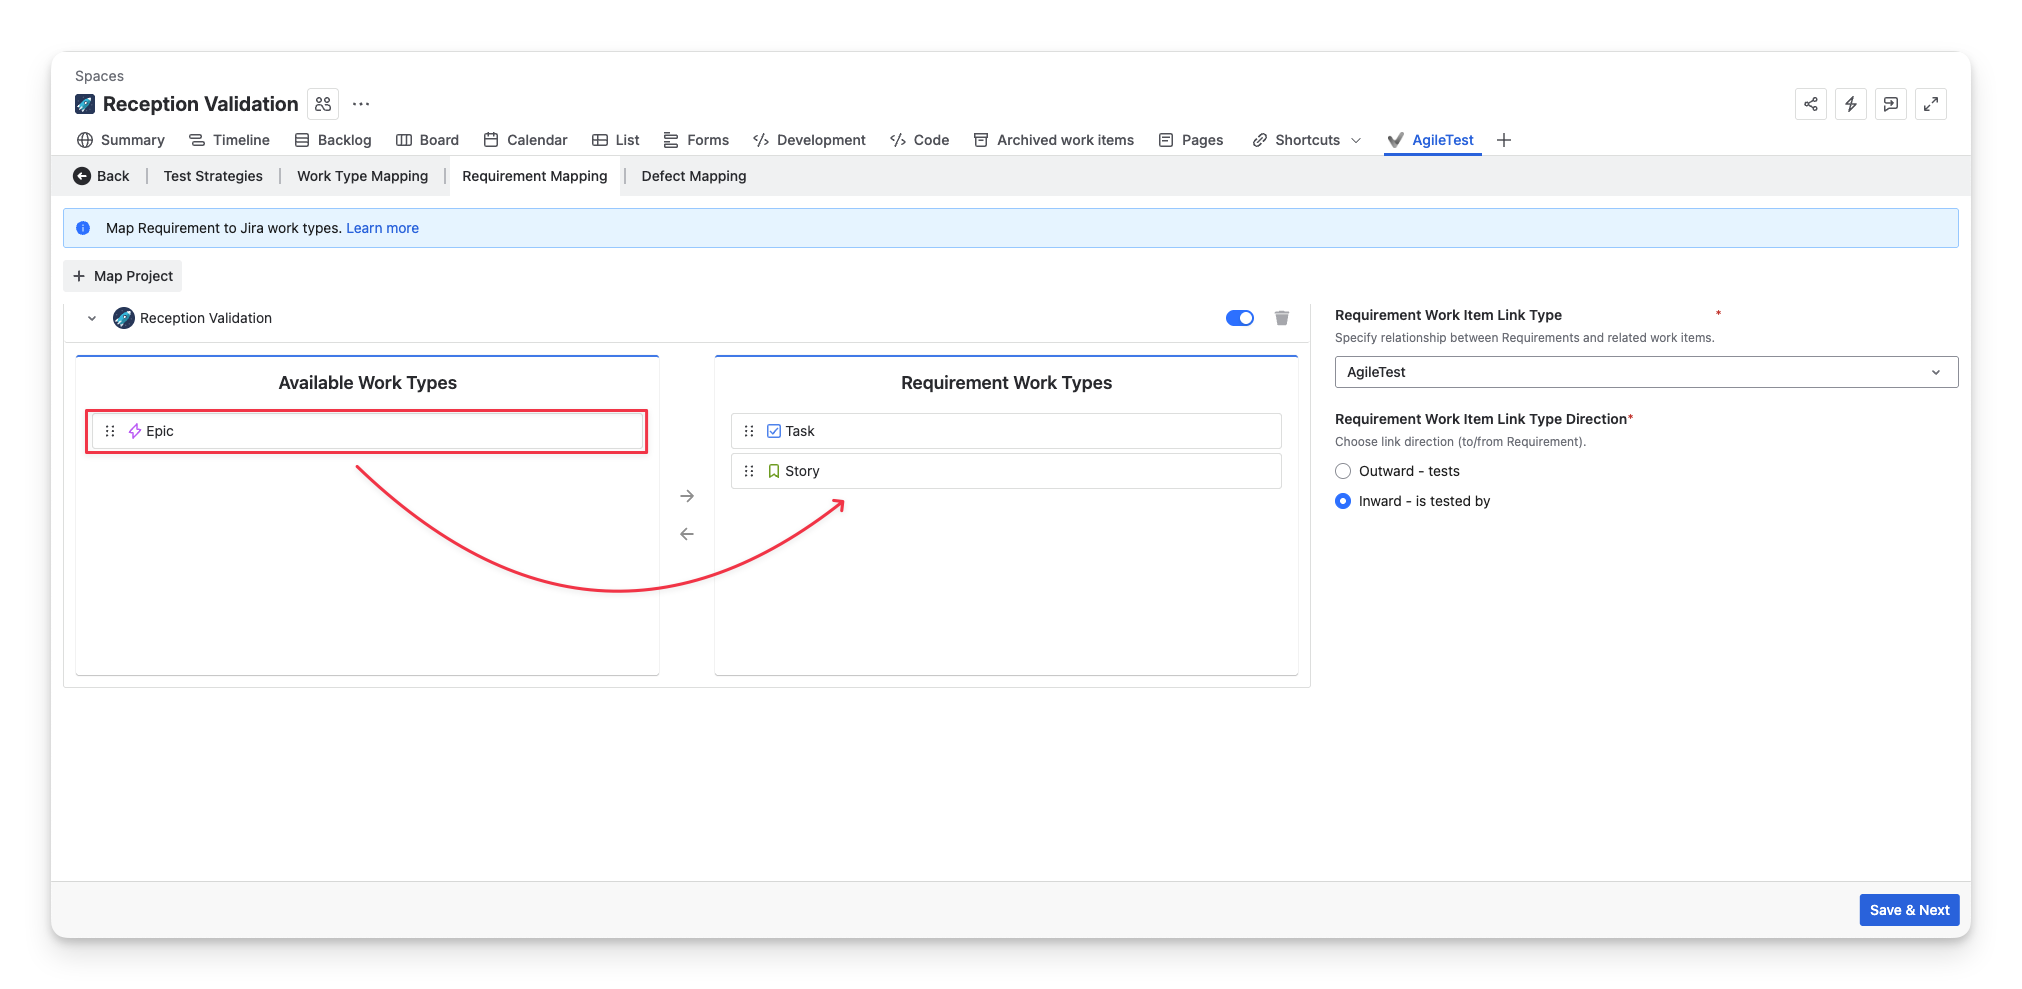
3.1 Requirement Mapping
Requirement mapping allows you to define which Jira work item types represent your requirements ( task story epic ). AgileTest uses this mapping to link test items to requirements, helping you track test coverage and ensure that all requirements are properly validated.
By default, AgileTest maps Task and Story as Requirement work types. If you need to adjust this mapping:
-
Drag and drop issue types from “Available Work Types” to “Requirement Work Types” to add them
-
Or drag them back to remove them from the requirement mapping
Read more: Requirement Mapping
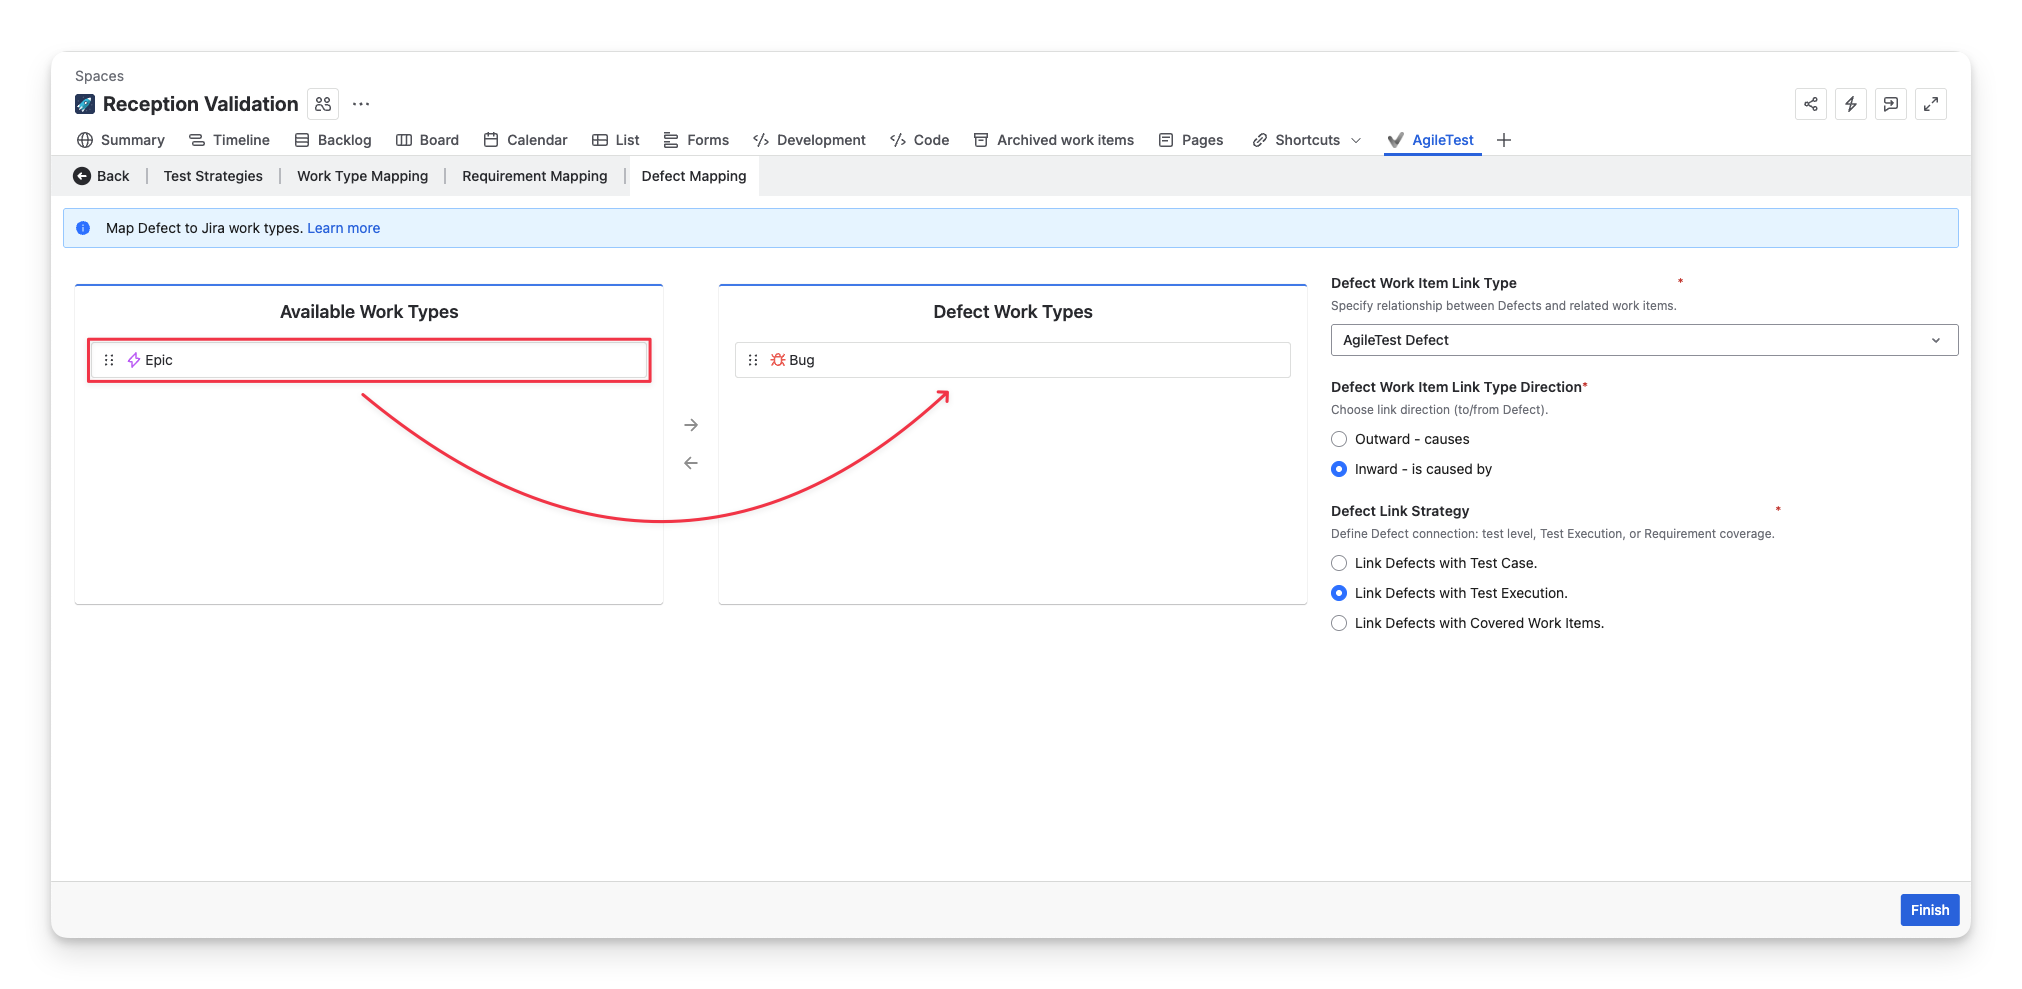
3.2 Defect Mapping
Defect mapping lets you specify which Jira issue types are used for bugs or defects. This enables AgileTest to create and link defects directly from test executions or test cases, making it easier to track issues, manage failures, and maintain a clear connection between testing and bug resolution.
By default, AgileTest maps Bug as the Defect work type. If you need to customize this mapping:
-
Drag and drop issue types from “Available Work Types” to “Defect Work Types” to add them
-
Or drag them back to remove them from the mapping
Read more: Defect Mapping
Should you need any assistance or further AgileTest inquiries, contact our 24/7 Support Desk.