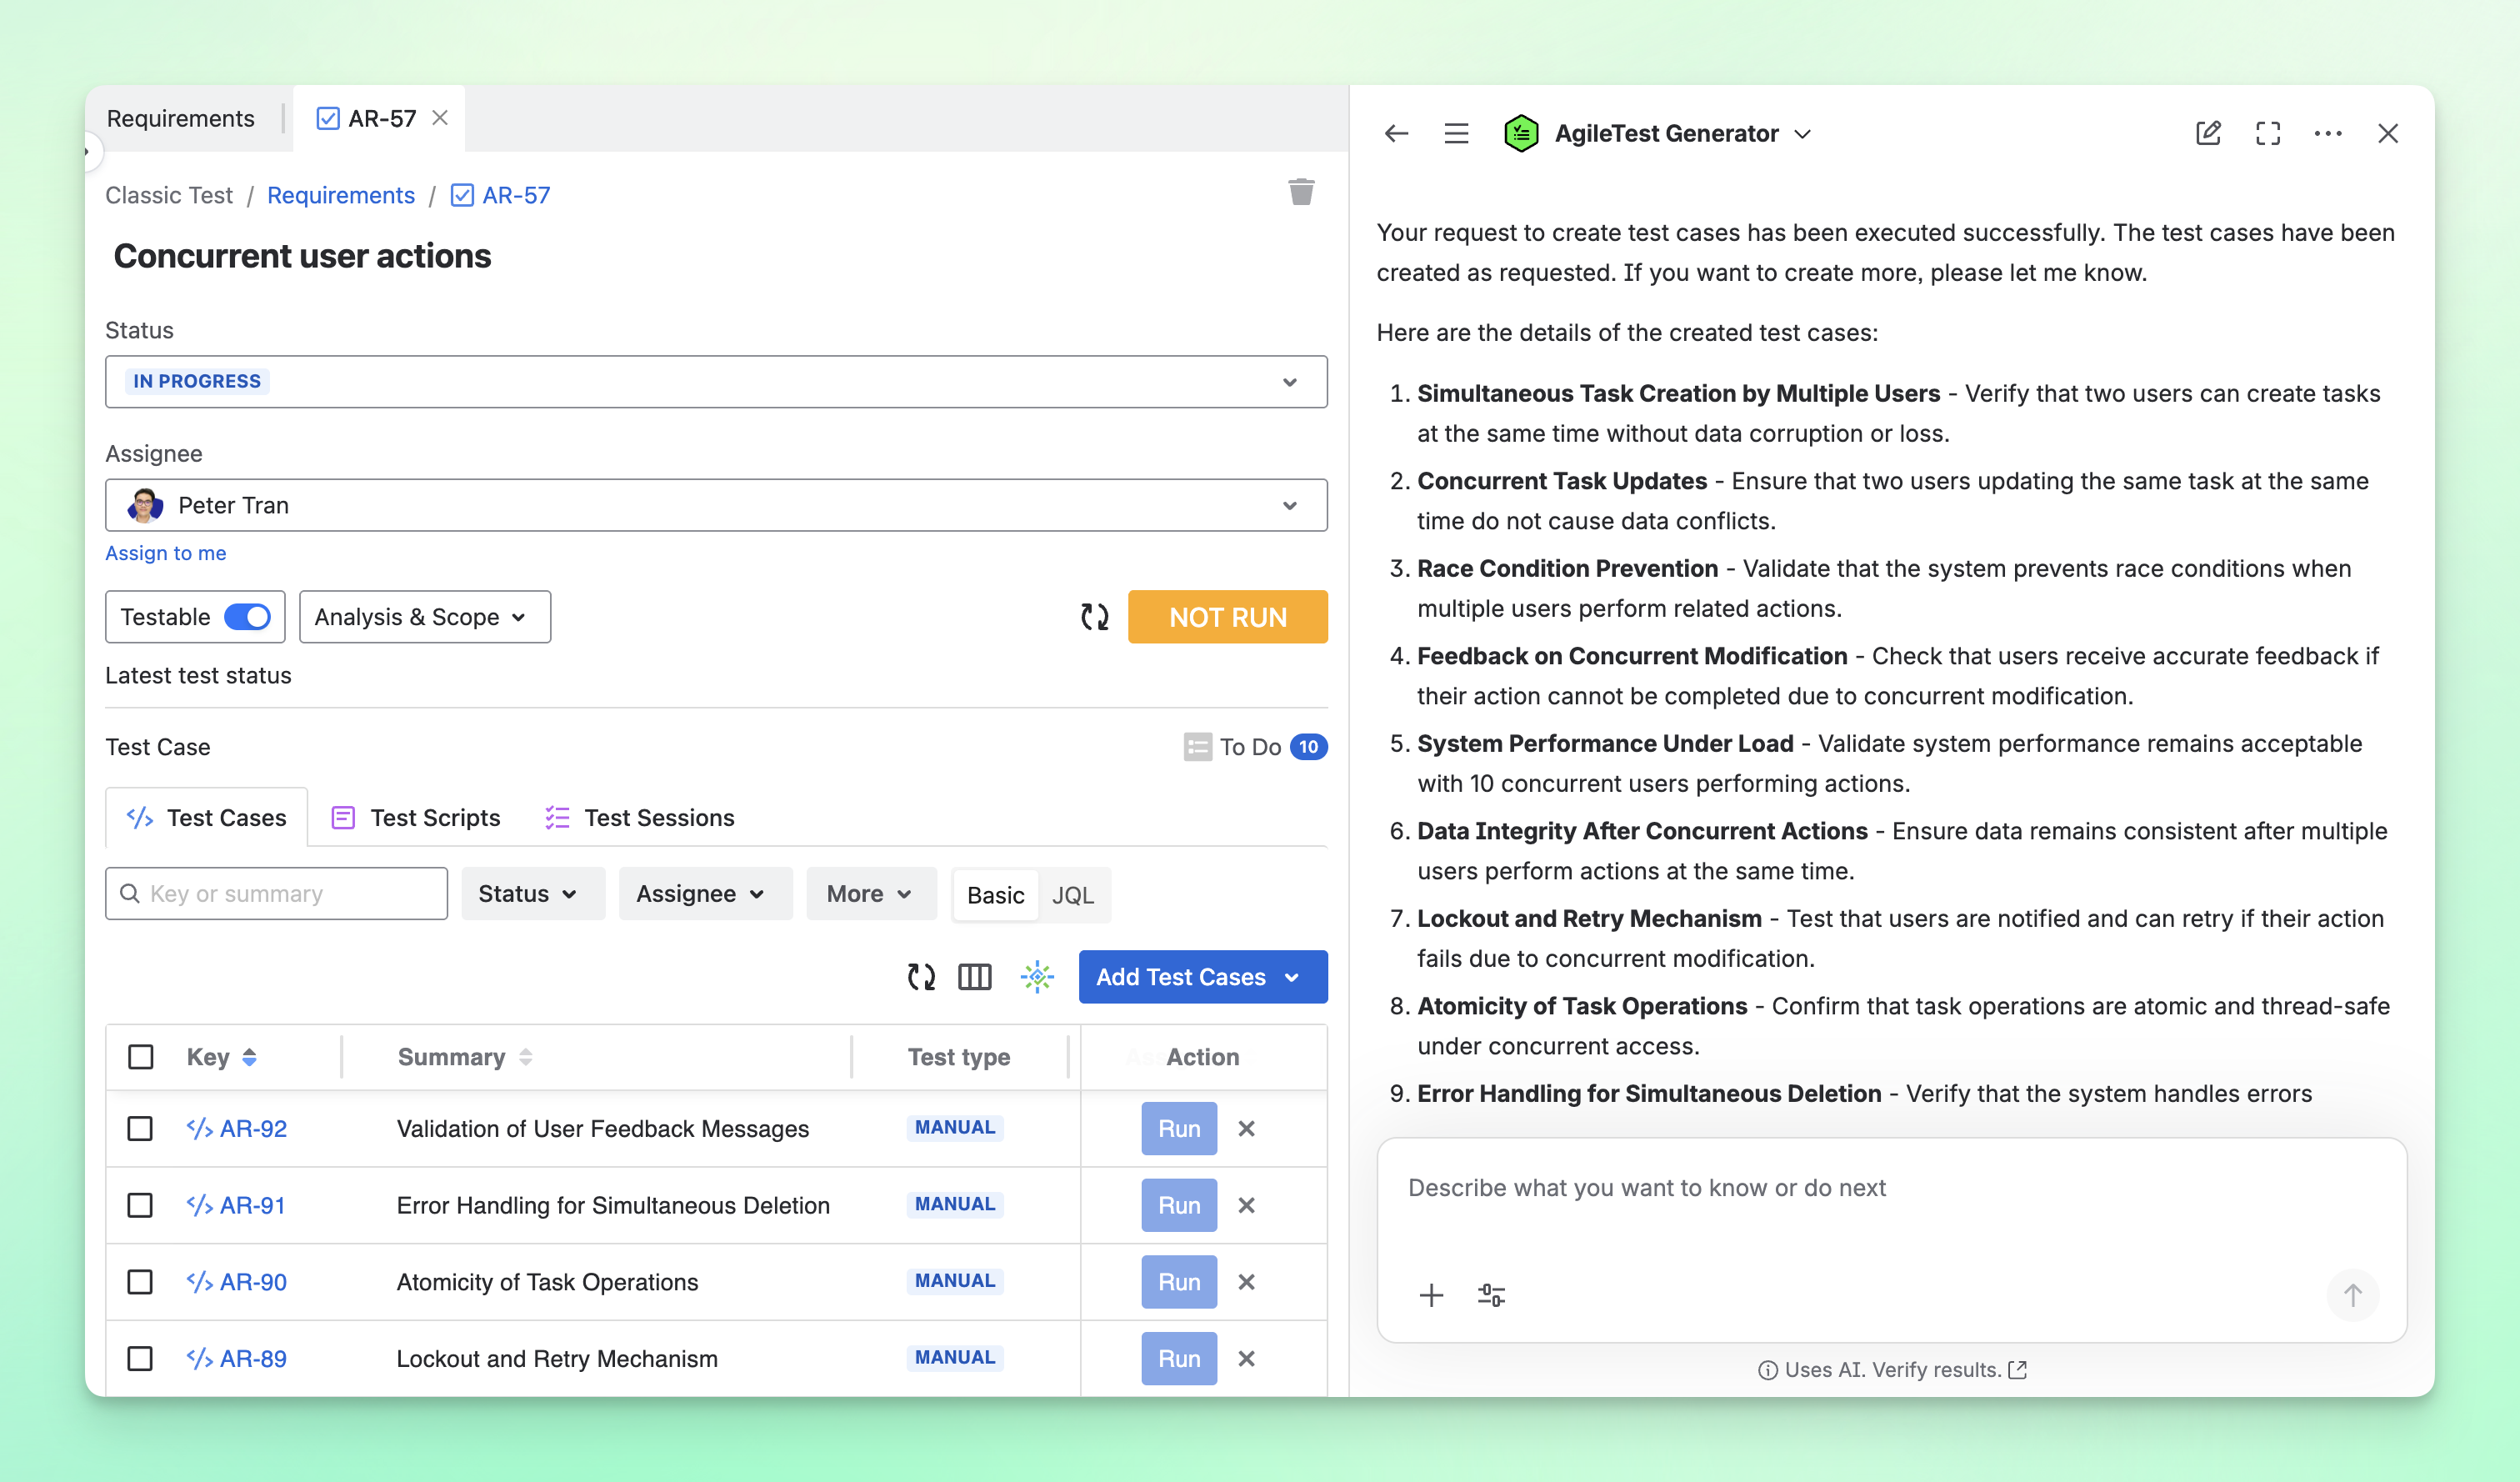
AgileTest is a test management app for Jira that supports all testing strategies from simple test script, exploratory test, ad-hoc test to comprehensive Test Case management.
Test Scriptcreates a hierarchical list that consolidates all the points requiring testing, allowing users to conduct tests and update the status of each item directly without needing to switch between pages.
Test Session enables easy execution of exploratory or ad-hoc tests. You can start new sessions at any time and as often as needed. During these sessions, you can add notes or link relevant issues to specific sessions.
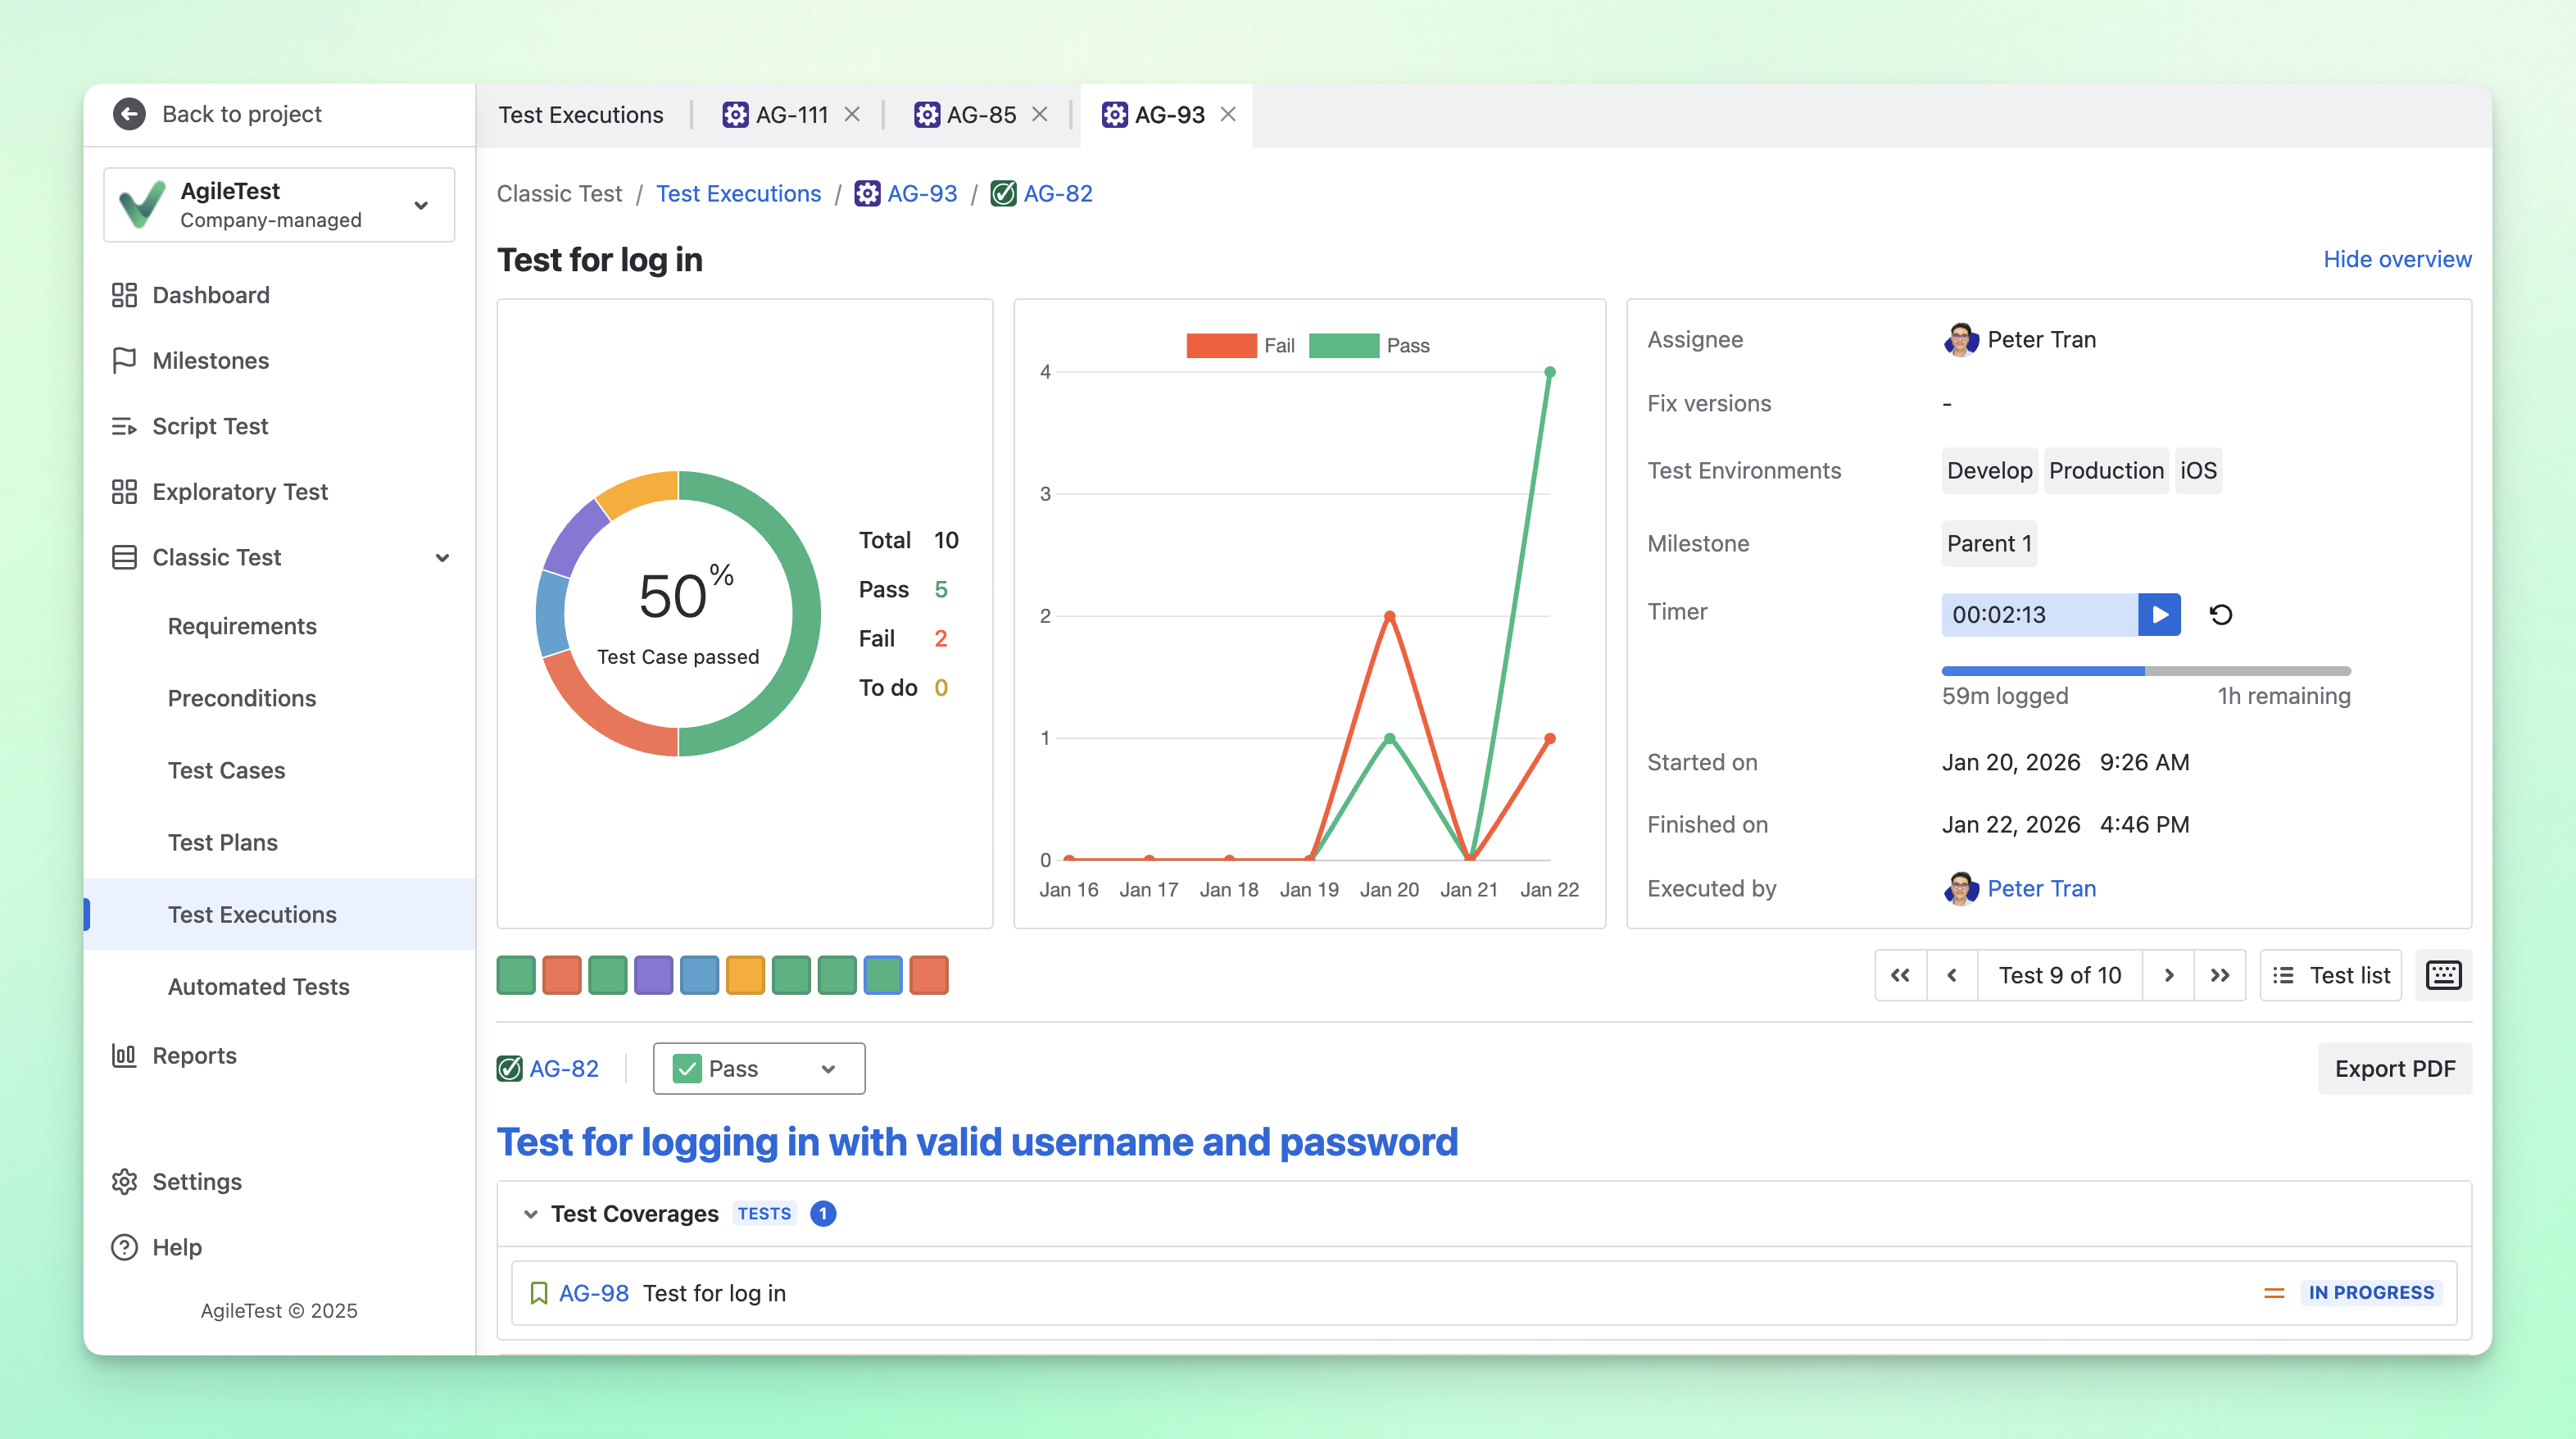
Test Management consists of three types of test items: Test Case, Test Plan, and Test Execution. These elements enable users to easily manage their test repositories and plan test executions more efficiently.
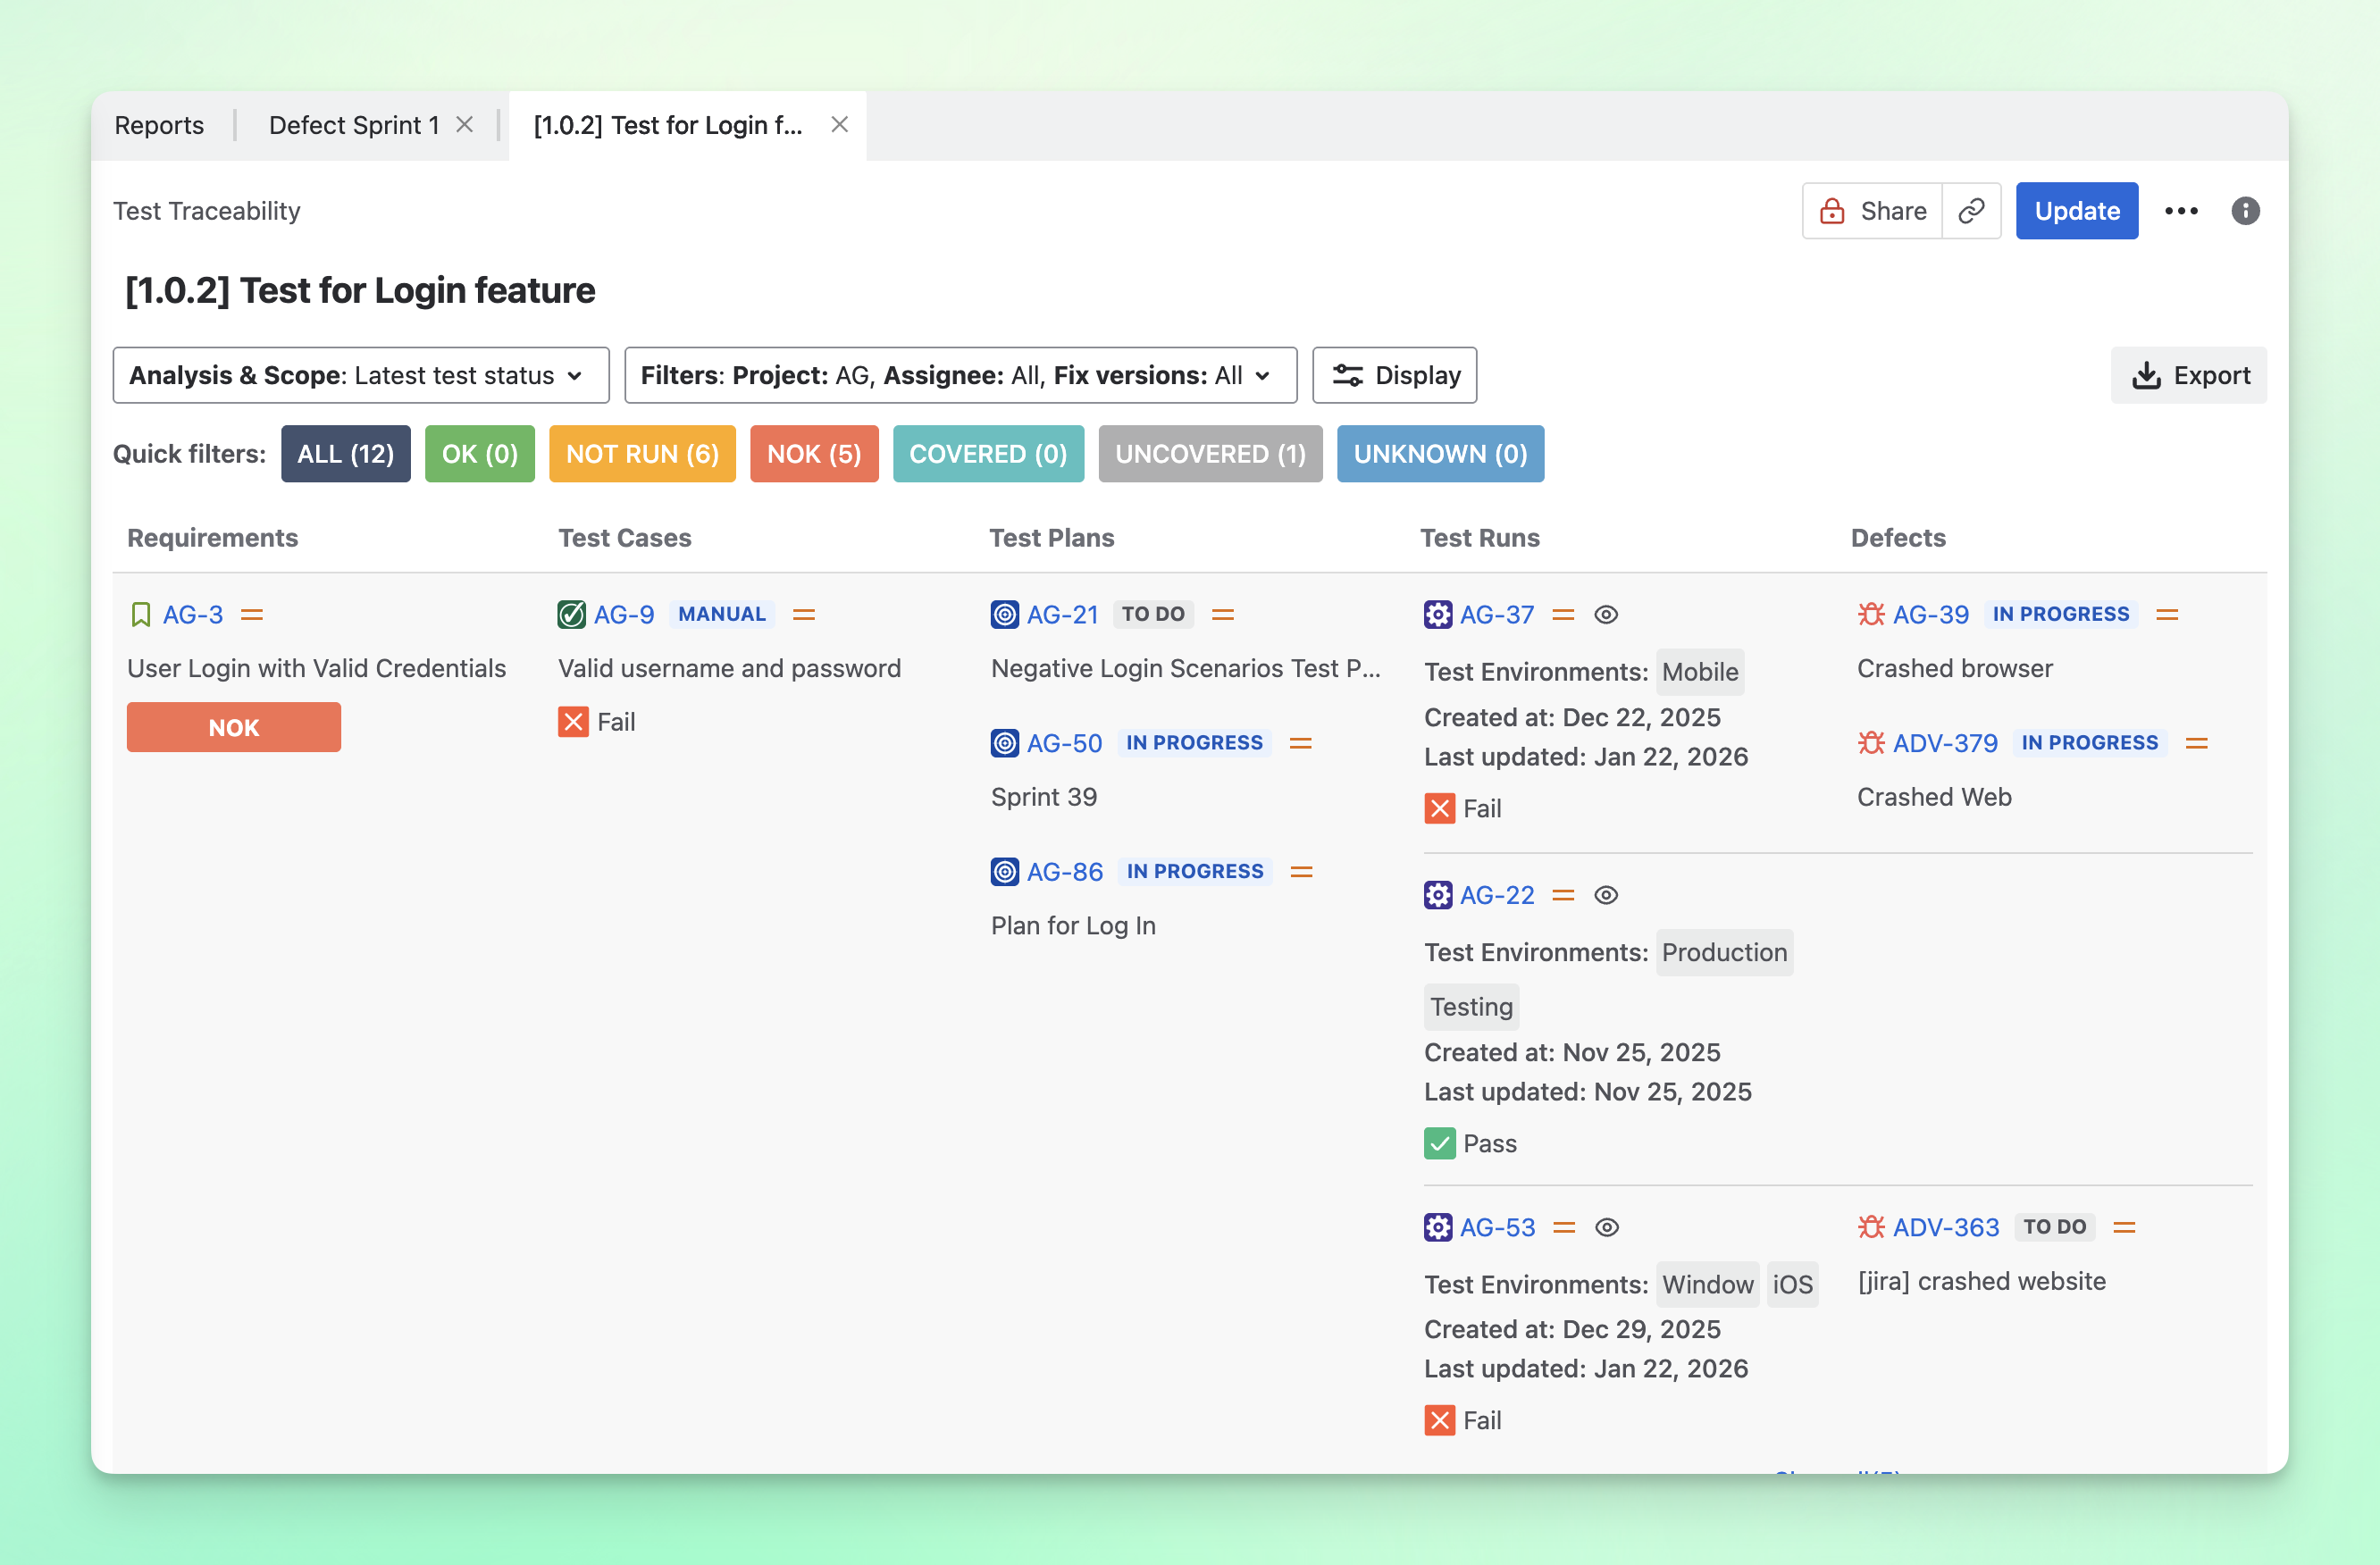
Reports includes two types of reports: the Test Coverage report and the Test Traceability report. The Test Coverage report allows users to verify whether specific test cases cover all Requirements. Meanwhile, the Test Traceability report provides a clear overview of the relationships between Requirements, Test Cases, Test Plans, Test Executions, and Defects.
Getting started
Configure project for the first time
Initially, AgileTest may not be ready for use in the project. The Jira Admin or Project Admin will need to perform some initial configurations.
Users can refer to the attached video for first-time project configuration. The video covers all the information mentioned on this page.
After accessing AgileTest from the project sidebar or the Testing Boards list on the AgileTest page, you will be directed to the following screen to begin the configuration process.
Testing Strategies
The first thing to consider is testing strategies. AgileTest supports three different strategies: Test Script, Test Session, and Traditional Test Case Management.
A TestScript involves a set of instructions for testing. In AgileTest, you can create a script in the TestScript Issue, execute tests quickly, and generate reports within the Issue.
TestSession supports exploratory testing and session management. You can manage ad-hoc tests and take notes in the TestSession Issue while testing without predefined instructions.
Both TestScript and TestSession are ideal for Agile teams or projects with frequent feature releases and continuous delivery, where extensive test planning is not feasible.
Conversely, Test Case Management is designed for comprehensive test planning and management, incorporating TestCase, Precondition, TestPlan, TestExecution, and more.
By default, all three strategies are enabled. You can select the appropriate strategies for your project by toggling them on or off.
Issue Type Mapping
After choosing the test strategies, you will proceed to map the Issue Types available in the project to AgileTest concepts, which include TestScript, TestSession, TestCase, TestPlan, and TestExecution, across the three strategies.
In company-managed projects, you have two options for mapping: auto configuration or manual configuration. However, for team-managed projects, manual configuration is the only option due to the unique structure defined by Jira.
Auto configuration: This option is for users who do not have specific Issue Types for testing and prefer to let the app handle the setup. By clicking the "Auto-configure Issue Types" button, AgileTest will create five Issue Types (TestScript, TestSession, TestCase, TestPlan, TestExecution) and map them to AgileTest concepts.
Manual configuration: For users who want to define and map Issue Types themselves, this approach requires more time and effort but offers greater flexibility to align AgileTest with their existing workflow.
To learn more about creating new Issue Types in a Jira project, please refer to the following resources.
In case manual configuration, users are required to create the Issue Types manually, AgileTest provides icons that you can download and use, or you can use your own icons.
Once all the Issue Types are created and available, you can easily map them to AgileTest as shown in the screen above.
Requirements & Defect
Requirements refer to the specific criteria or conditions that a feature must meet. In a typical process, testers will first review the requirements to prepare the tests. By default, both Stories and Tasks are mapped to Requirement.
Defect are errors or flaws in the software that cause it to behave unexpectedly or incorrectly. Defects are identified during the testing process. By default Bug Issue Type is mapped to Defect.
Based on that understanding, you can map any available Issue Types to Requirement and Defect if they fit your process.
When mapping, you also need to set the Requirement Issue Link Type and Defect Issue Link Type
Requirement Issue Link Type is the relation between Requirement and TestCase. By setting inward or outward, you could define the link direction between them. If you link a requirement to a test case with Inward - is tested by option, the link description of test case on requirement would read as so.
For example:
Likewise, Defect Issue Link Type is the relation between Defect and TestCase. Inward type is set by default. In other words, from the view of the defect, the link description of the test case would read as is caused by.
On the other hand, if you set the Outward option for either Link type, it will read backwards, which is not recommended. This is useful when you want to customize the link description to fit your needs.
To learn more about Jira Issue Link setting, please refer to this article
Voilà! After configuring all the above settings, AgileTest will be available for use in the project. 🥳🥳🥳
Write the first Test Case
In this guide, we will walk you through creating your first Test case using Agile Test.
To create new Test cases, you must have at least member-level access to the current project. To learn how to add member to a project with these document from Jira.
In your project, navigate to Test repository by opening AgileTest → Test Management → Tests.
Choose the button New Test Cases on the right-hand side
Select the issue key to open the Test Case board. In the first tab, titled Test Details’, you can define the test steps by entering the Action, Data, and ExpectedResult fields. These fields are set default and can be configured afterwards.
Action is what the user do in a test step.
Data is the input detail in the test step. It could be input params, credential informations, etc, for example username, password,…
Expected result is what should occur after the action is performed.
Test type is set to Manual by default, you can always change it to a different type at any time.
Preconditions tab is where your prerequisites or prior-to-test actions should be situated. You can either create new preconditions or select existing ones.
Similarly, for Test Plans, Test Executions, and Requirements, you can either create new ones or choose from available options to associate them with your Test case.
Remember, we also support JQL in addition to Basic search. If you need to find a group of issues, use JQL queries to filter tickets. Otherwise, Basic search will work for most cases.
At last, your first Test case should be fully defined and ready to use 😉 .
Run the first Test Execution
In this document, we will show you how to create and run your first Test execution. By far, you should have at least a Test case in your test repository.
If you have not created any Test case, please refer to this document to prepare at least one.
Before we begin, let’s explain some terms we would encounter through out this document.
Test execution is simply a test item to which tester could link and manage their Test suite or group of Test cases during testing process.
Firstly, open Test Management → Test Execution.
Create a new Test Execution by clicking +New Test Execution button.
Open that new one and link your Test case(s) to it.
Now, your Test Execution is ready to run!!
2. Let’s run the execution!
By now, you should be at Test Execution screen in Test Management.
Click the Run button to start the sequence and you will be taken through all tests one by one until the final Test Case is complete. On each test step in an executed test case, you can attach any evidence, add comments, or even create Defects.
For every Defect created, the application would link it to either Test Execution or the current Test Case. It depends on your setting on the initial configuration. However, you can always change it in Project Settings later on.
The final result of every Test Case is calculated based on all statuses of its steps.
Learn more about initial configuration and project settings.
For common problem-solving steps, visit our Knowledge Base FAQs. If you encounter errors or need to prepare information for support, refer to our 24/7 Support Desk.