.png)
To create new Test cases, you must have at least member-level access to the current project.
In this guide, we will walk you through creating your first test case using AgileTest. You can learn how to prepare structured test cases and get them ready for your execution.
1. Create Your First Test Cases
1.1 Prepare Your Requirement
Before you start, we highly recommend preparing at least one requirement in advance. A requirement helps you define your testing scope, so that you can strategically write your test case to cover these criteria.
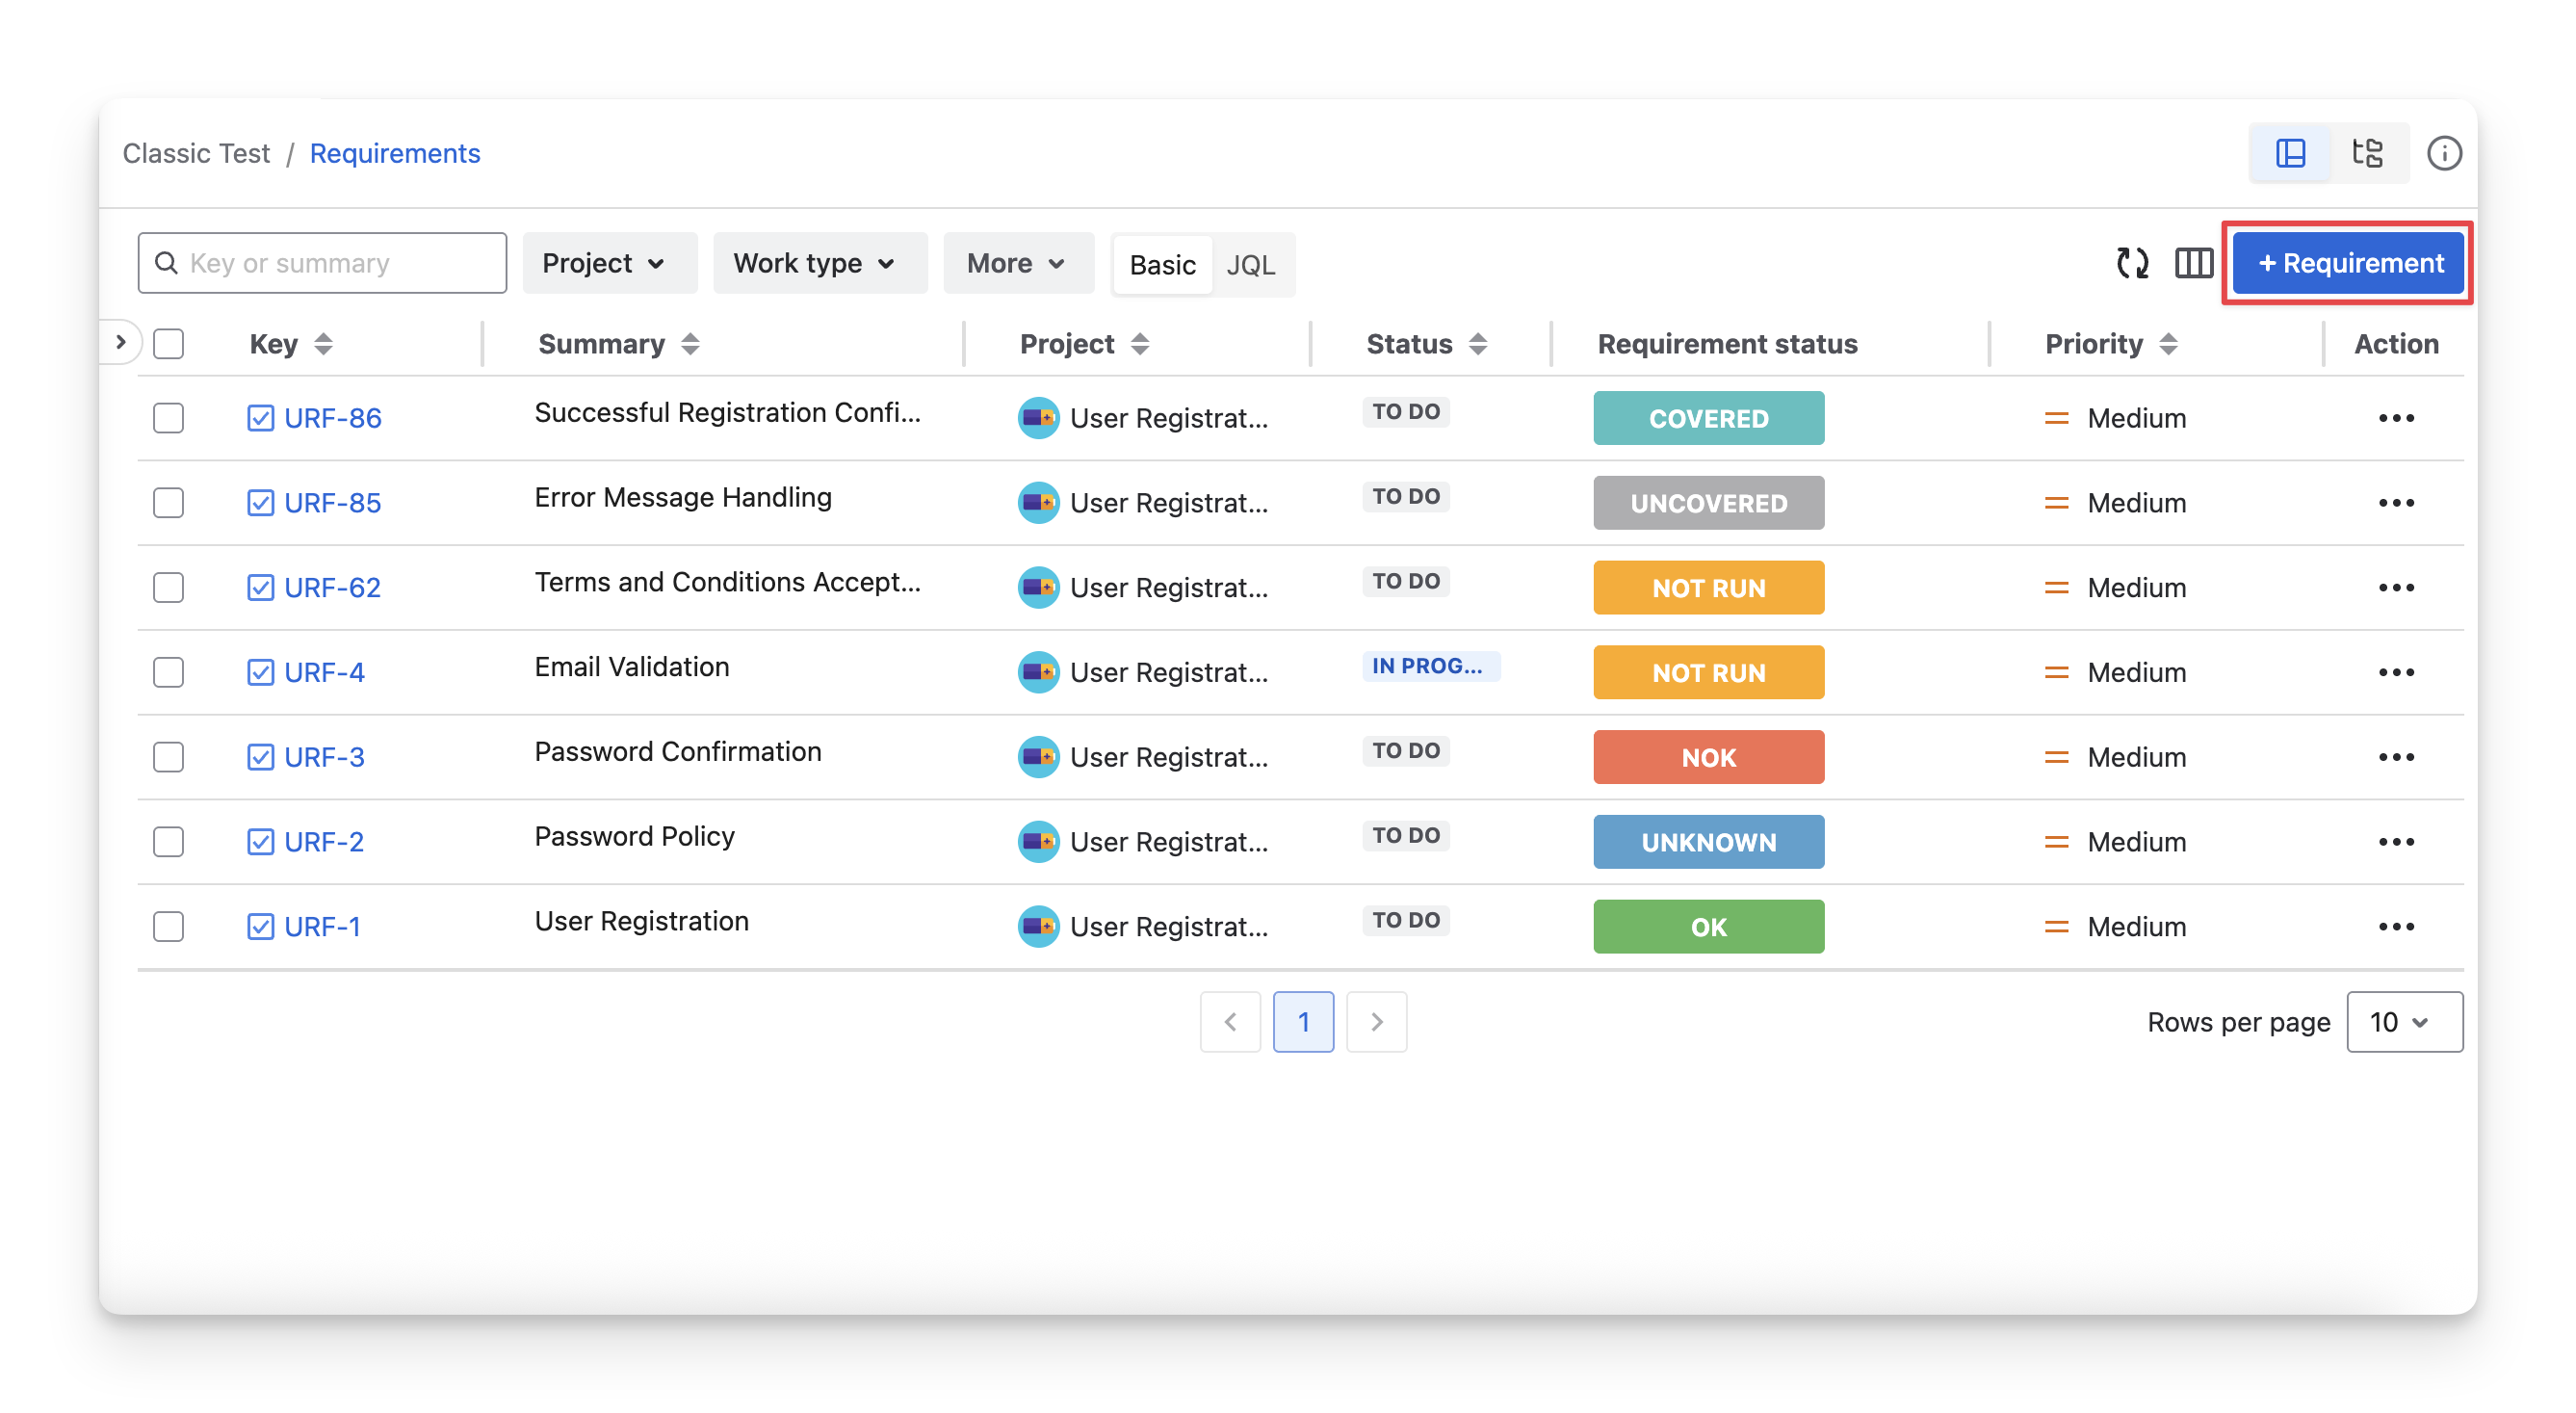
You can go to the Classic Test section → Select Requirements to access the requirement screen.
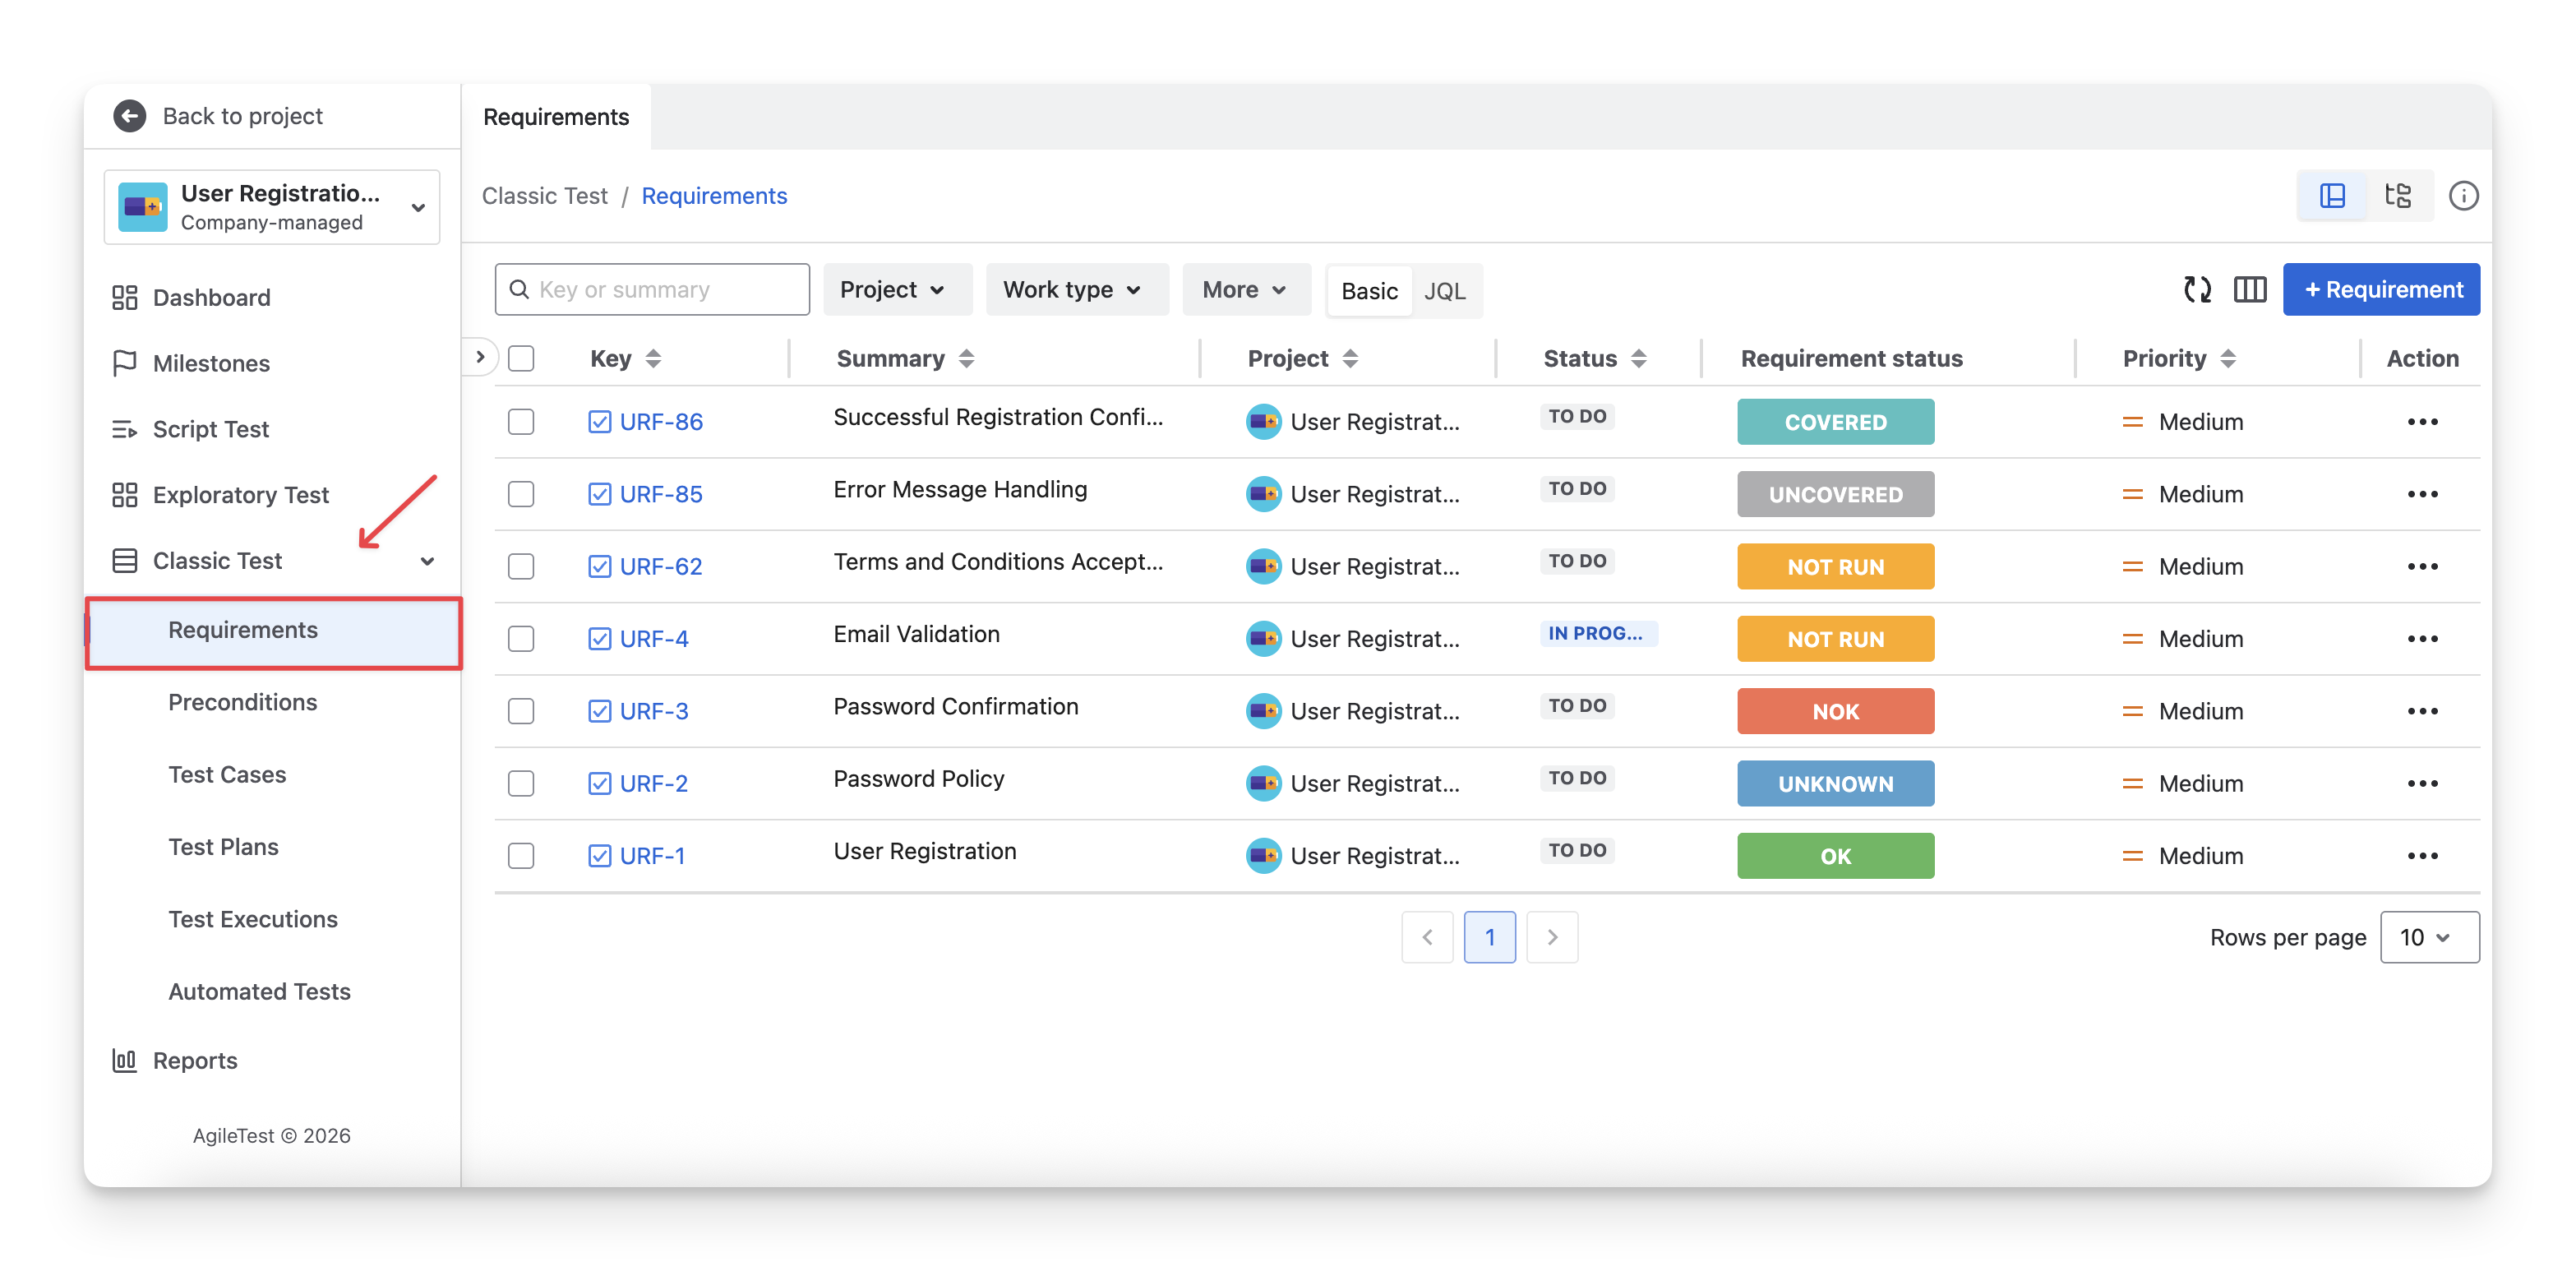
Then, you can click on the “+ Requirement” button and fill in the details to create a requirement.
Learn more about Requirements.
1.2 Create Your First Test Case
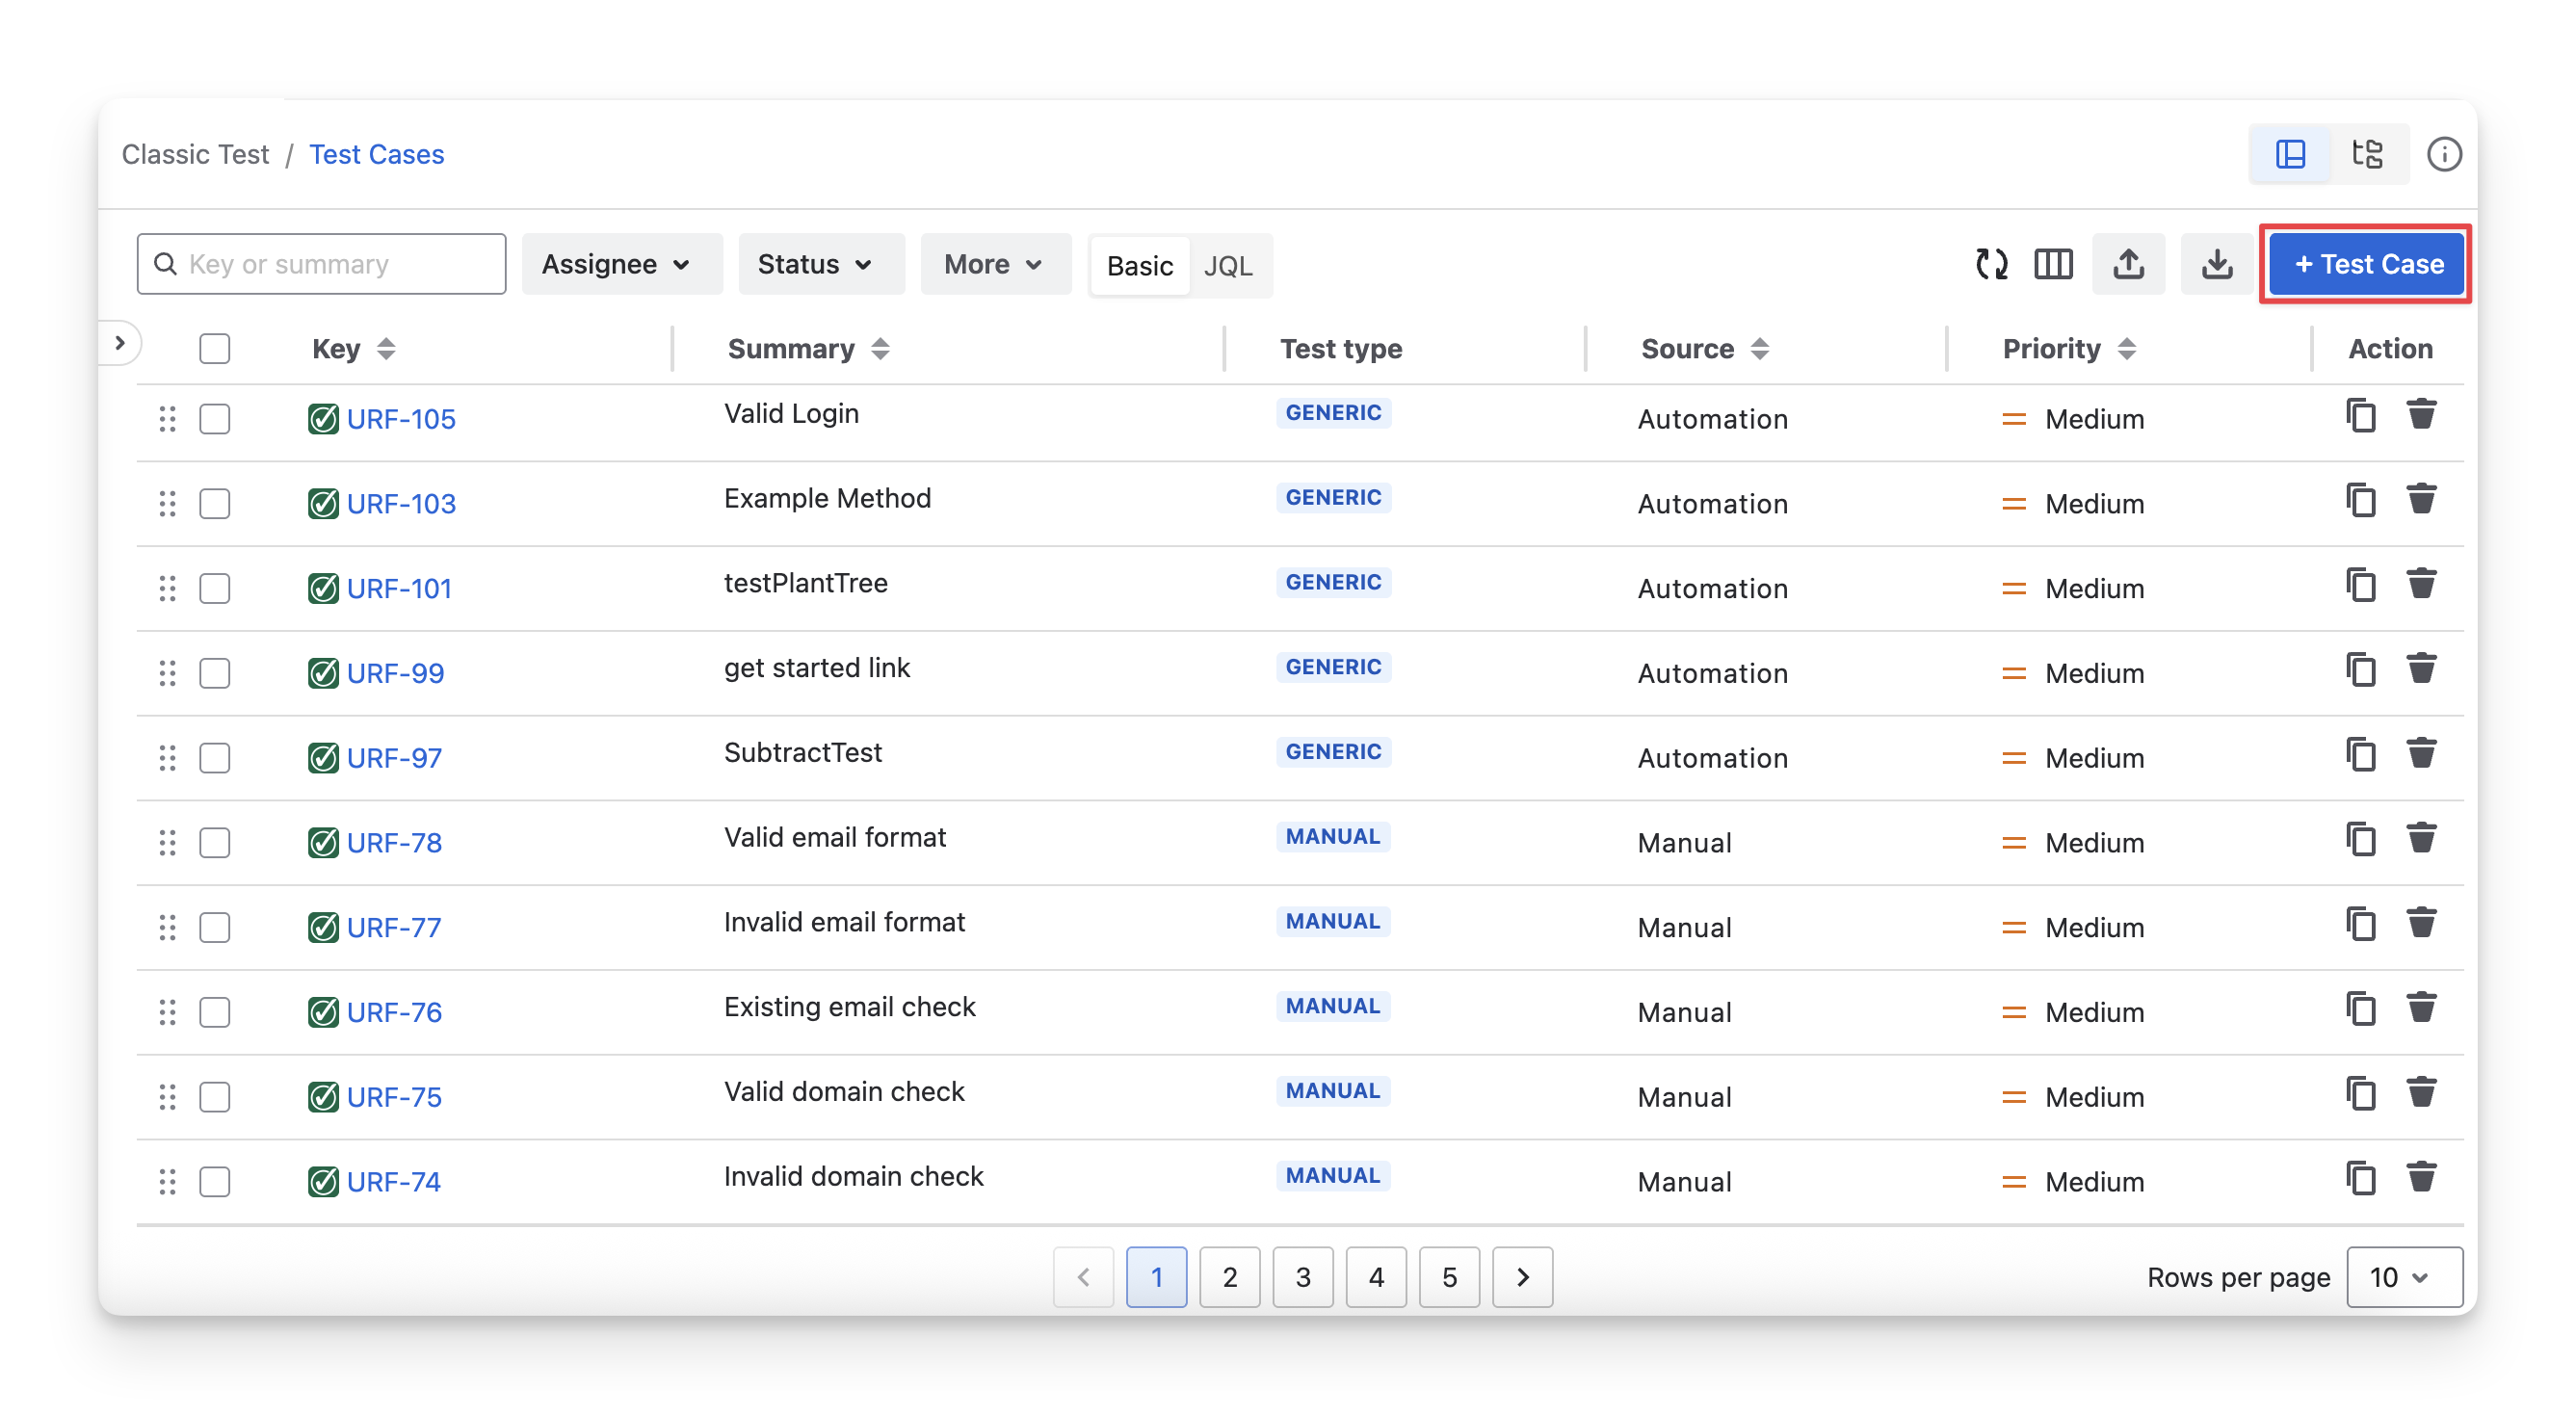
Navigate to the Classic Test section → select Test Cases. This is the section where you can create your test cases.
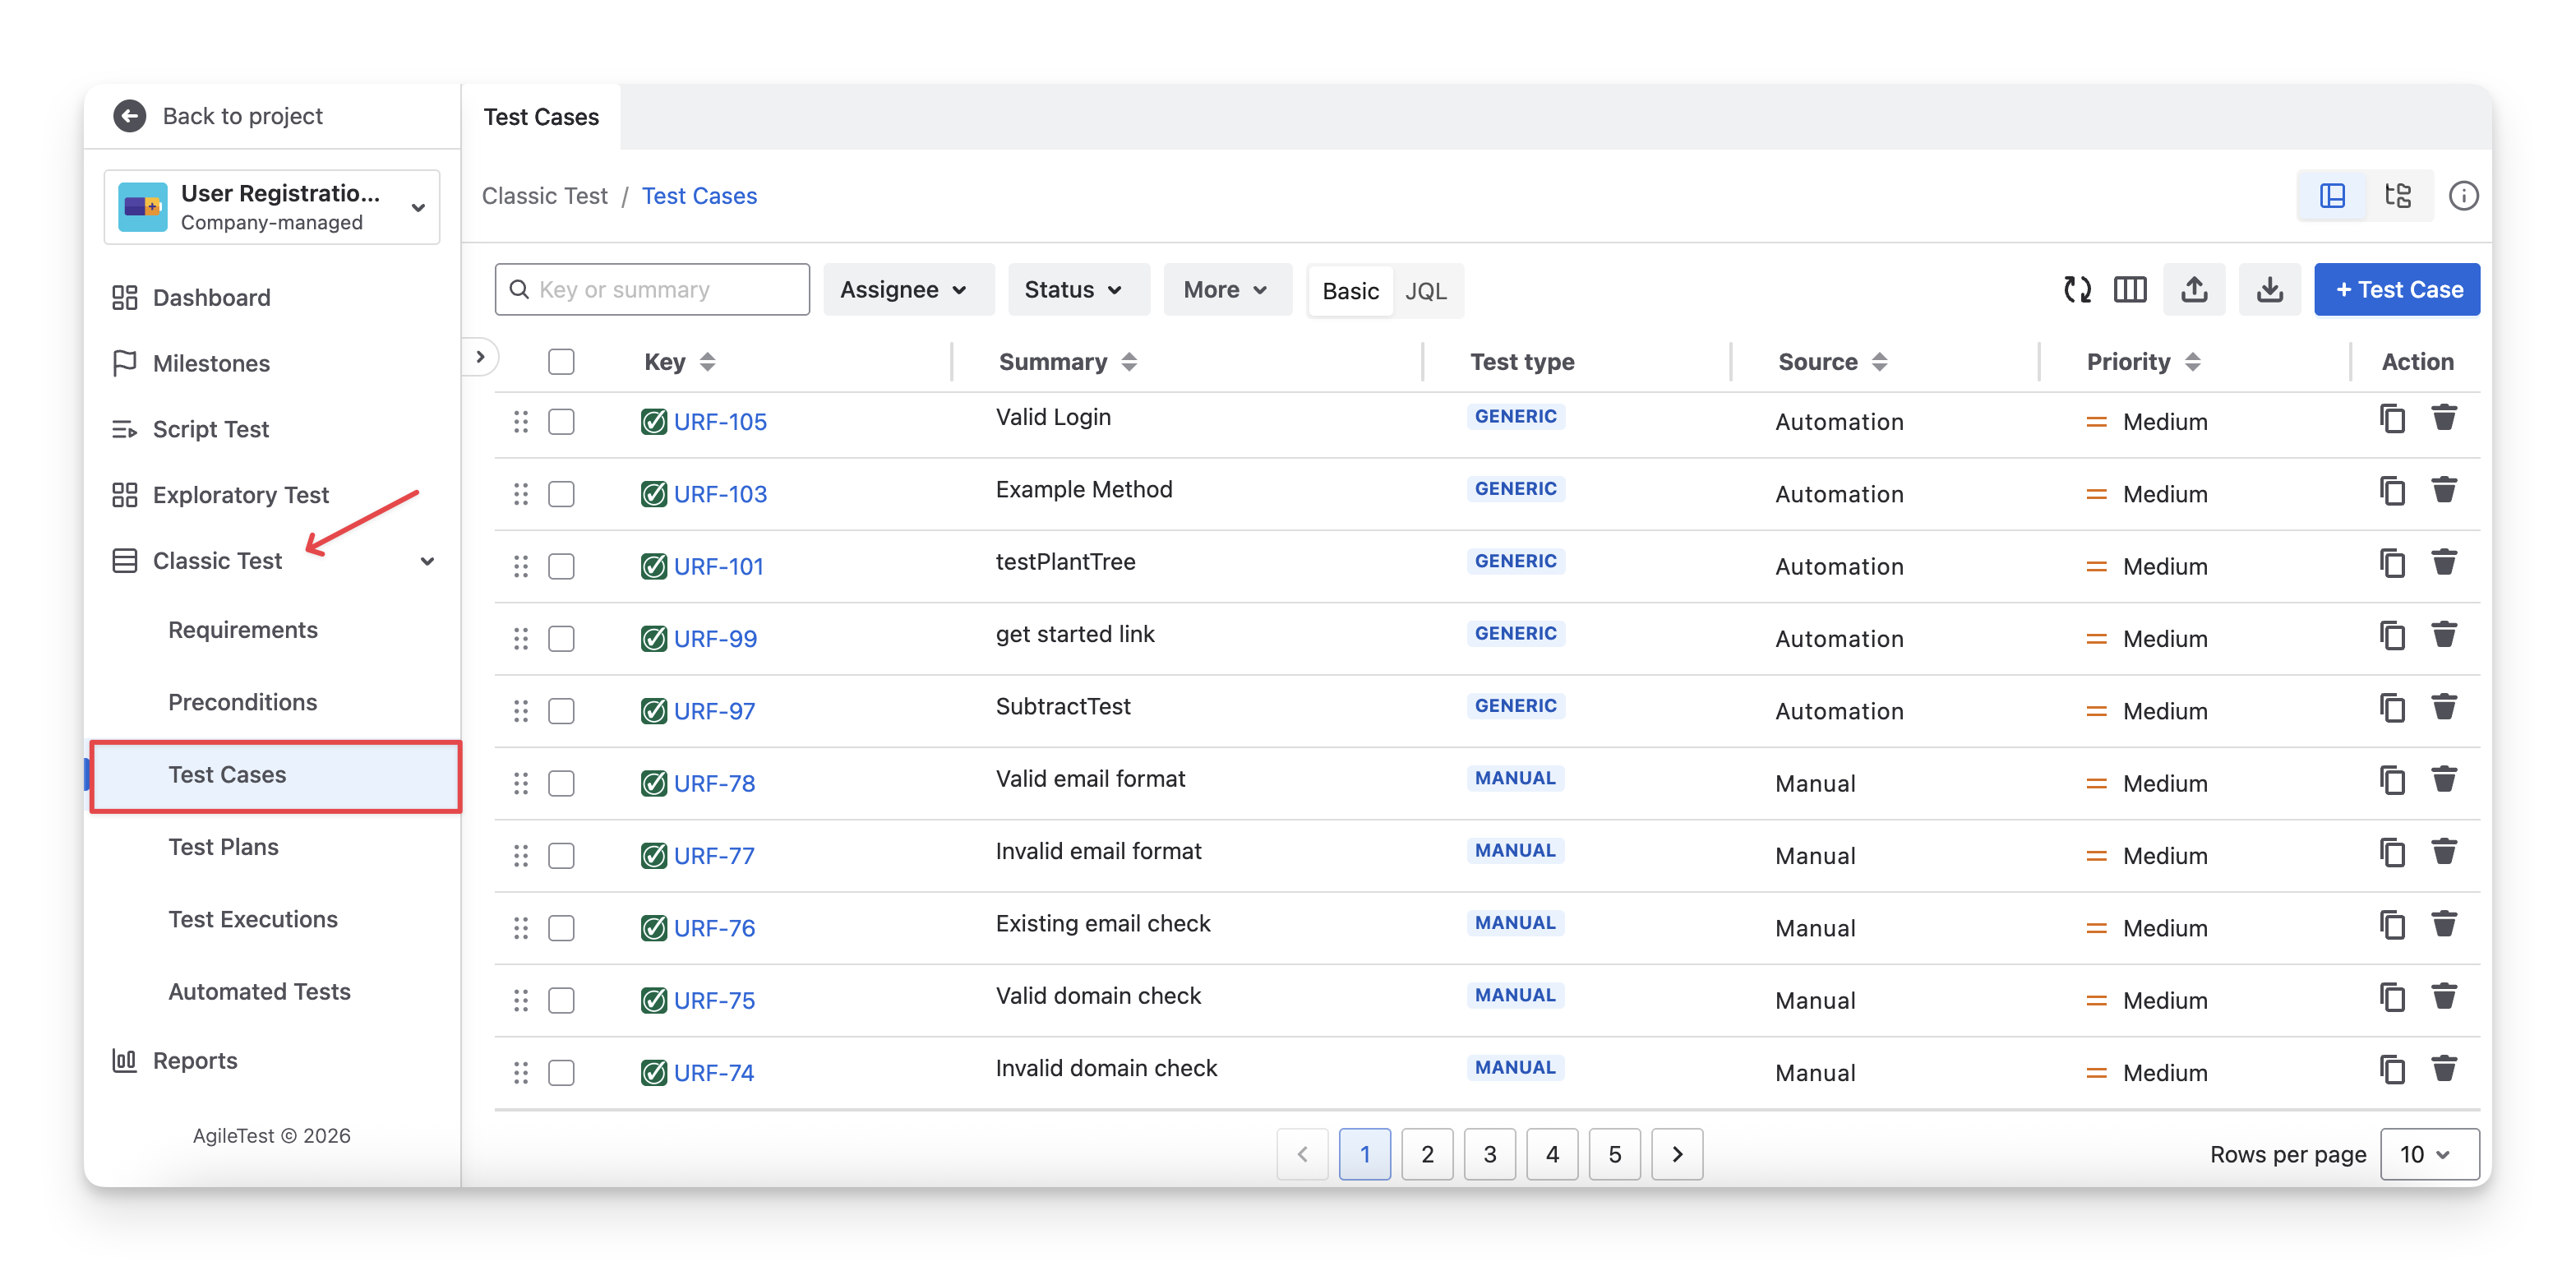
You can click on the “+ Test Case” button to create a test case manually.
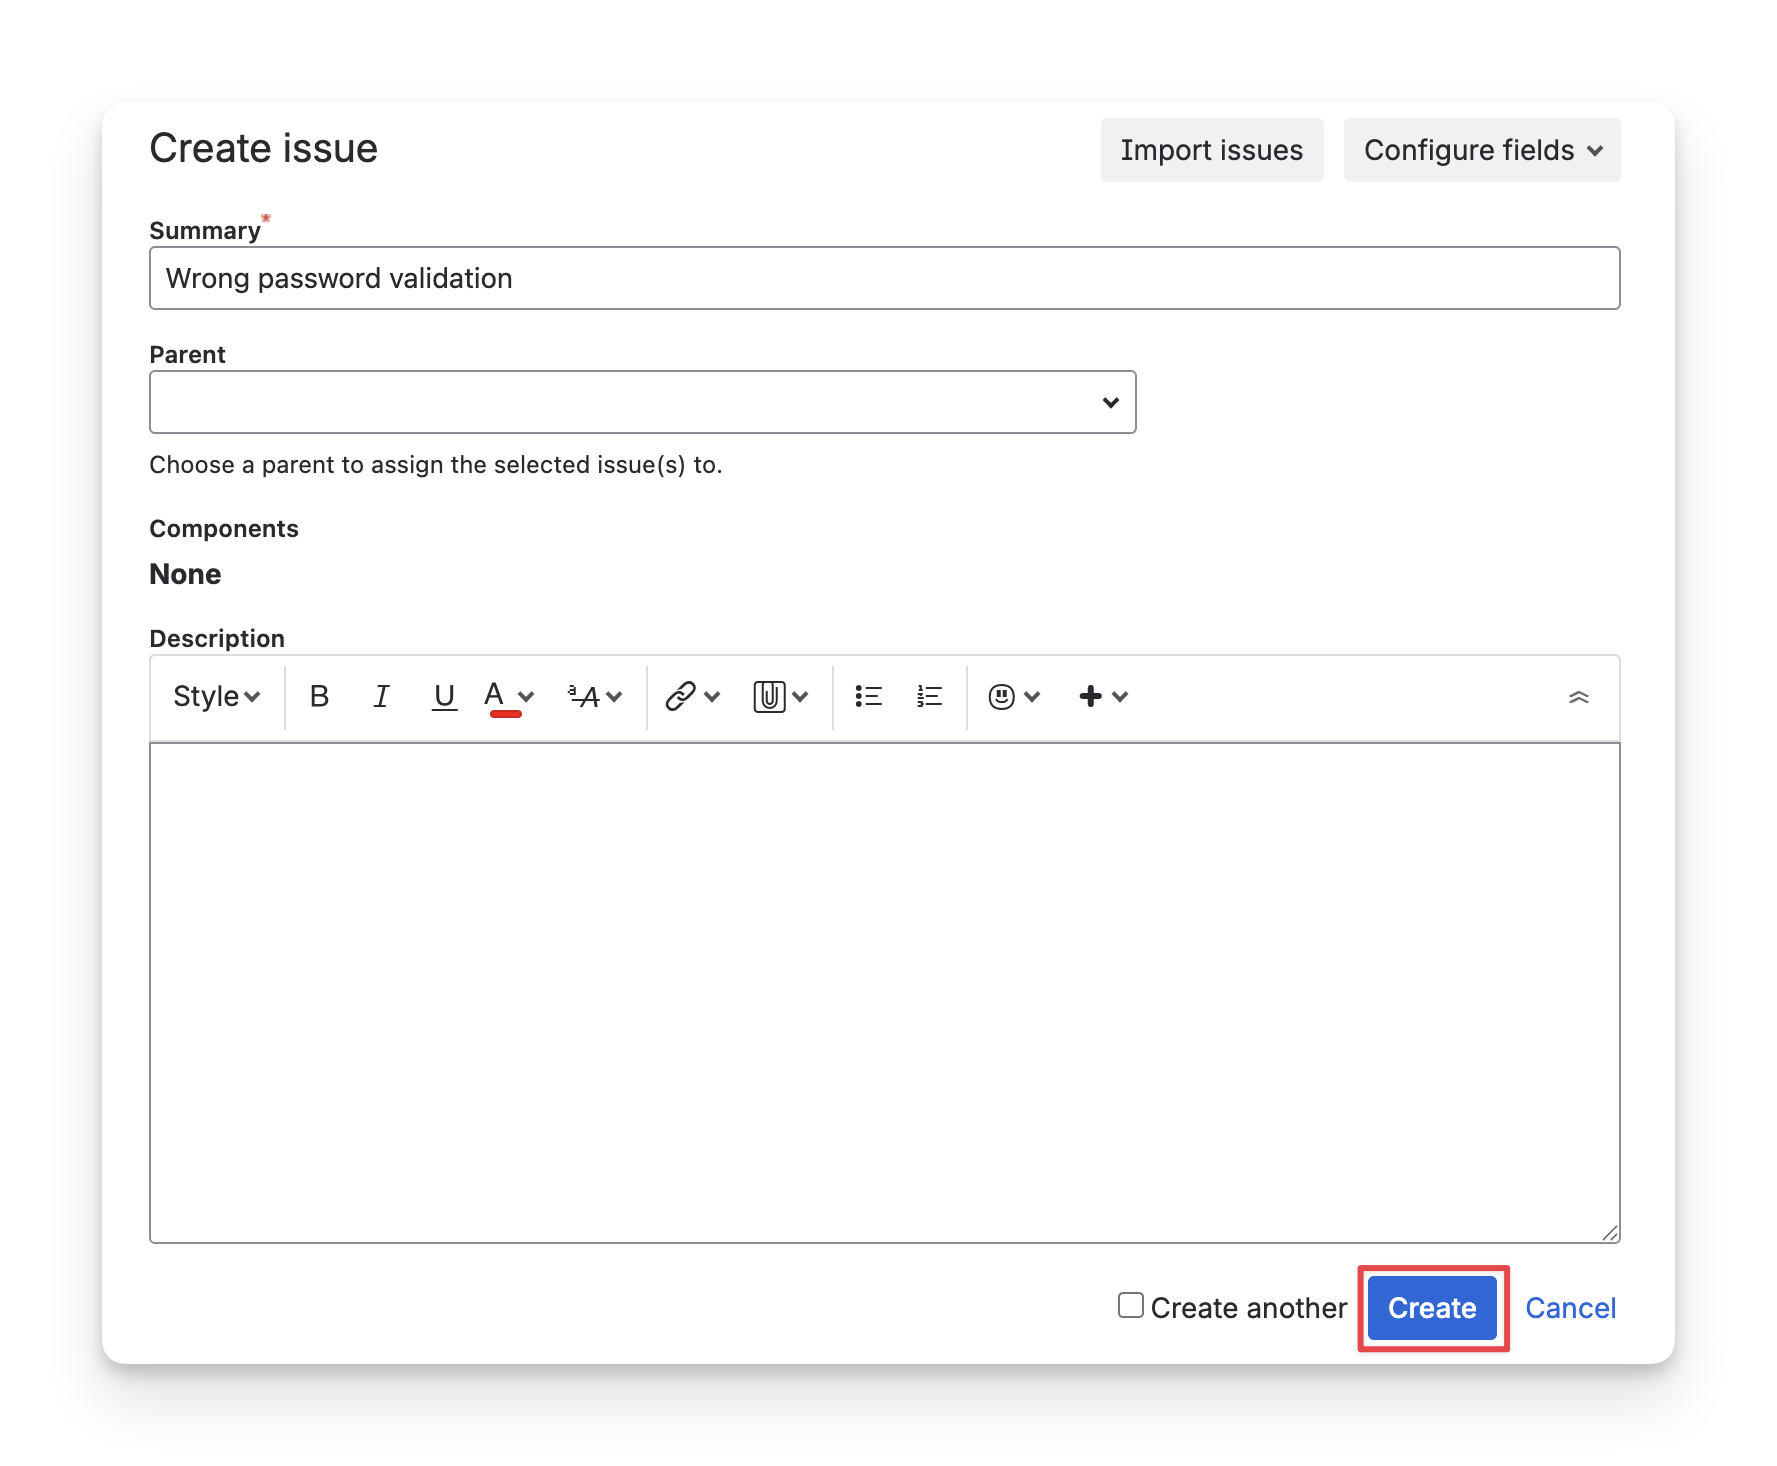
A dialog will appear. You can input your details for this test case. Once finished, click on the “Create” button.
Learn more about other approaches to creating test cases:
2. Get Your Test Cases Ready For Execution
2.1 Link Your Test Cases With Requirement
After creating your test cases, link them to your requirements. This establishes traceability, allowing you to monitor results in test reports. To do this, follow these steps:
-
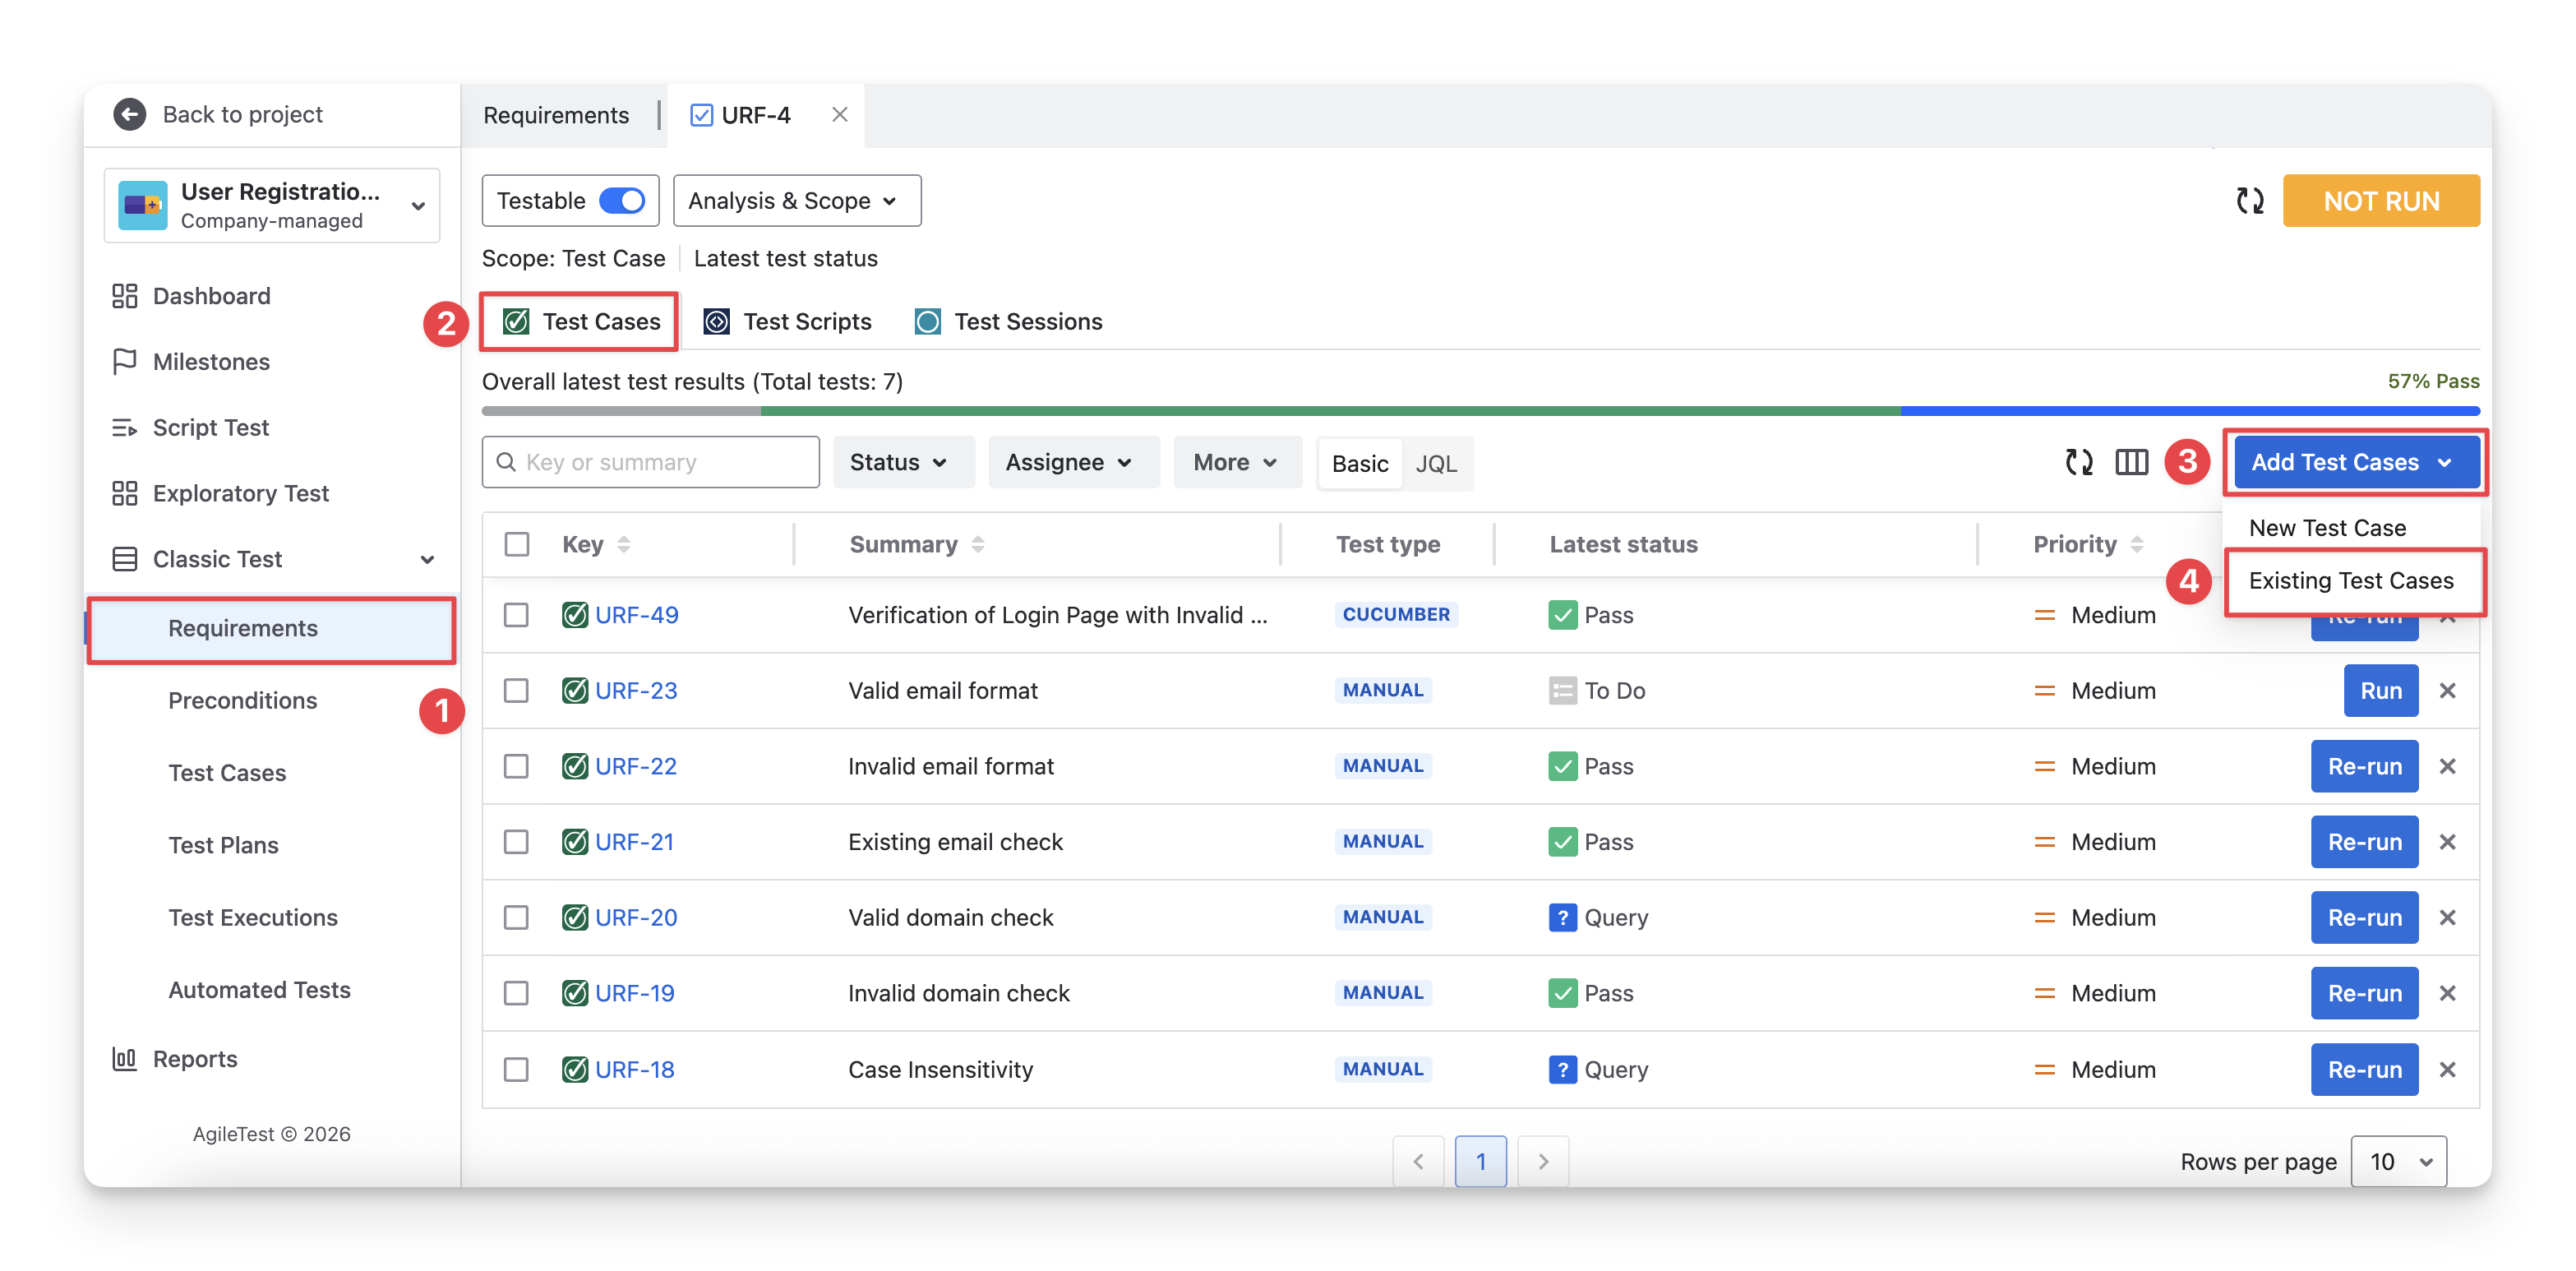
Navigate to the Requirements section, click on the requirements you want to link with test cases.
-
Select the “Test Cases” tab.
-
Click on the “Add Test Cases” button.
-
Choose “Existing Test Cases”.
-
Now you can select which test cases to add and link with the requirement.

-
Click the “Add Selected” button to complete.
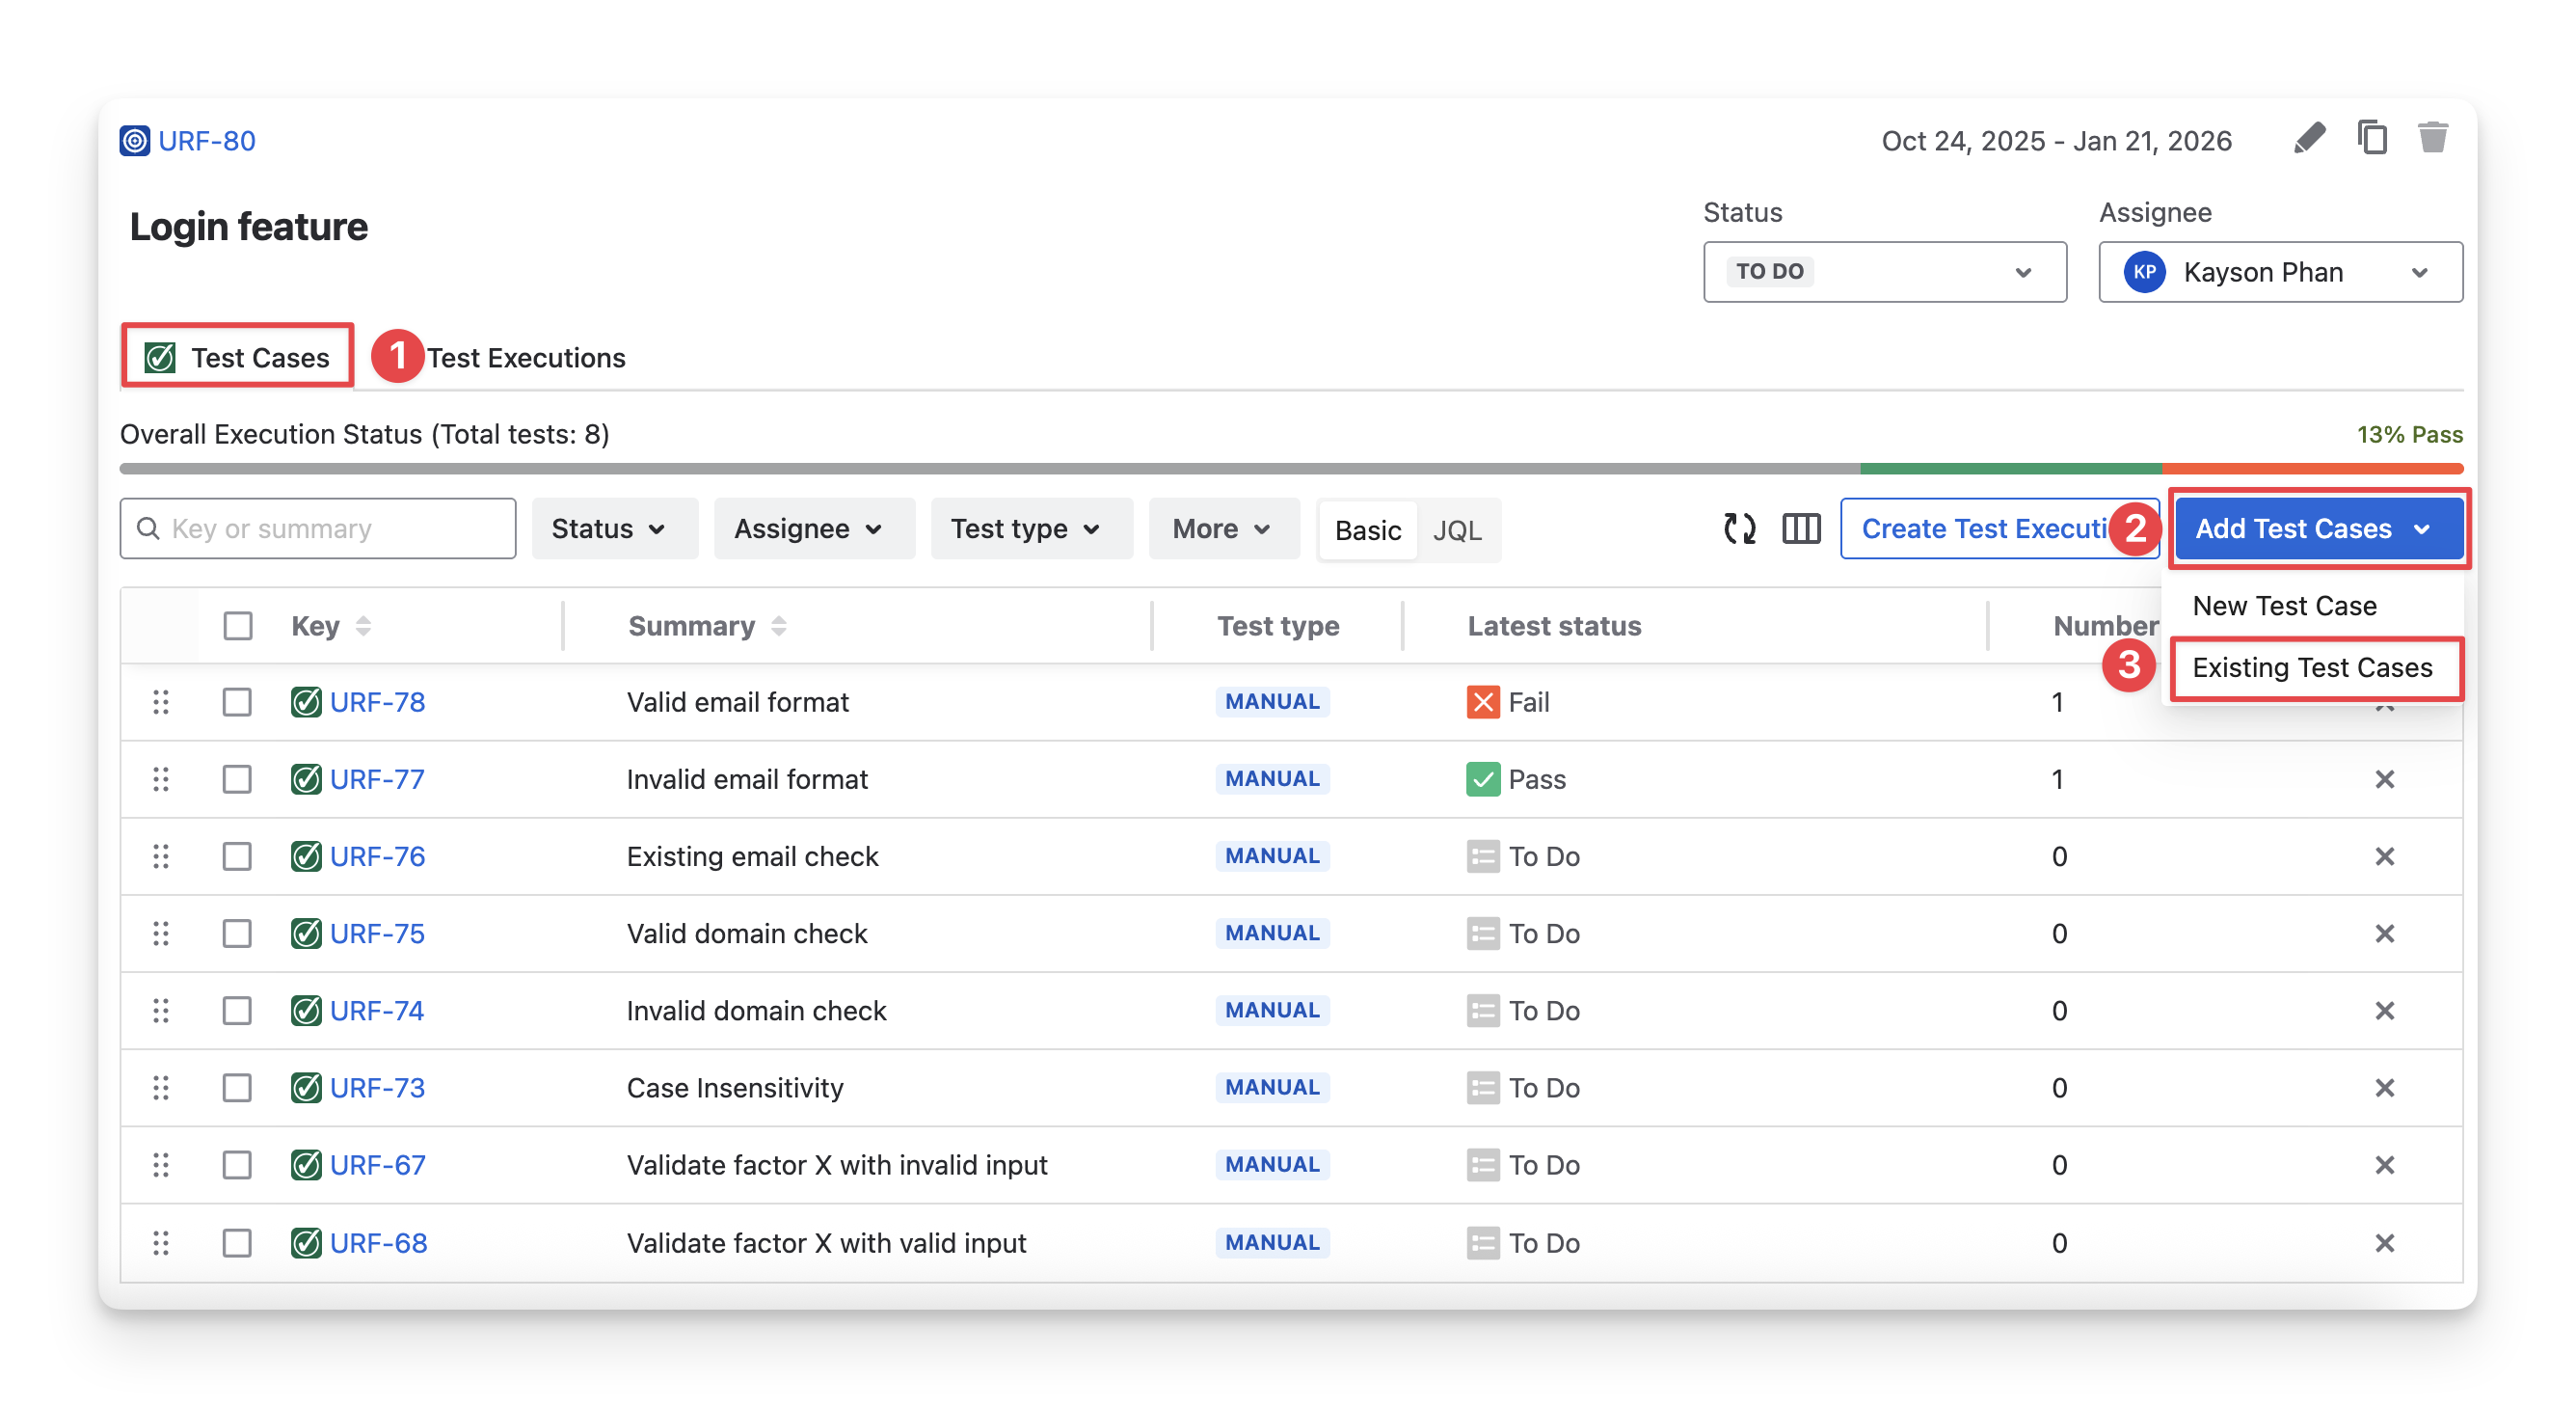
2.2 Plan Your Test Cases For Execution
When you have a list of test cases, you can add them to a plan with a timeline to manage what and when to test.
Learn more about Test Plans.
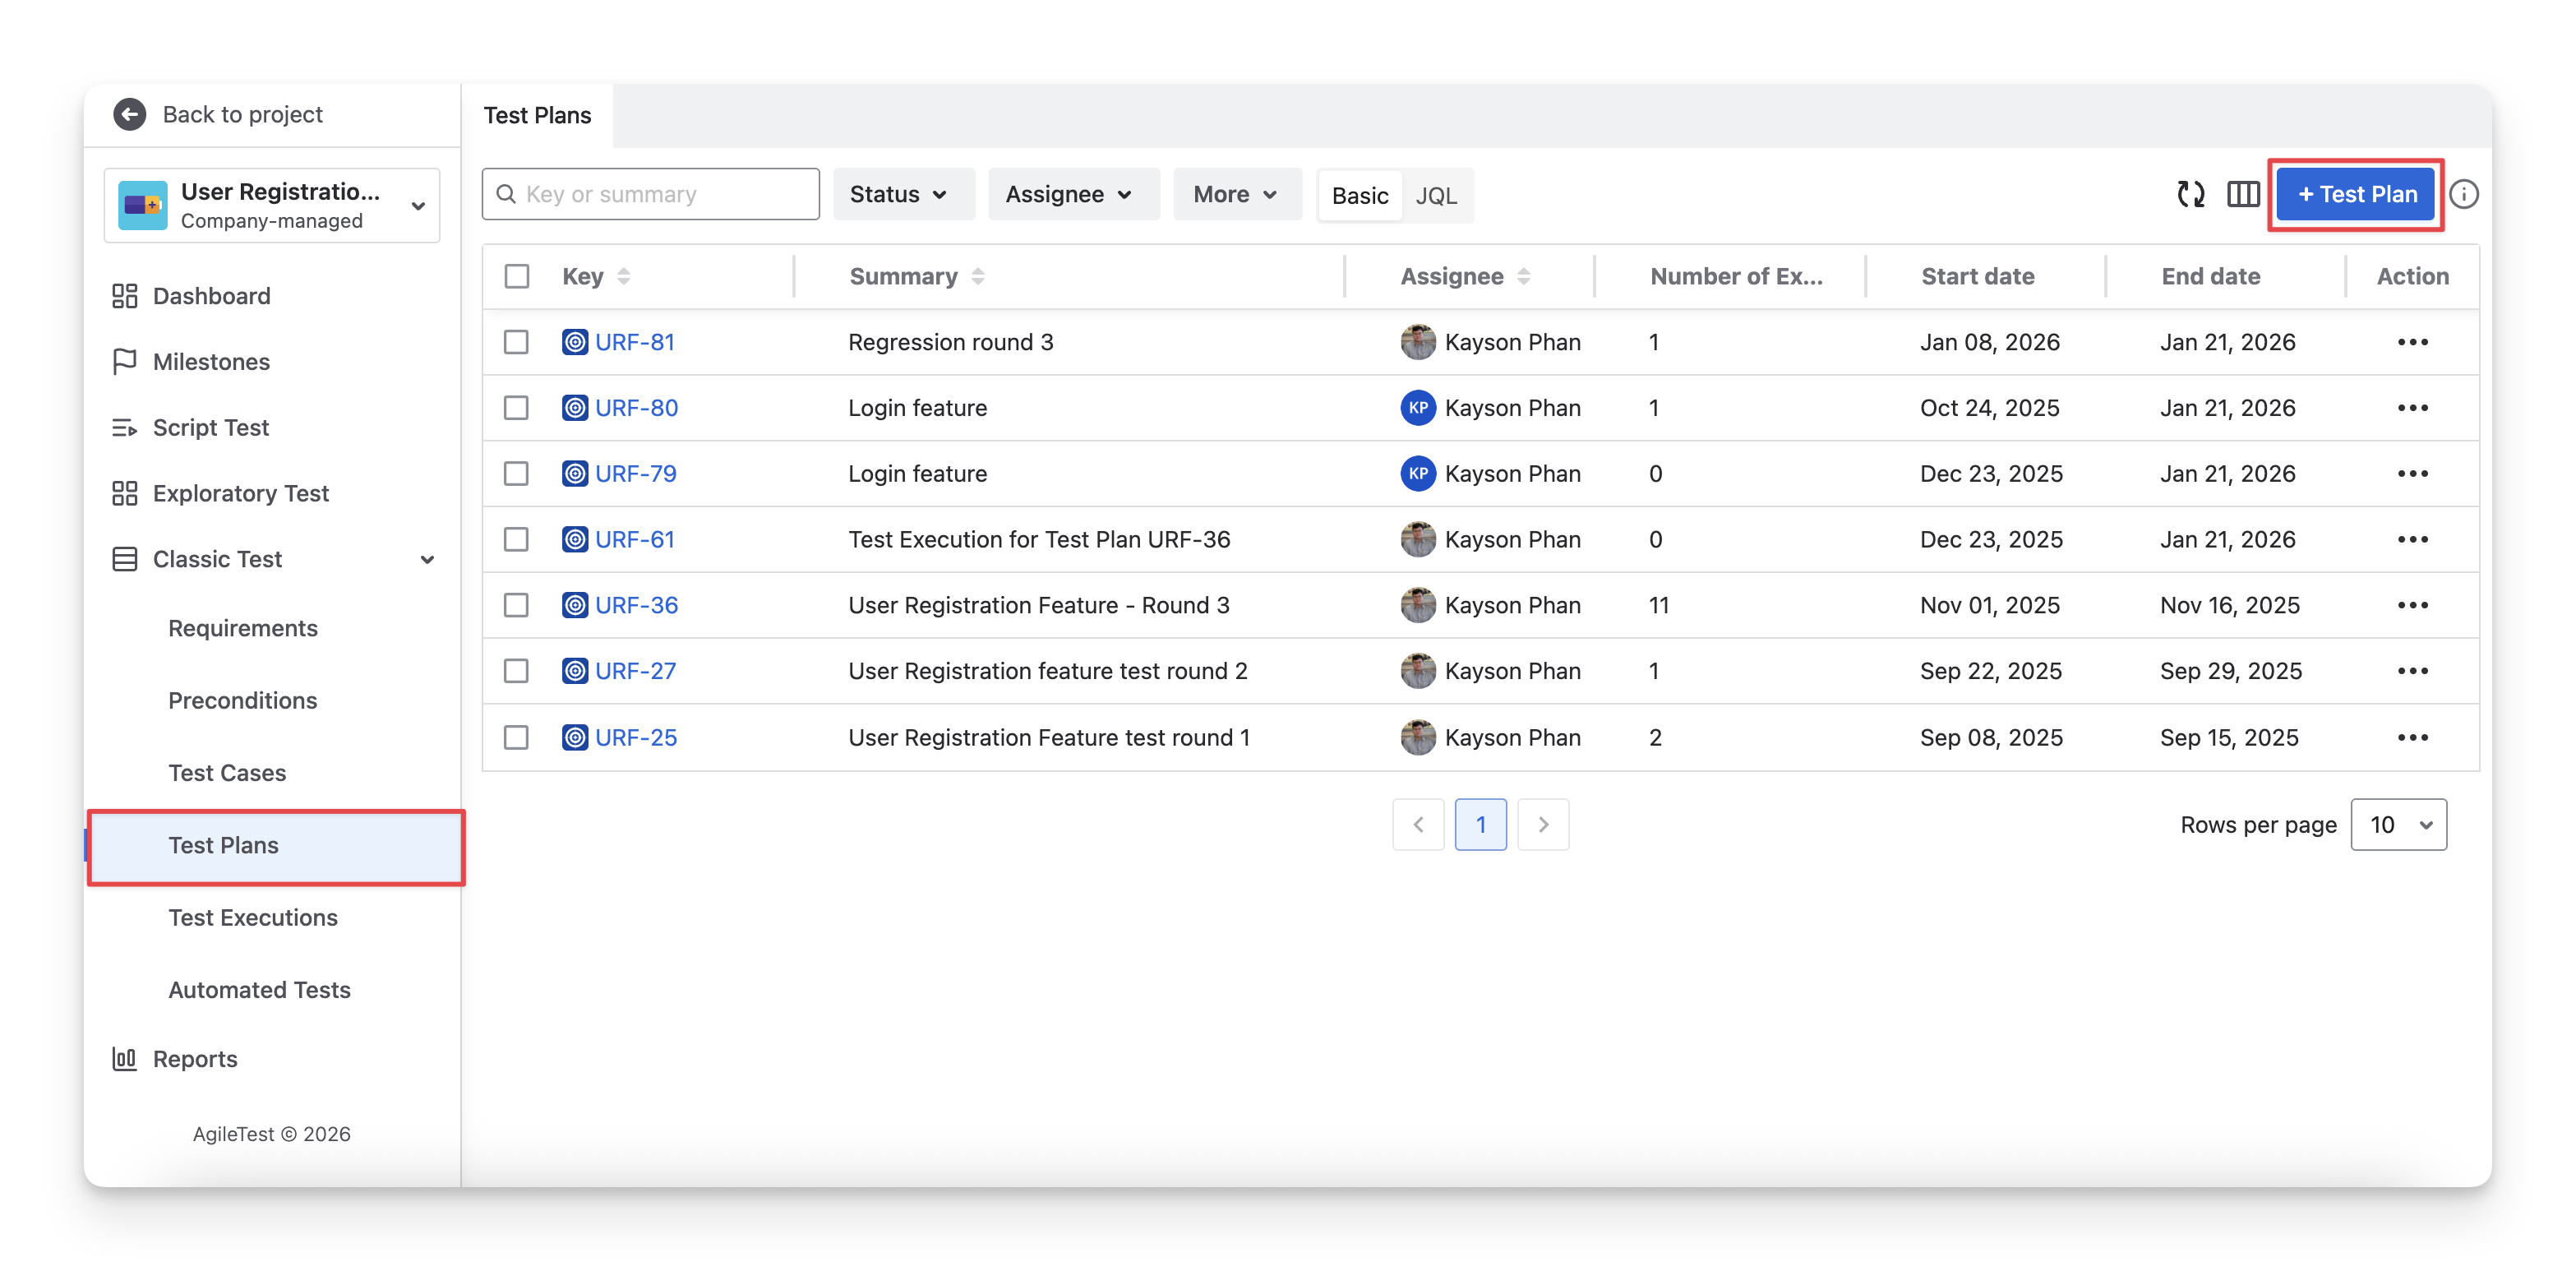
Navigate to the Classic Test section → Choose Test Plan. Here, you can click on the “+ Test Plan” button to create a new plan.
To add test cases to this plan, follow these steps:
-
Select the Test Cases tab.
-
Choose the “Add Test Cases” button.
-
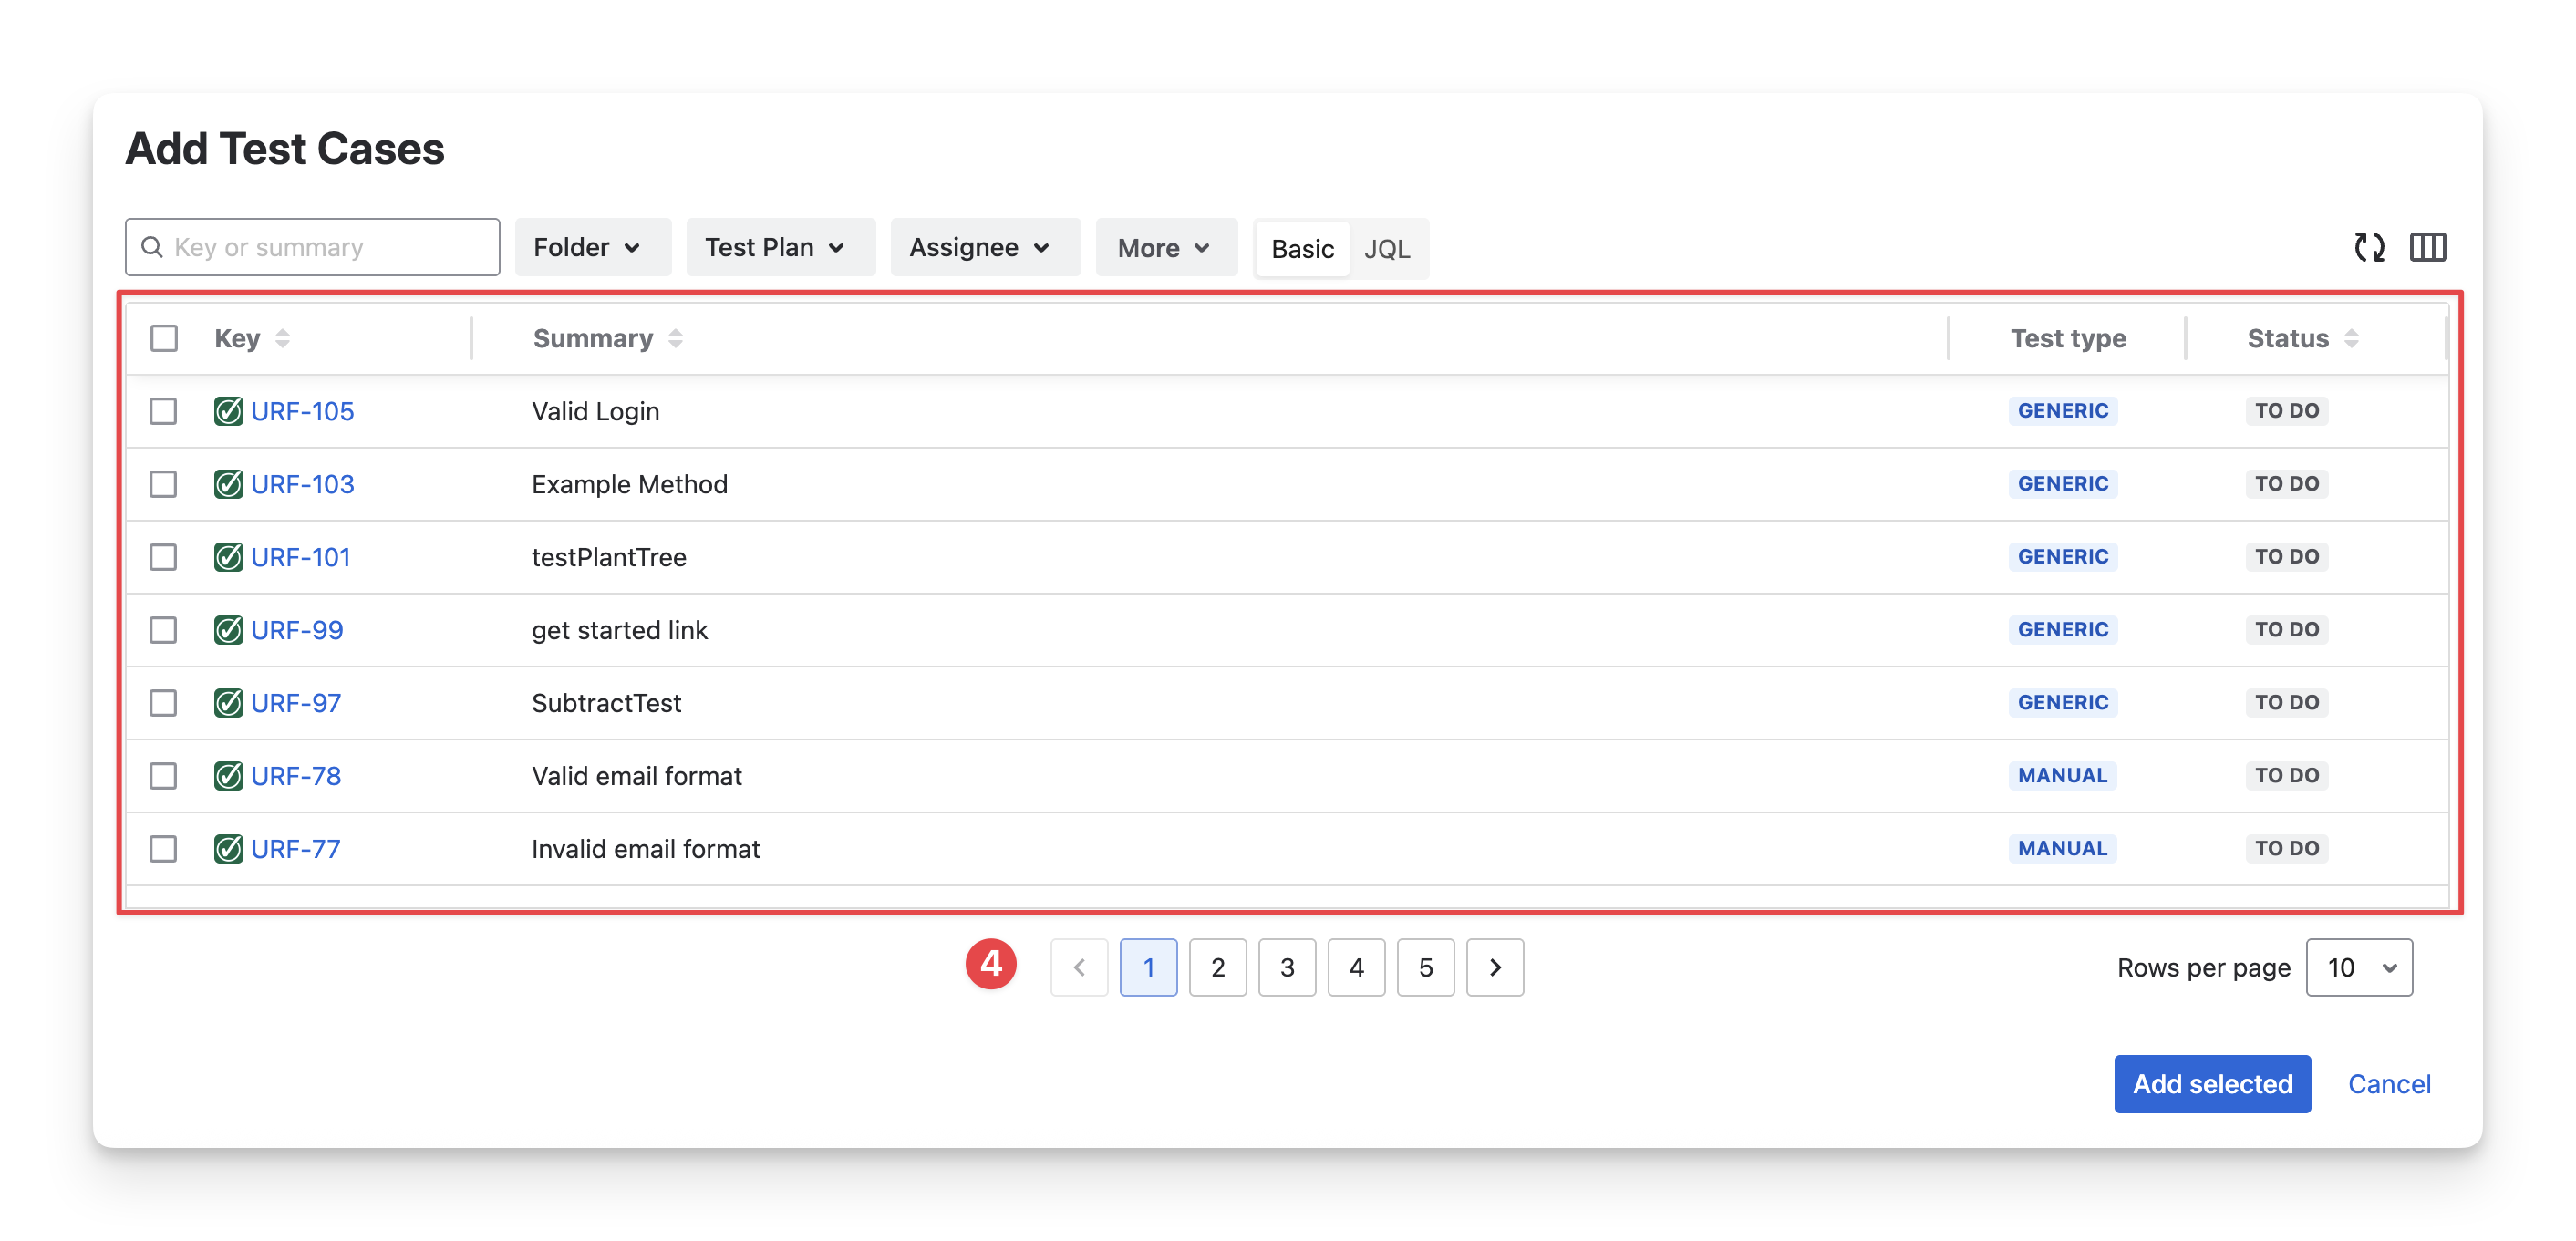
Select the “Existing Test Cases” option.
-
Now you can select which test cases to add to this plan.
-
Click the “Add selected” button to finish.
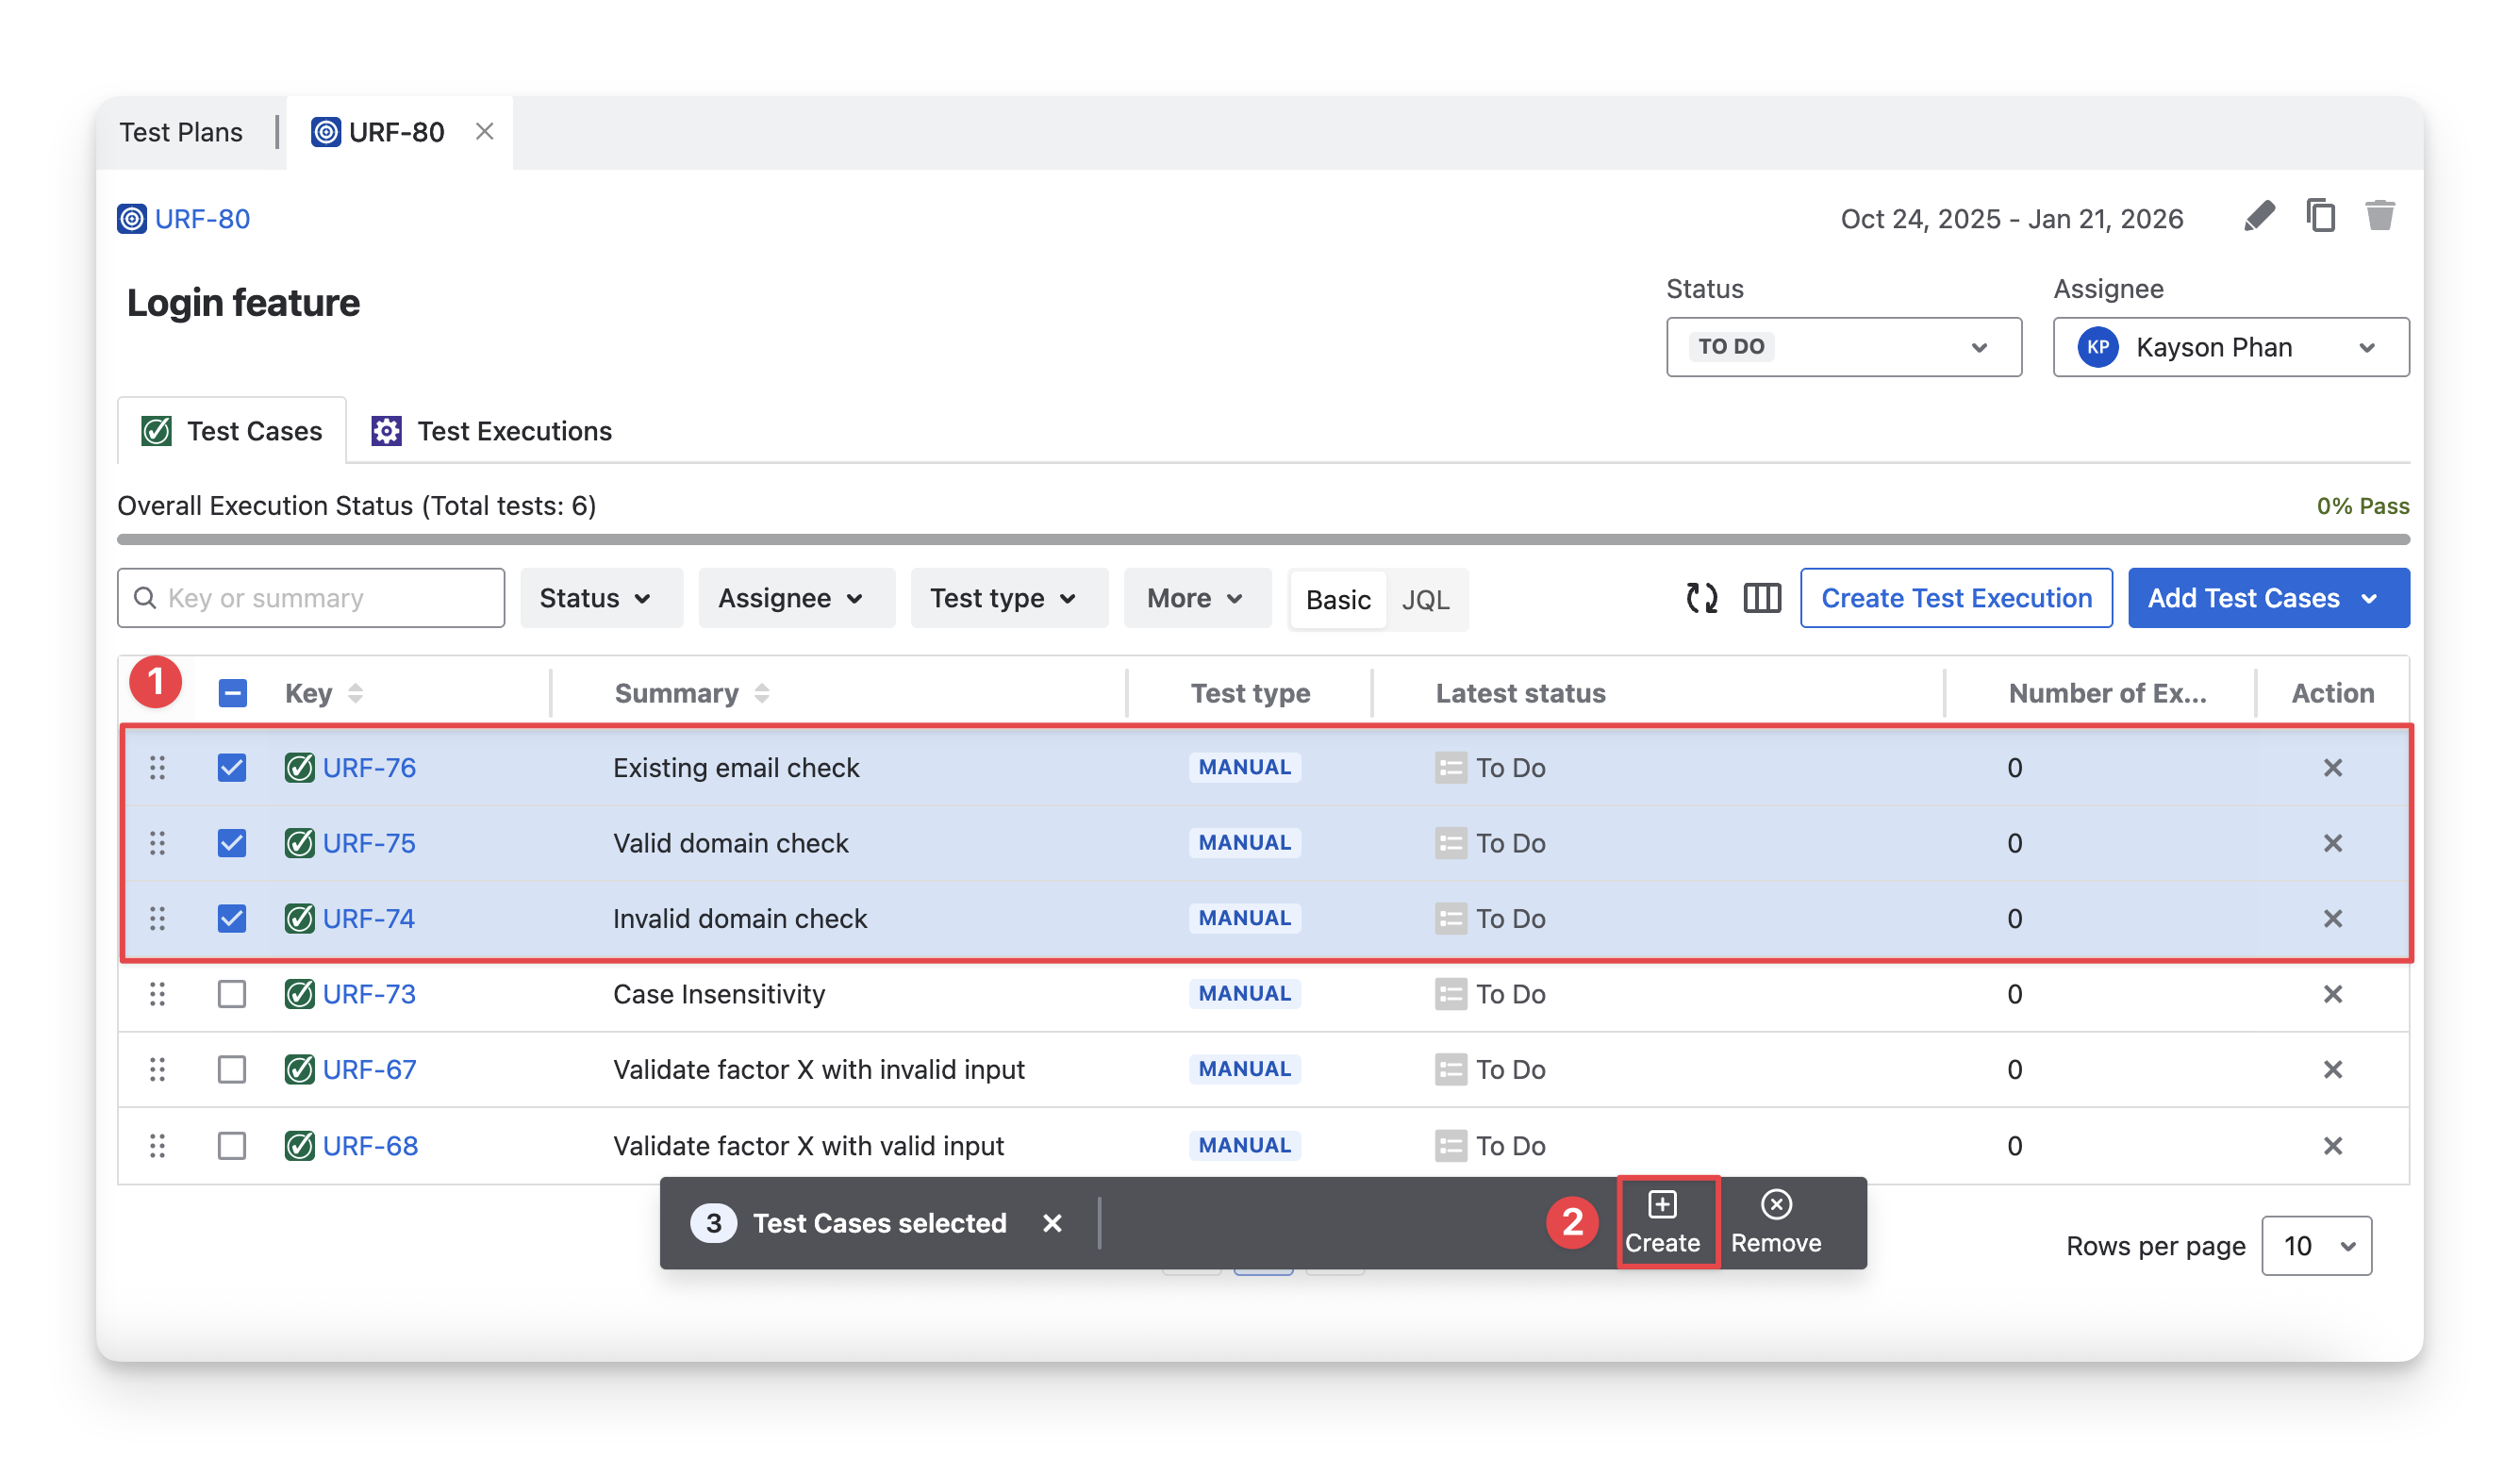
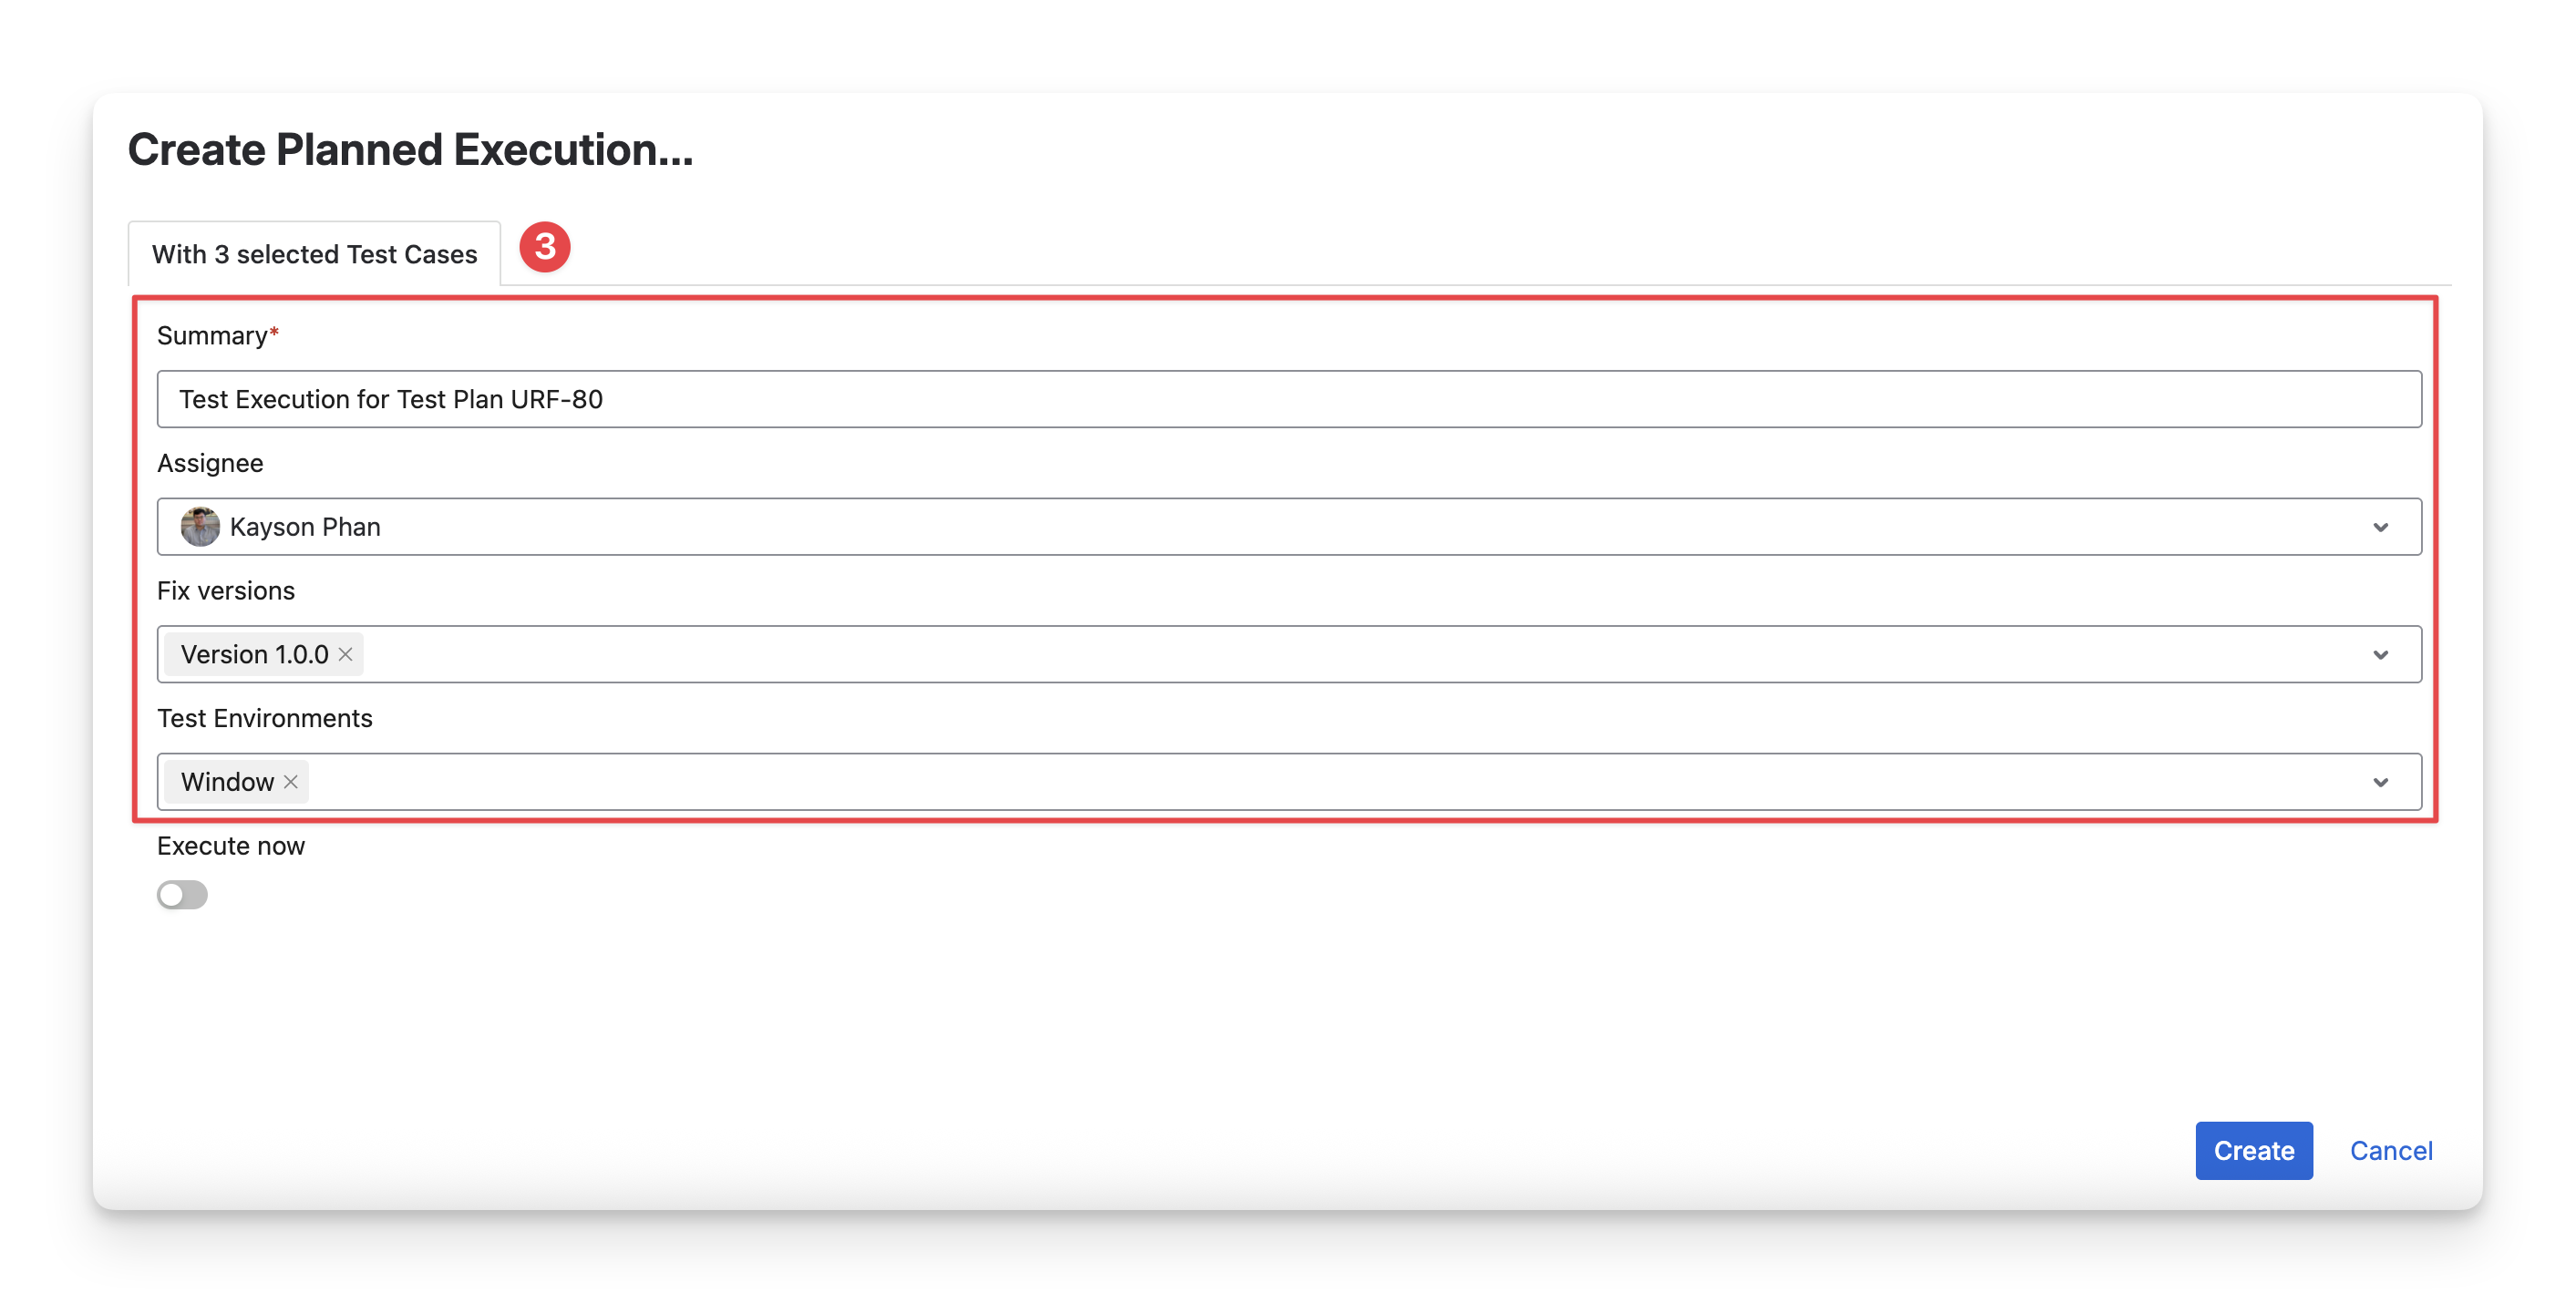
Once you have finished adding all the essential test cases, you can create test executions from these test cases to prepare for your test run. Here's how:
-
Select the test cases you want to create an execution for.
-
Click the “Create” button on the toolbar.
-
Fill in the test execution details.
You’ve just completed your first test preparation in AgileTest—from requirement to execution. You’re now ready to move on to executing your tests.
Read next: Run Your First Execution.
Should you need any assistance or further AgileTest inquiries, contact our 24/7 Support Desk!