Import Assets to AssetIT
AssetIT supports users to import their assets from a CSV file. This is particularly useful if you're migrating data from another asset management system or if you have a large number of assets to add.
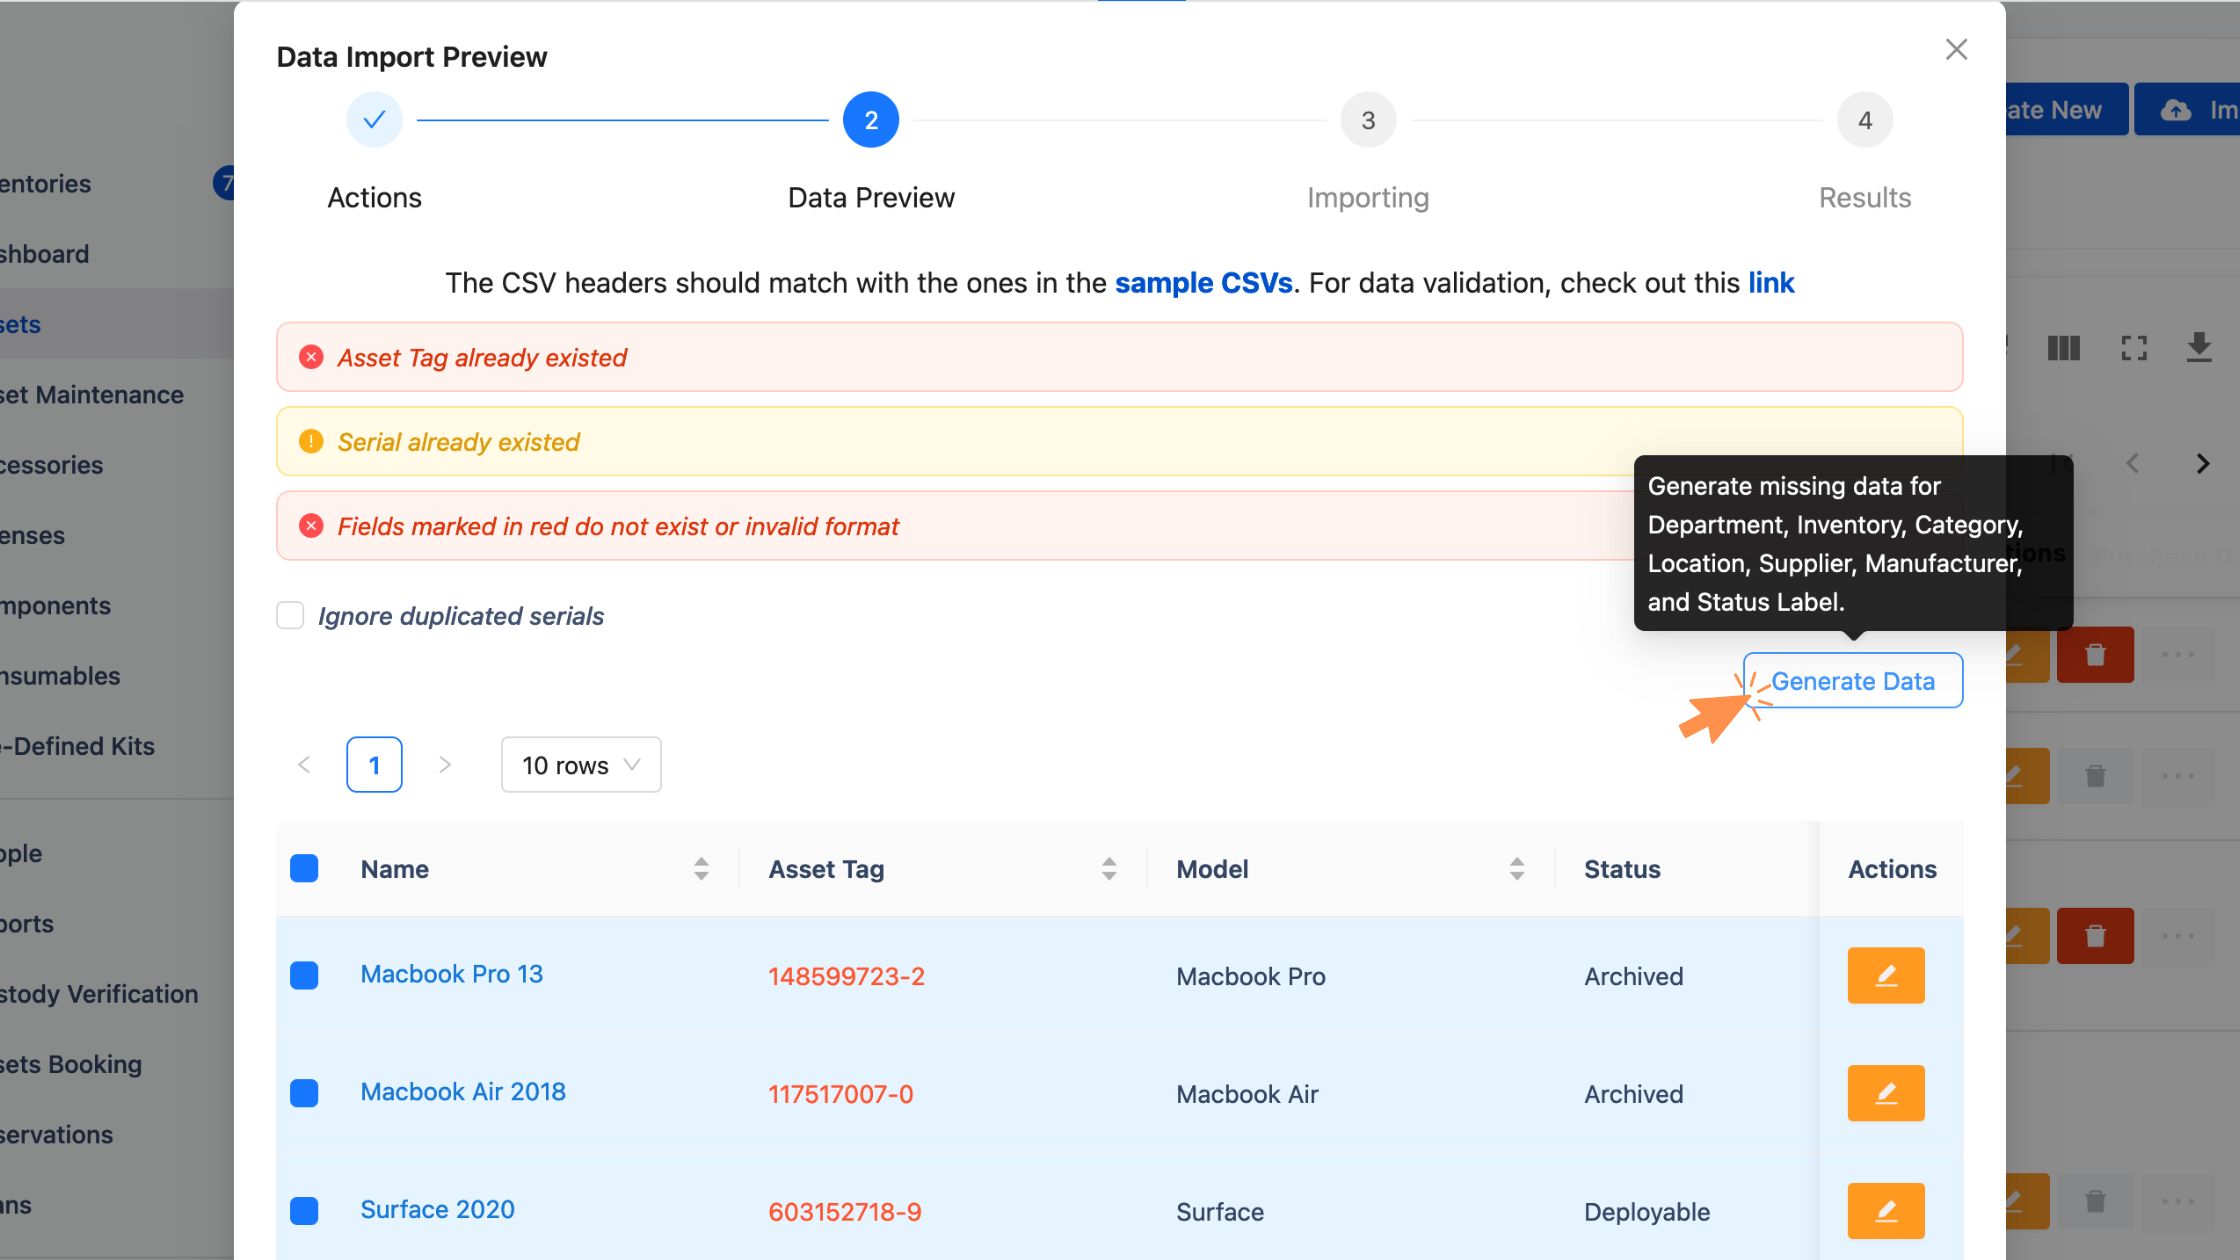
You can download the sample CSV file format from the import dialog.
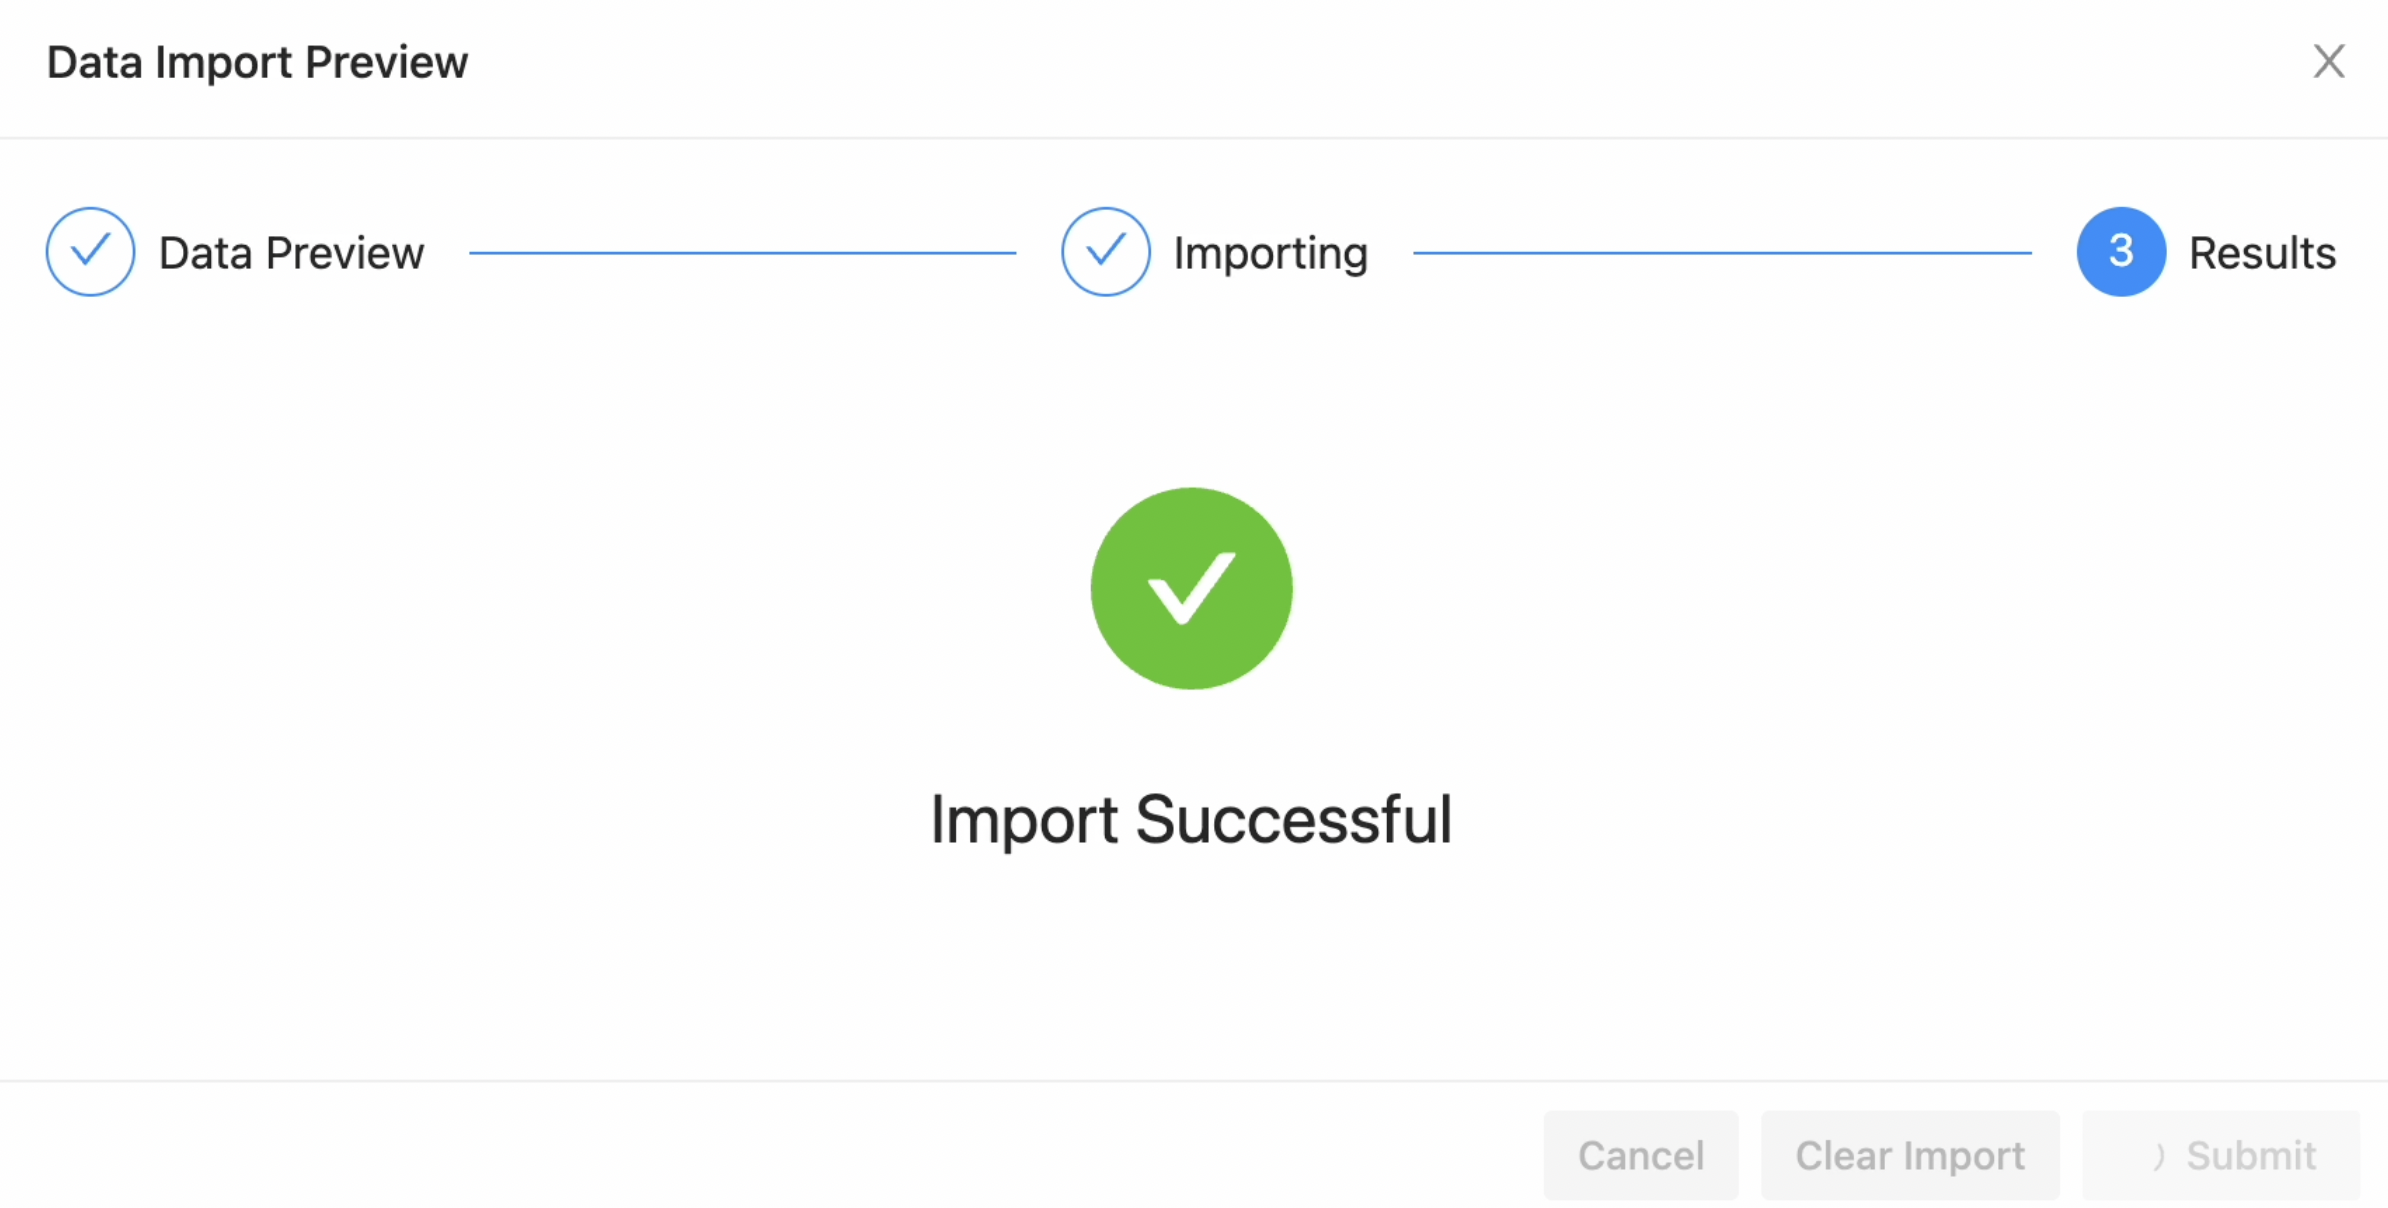
There are 3 steps to import assets including Data Preview, Importing and Results

Data Preview
In this step, you can preview all of your assets to be imported. AssetIT also performs data validation at this stage, checking for any invalid fields before you submit the CSV file for import.
If you would like AssetIT to automatically fill in the missing fields or options during data imports, click “Generate Data”.
If the Asset Tag column is left blank and the "Generate auto-incrementing asset tags" toggle is activated in the Asset Tag Setting, AssetIT will automatically create an incrementing tag for it accordingly.
Data Validation for Importing Assets into AssetIT
Before importing your assets via a CSV file into AssetIT, the system will perform a data validation check. Each field has certain requirements and constraints that must be met. Here is a summary of these fields and their data validation rules:
No | Field | Value | Require | Length |
|---|---|---|---|---|
1 | Name | Any text | Yes | Max: 50 characters |
2 | Asset Tag | Unique string | Yes | Max: 100 characters |
3 | Model | Asset Model name defined in Settings → Asset Models | Yes | NA |
4 | Status | Status Label name defined in Settings → Status Labels | Yes | NA |
5 | Inventory | Inventory name defined in Settings → Inventories | No | NA |
6 | Serial | Any text | No | Max: 100 characters |
7 | Assigned To | Jira user ID(s) or user name(s) This field requires Status (No. #4) with Status Type deployable | No | Max: 150 characters |
8 | Order Number | Any text | No | Max: 100 characters |
9 | Purchase Date | Date format MMM D, YYYY. Example Mar 6, 2020 | No | NA |
10 | Purchase Cost | Format: Number with 2 decimal digits. Example 265.89 USD Currency: a valid currency. Default currency is USD if not provided | No | Min: 0 Max: 999999.99 |
11 | Warranty Months | Any number | No | Max: 999 |
12 | Department | Department name defined in Settings → Departments | No | NA |
13 | Notes | Any text | No | NA |
14 | Checkout Type | Asset or Location or User Default is User | No | NA |
15 | Assigned To | Jira user id or user name This field requires Status (No #4) with Status Type deployable | No | Max: 150 characters |
16 | Location | Location name defined in Settings → Locations | No | NA |
17 | Supplier | Supplier name defined in Settings → Supplier | No | NA |
Importing
Once you've reviewed and confirmed that all data entries are valid, click on the 'Submit' button to start the import process. A progress bar will indicate the import status, letting you know how many assets have been imported so far.

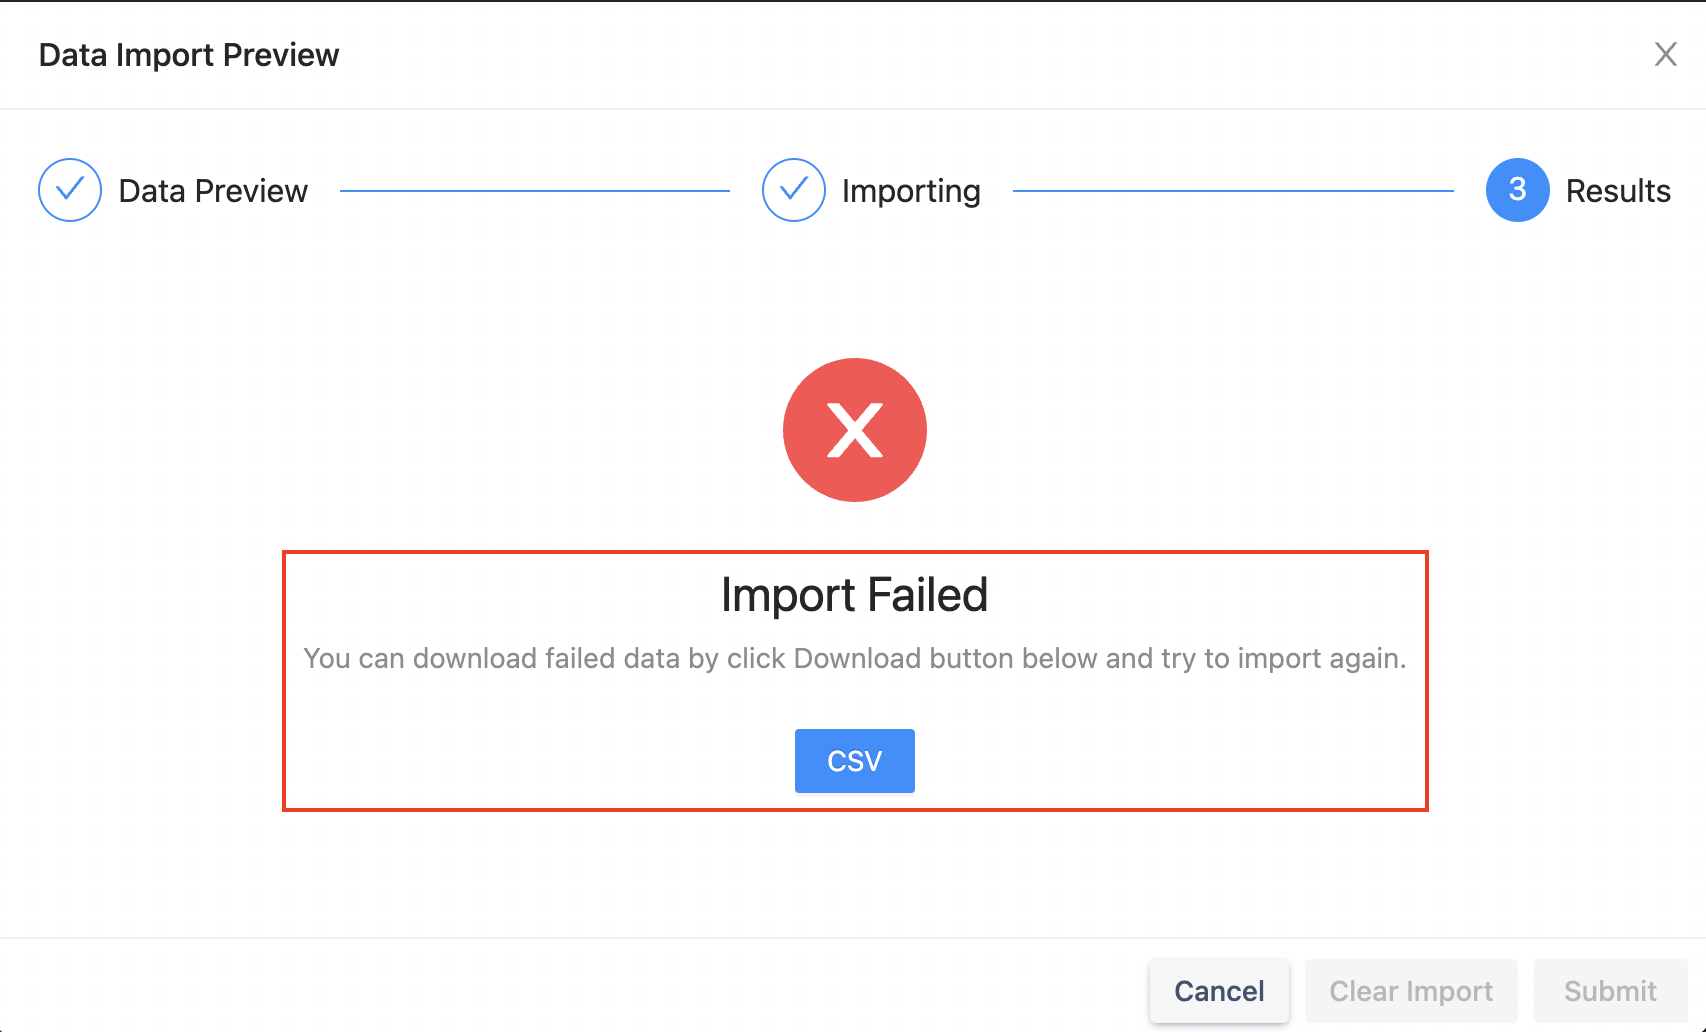
Results
The Results step shows the final import results.
If any errors occurred during the import process, AssetIT will provide a downloadable CSV file containing all the failed rows. This allows you to easily review, correct, and re-import any failed assets.
Importing assets from a CSV file into AssetIT allows you to save time, increase data accuracy, and optimize your IT asset management for Jira.