.png)
There are two ways to create new assets: bulk import and manual creation .
Before you begin, make sure you have already created or imported Asset Models
Approach 1: Import Assets using CSV files
You can import new assets or update existing ones in bulk using the import function.
This approach allows users to import new assets into AssetIT using CSV files.
Importing new assets
-
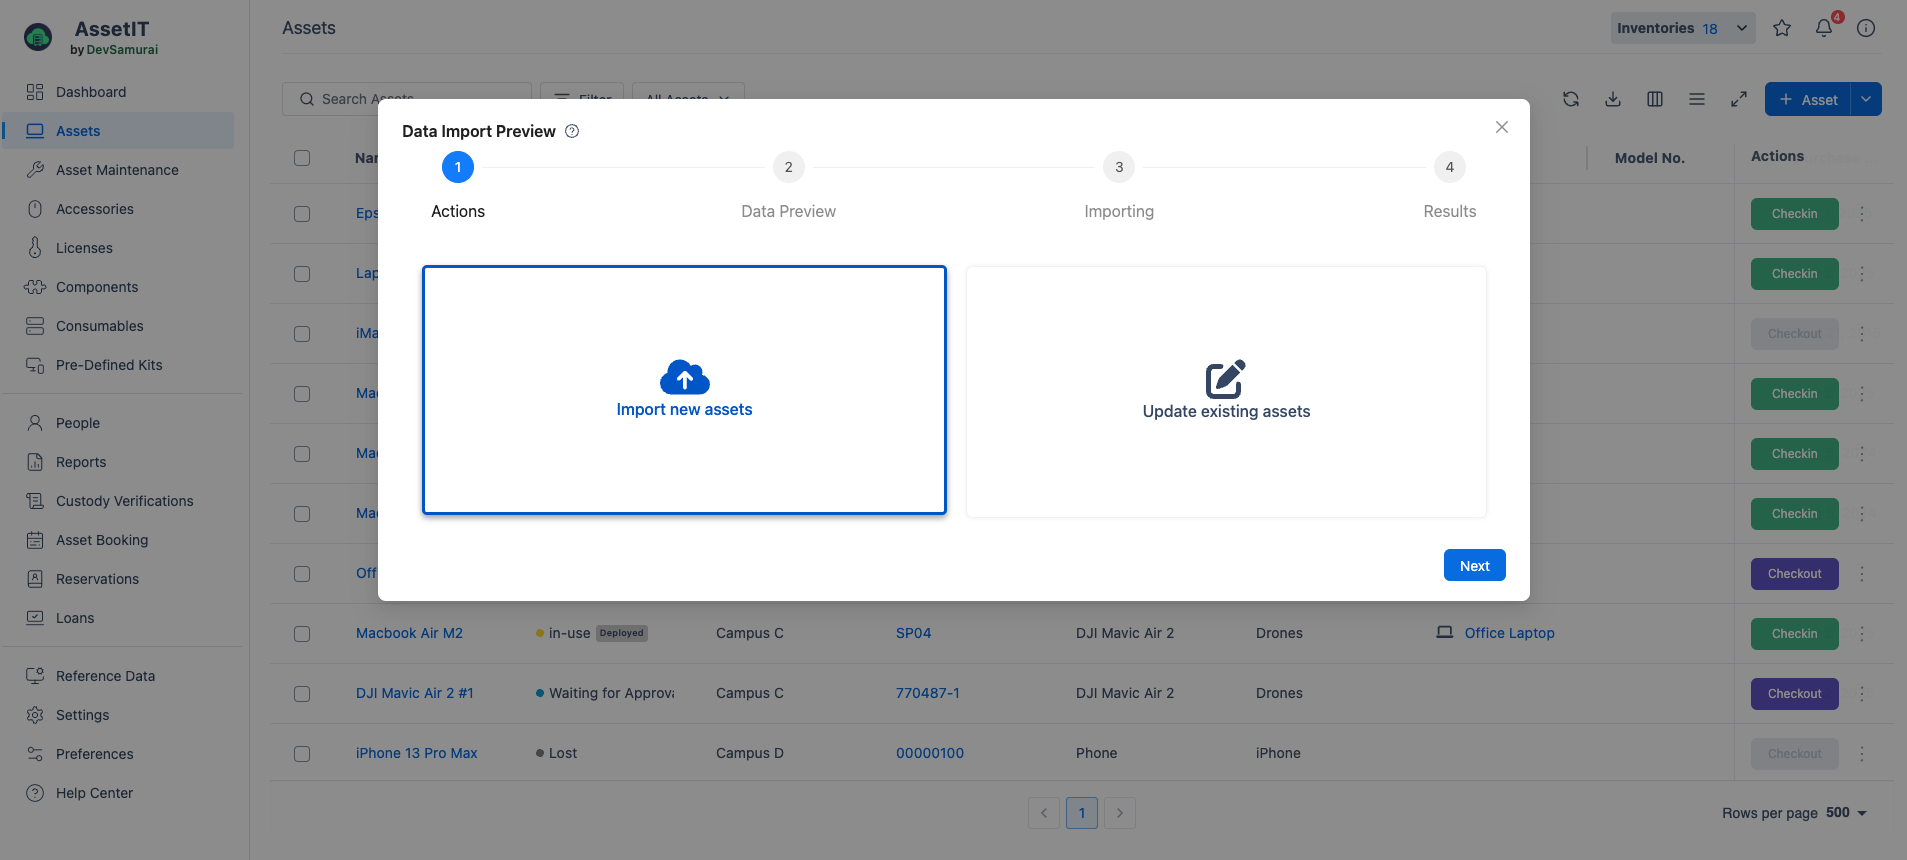
On the top right of the Assets page, click the dropdown of


-
Choose Import New Assets.
-
A table appears with a sample CSV file you can use to prepare your data.
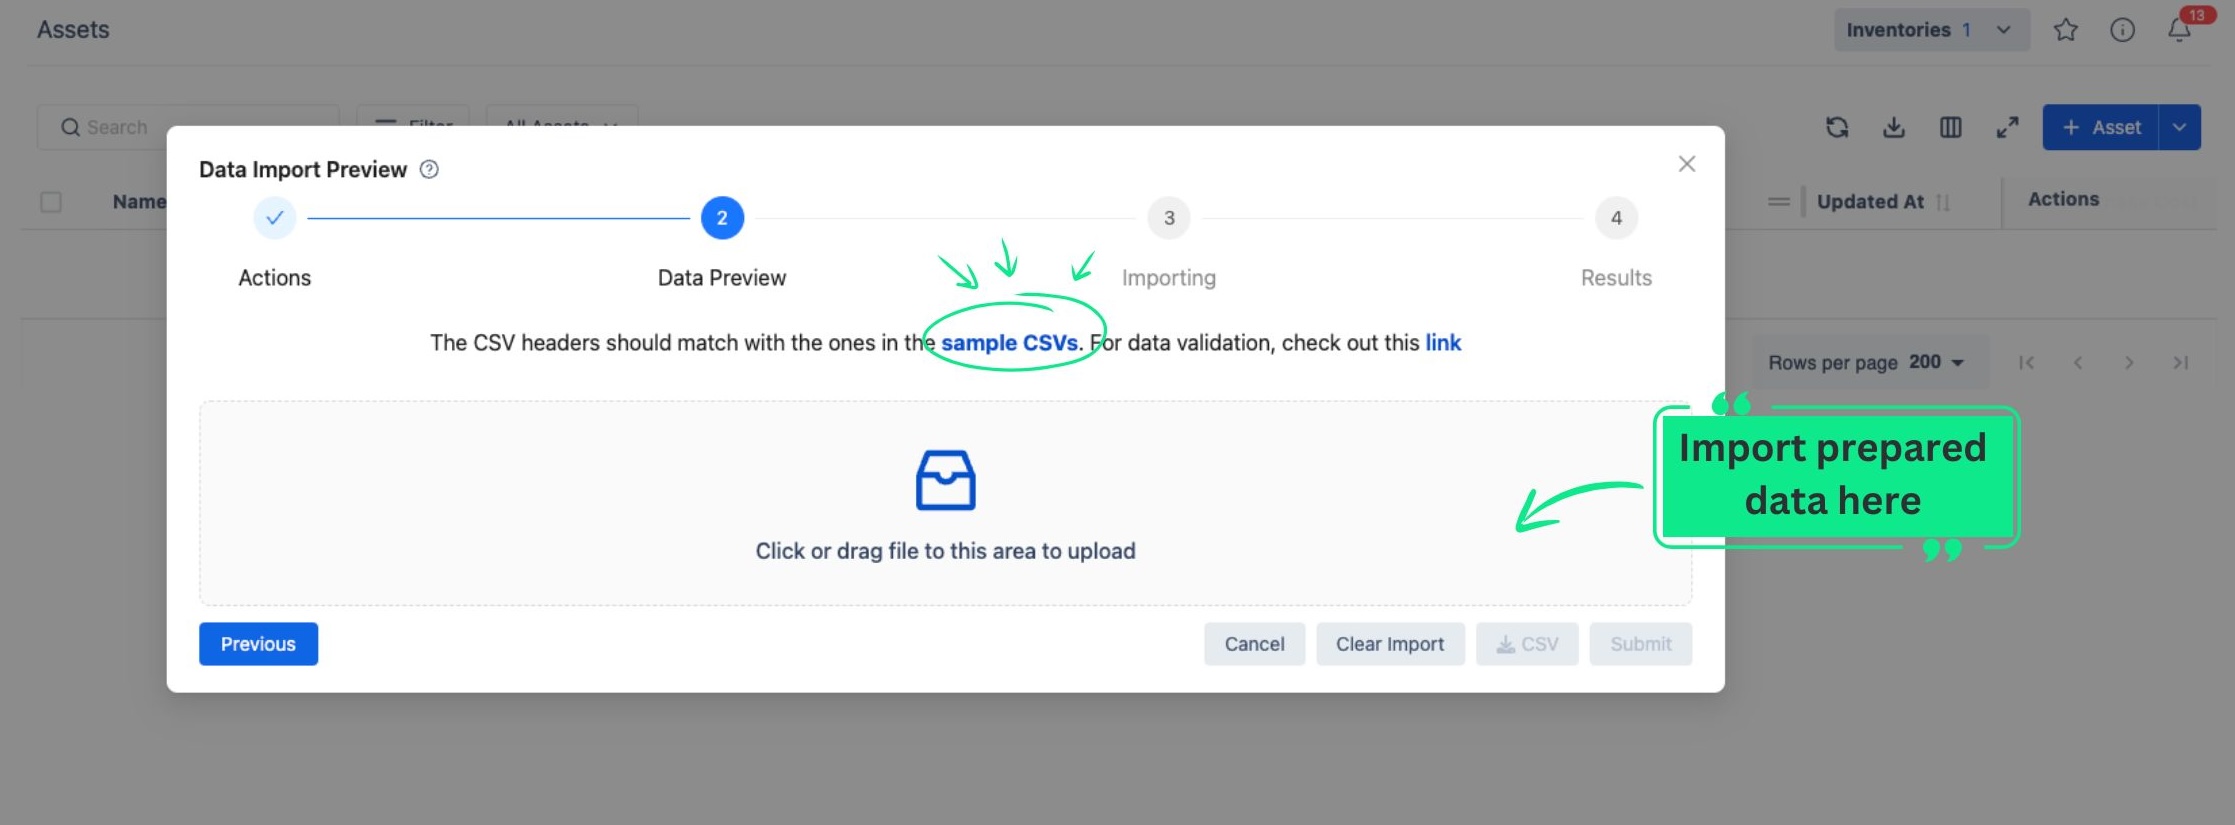
-
Once your data is ready, import it into the app. You will then move to the Data Preview stage.
-
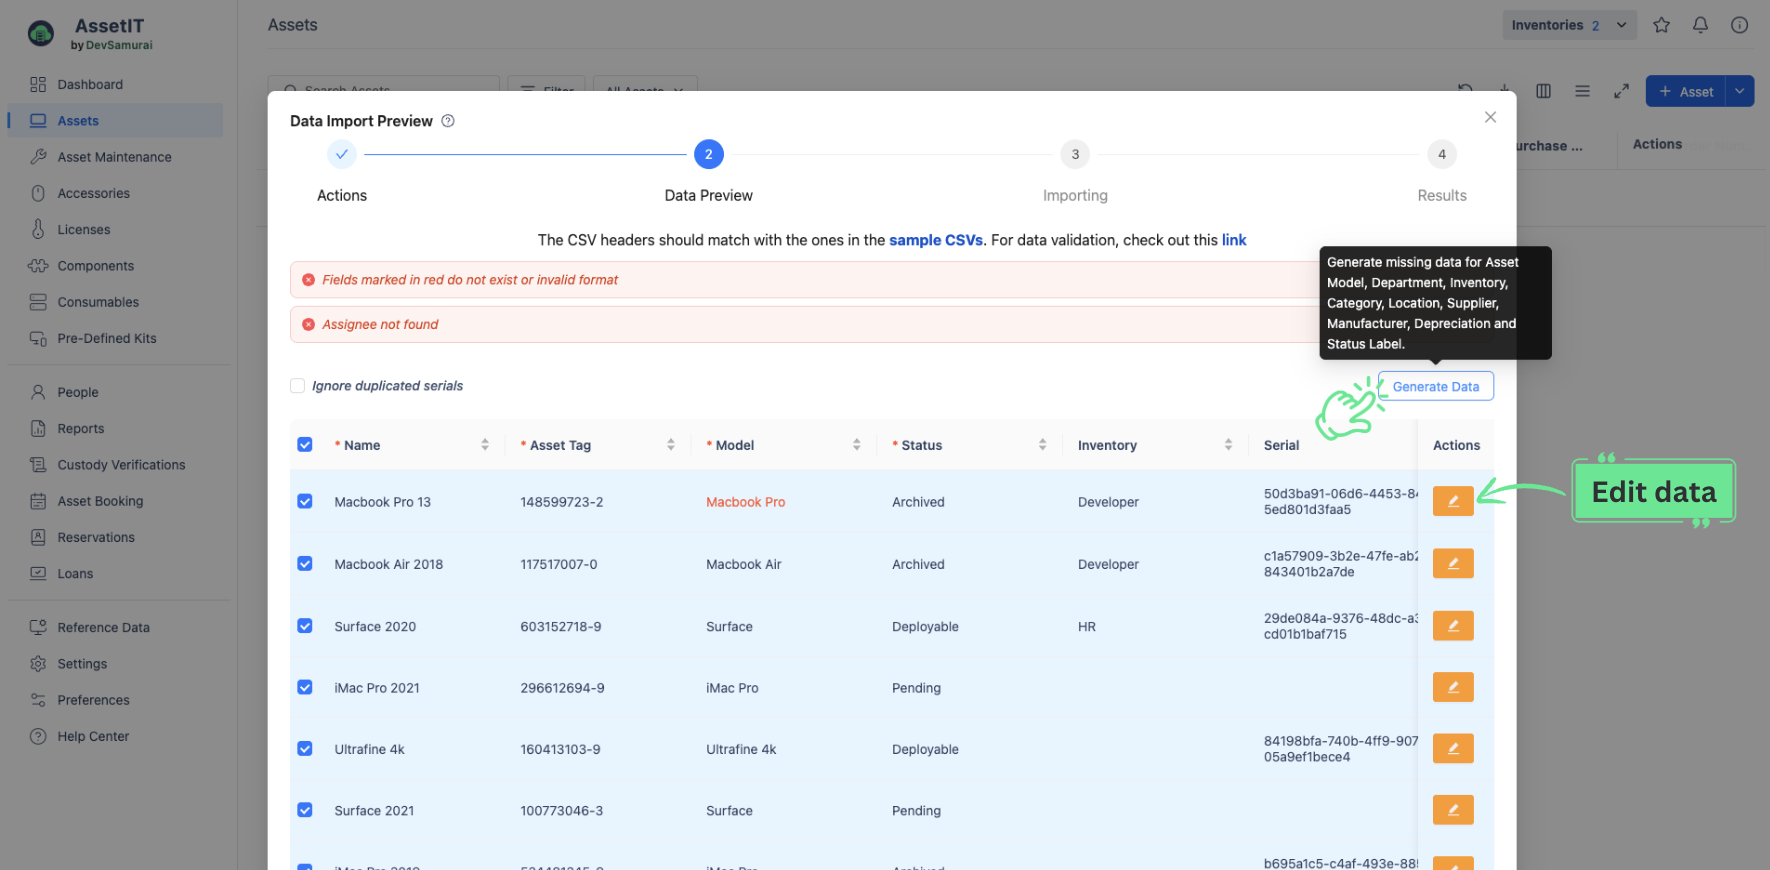
In the Data Preview stage, the app highlights any fields with errors so you can make adjustments directly.
-
To modify data, click Edit.
-
To automatically generate missing data for asset model , Department , Inventory , Category , Location , Supplier , Manufacturer , and Status Label , click Generate Data.
-
You can also download the most recently modified data as a CSV file for further customization by clicking the ![]()
-
Click on Submit to finish importing your assets.
-
Your new assets now appear on the Assets page.
Data validation for importing assets
Before importing assets via CSV, AssetIT performs a data validation check. Each field has specific requirements and constraints. Below is a summary of all fields and their validation rules:
|
No |
Field |
Value |
Require |
Length |
|---|---|---|---|---|
|
1 |
Name |
Any text |
Yes |
Max: 100 characters |
|
2 |
Asset Tag |
Unique string |
Yes |
Max: 100 characters |
|
3 |
Model |
Asset Model name defined in Reference Data → Asset Models |
Yes |
NA |
|
4 |
Status |
Status Label name defined in Reference Data → Status Labels |
Yes |
NA |
|
5 |
Inventory |
Inventory name defined in Reference Data → Inventories |
No |
NA |
|
6 |
Serial |
Any text |
No |
Max: 255 characters |
|
7 |
Assigned To |
Jira user ID(s) or user name(s) This field requires a Status (#4) with a Deployable status type. |
No |
Max: 150 characters |
|
8 |
Order Number |
Any text |
No |
Max: 100 characters |
|
9 |
Purchase Date |
Date format MMM D, YYYY (e.g., Mar 6, 2020) |
No |
NA |
|
10 |
Purchase Cost |
Number with 2 decimal places (e.g., 265.89 USD). Currency defaults to USD if not provided. |
No |
Min: 0 Max: 9999999999.99 |
|
11 |
Warranty Months |
Any number |
No |
Max: 999 |
|
12 |
Department |
Department name defined in Reference Data → Departments |
No |
NA |
|
13 |
Notes |
Any text |
No |
NA |
|
14 |
Checkout Type |
Asset or Location or User Default is User |
No |
NA |
|
15 |
Location |
Location name defined in Reference Data → Locations |
No |
NA |
|
16 |
Supplier |
Supplier name defined in Reference Data → Supplier |
No |
NA |
If the Asset Tag column is left blank and the Generate auto-incrementing asset tags toggle is enabled in Asset Tag Settings, AssetIT automatically generates an incrementing tag for the asset.
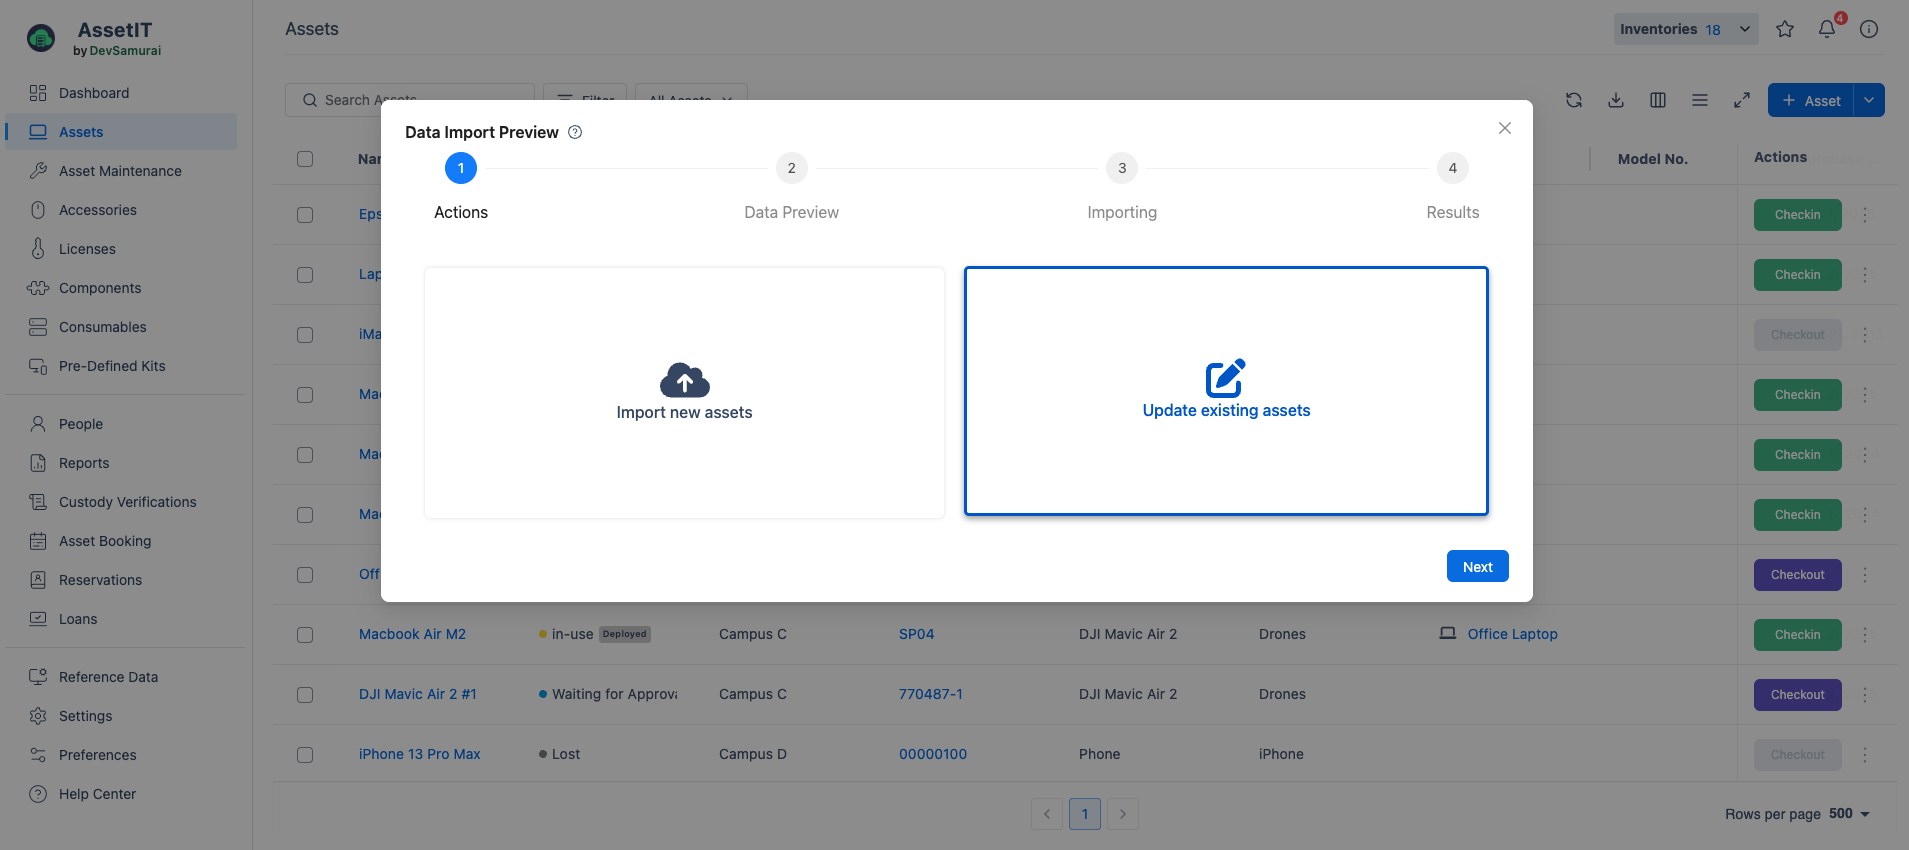
Updating existing assets via the import function
You can update existing assets in bulk using the same Import function.
Prepare your CSV file
-
Include the correct Asset Tags for the assets you want to update. Asset Tags serve as the unique identifier for each asset during import.
-
Include all the fields you want to update (e.g., asset name, status, or other relevant information). Any data in the CSV replaces the existing values in the system.
-
AssetIT matches the Asset Tags in your CSV with existing assets in the database. Only the fields included in the CSV are updated — all other fields remain unchanged.
Important note on assets in Trash:
-
Assets moved to the Trash still retain their Asset Tags unless permanently deleted.
-
If your CSV includes an Asset Tag that belongs to an asset currently in the Trash, the import fails for that asset.
-
To avoid import errors, make sure the Asset Tags in your CSV do not belong to trashed assets.
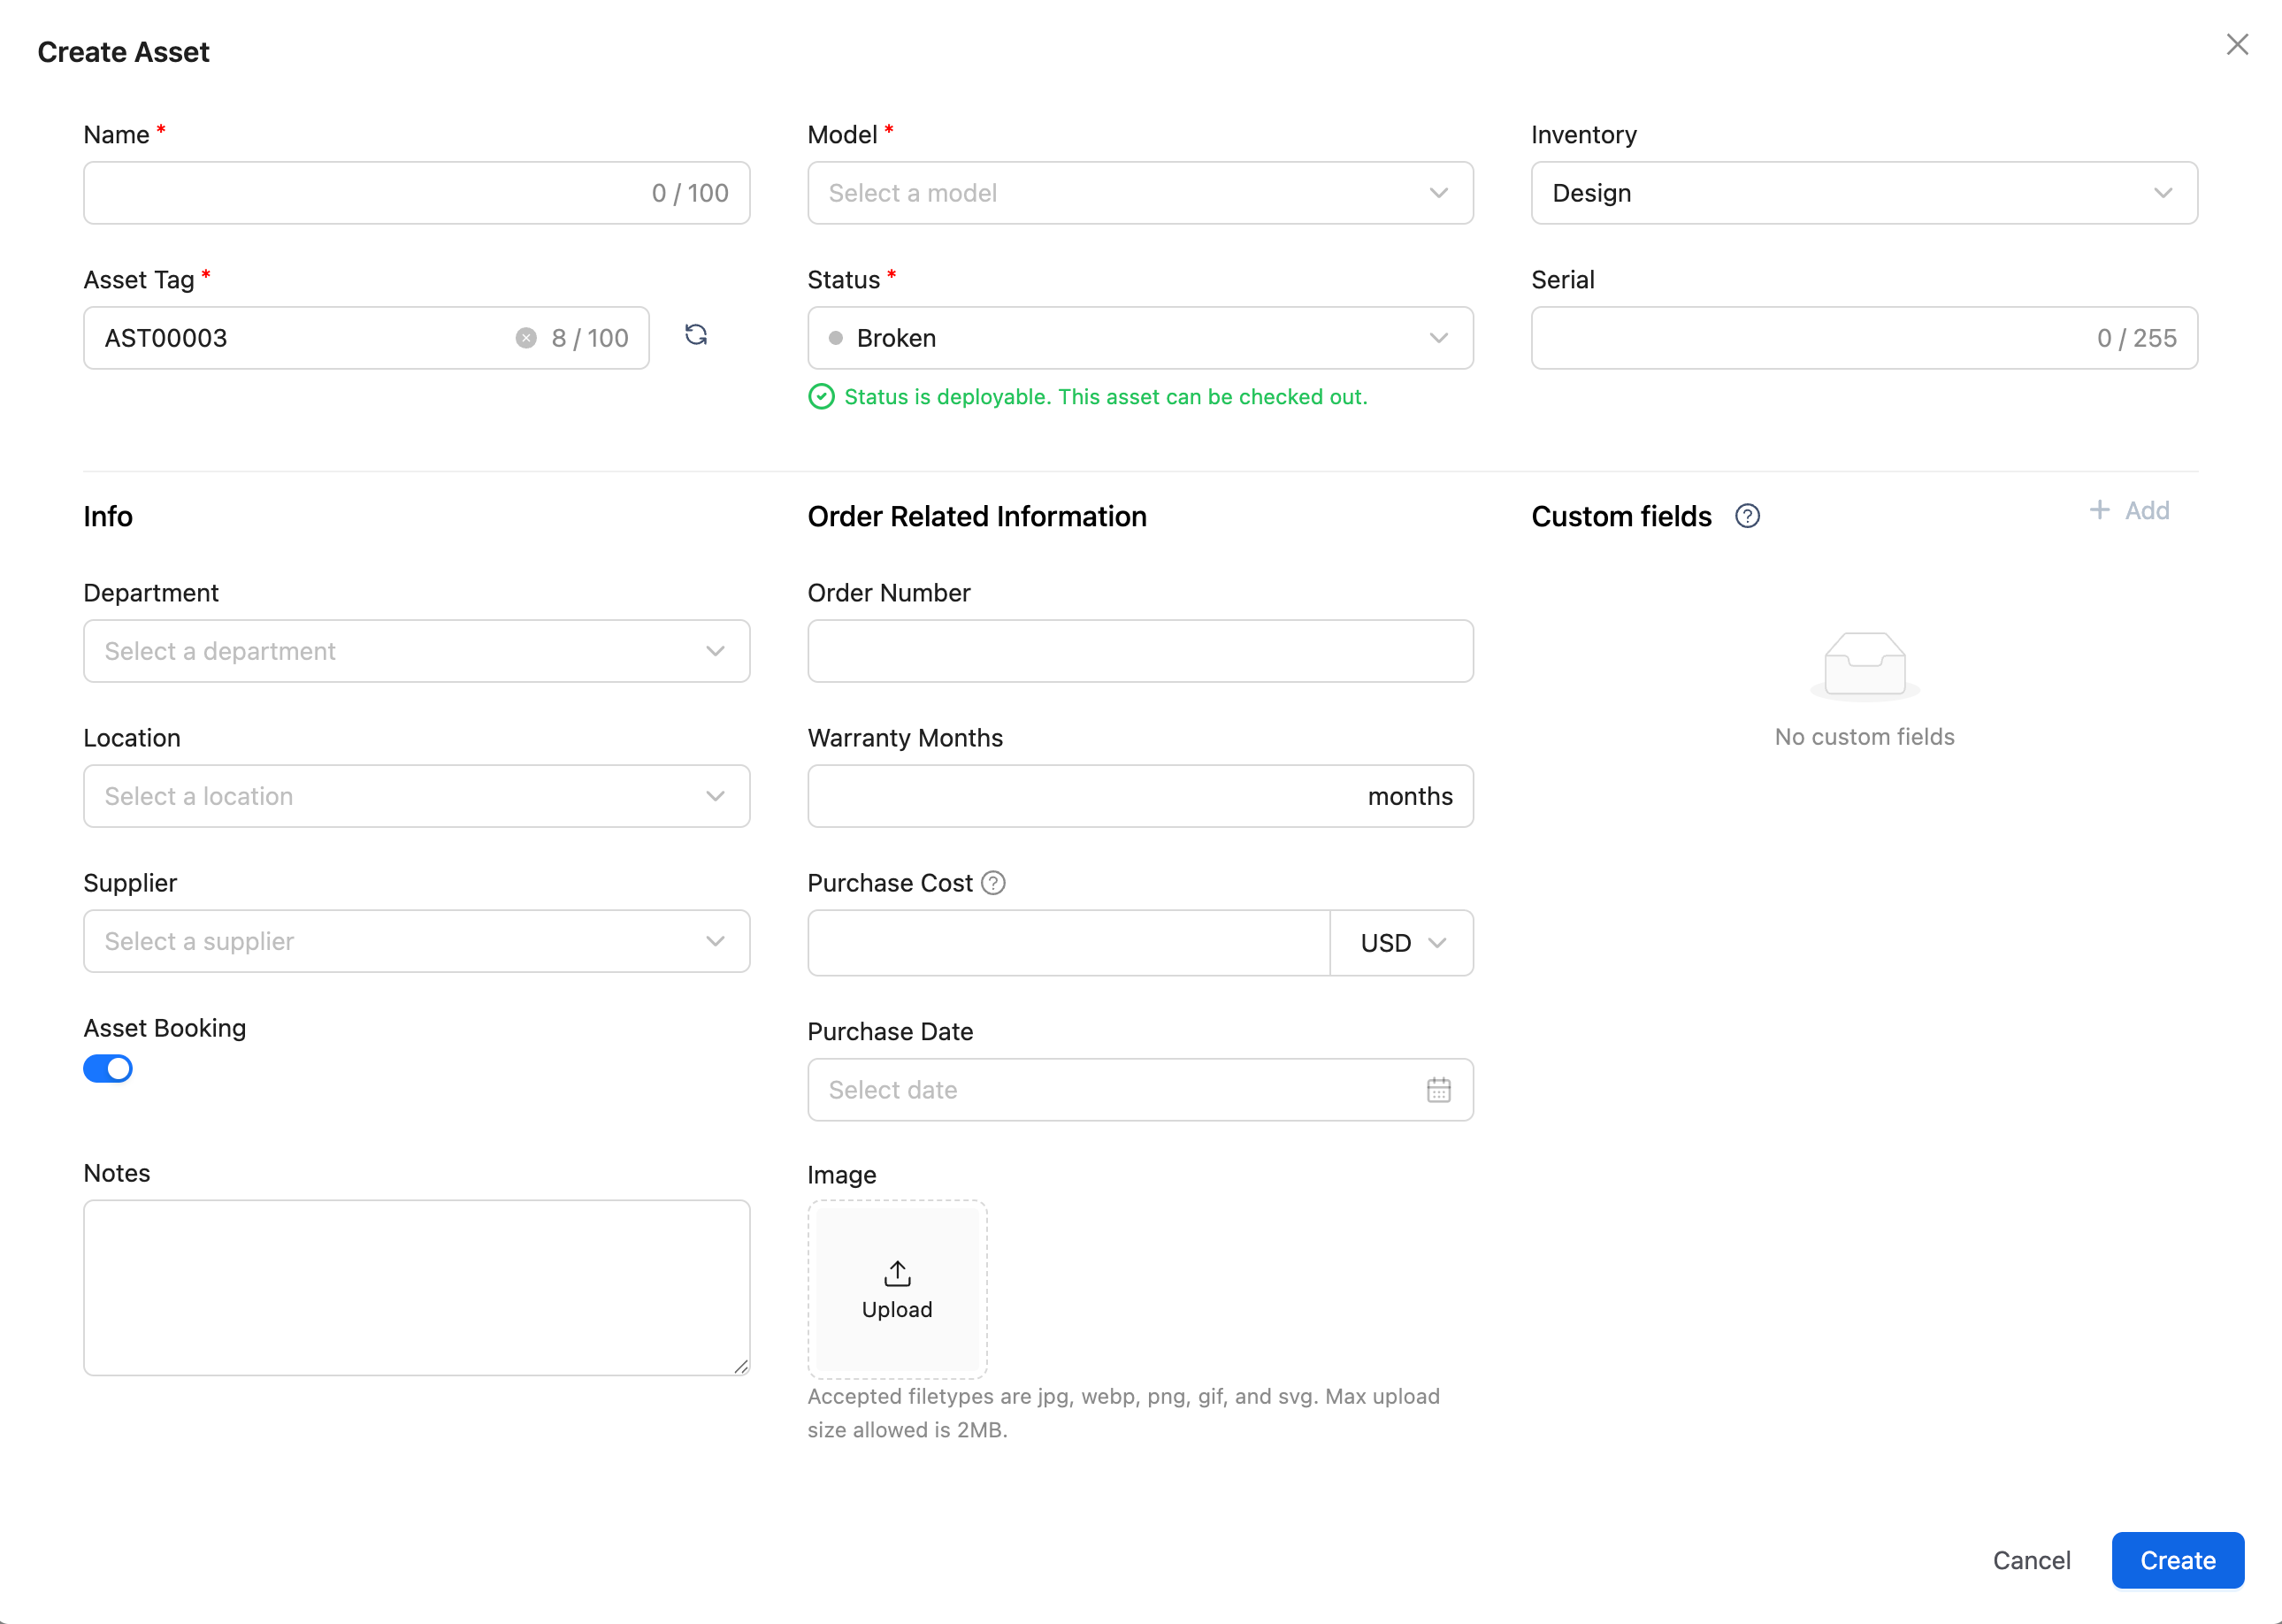
Approach 2: Create new assets manually
You can also create each asset individually:
-
In the Assets section, click on

-
You are directed to the Create Asset page. Fill out the mandatory fields first, then complete any additional fields as needed.
-
Click on Submit to finish. Your new asset now appears in the Assets list.
Pro tip:
Some fields let you choose from available options, but if the data you need is not listed, you can create it on the fly — simply type the desired value in the field and press Enter or Tab.