.png)
Bulk Delete allows users to remove multiple assets at once, streamlining asset management. This feature ensures that users can efficiently delete outdated or unnecessary assets while preventing the deletion of assets currently in use or linked to other records.
Additionally, the Restore feature allows users to recover assets that were not permanently deleted.
Steps to Bulk Delete Assets
1. Select Assets
-
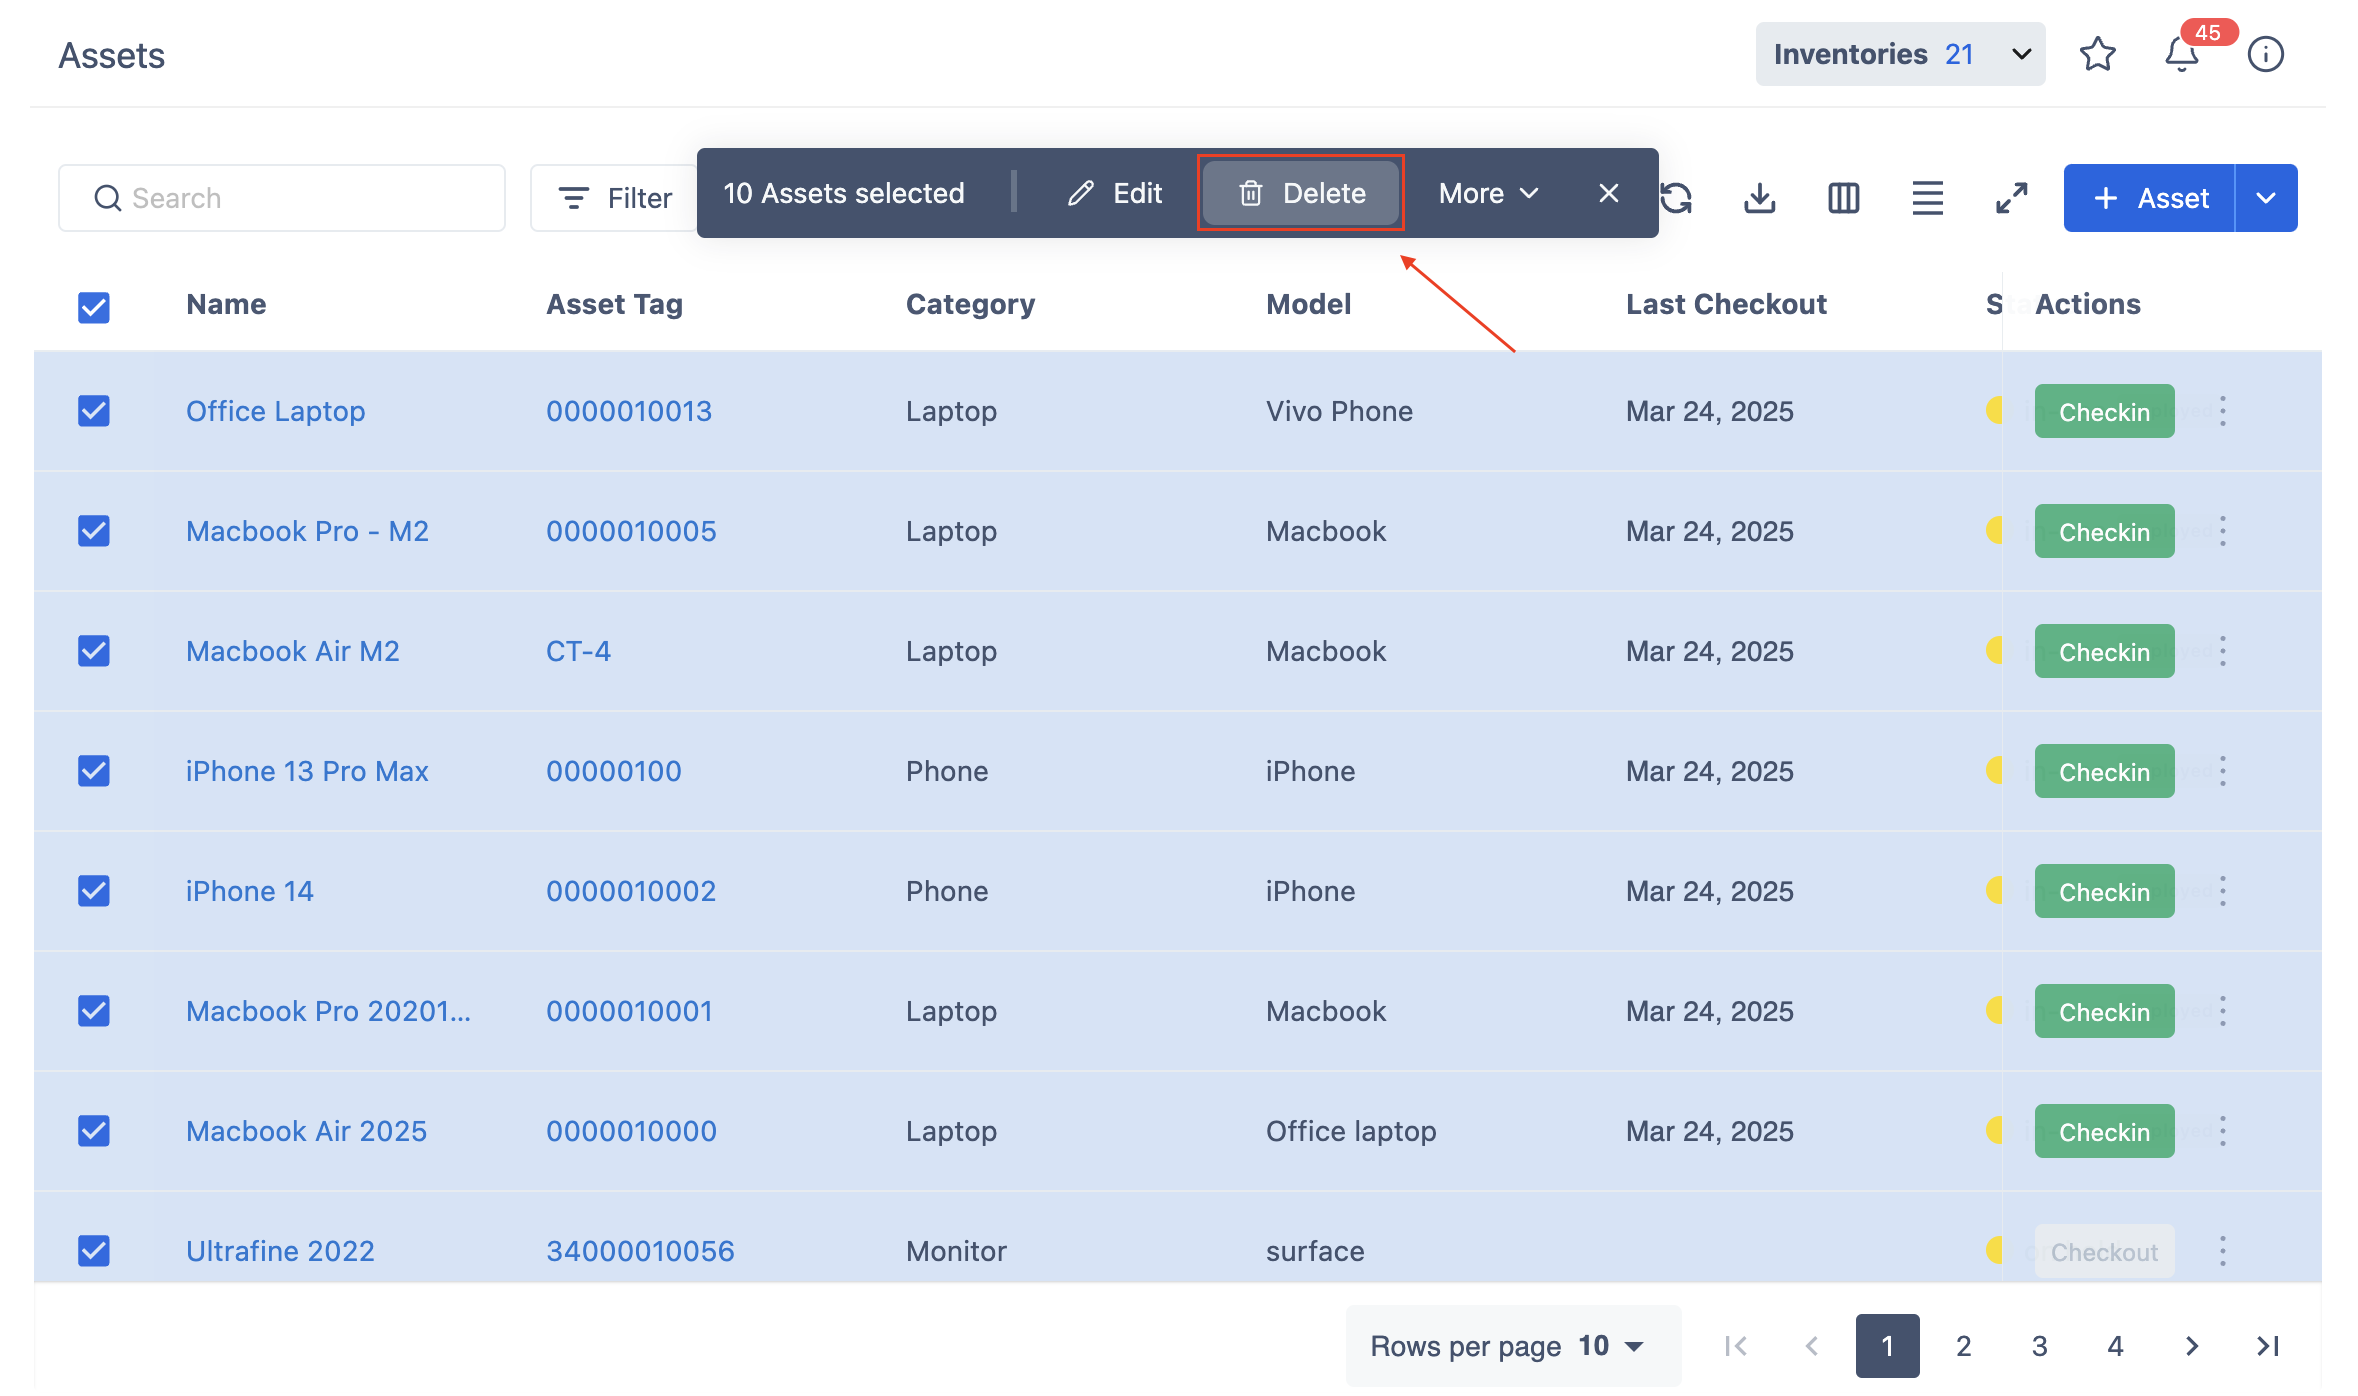
Navigate to the Assets page.
-
Use the checkboxes to select the assets you want to delete.
-
Once the assets are selected, click the Delete button located at the top of the asset list.
2. Confirm Bulk Deletion
-
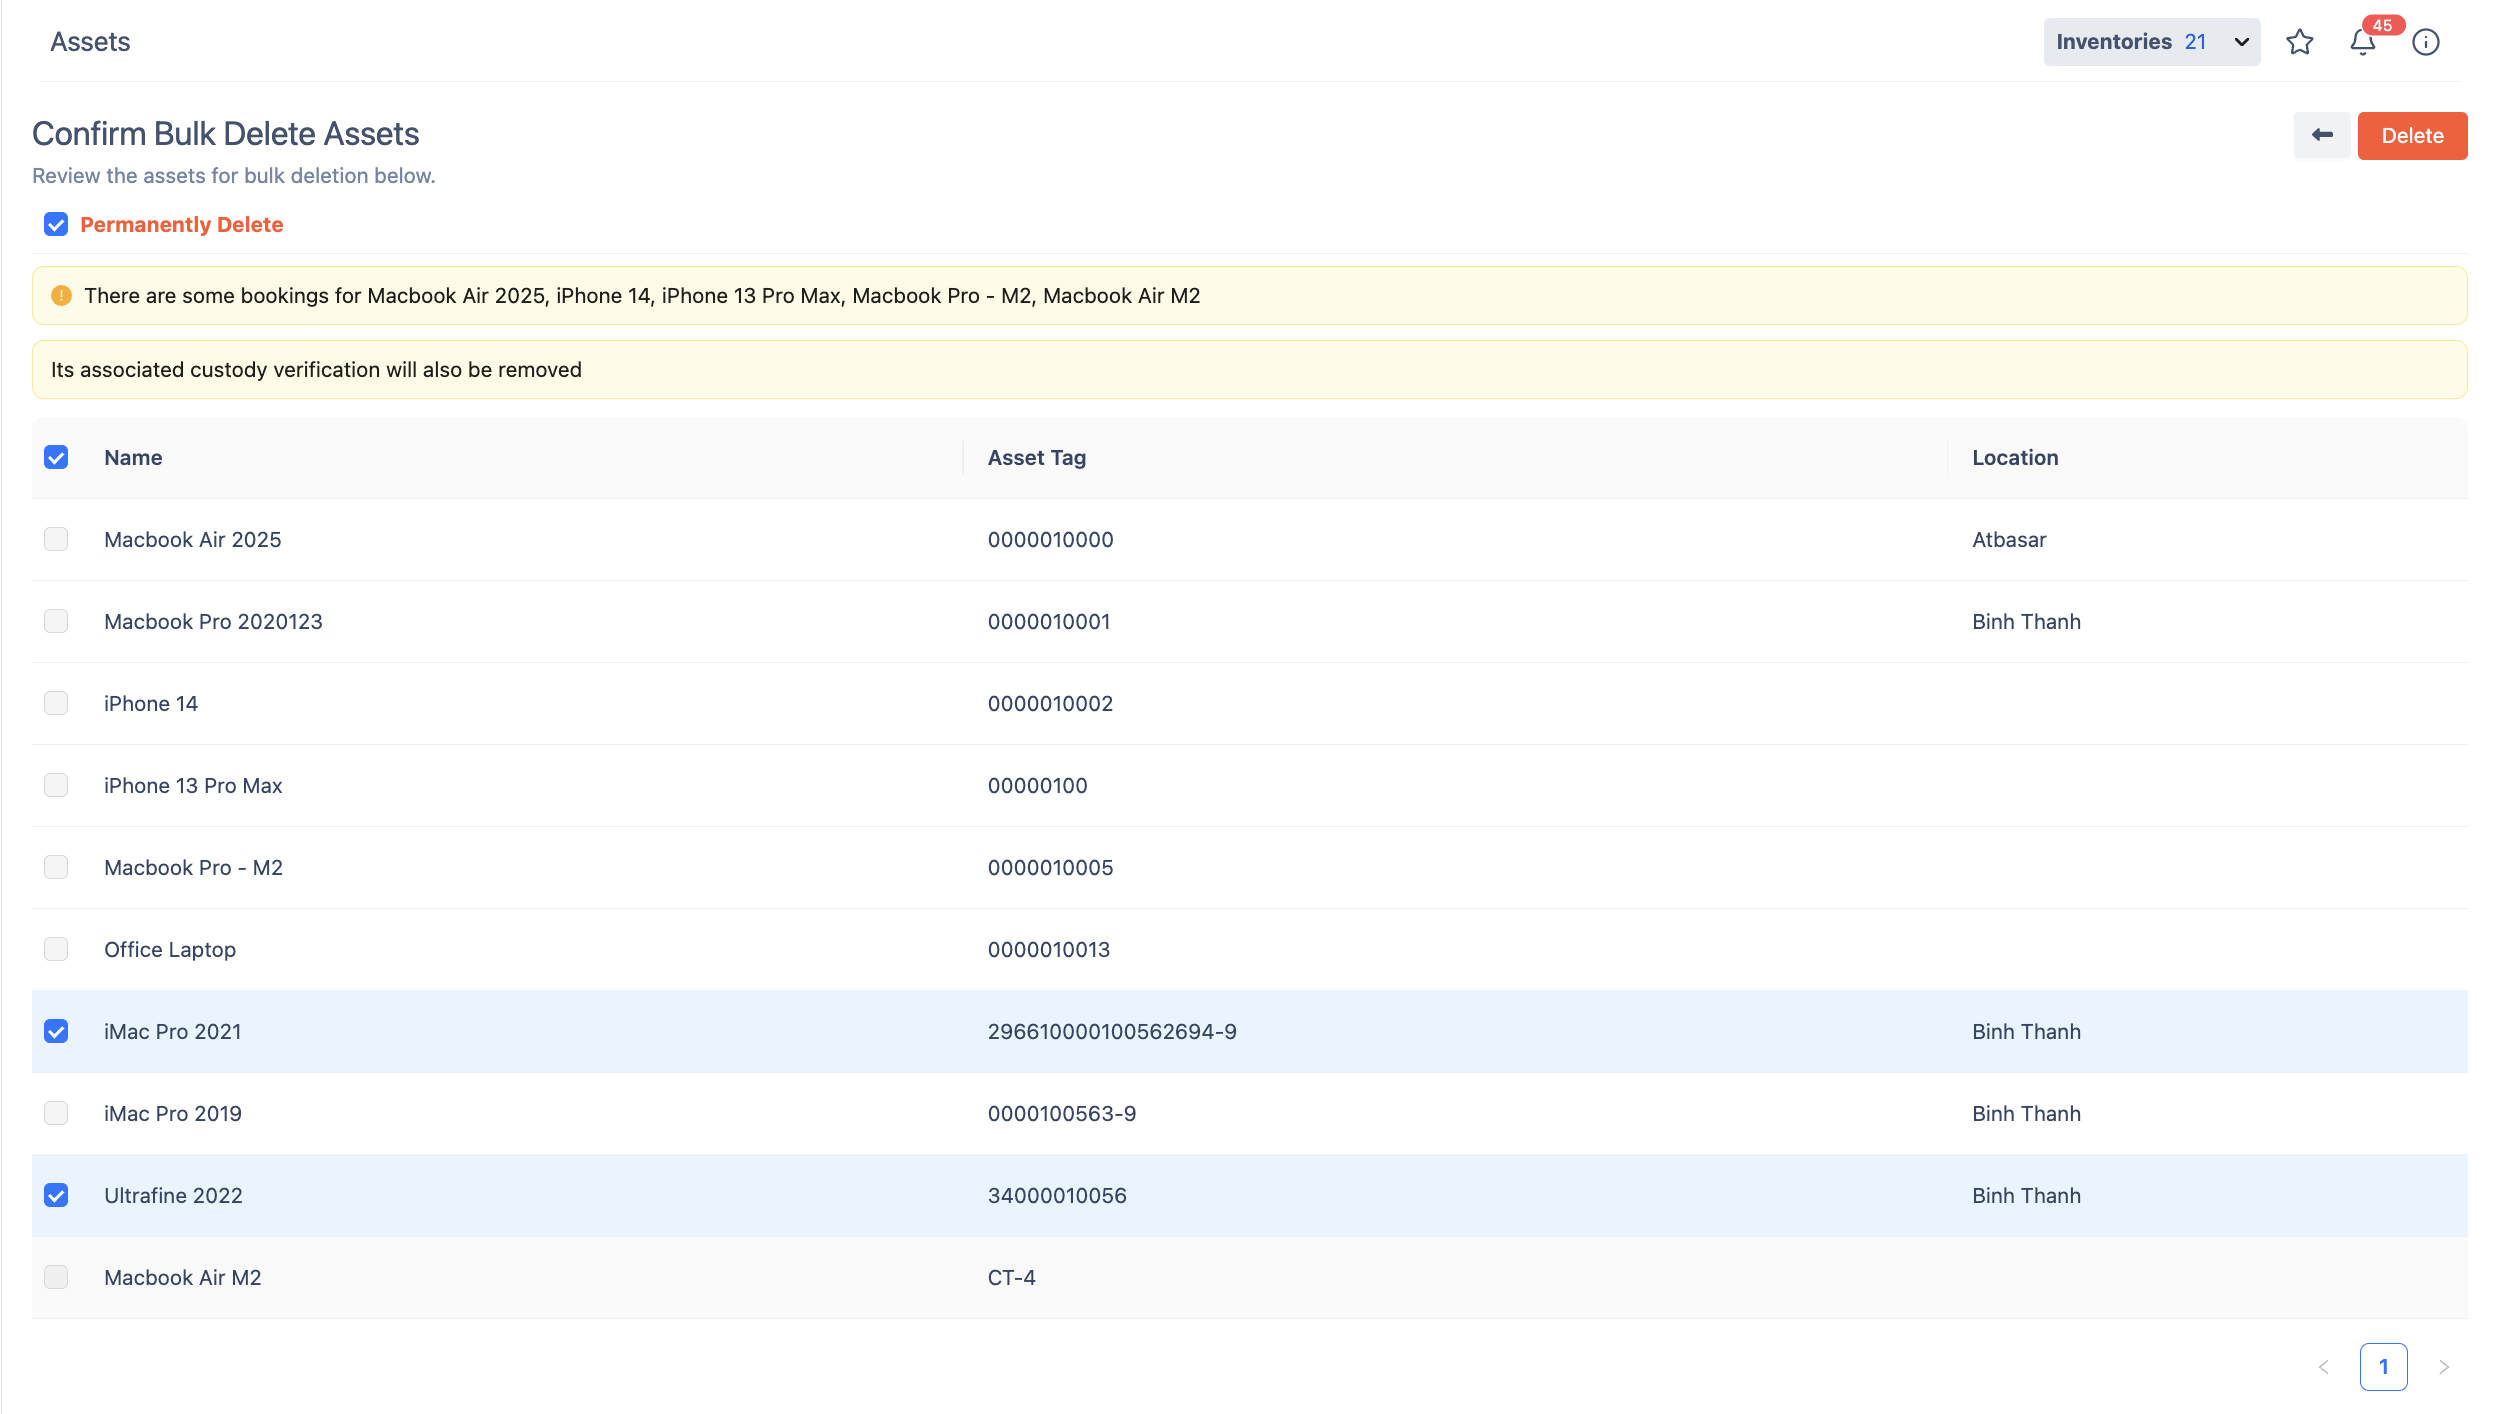
The Confirm Bulk Delete screen will appear, listing all selected assets.
-
Review the assets before proceeding.
-
Optionally, check the Permanently Delete box if you want the assets to be permanently removed from the system.
Important Notes
The system will automatically disable items that are currently in use or currently linked to other items, preventing their deletion.
-
Click Delete to confirm the action or Cancel to return without making changes.
Steps to Restore Deleted Assets
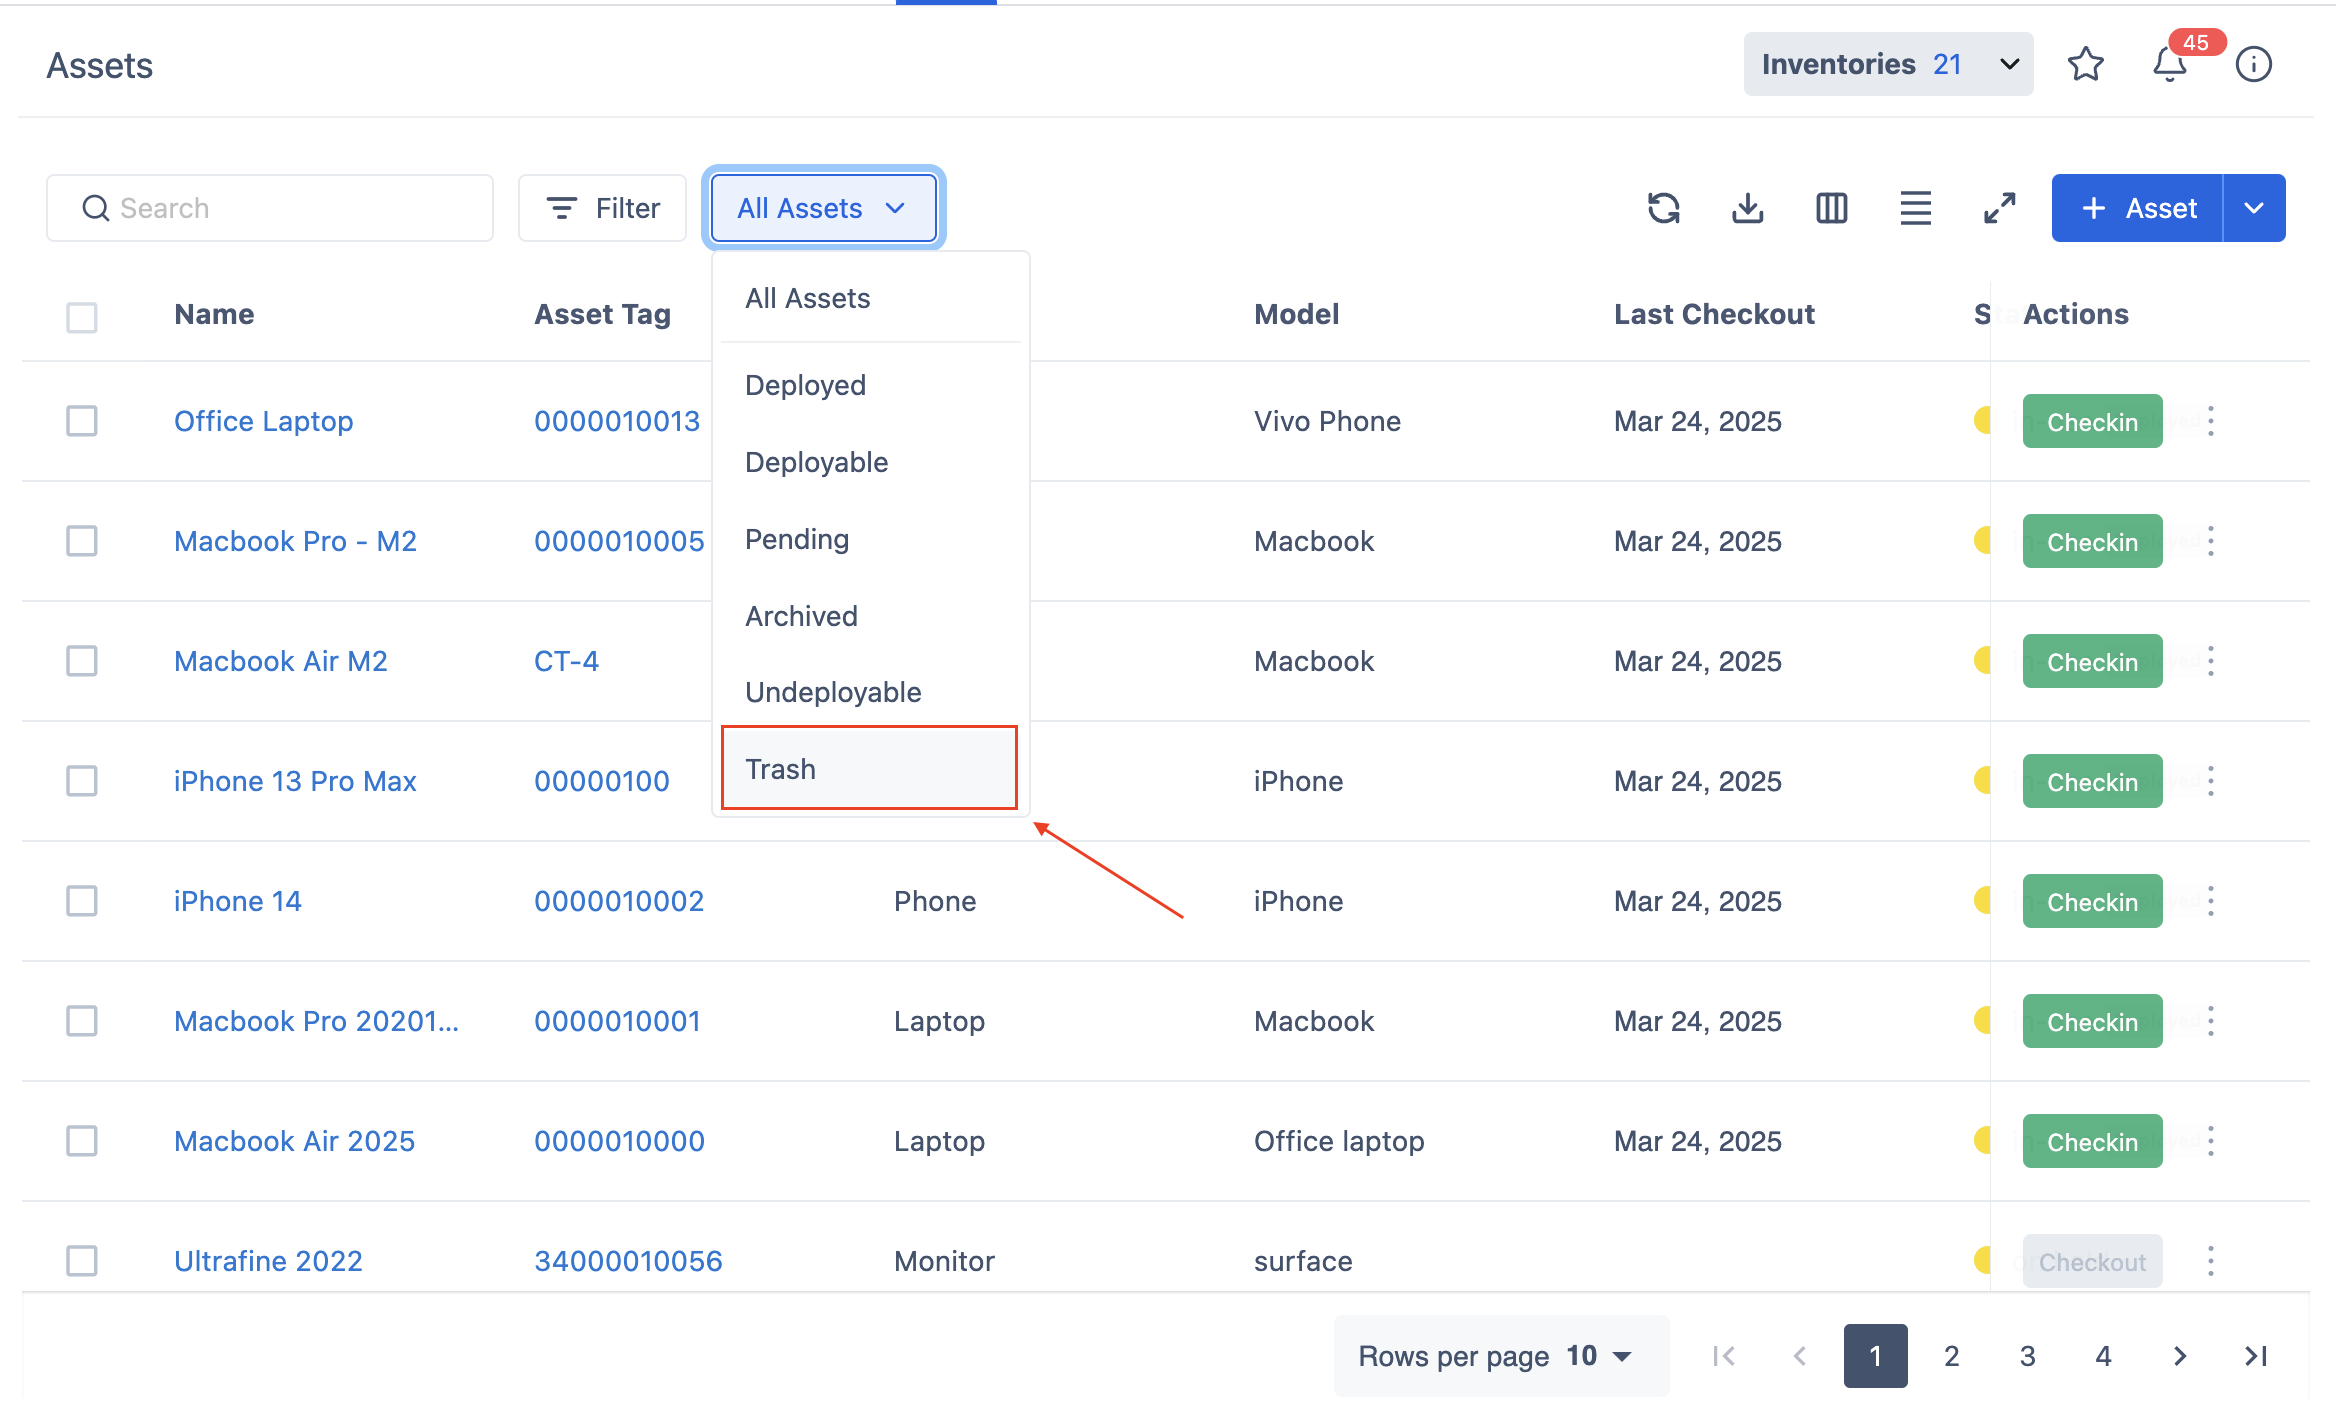
If assets were deleted but not permanently removed, they can be restored.
1. Navigate to Trash
-
Go to the Assets page.
-
At the dropdown of Asset Categorizations, choose Trash.
2. Restore Deleted Assets
-
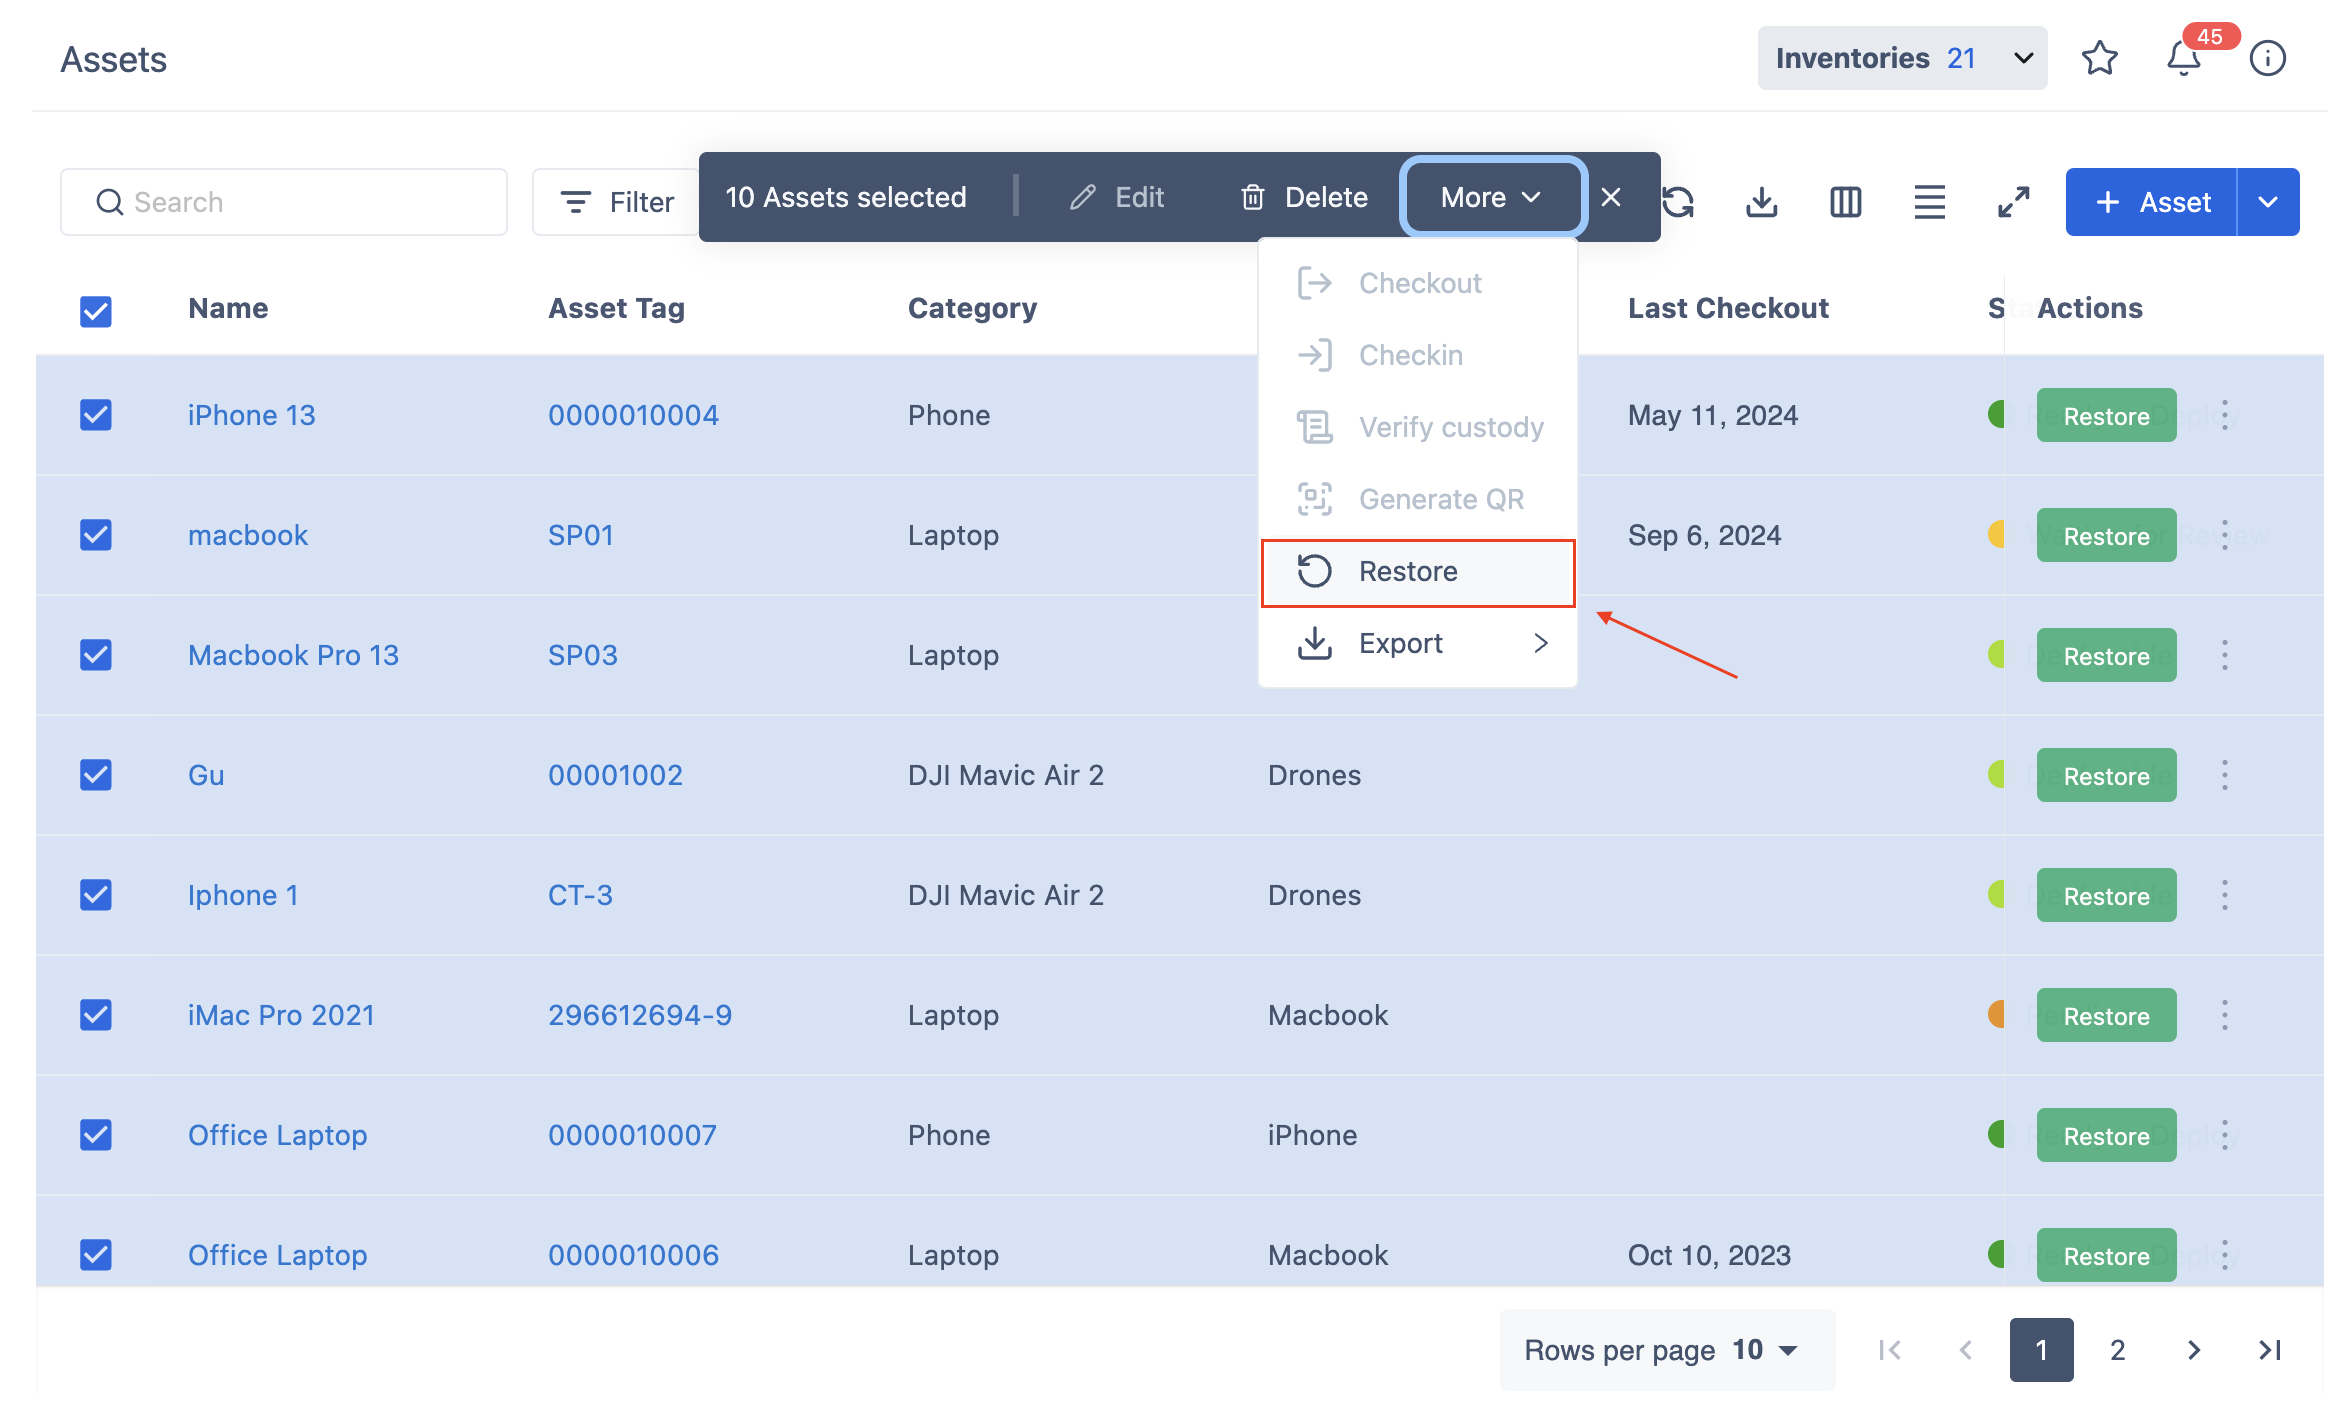
At the Trash list, simply click on the Restore button to recover the asset.

-
To permanently delete the asset, click on the


Bulk Actions for Assets in Trash
1. Restore in Bulk
-
Use the checkboxes to select multiple deleted assets.
-
Click the Restore button to return them to active status.
2. Delete Permanently
-
Use the checkboxes to select multiple deleted assets.
-
Click the Delete option to remove them permanently.