.png)
Bulk Checkout allows users to efficiently assign multiple assets at once. This streamlines asset distribution and ensures proper tracking of asset usage. Assets can be checked out to a user, another asset, or a location.
Steps to Bulk Checkout Assets
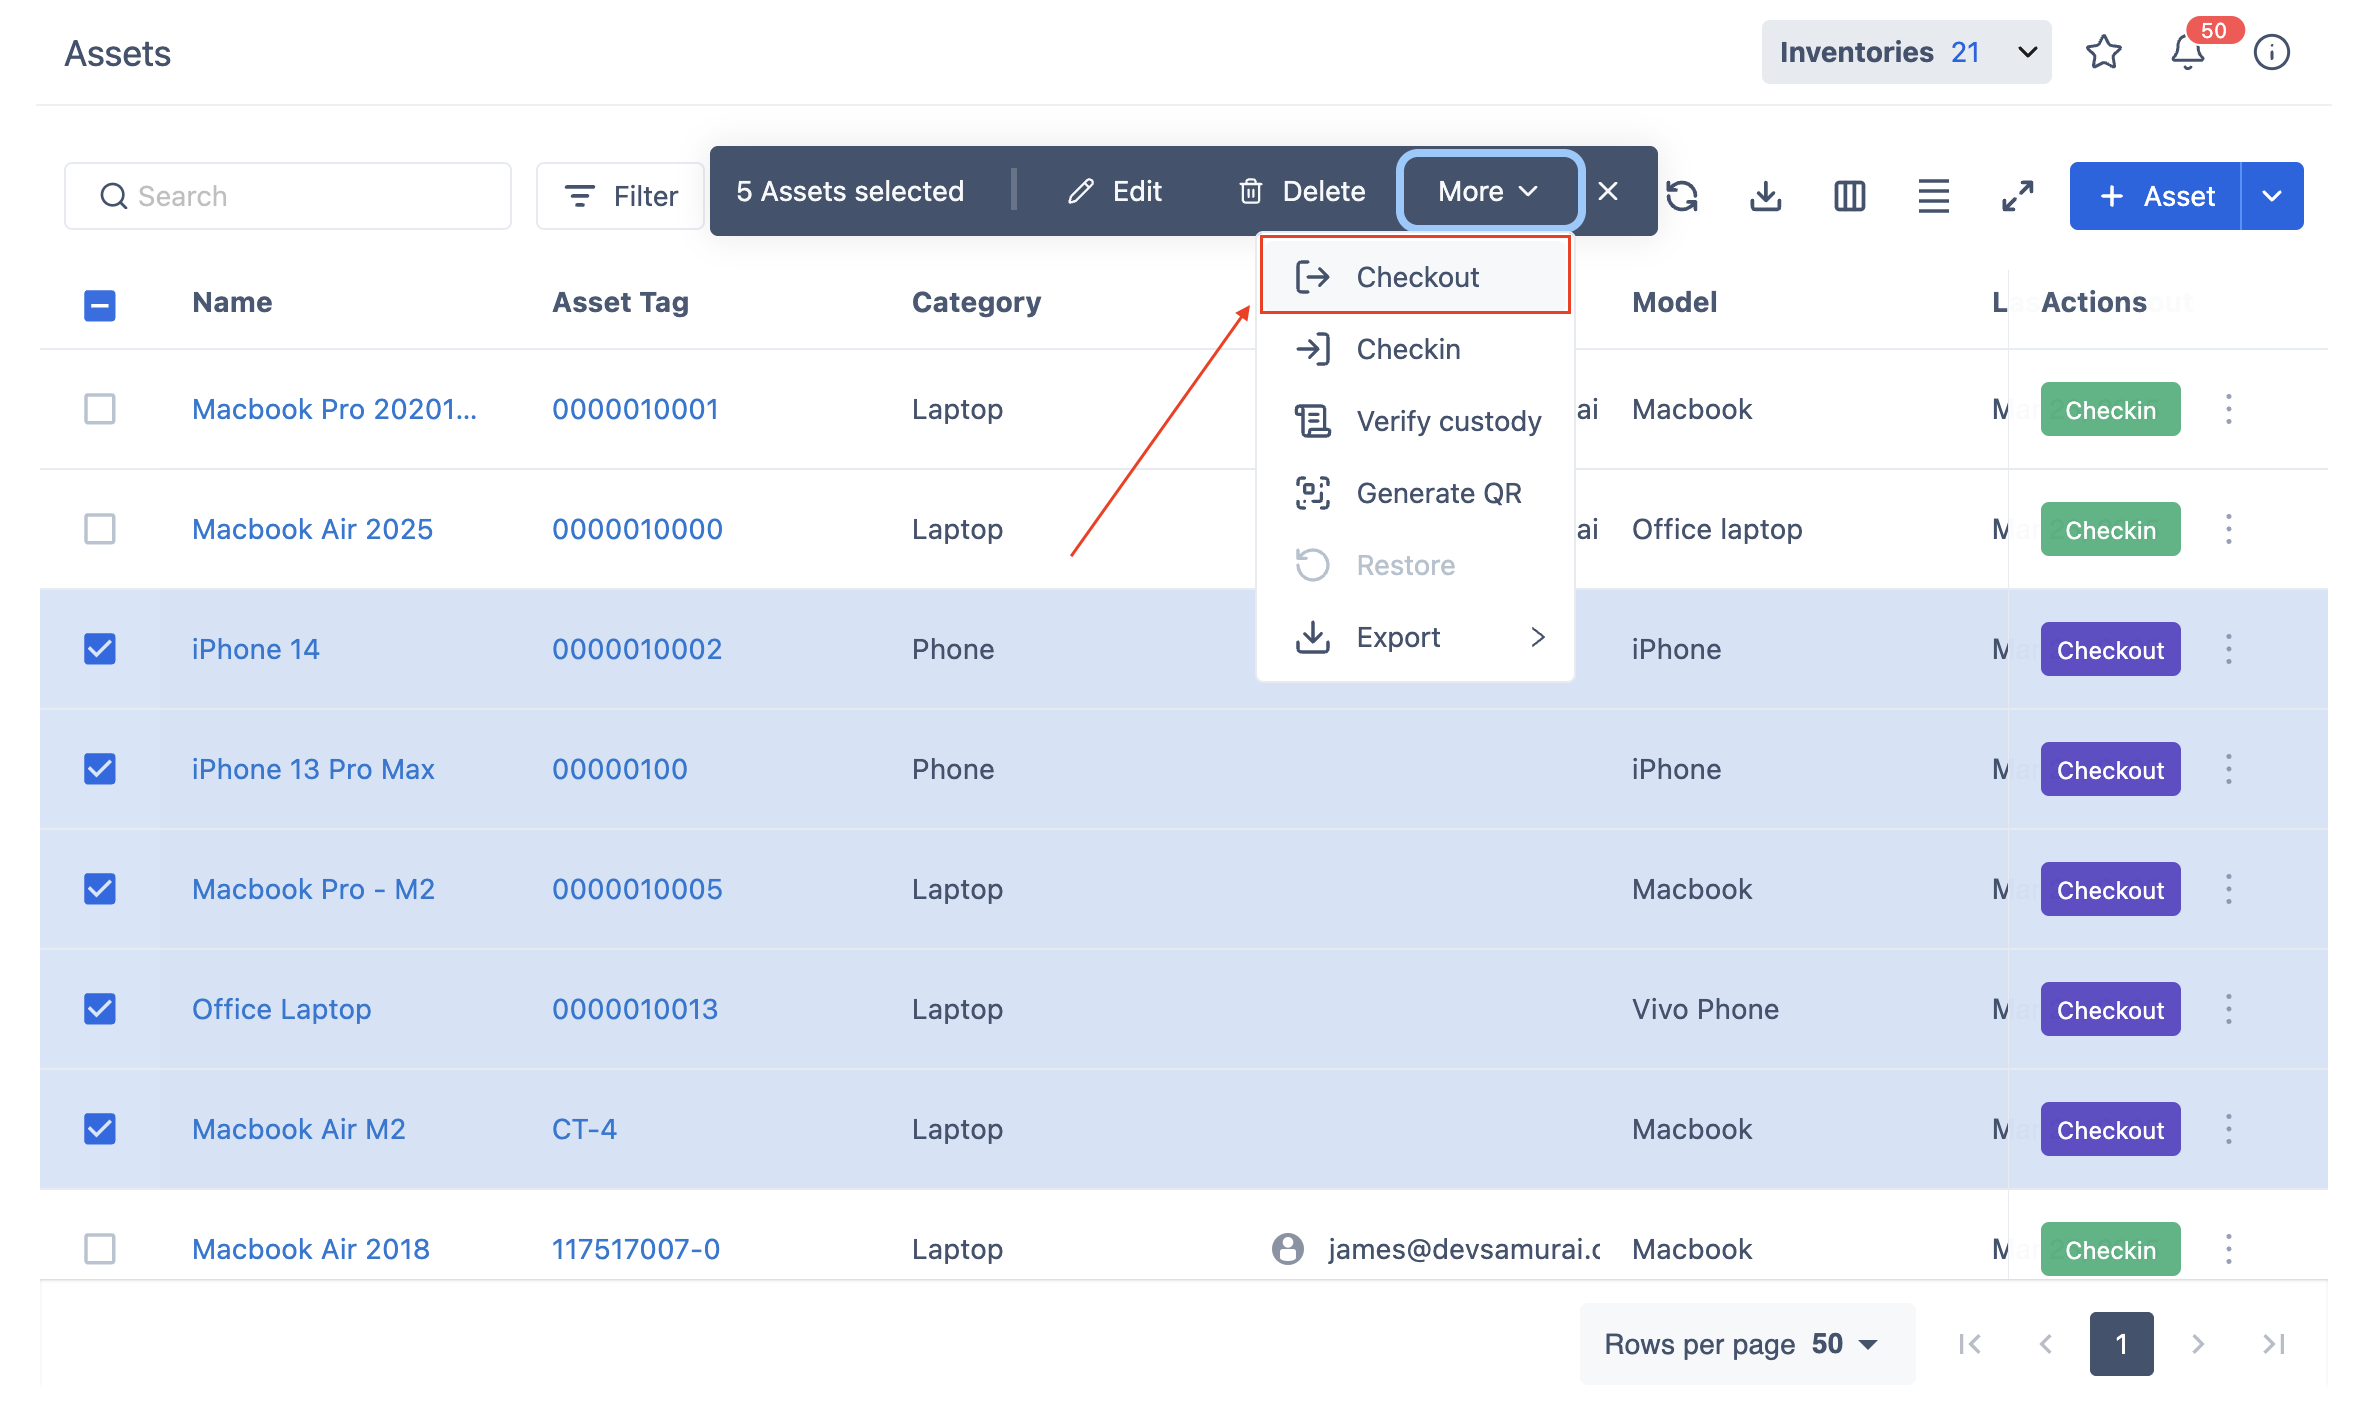
1. Select Assets
-
Navigate to the Assets page.
-
Use the checkboxes to select multiple assets you want to check out.
-
Click on the More button in the action bar.
-
Select Checkout from the dropdown menu.
2. Confirm Assets for Checkout
-
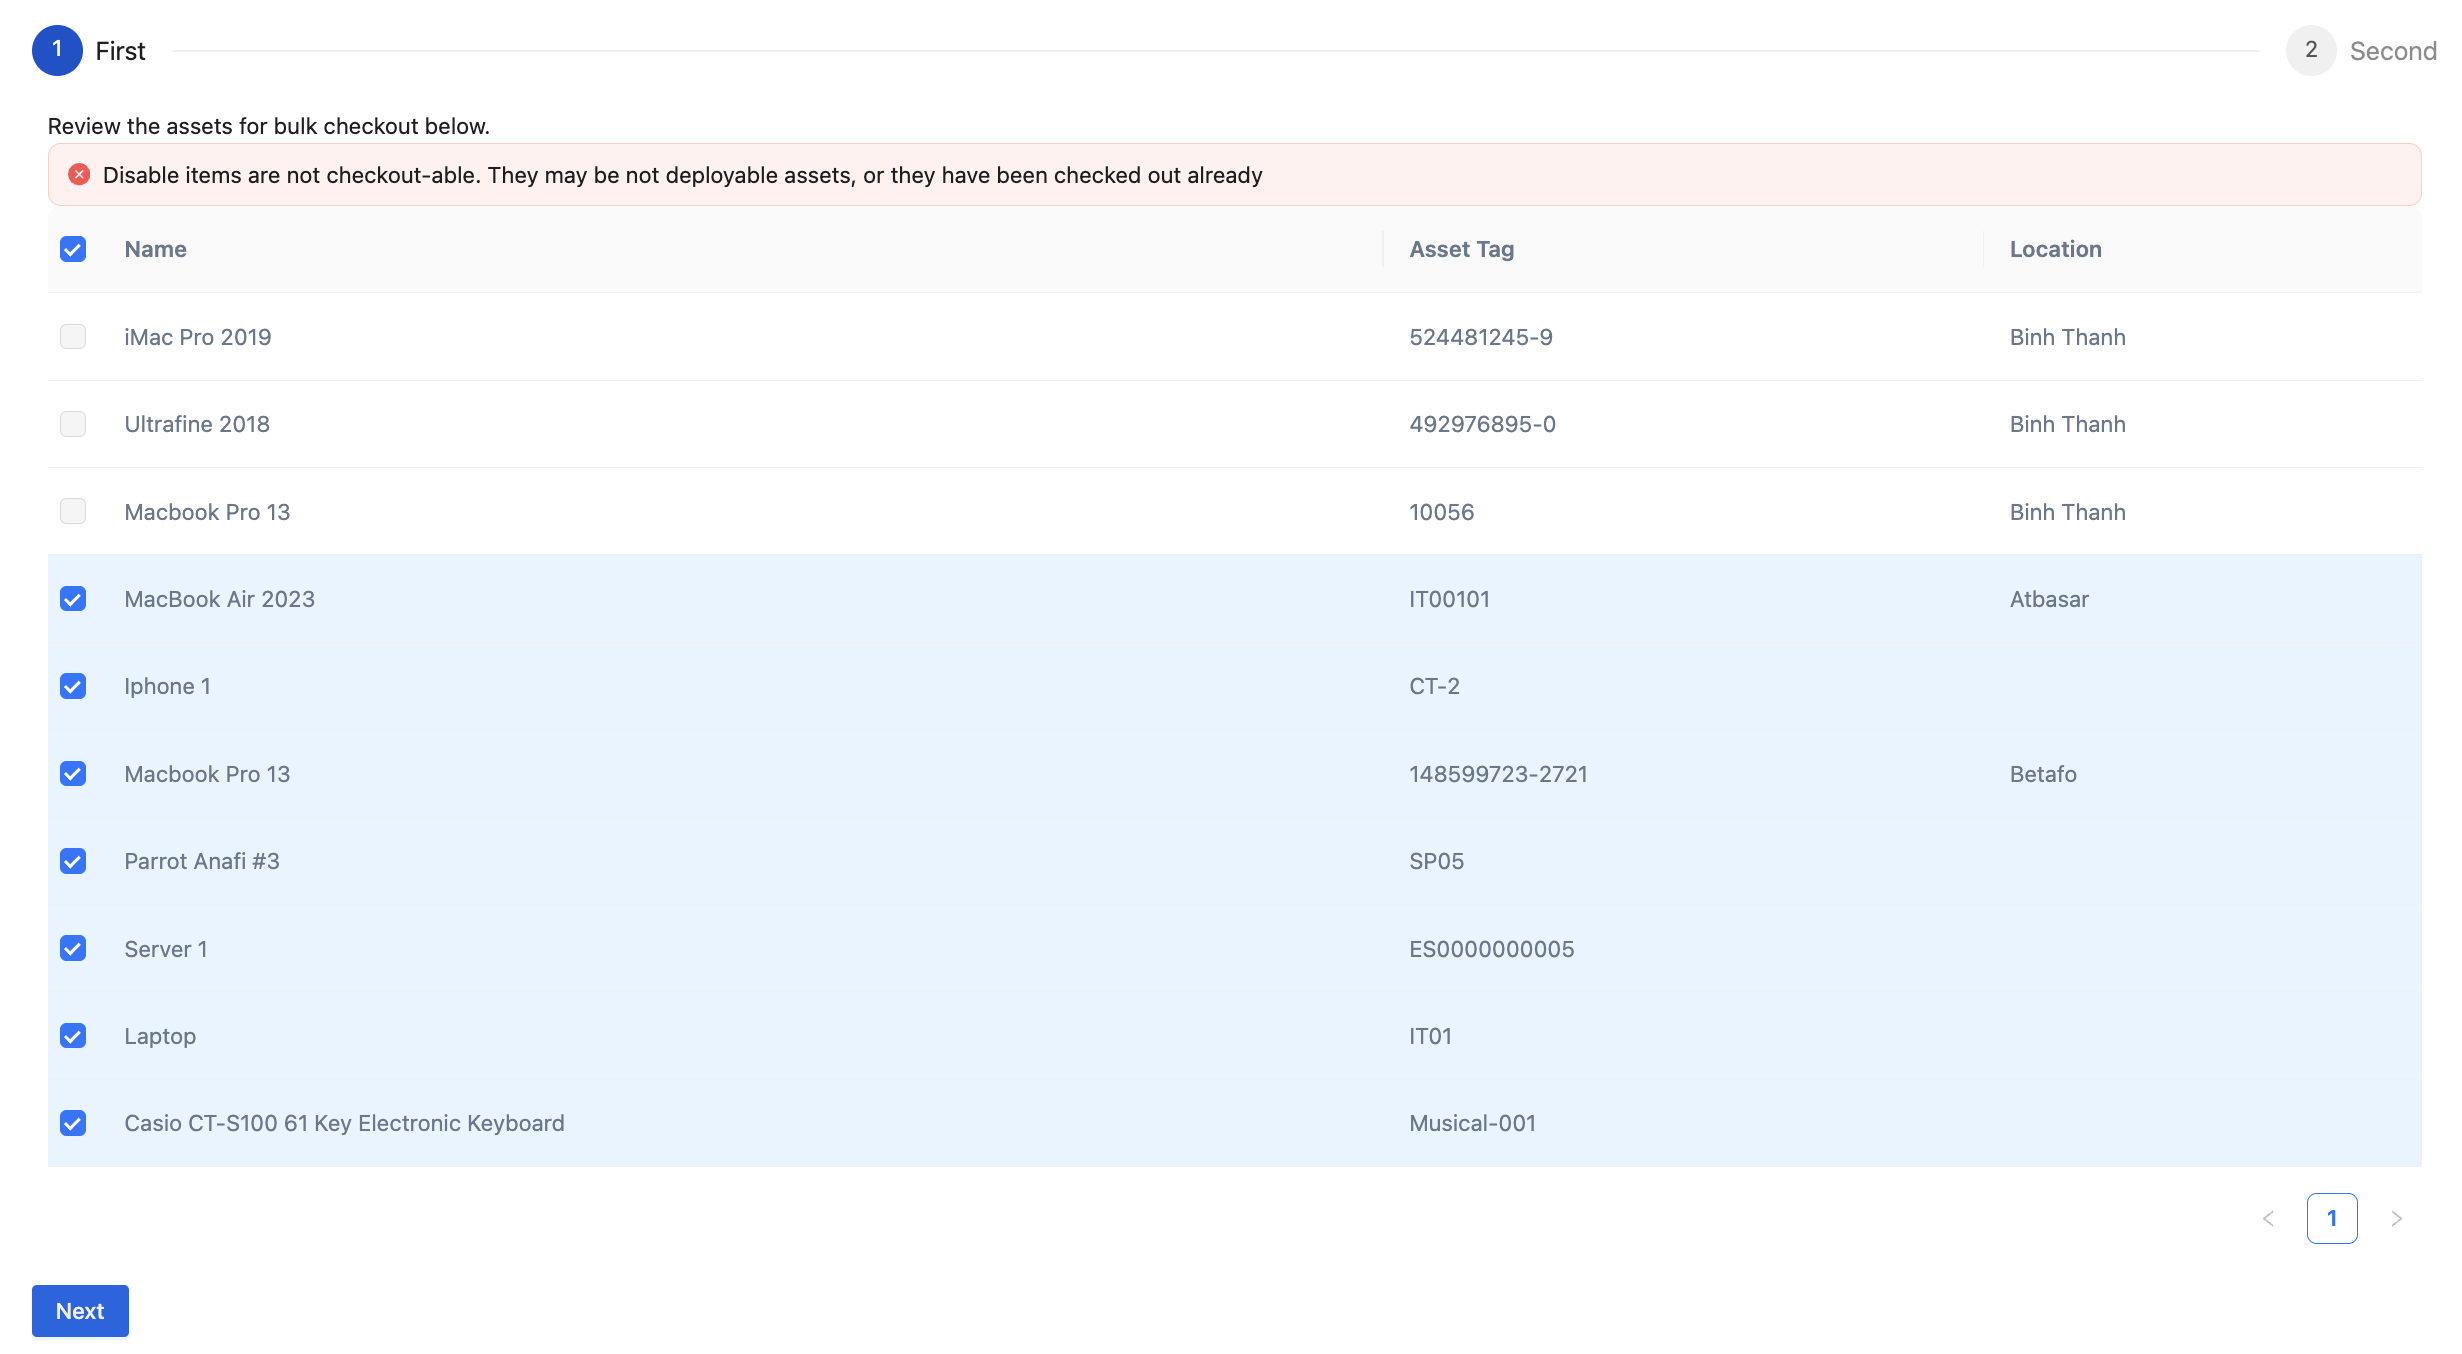
The Bulk Checkout Assets screen will appear.
-
Review the list of selected assets to ensure they are correct.
-
Items that cannot be checked out due to status restrictions or being assigned to another entity will be disabled.
-
After reviewing, click Next to access the checkout form.
-
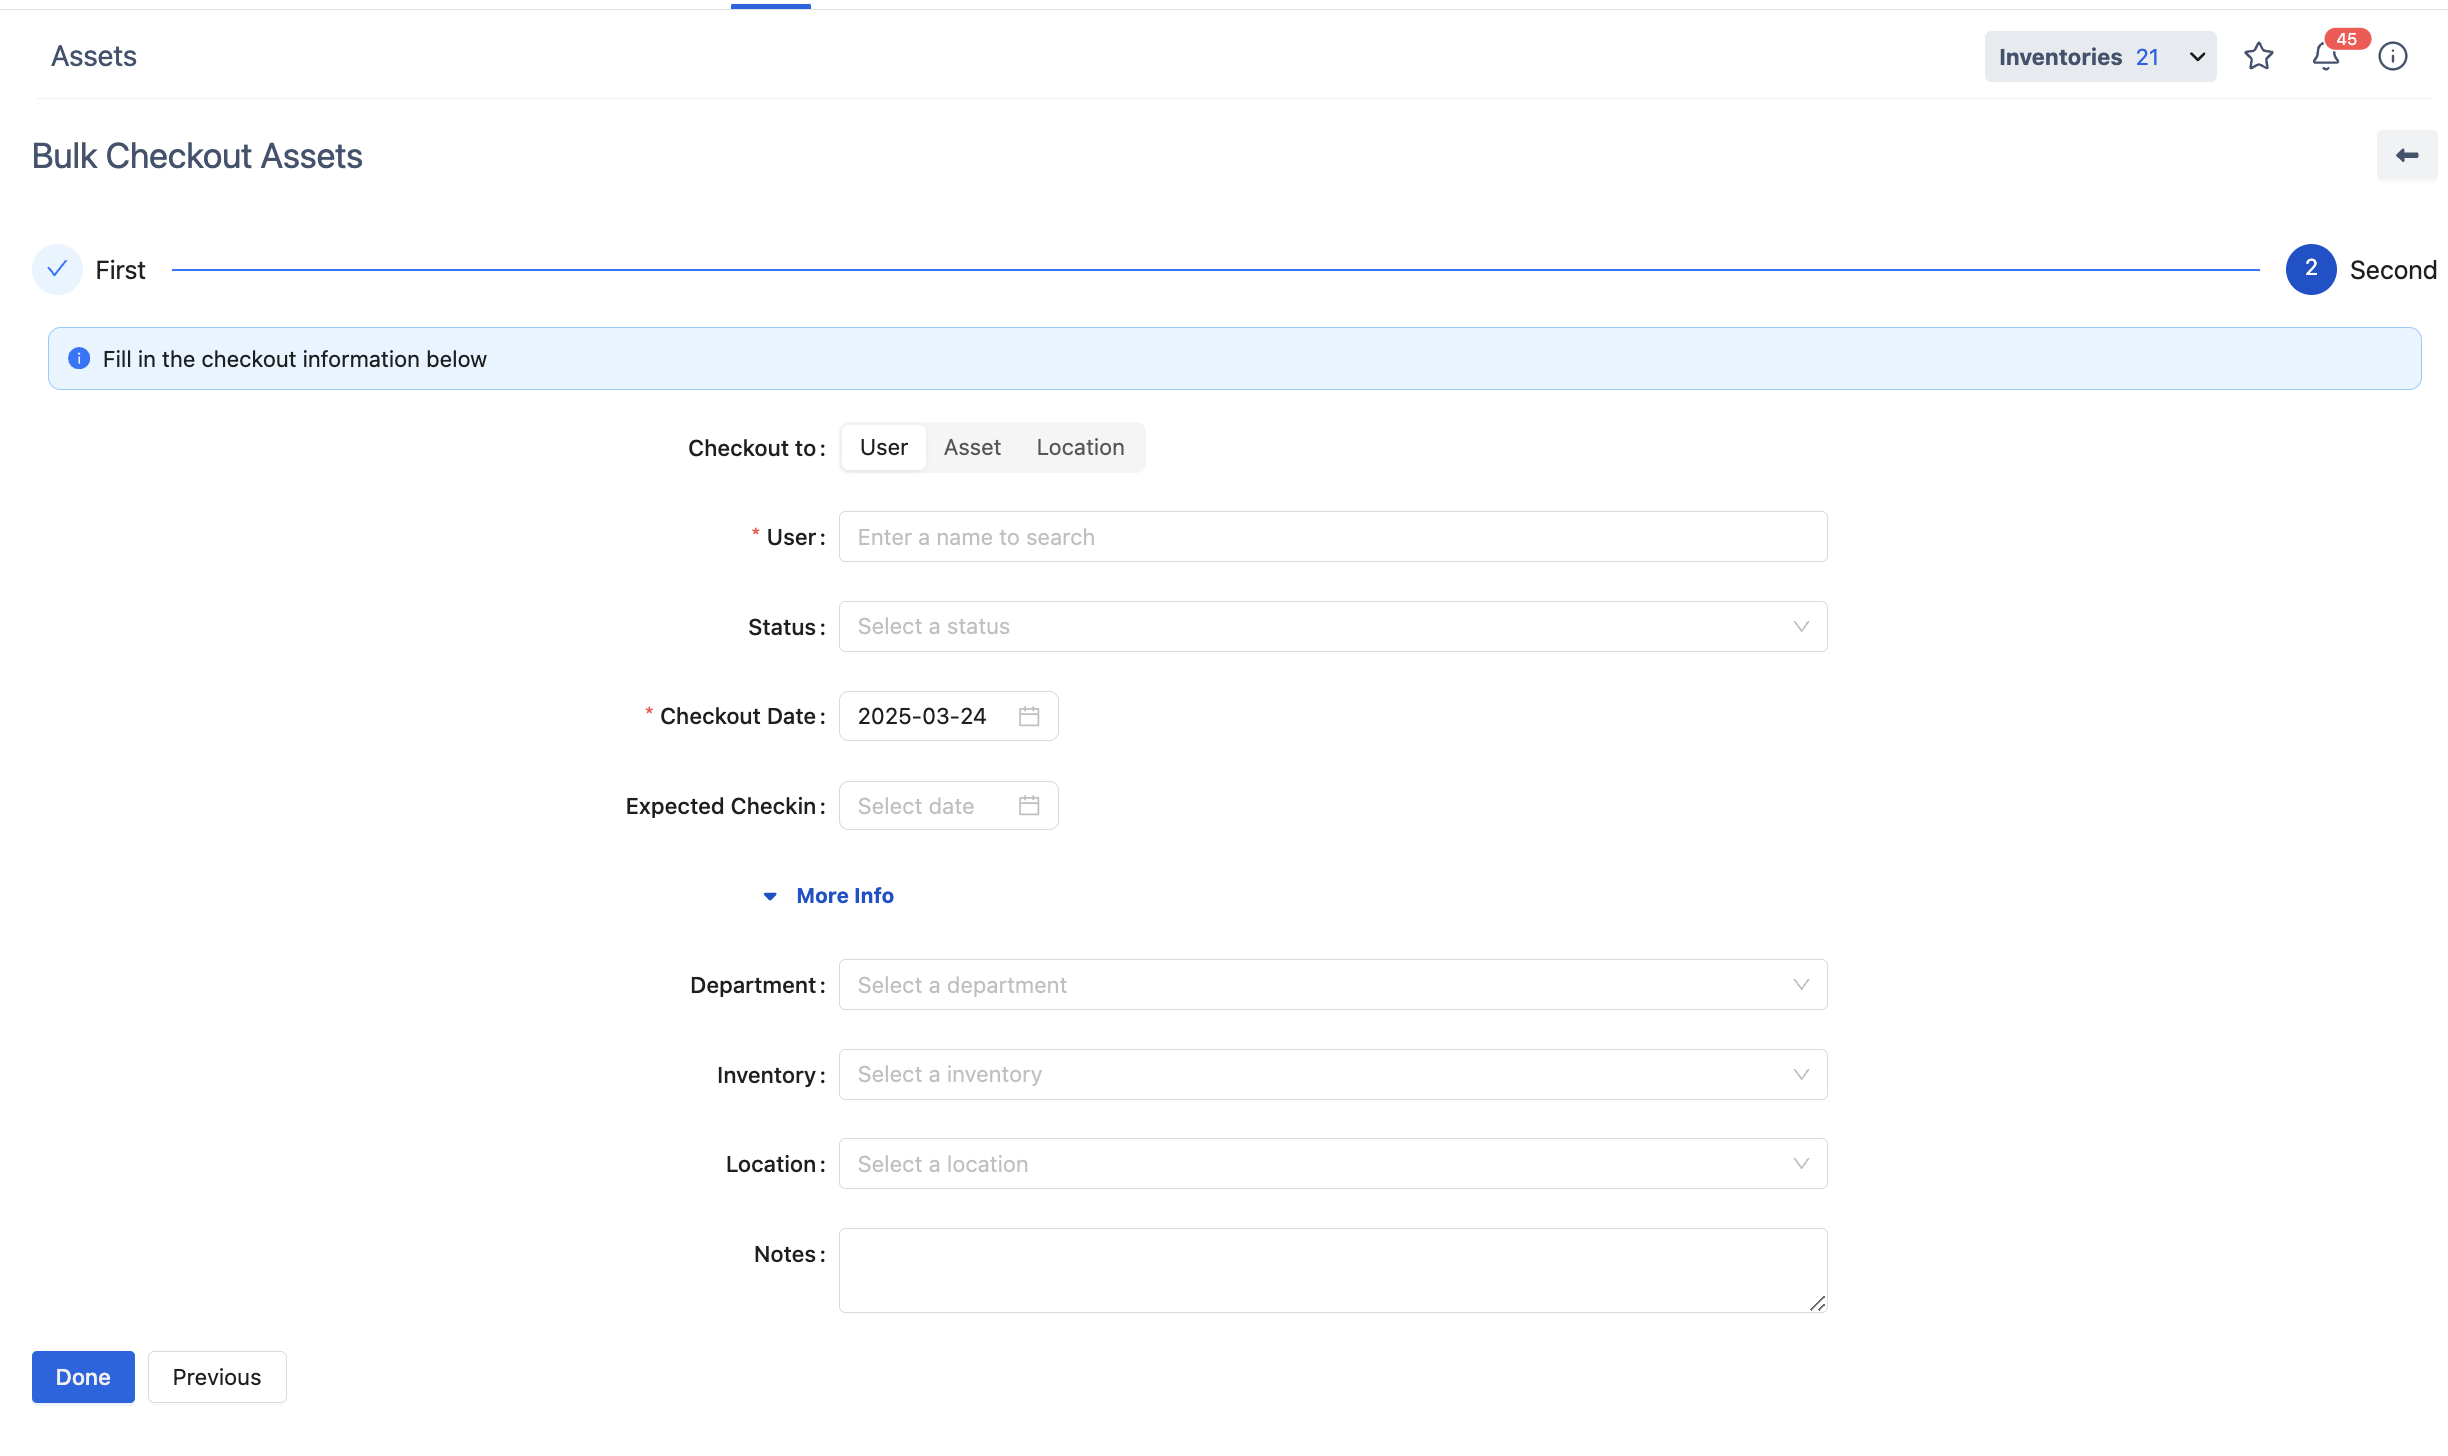
Proceed to the Checkout Form
-
Choose the subject for checkout (to a user, another asset, or a location) and fill in the required information.
-
Click Done to finish the process.