.png)
Bulk Checkin allows you to return multiple assigned assets at once. This ensures that assets are properly updated in the system and are available for future use.
Steps to Perform Bulk Check-in
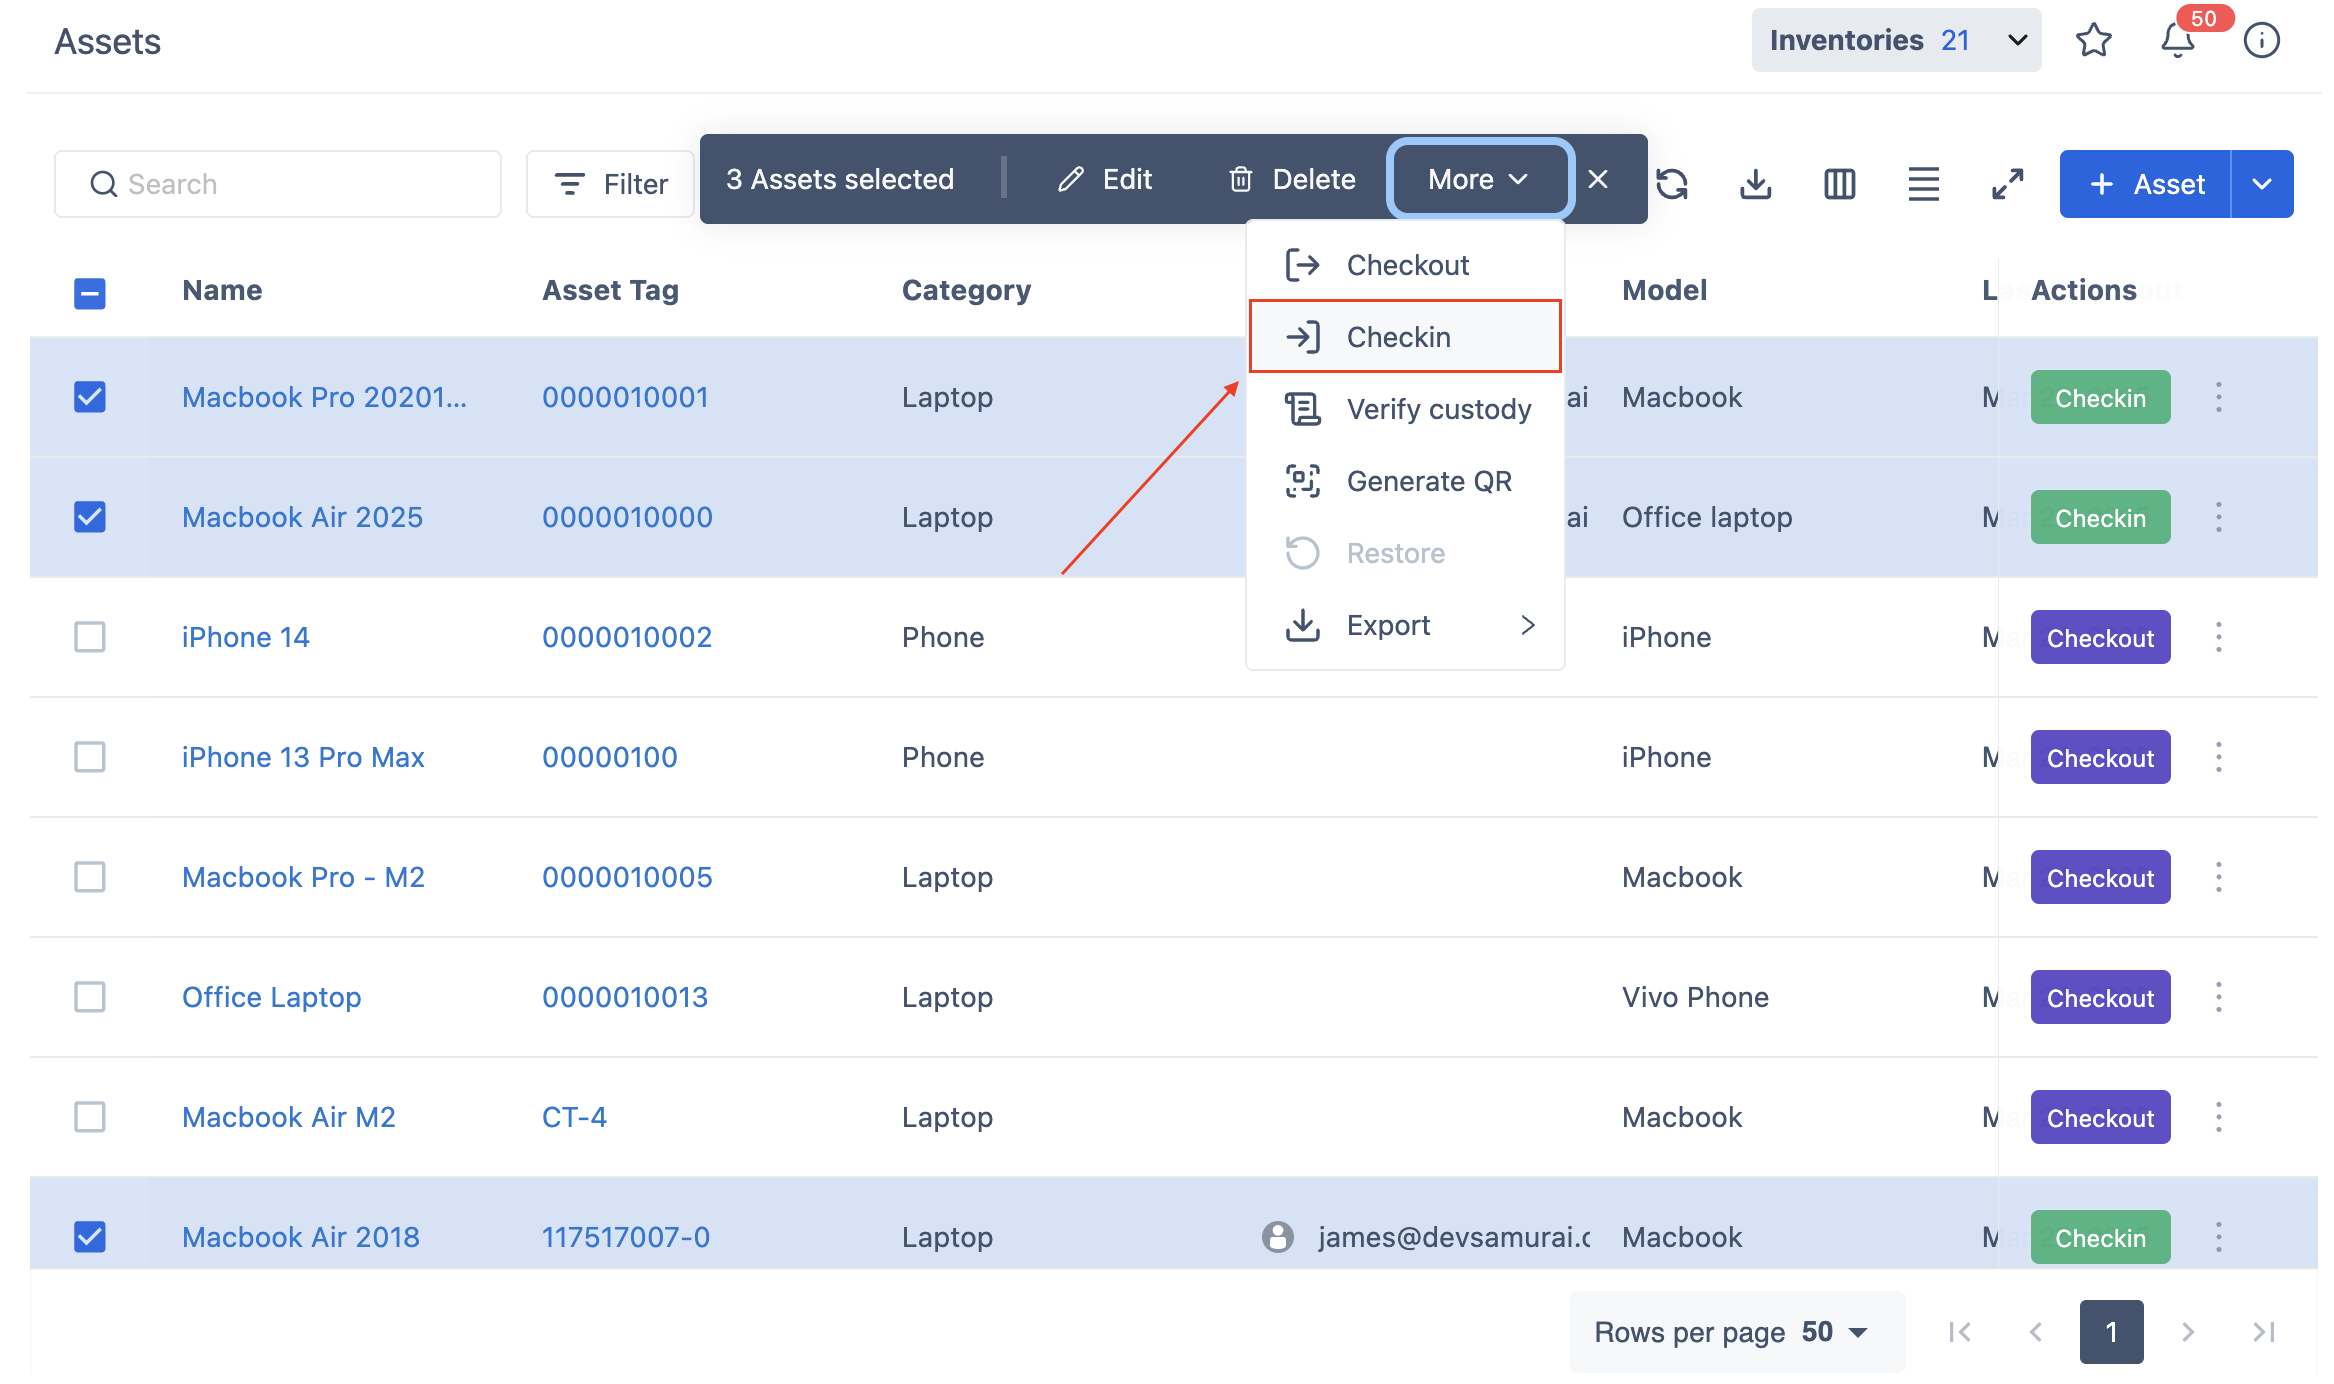
1. Select Multiple Assets
-
Navigate to the Assets page.
-
Select the assets you wish to check in by checking the boxes next to their names.
-
Click on the More dropdown menu in the toolbar.
-
Choose the Checkin option.
2. Review Assets for Check-in
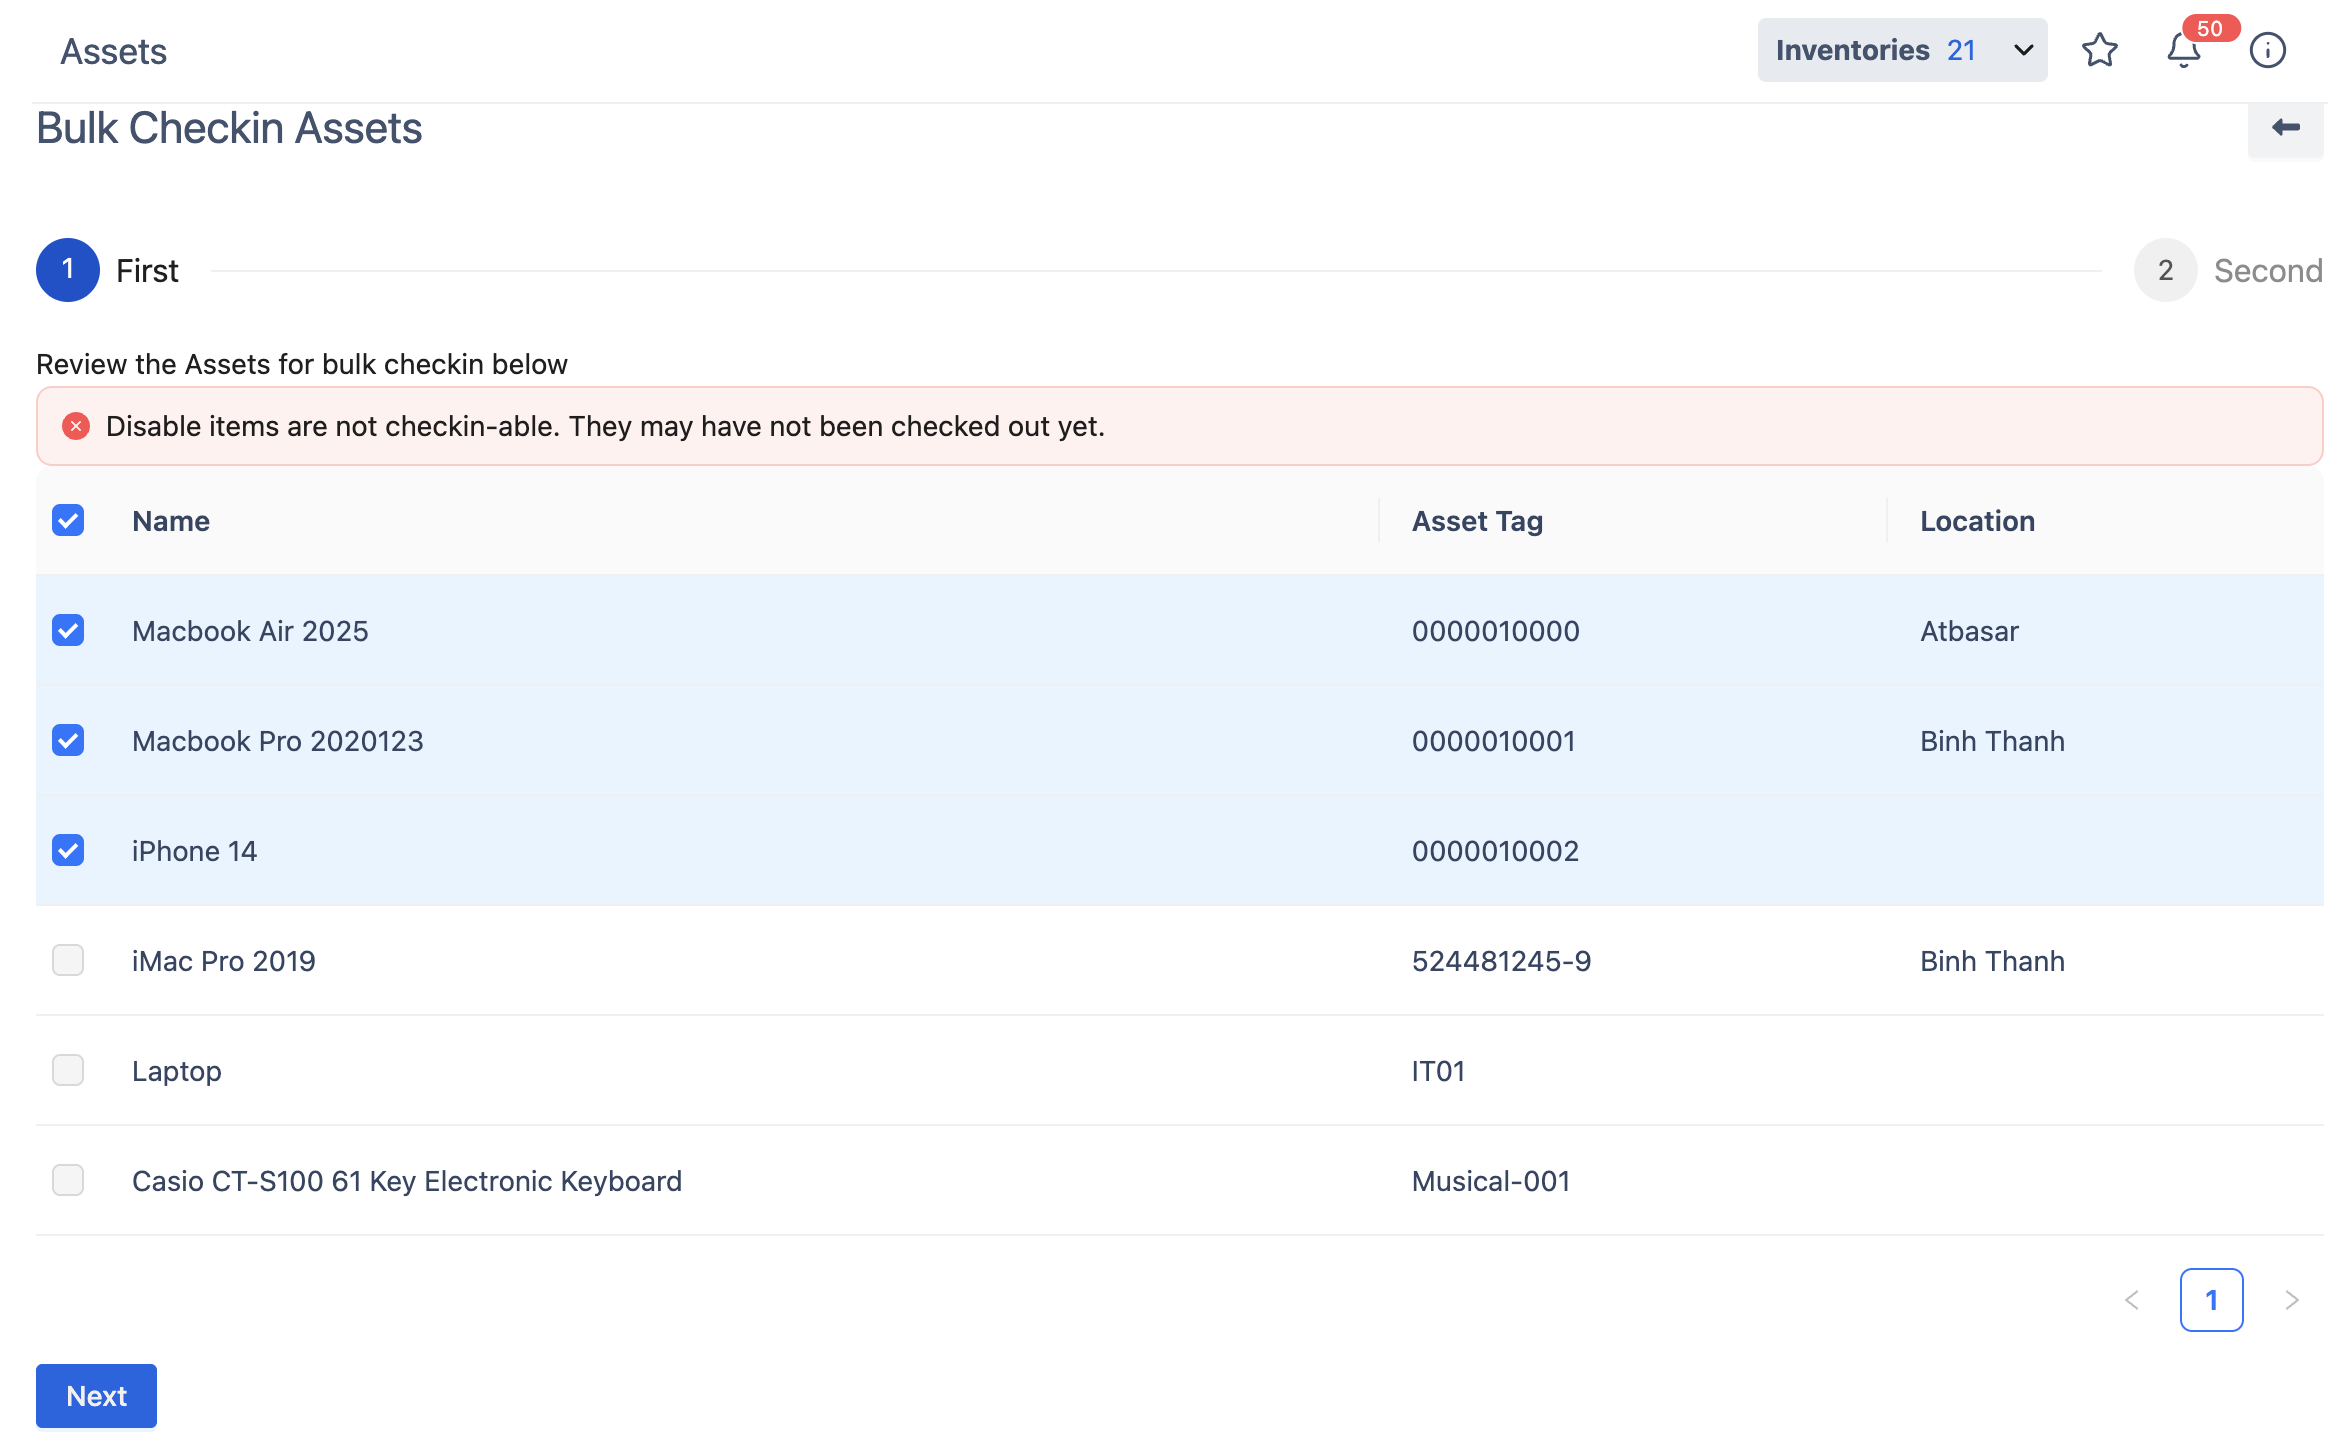
-
You will be redirected to the Bulk Checkin Assets screen.
-
Review the list of assets and confirm they are correct.
-
Click Next to proceed.
3. Complete the Check-in Form
-
Modify the necessary fields, including:
-
Status: Update the assets' condition.
-
Location: Assign a new location if necessary.
-
Department: Select the responsible department.
-
Inventory: Choose the appropriate inventory category.
-
Check-in Date: Ensure the correct return date is selected.
-
Notes: Add any relevant information.
-
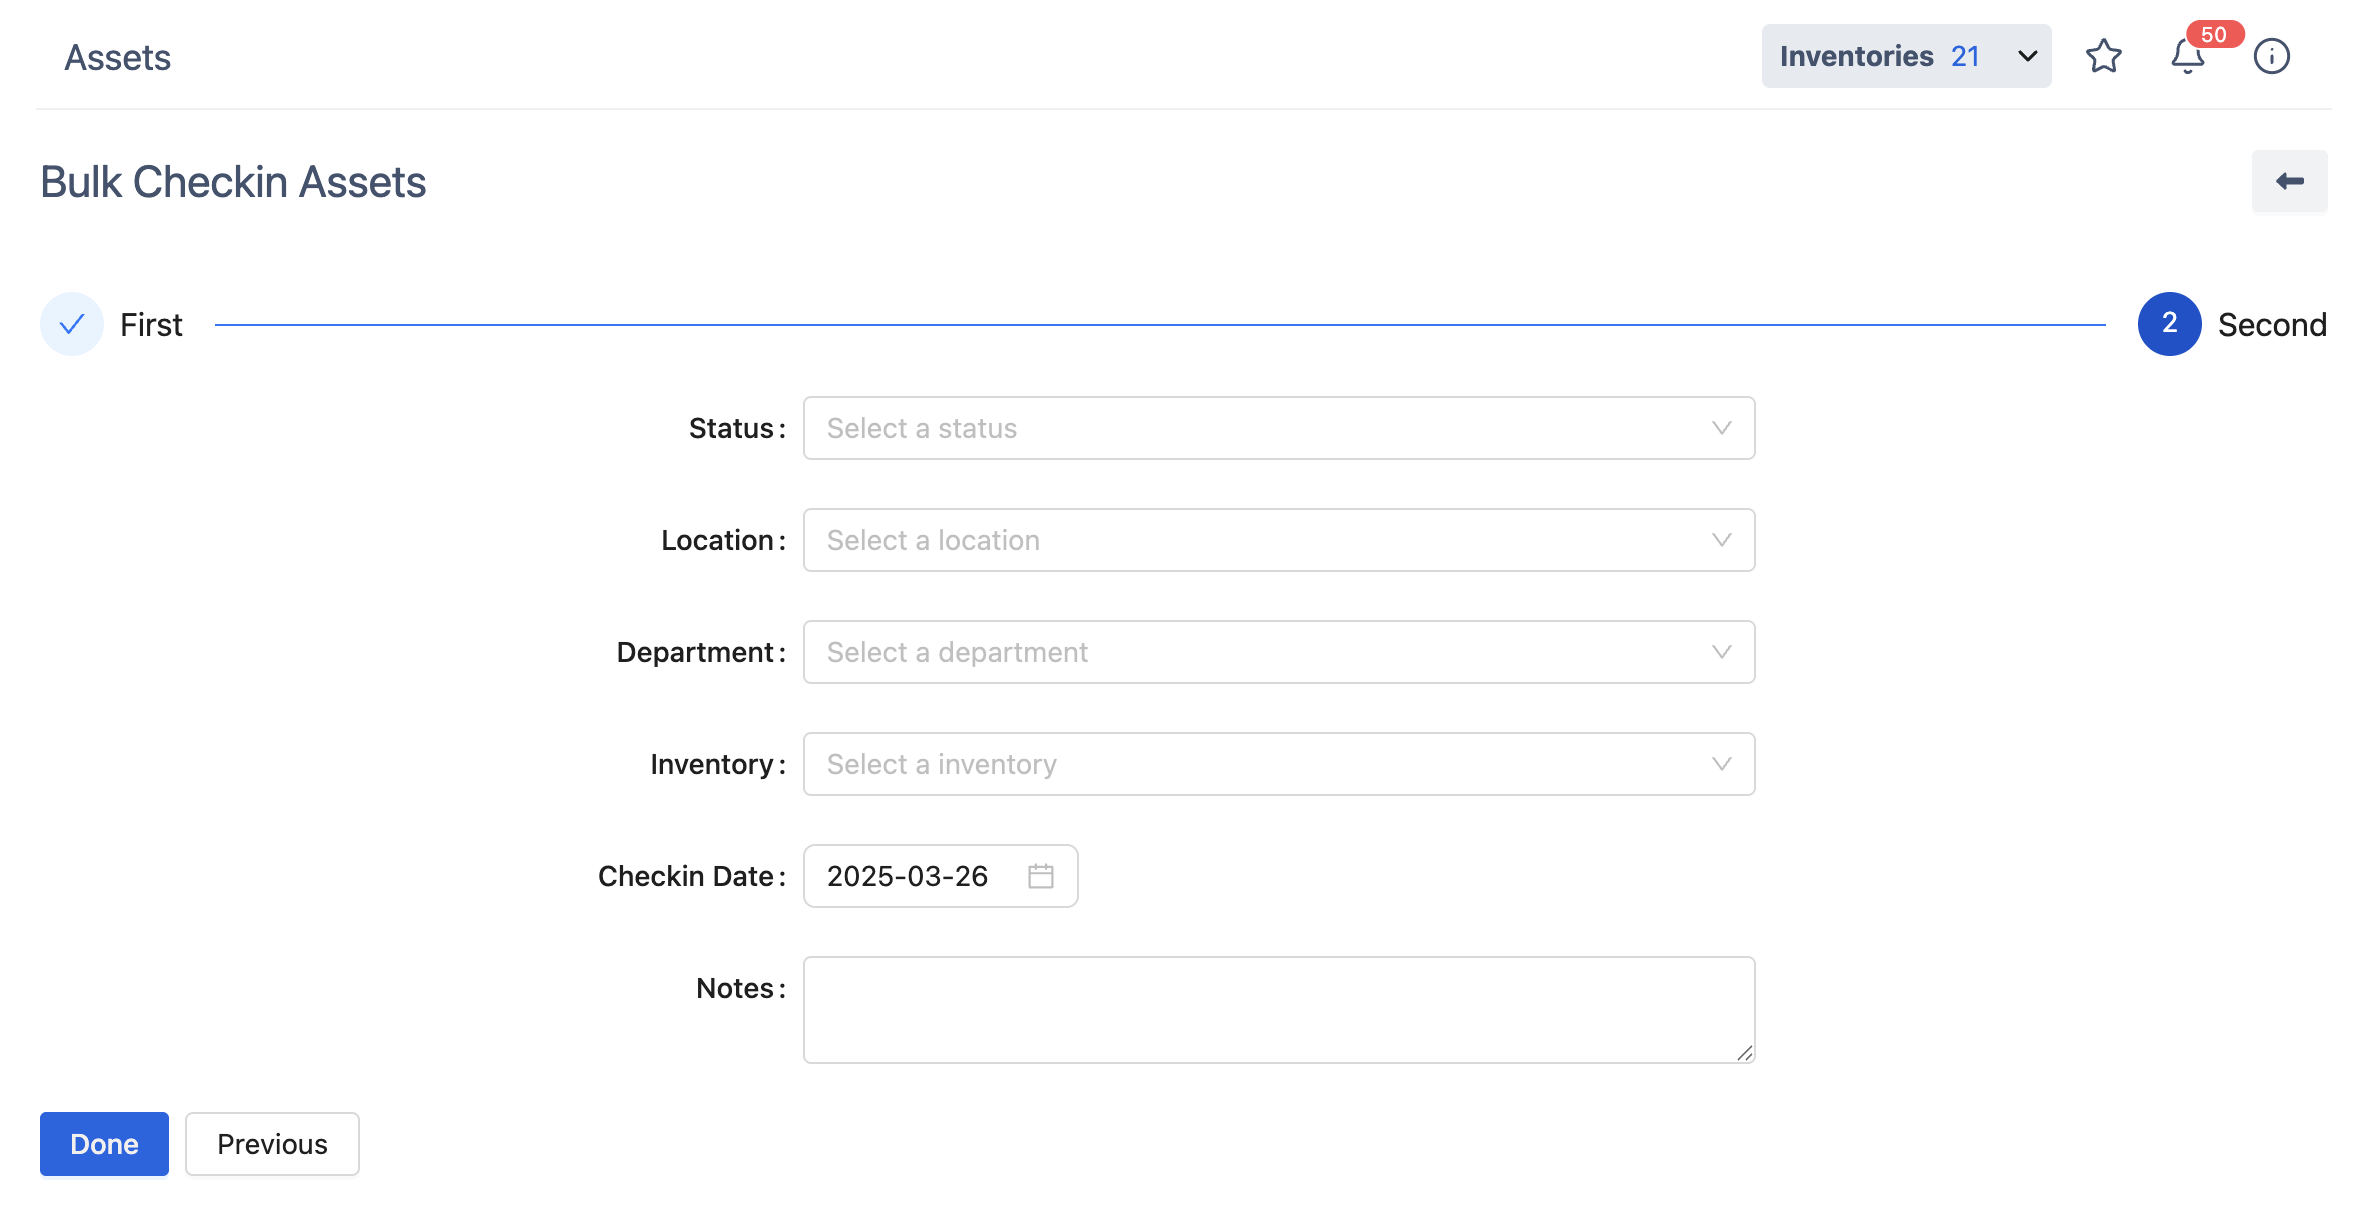
4. Confirmation
Once all details are reviewed, click Done to complete the process. The assets will now be available for reassignment.