[Data Center] 2.4. Edit An Accessory
There are four ways to edit an accessory in AssetIT. Choose the method that best suits your needs:
1. In-line Edit
At the Accessory List view, double-click on the cell you wish to edit.
You can edit the following fields:
Accessory Name
Total Quantity
Min Quantity
Purchase Date
Purchase Cost
Order Number
Category
Manufacturer
Model Number
Department
Supplier
Location
Inventory
Notes
Note: Custom fields cannot be edited using this method.
After making your changes, simply click outside the cell to save the updates automatically.
2. Edit via the 'More' Button
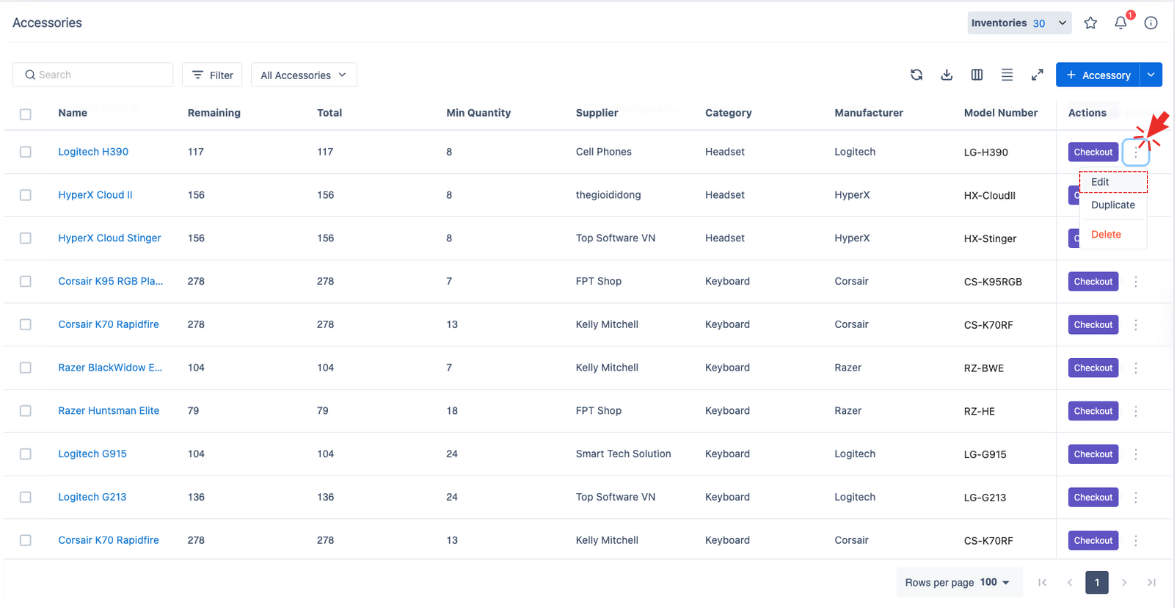
At the Accessory List view, click the More button (
 ) of an accessory.
Select Edit from the options.

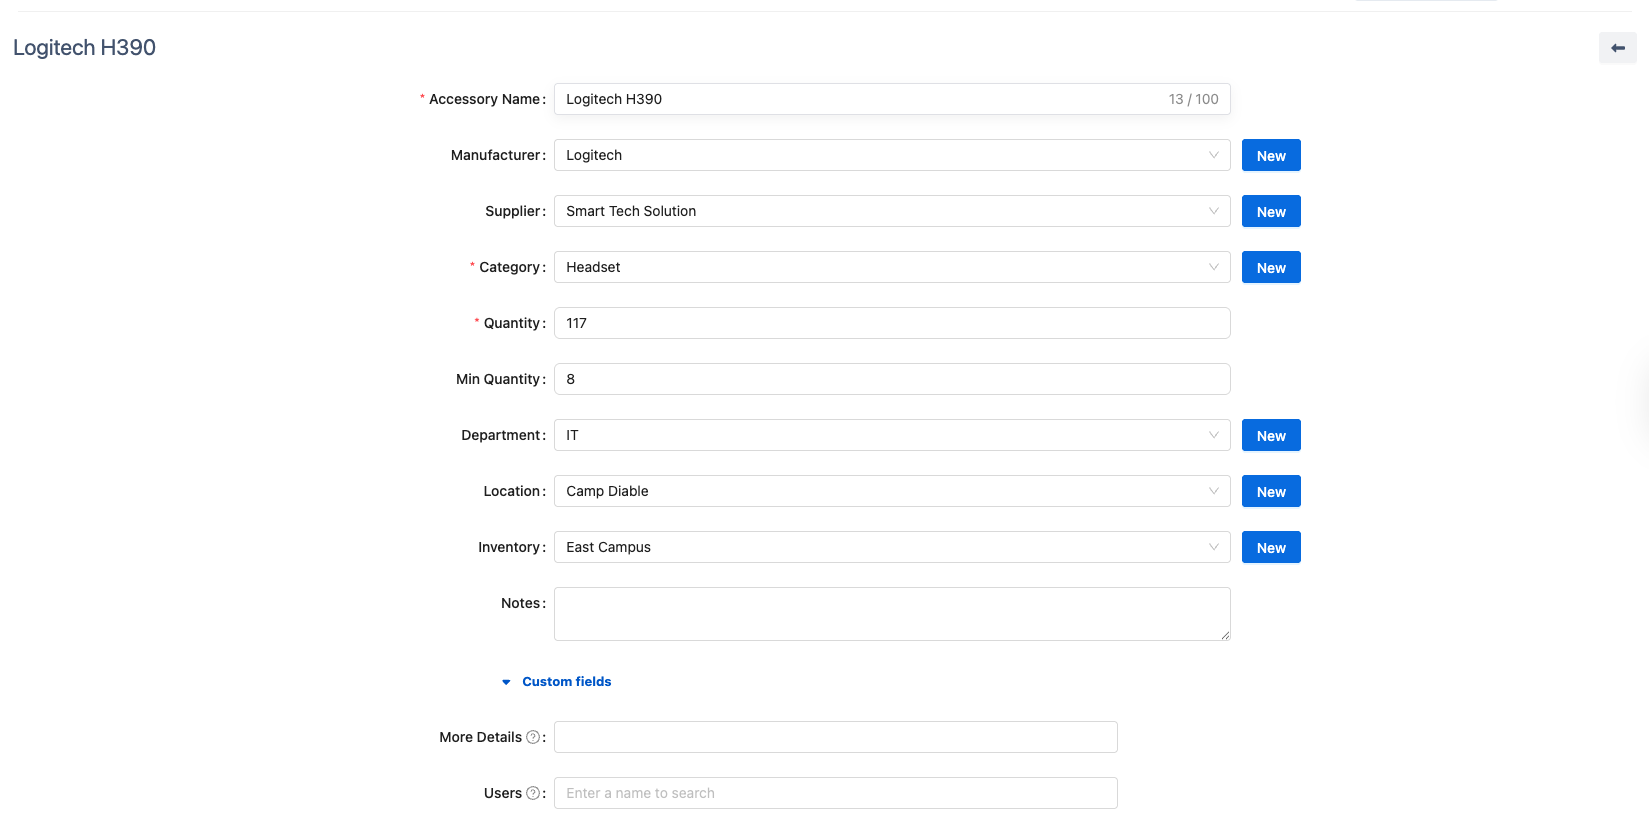
In the Accessory Edit Page, you can update all fields, including custom fields.

Once you have made the desired changes, click
 to save.
3. Edit in Accessory Detail Screen
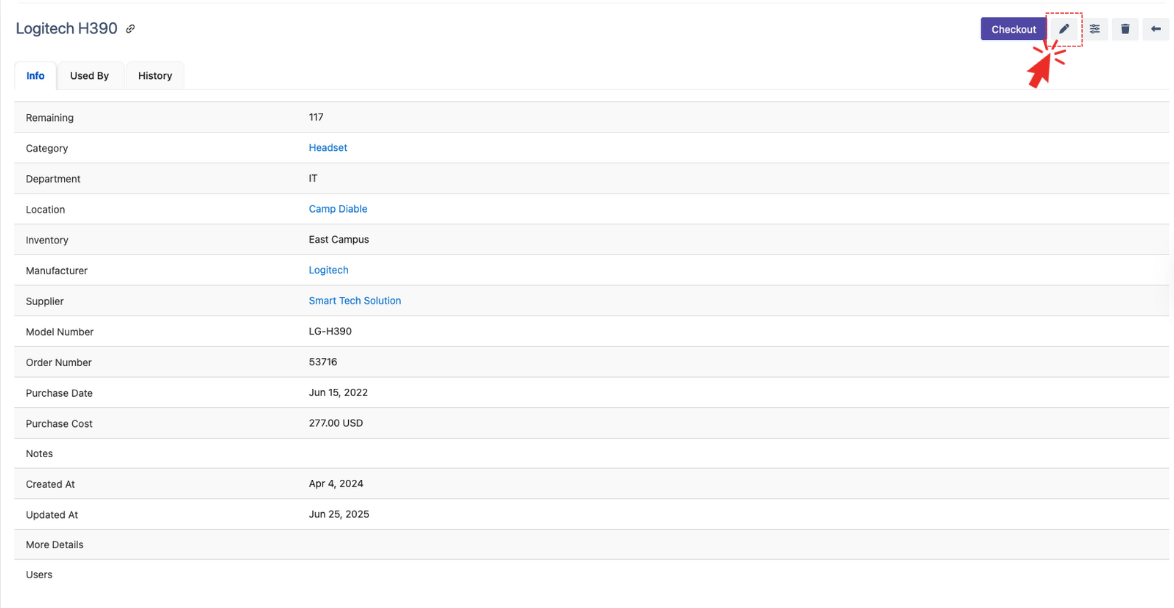
In the Accessory List, click the Accessory Name to navigate to its detailed page.
On the Accessory Detail page, click the
 button located at the top of the screen to start editing the accessory’s information.

In the Accessory Edit Page, you can update all fields, including custom fields.
After editing, click
 to save your changes.
4. Bulk Edit
Select multiple accessories from the accessory list that you want to edit.
Use the Bulk Edit function to apply changes across all selected accessories at once. → How to Bulk Edit Selected Accessories.
.png)