.png)
Time to collect more new bold ideas to make outstanding products for your users.
The Ideas Portal is the newest feature coming to Routemap for Jira Cloud. It empowers teams to generate a voting portal to submit ideas publicly, vote, plan new ideas for development, link to Jira issues, feedback, and more.
These ideas can be feature requests, improvement suggestions, customer feedback, and more.
One more step to make that important Product Discovery that satisfies your users' needs!
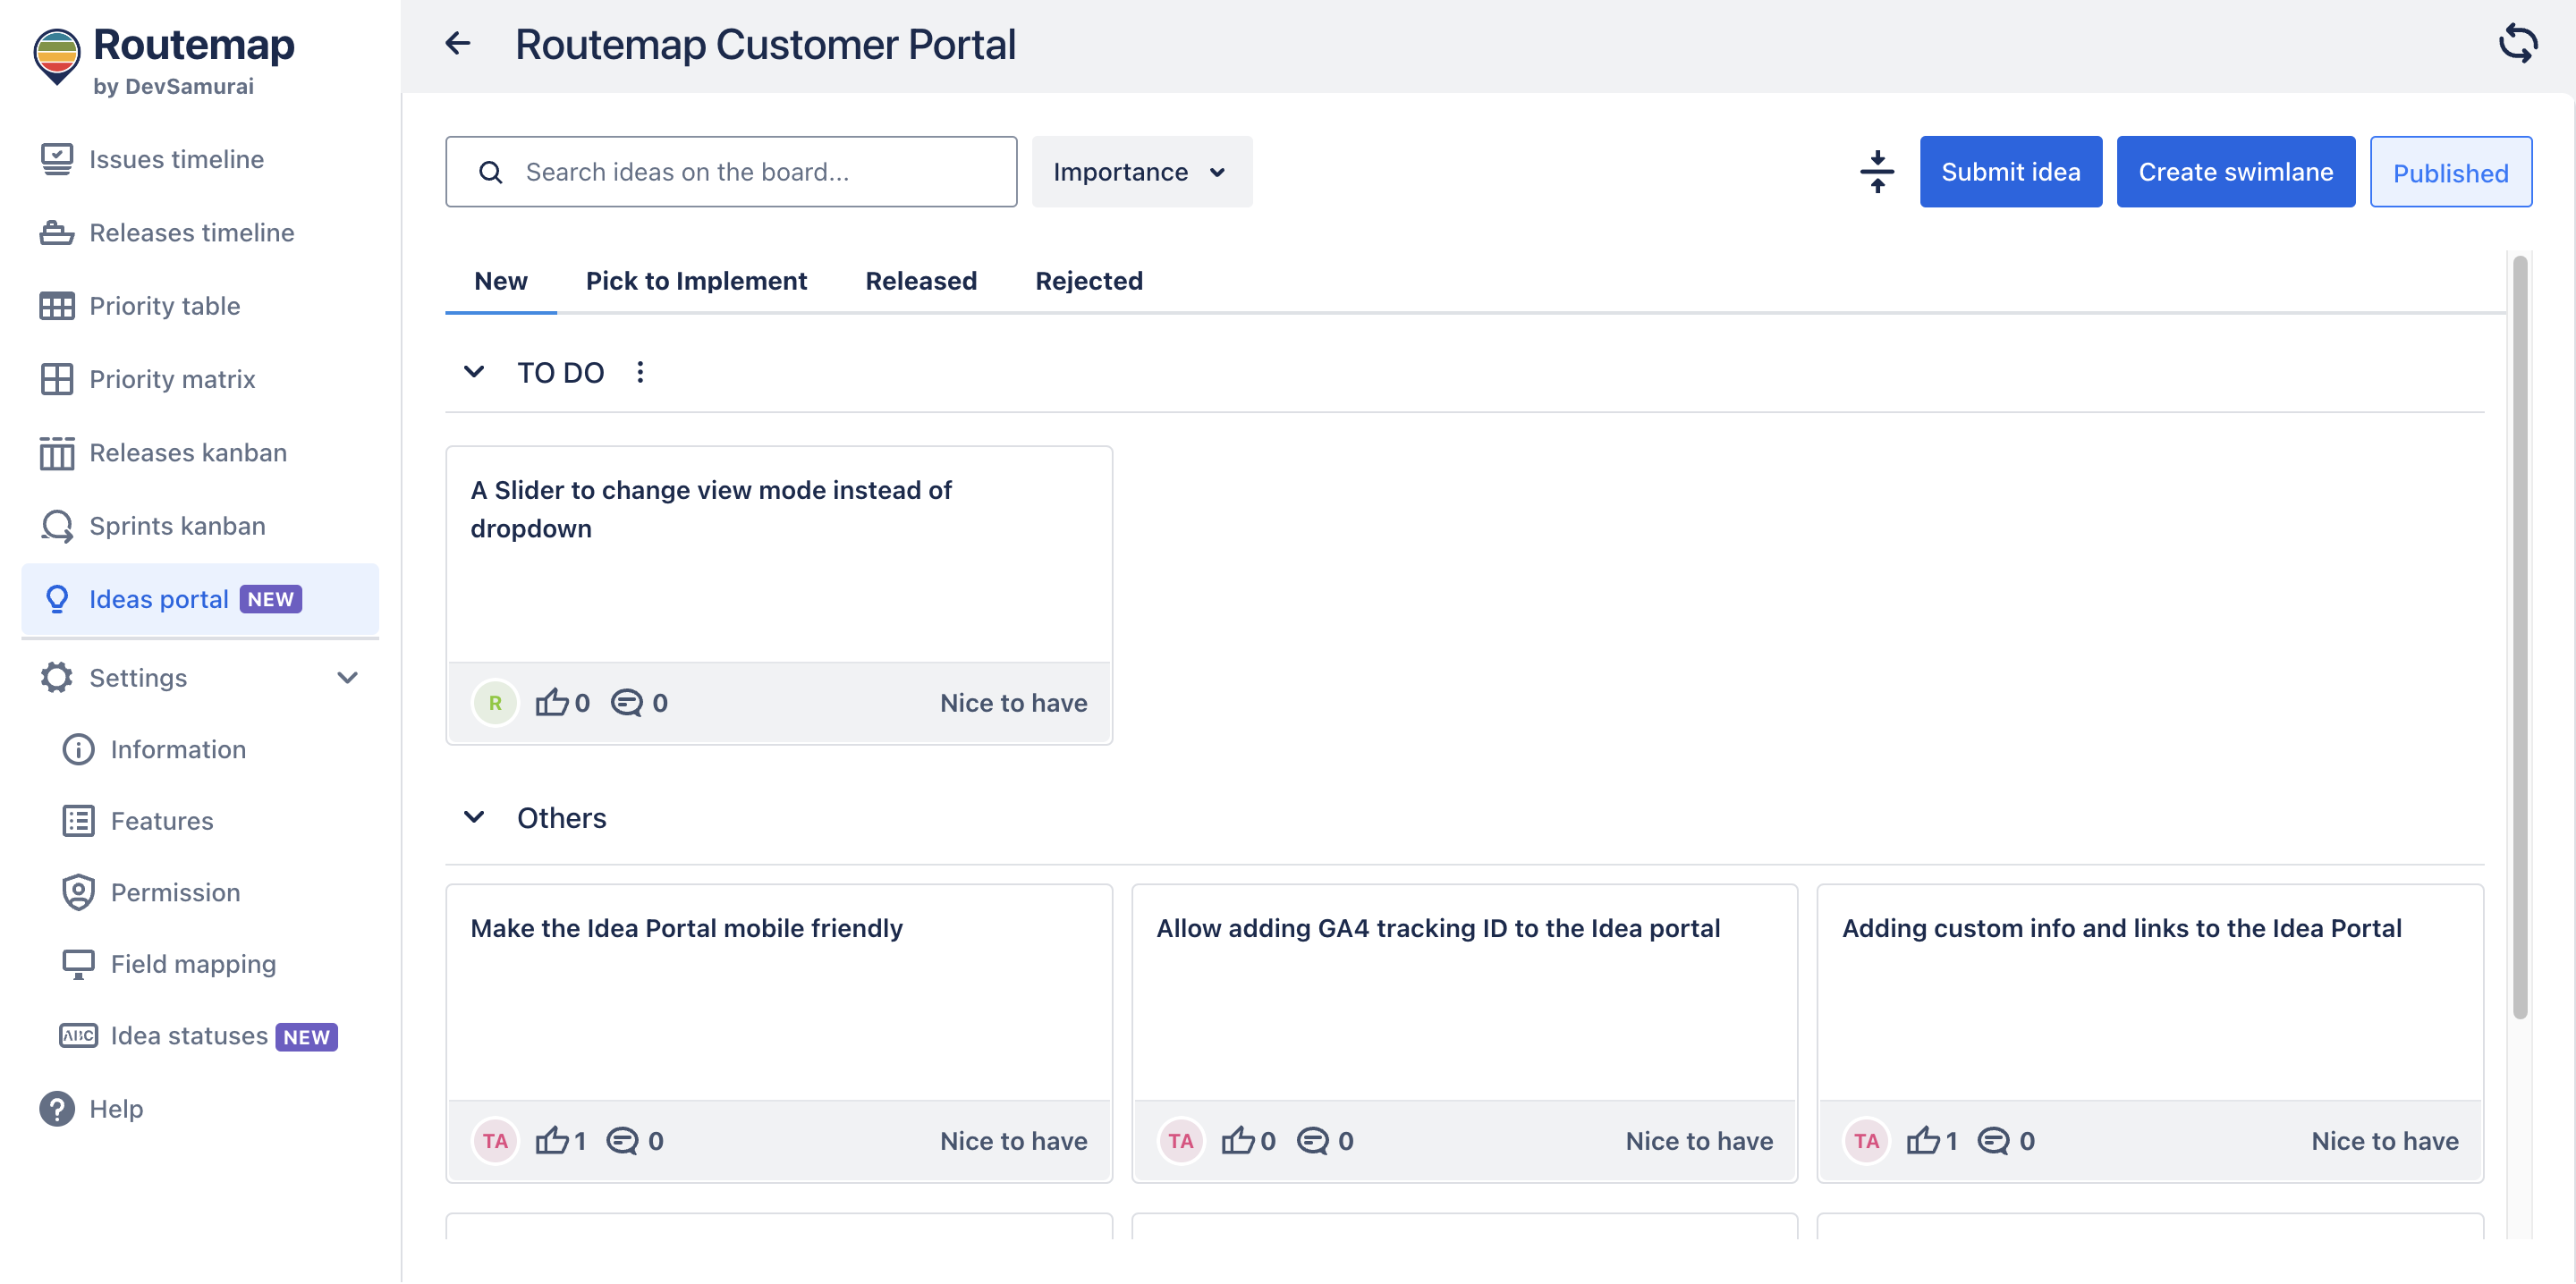
The Ideas portal menu
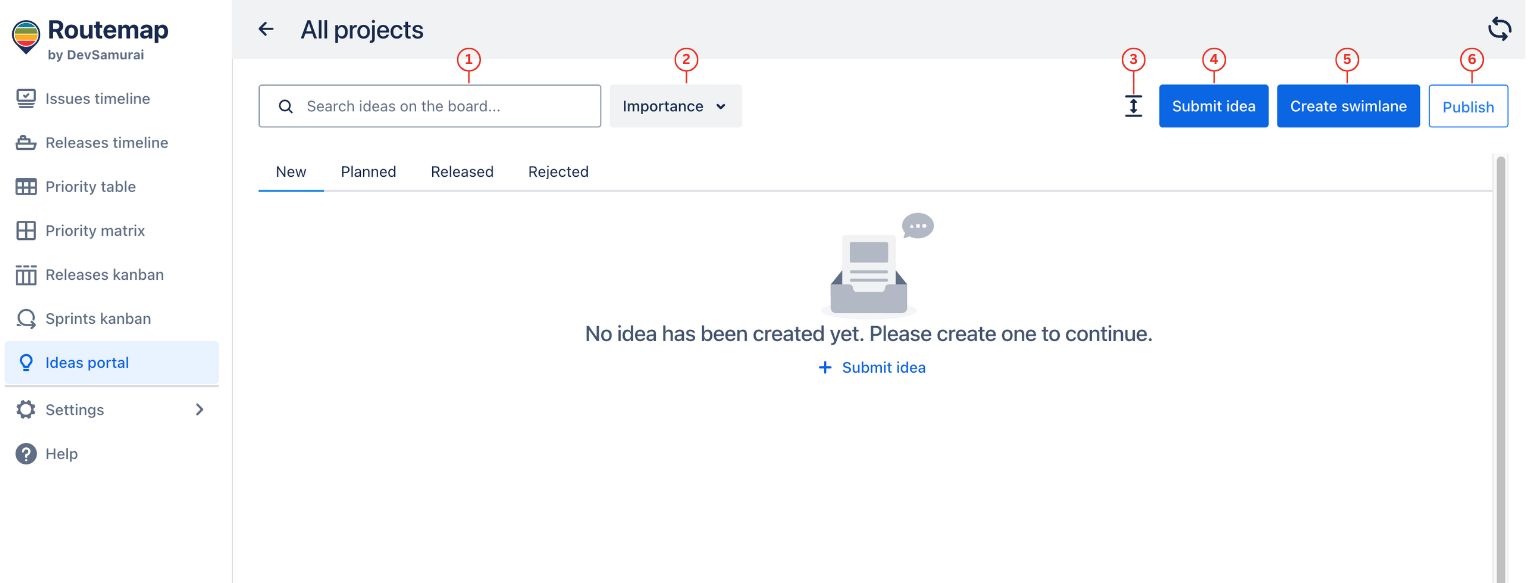
Before going deeper into the Collect Ideas feature, let’s take a quick look at the menu and its functionality:
-
Search ideas box: quickly locates an existing idea in the portal.
-
Idea’s importance filter: sorts out ideas with a specific importance level.
-
Collapse/Expand all idea swimlanes: provides an organized view by collapsing or expanding all swimlanes.
-
Submit idea: allows you to add a new idea as a card to the portal.
-
Create swimlane: add a new swimlane to your ideas portal. This will help you organize new ideas in different lanes for better management.
-
Publish: makes the Ideas portal public to all external users.
Besides the menu, you can also see there are different tabs where you can manage submitted ideas in different statuses:
-
New
-
Planned
-
Released
-
Rejected
These idea statuses represent each stage of the ideation process. It starts from a brand-new idea, moves to the Planned stage where ideas are approved for development, and finally goes to the Released stage where ideas have successfully become features.
The Rejected stage represents ideas not suitable for development.
For more details about the idea statuses, please read how to manage them.
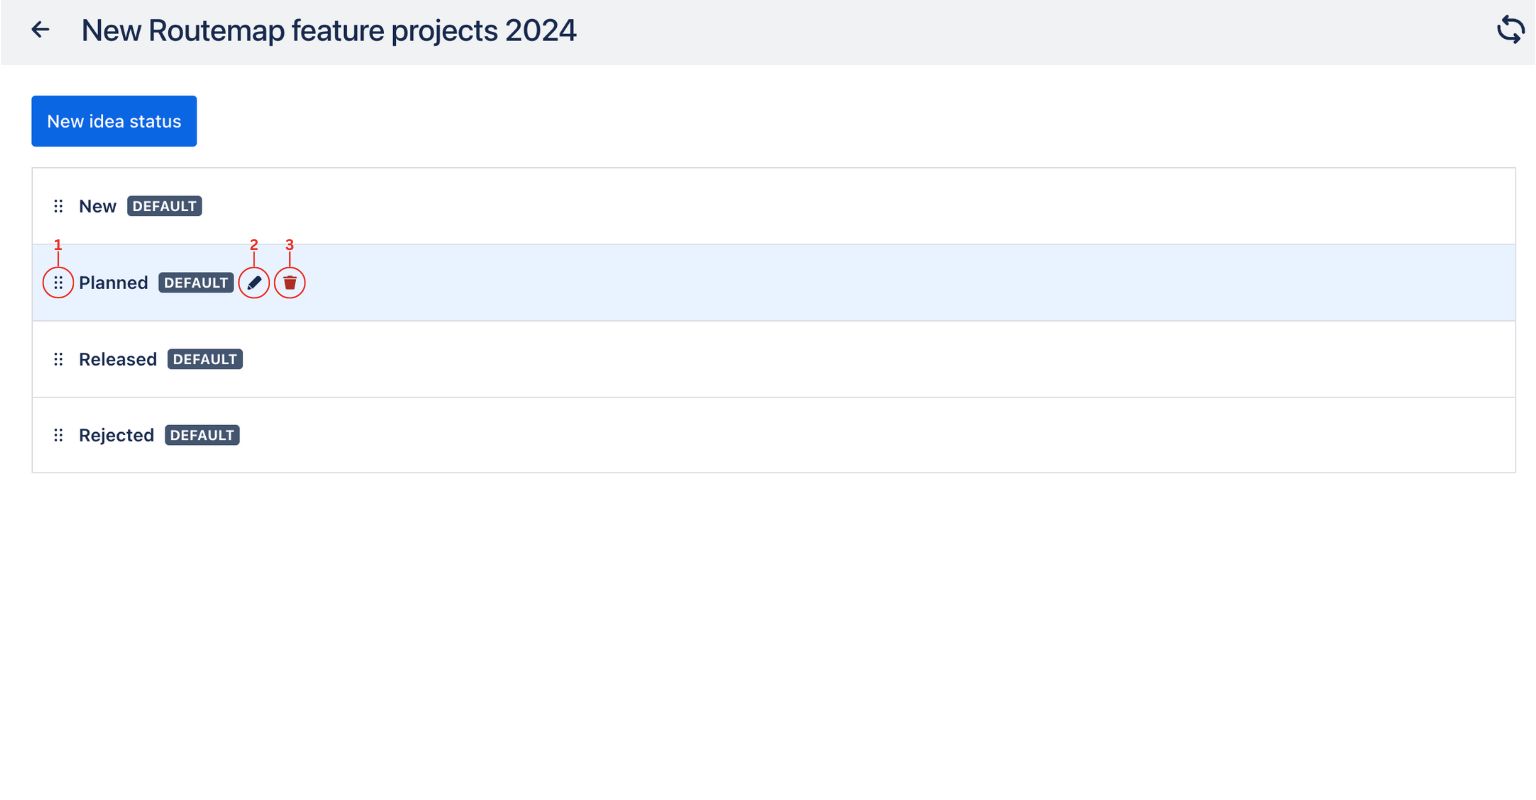
Idea statuses settings
By default, the Ideas portal contains 4 different statuses to help you manage your ideas. By going to the board settings, you can change the order of idea statuses to your preference, edit a status, or remove it from your board.

Please note
You cannot change or edit the “New” and “Rejected” statuses as they are crucial to the Ideas portal.
-
1: Move the idea status up or down
-
2: Edit the idea status title
-
3: Delete status
Additionally, you can also add a new custom idea status to the portal to fulfill your needs.

Start submitting a new idea
To start using this new feature, you can submit a brand new idea for your product.
This idea can be new feature requests, app improvements, and more.
There will be a popup for you to fill in the information about this new idea:
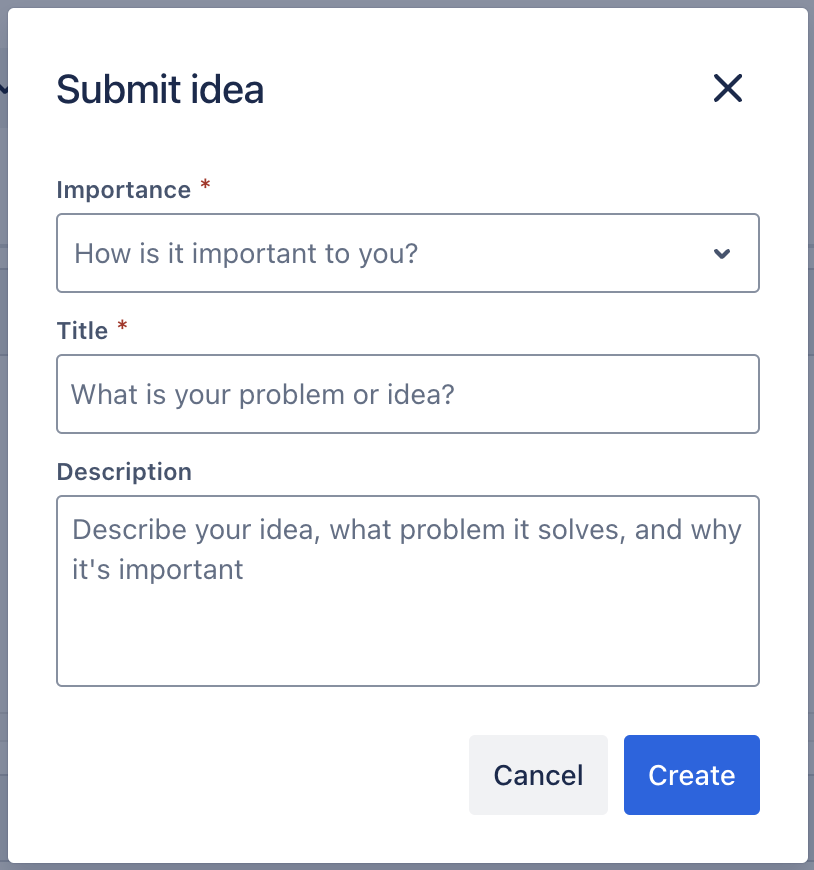
-
Importance: where you can categorize your idea into one of 5 levels ( Critical, Important, Nice to Have, Not important, and Unnecessary).
-
Title: the name of this idea. Remember to keep it at 255 characters or below.
-
Description: where you can add more information to clarify your idea better.
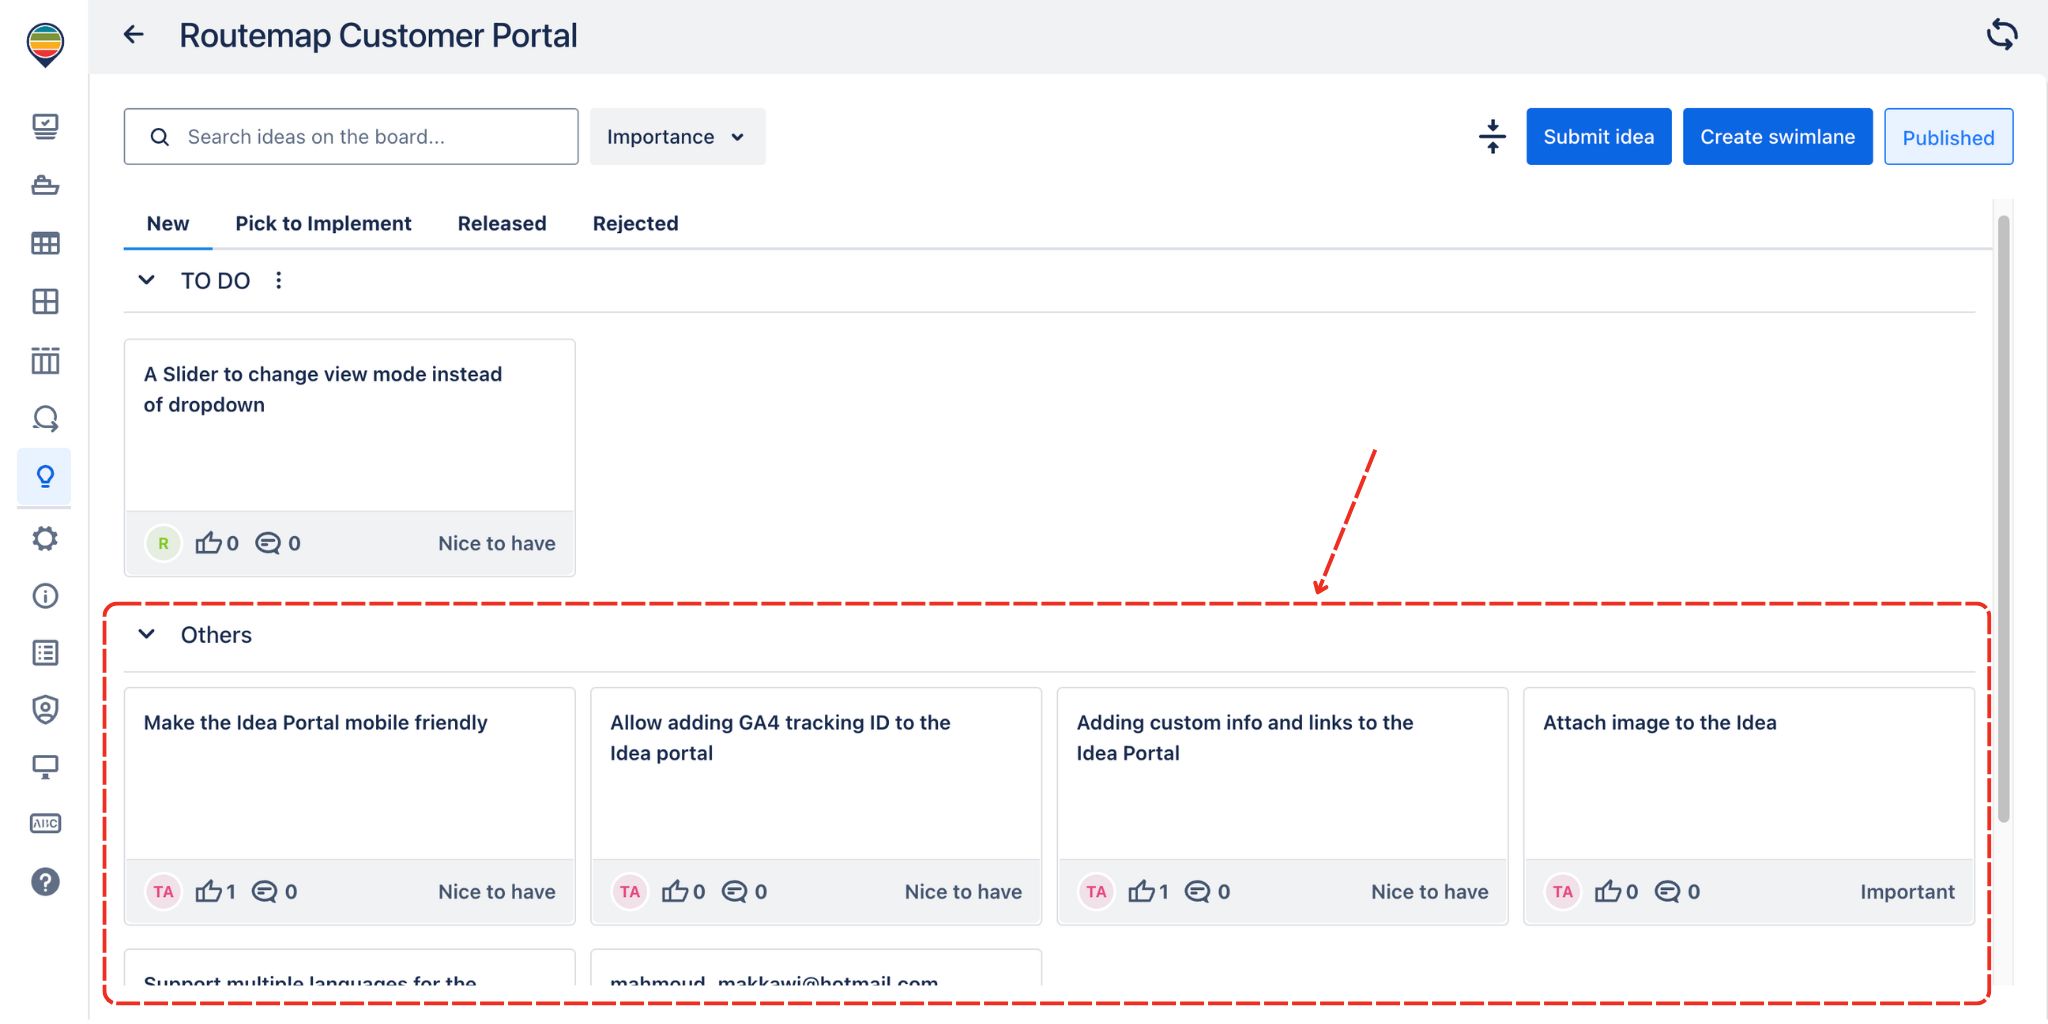
After submission, your idea will be visualized as a card in the Others swimlane of the portal.
Manage new ideas in 4 Statuses
Heads Up
You can move ideas from one swimlane to another by locating the button on the top right corner and using drag-and-drop.
1. New status
This is where you can find all the new ideas submitted to your portal. Here, you can also keep track of how many votes each idea has, comments for an idea, and decide if one idea should be moved on to the planned step or rejected.
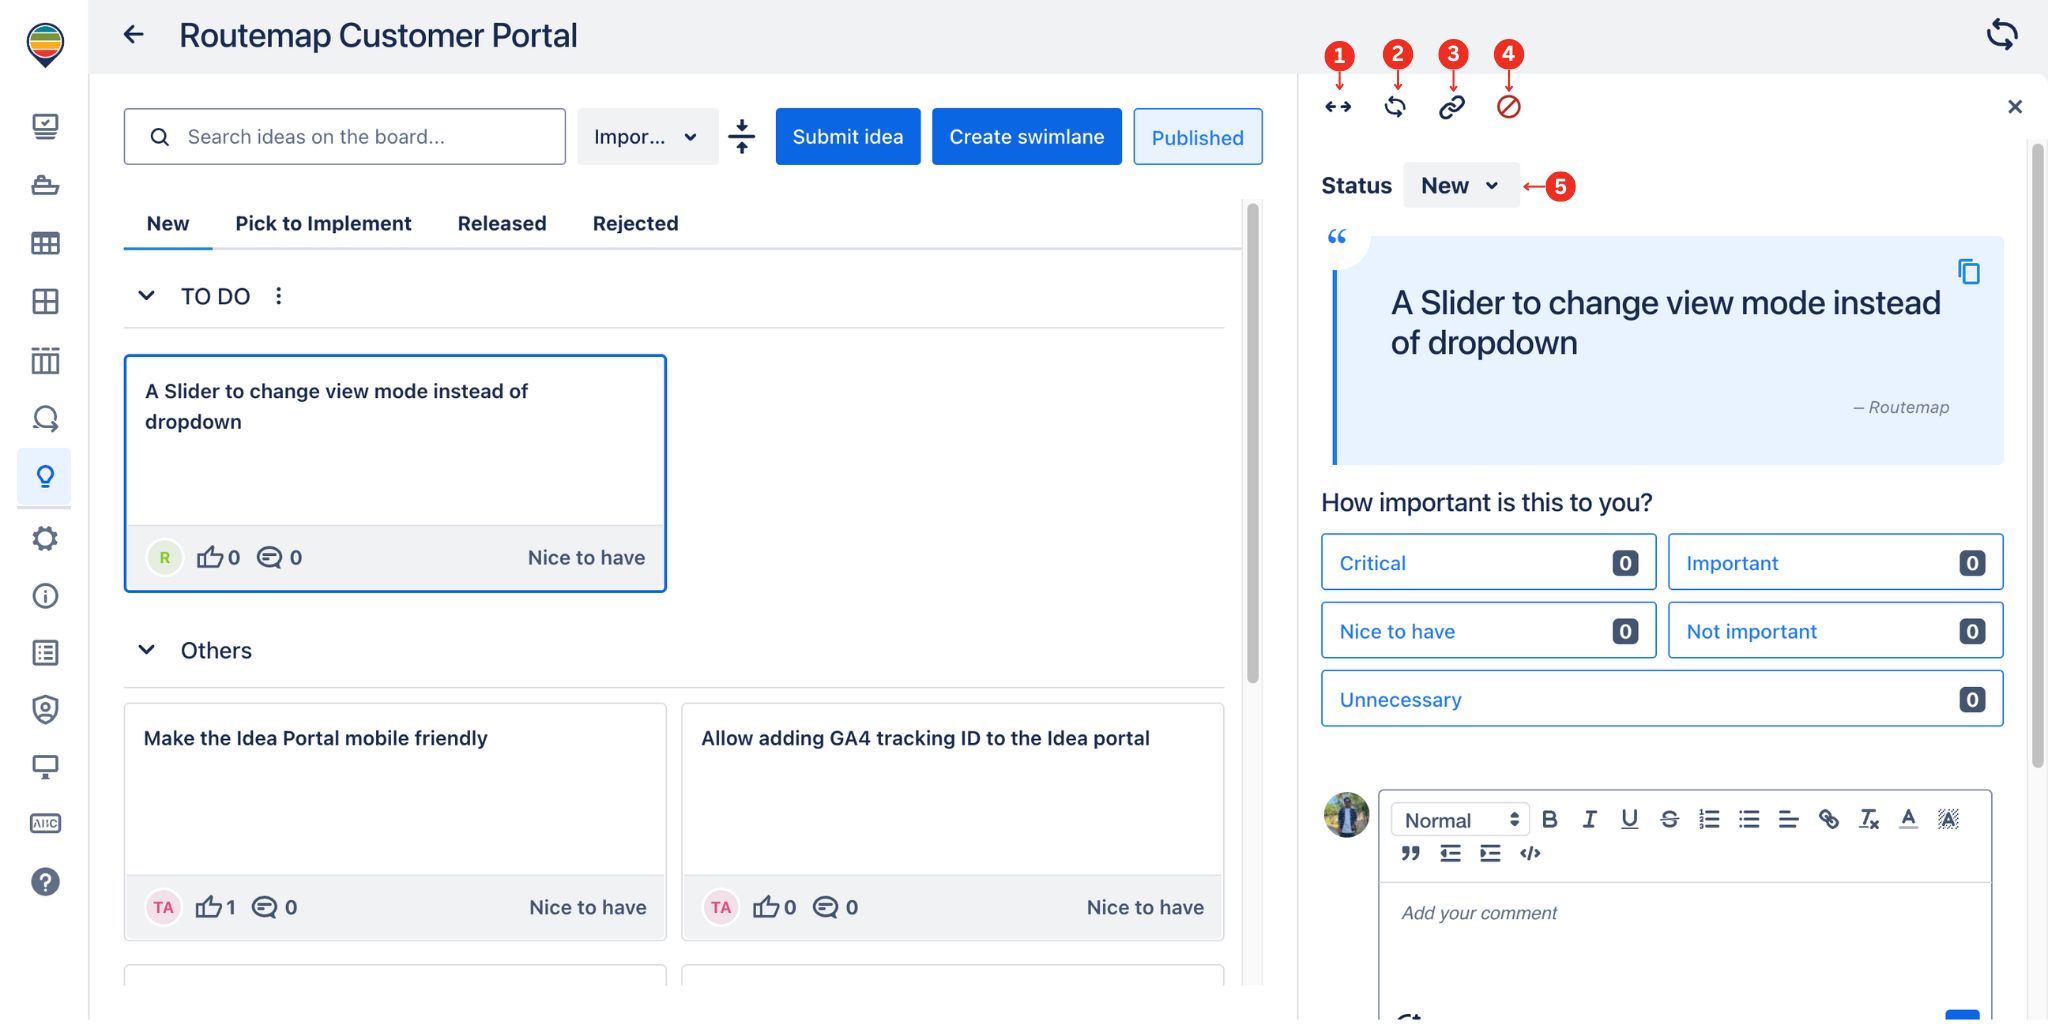
|
1 |
Expand |
Help open the idea details dialog bigger. |
|
2 |
Refresh |
Refresh the idea dialog to update new votes and comments. |
|
3 |
Link issue |
Allow linking new ideas to existing Jira issues or create a new issue for ideas. |
|
4 |
Reject |
Disapprove an idea and move it to the Rejected status. |
|
5 |
Change status |
Quickly change an idea’s status from New to Released. |
2. Planned status
Once an idea has been approved for development, you can now move it to the Planned section. You can do this by changing the status in the idea details.
At this point, you will see a dialog:
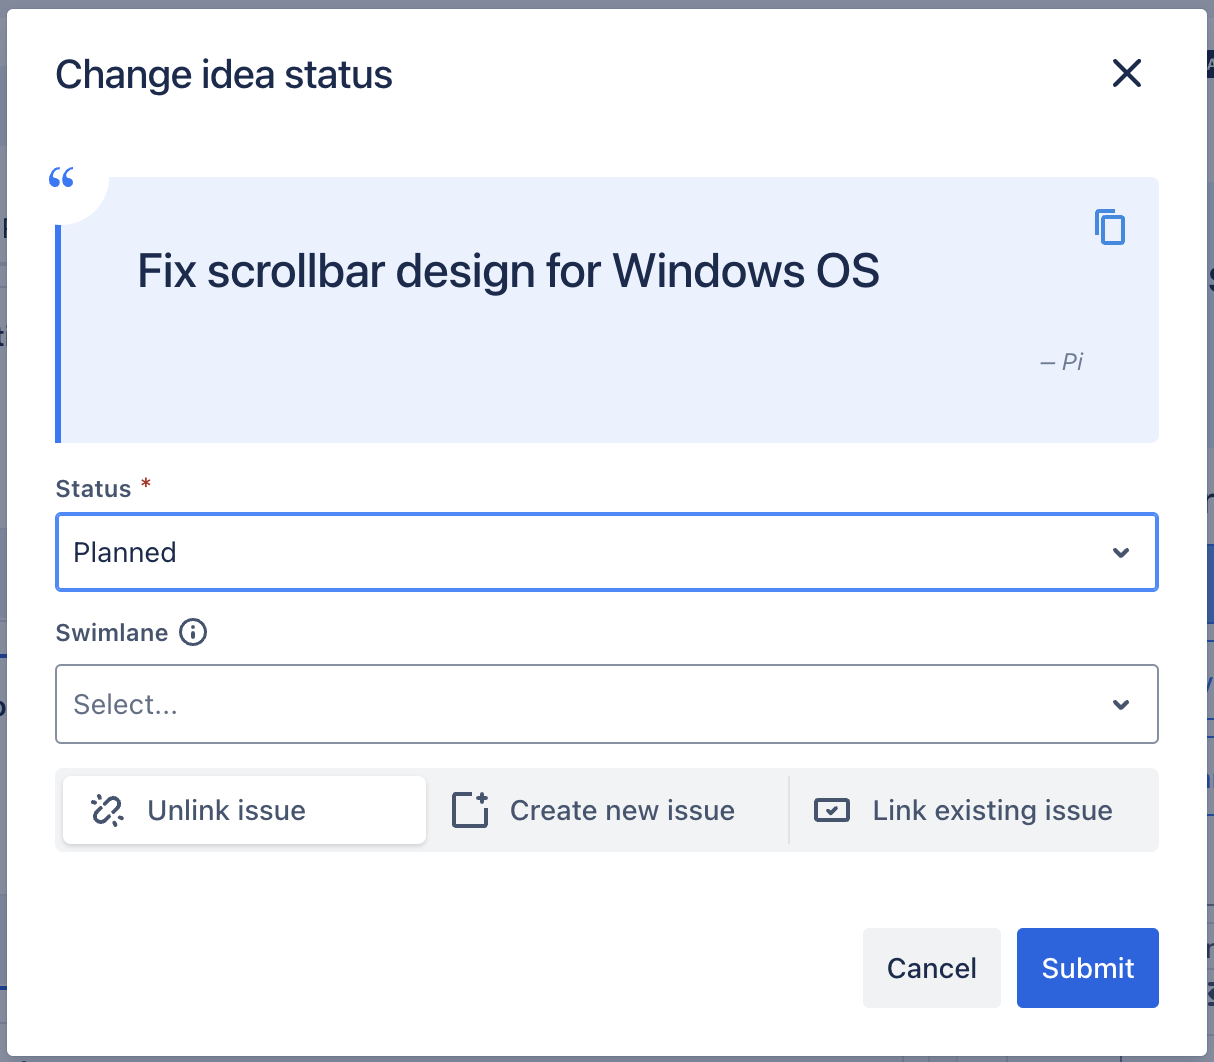
-
Status: this allows you to change the status of the new idea to either Planned or Released.
-
Swimlane: choose a swimlane that you created in the portal to help manage the approved ideas better.
-
Unlink issue: if this idea has already been linked to a Jira issue, you can clear that up by choosing unlink.
-
Create new issue: you can create a completely new Jira issue of a specific project in this Routemap board.
-
Link existing issue: you can also link an existing issue from a project to this idea.
When done, you can go ahead and submit the idea to Planned.
In this board, you can easily keep track of all the ideas approved for development.
Once again, you can click each idea to open its details dialog where you can manage its votes, comments, and more.
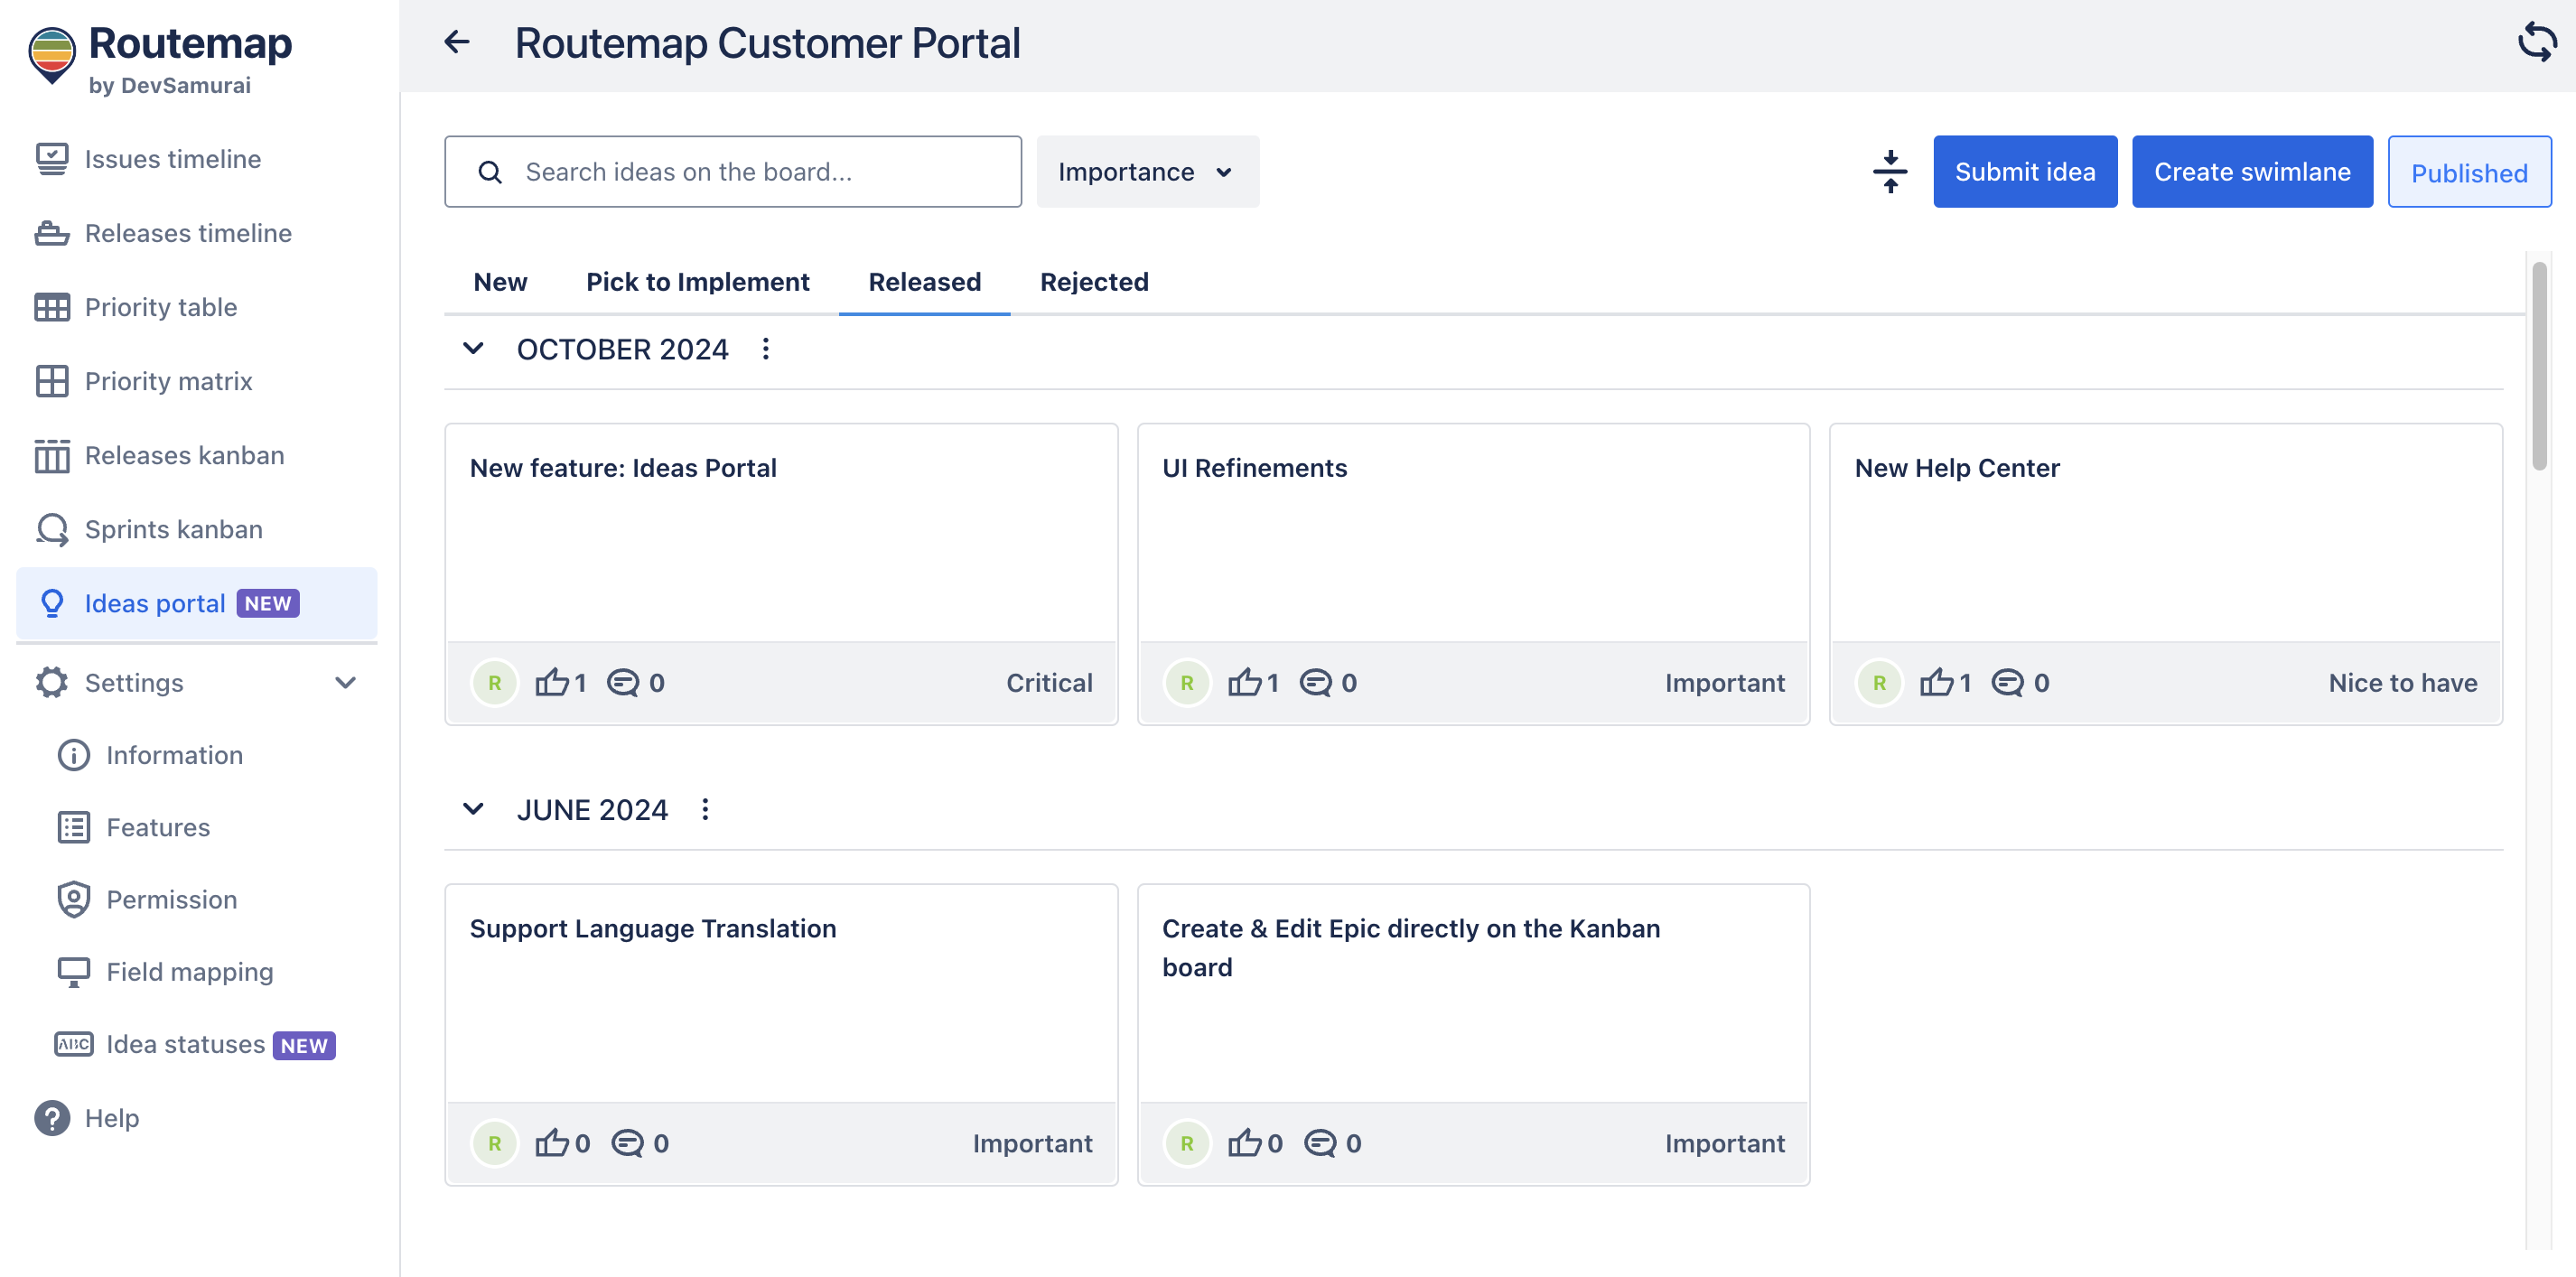
3. Released status
When your planned new ideas have reached the final stage of development or already become a feature, you can move this idea to the “Released” status. This will let every team member know the current progress of your product.
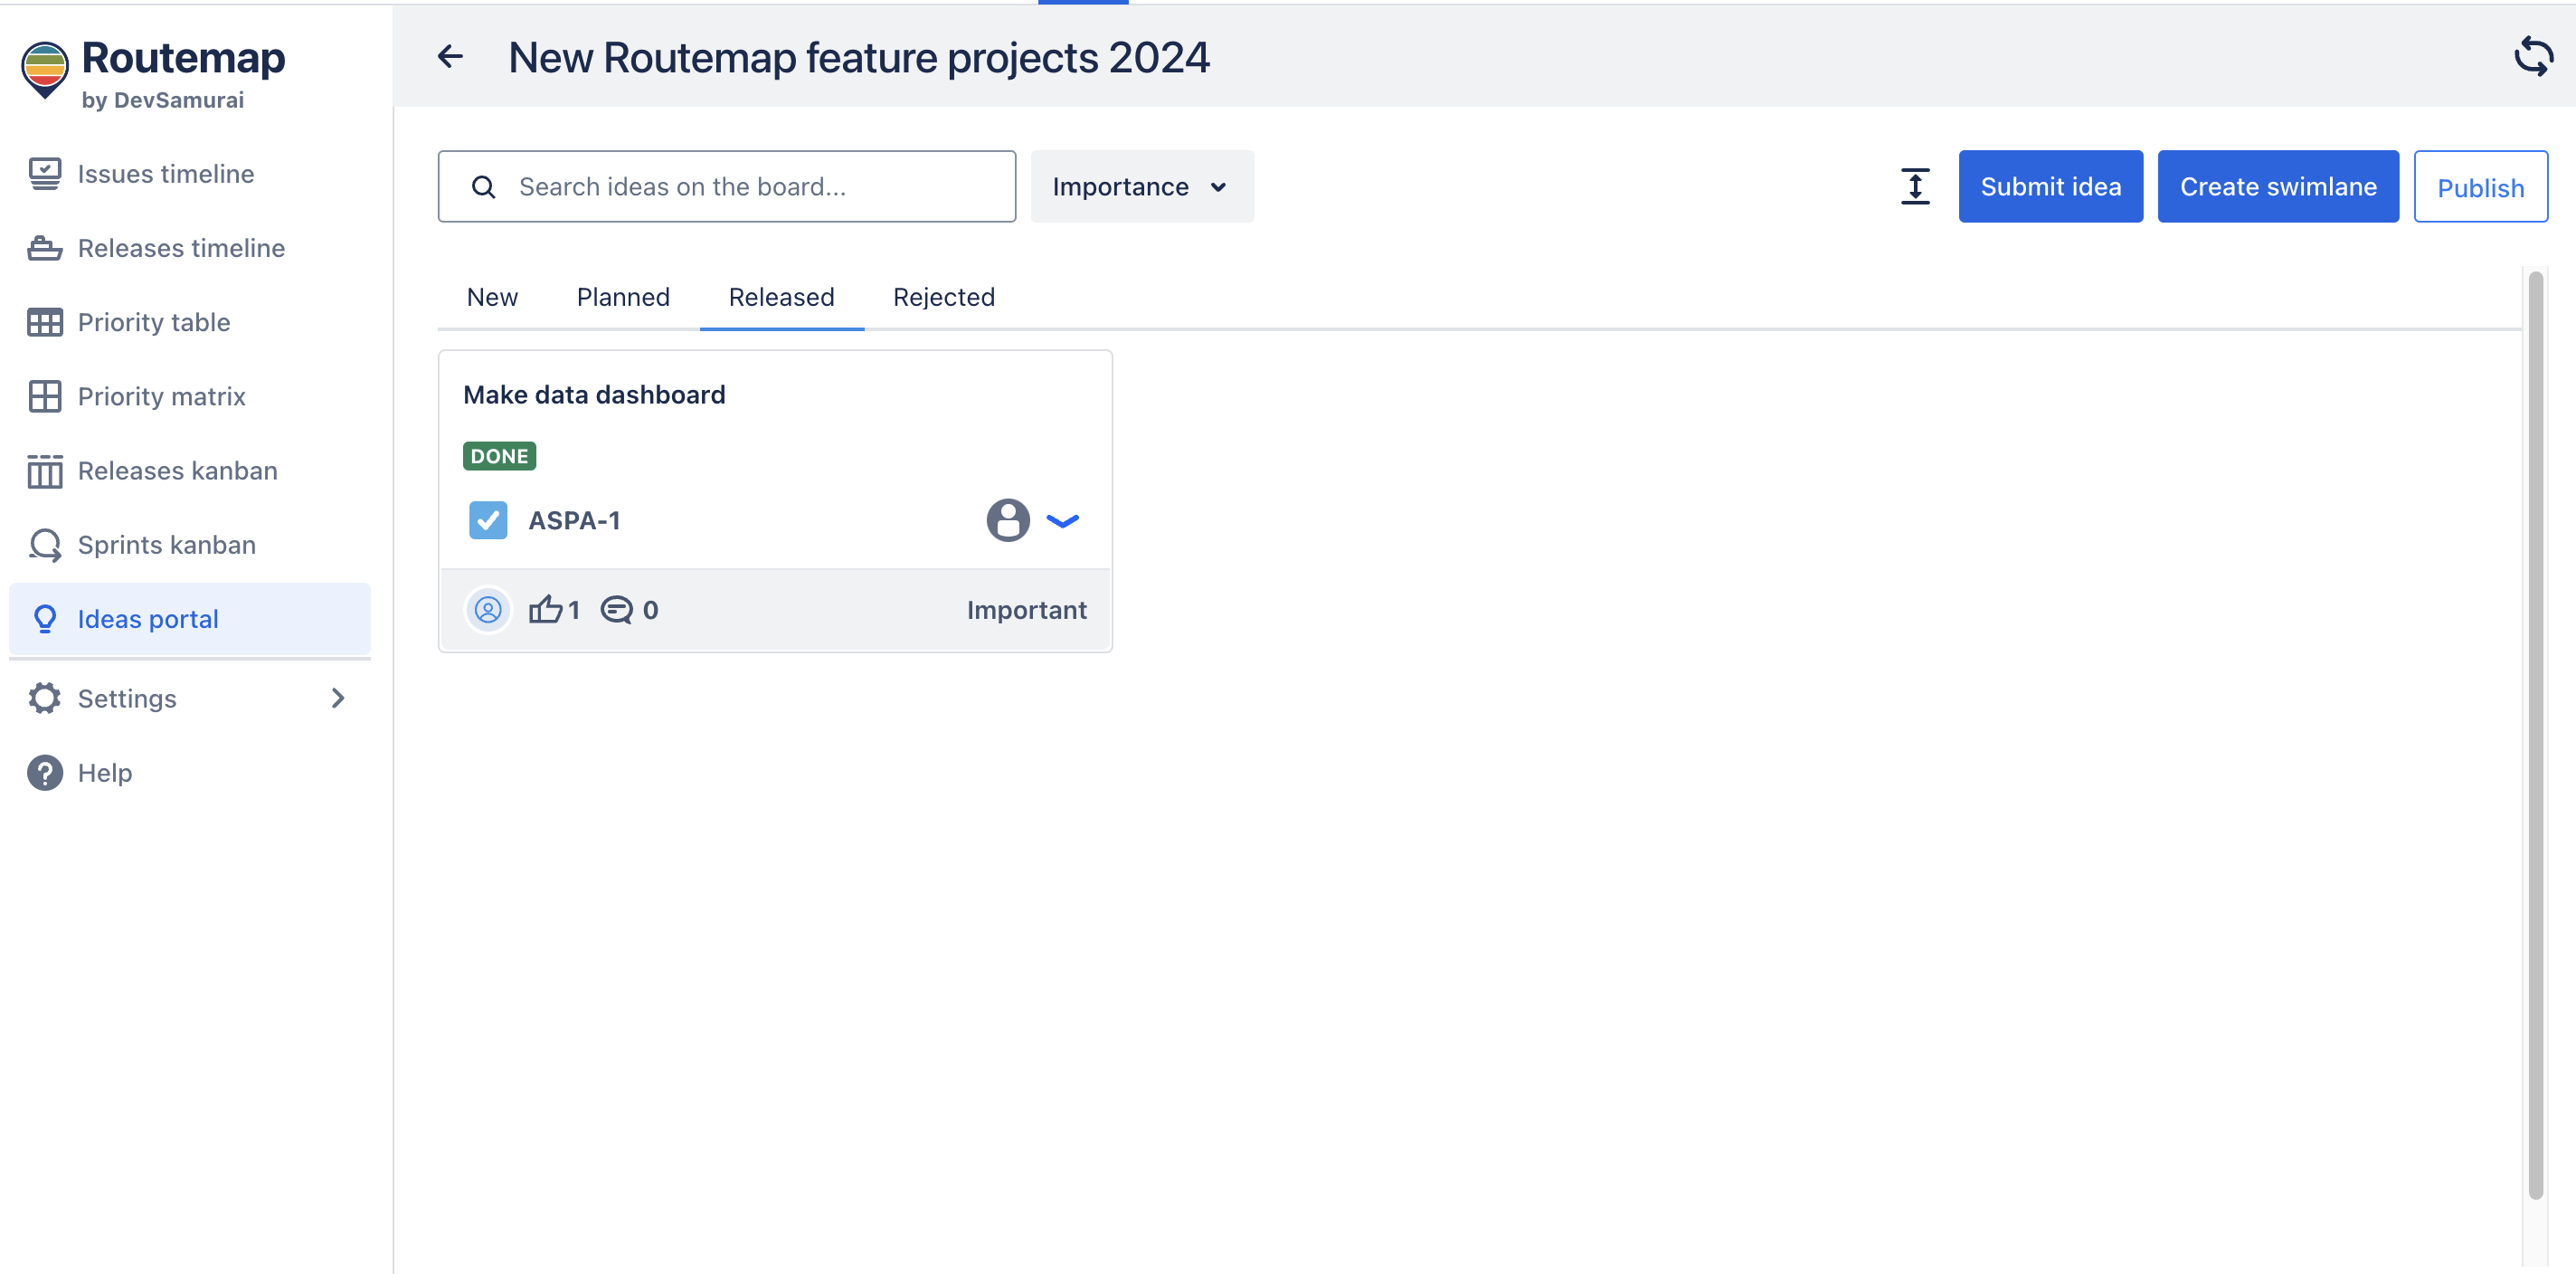
If you made this portal publicly visible to external users, they can also get updated on the idea statuses.
4. Rejected status
In case you find some ideas underwhelming and unnecessary to the development, you can reject and remove them from the “New” status.
That idea will then be moved to “Reject.”
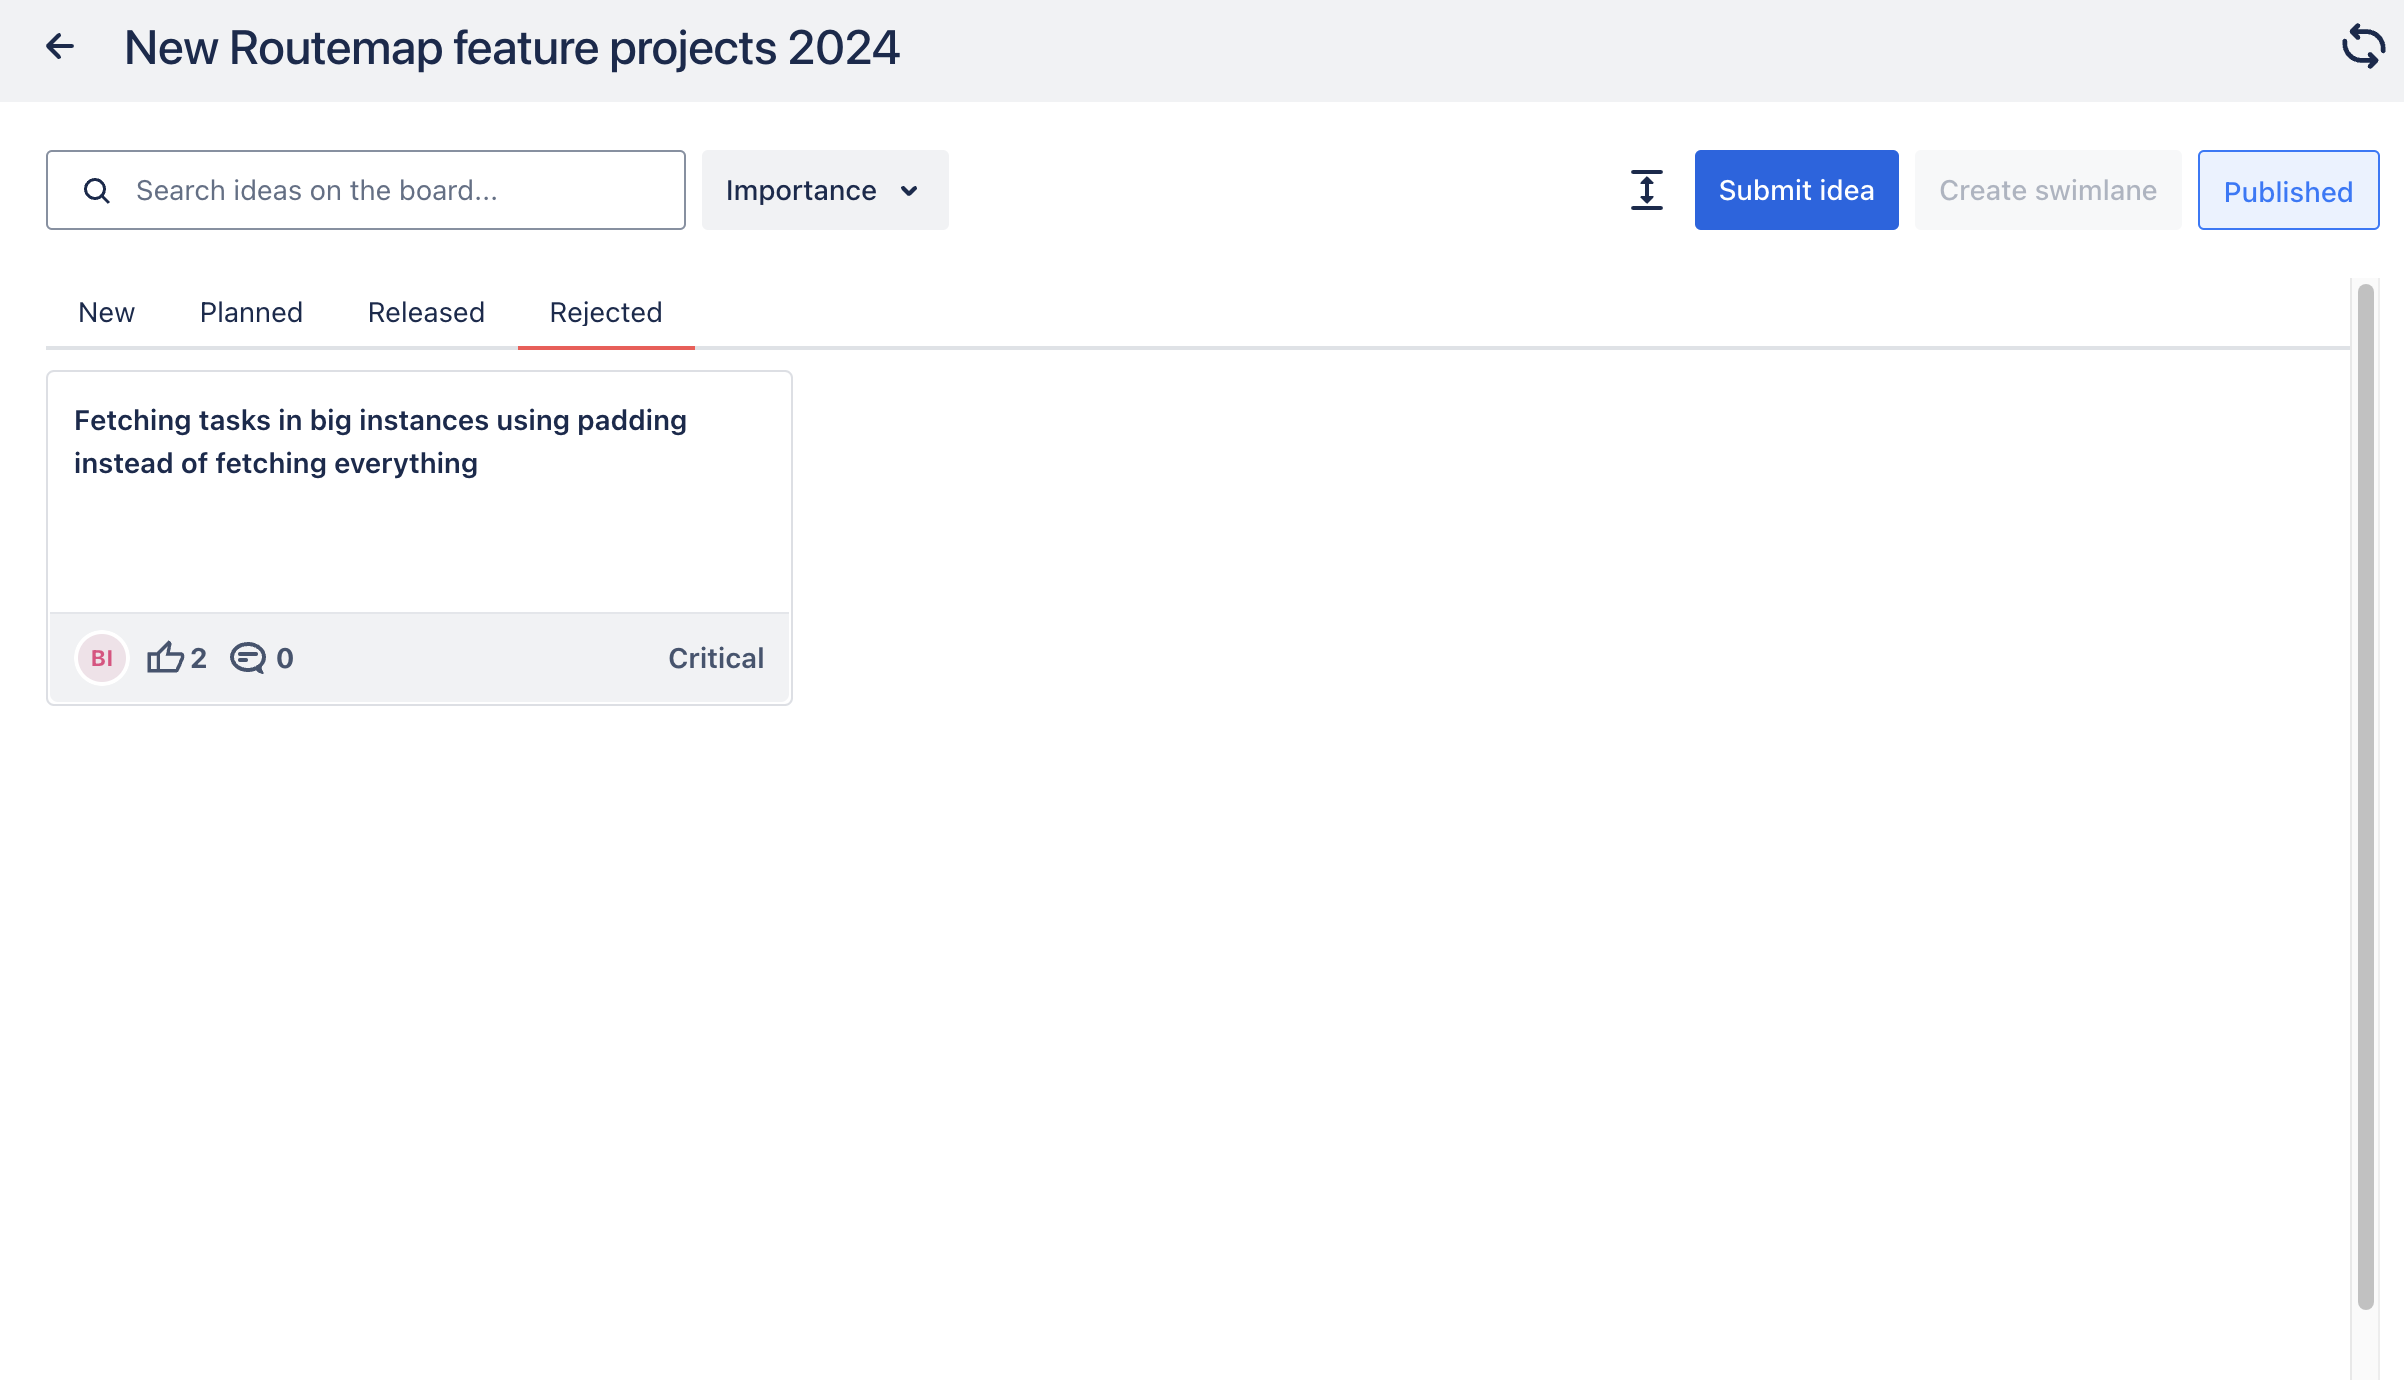
Here, you can always restore the idea to the “New” status or delete it forever from your portal while in the idea details.

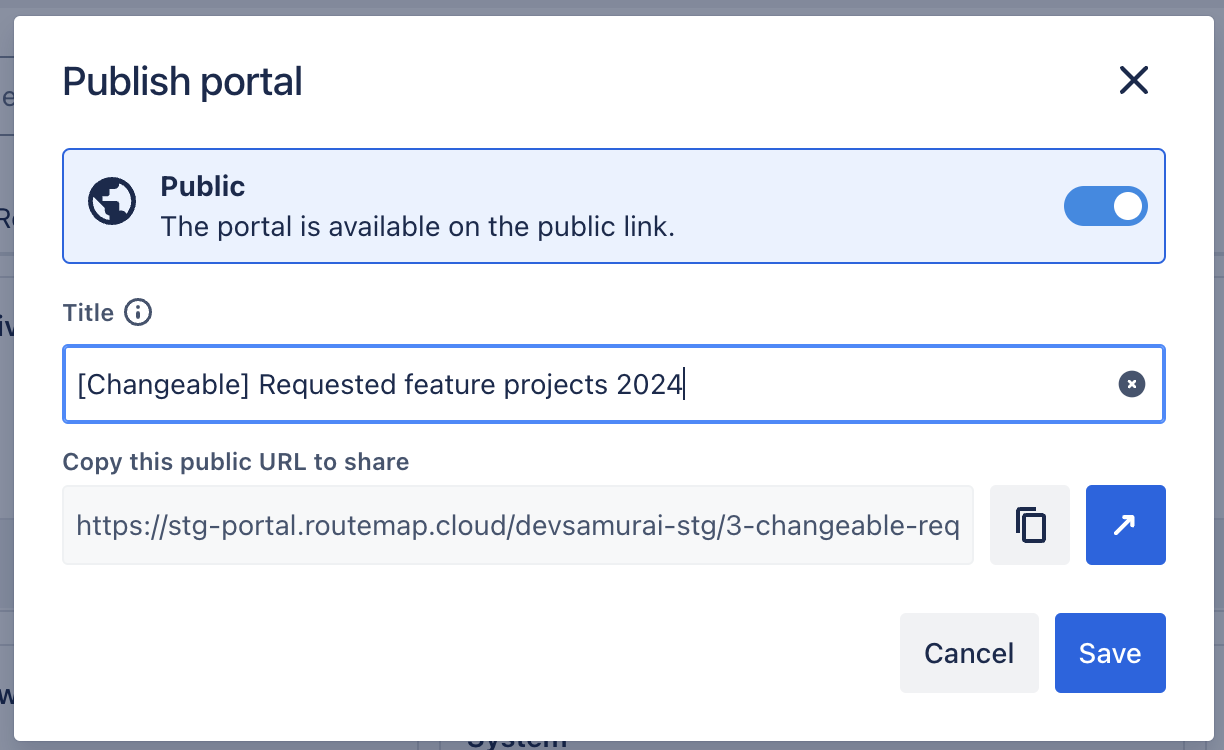
Share your Collect Ideas portal
Now we should move on to the core of this feature. It is the ability to share this collecting idea portal publicly so you can get all the most demanded ideas from your target consumers or audience.
All you have to do is locate the Publish button, toggle on the share option, and that’s it. You can copy the shareable link and use it to get more ideas from your consumers or anyone else.

When publishing this Ideas portal, you can change its title to keep your project’s name confidential.