.png)
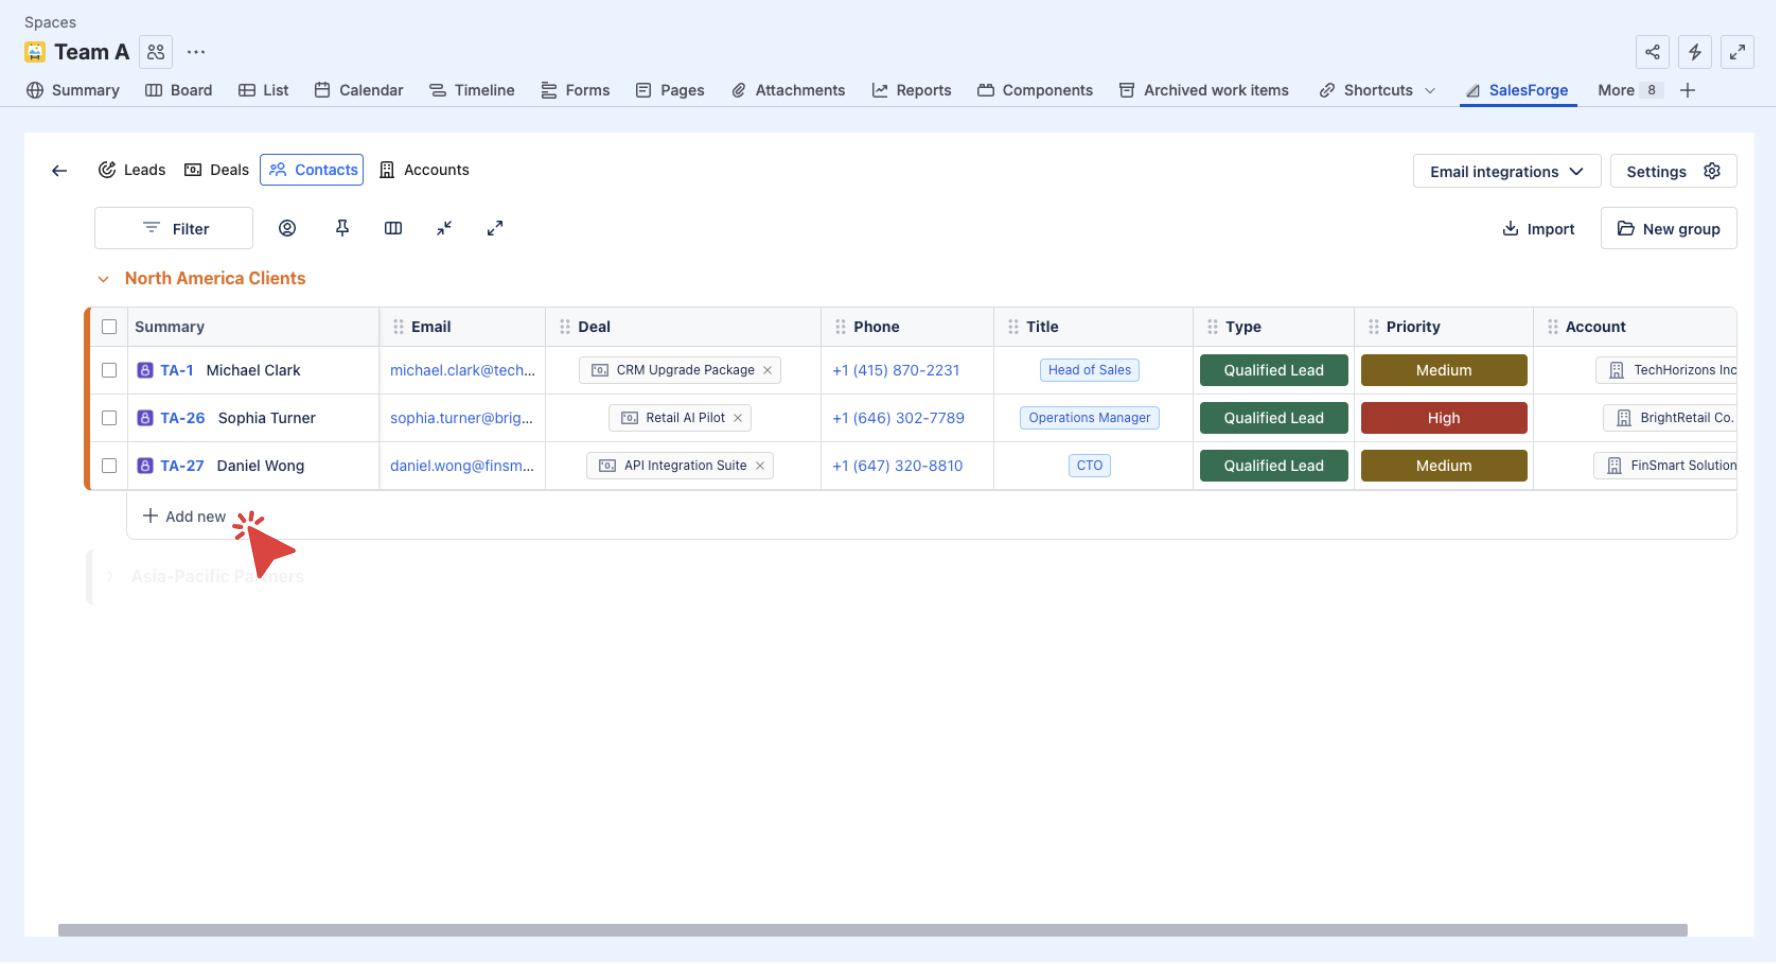
There are two ways to create new Contacts:
(1) Manual Input:
Click on ➕ Add New at the bottom of any group to create a new Contact. Each Contact acts as a Jira work item, holding all the key details such as Account, Email, Phone, Deal, Title, and Priority.
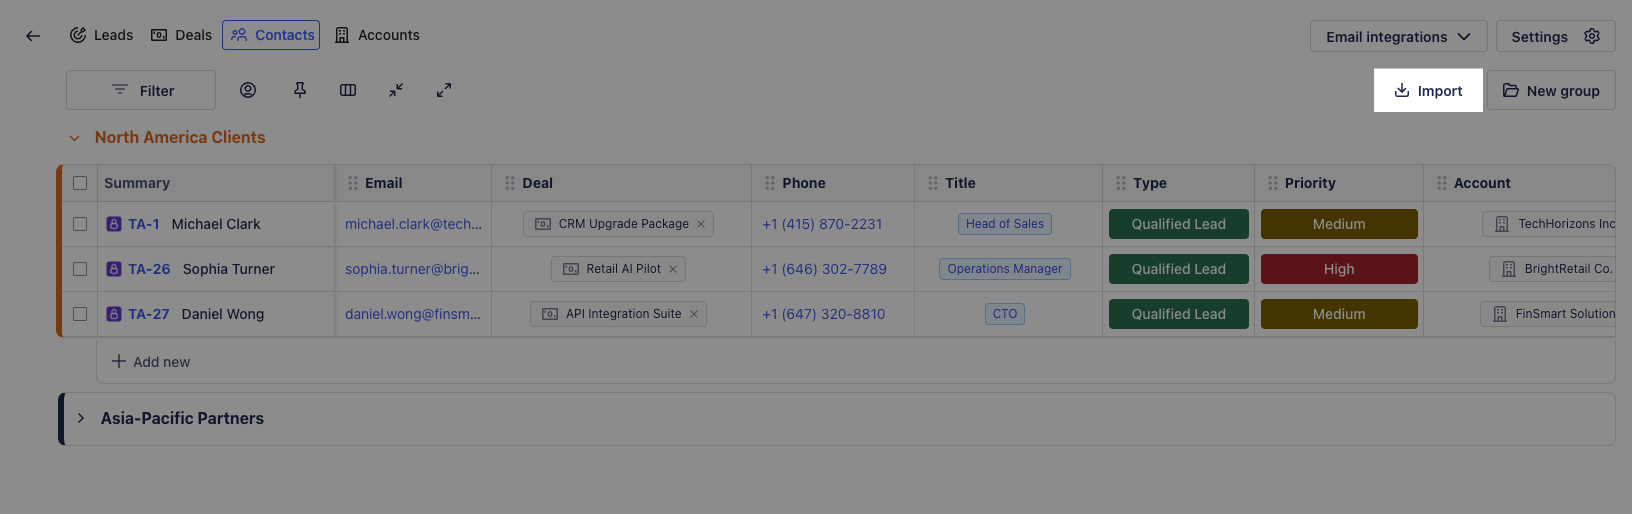
(2) Bulk Import:
-
Upload your CSV file
-
Click on

-
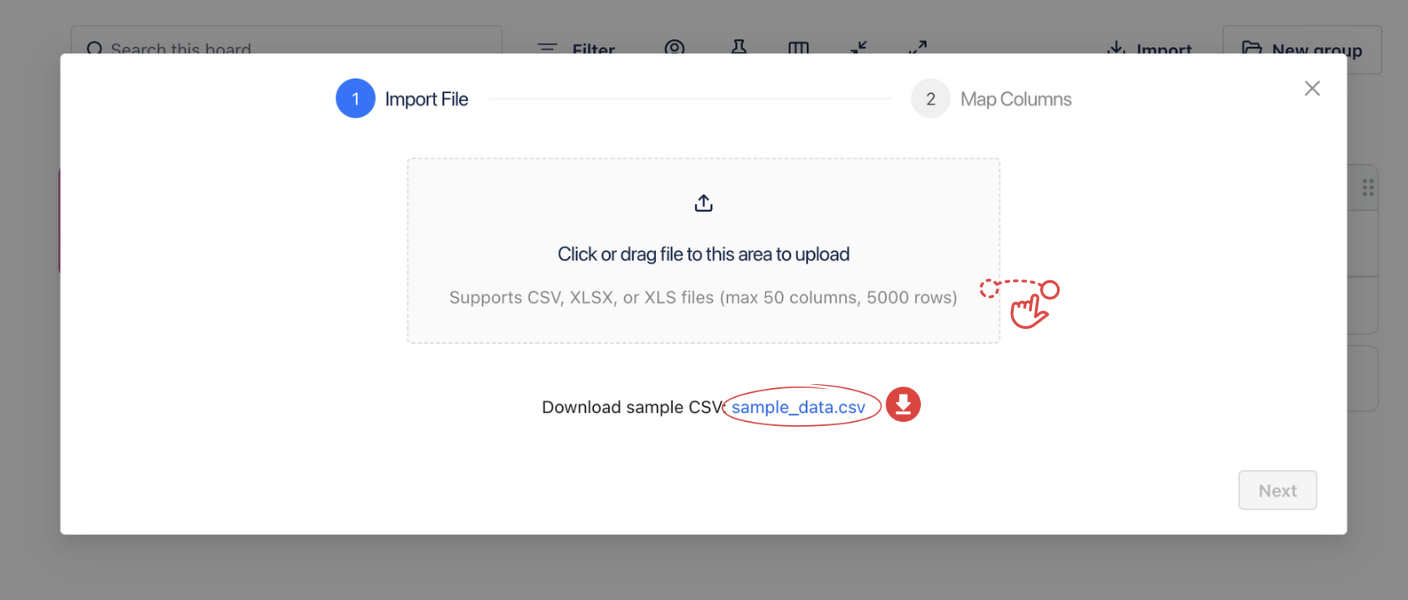
Drag and drop your CSV file into the area provided. Please review the sample CSV file provided in the Import dialog to ensure your file has the correct format and values before uploading.
-
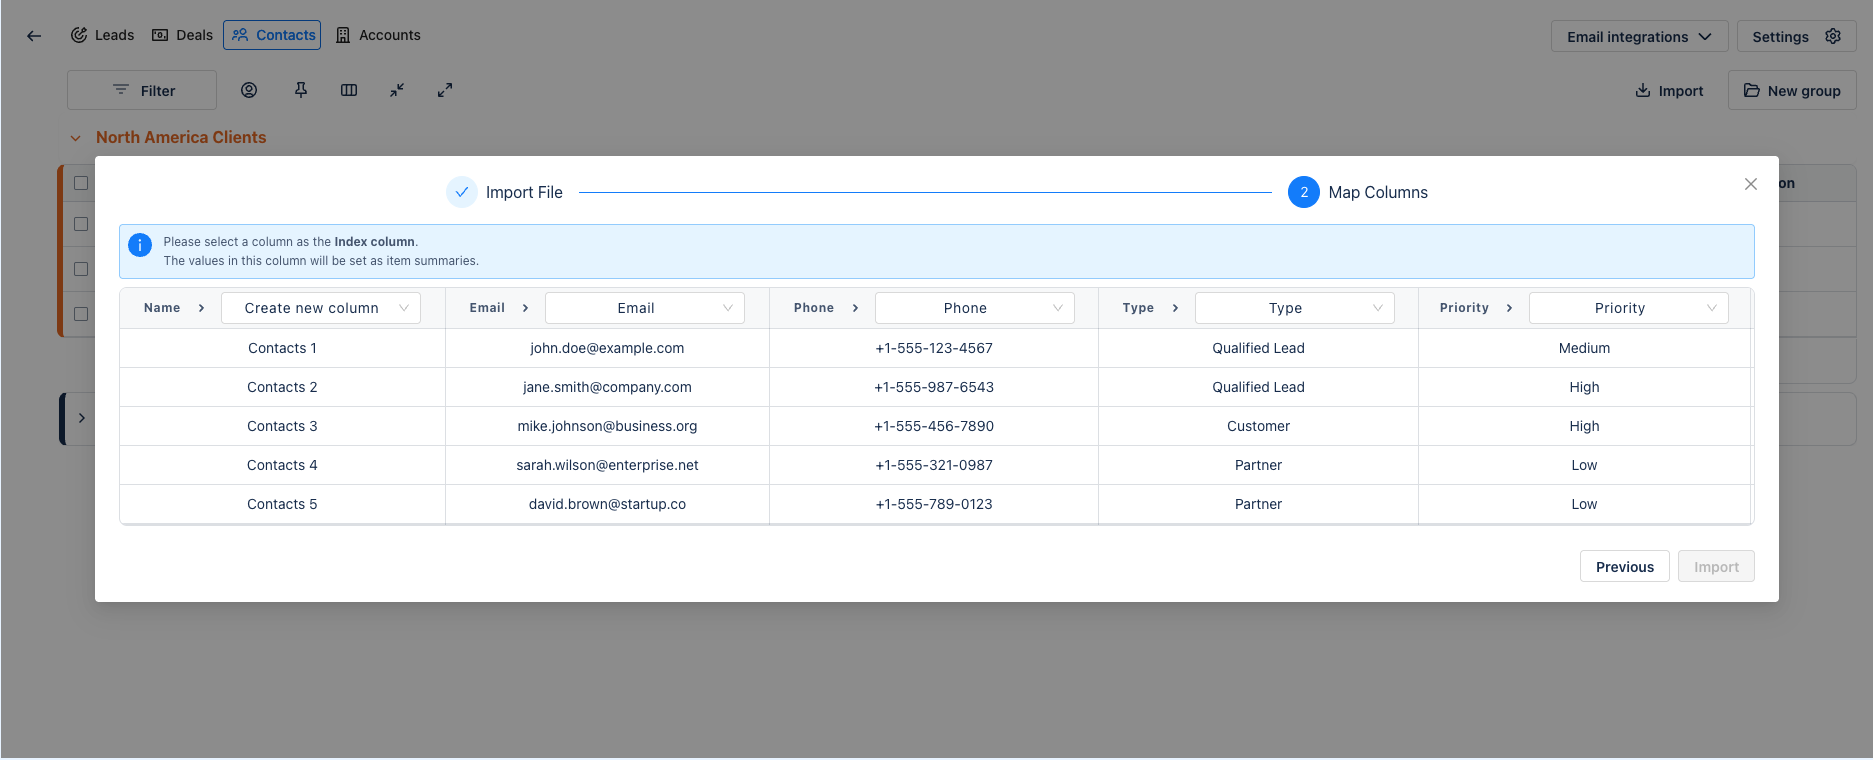
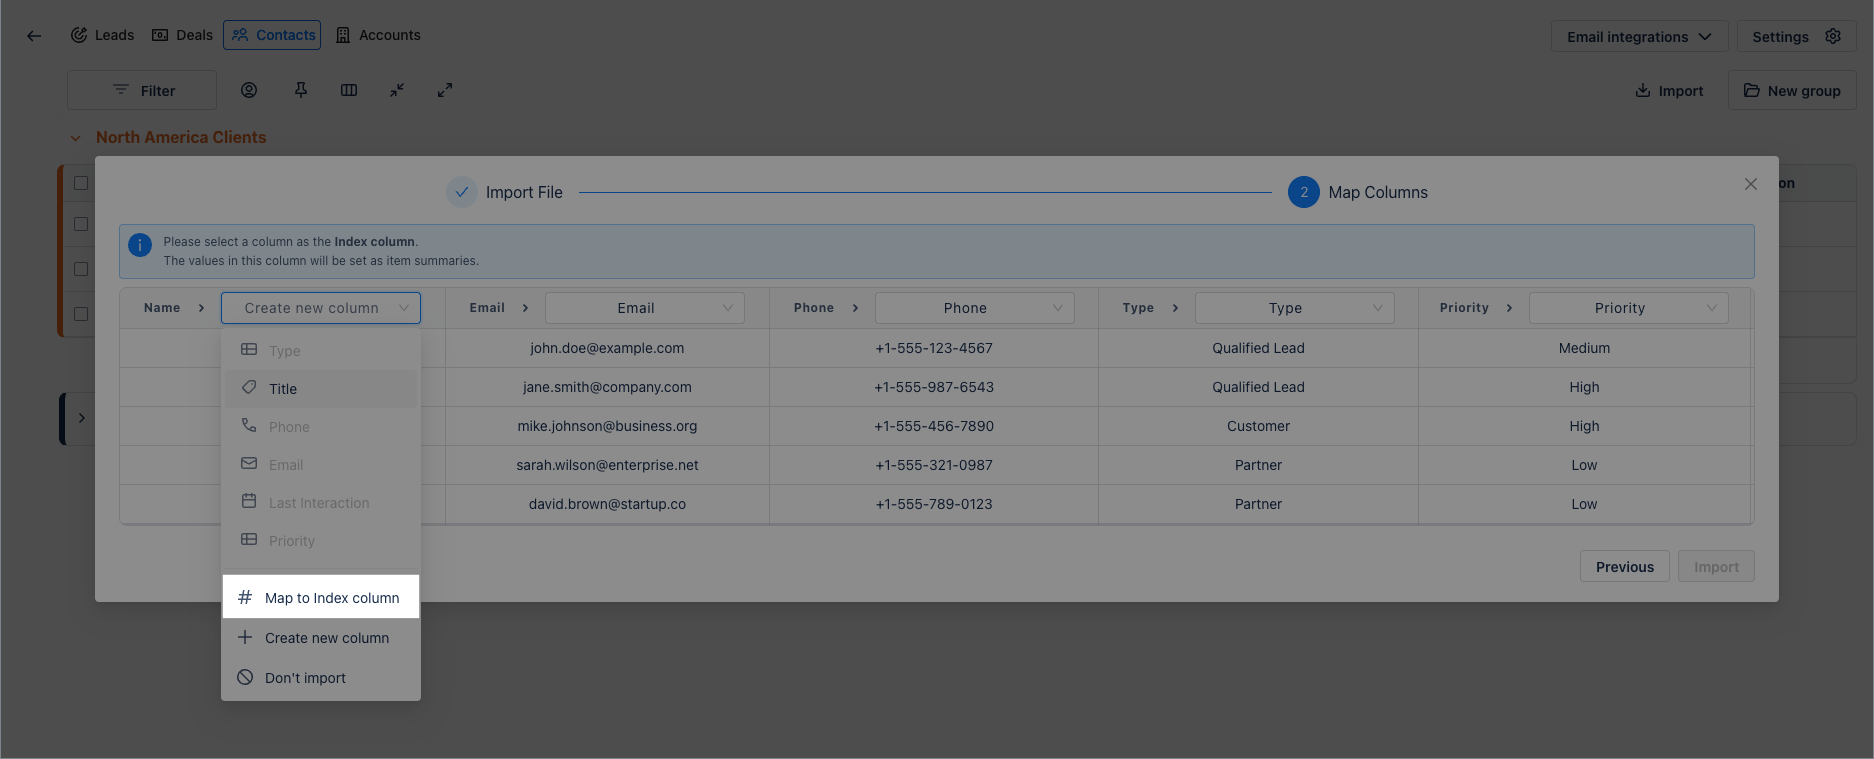
Column Mapping
-
Once your file is uploaded, you will be prompted to map your columns. This step ensures that the data from your CSV file is correctly assigned to the corresponding fields in Sales & CRM for Jira.
-
Each column from your file appears on the left. Use the dropdown menus on the right to select the matching Sales & CRM column type (e.g., Email, Phone, Type, Priority).
-
While mapping the data in the CSV file to the system, you must select one column as the Index Column.
-
What is an Index Column?
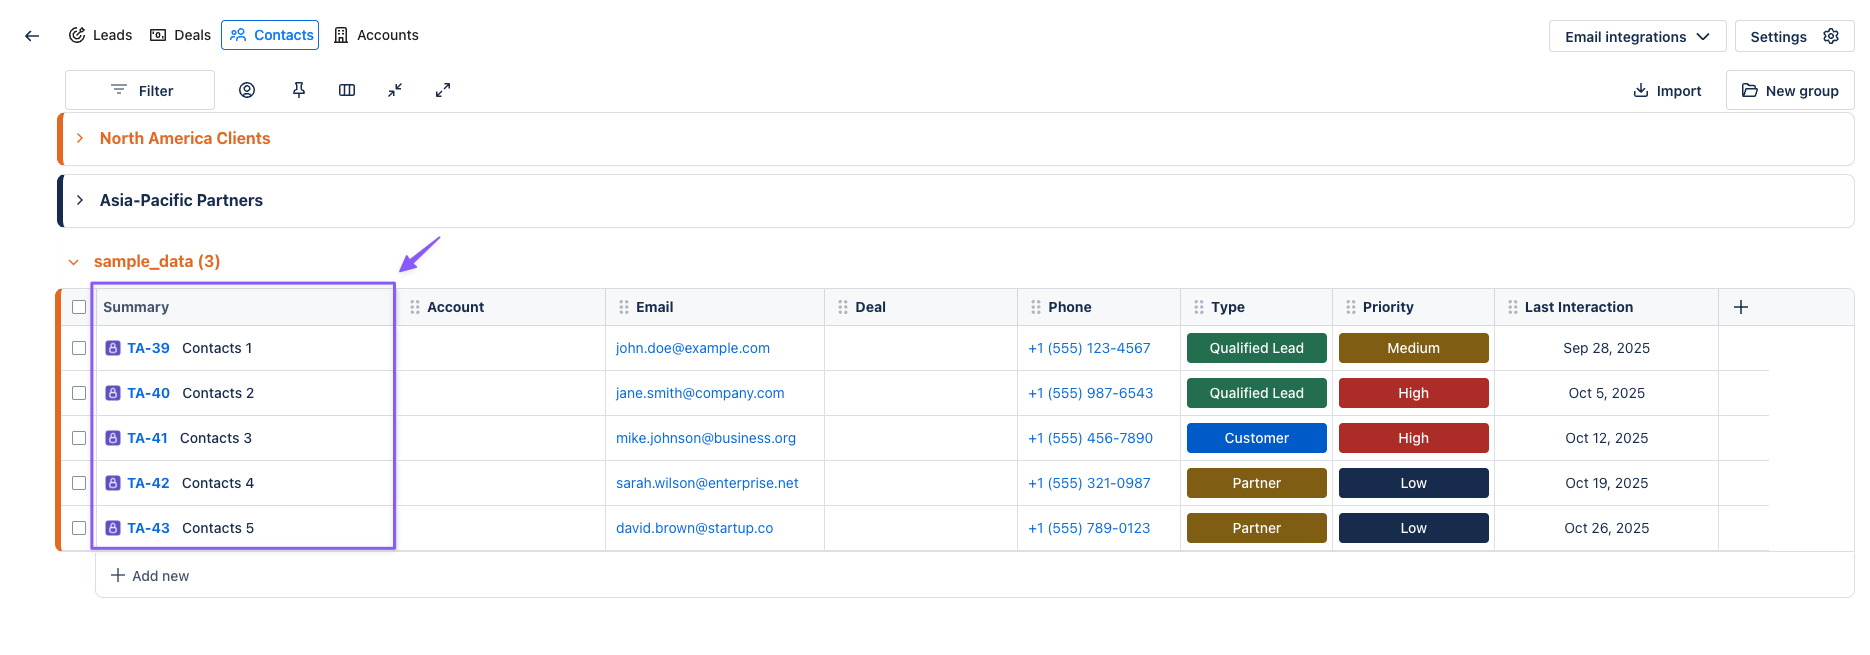
The Index Column represents a Contact’s main identifier and will appear as the summary of your Jira work item. Ideally, it should be mapped with the Contact Name column in your CSV file.

For example, if your CSV file contains a column named Contact Name with entries like Contacts 1, Contacts 2, or Contacts 3, mapping this column as the Index Column will make these names appear as the summary of each imported Contact.
-
Create and Remove Column (if any)
-
If your file contains new information not currently in your board, you can create a new column by selecting

-
If a column is not needed, choose

-
-
Complete Import
-
After mapping all necessary columns and confirming the Index Column, click

-