.png)
Configuring field mapping ensures that Jira fields align correctly with TeamBoard ProScheduler fields. By adding the right Jira fields to your project, you enable seamless task planning, time tracking, and resource management within TeamBoard ProScheduler.
Adding fields to work item screens in Jira differs between project types: company-managed projects use screens and schemes, while team-managed projects offer a simpler, project-specific method.
To check whether your project is team-managed or company-managed, select More actions (•••) next to the project name in either the header or the sidebar. At the bottom of the menu that opens, your project details will be shown.
Company-managed projects
To update screens, you must have Administer Jira rights
Adding a field to a screen
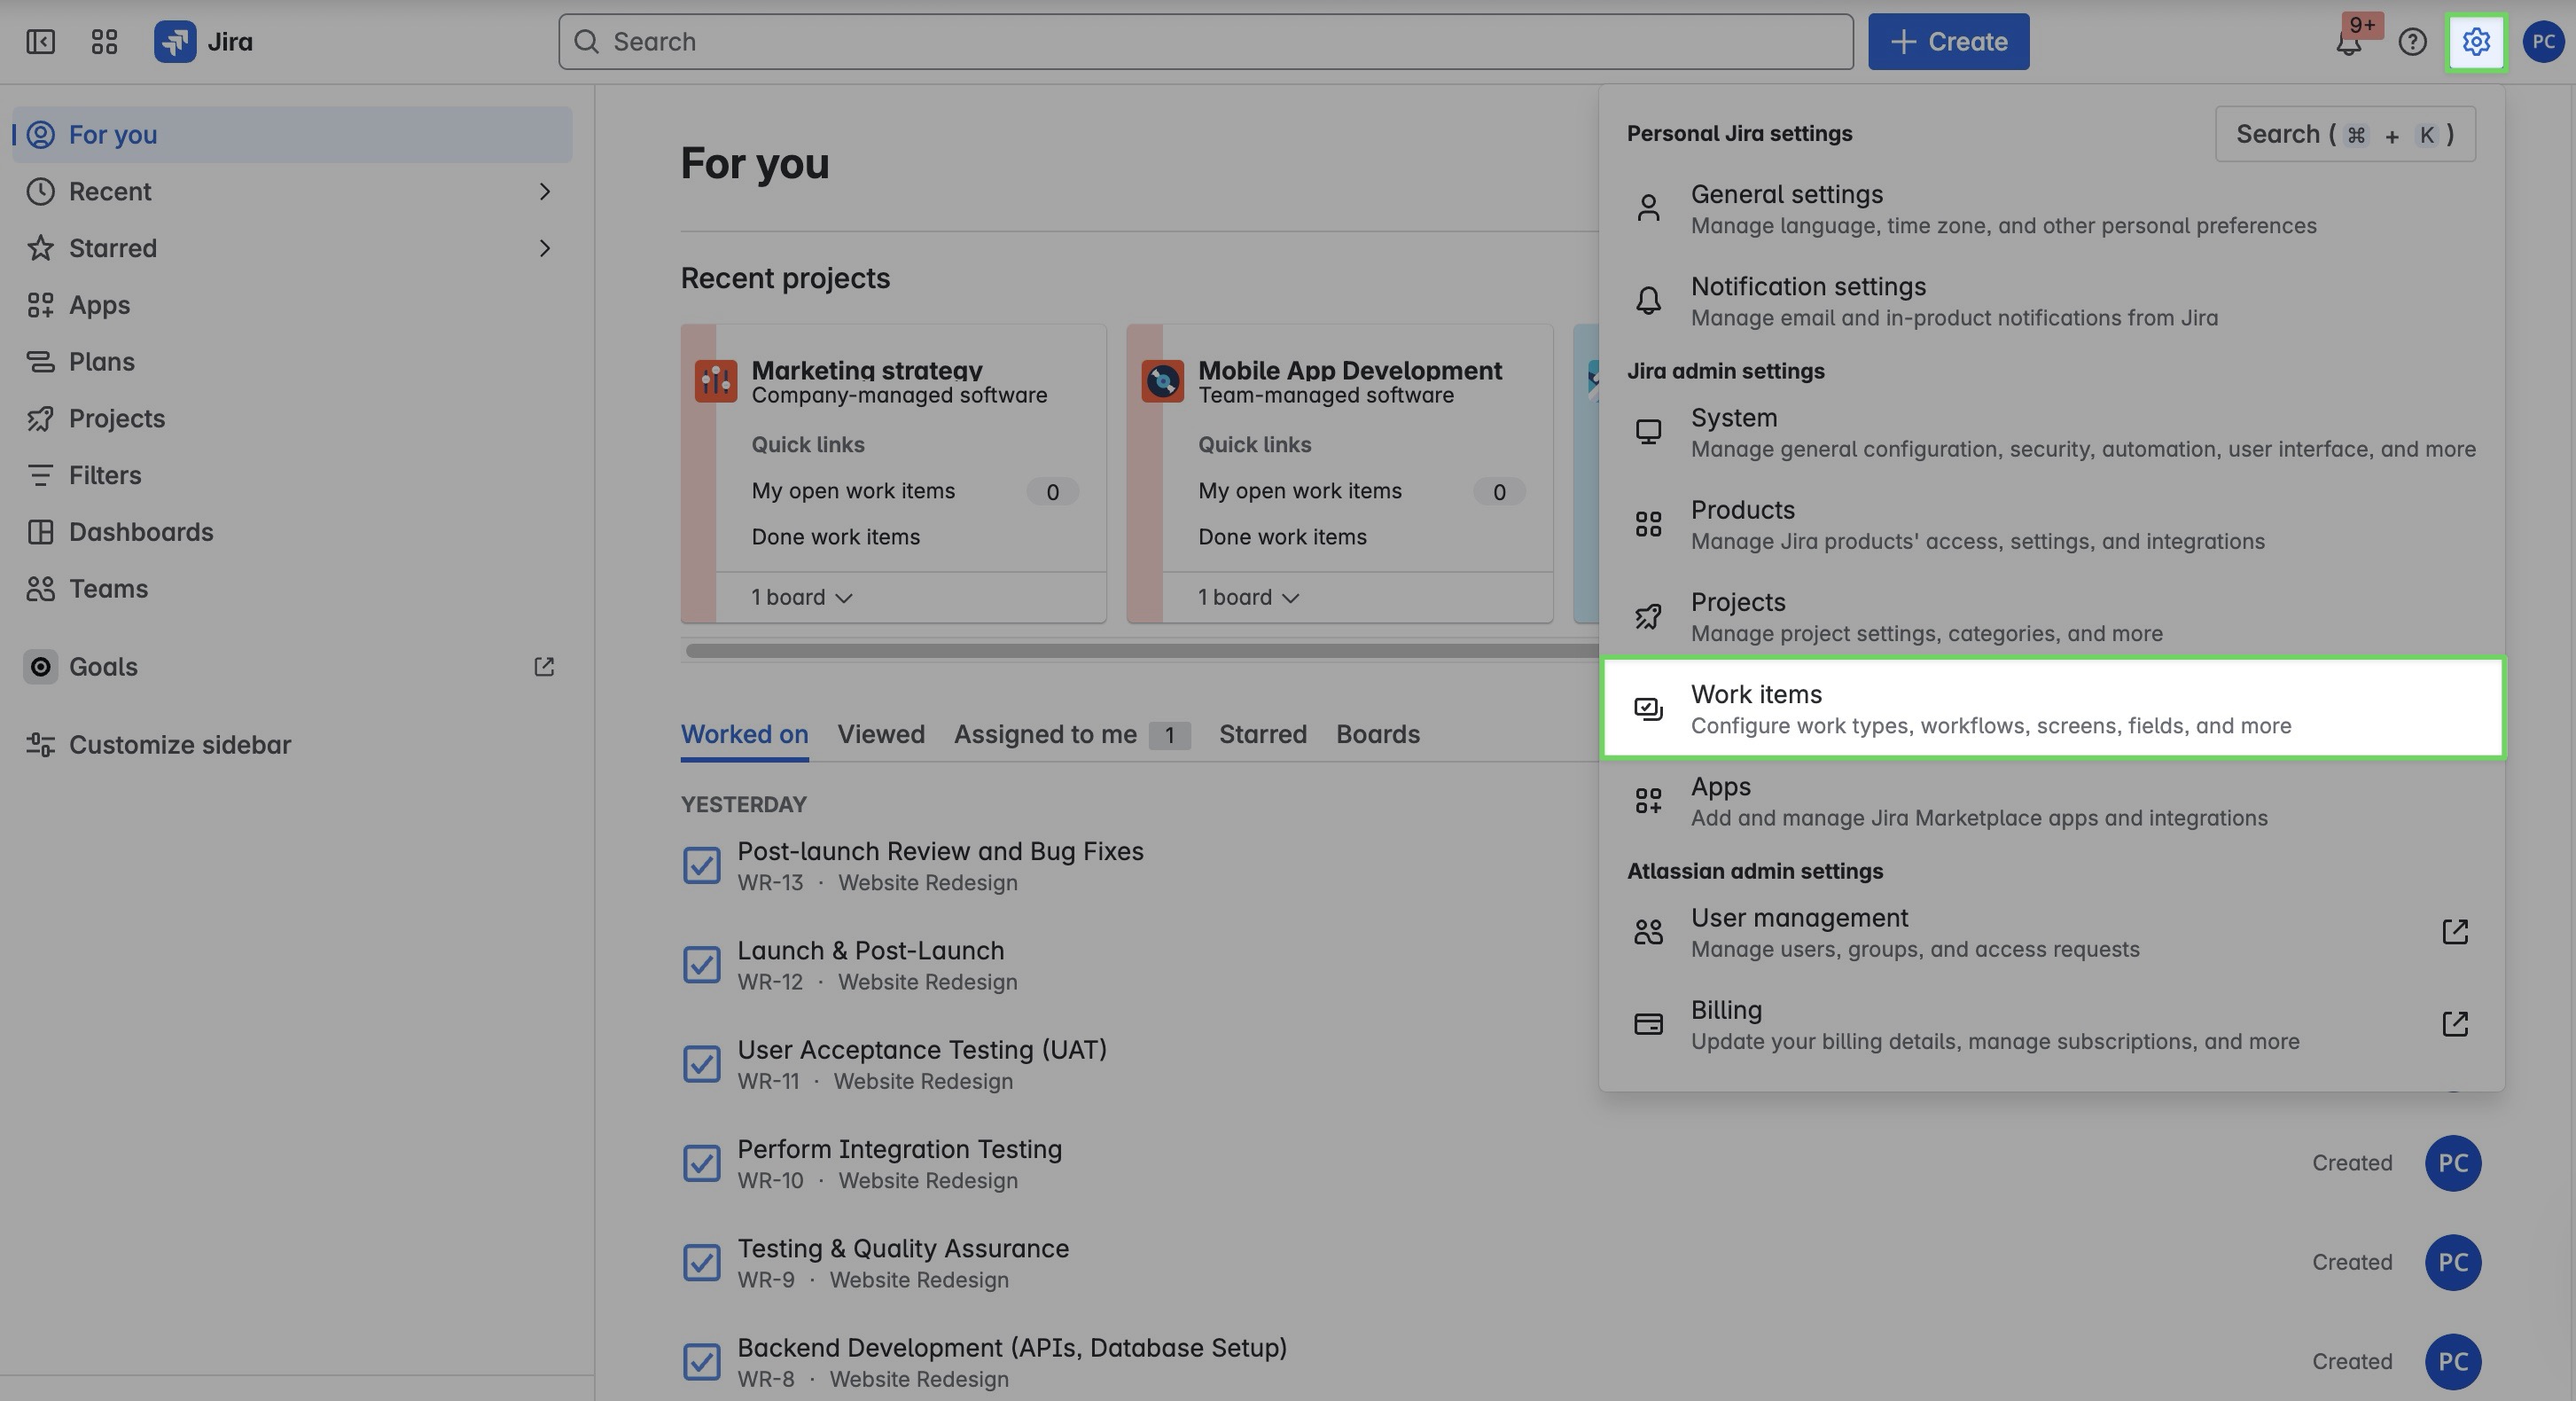
step 1 Navigate to ⚙️ settings from the top right screen > Work items.
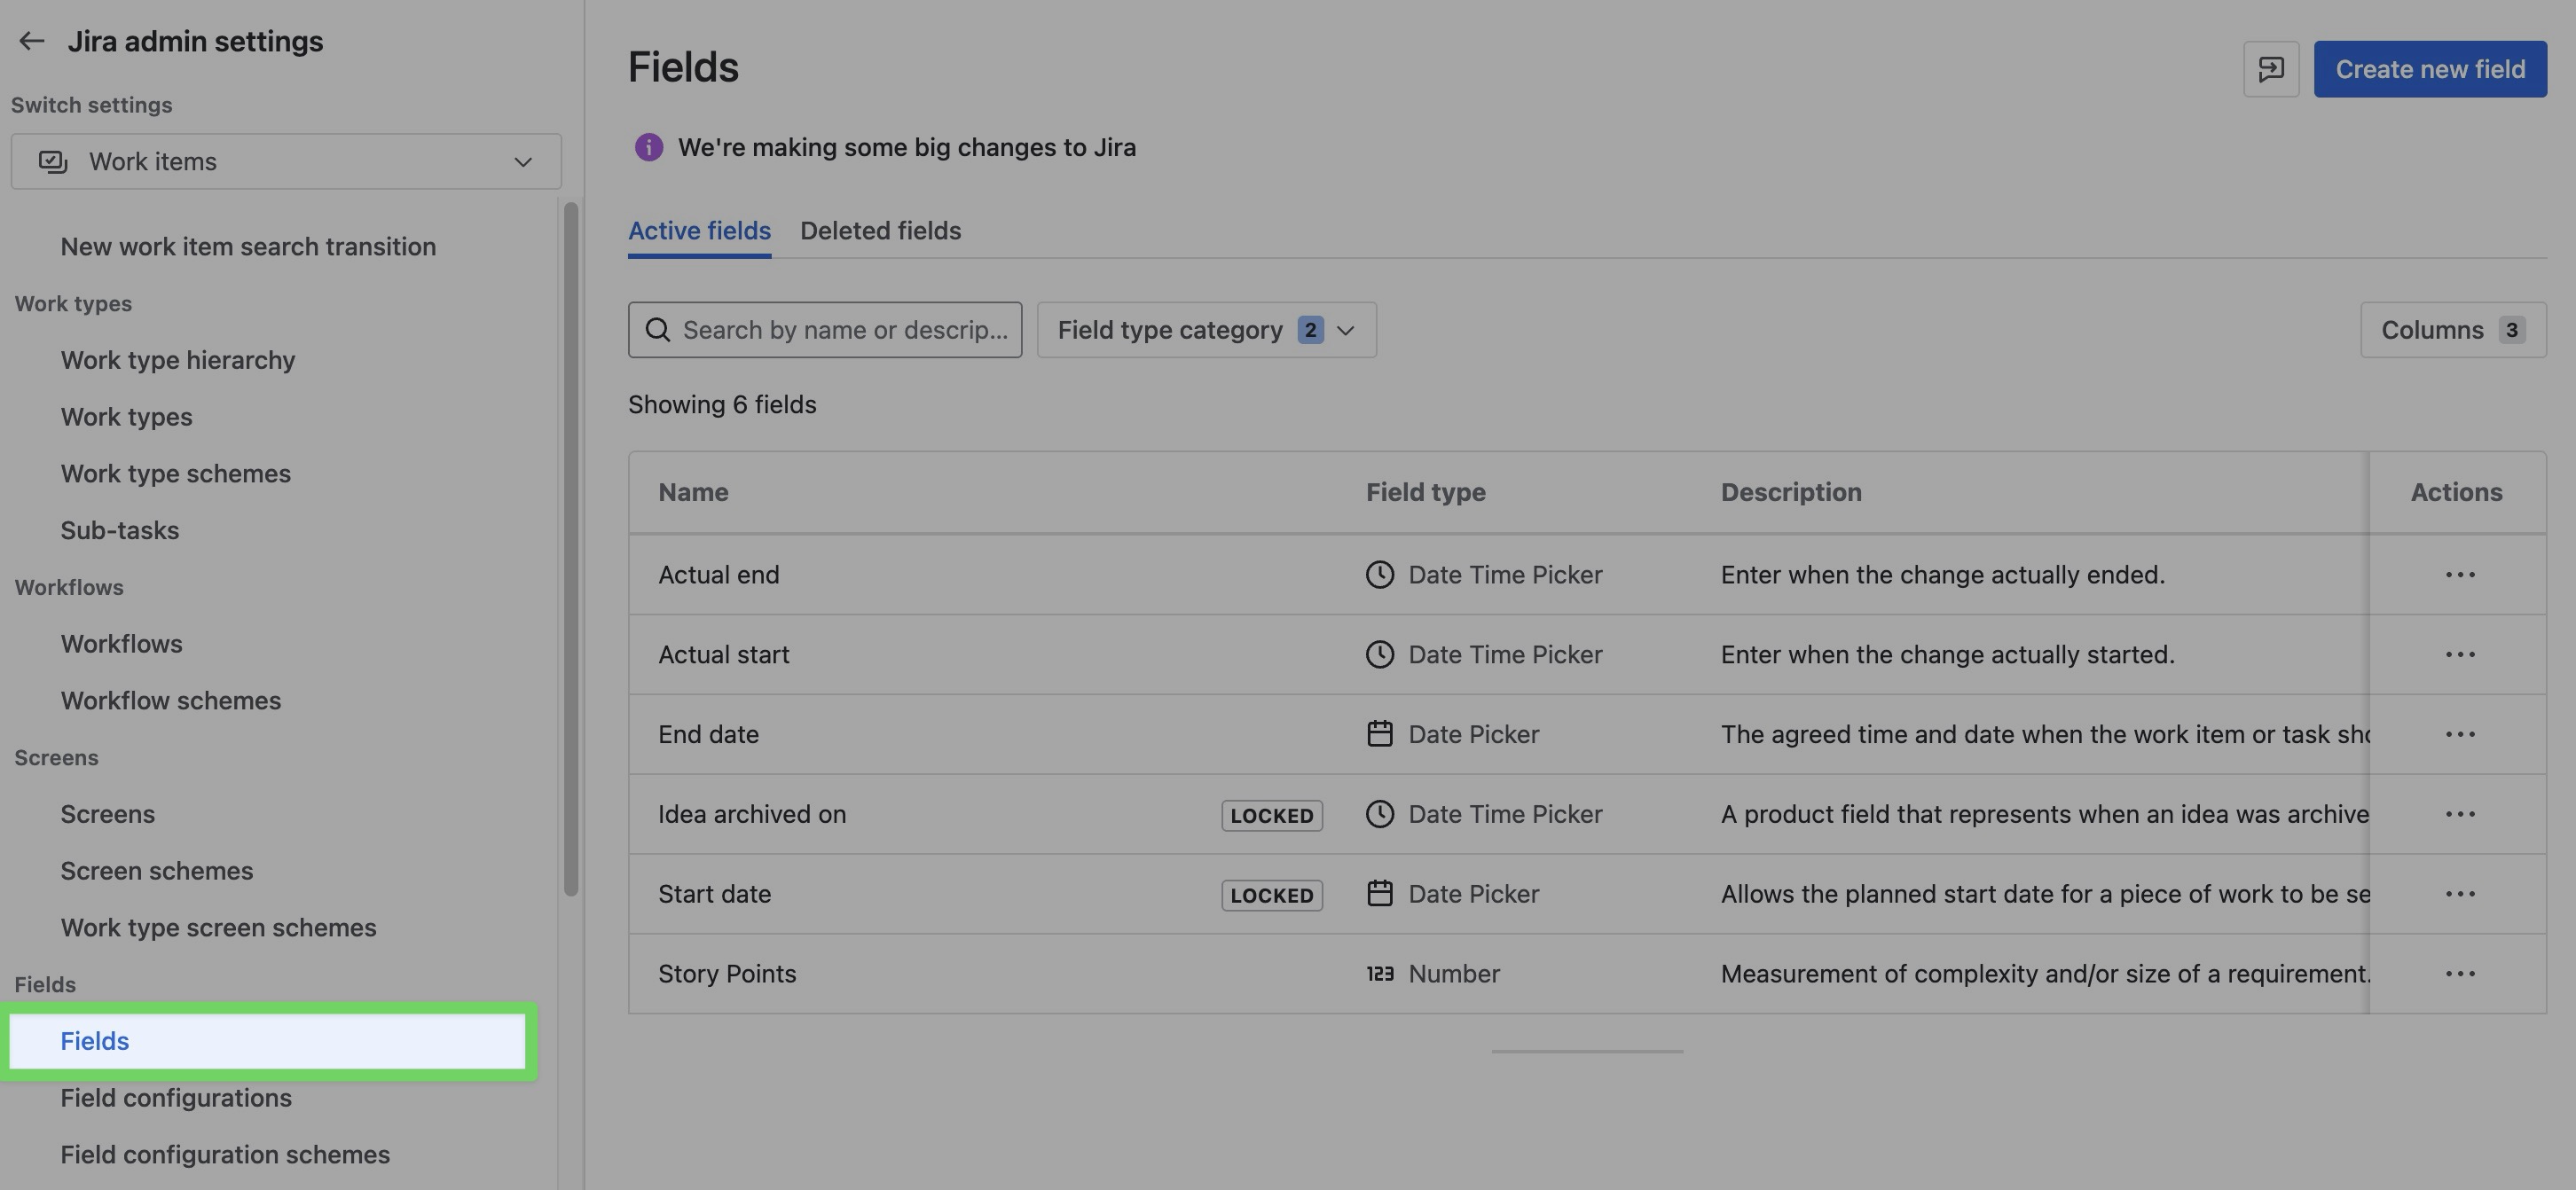
step 2 Under the Fields section in the left menu, click Fields.
step 3 Find the field you want to add to the screen.
TeamBoard supports mapping the following Jira field types:
-
Date Fields → Date picker fields allow people to provide date information using a calendar selection to complete the field. People can also complete the field by typing dates into the field.
-
Date time fields → Like date picker fields, date time picker fields allow people to provide time of day information using a calendar and a dropdown time selector to complete the field. Time fields have two input areas: one to specify the date, and one to specify the time.
-
number fields → Number fields allow people to provide numerical information as free-form text. A single-line text box allows people to complete the field with a number. People can safely enter numbers between -1 trillion and 1 trillion (100,000,000,000,000).
step 4 Click the three dots (•••) in the Actions column next to the selected field
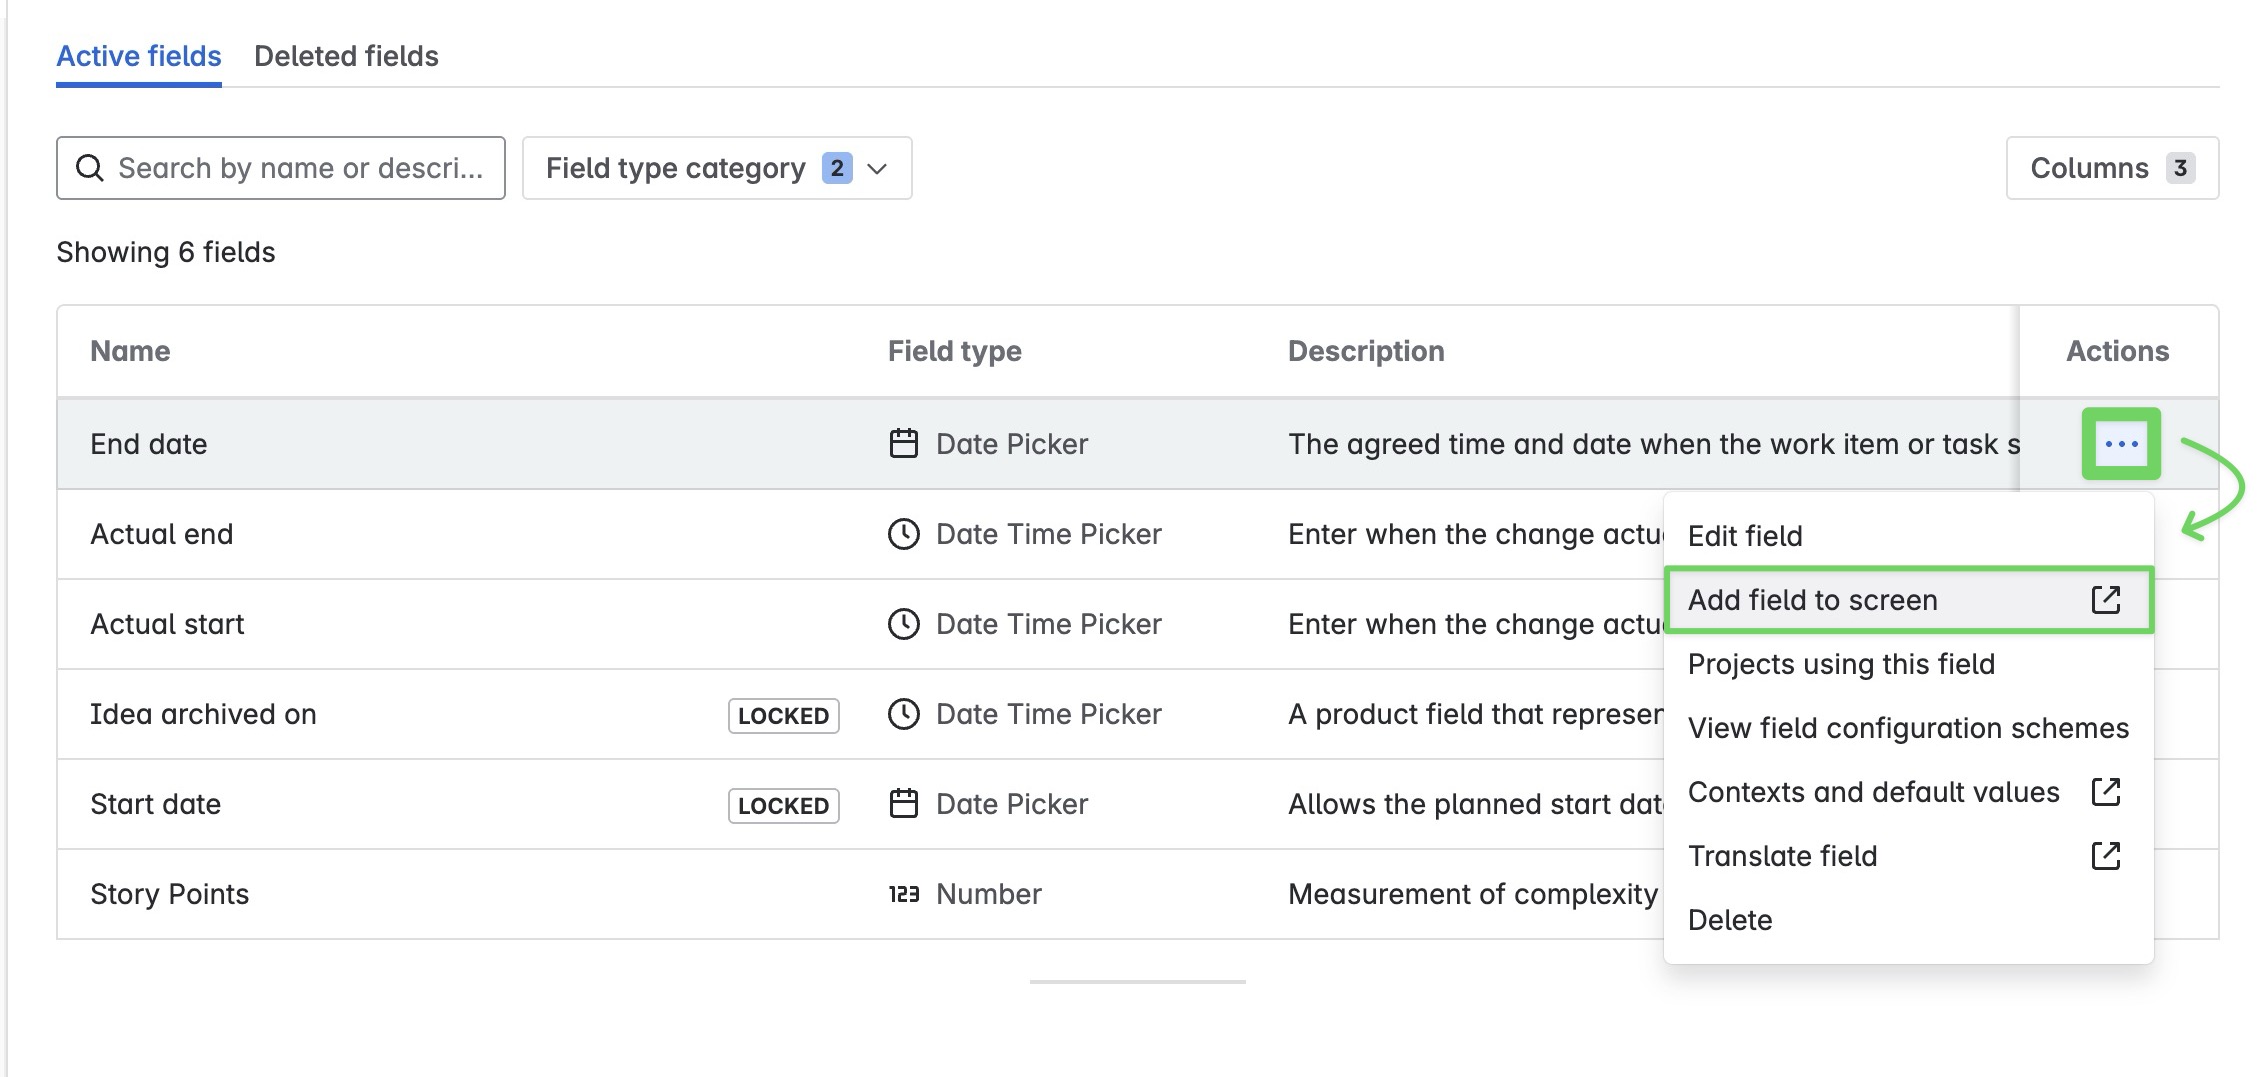
step 5 From the drop-down menu, select Add field to screen
step 6 Check the screens on which you want this field to appear
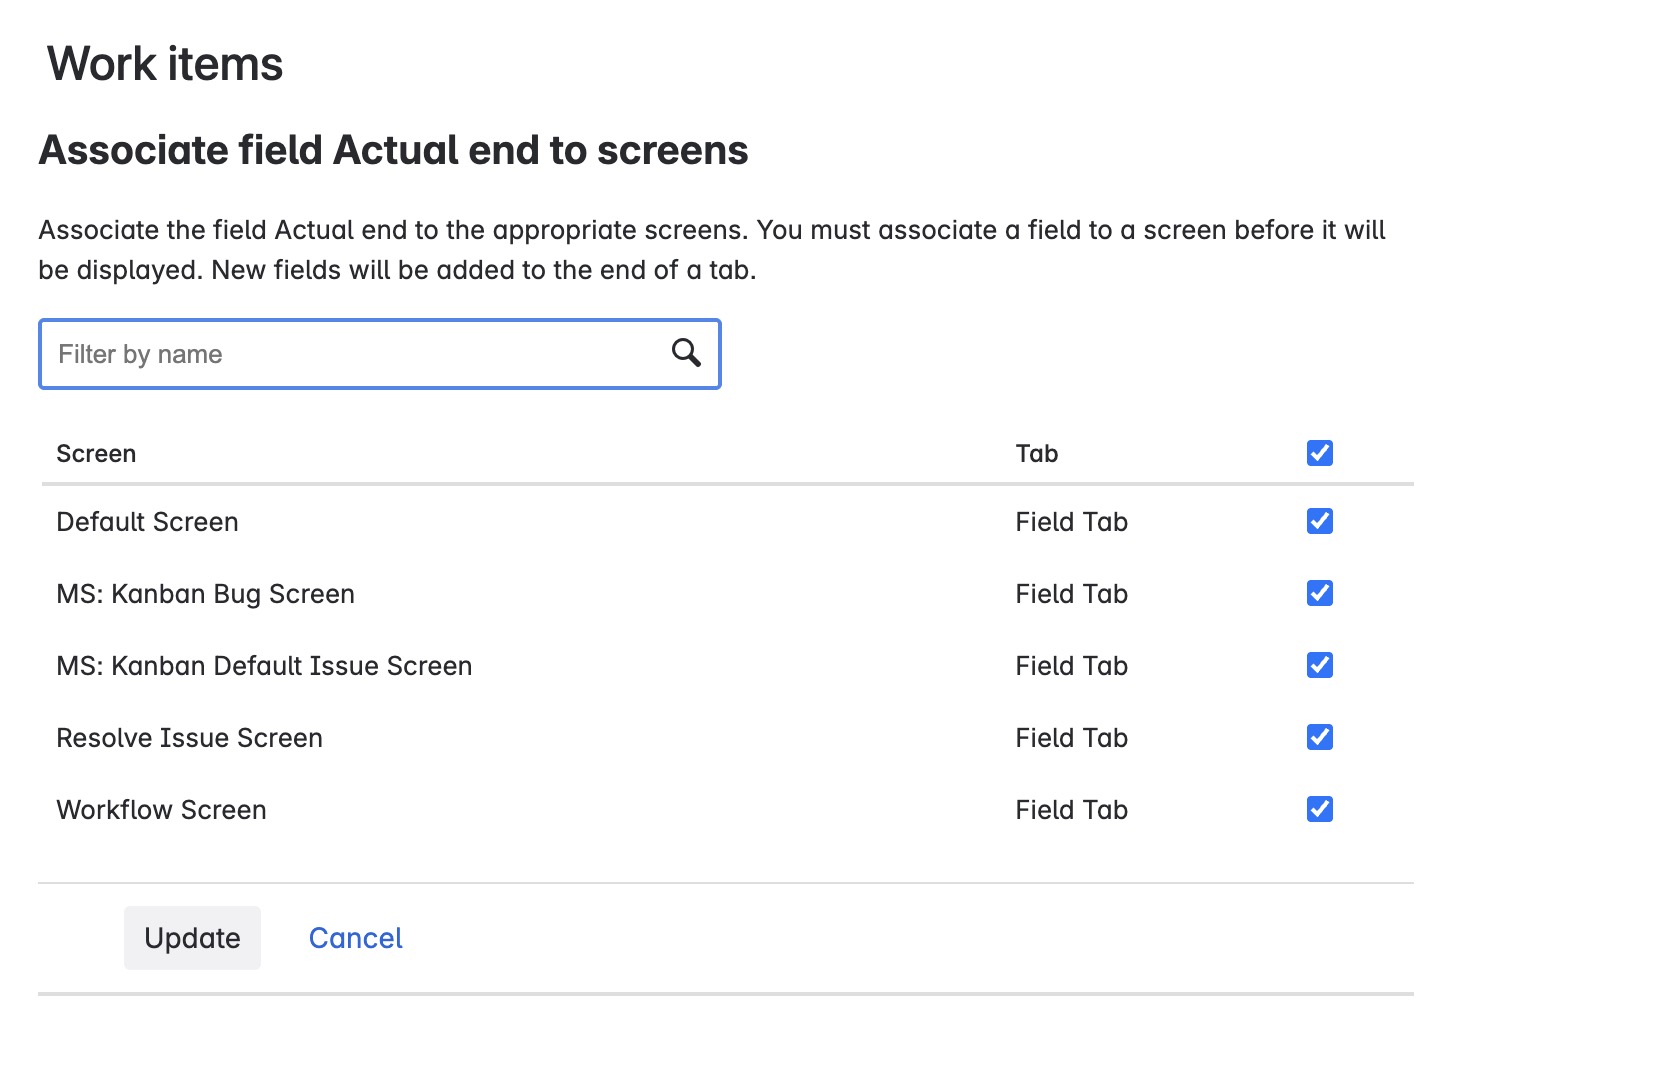
step 7 Click ![]()
Creating a new custom field
step 1 Navigate to ⚙️ settings from the top right screen > Work items.
step 2 Under Fields in the left menu, click Fields.
step 3 Click ![]()
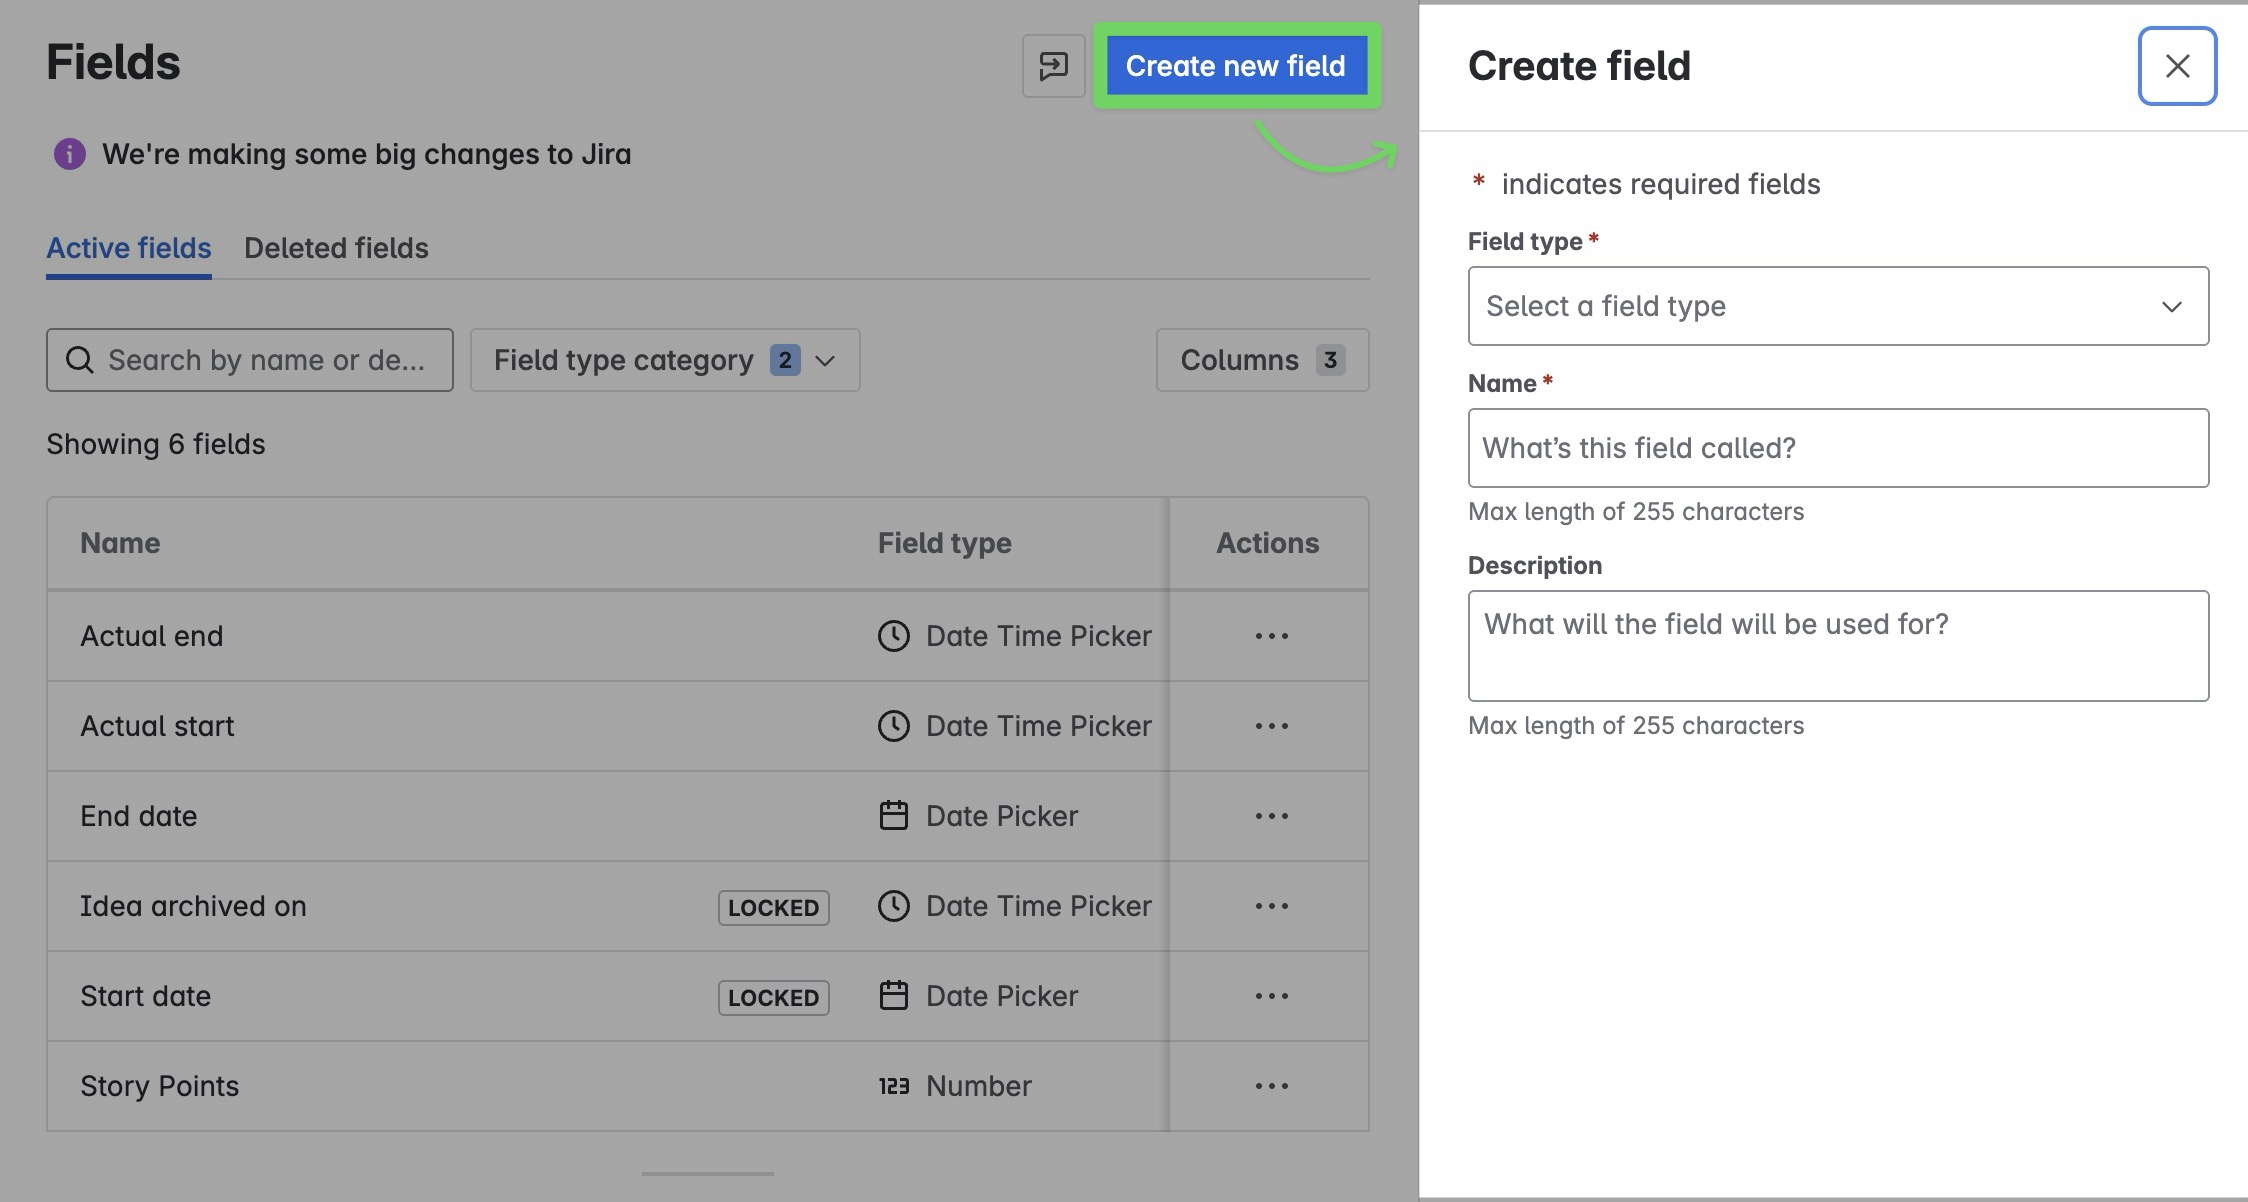
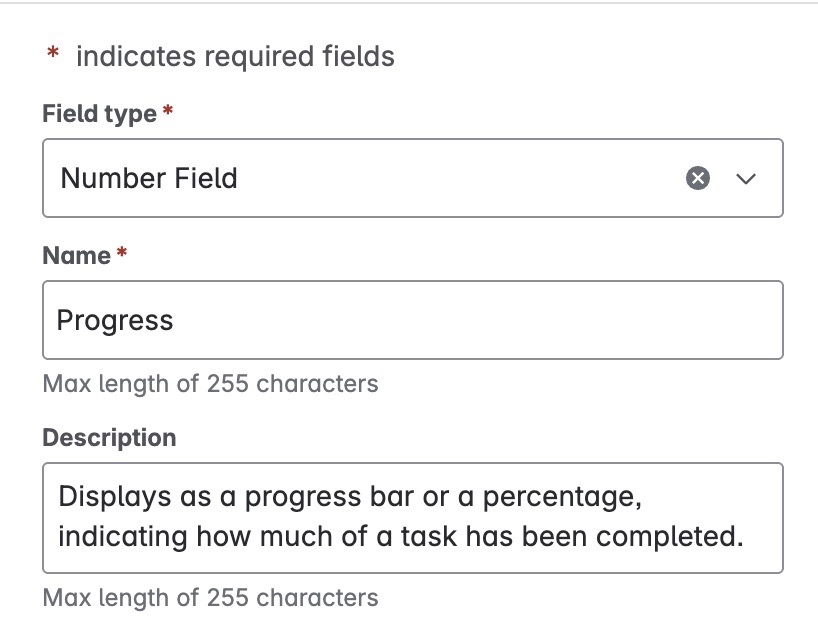
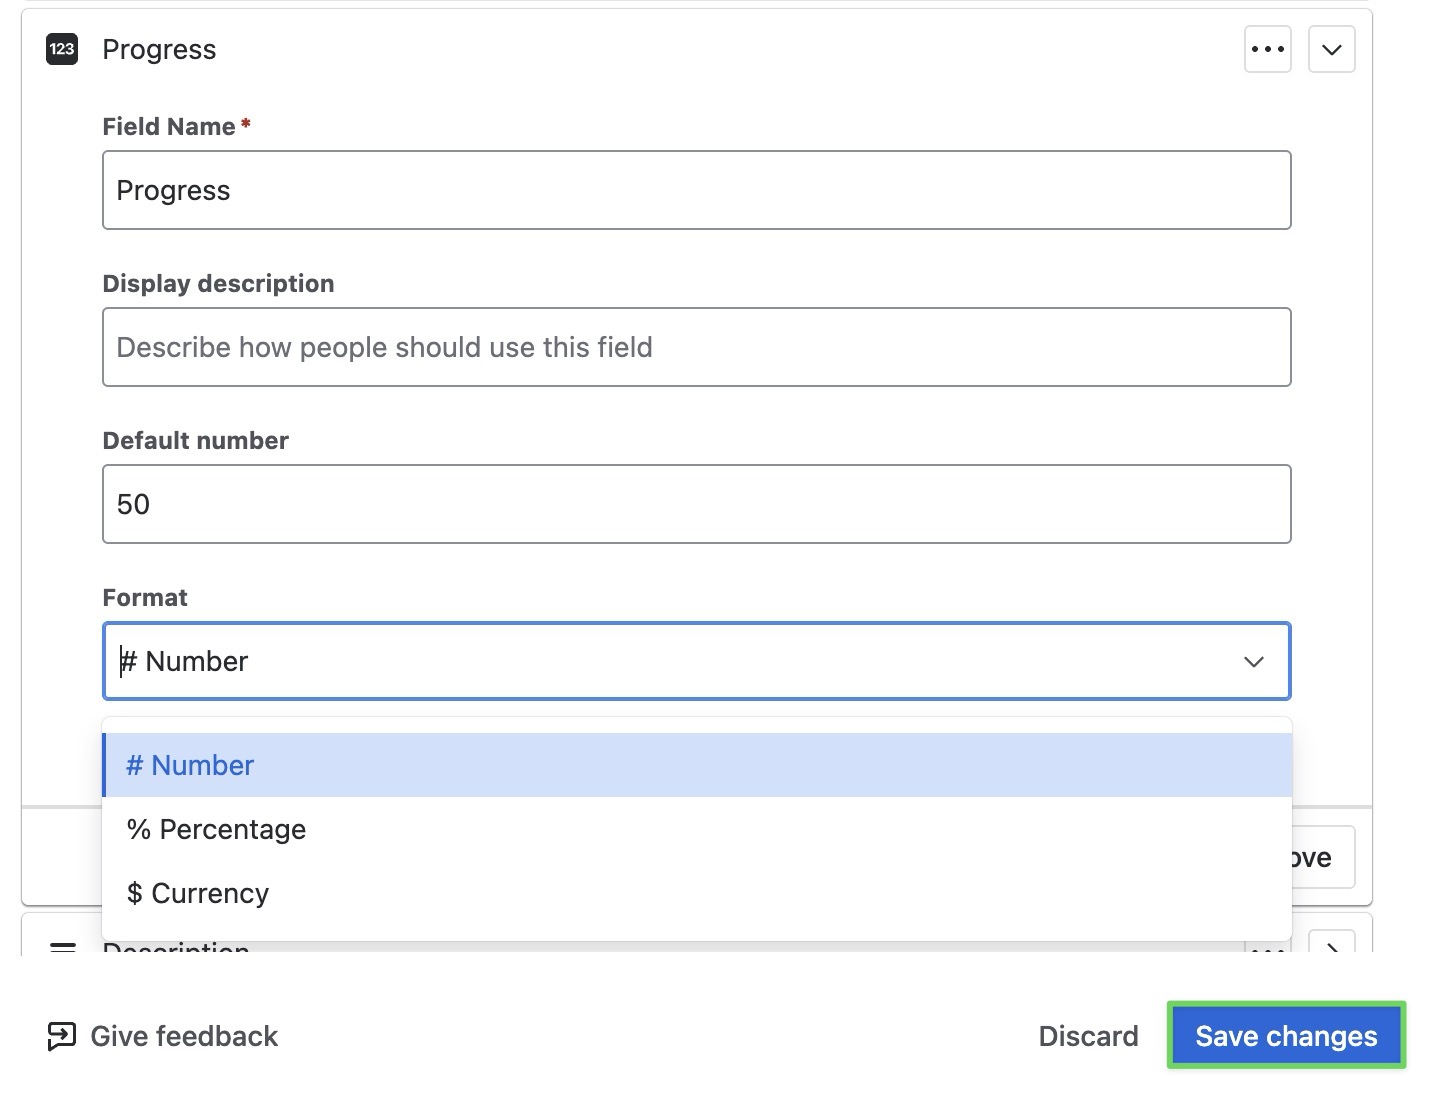
step 4 Select the type of field you want to create and configure the field by entering its name, description.
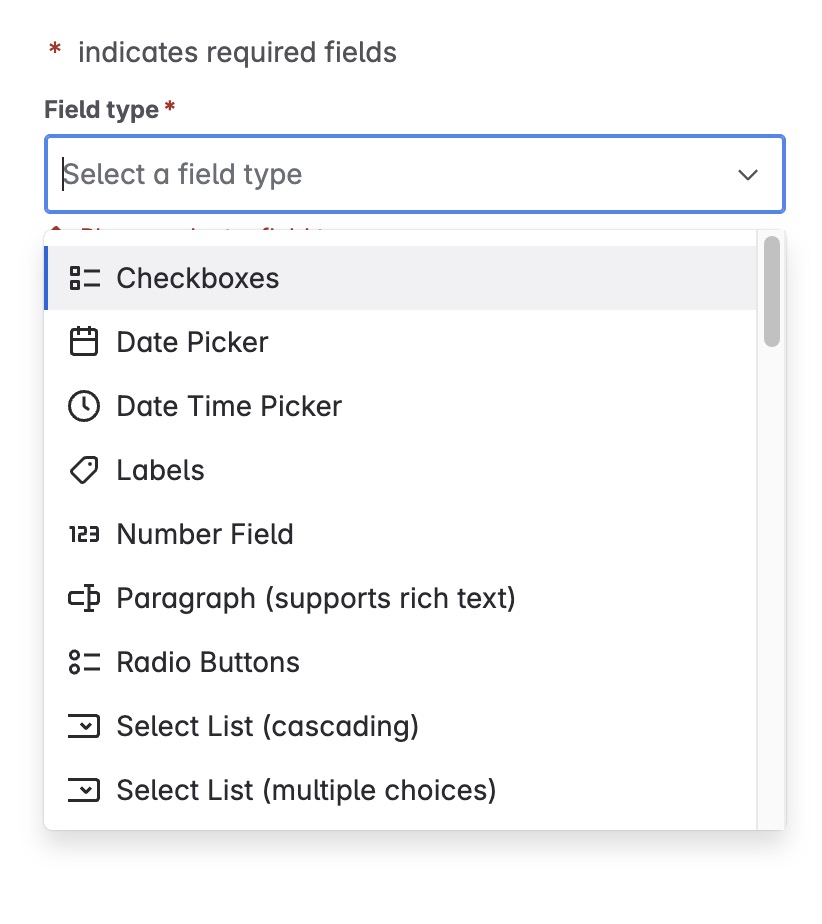
-
Select

Now, you can associate the new custom field with work item screens and then add the field to your work items.
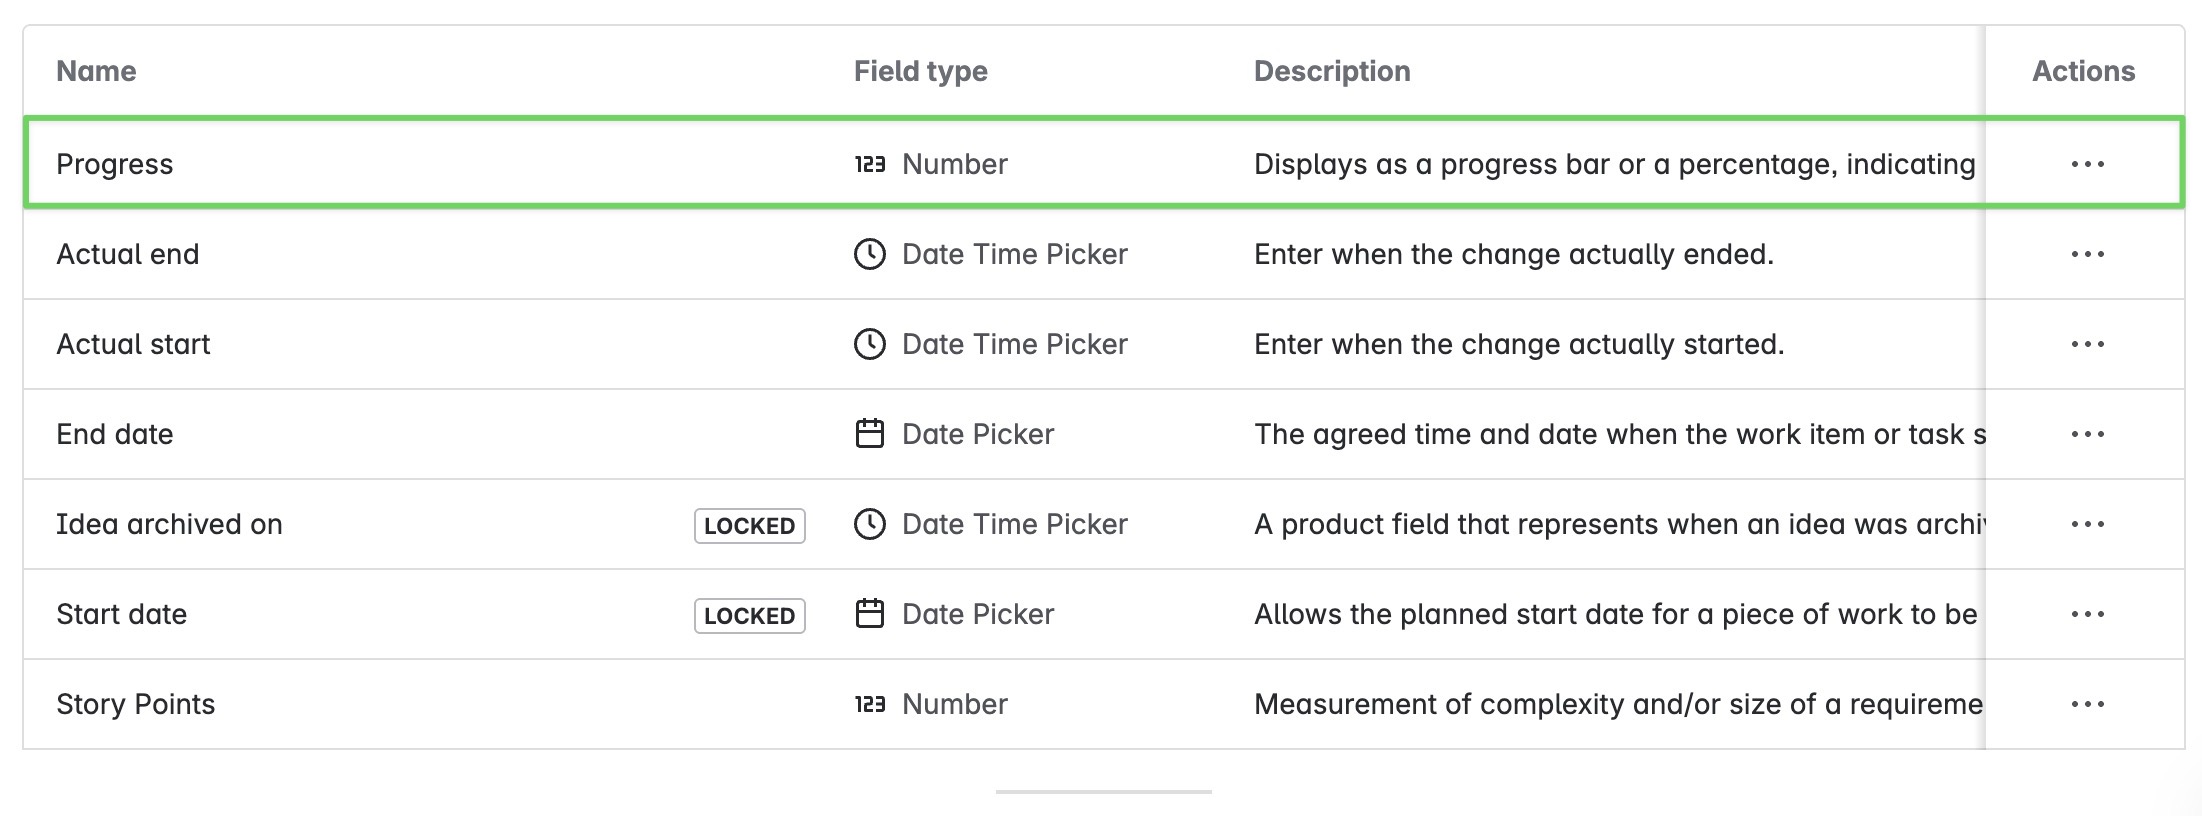
Now, you can associate the new custom field with work item screens and then add the field to your work items.
Team-managed projects
Team-managed projects don’t have a screen scheme. Fields can be added to each work type.
Adding fields to work types
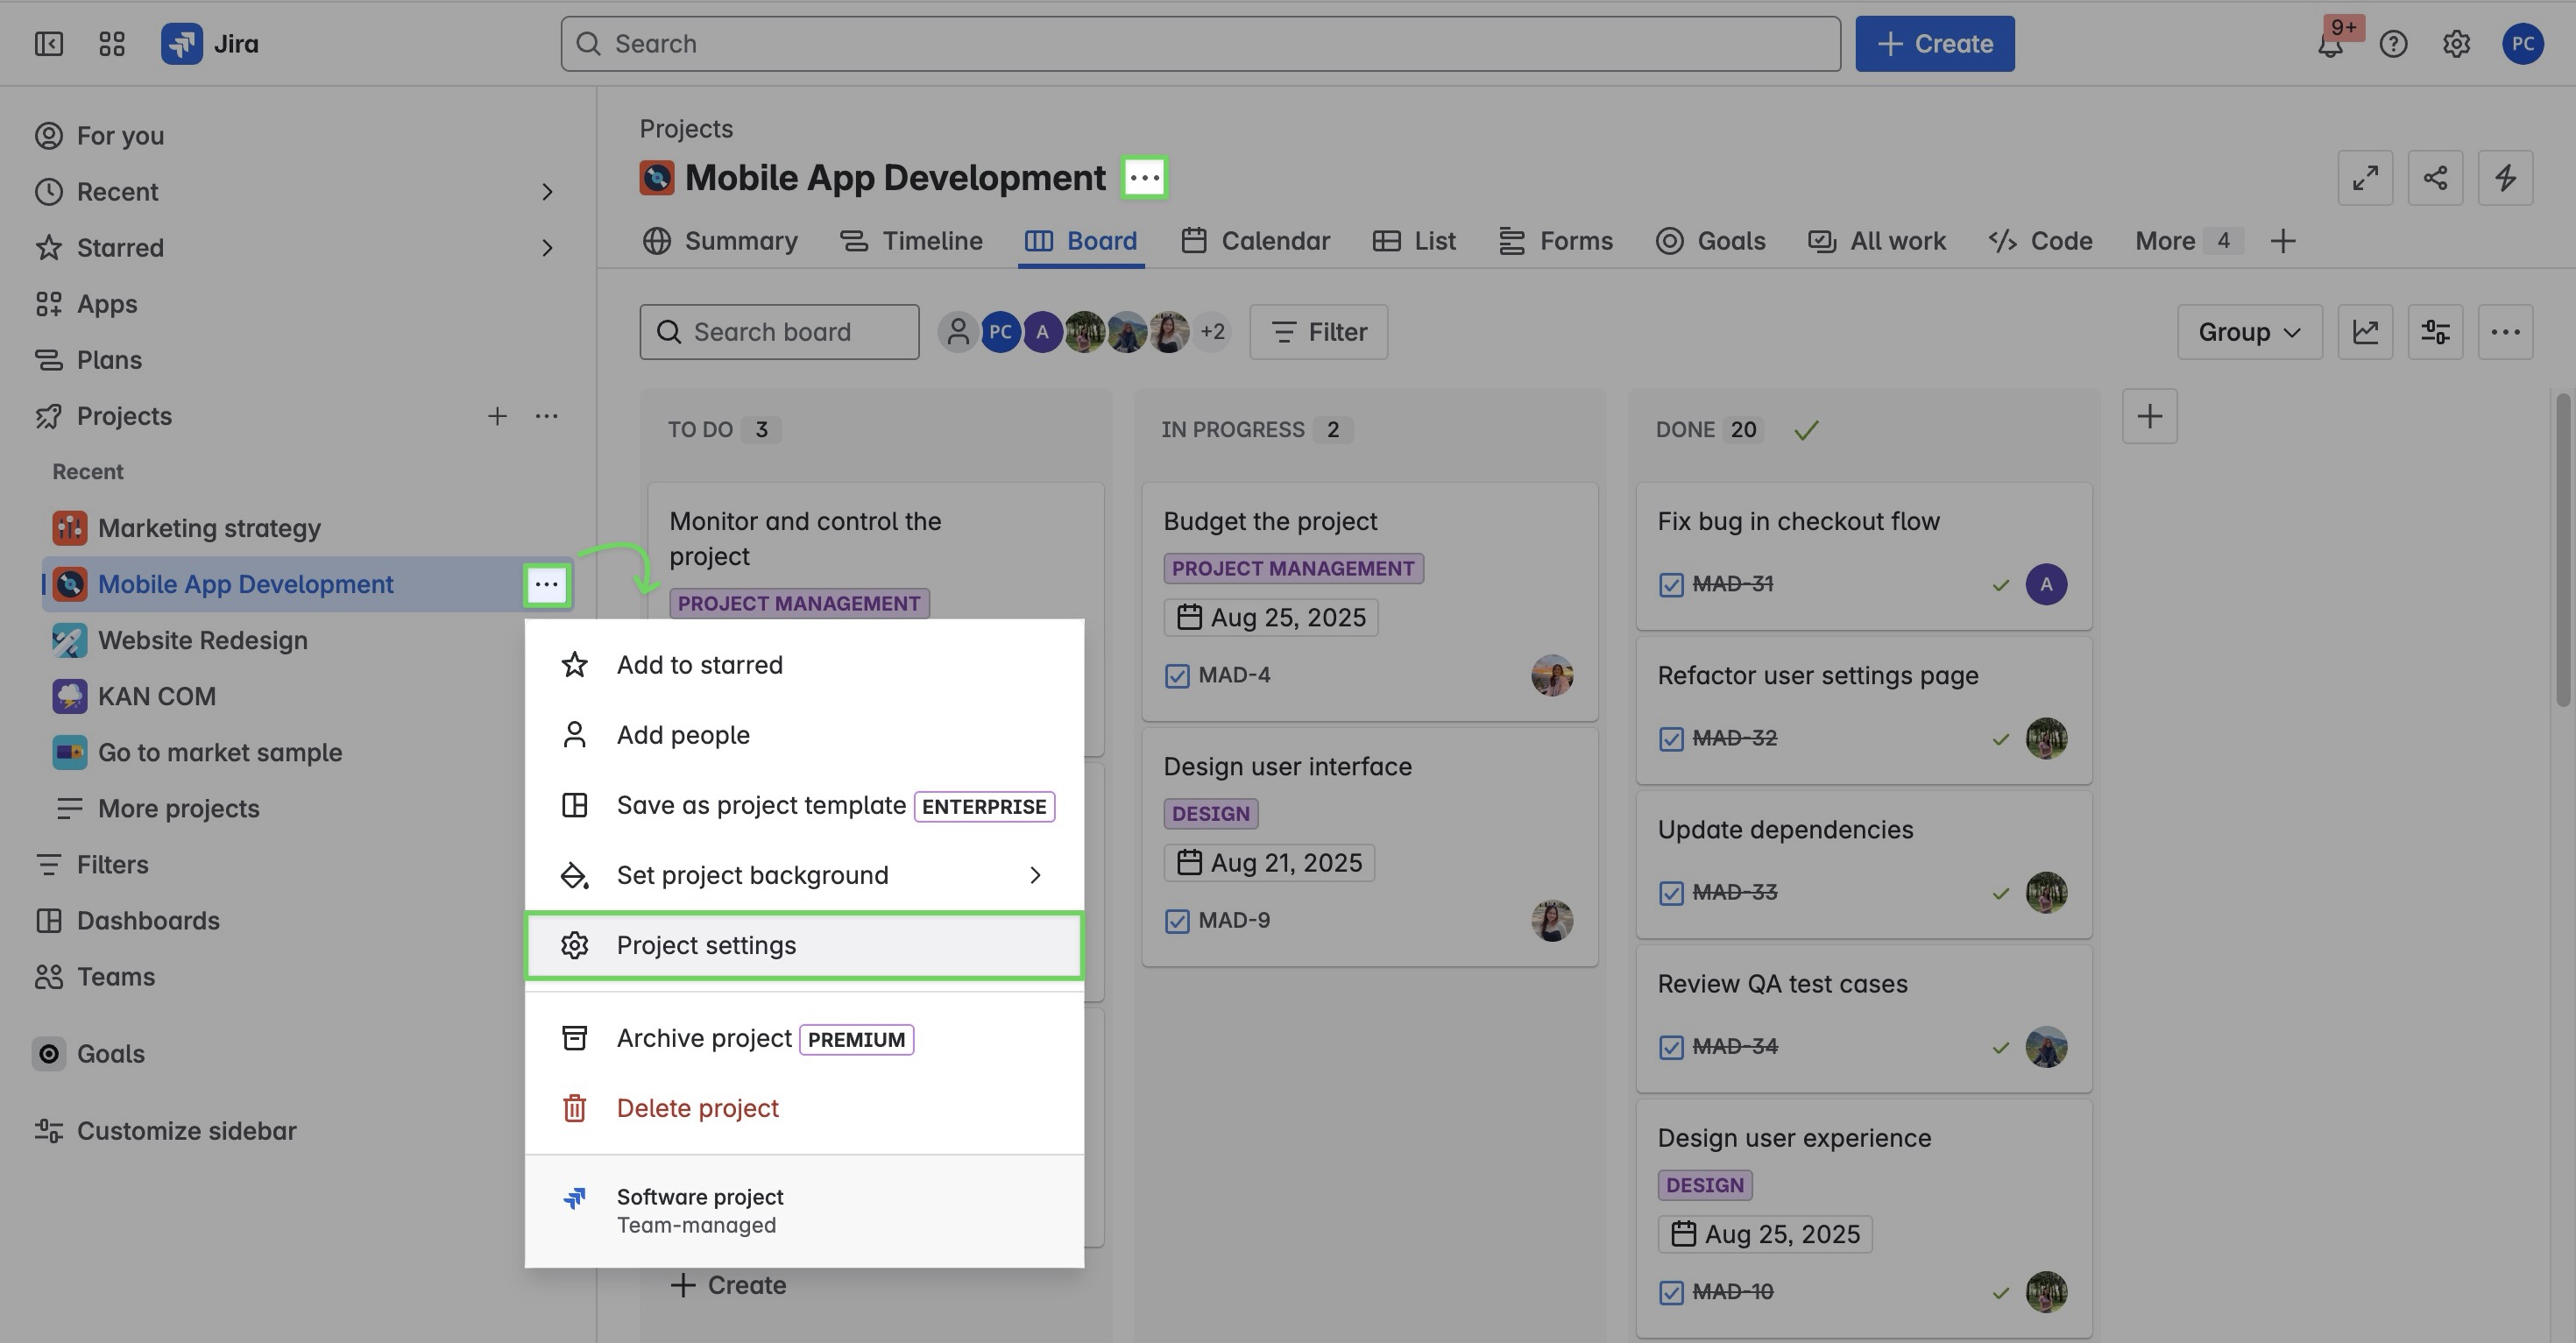
step 1 Access Project settings:
-
Select More actions (•••) next to the project name in either the header or the sidebar.
-
A menu will open, click ⚙️ Project settings.
step 2 Navigate to Work types > Choose the specific work item type ( Epic Bug Feature Story Task Subtask ) that you want to modify.
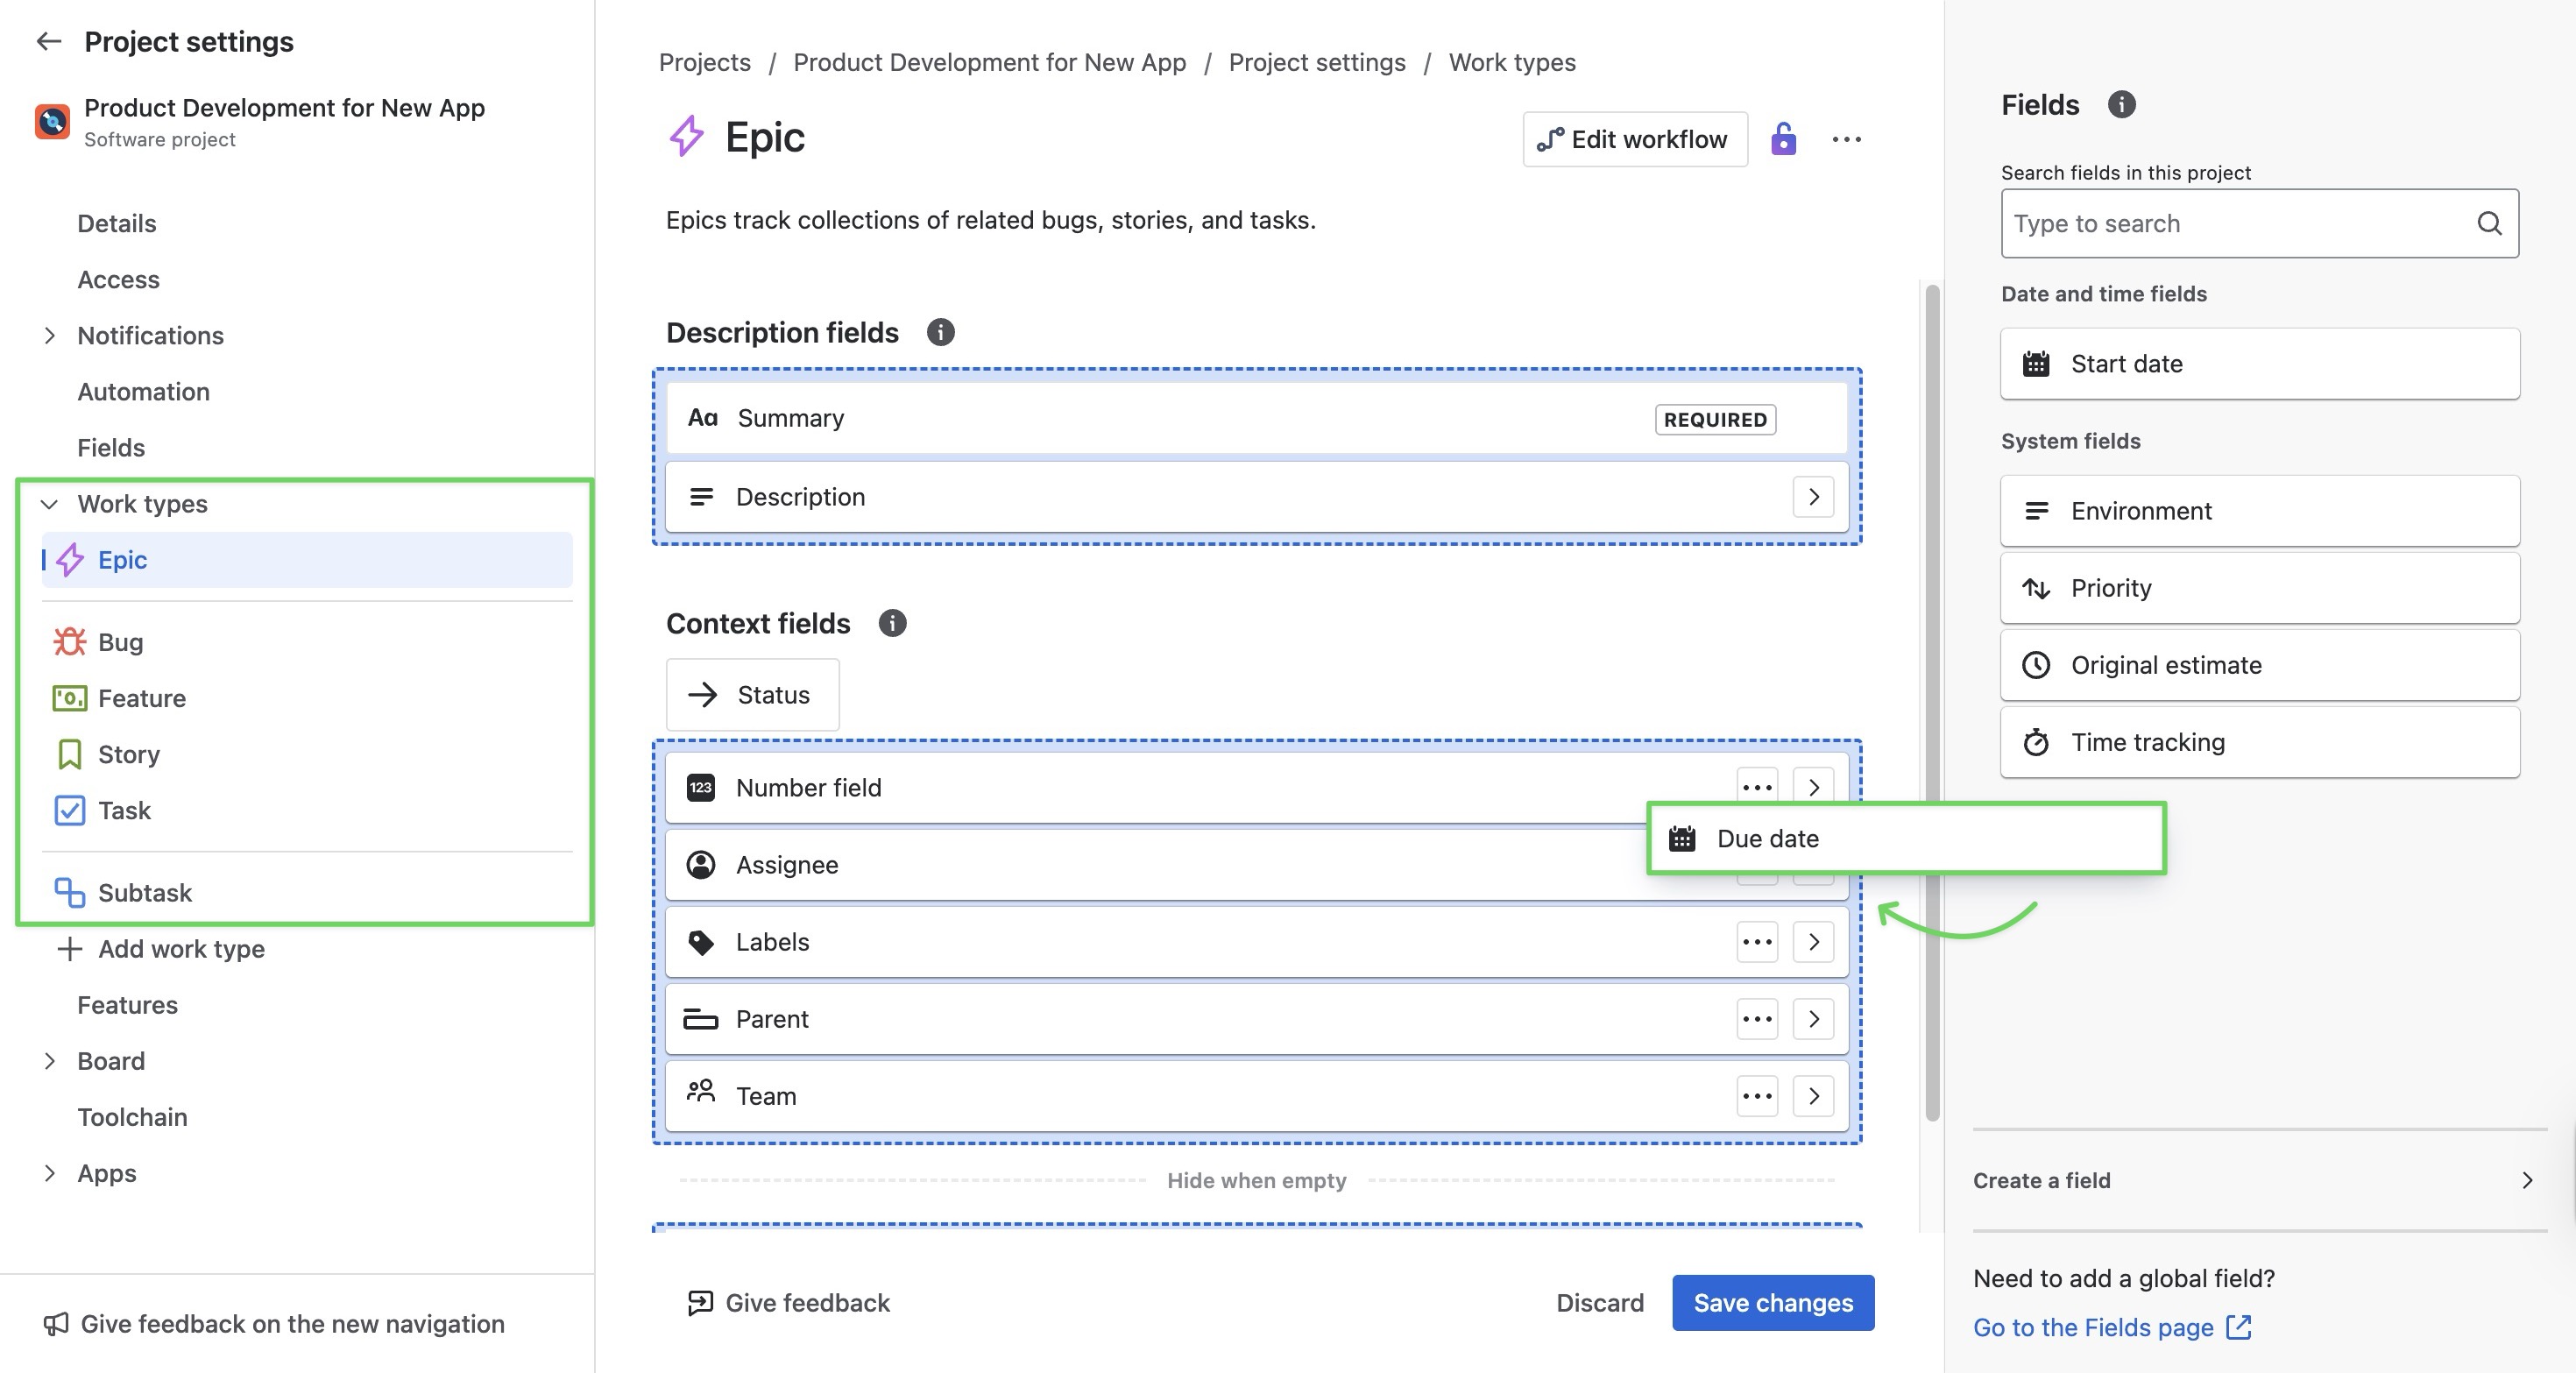
step 4 Drag the field from the toolbar into the list of fields. Jira will highlight the areas you can drop the field into.
TeamBoard supports mapping the following Jira field types:
-
Date Fields → Date picker fields allow people to provide date information using a calendar selection to complete the field. People can also complete the field by typing dates into the field.
-
Date time fields → Like date picker fields, date time picker fields allow people to provide time of day information using a calendar and a dropdown time selector to complete the field. Time fields have two input areas: one to specify the date, and one to specify the time.
-
number fields → Number fields allow people to provide numerical information as free-form text. A single-line text box allows people to complete the field with a number. People can safely enter numbers between -1 trillion and 1 trillion (100,000,000,000,000).
-
Click

Creating a new custom field
For team-managed projects, custom fields are local to that project and cannot be reused in other team-managed or company-managed projects.
step 1 Access Project settings:
-
Select More actions (•••) next to the project name in either the header or the sidebar.
-
A menu will open, click ⚙️ Project settings.
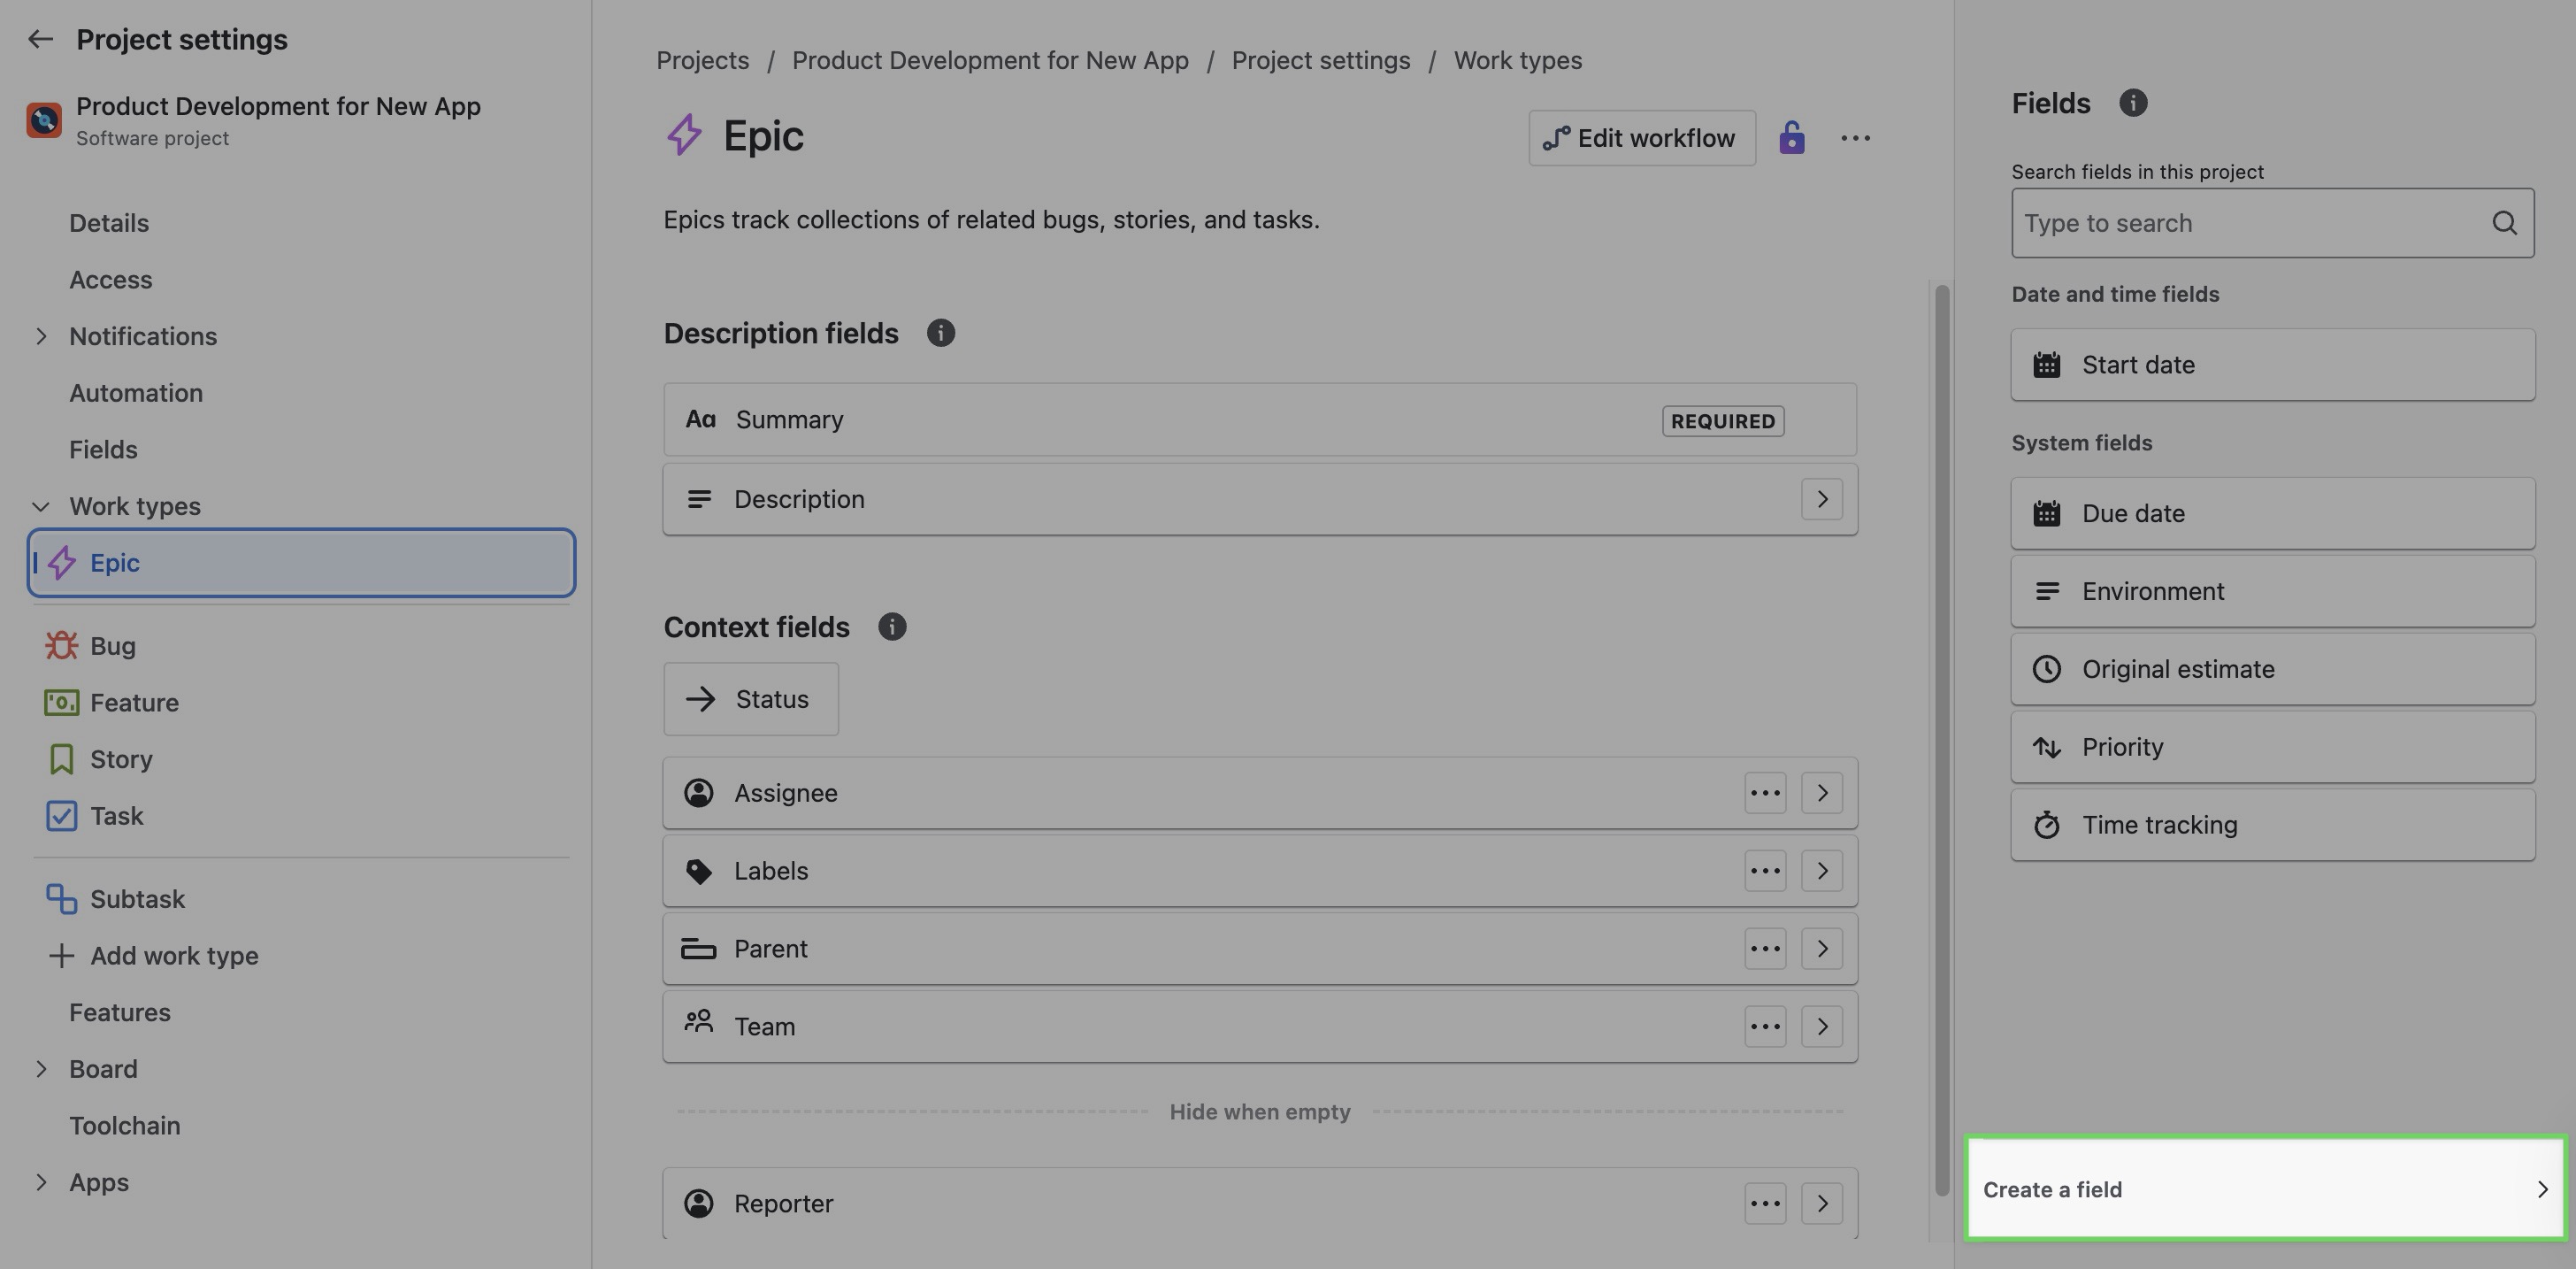
step 2 Navigate to Work types > Choose the specific work item type ( Epic Bug Feature Story Task Subtask ) that you want to create a field for.
step 3 In the bottom-right corner, click Create a Field.
step 4 Drag and drop a field type to one of the sections on the left to create a custom field for this work type.
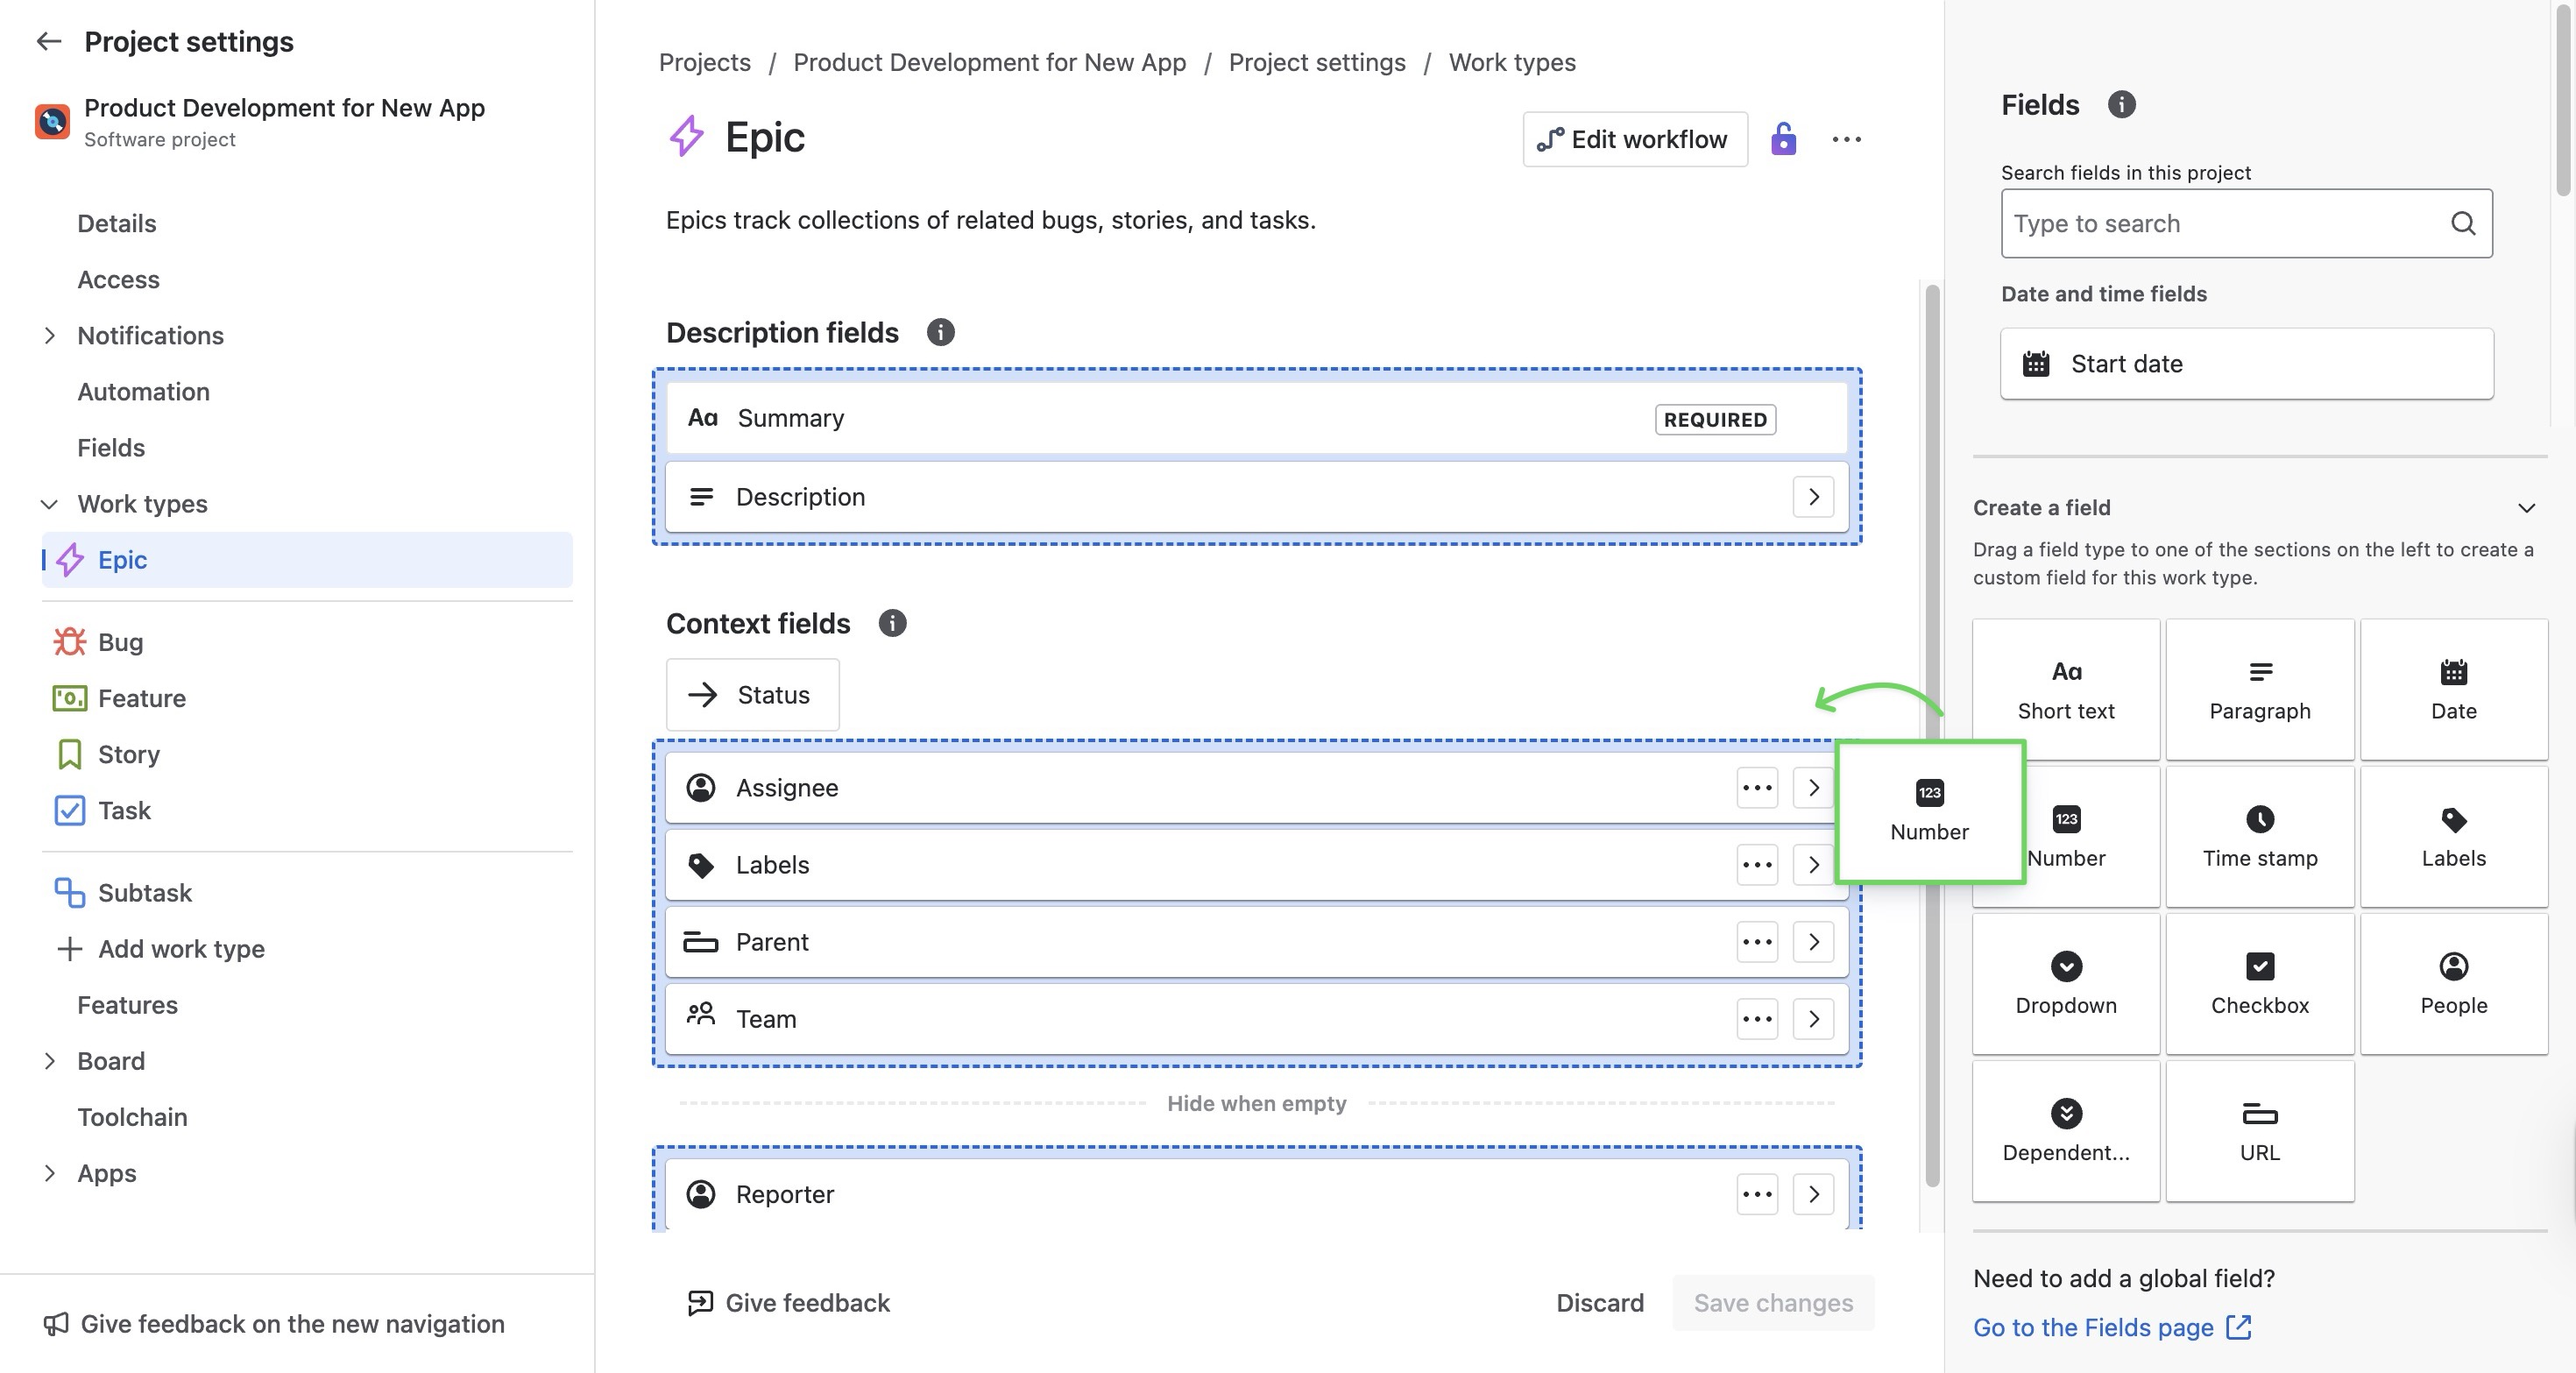
step 5 Configure the field by entering its name, description, and field details.
-
Click
Fields can also be set for specific work types by following these steps:
Open a work item > Go to the Details section > Select ⚙️ > Create field.