.png)
Only Jira Admins and App Admins can configure Date mapping settings.
Important note
When mapping date fields to Jira fields, ProScheduler follows Jira’s specifications. As a result, some advanced features are not supported, including:
What is date mapping? Date mapping in ProScheduler allows you to automatically sync the task’s start and end dates between Jira and ProScheduler. This ensures that when you plan the start and end dates of a task in ProScheduler, they are reflected in Jira, and vice versa, making it easier to manage project timelines across both platforms.
How it works:
-
Plan in ProScheduler: When you set the start and end dates in ProScheduler, they are automatically synced to the corresponding date fields in Jira.
-
Plan in Jira: When you set the start date or end date in Jira, those changes are reflected in ProScheduler.
ProScheduler supports mapping Date Fields in Jira.
What Are Date Fields in ProScheduler?
In ProScheduler, the primary date fields you will interact with are:
-
Start date: This is the date when the task is planned to begin.
-
End date: This is the date when the task is planned to be completed.
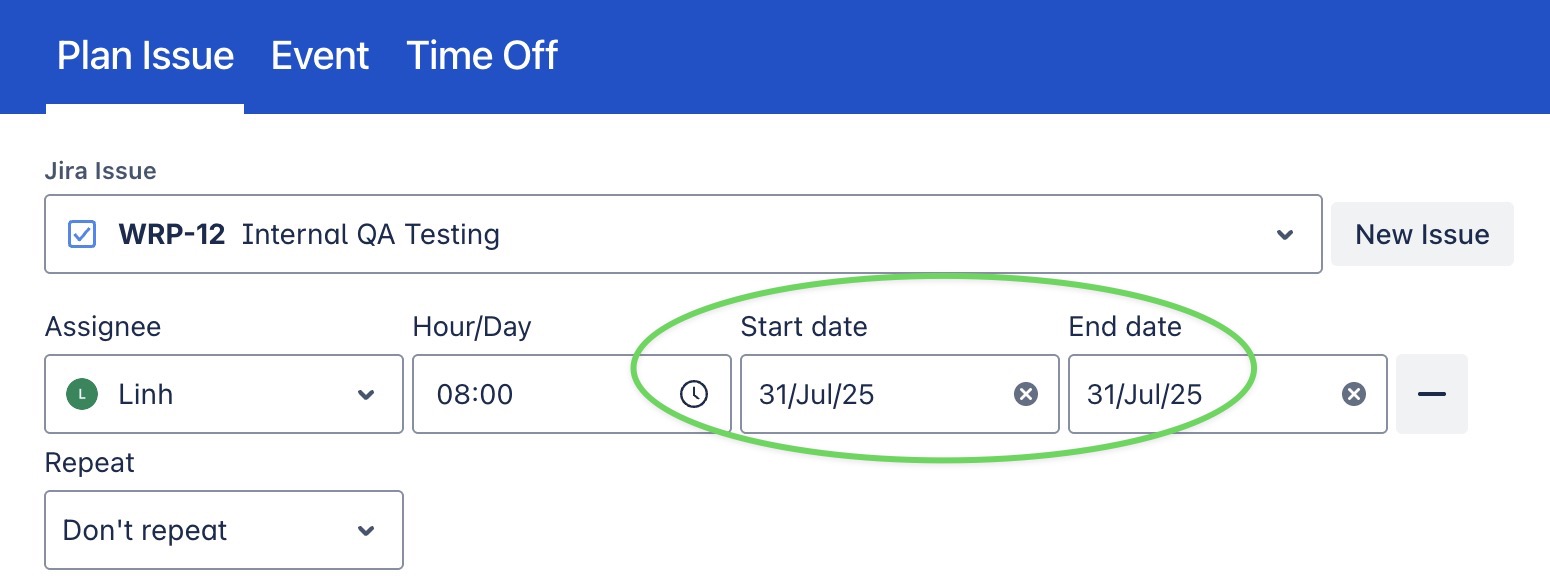
These date fields are used for scheduling and tracking task timelines within ProScheduler.
Before you map Jira date fields to ProScheduler, ensure that your desired Jira fields (e.g., Start Date or Due Date) are already available in your Jira project or work type.
Accessing Date mapping
-
Click on ⚙️ Settings from the sidebar.
-
Select Date mapping in the app settings.
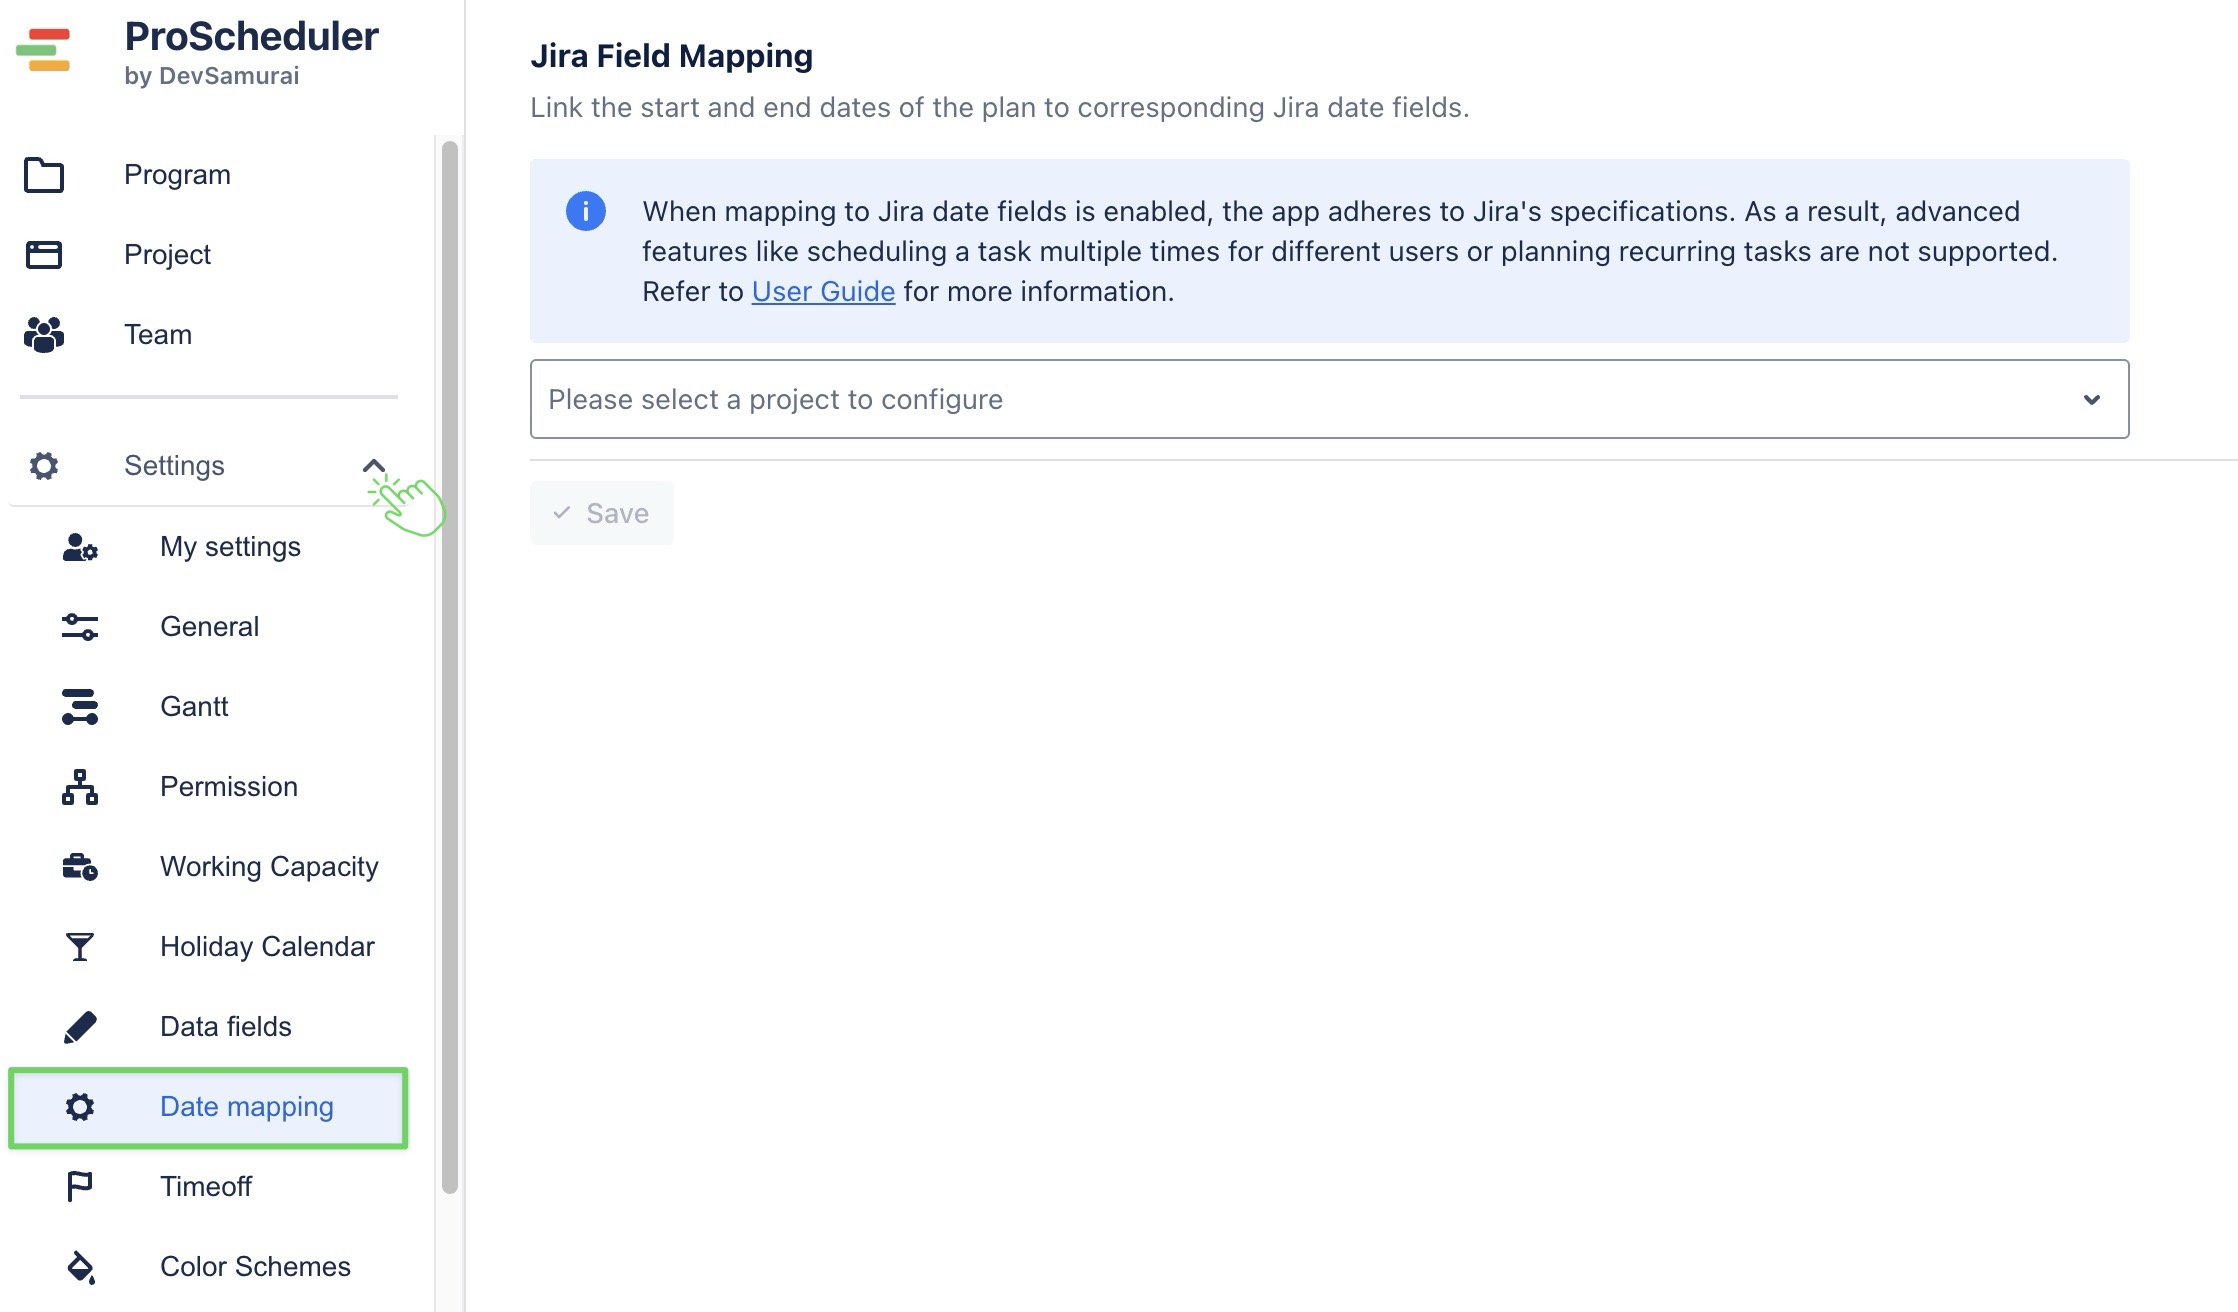
You can also configure date mapping from Board settings
Configuring Date mapping
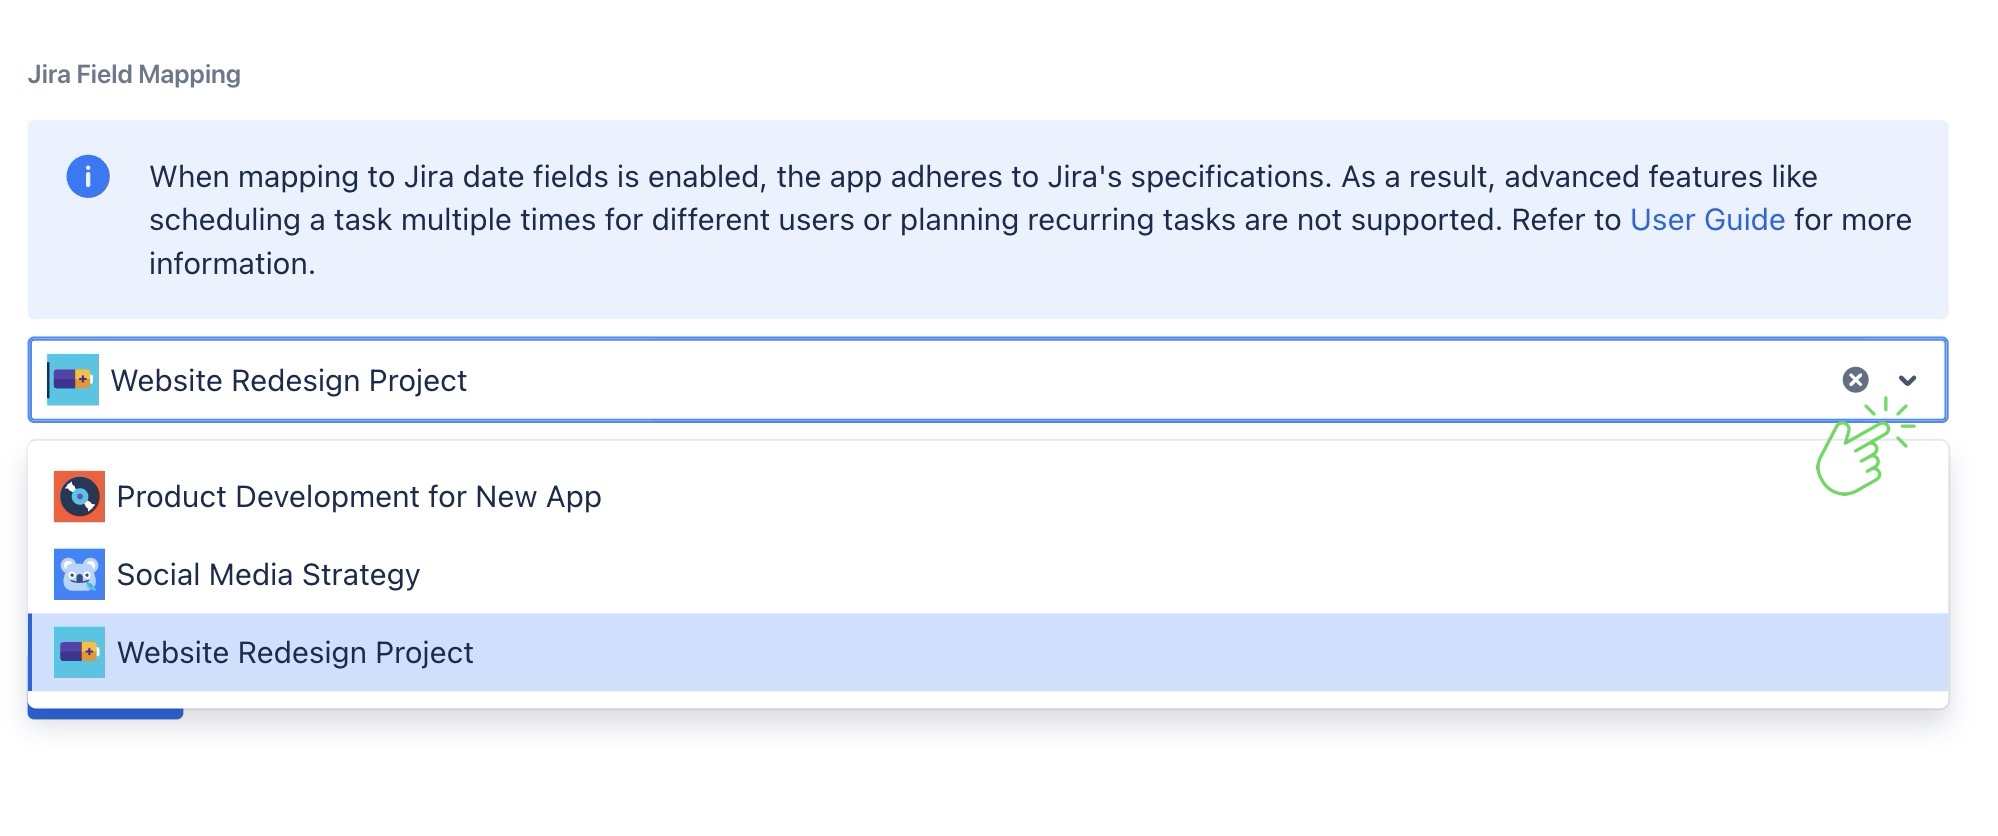
You can configure the field mapping for each project by following the steps below:
-
Select the project you want to configure in the dropdown list.
-
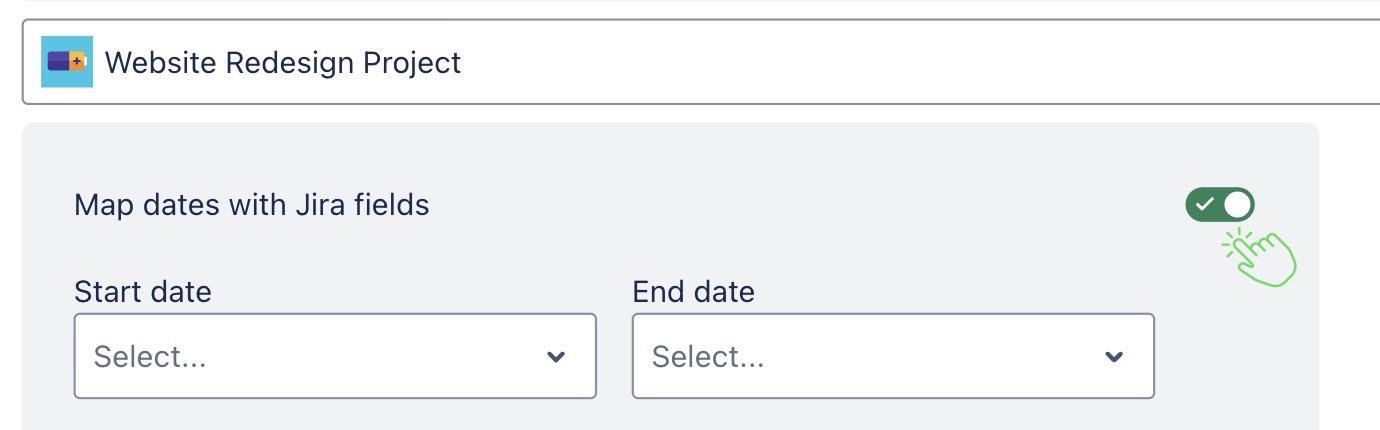
Toggle

-
Select the Jira fields you want to map to the Start date and End date.
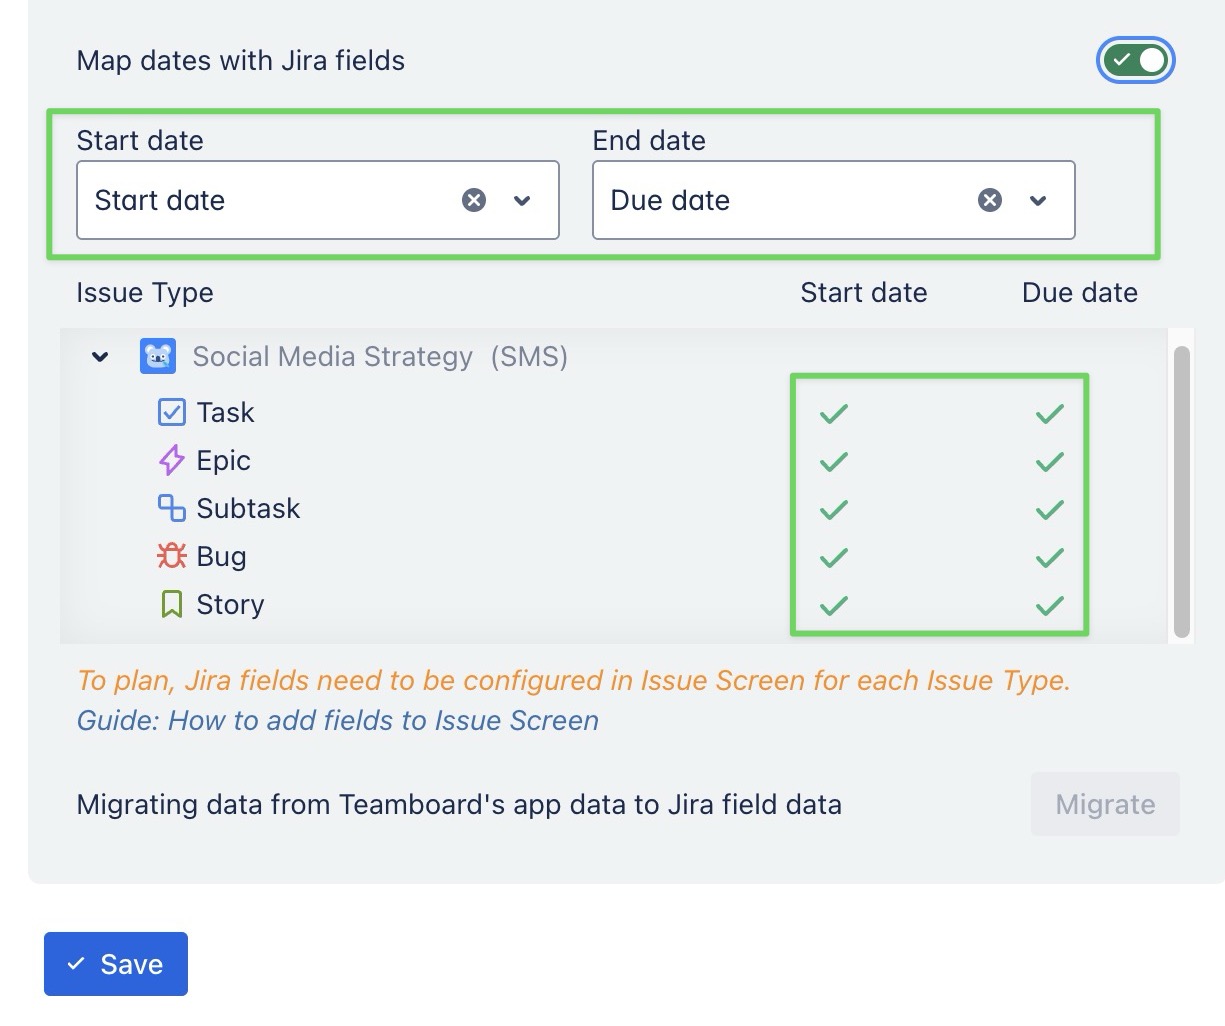
Green checks (✅) indicate that these fields can be mapped and the dates will be applied successfully for that work type.
If a red cross (❌) appears next to any field, it means that the selected field does not exist for that work type in your project configuration. As a result, ProScheduler cannot map the fields to your Jira fields.

=> You will need to reconfigure your Jira project to make sure that your desired Jira fields are already available in your work type.
For troubleshooting steps, read this: How to add date fields to your Jira Projects
-
Click

Once complete, all previously app data within the project will be reset and aligned with the newly mapped dates.
Use Case
-
Use this when Jira already contains valid planning data (Start and Due Dates), and you want to map the app to Jira fields without changing existing Jira data.
-
Or you want to map Jira fields for future tasks without transferring current data from ProScheduler to Jira.
If you need more details, take a look at the example:
Example
use case 1 Mapping with existing Jira Data
-
You already have a list of work items in Jira with Start and Due Dates.
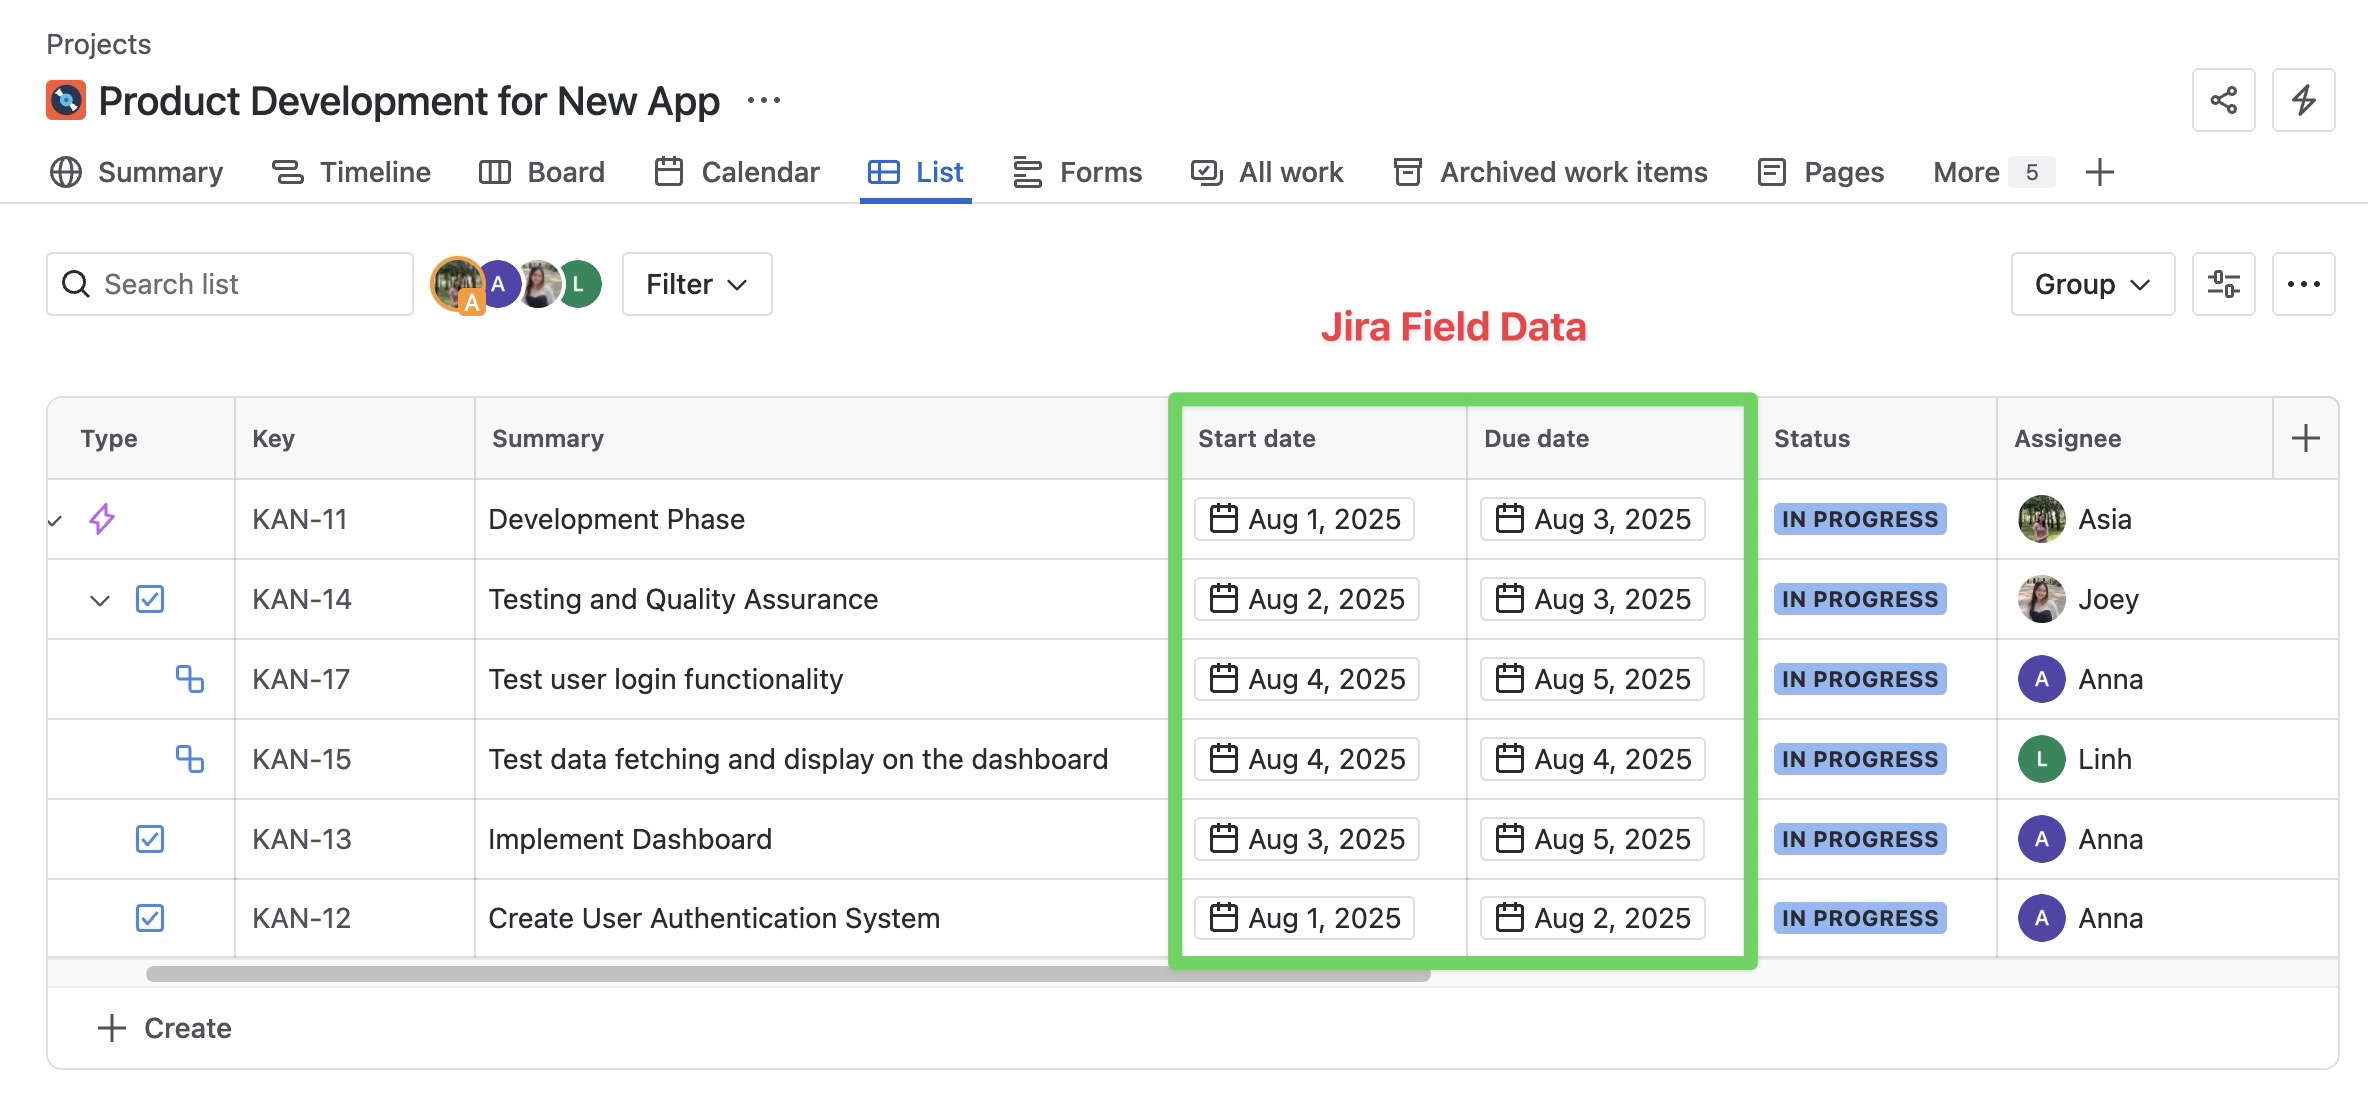
-
Once you enable field mapping, ProScheduler will automatically sync with this existing Jira data
use case 2 Future task mapping only
-
Your current tasks in ProScheduler are finalized, so you don’t want to transfer any of that data to Jira.
-
You're starting a new sprint next week and want all upcoming tasks in the app to sync with Jira's field structure (e.g., Start and Due Dates).
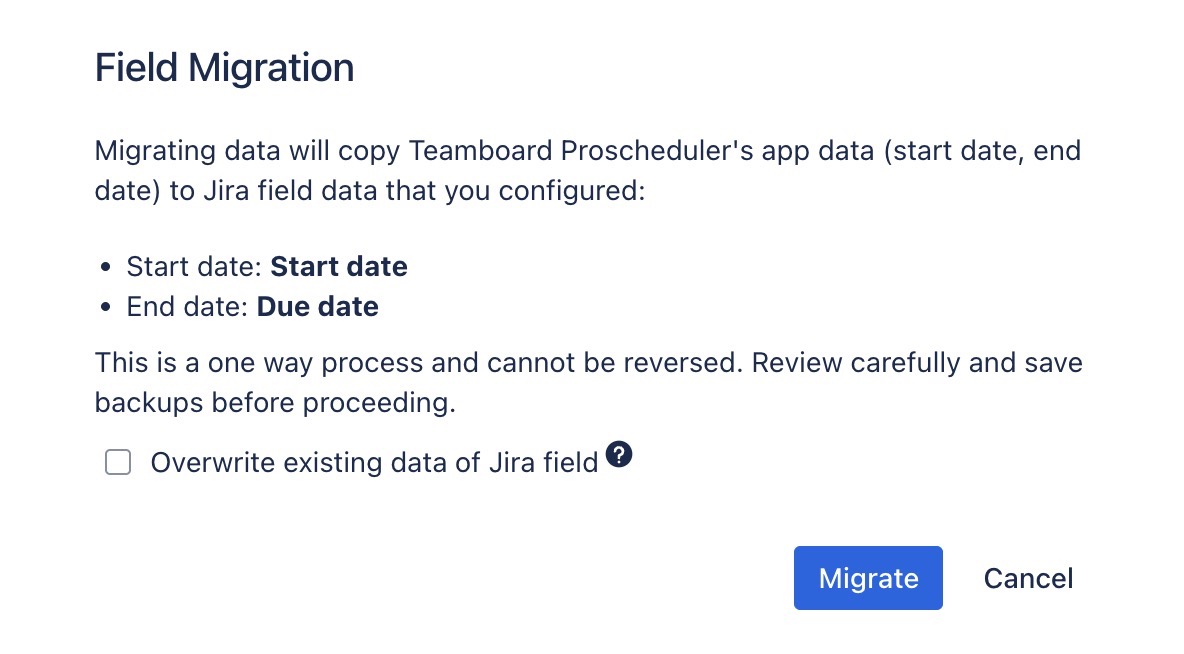
Migrate existing App data to Jira fields
After saving the field mapping configuration, if you want to keep the app’s existing planning data (Start and End Dates) and apply it to Jira
=> Click 
If you need more details, take a look at the example:
⚠️ Important behavior: Task planned multiple times
If you assign the same task multiple times in ProScheduler, only the task plan with the earliest Start Date will be kept when you click Migrate.
If you need more details, take a look at the example:
Overwrite existing data of Jira fields
This option will prioritize the data from Teamboard's app. If unchecked, the existing data from the Jira field will be kept.