.png)
Teamboard ProScheduler gives you several ways to plan tasks. You can choose the option that best fits your workflow and project needs.
Planning via the Work Item Box
You can also plan tasks via the work item box on the Calendar Board, following the same steps as in the Schedule Board.
The Work Item Box includes tasks and backlogs from a Jira project, serving as a centralized hub for viewing and managing tasks in one place.
Here’s how to plan tasks via the Work Item Box:
-
Go to the Schedule Board from the top navigation bar.
-
Click

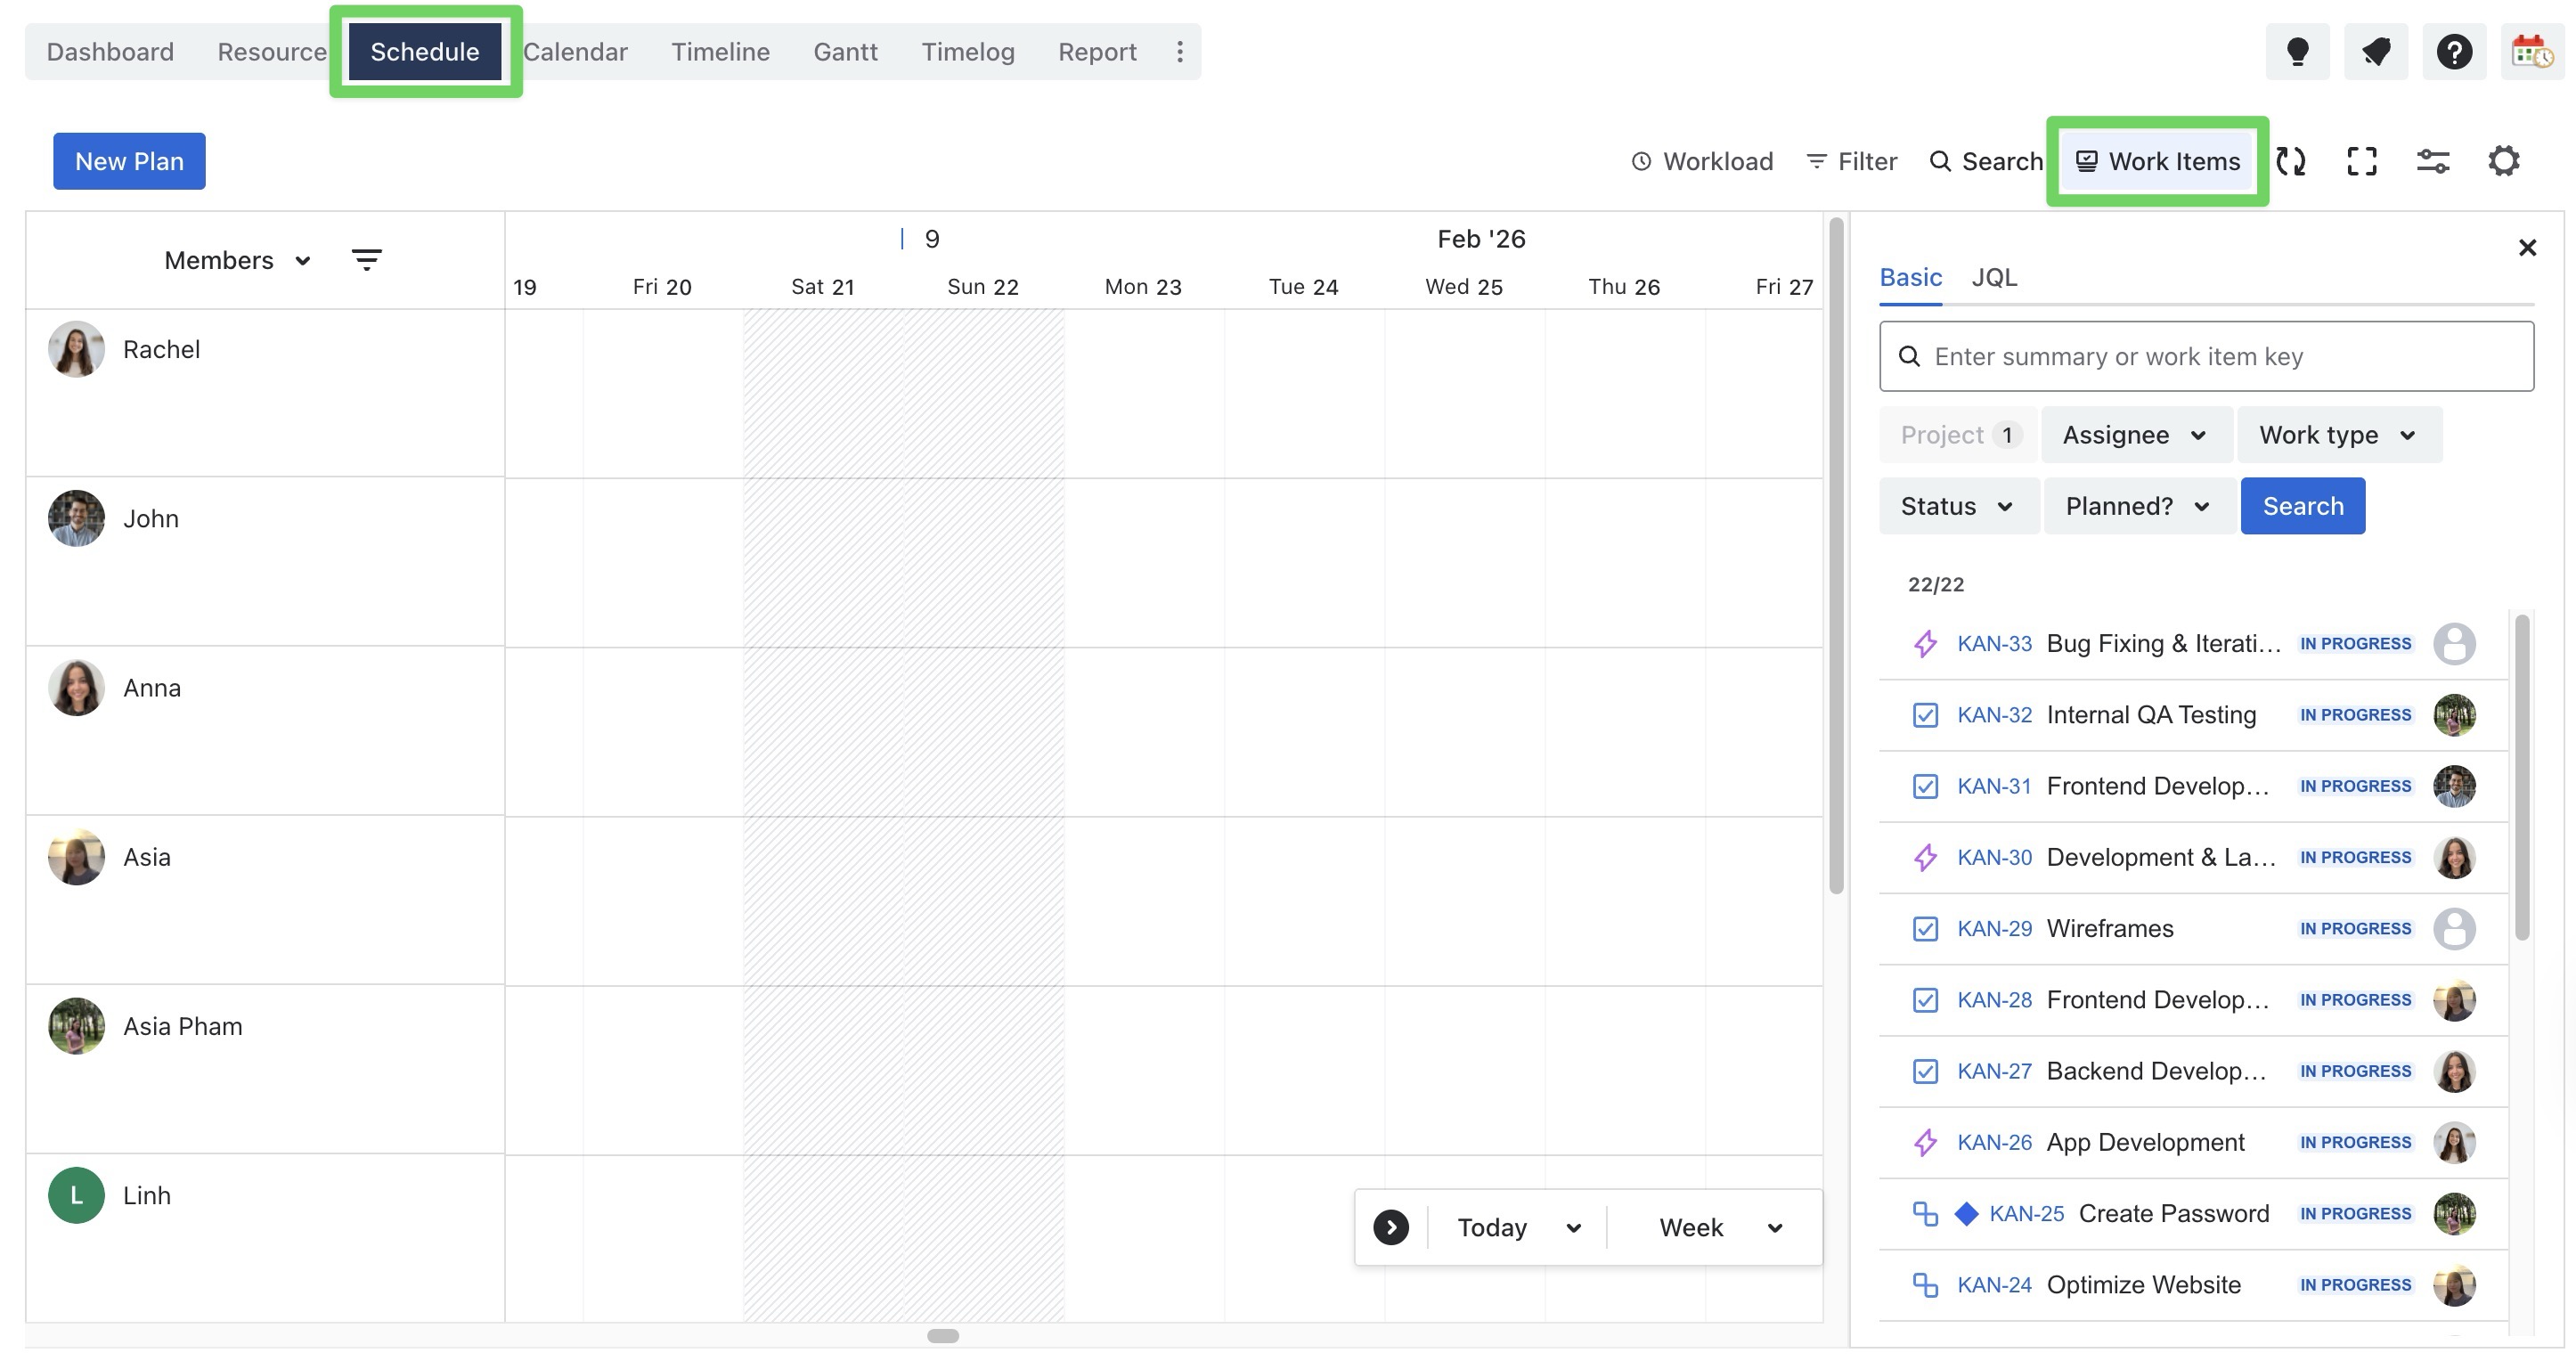
-
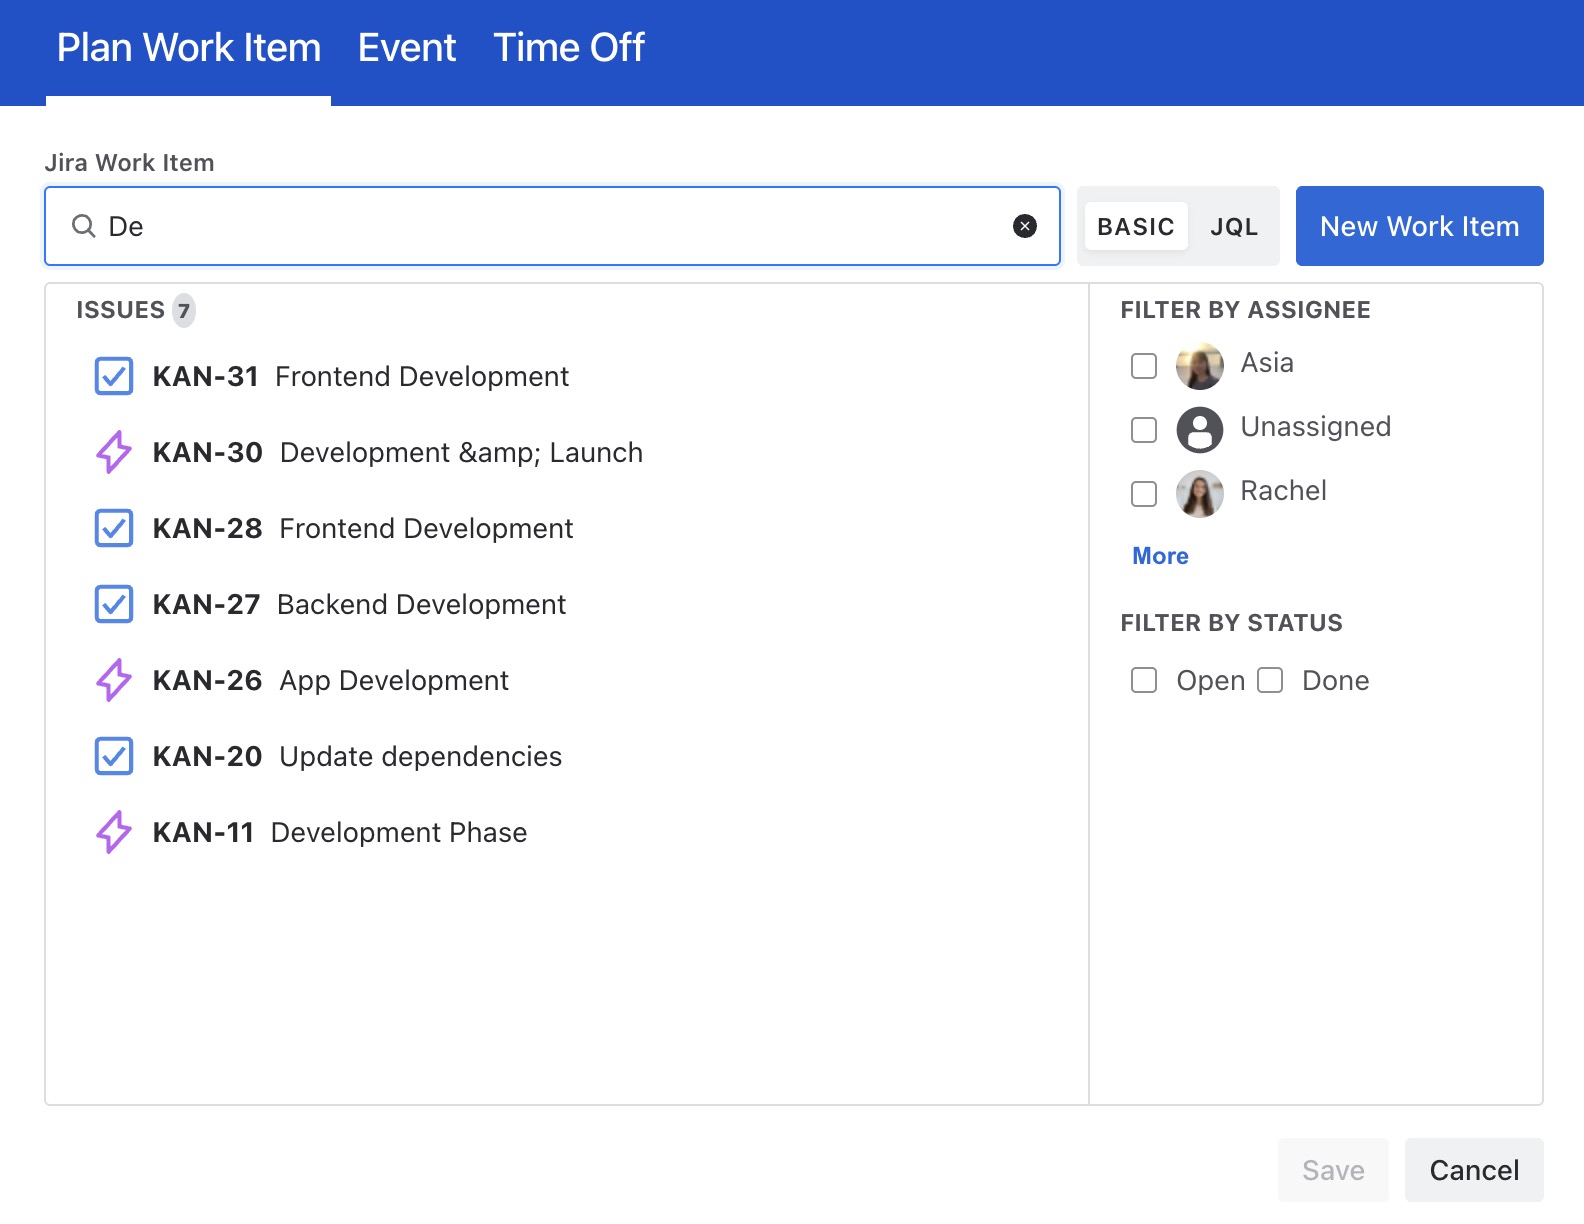
Find a work item by typing its summary or key in the search bar:
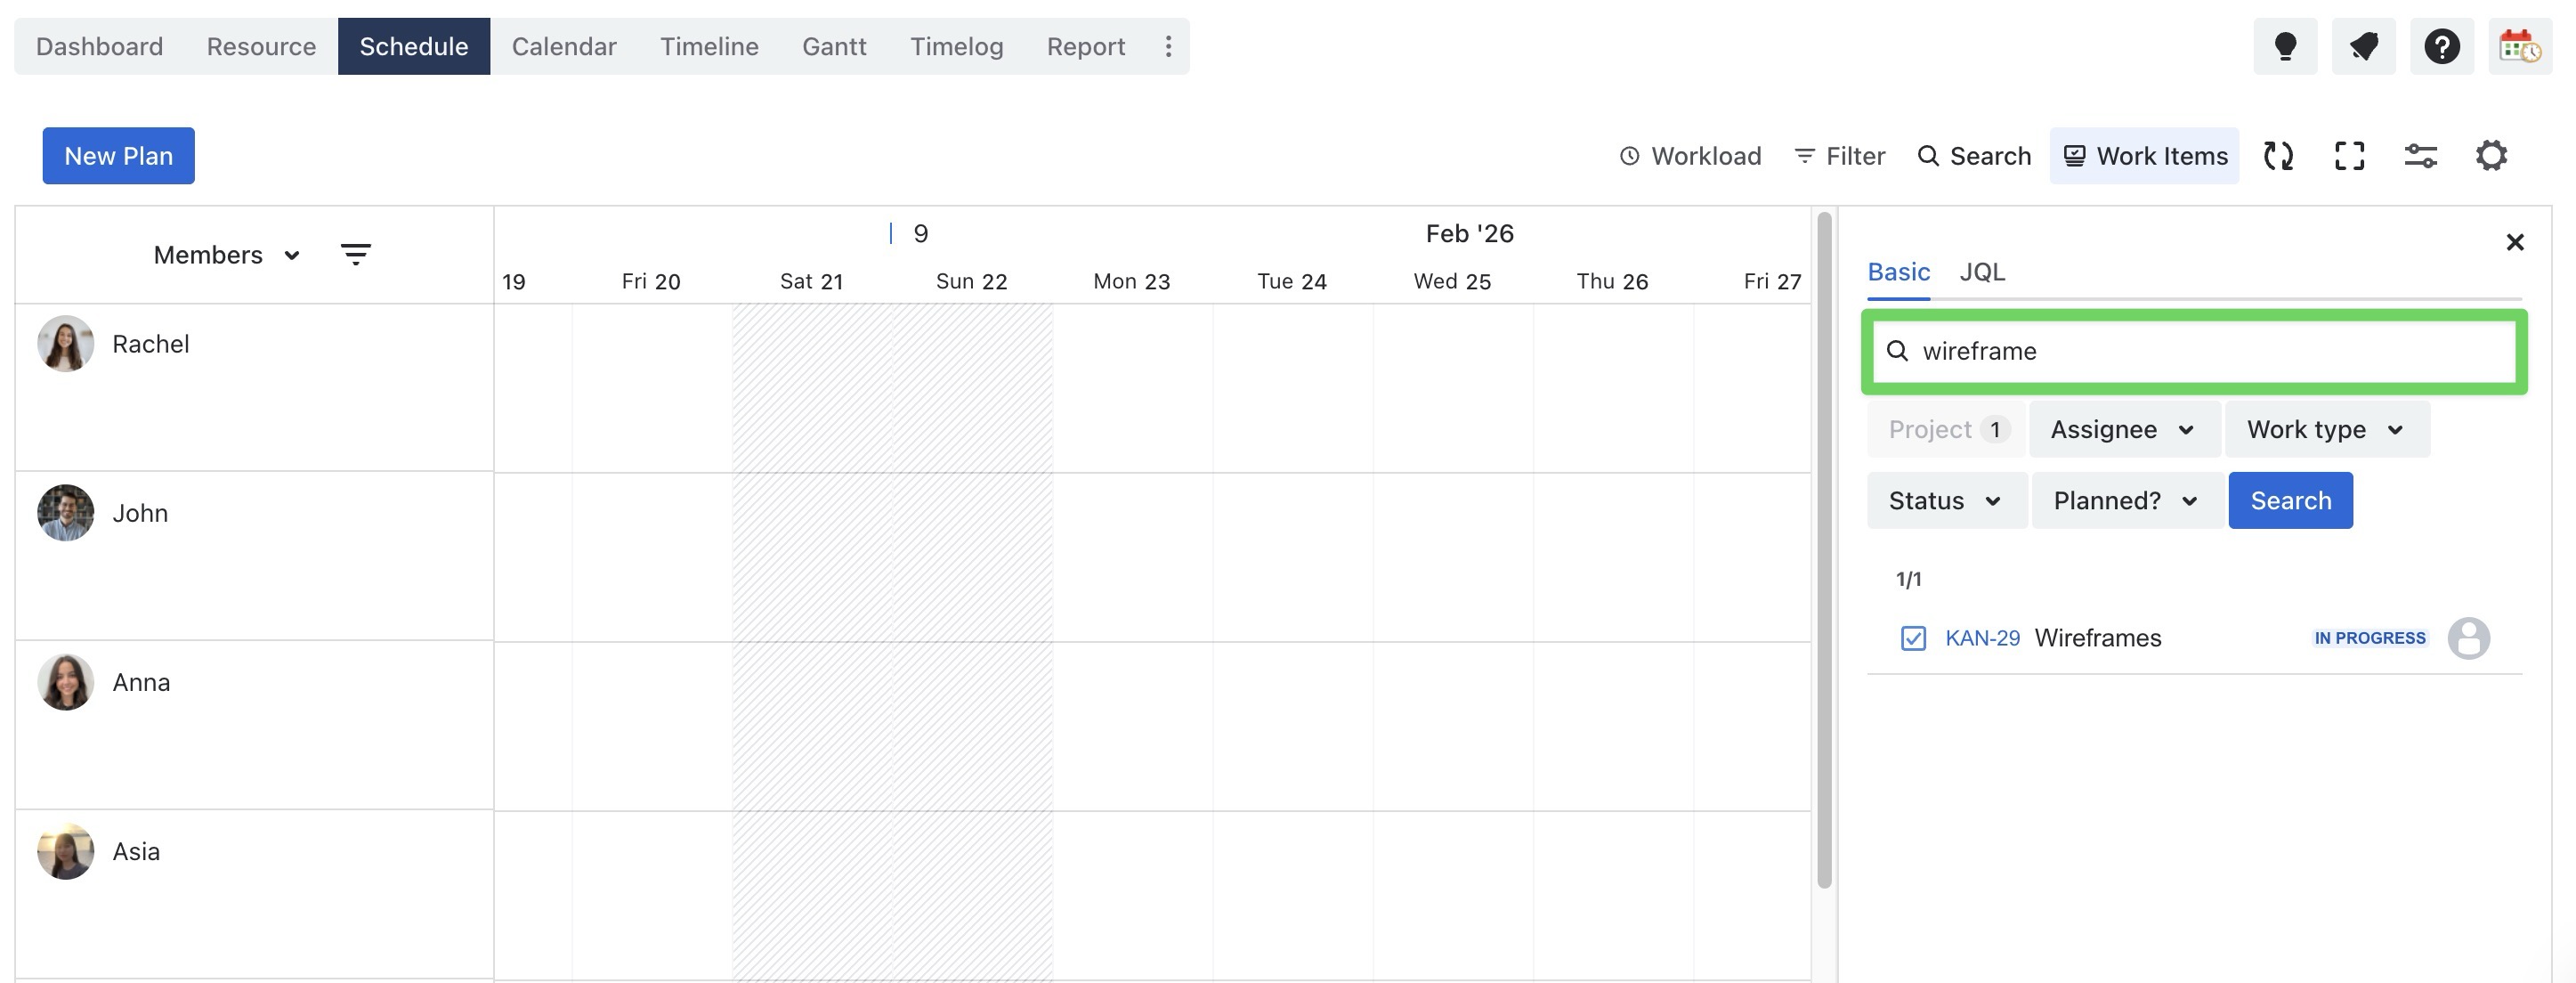
You can also use filters to quickly narrow down the list:
-
Basic Filter: Use fields like
Project,Assignee,Work type,Status, orPlannedto filter tasks. -
JQL (Jira Query Language): For more advanced filtering, switch to the JQL tab and enter your custom query.
Tips: Use the Planned or Status filters to quickly find unscheduled or to-do tasks, helping you stay on top of project progress.
-
Once the work items appear in the list, drag and drop the work items onto the board to plan and assign.
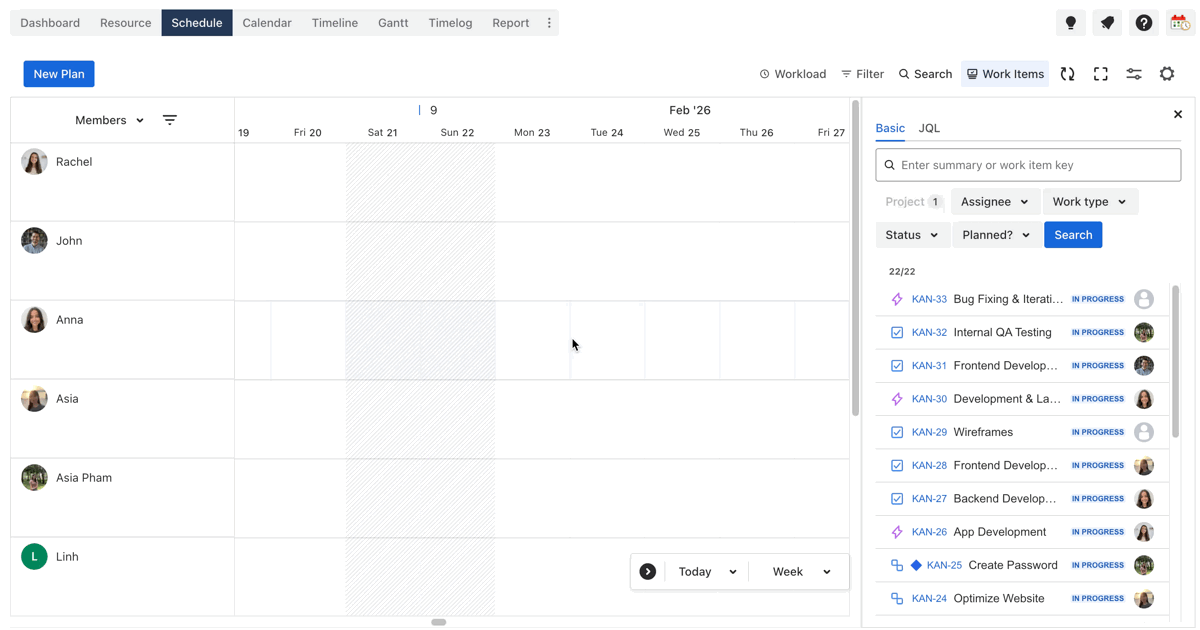
Tips: You can adjust the start date and end date of a task by dragging it left or right. To change the scheduled hours for the task, simply drag it down.
Planning via the Planning Dialog
The Planning Dialog is a pop-up window that lets you quickly plan tasks onto the board. You can open this dialog in two ways:
-
Go to the Schedule Board from the top navigation bar.
-
Open the Planning Dialog in two ways:
option 1 Click ![]()
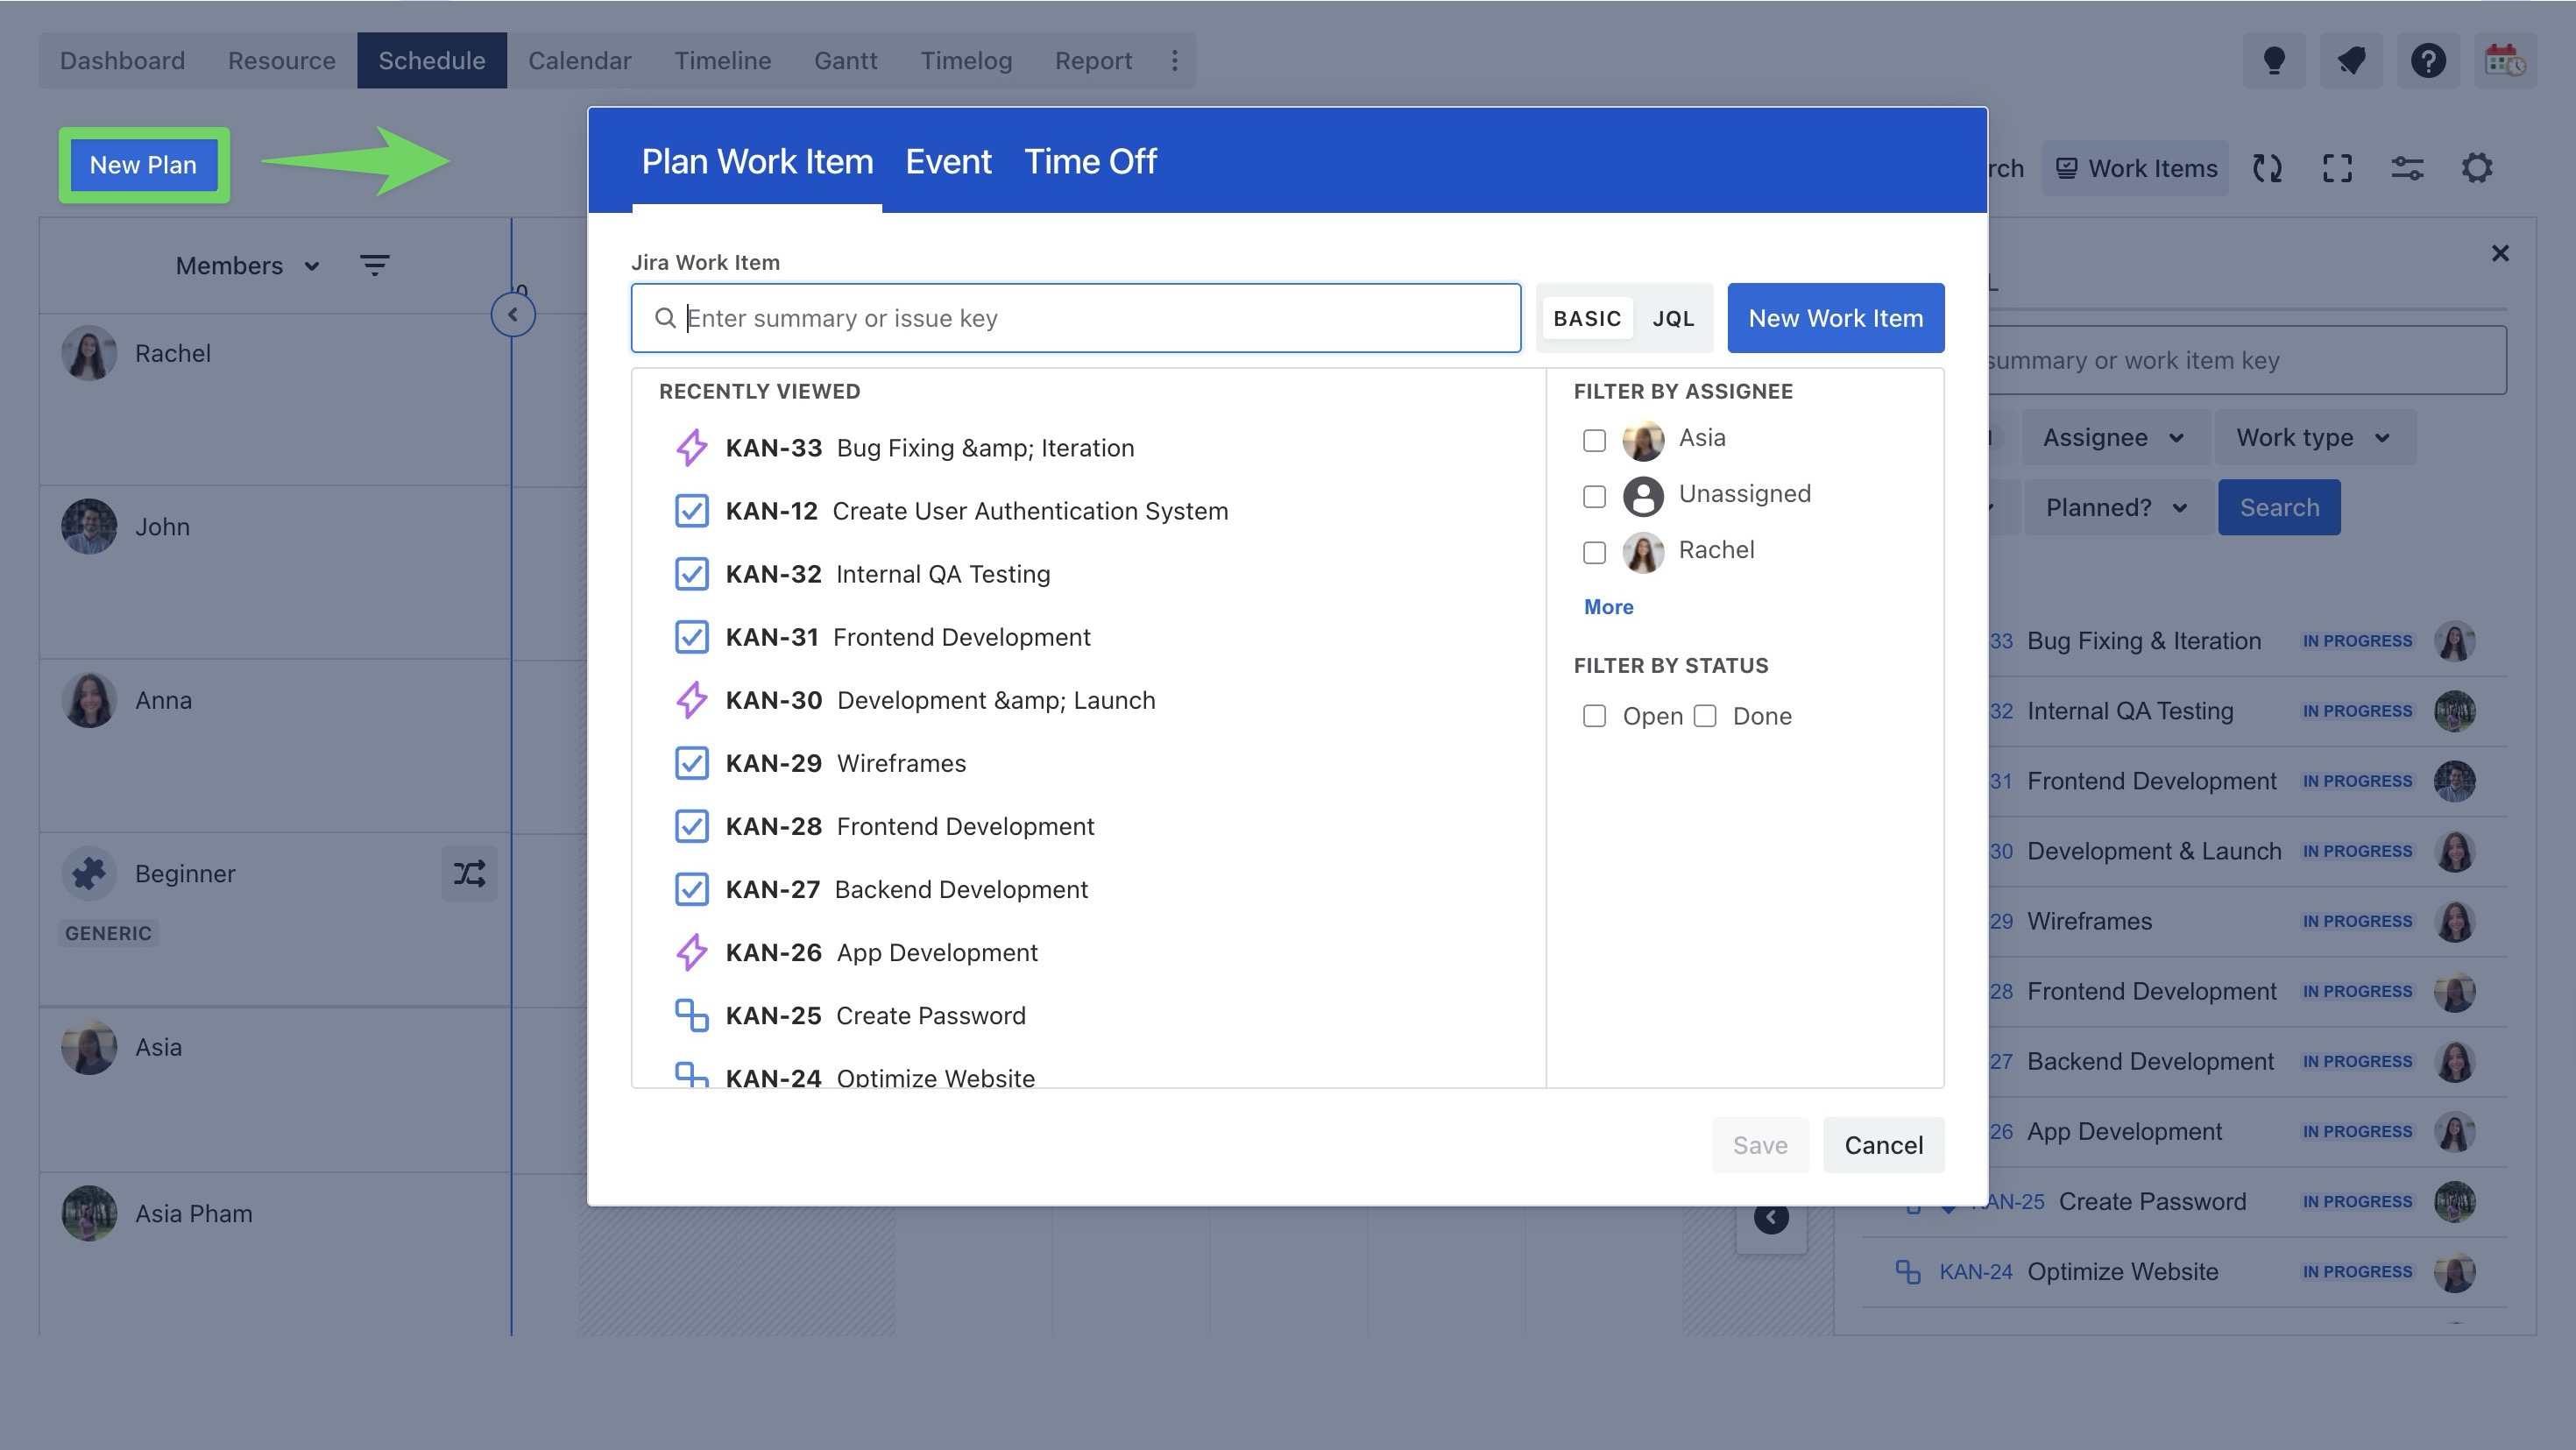
option 2 Click on a date cell or drag across multiple cells to open the Planning Dialog.

You can also access the Planning Dialog from the Calendar Board by clicking on a specific date or dragging across a range of dates.
-
In the Planning Dialog, you can:
-
Search for an existing work item by typing its summary or work item key
-
Create a new work item by clicking

-
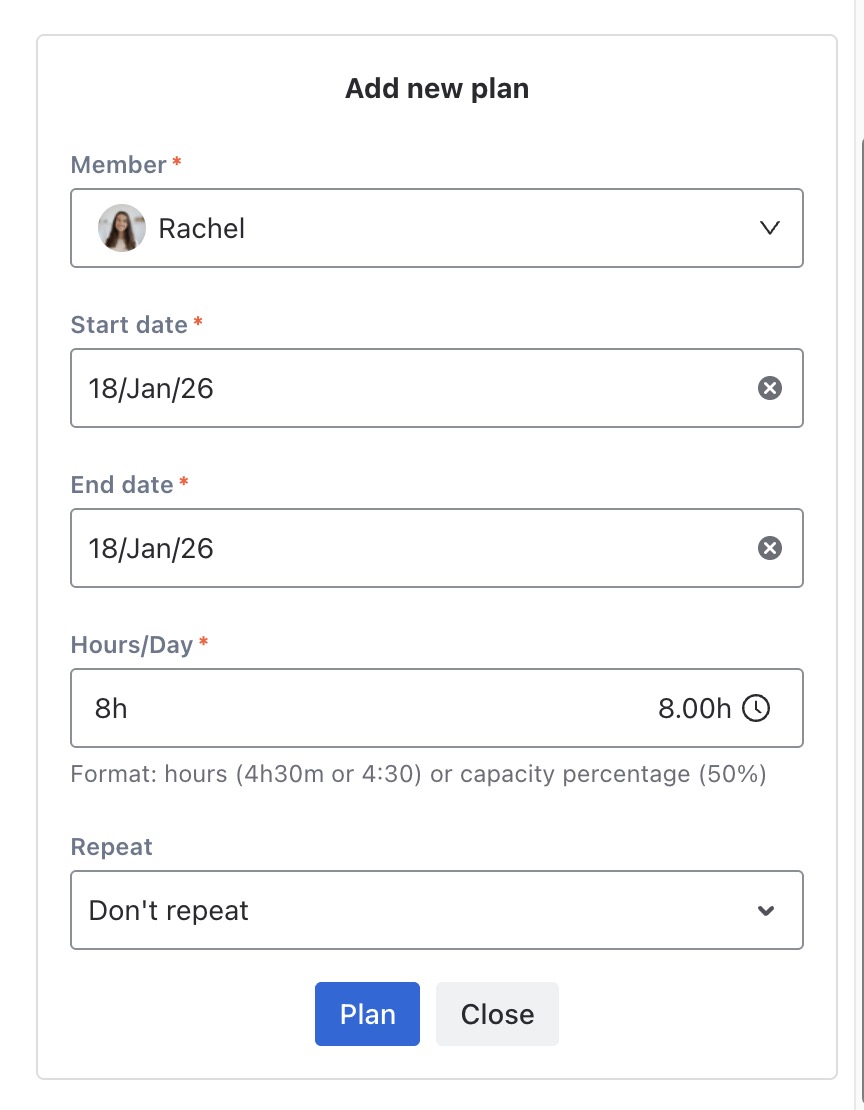
Complete the task planning by filling in the following fields:
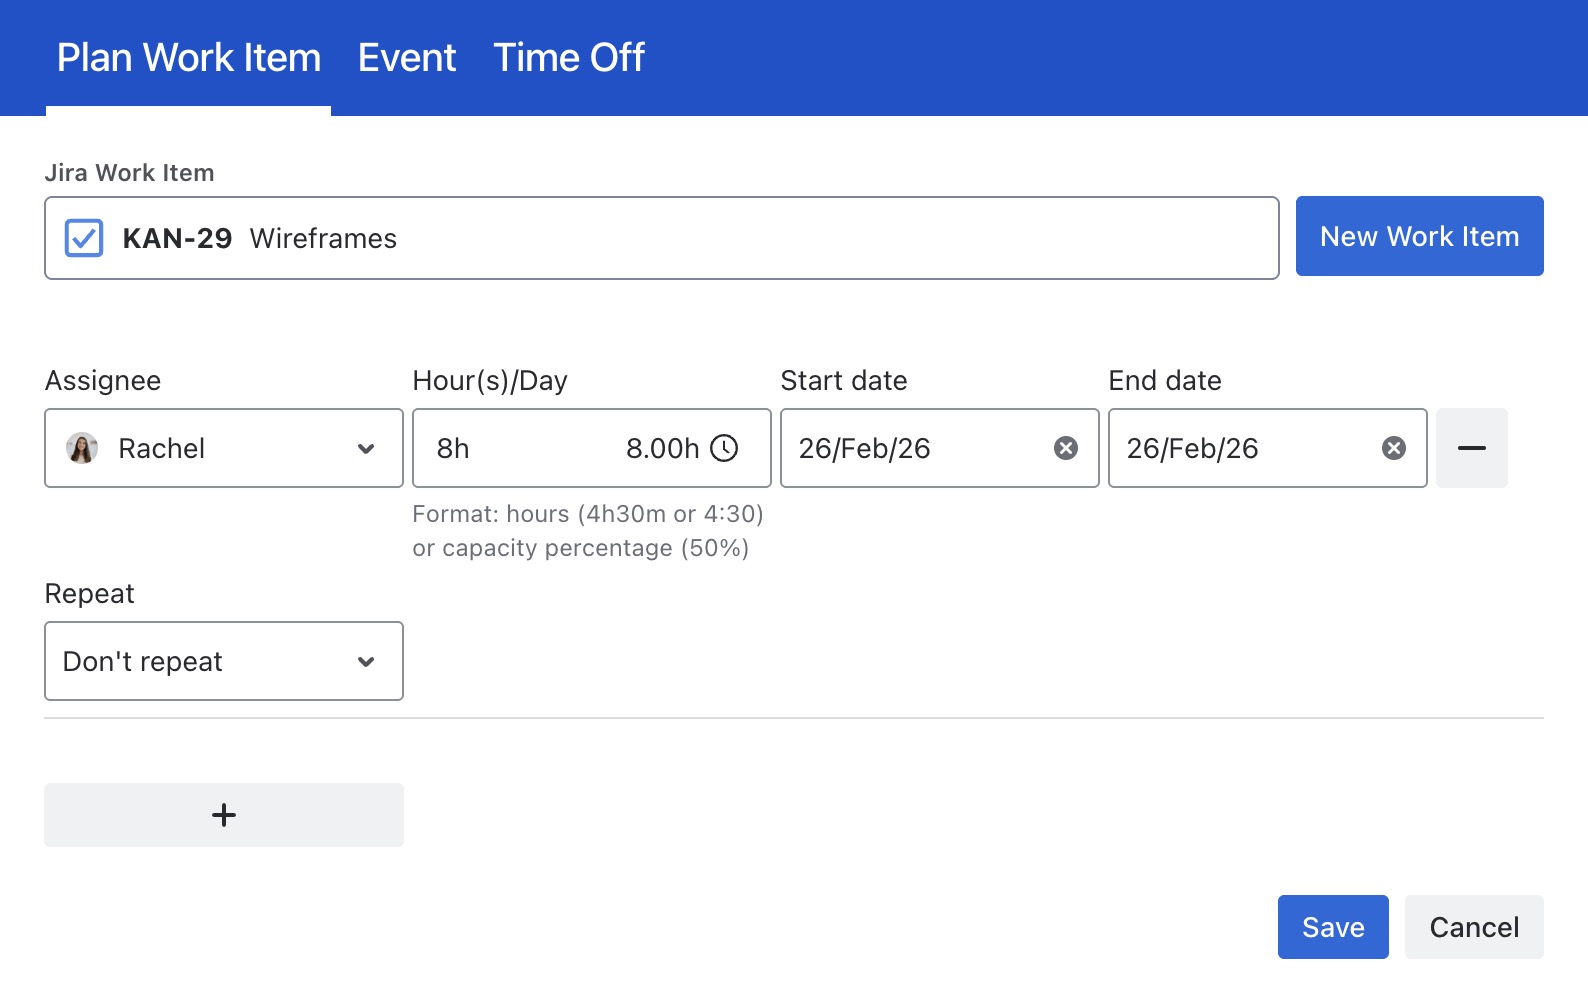
-
Assignee: The team member responsible for completing the task.
-
Start date: The date the task is scheduled to begin.
-
End date: The date by which the task should be completed.
-
Hours/Day: Refer to how many working hours per day a person is planned to work on the task.
When using the Planning Dialog:
-
The Assignee is automatically set to the user creating the task.
-
The Start date and End date are based on the dates you selected while planning.
-
Hours/Day uses the default value defined in App Settings, but you can adjust it as needed during planning.
Hours/Day Definition
Hours/Day defines how many working hours per day a person is planned to spend on a task.
Supported formats
-
Hours:
4h30mor4:30 -
Capacity percentage:
50%
How percentage capacity works
When you enter a percentage, ProScheduler calculates the planned hours based on the assignee’s daily working capacity for each date in the task’s schedule.
Example:
-
Monday capacity: 8 hours
-
Tuesday capacity: 4 hours
If the task is planned with 50% capacity:
-
Task starting on Monday → 50% of 8h = 4h
-
Task starting on Tuesday → 50% of 4h = 2h
This allows planning to automatically adapt to different daily capacities without manually adjusting hours.
-
Click

Planning via the Jira Work Item Detail Panel
TeamBoard ProScheduler allows users to plan tasks directly within the Work Item Detail panel without needing to switch to the ProScheduler app. Here is how to do it:
-
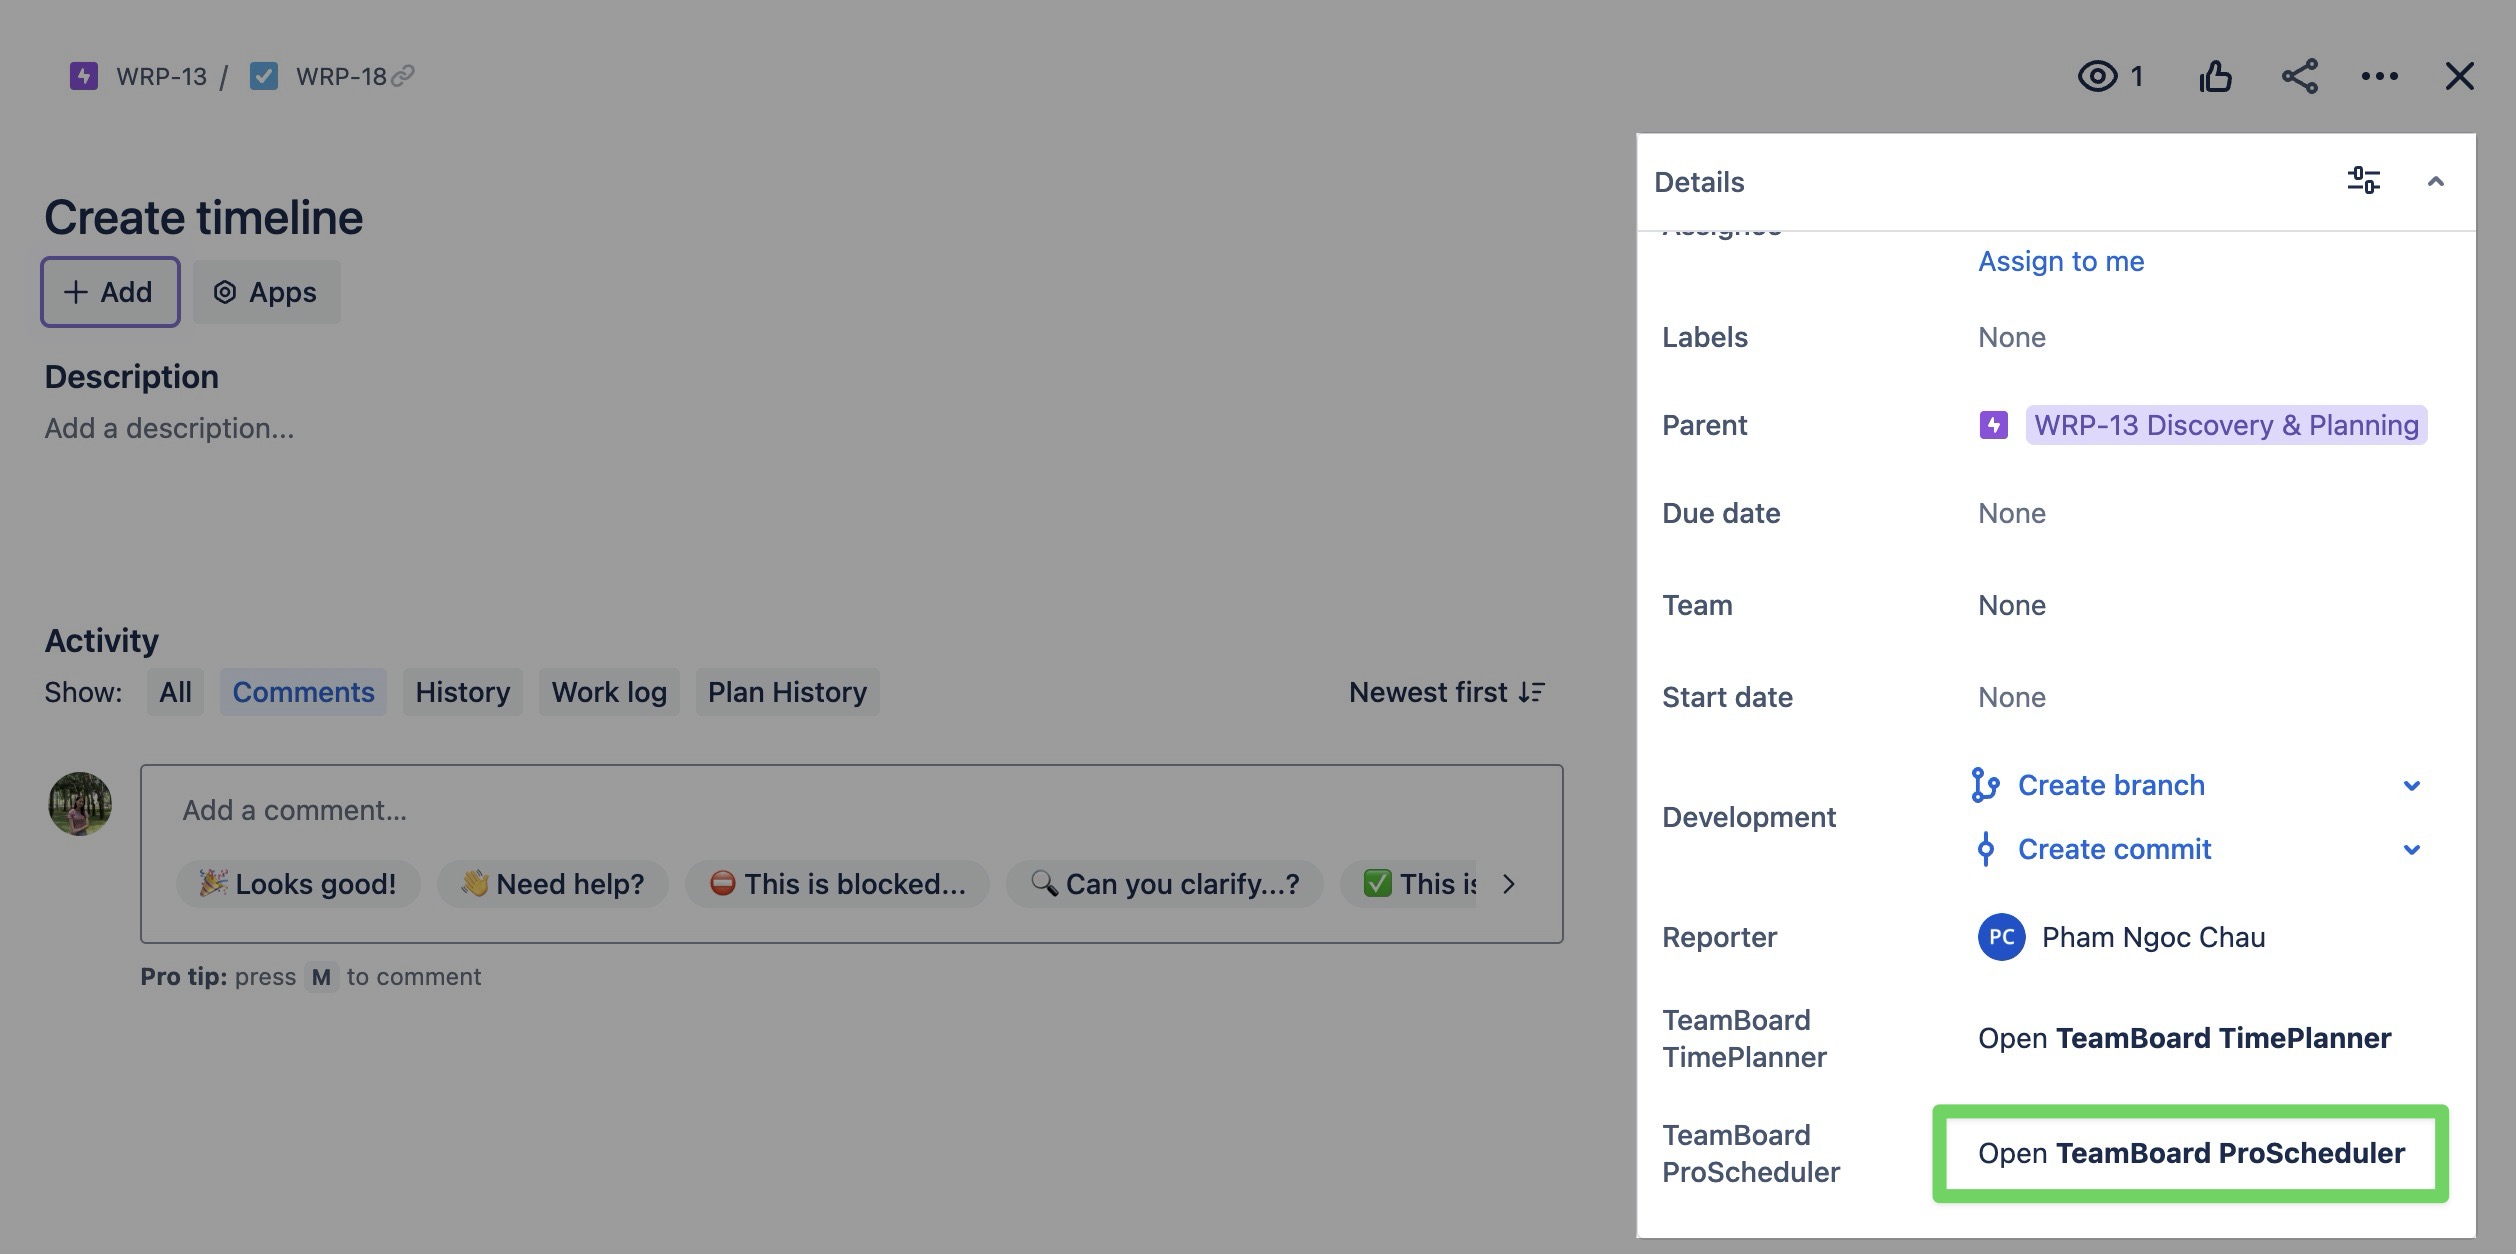
Open the Jira Work Item for the task you want to plan.
-
In the right-hand panel, click Open TeamBoard ProScheduler. This will open the planning section for the selected task.
-
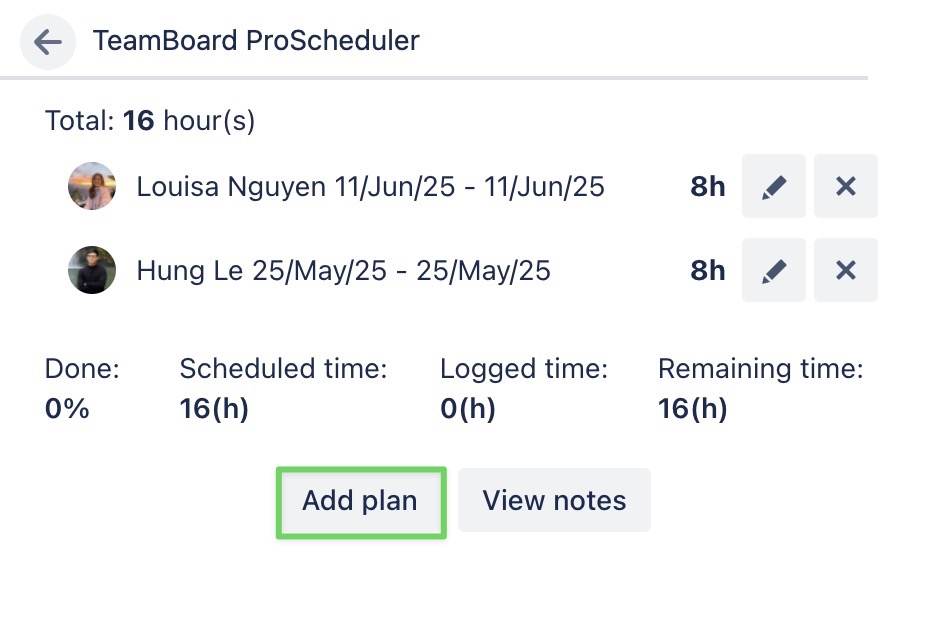
In the planning section, click

-
Complete the task planning by filling in the following fields:
-
Member: The team member responsible for completing the task.
-
Start date: The date the task is scheduled to begin.
-
End date: The date by which the task should be completed.
-
Hours/Day: Refer to how many working hours per day a person is planned to work on the task.
-
Click

Once you set the task plan, it automatically appears in the TeamBoard ProScheduler. For visual planning, go to the Schedule Board or Calendar Board. You can easily drag and drop the task to adjust its timeline.