.png)
-
Only App Admins, Jira Admins, or Team Admins can grant permissions to team members.
-
A single member can have multiple roles.
For more information about app-level permissions, visit here.
Team permissions in TimePlanner define how team members can access and manage schedules, task plans, work logs, timesheets, and other team-related data. This feature allows team leaders and administrators to control team activities effectively while enabling members to focus on tasks relevant to their roles.
Within a team, there are two default roles: Team Leader and Member. Administrators can also create custom roles and assign team members to these roles based on their responsibilities. A single team member can hold multiple roles simultaneously, providing flexibility in managing responsibilities.
Team Roles
In TimePlanner Team, there are several team roles, including: Team Admin, Team Leader, Team Creator, and Member.
TEAM ADMIN
As the Team Admin, the user can create new teams and view all teams in TeamBoard TimePlanner. Additionally, users will have full control over resource allocation within teams and can access team data.
TEAM LEADER Default
As a Team Leader, you can see all the teams you belong to. By default, you are given full permissions to manage key areas of team operations.
1. Worklogs & Schedules
-
View and Manage Team Worklogs: Track and update your team’s logged work hours.
-
View and Manage Team Schedules: Monitor and adjust team schedules as needed.
-
Manage Team Members’ Settings: Update important details for each member, including:
-
Holidays & Capacity: Set holiday schedules and define availability to ensure proper coverage.
-
Default Approvers: Assign approvers for timesheets and leave requests to keep workflows smooth.
-
Leave Balances: Monitor taken and remaining leave days for each team member.
For a detailed list of permissions assigned to team leaders, refer here.
TEAM CREATOR
Users with the Team Creator role can only see the teams where they are included or they created, and they will retain the following permissions:
-
Edit Team Name: Able to change the name of the team as needed.
-
Add and Remove Members: Can manage team members by adding new members or removing existing ones.
-
Delete Team: Have the authority to delete any team they have created.
MEMBER Default
Users with a member role can only see the teams where they are included and can not create new teams or access other team schedule boards.
By default, members do not have any team-specific permissions. However, App Admins and Team Admins can grant individual permissions to members as needed, based on their roles and responsibilities within the team.
How to Access Team Permissions
These permissions are configured on the team's Permission Settings. Follow these steps to access Team Permission:
-
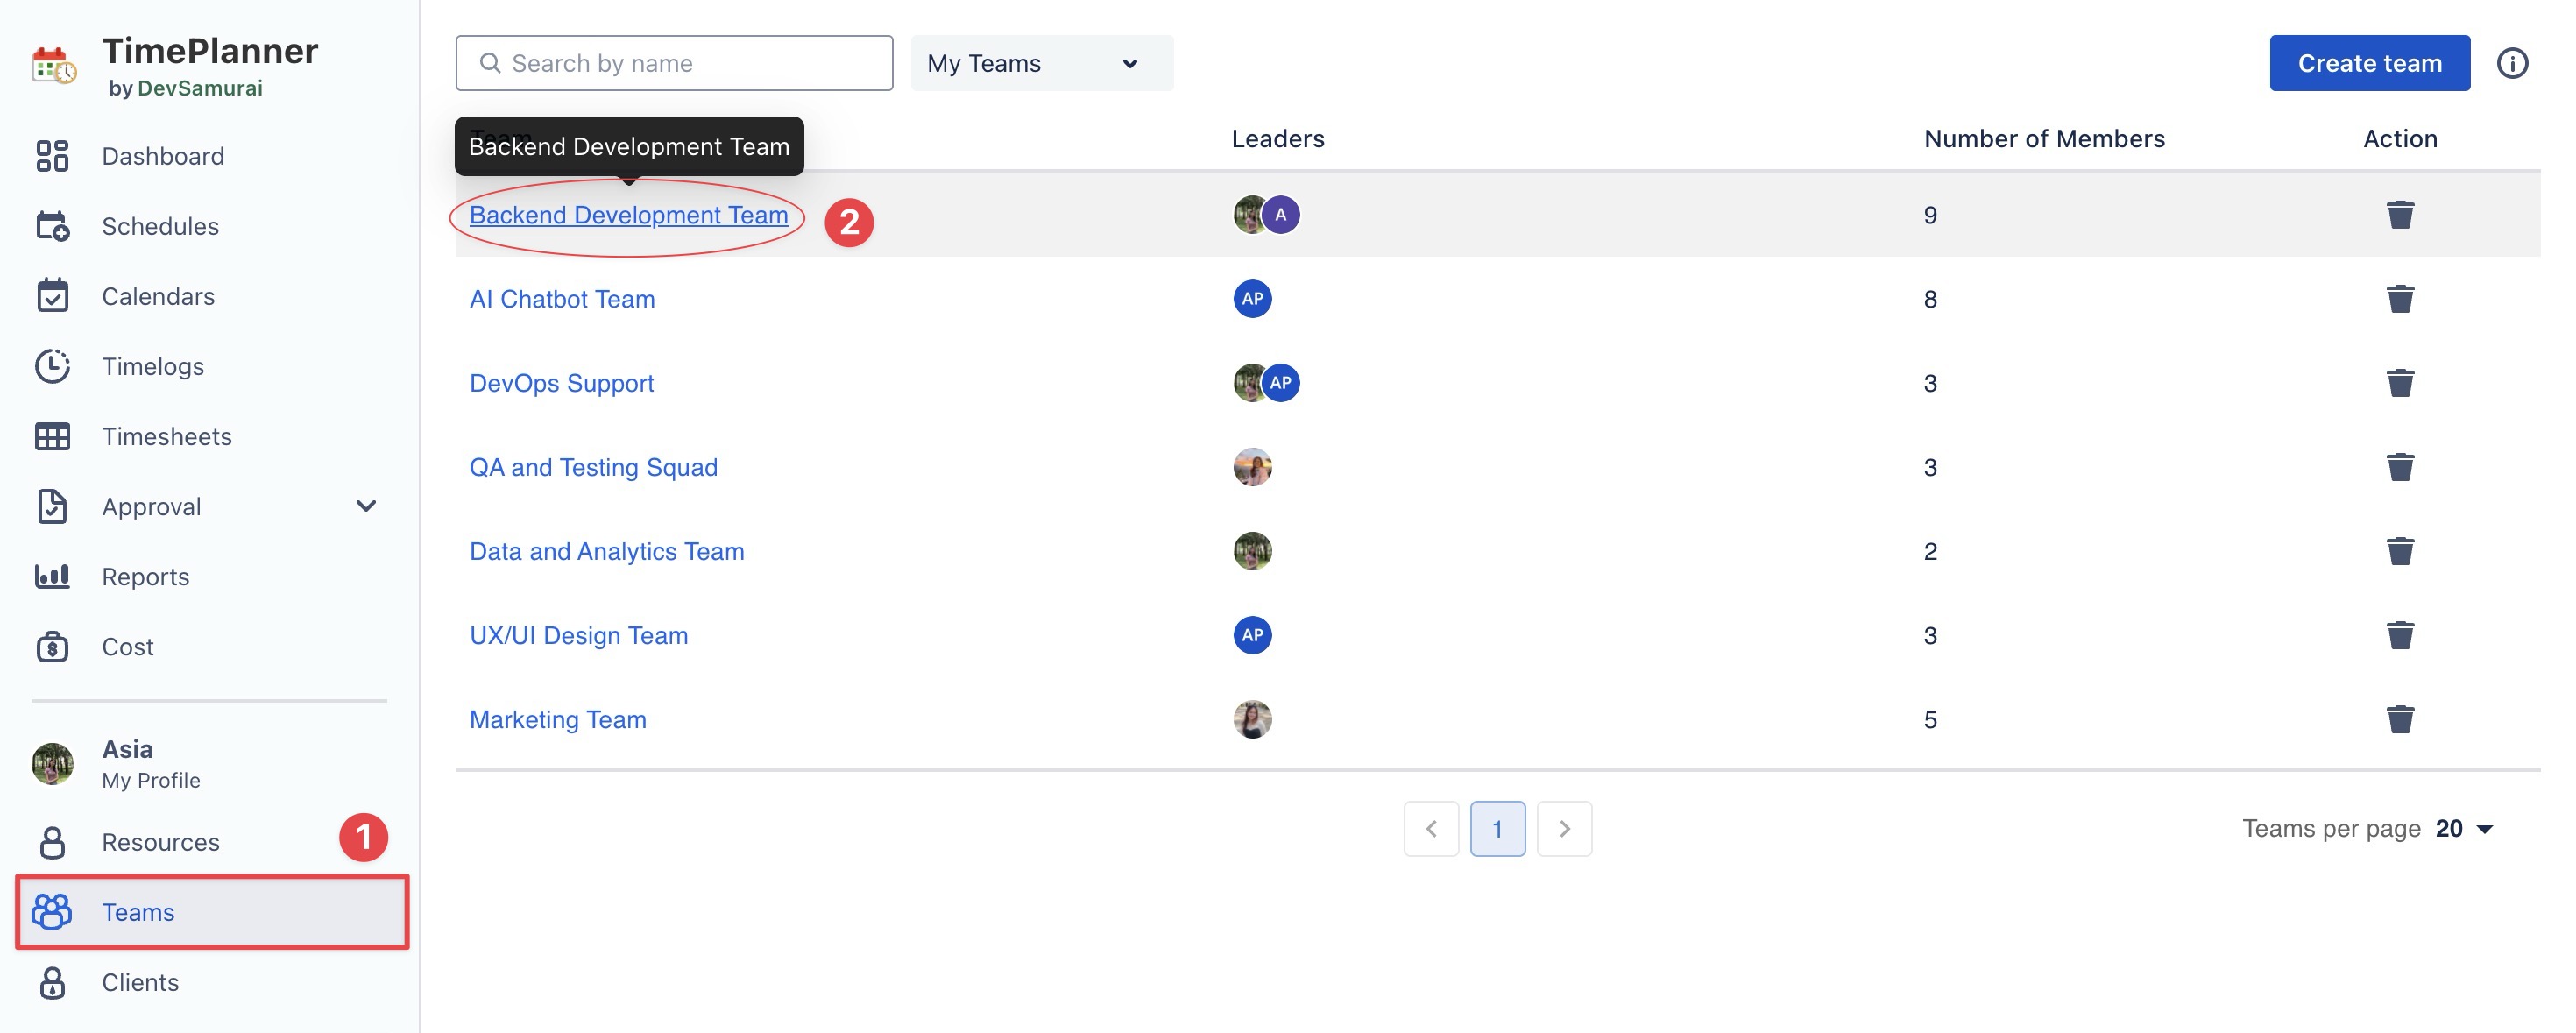
Navigate to the Teams section from the left sidebar.
-
Click on the specific Team Name to open the Team Workspace.
-
Click

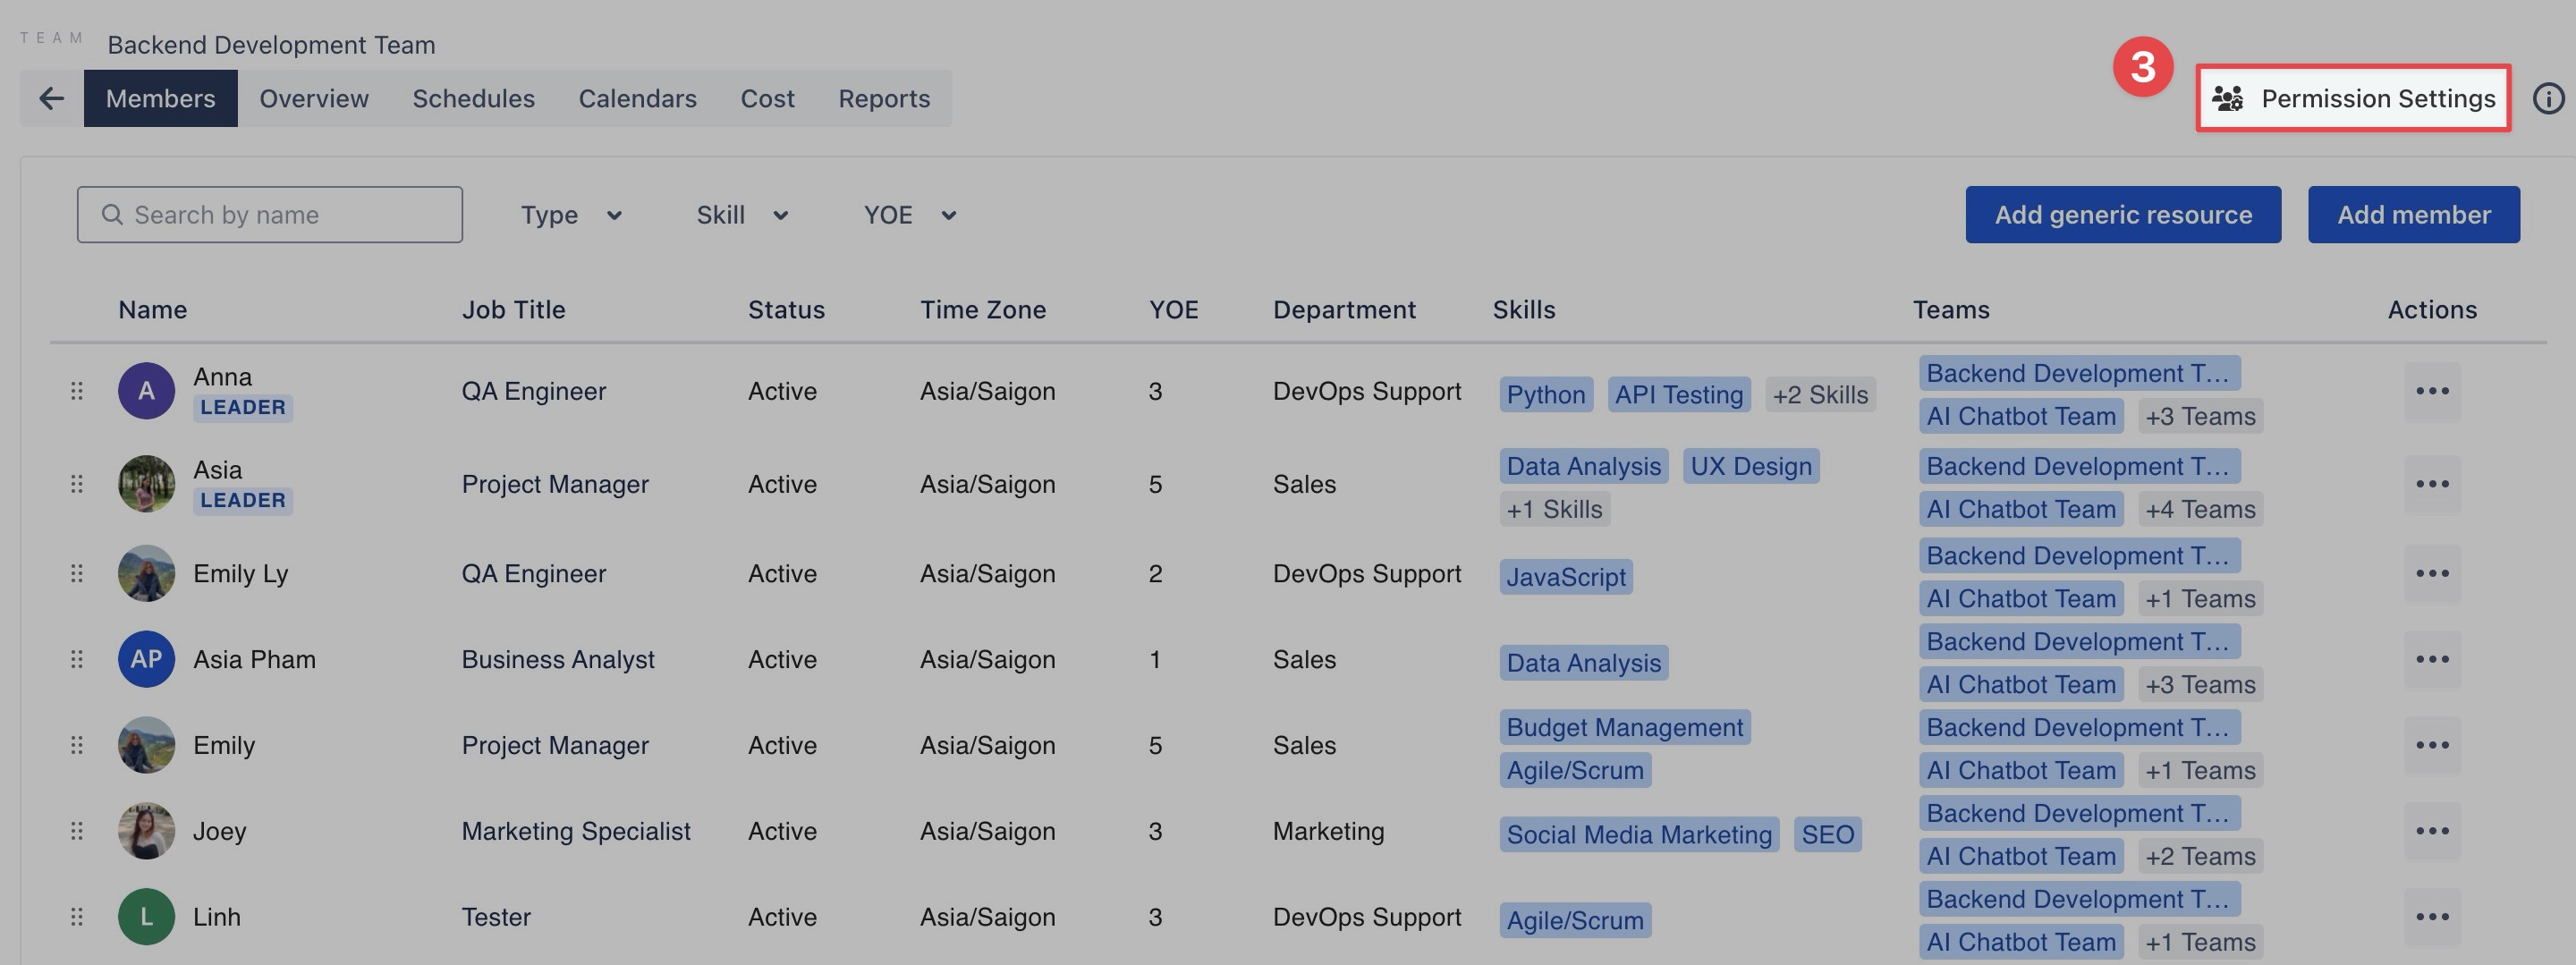
Here you can create new roles, assign permissions, and update existing roles.
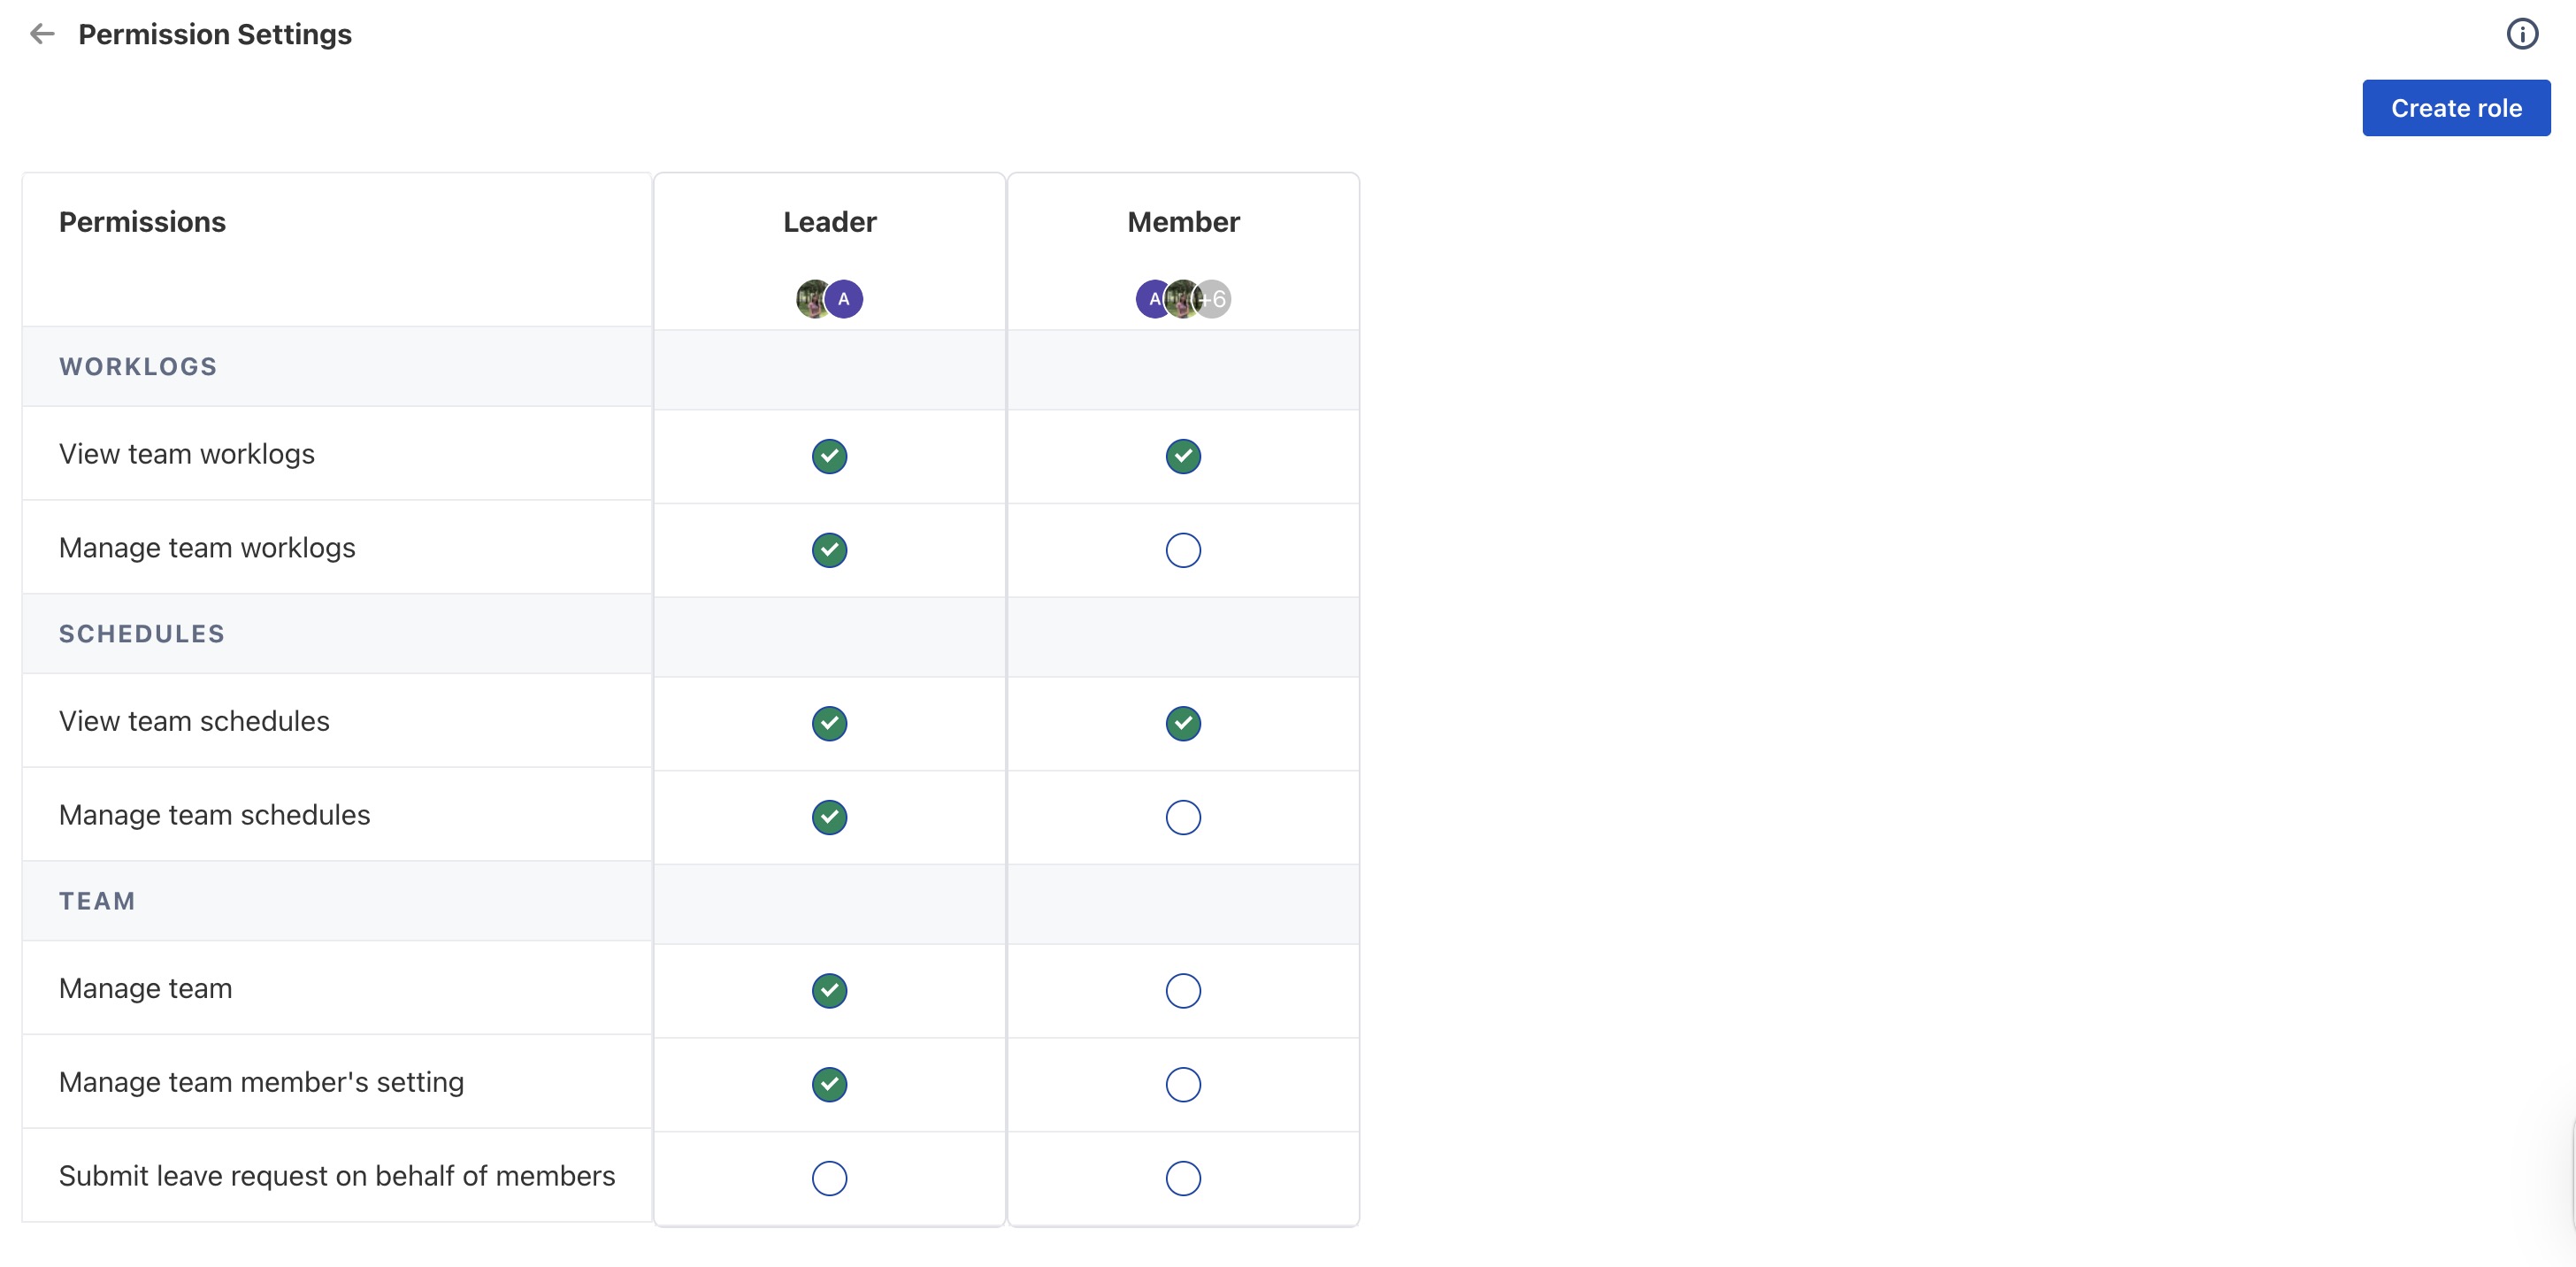
Permissions Overview
The following categories explain what each permission allows and how it affects team management:
|
Category |
Permission |
Description |
|---|---|---|
|
Work Log |
View team work logs |
Allows viewing logged hours of team members in Timelog, Report, and Dashboard. |
|
Manage team work logs |
Allows modifying logged hours of team members. |
|
|
Schedule |
View team schedules |
Allows viewing task planning in the Schedule and the scheduled hours data of other members in the Report and Dashboard. |
|
Manage team schedule |
Allows updating tasks (start/end dates, durations) for team members. |
|
|
Team |
Manage team |
Allows adding/removing members, editing team names, and assigning team leaders. |
|
Manage team member settings |
Allows updating holidays, capacity, default approvers, and monitoring leave balances. |
|
|
Submit leave requests on behalf of members |
Allows creating and submitting leave requests for team members. |
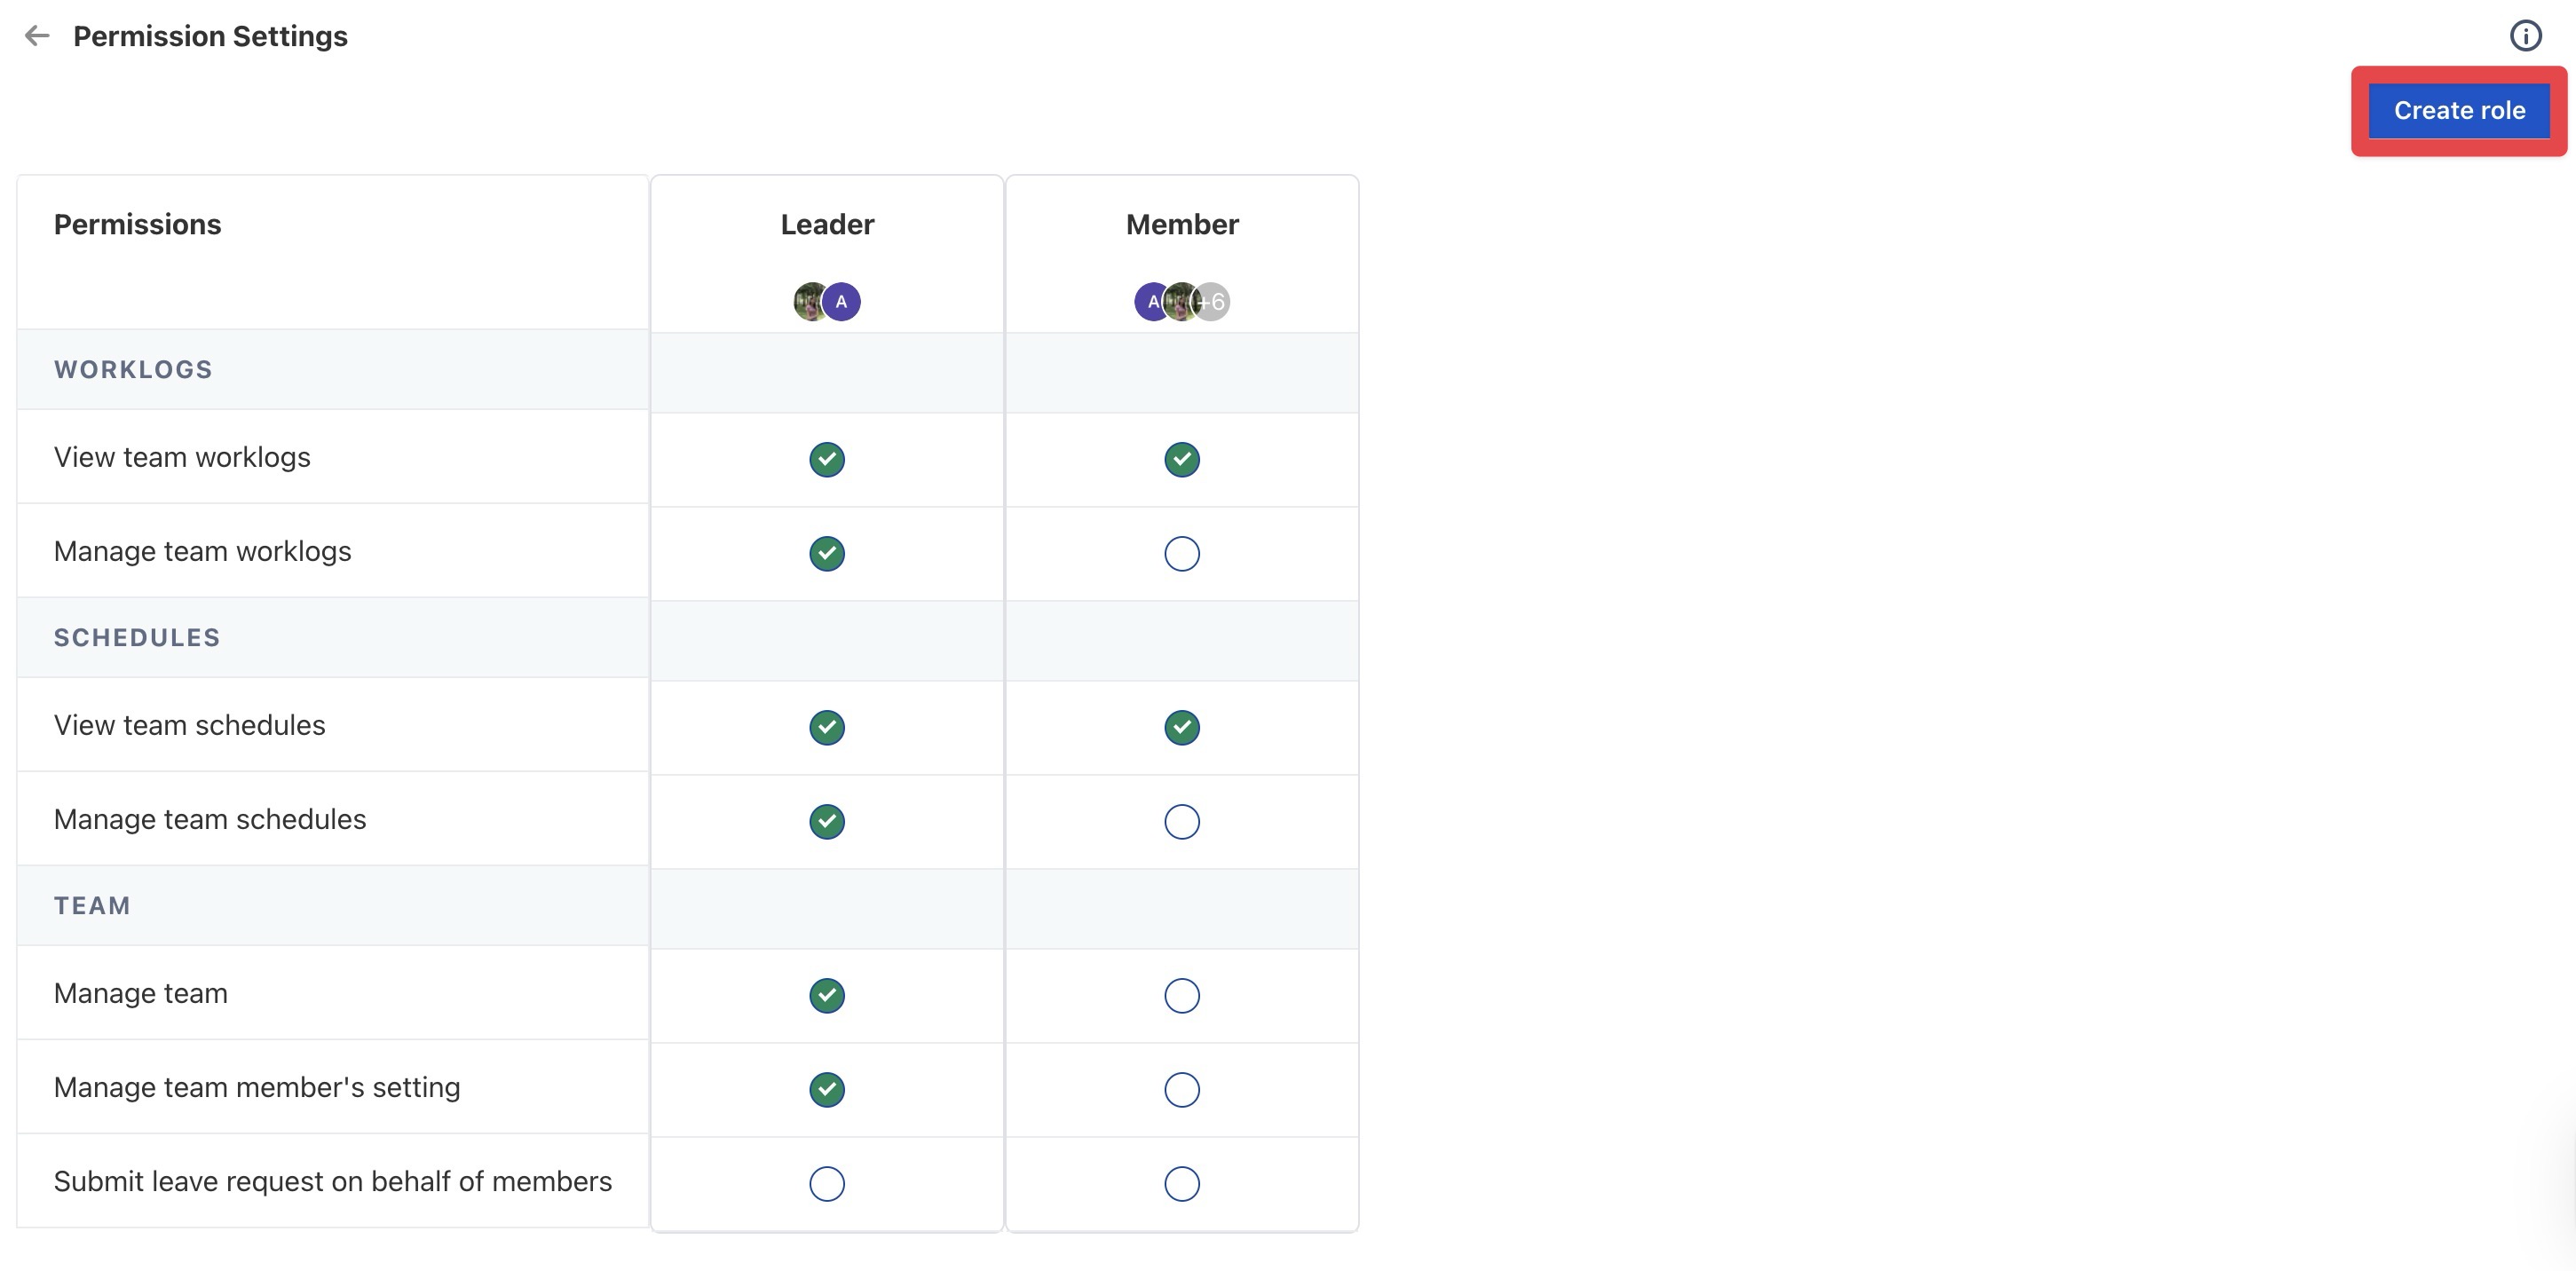
Creating a New Role
If your team has unique responsibilities, you can create custom roles with specific permissions.
Steps to Create a New Role:
-
From the Tem Permission page, Click

-
A new column will appear, define the role by doing the following fields:
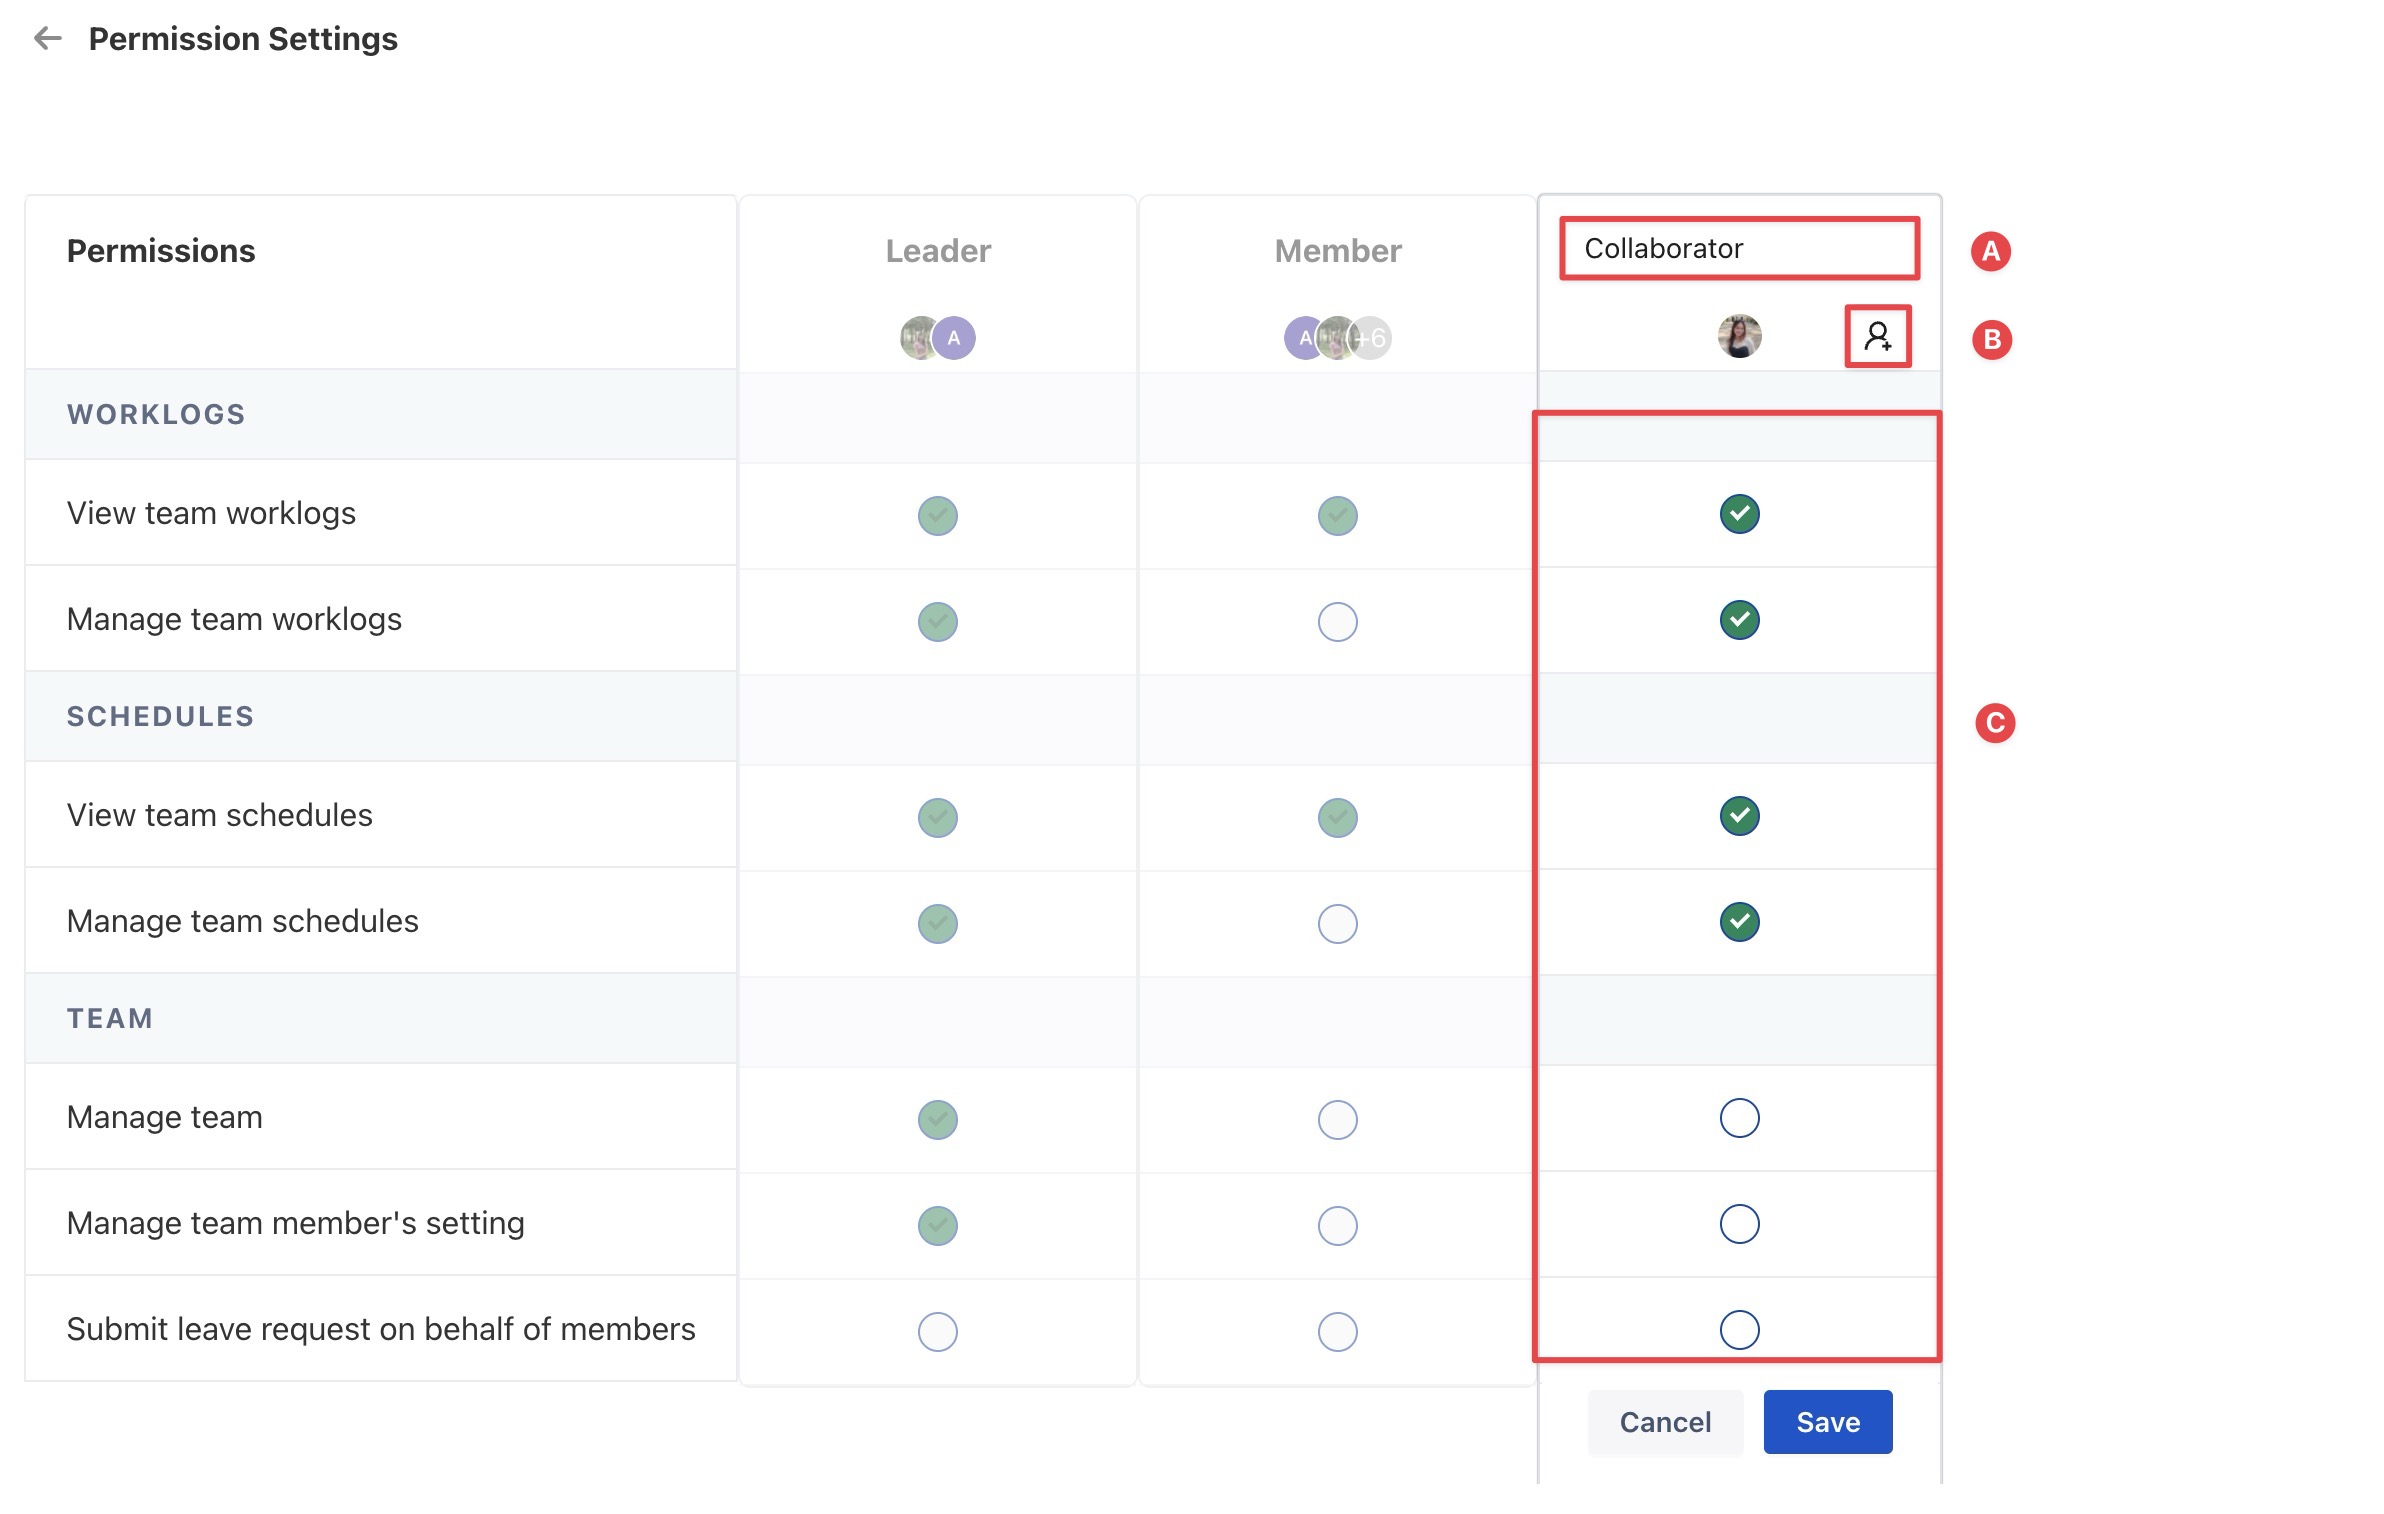
A. Name the role: Enter a descriptive role name.
B. Add Users: Select one or more users for this role.
C. Assign Permissions: Check the boxes for the permissions you want to grant.
-
Click