.png)
When managing multiple projects, keeping track of progress, dependencies, and team collaboration can be challenging. The user story map in ProductGo offers a powerful visual tool to streamline this process, particularly when working with numerous projects in Jira. Here are the details.
Steps in this use case:
-
Create an Agile board
-
Access ProductGo
-
Manage your projects on a story map board
Step 1: Create an Agile Board
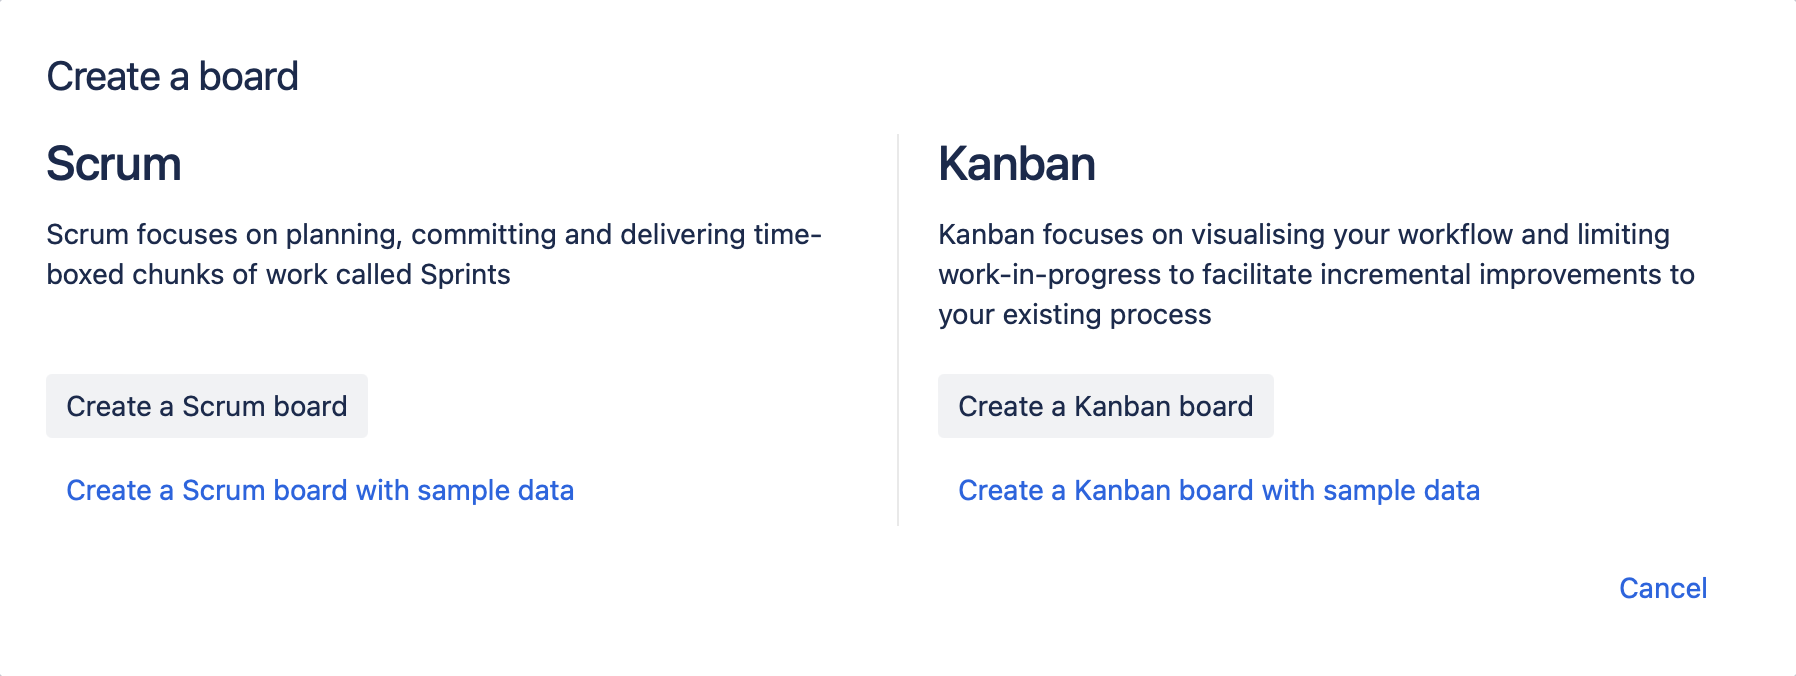
There are two main types of Agile boards in Jira: Scrum and Kanban. Here’s a breakdown of how to create them:
-
Access the board creation menu
In Jira, navigate to the search bar and select View all boards or Go to all: Boards depending on your Jira version. Click the Create board button.

-
Choose Scrum or Kanban board
Select Create a Scrum board or Create a Kanban board from the options.
-
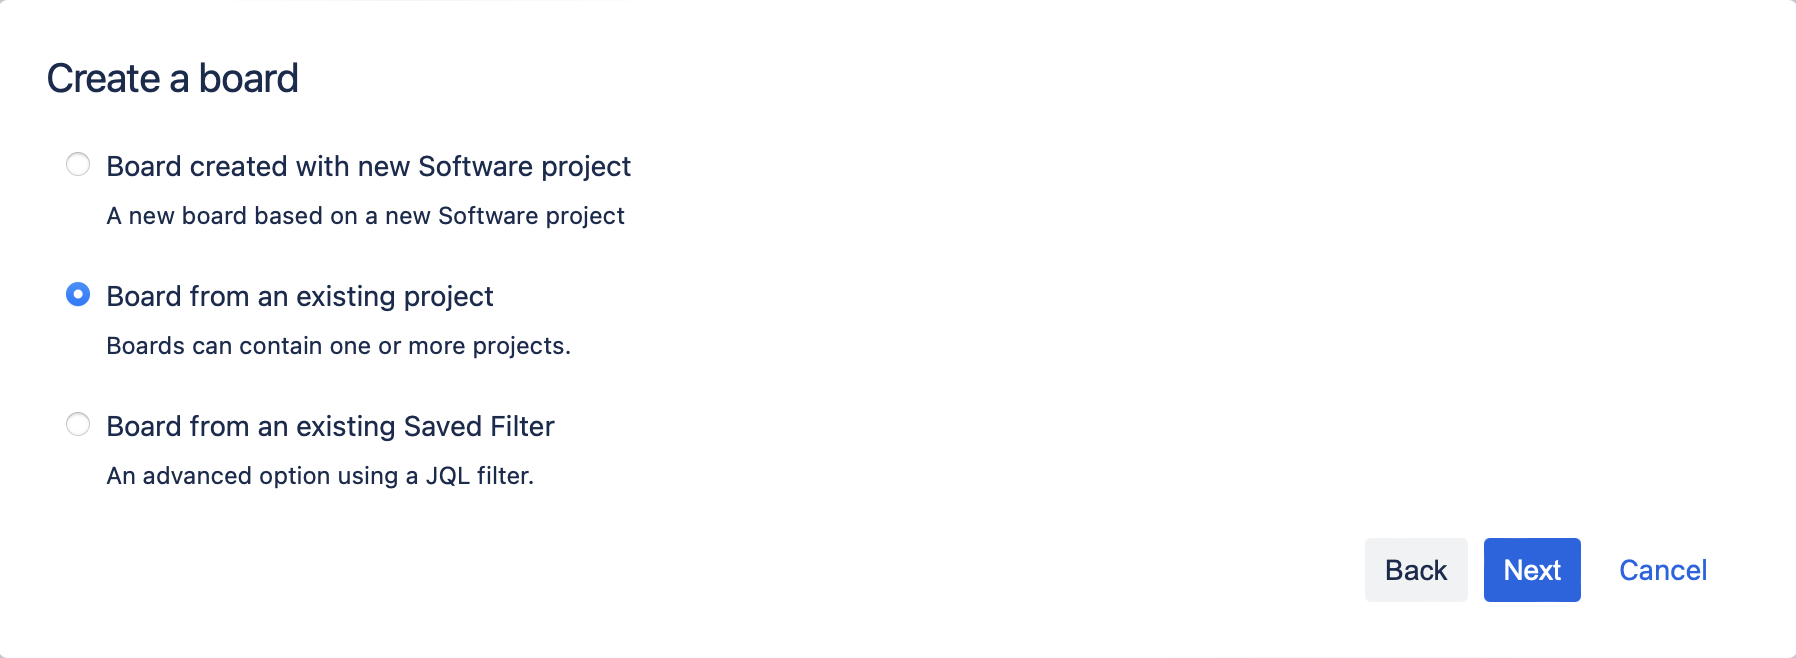
Pick projects
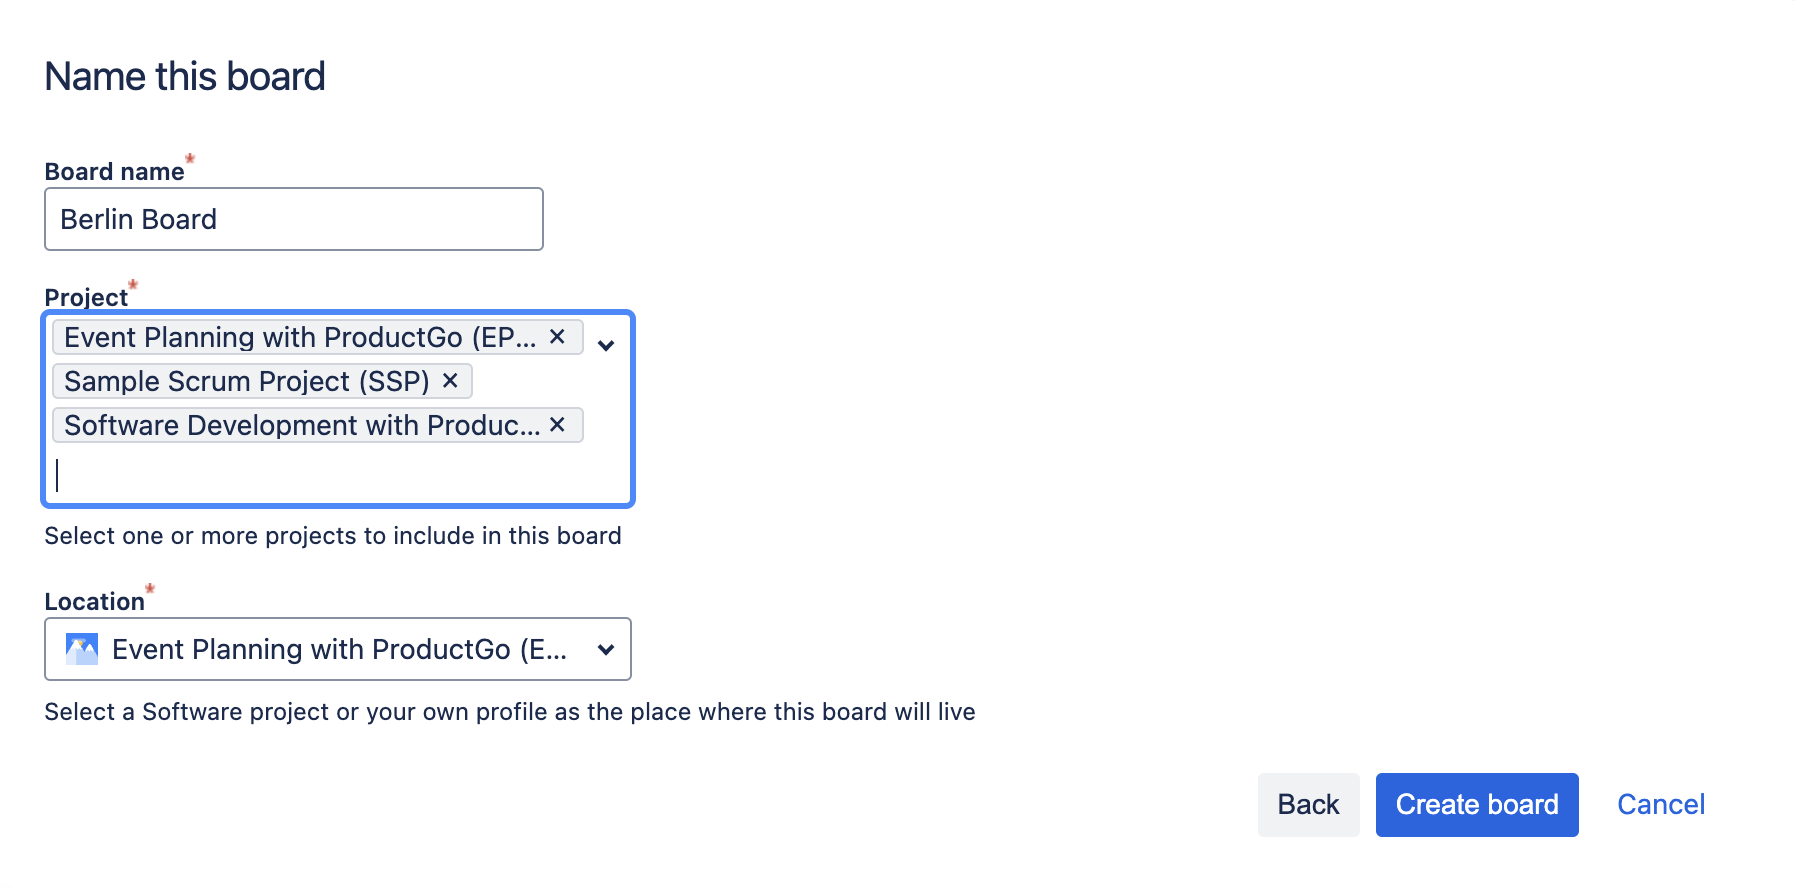
Choose the Board from an existing project option then pick the projects you want to manage and their location.
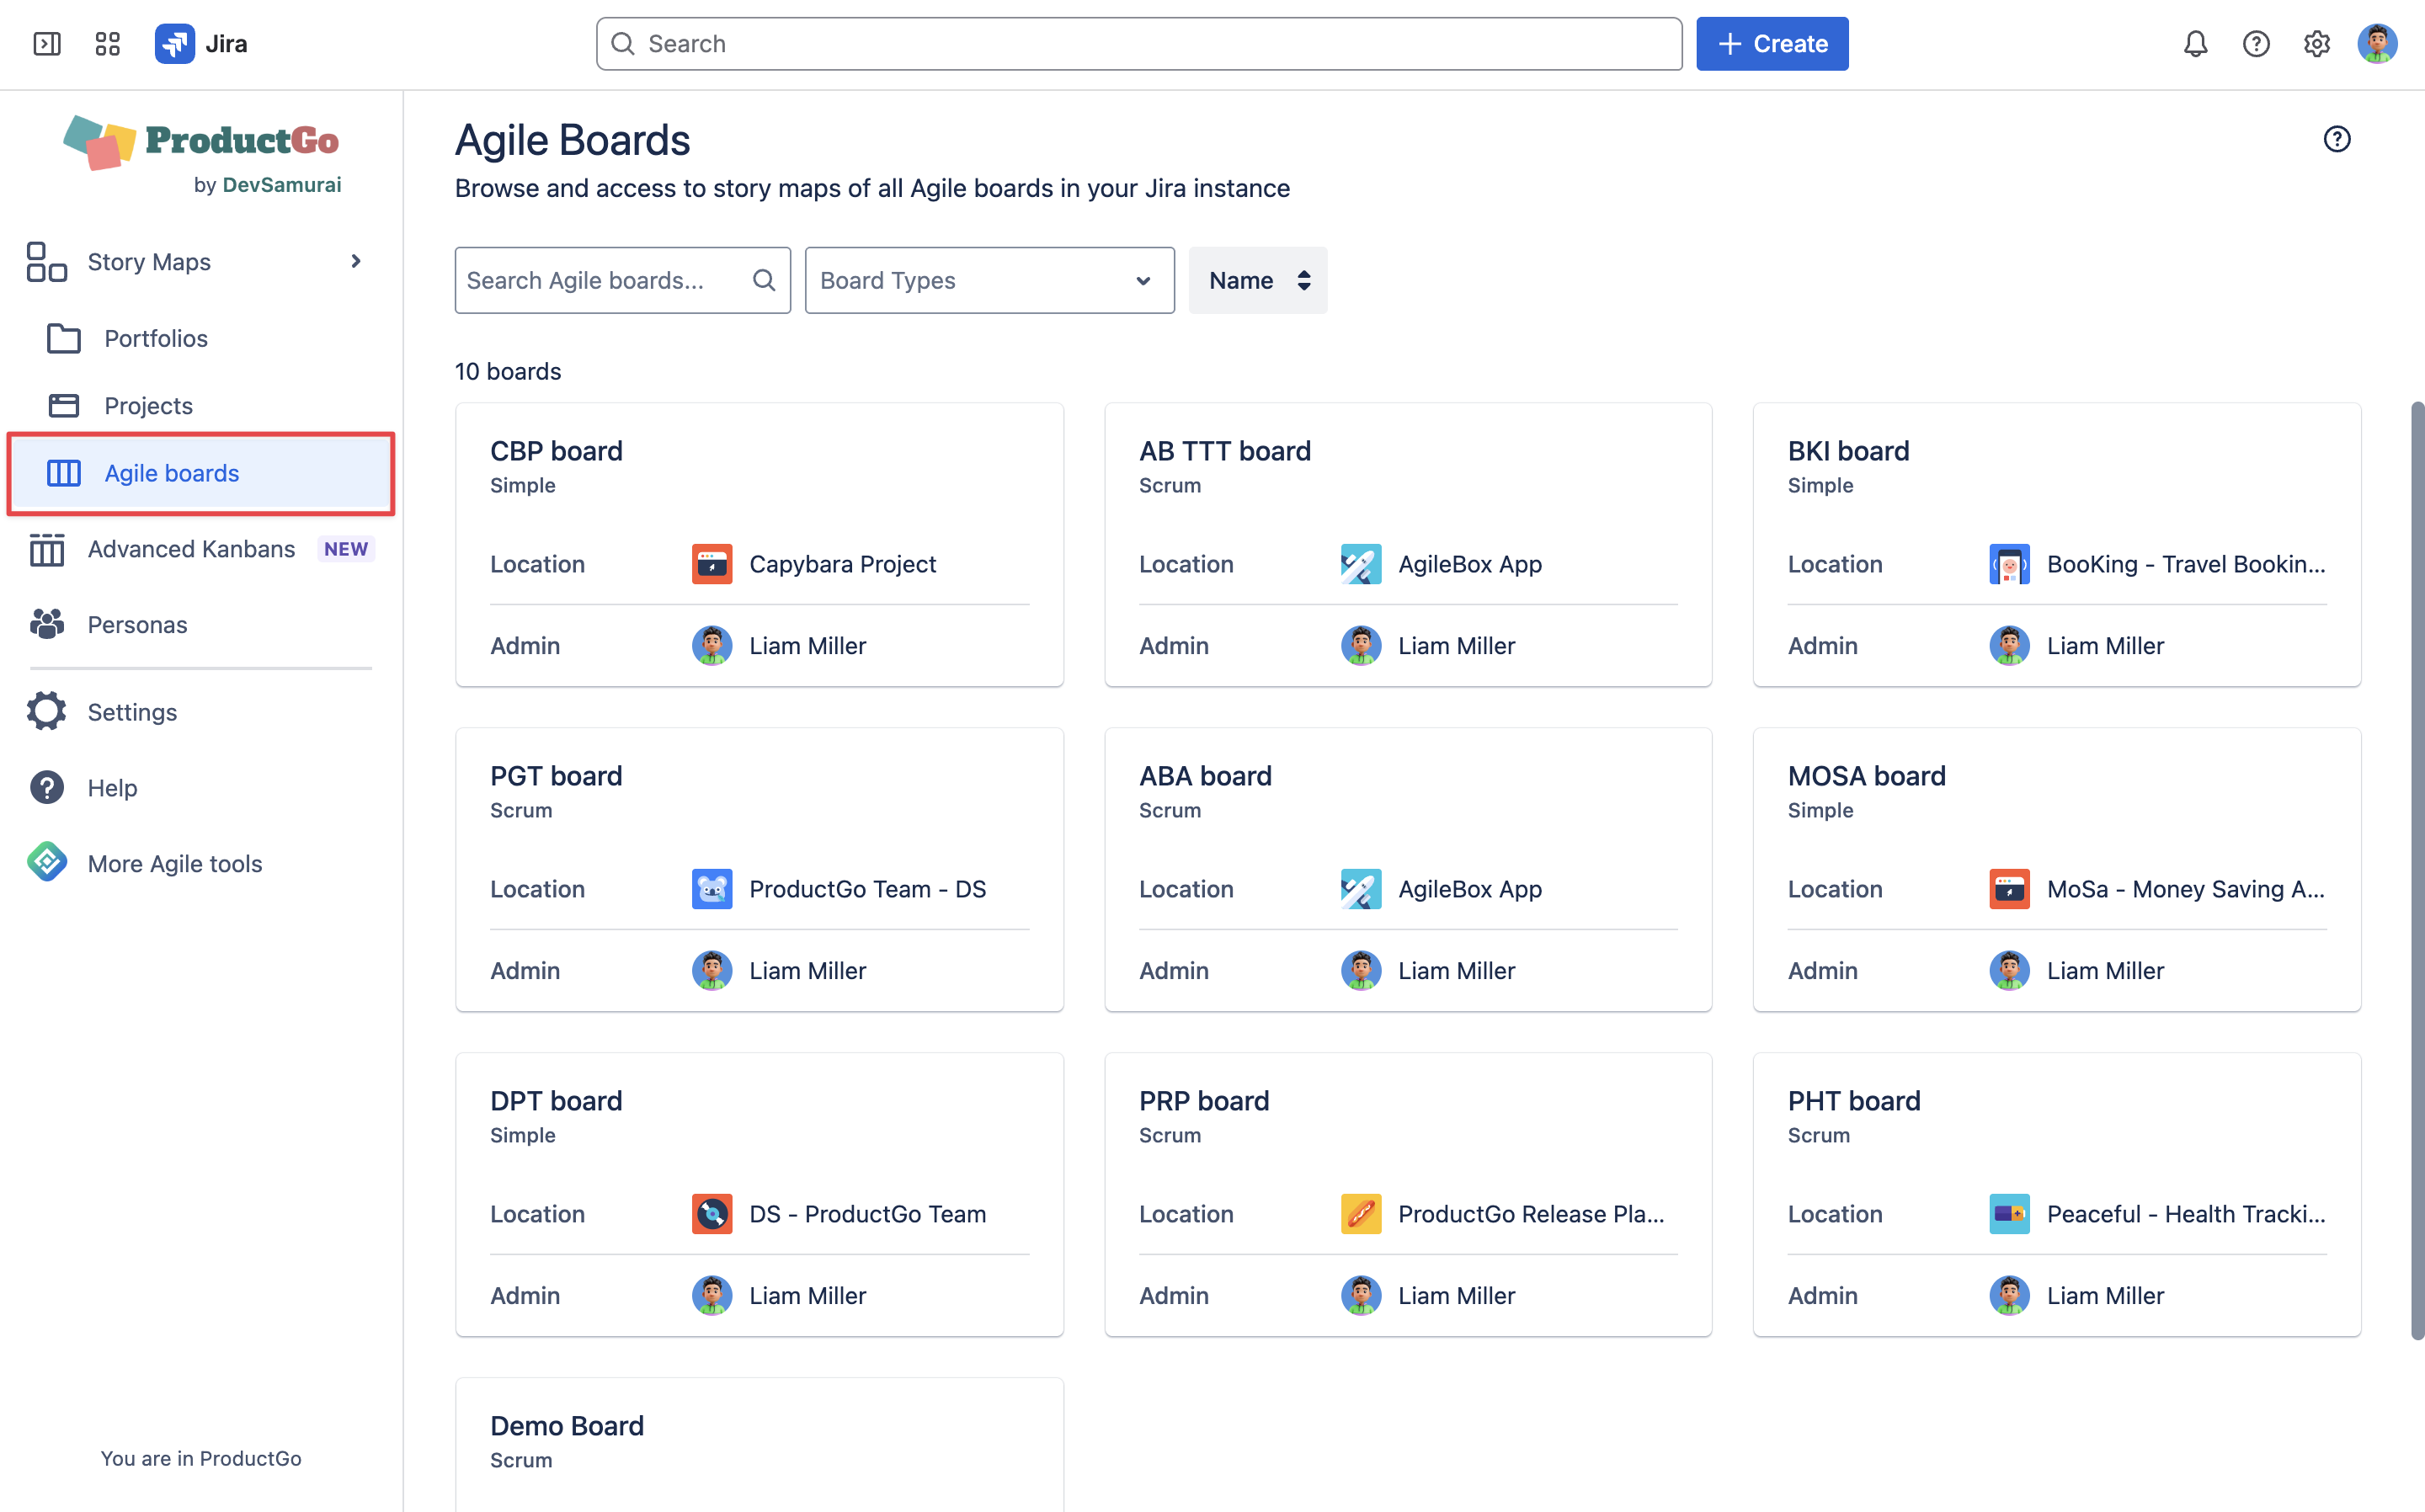
Step 2: Access ProductGo
Access ProductGo from the button in the top right corner of the Agile board or board backlogs.

Another way to access the Agile boards story map is by going to Apps → ProductGo → Agile boards → Browse and access your board
Step 3: Manage your projects on a story map board
After accessing the story map, all your data from projects will show up on the board (including the Goals level if you already created in the project’s story map)
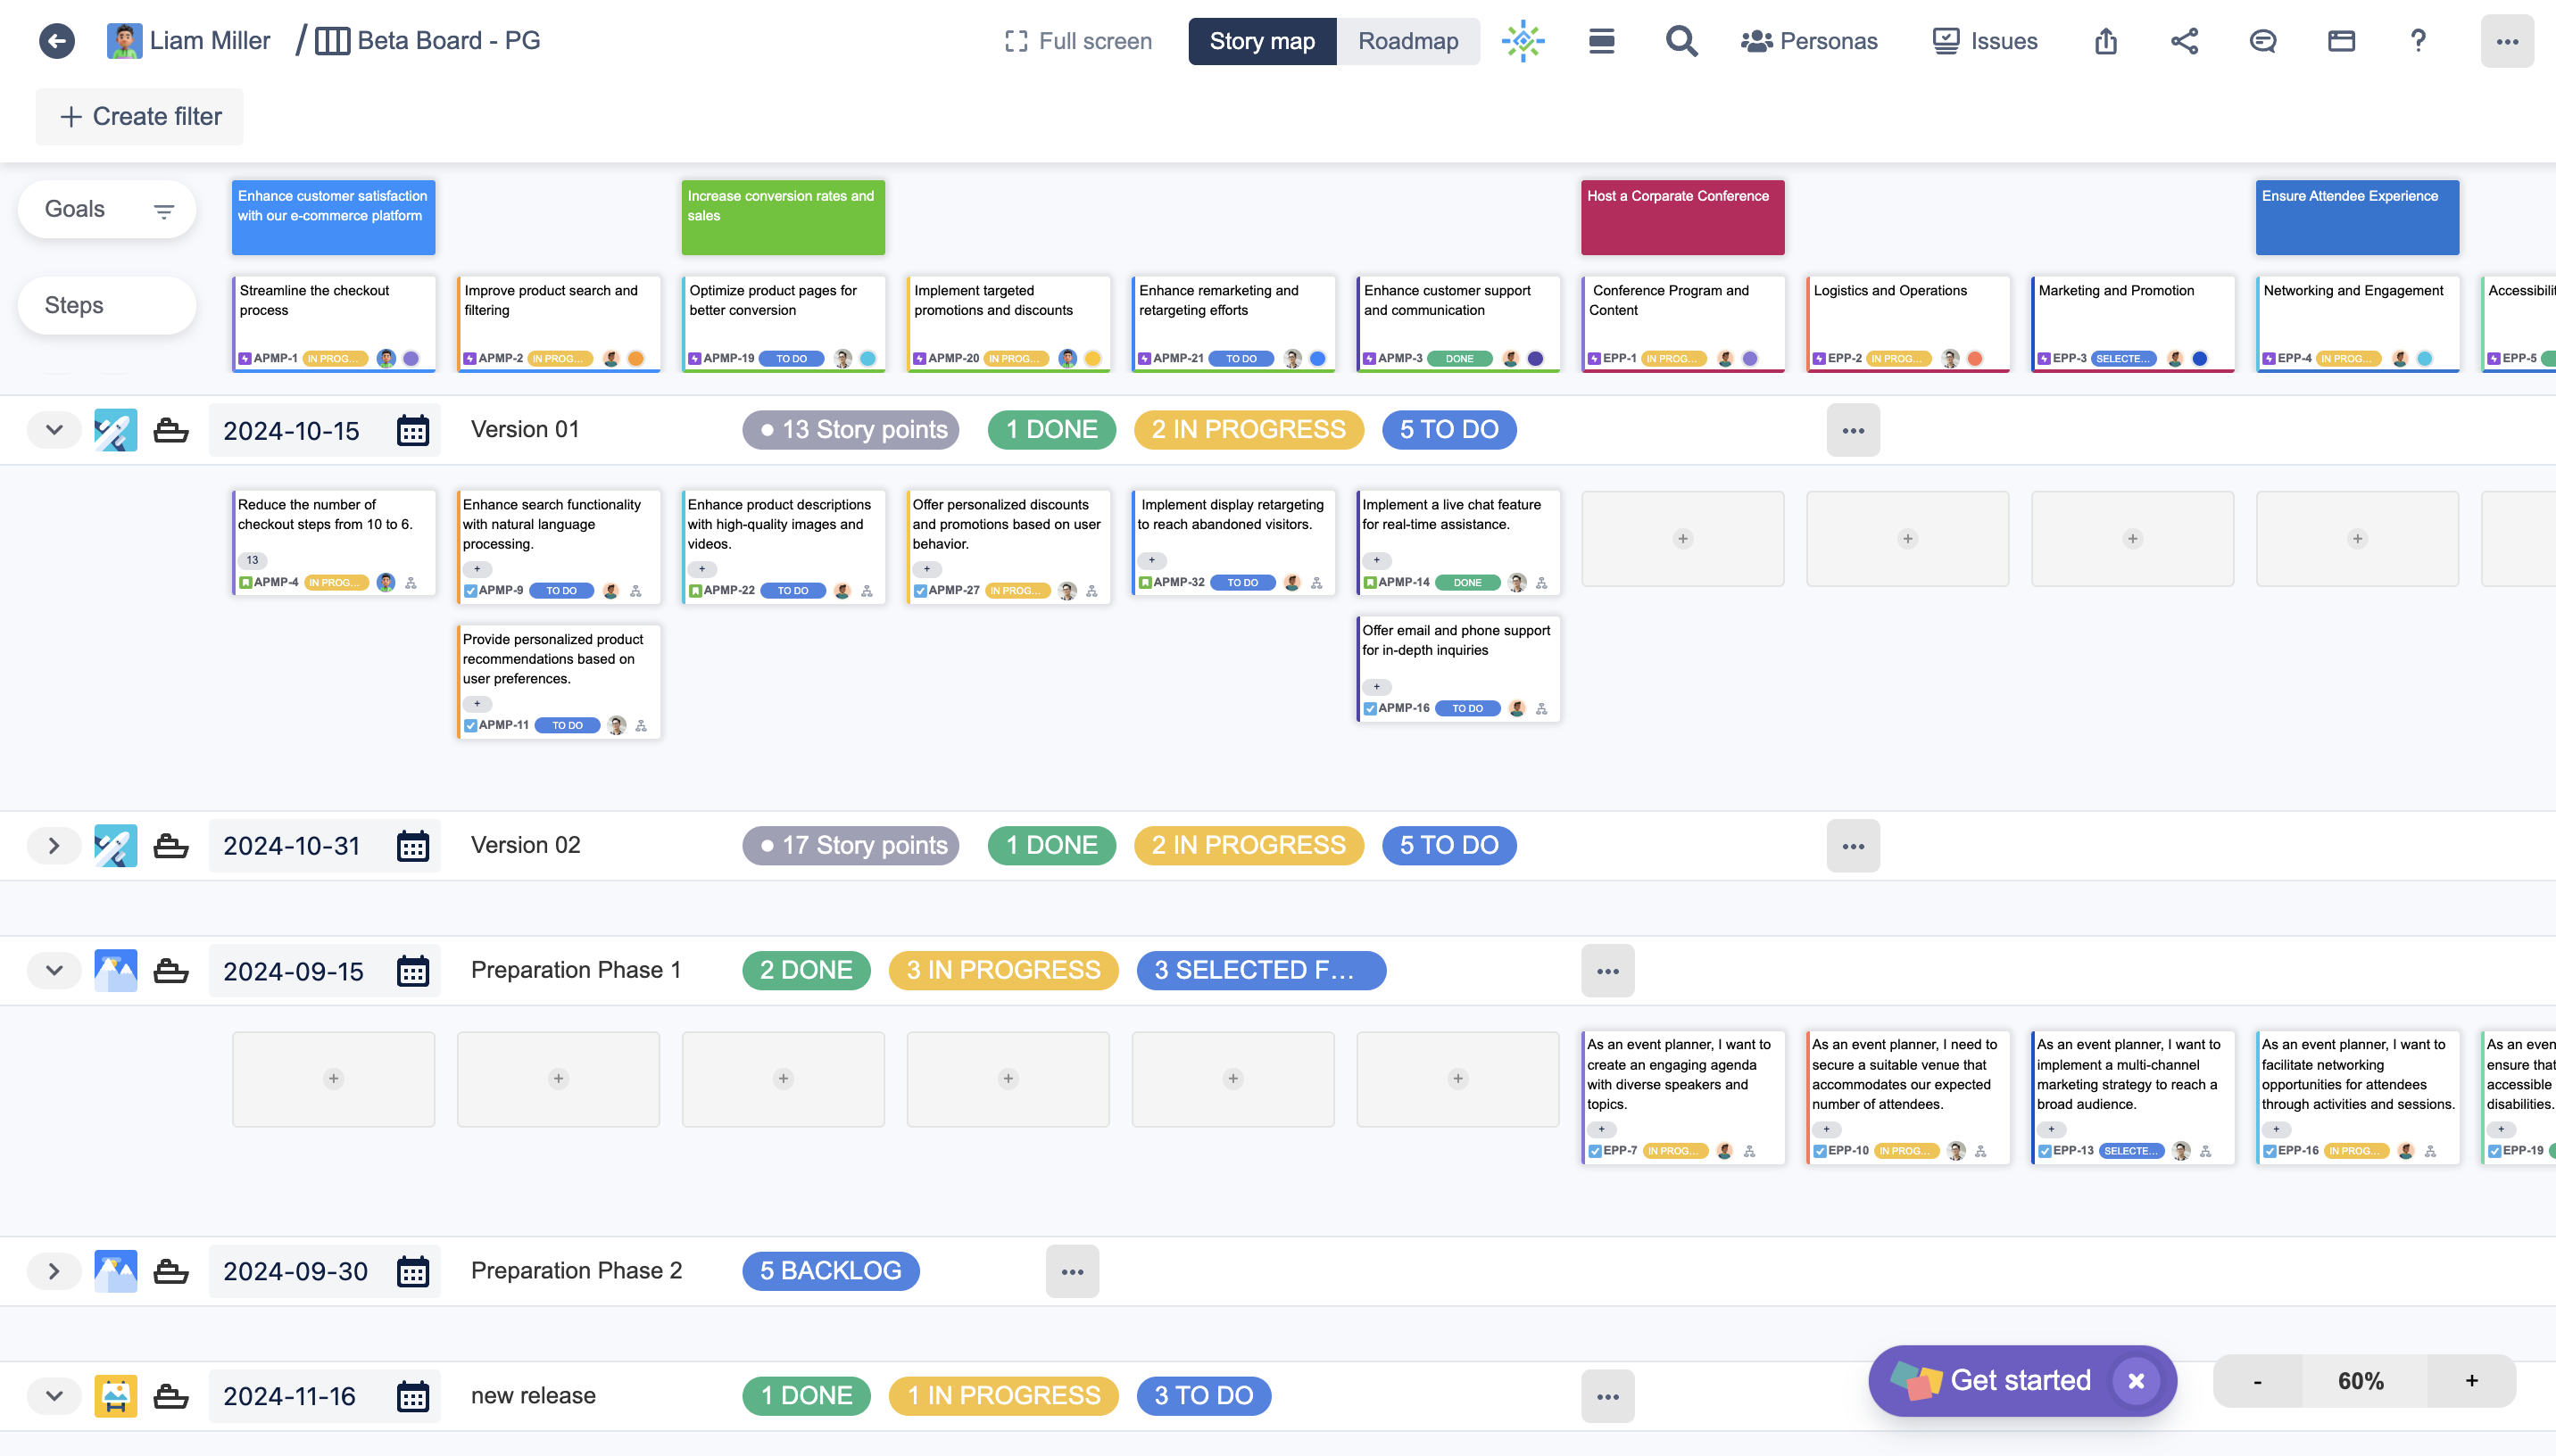
With the board, you can see all issues in each project, add more issues from Issues without Epic section, and create new issues directly here.
You can also manage all sprints and releases of every included project by swimlanes: Start/Complete Sprint and Release, or create new ones.
Some additional guides to help you better manage your board:
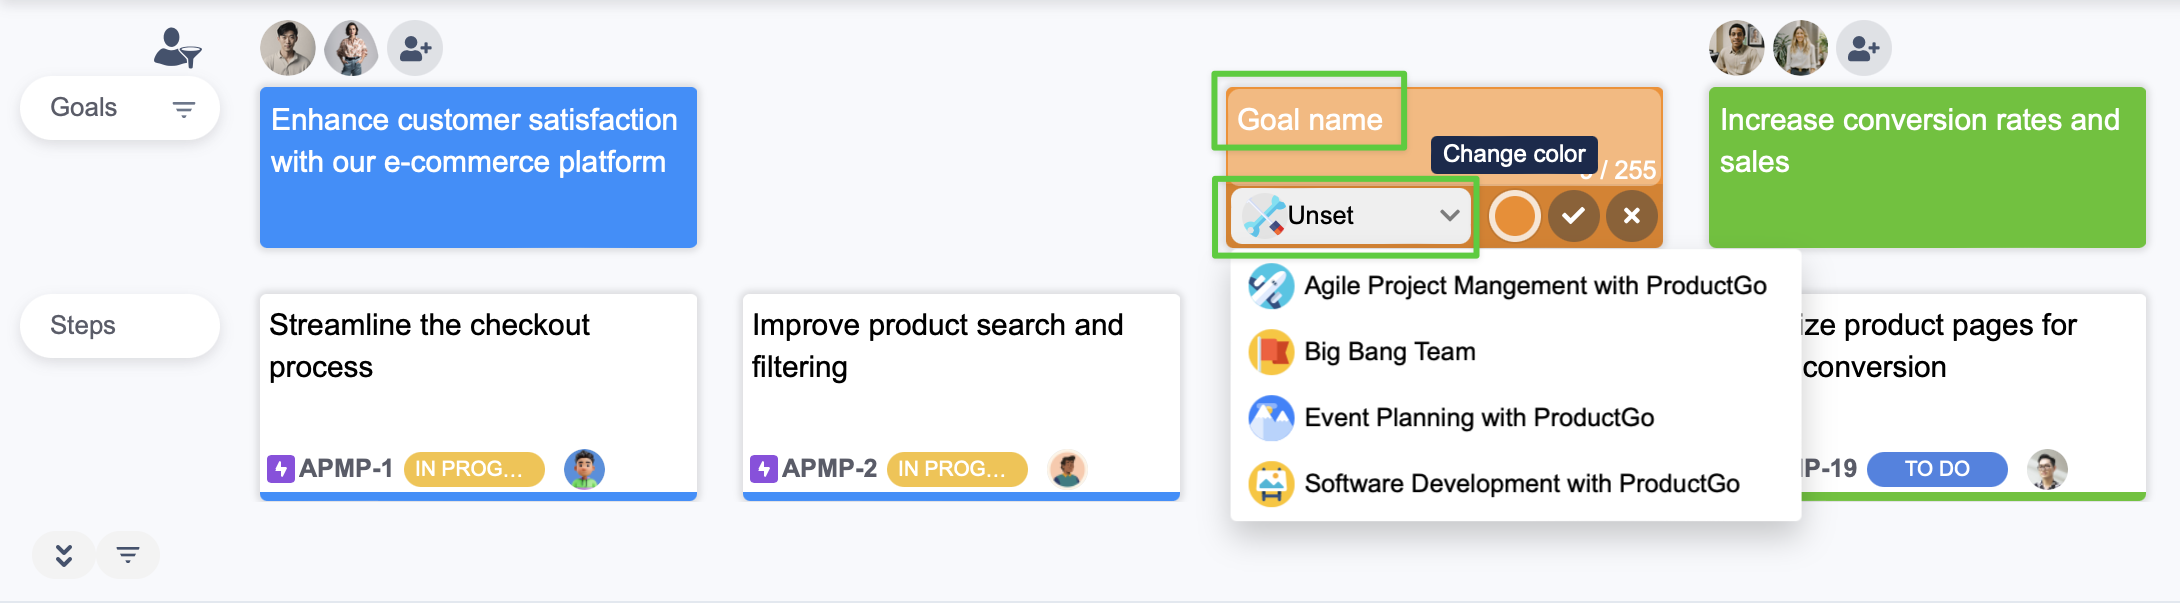
Create Goals for each project
Hover the mouse to the Goal level and click on the + button or Add new goal card
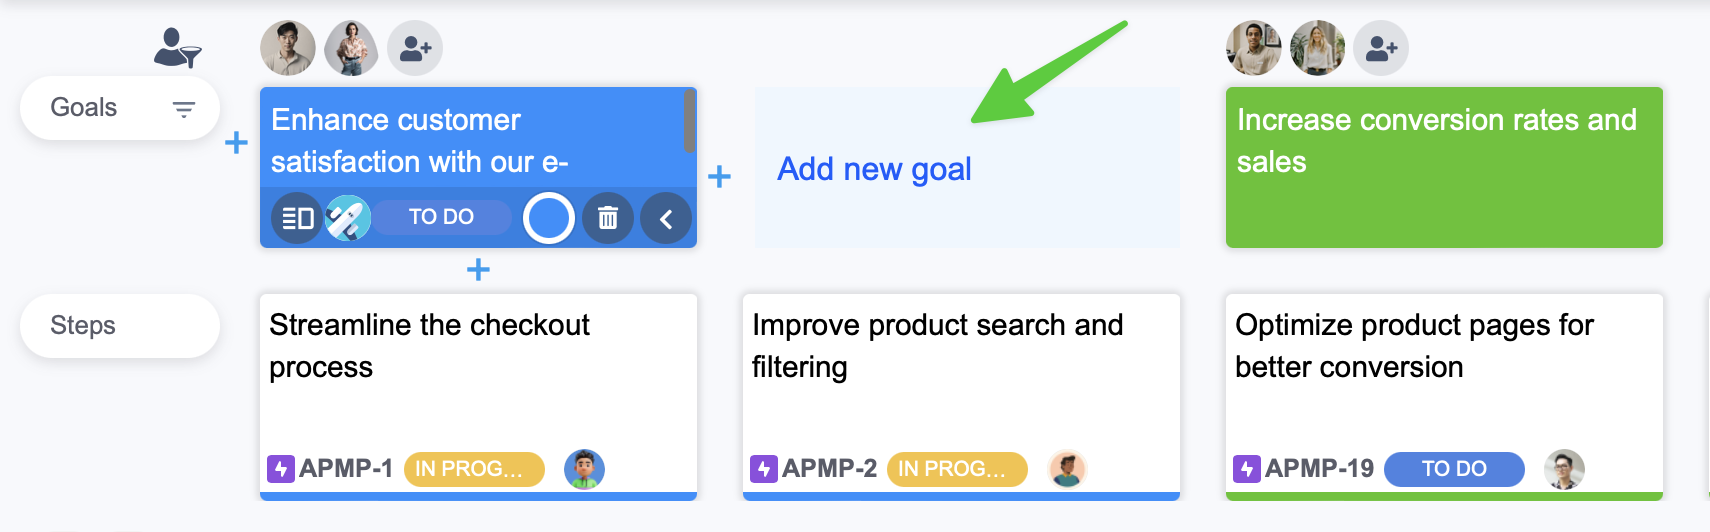
Enter the goal name and select the project for the goal, you can also change the color of the goal
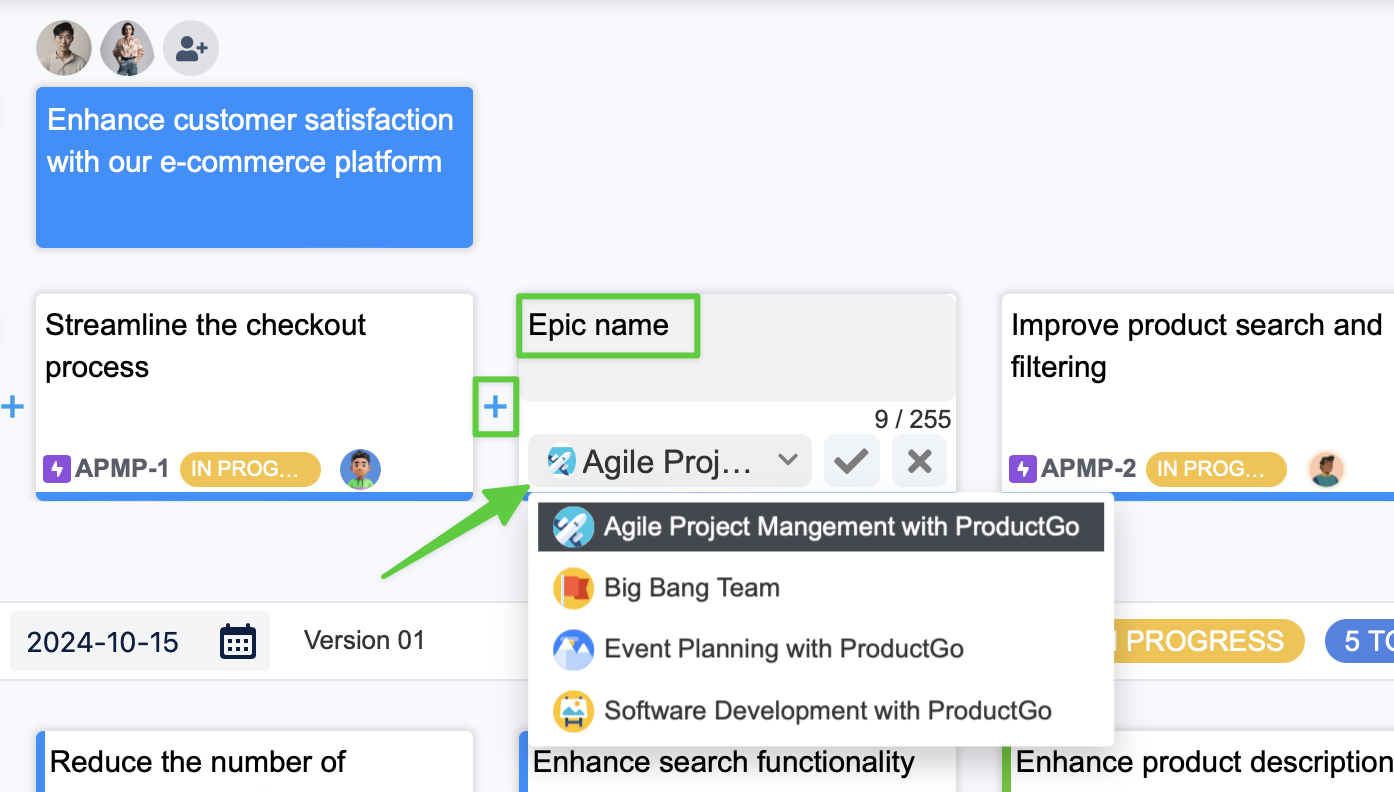
Create Steps/Epics
To create an epic or step, find and select the + button where you want. Enter the epic name and select the project for the epic.
A goal can contain epics from many projects.
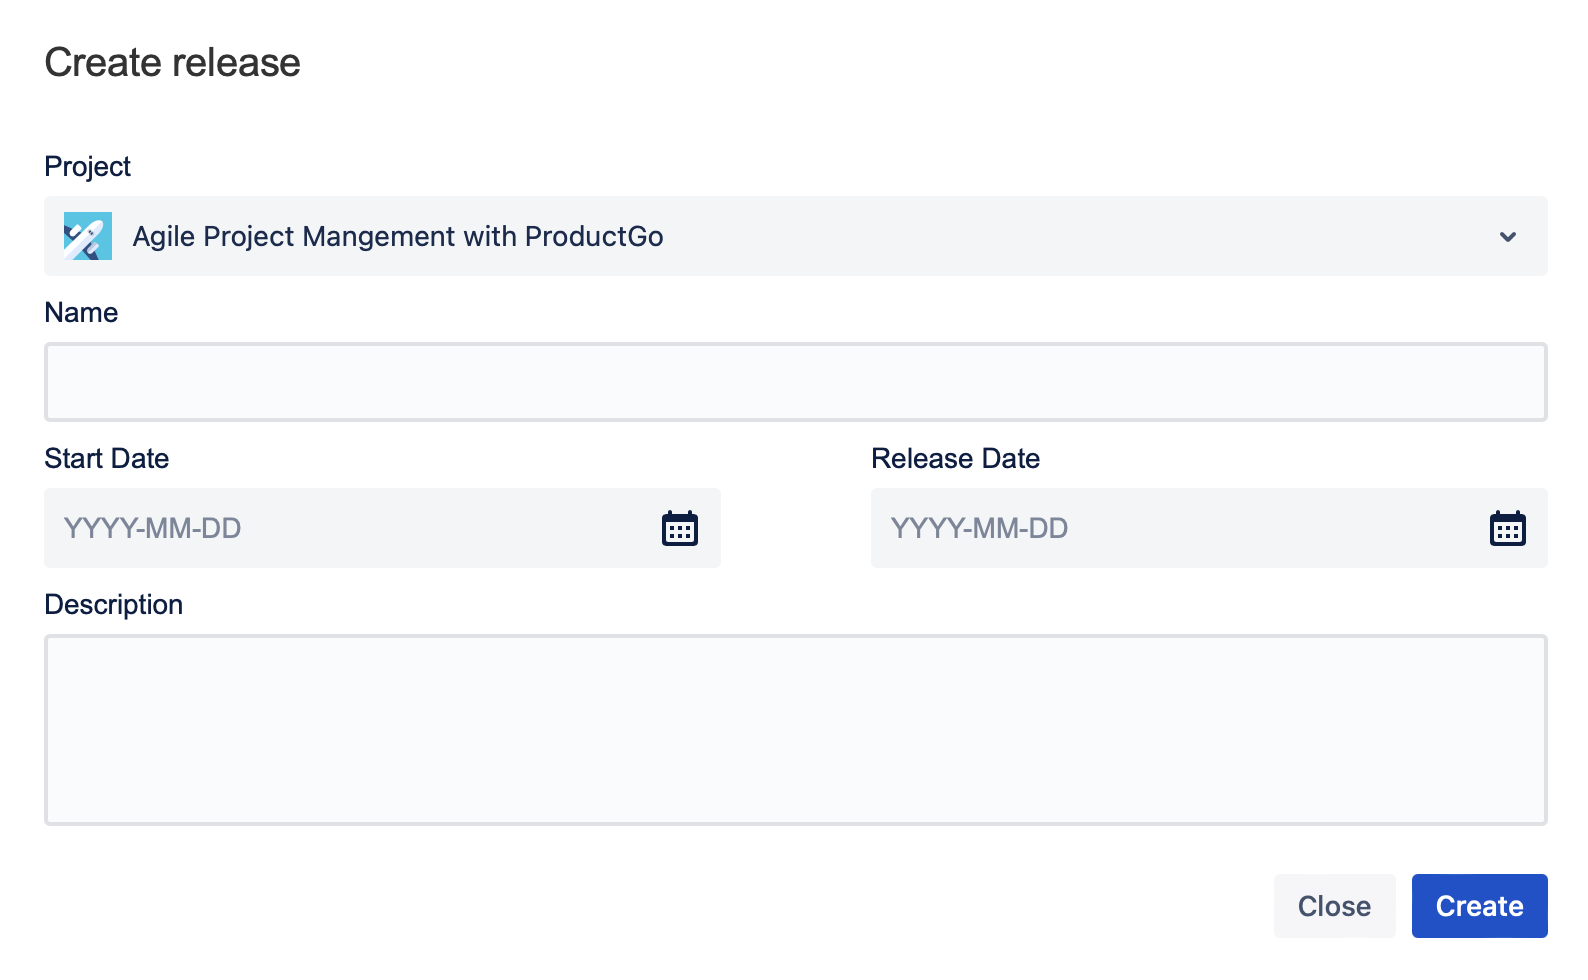
Create Release/Sprint
To create a Release or Sprint on the story map board, hover the mouse above the swimlanes until the Add new release/sprint line appears, then select it.
Fill in the details in the Release/Sprint creation window pop-up, include: Project, Name, Start-Release Date, Description/Sprint Goal.
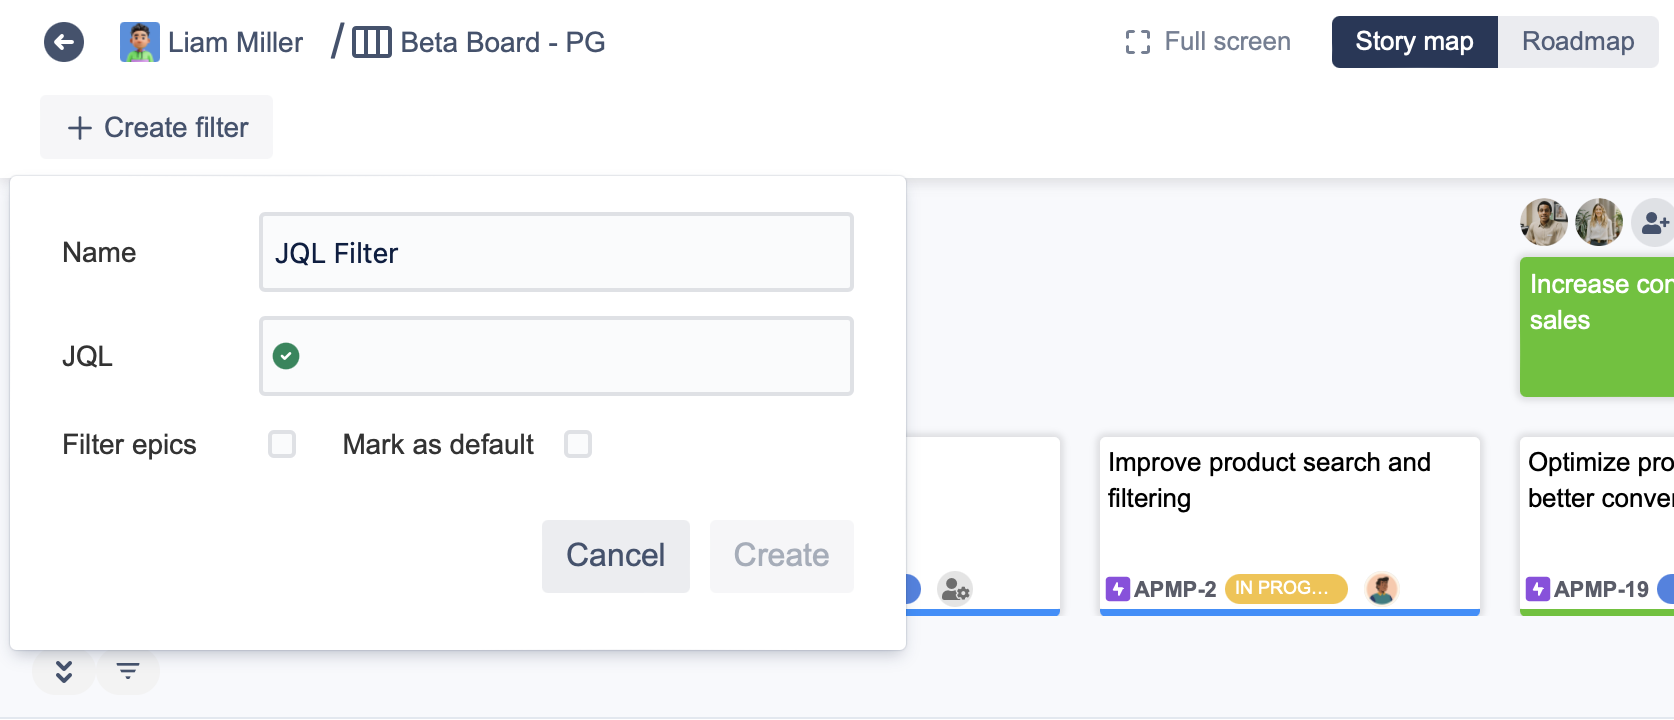
Create JQL Filter
Use this filter to sort out your issues in your projects by JQL. Enhance the managing ability with many projects.
That’s all about managing multiple projects in the user story map. If you have any concerns about this use case or want to know more about our app, feel free to contact us via our Support Desk or atlassian@devsamurai.com.
Additional Resources of ProductGo: