.png)
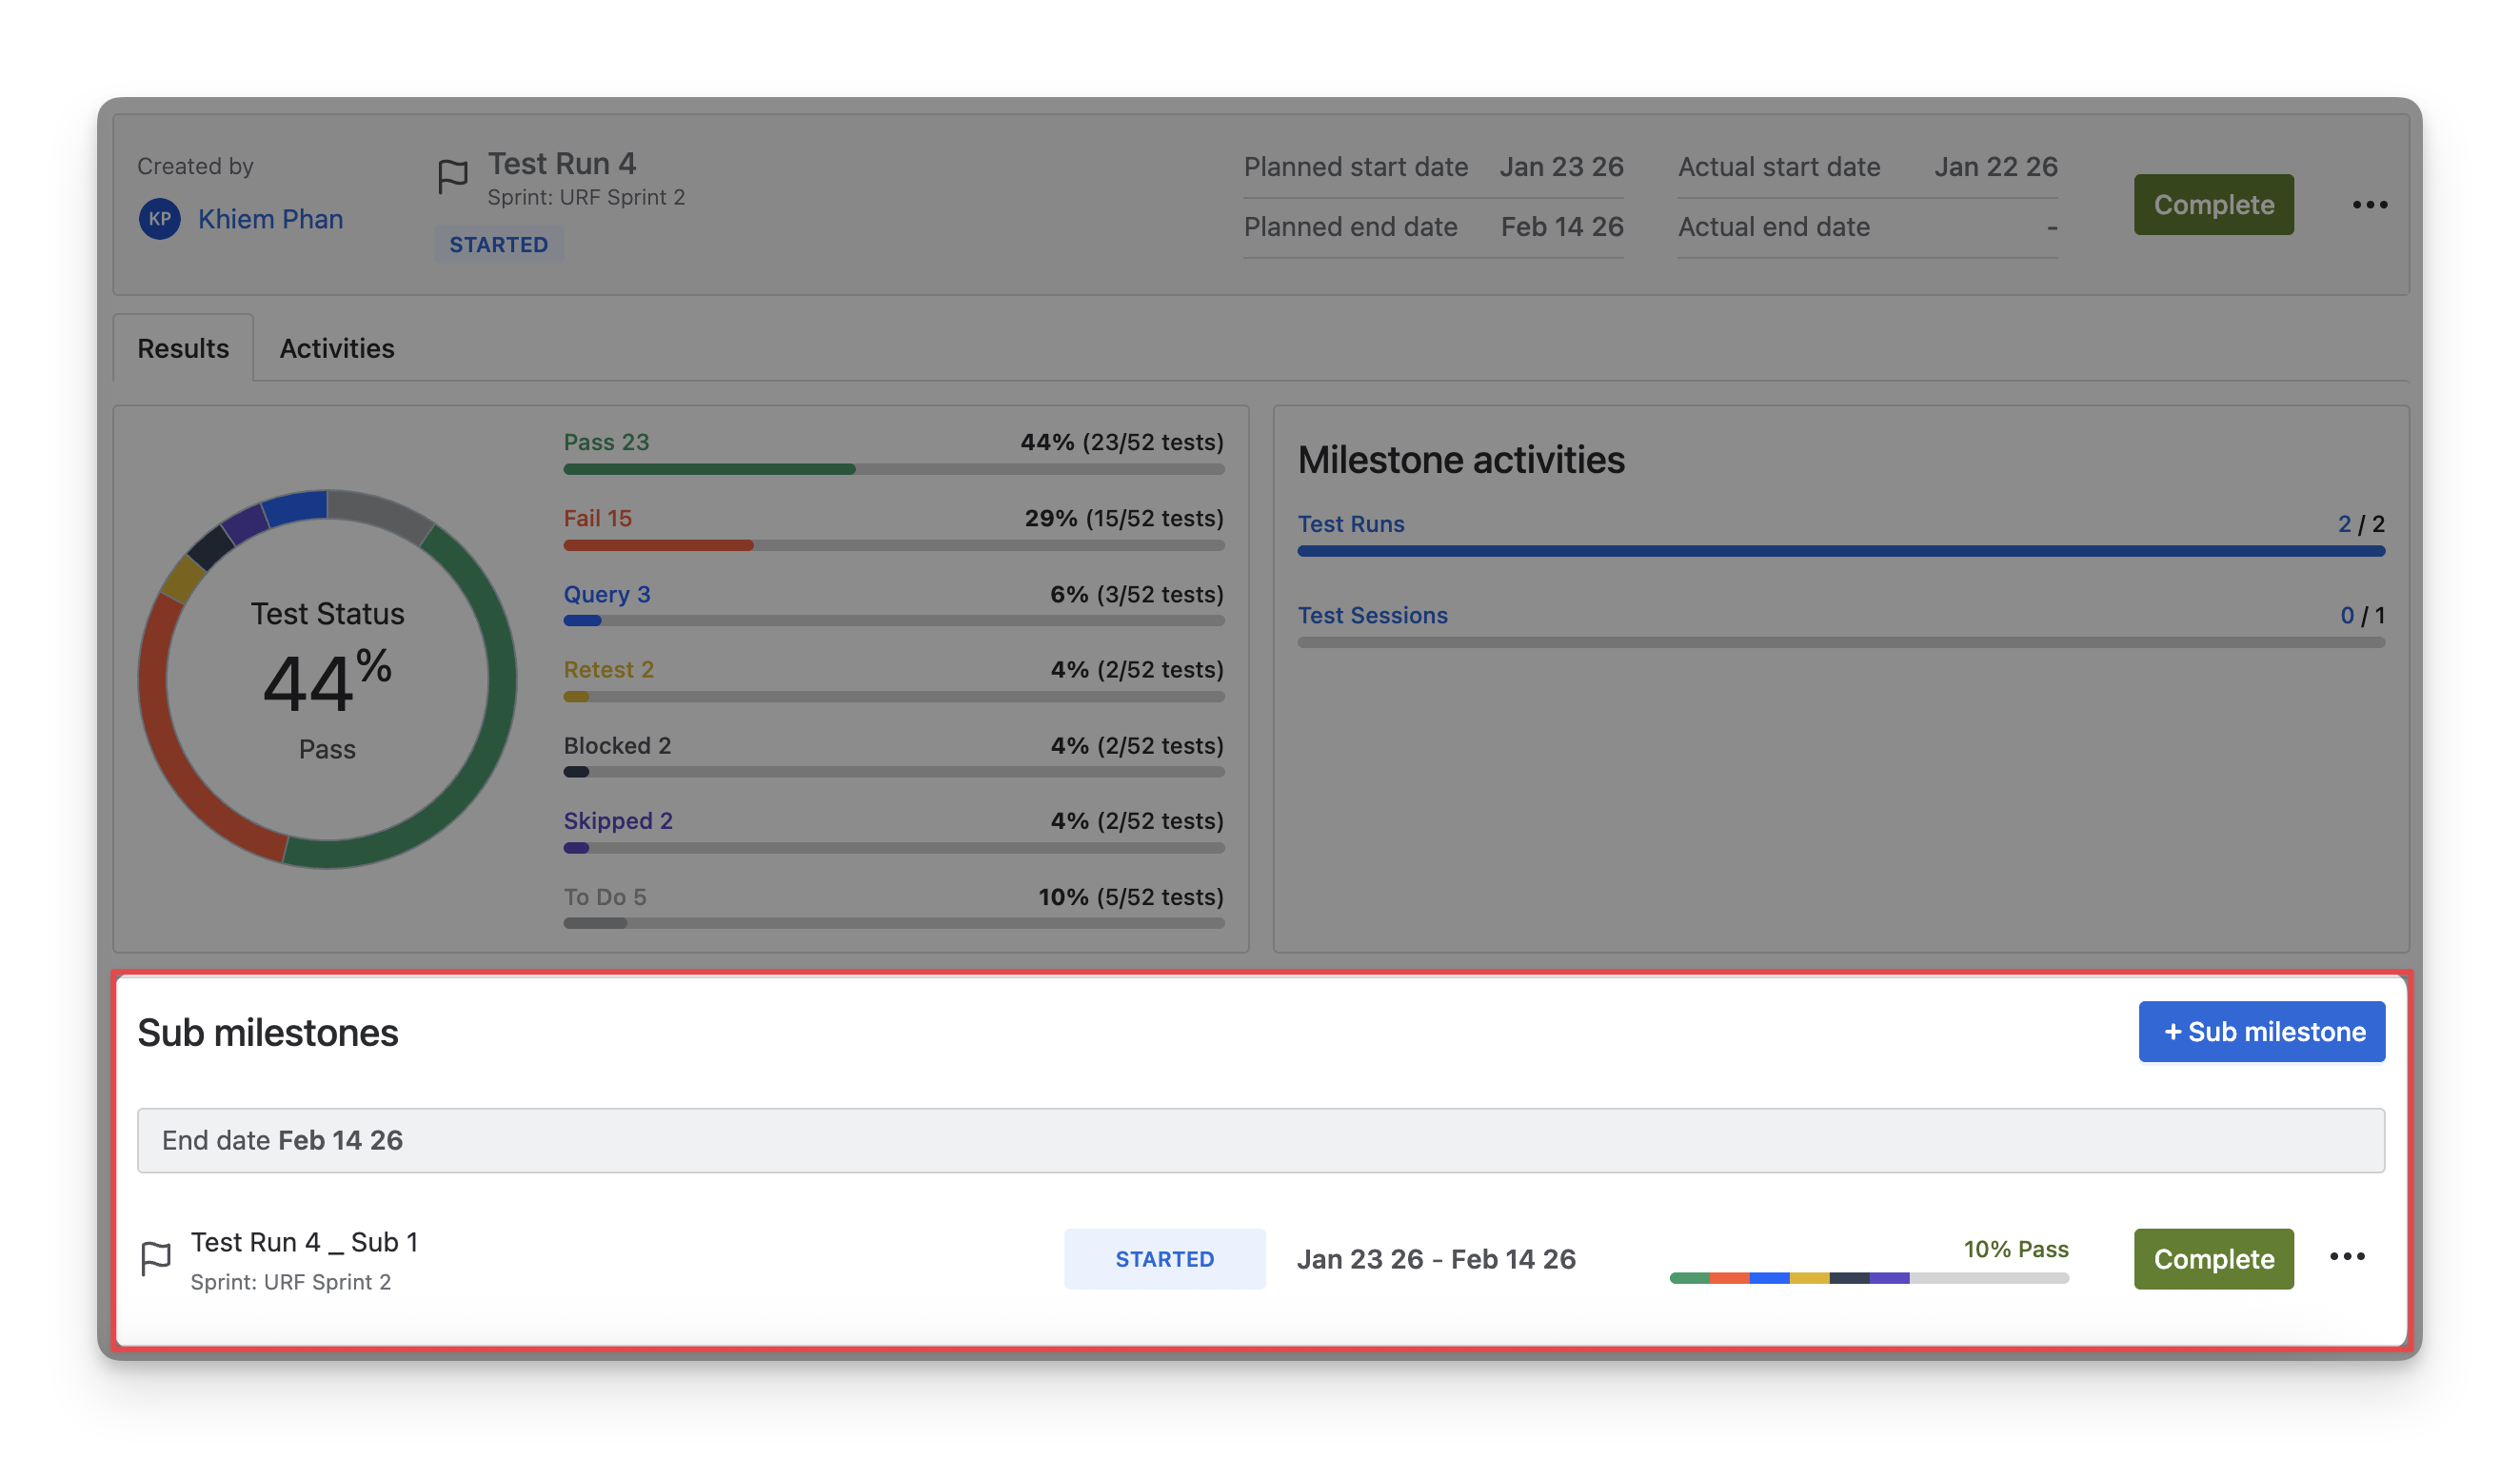
When you click on any Milestone Key in the Milestone list, you are redirected to the Milestone Detail screen, where you can view and manage detailed information related to that milestone.
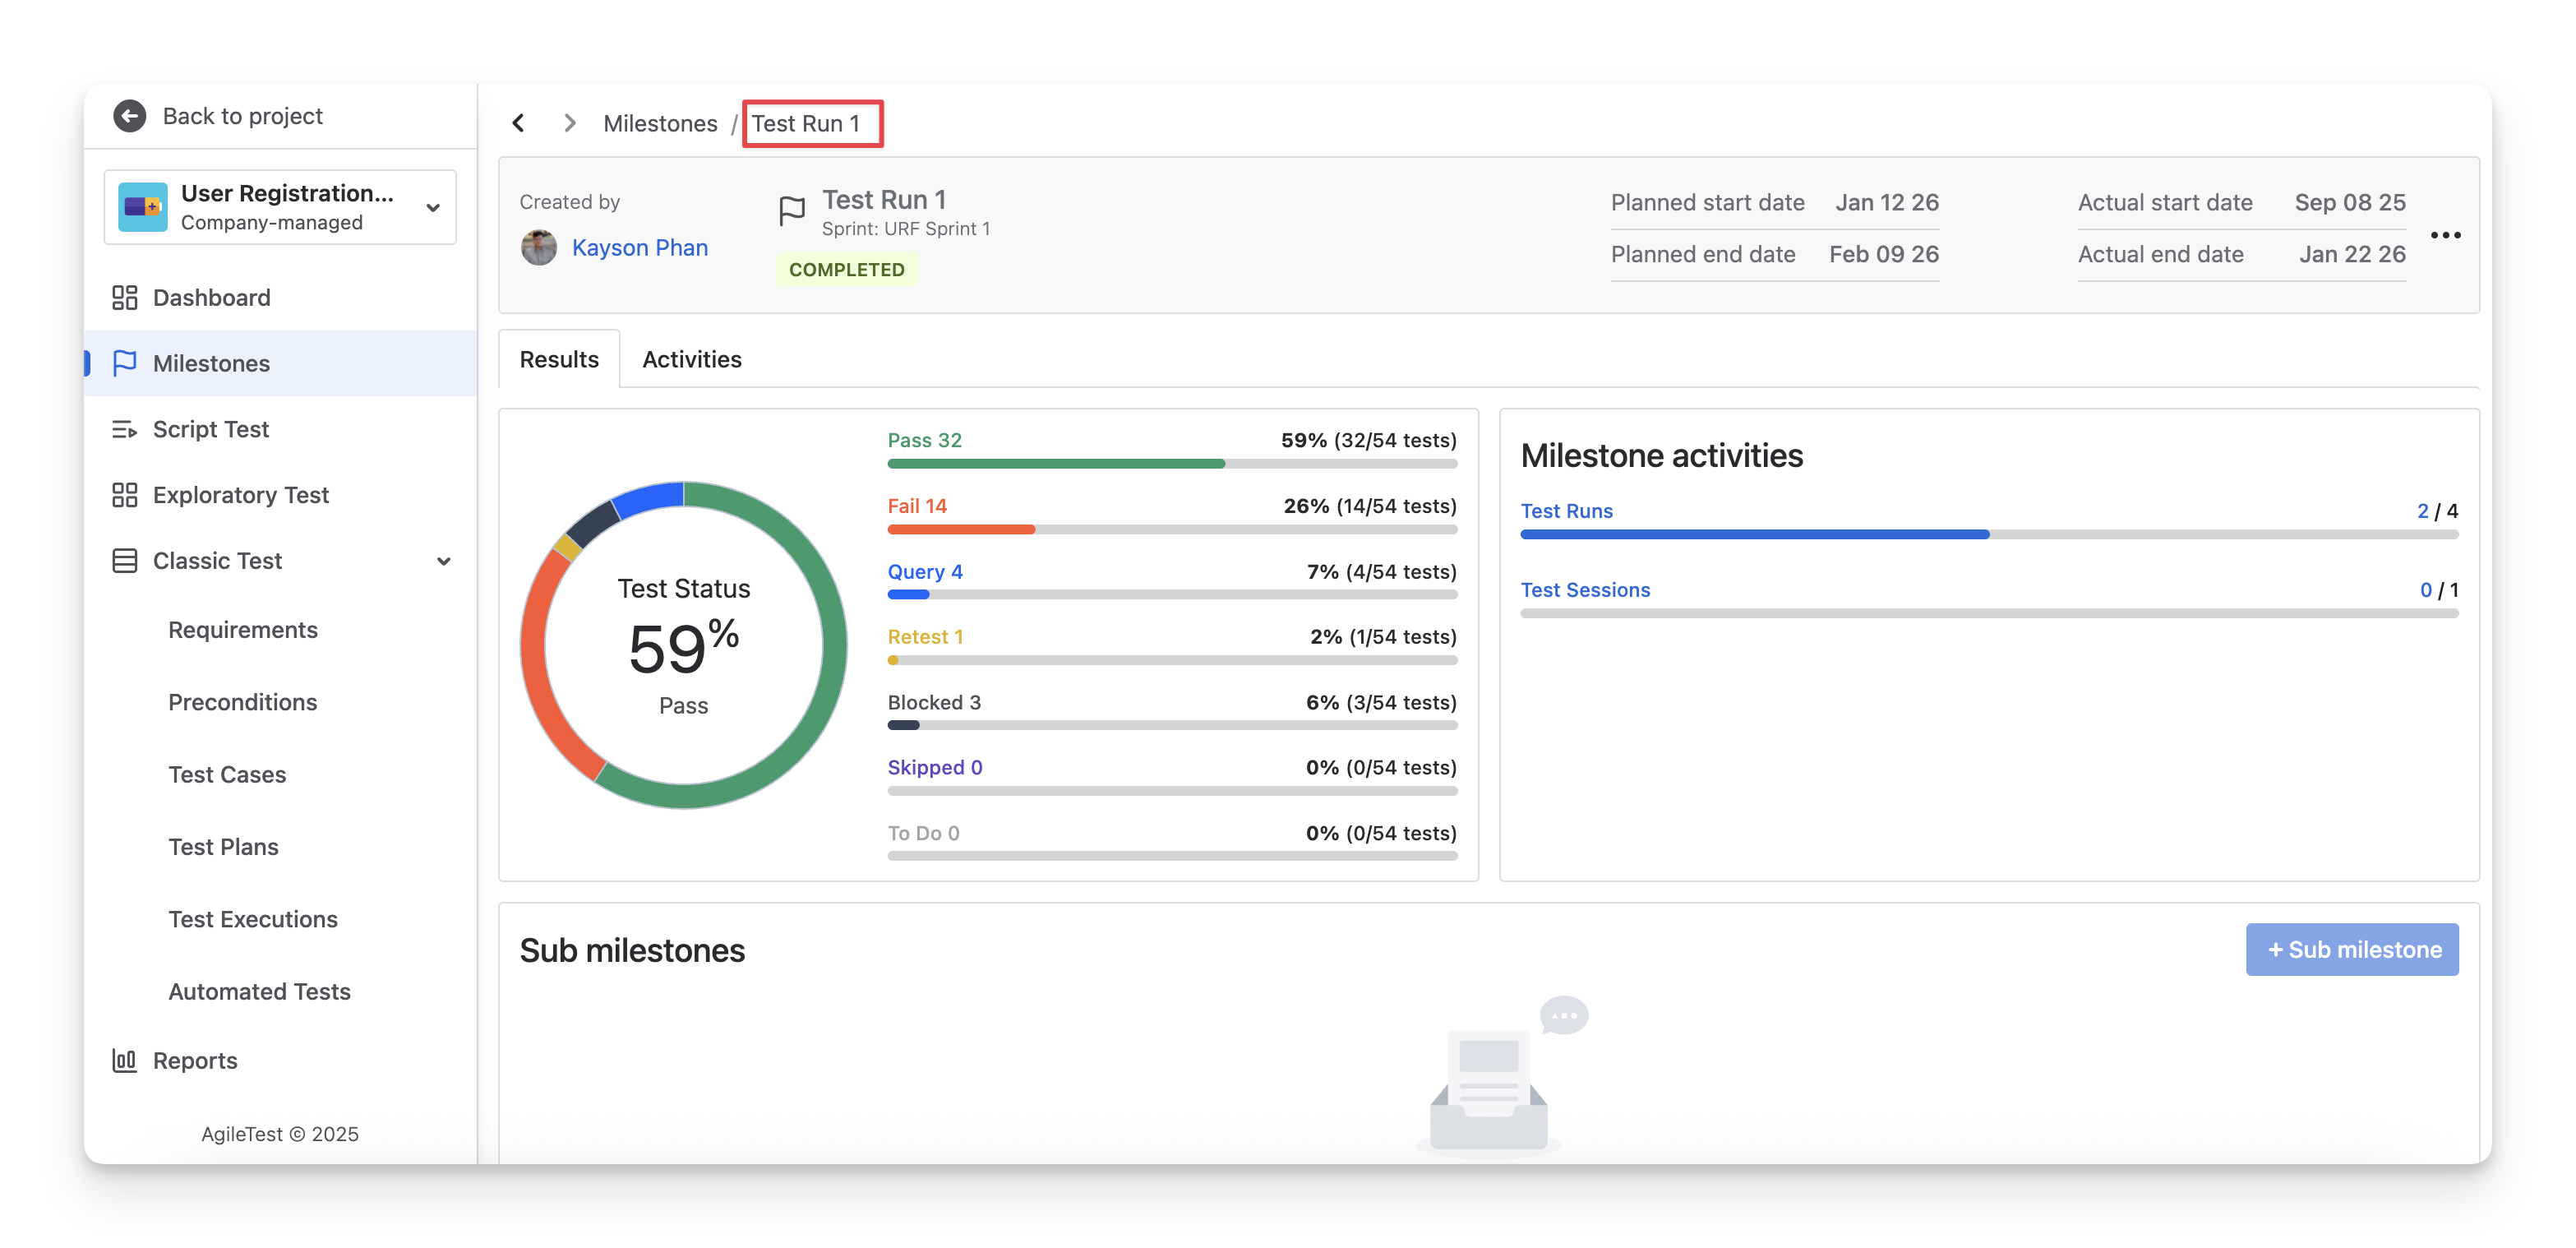
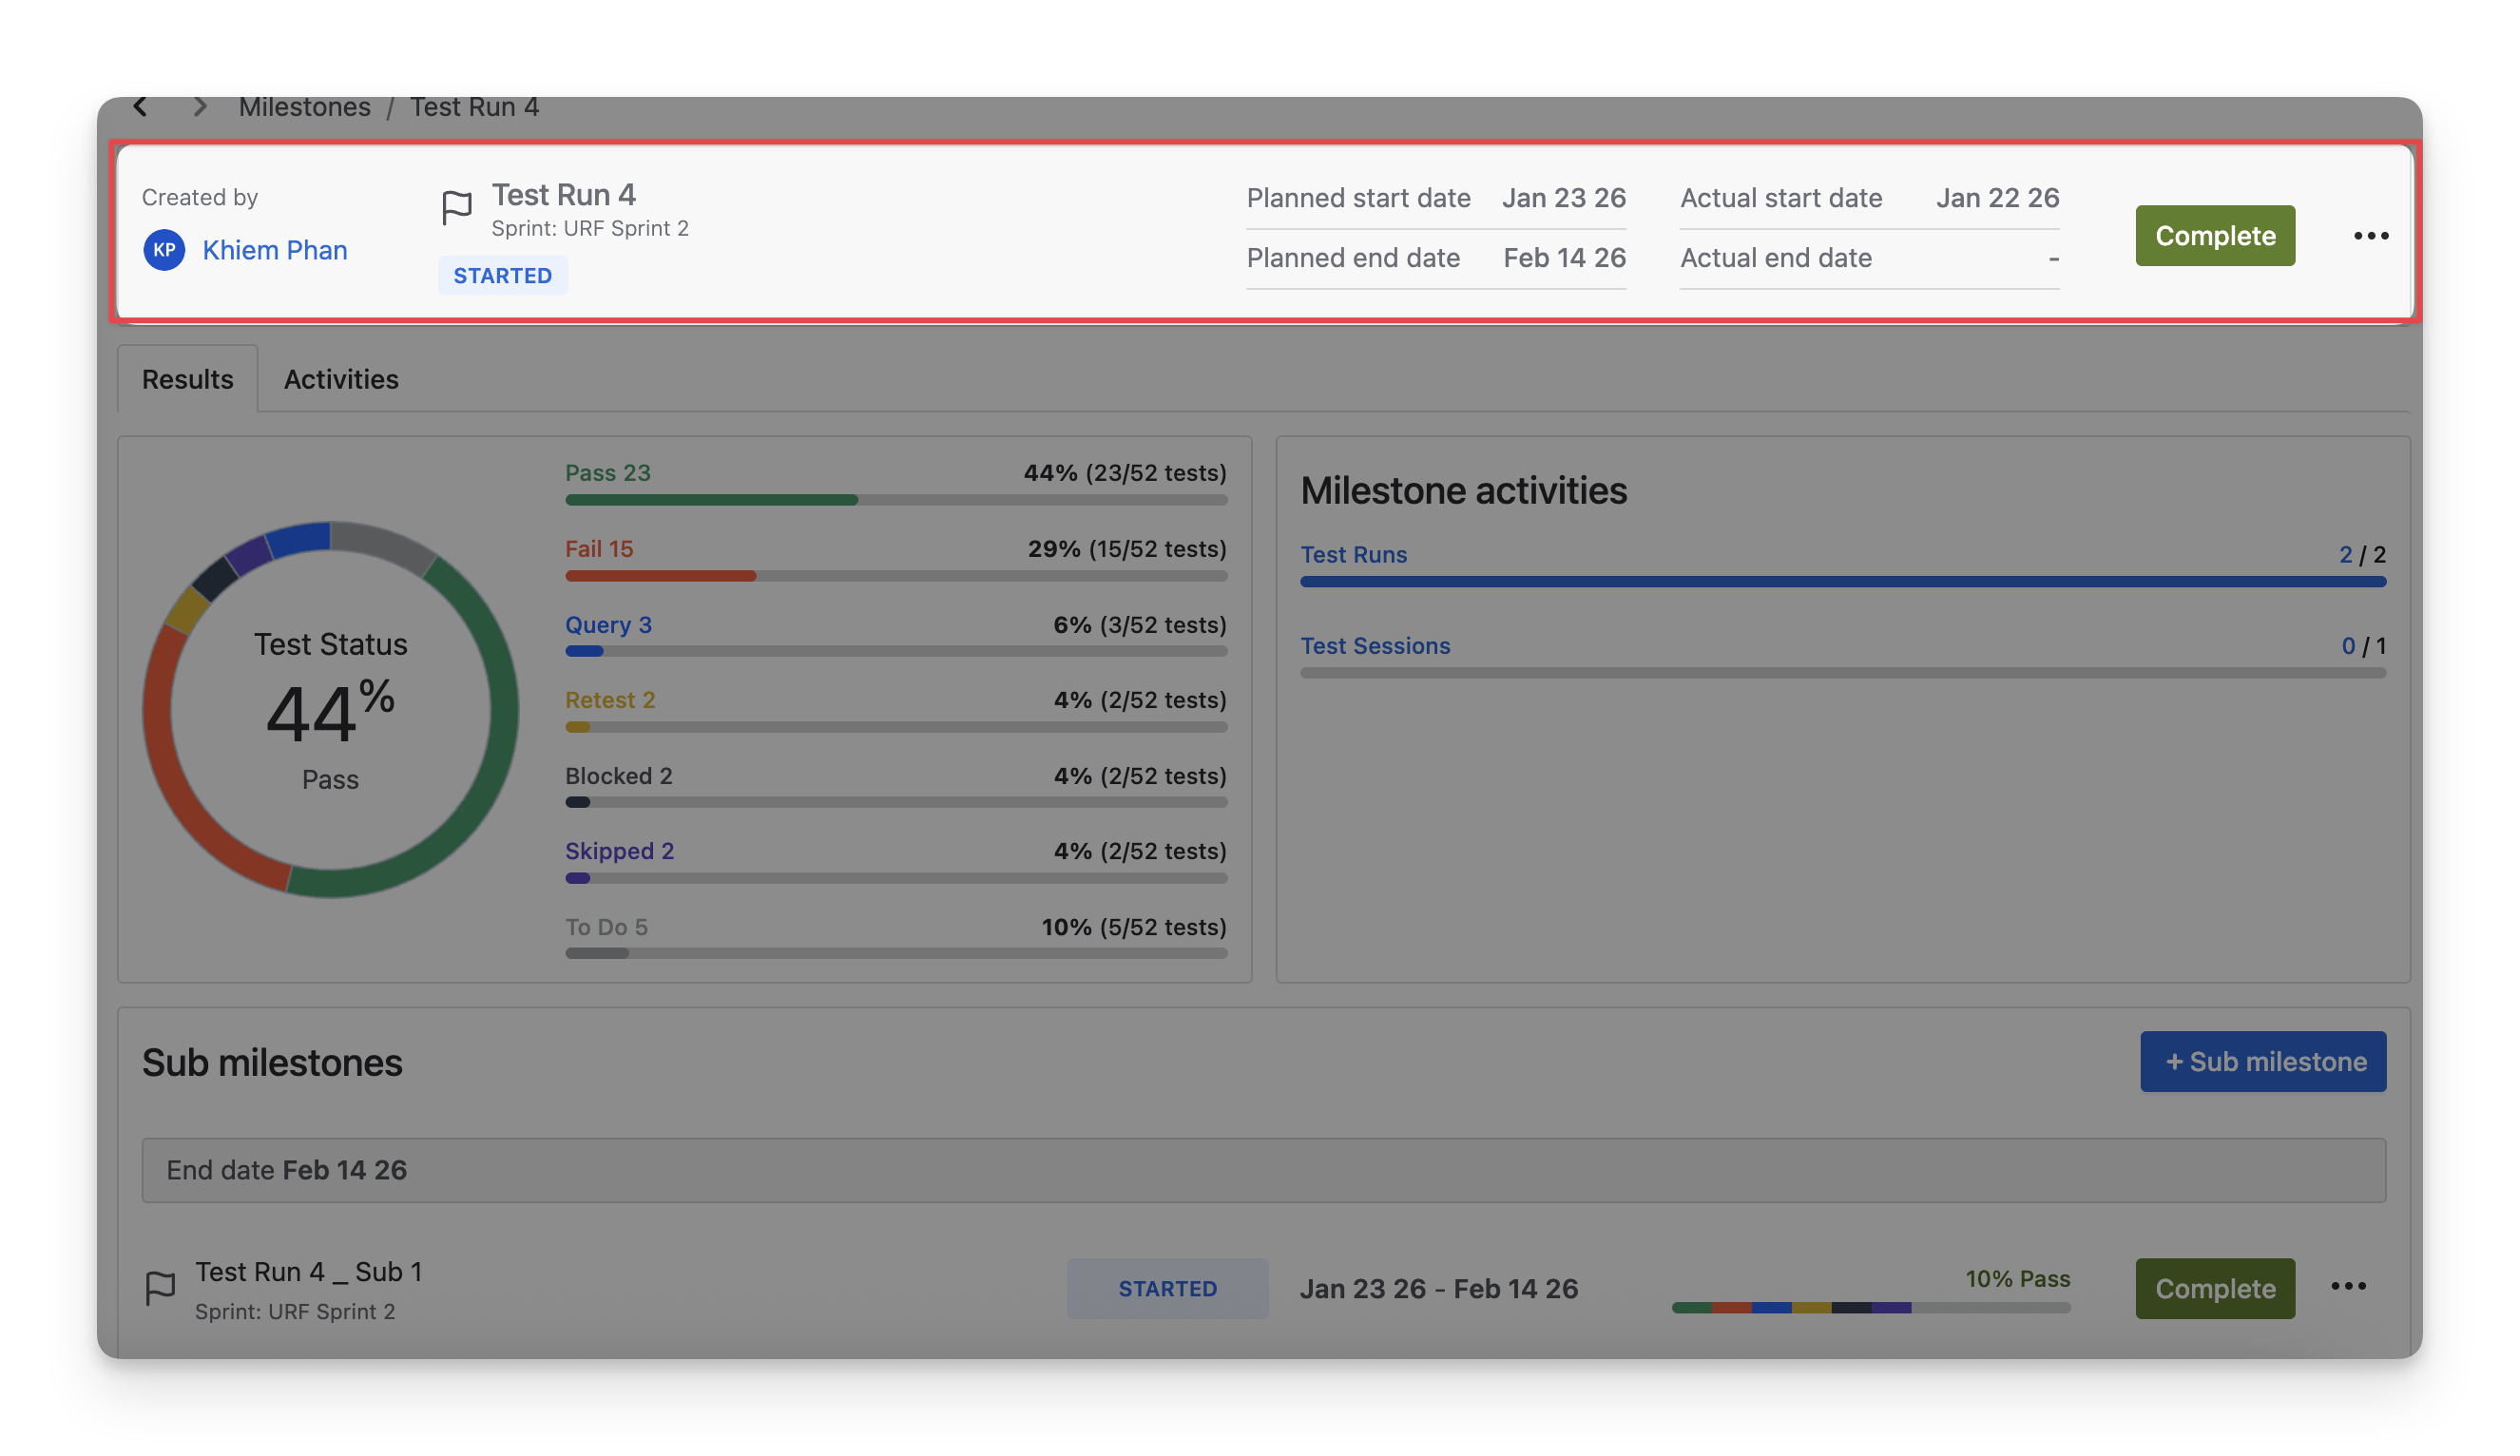
1. Milestone Basic Information
All key information about a milestone is displayed at the top of the Milestone Detail screen. This section gives you a quick overview of the milestone’s context and progress, including:
-
Milestone Creator: The user who created the milestone.
-
Milestone Status: The current status of the milestone.
-
Planned Start and End Dates: The scheduled timeframe defined during planning.
-
Actual Start and End Dates: The real dates when the milestone was started and completed.
You can only change the name and its link with the sprint /release.
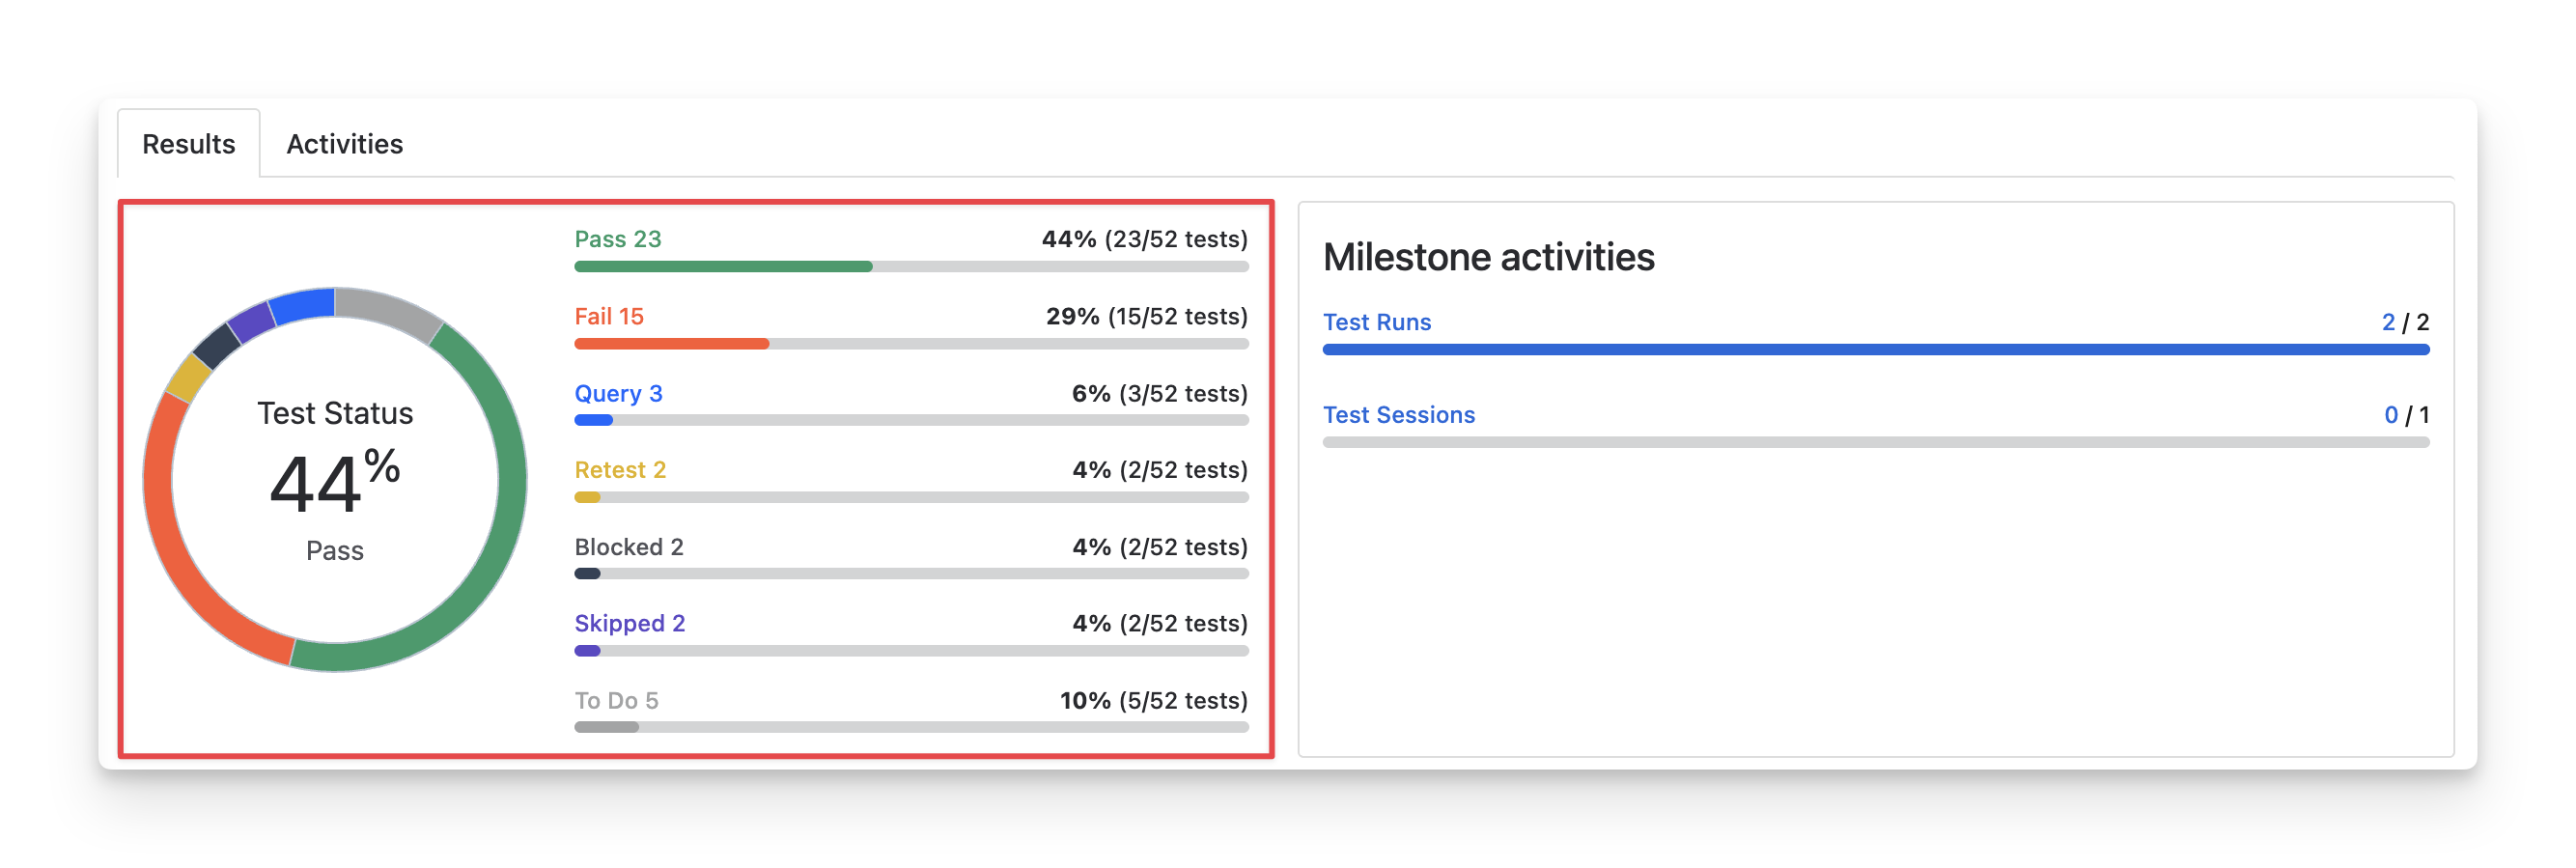
2. Milestone Execution Results
The execution results of the milestone are displayed in 2 tabs:
2.1 Results
At the Results tab, you can view:
-
Overall execution status: shows the combined results of all testing activities within a milestone. This includes the execution status of test cases, test run items, and test session items ( Fail pass skipped blocked query todo retest ).
-
Total counts for Test Runs and Test Sessions:
-
Test Run counts represent the number of executions from script tests
-
Test Session counts represent the number of executions from exploratory tests
-

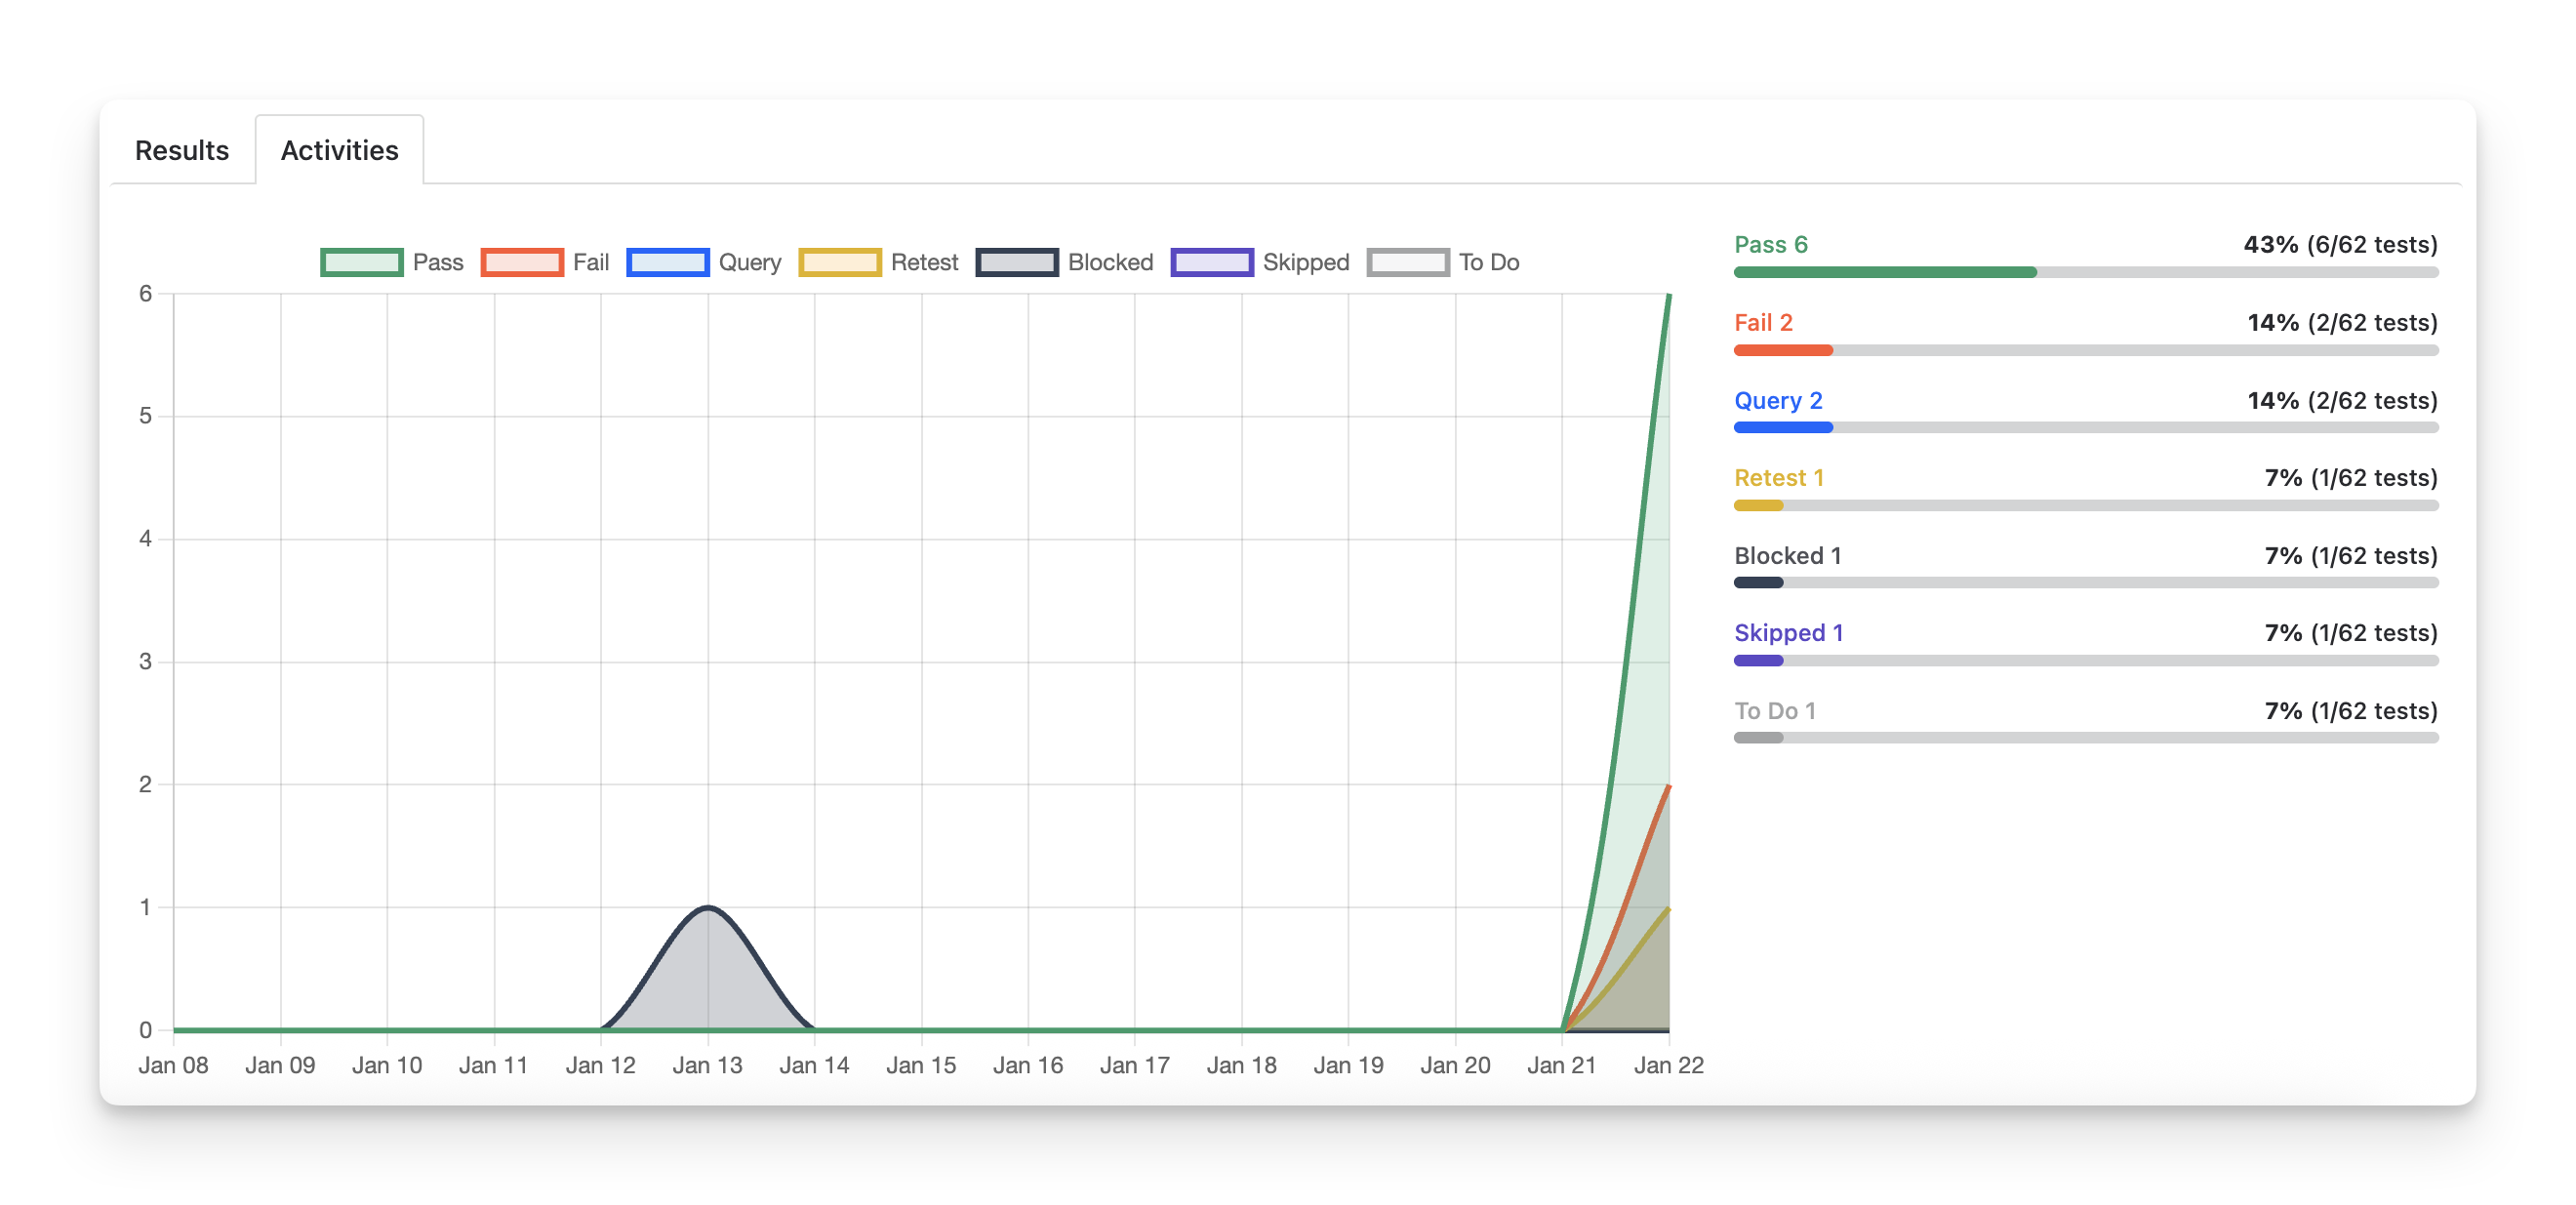
2.2 Activities
To view the trends of execution status, switch to the Activities tab. This helps QA teams track how testing progress evolves, identify periods with frequent failures or retesting, and better understand overall testing stability throughout the milestone.
3. Sub Milestones
A milestone can be divided into smaller sub-milestones to help teams better track and manage testing work. The main milestone acts as the parent milestone, while the smaller ones are its child (sub-milestones).
In the Milestone Detail screen, under Milestone Execution Results, parent milestones display all associated sub-milestones along with their execution statuses, giving teams a clear view of testing progress at both a high-level overview and a detailed level.
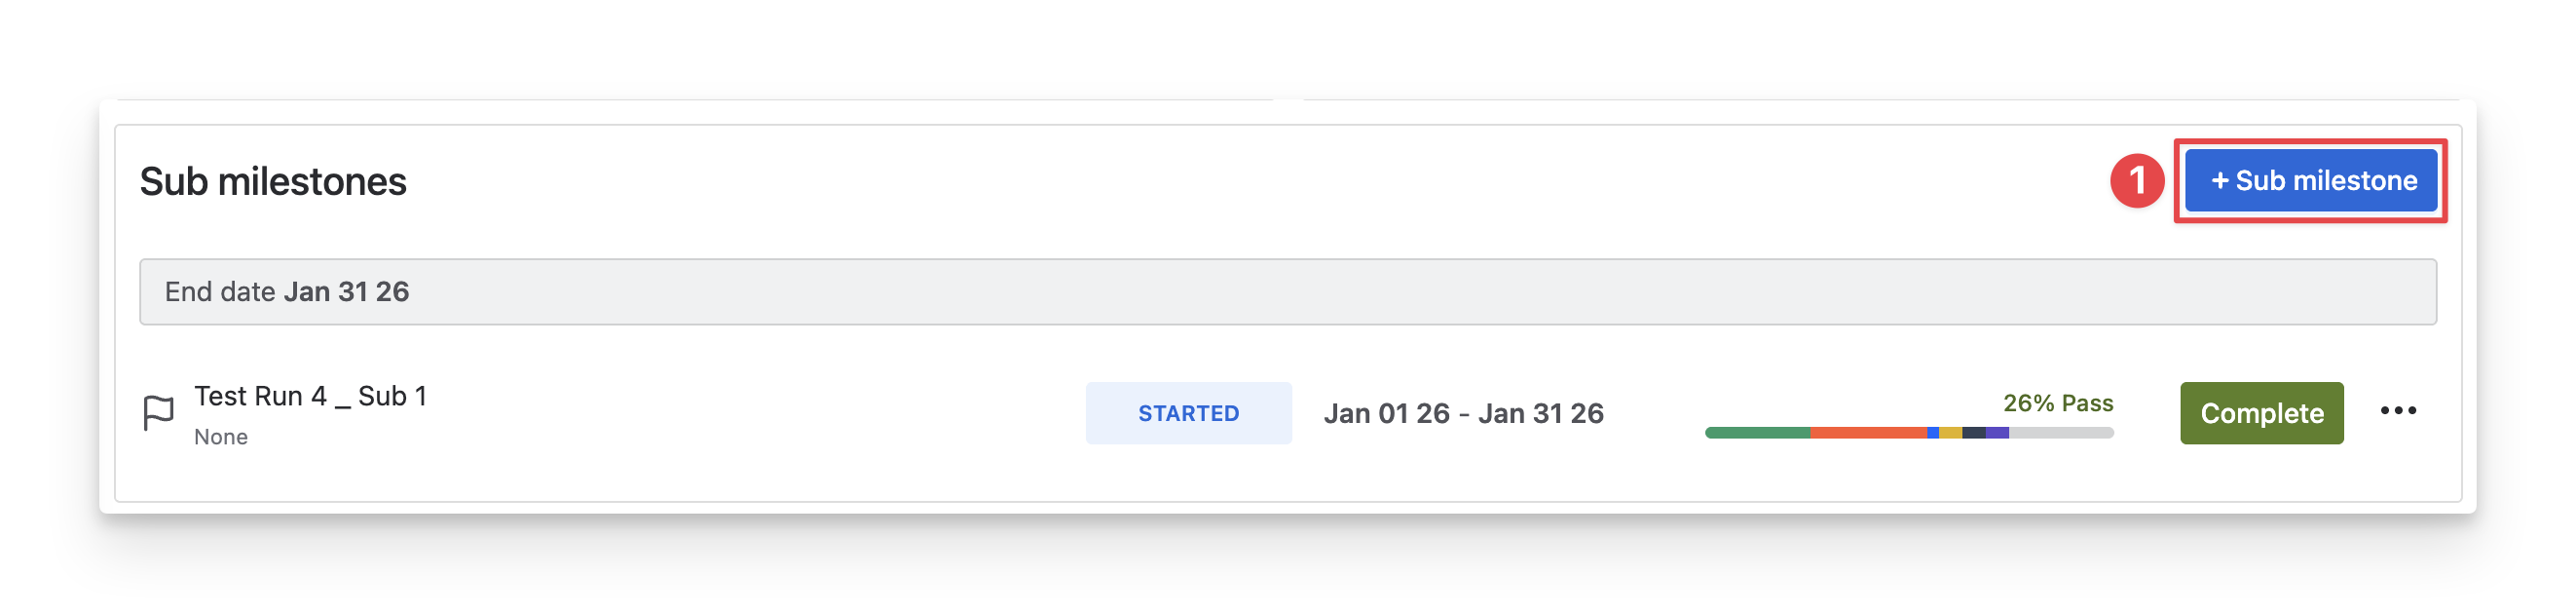
To create new sub milestones, follow these steps:
-
Click on the “+ Sub Milestone”.
-
Fill in the Milestone details.

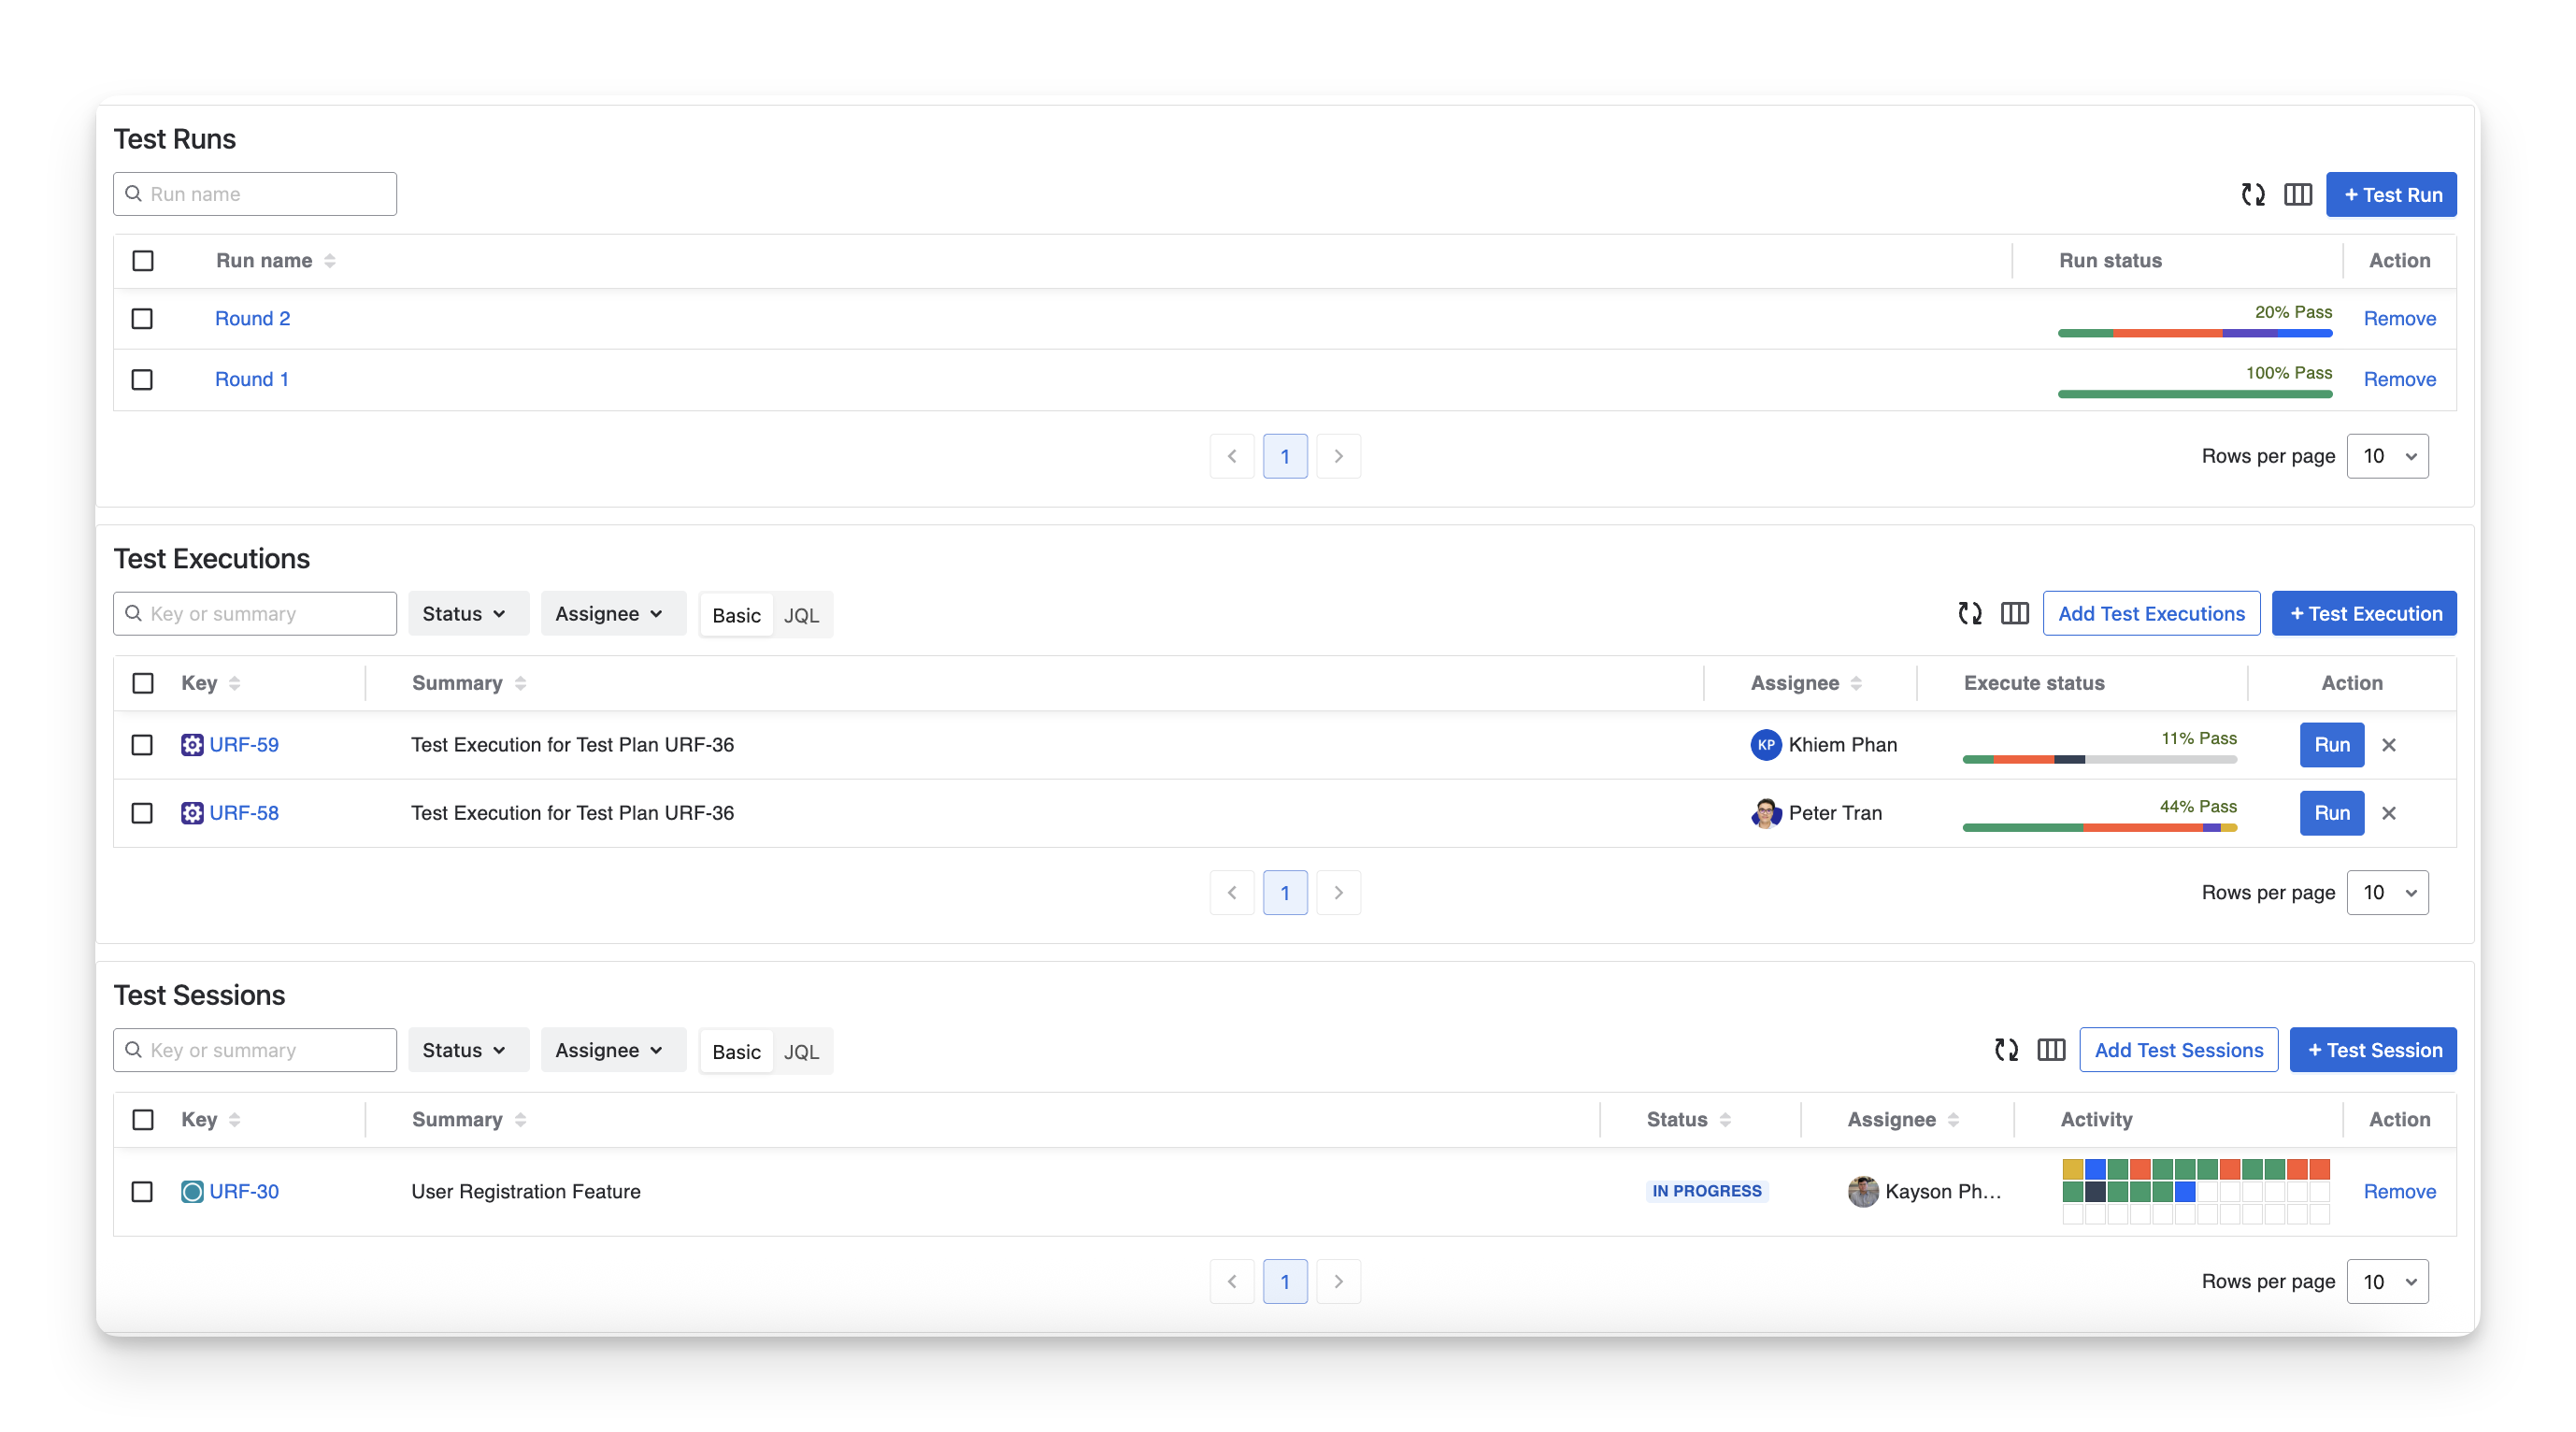
4. Test Item Linking
When you scroll down the Milestone Details screen, you will see three sections: Test Runs, Test Executions, and Test Sessions. These sections show which testing activities are currently linked to the milestone and allow you to add new testing activities as needed.
4.1 Add Test Executions to Milestones
Adding Test Executions to milestones helps you track classic test progress against specific timelines. By grouping executions under a milestone, teams can see how individual test runs contribute to overall milestone completion.
To add test executions to a milestone, follow these steps:
-
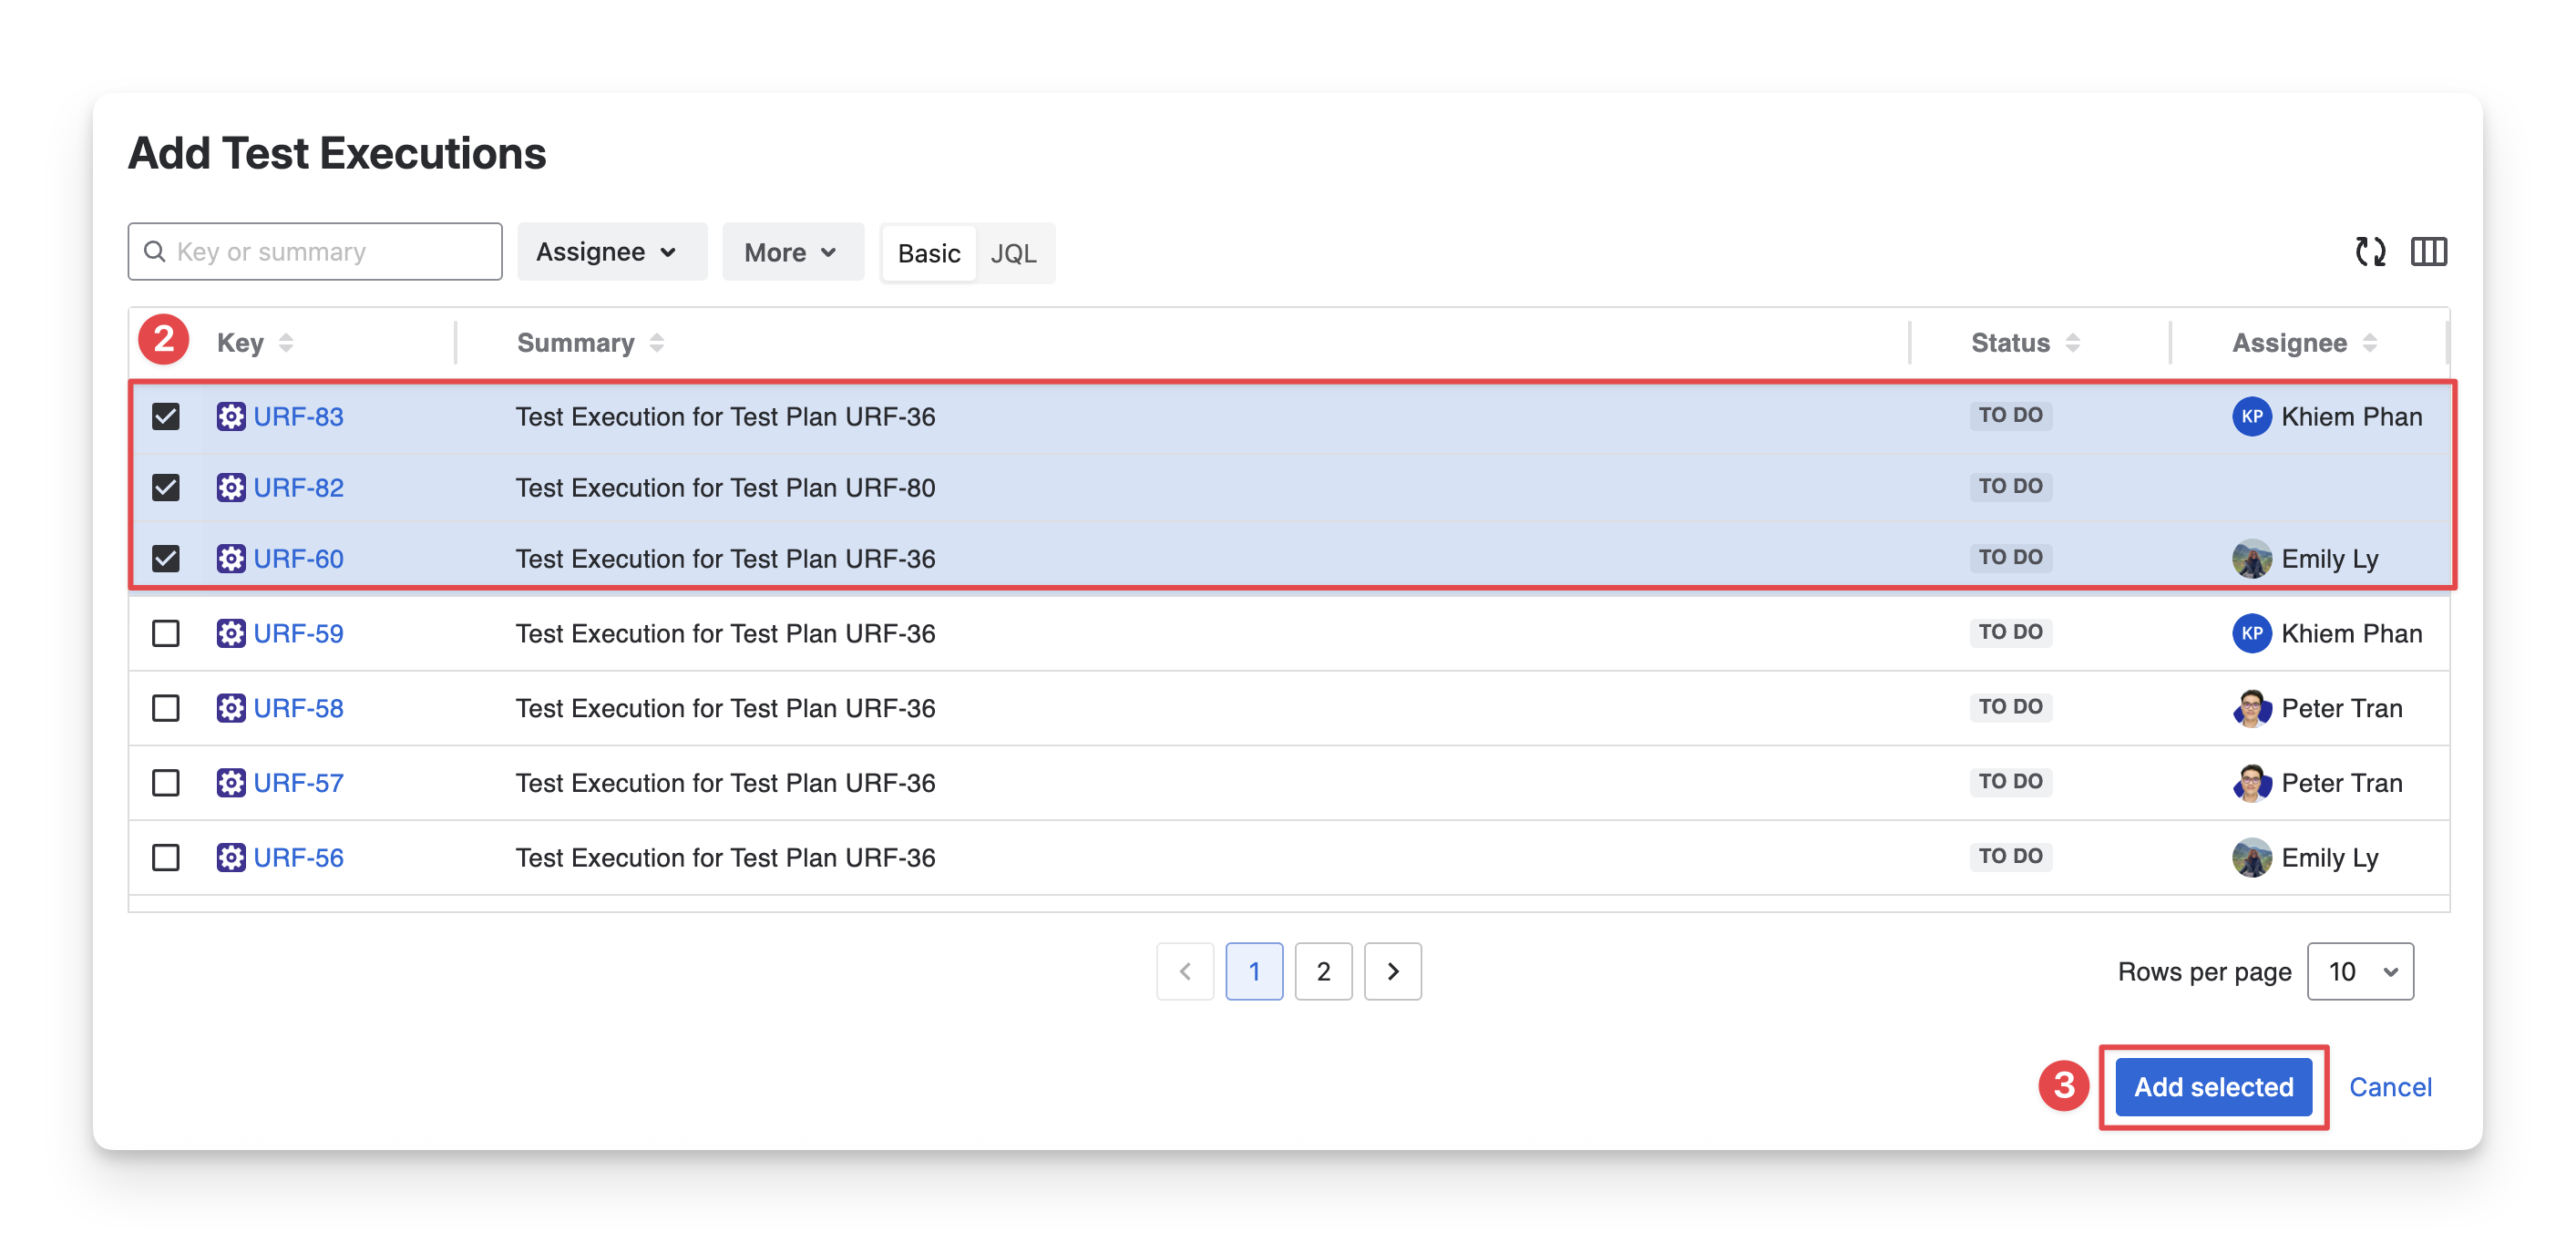
Click on the “Add Test Executions” button.
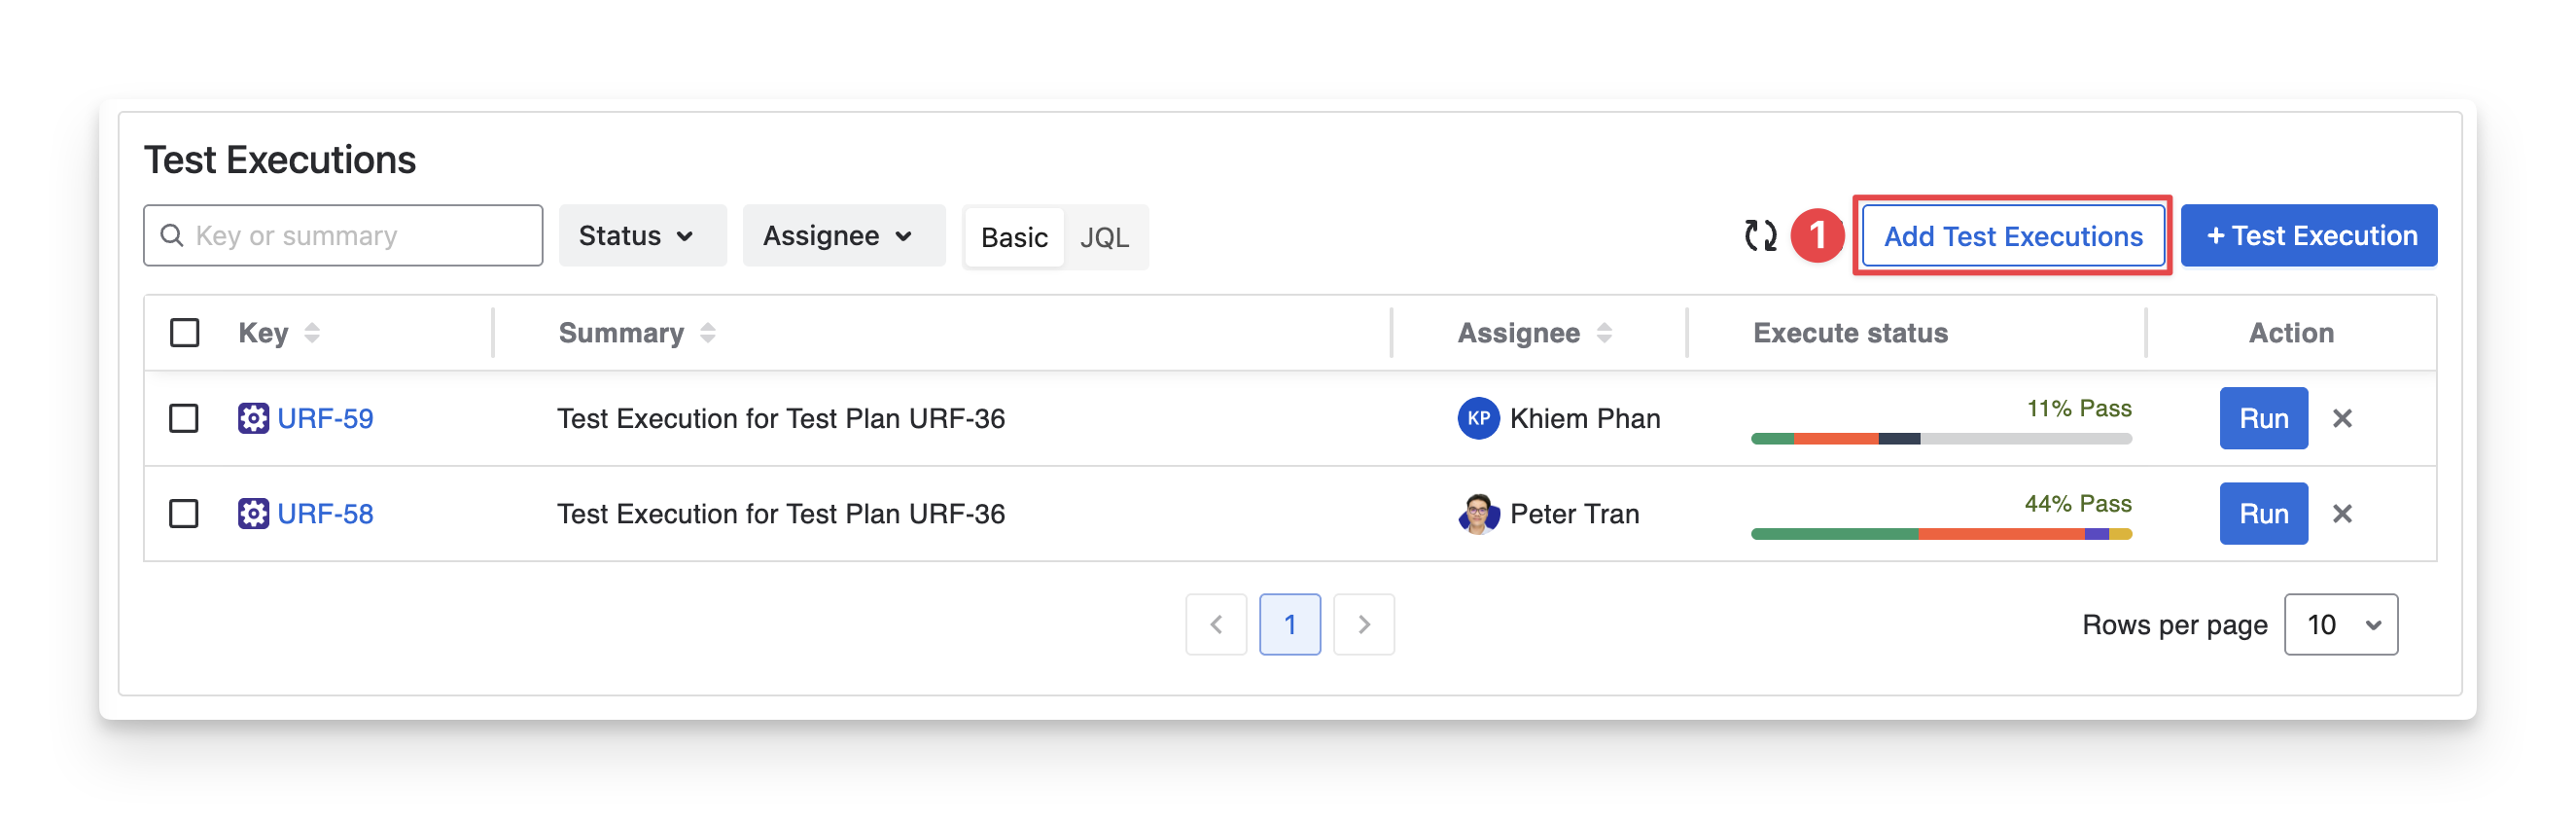
If you choose “+ Test Execution ” you will manually create a new test execution here.
-
Select the test executions you want to add to the current milestone. You can search for test execution by name, filter with fields, or use JQL.
-
Click the “Add selected” to complete this step.
4.2 Add Test Runs to Milestones
Adding Test Runs to milestones helps QA teams track how your checklist-based testing activities contribute to overall milestone completion.
To add test runs to a milestone, follow these steps:
-
Click on the “+ Test Run” button.
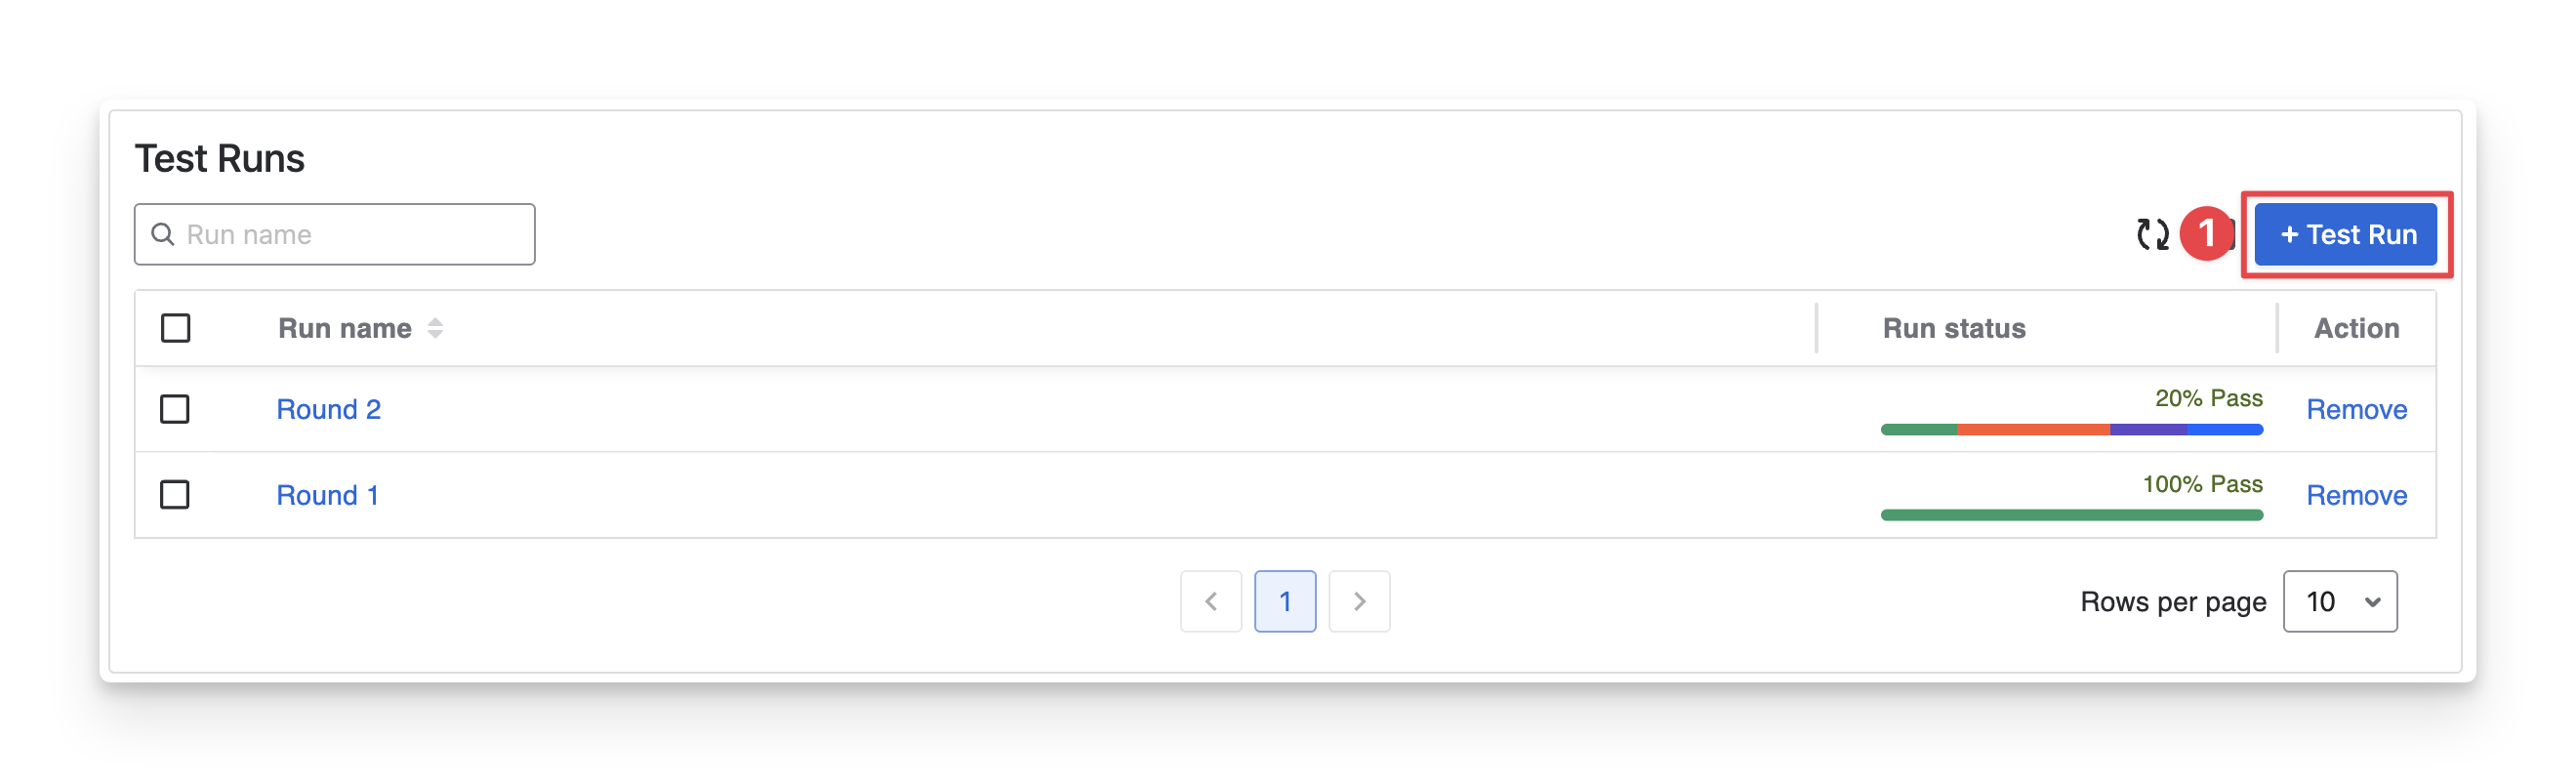
-
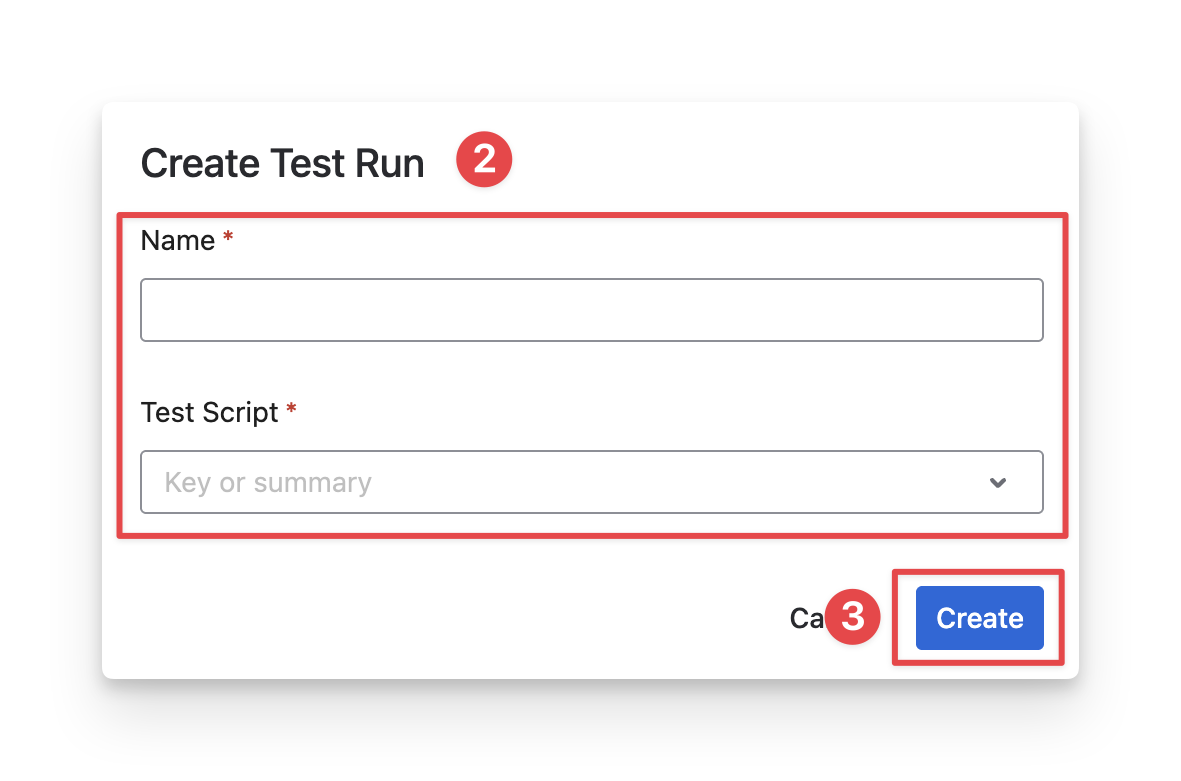
Name the Test Run and select from your existing test run lists.
-
Click the “Create” button.
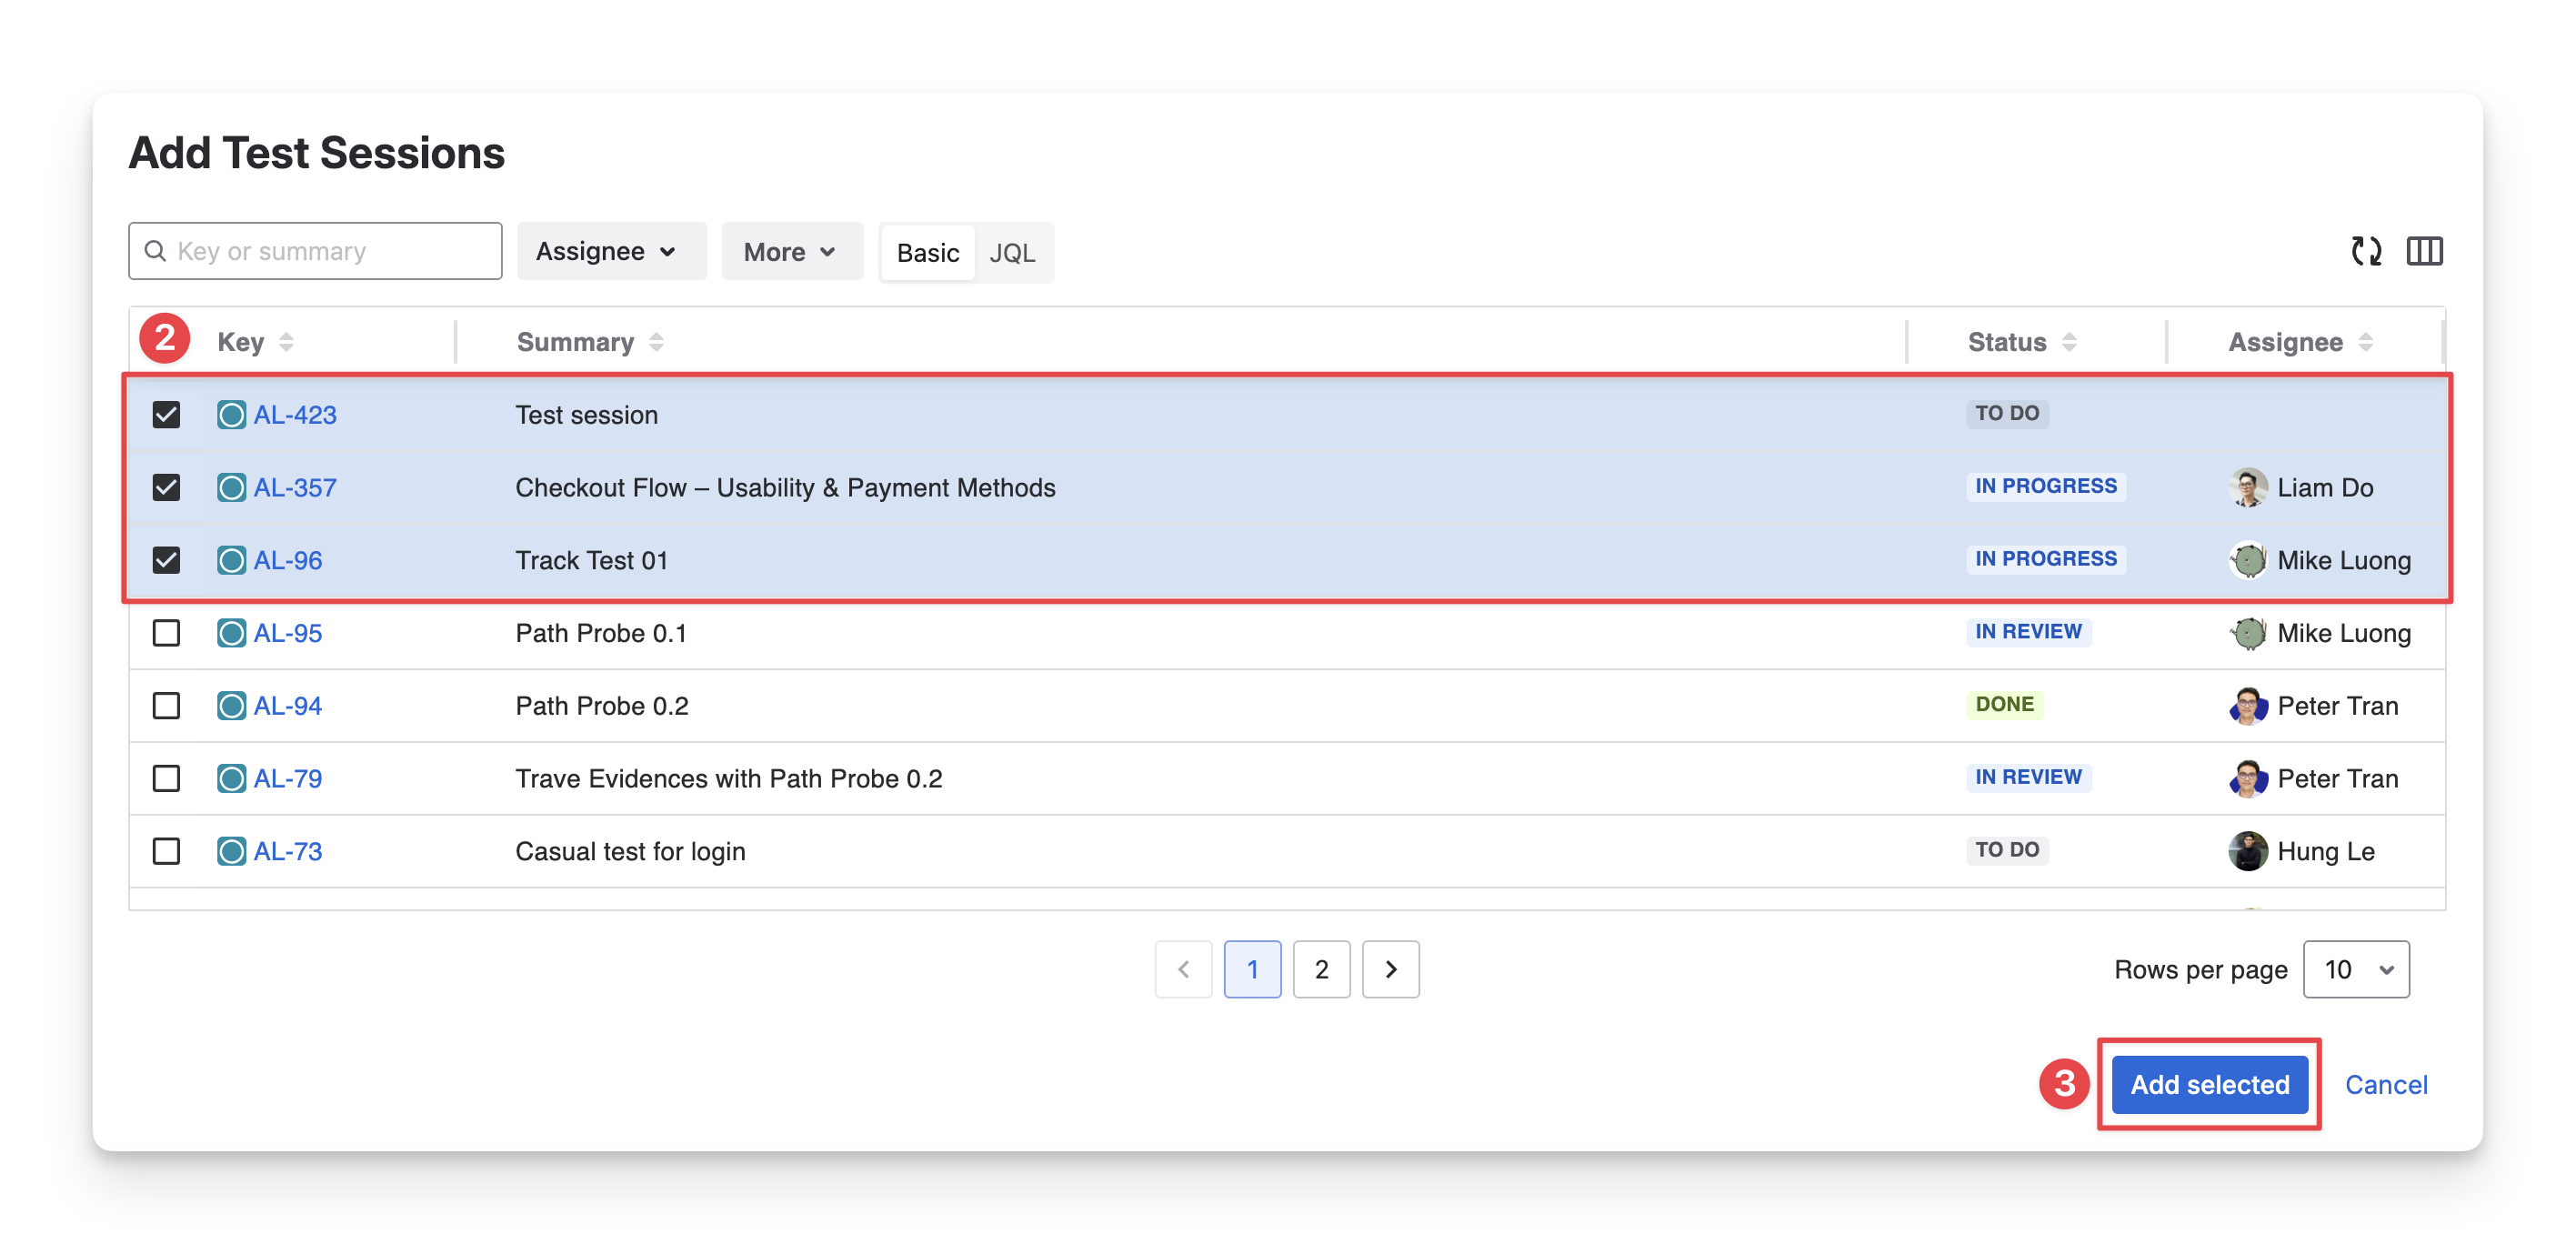
4.3 Add Test Sessions to Milestones
Adding Test Sessions to milestones helps QA teams track exploratory testing efforts tied to a specific timeframe.
To add test sessions to a milestone, follow these steps:
-
Click on the “Add Test Sessions” button.
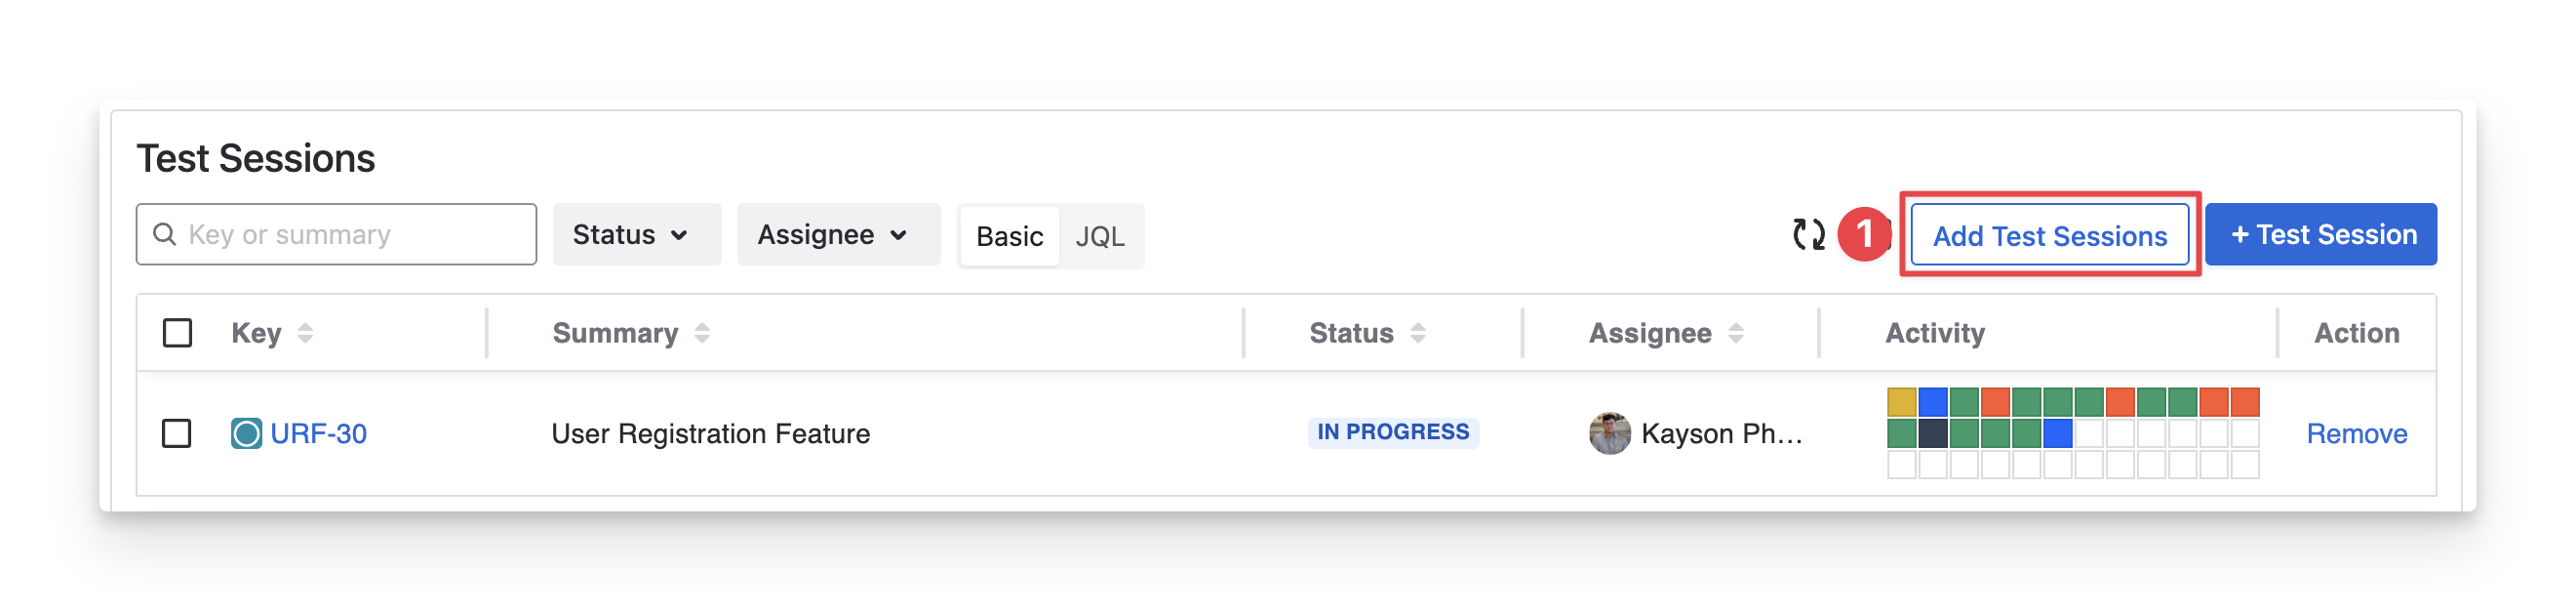
If you choose “+ Test Session ” you will manually create a new test session here.
-
Select the test runs you want to add to the current milestone. You can search for test sessions by name, filter with fields, or use JQL.
-
Click the “Add selected” to complete this step.
Should you need any assistance or further AgileTest inquiries, contact our 24/7 Support Desk!