.png)
A roadmap is a high-level visual representation of a project's goals, milestones, and deliverables over a specified time frame. It serves as a strategic guide that aligns the project's objectives with the organization's overall goals and provides a clear overview of its direction, key activities, and timelines.
This feature allows you to plan and visualize tasks, track their progress, collaborate with team members, and share boards with your stakeholders. ConfluPlan provides a comprehensive visual presentation of your team’s goals, milestones, and deadlines. As a result, this will keep everyone updated, ensuring the project stays on track.
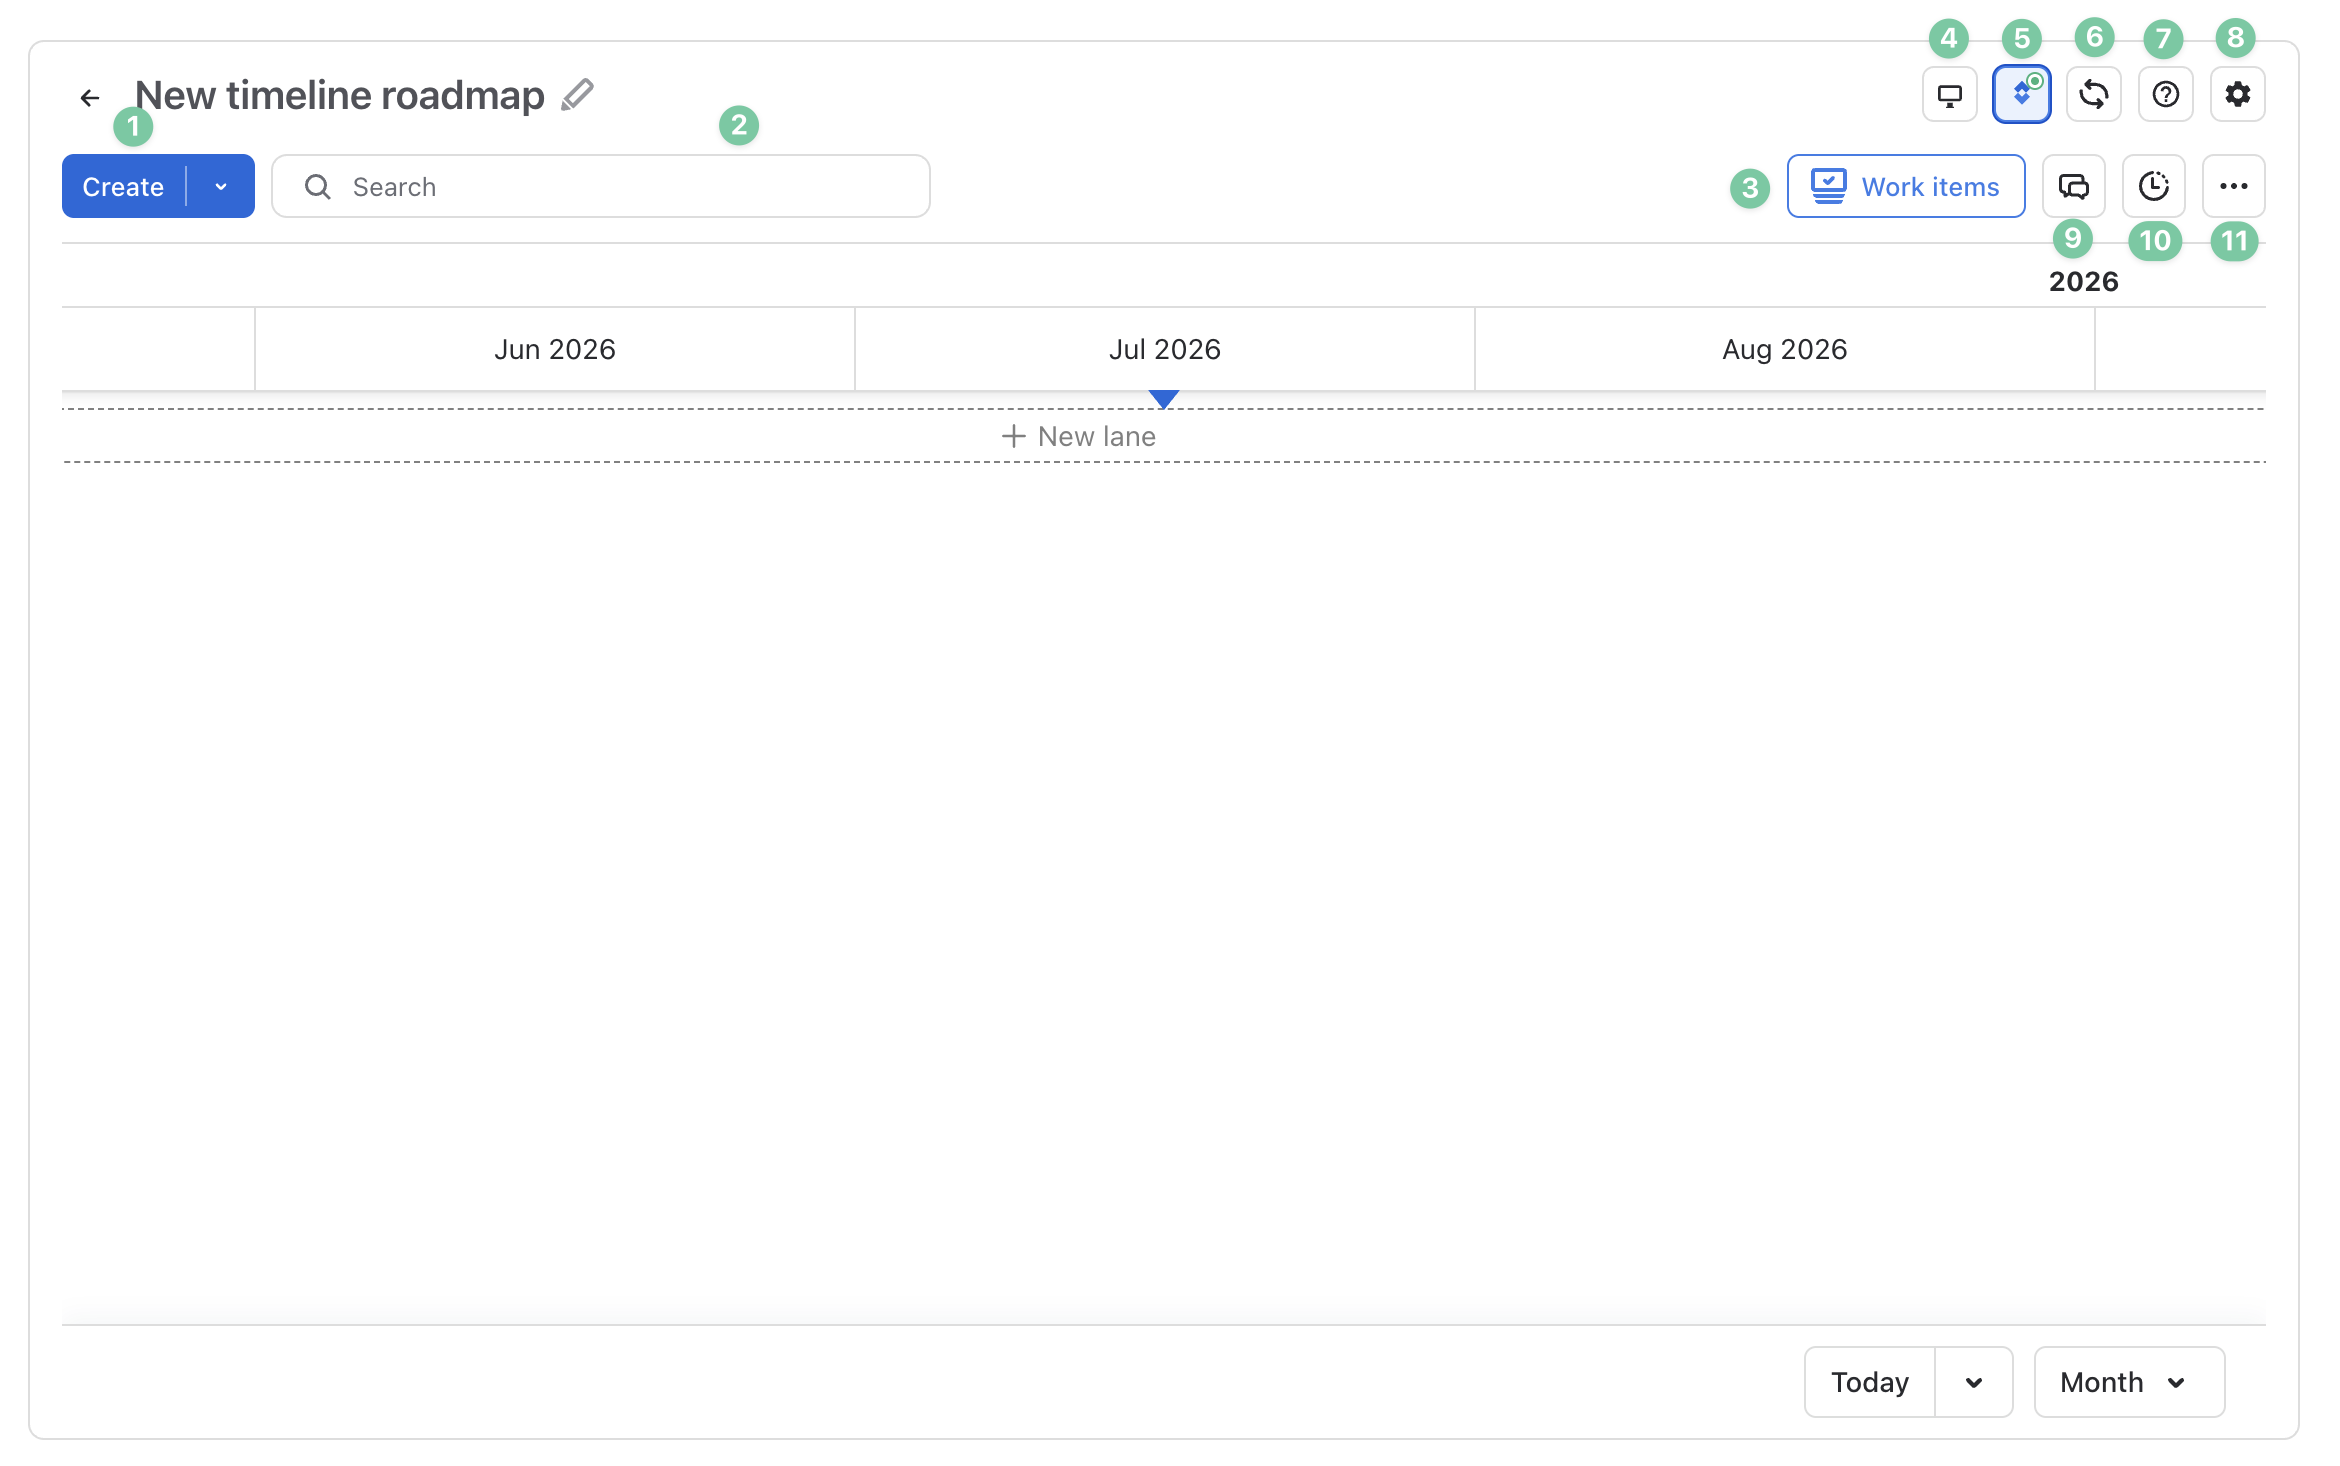
1. Menu bar
Let’s begin with the app's Menu bar.
-
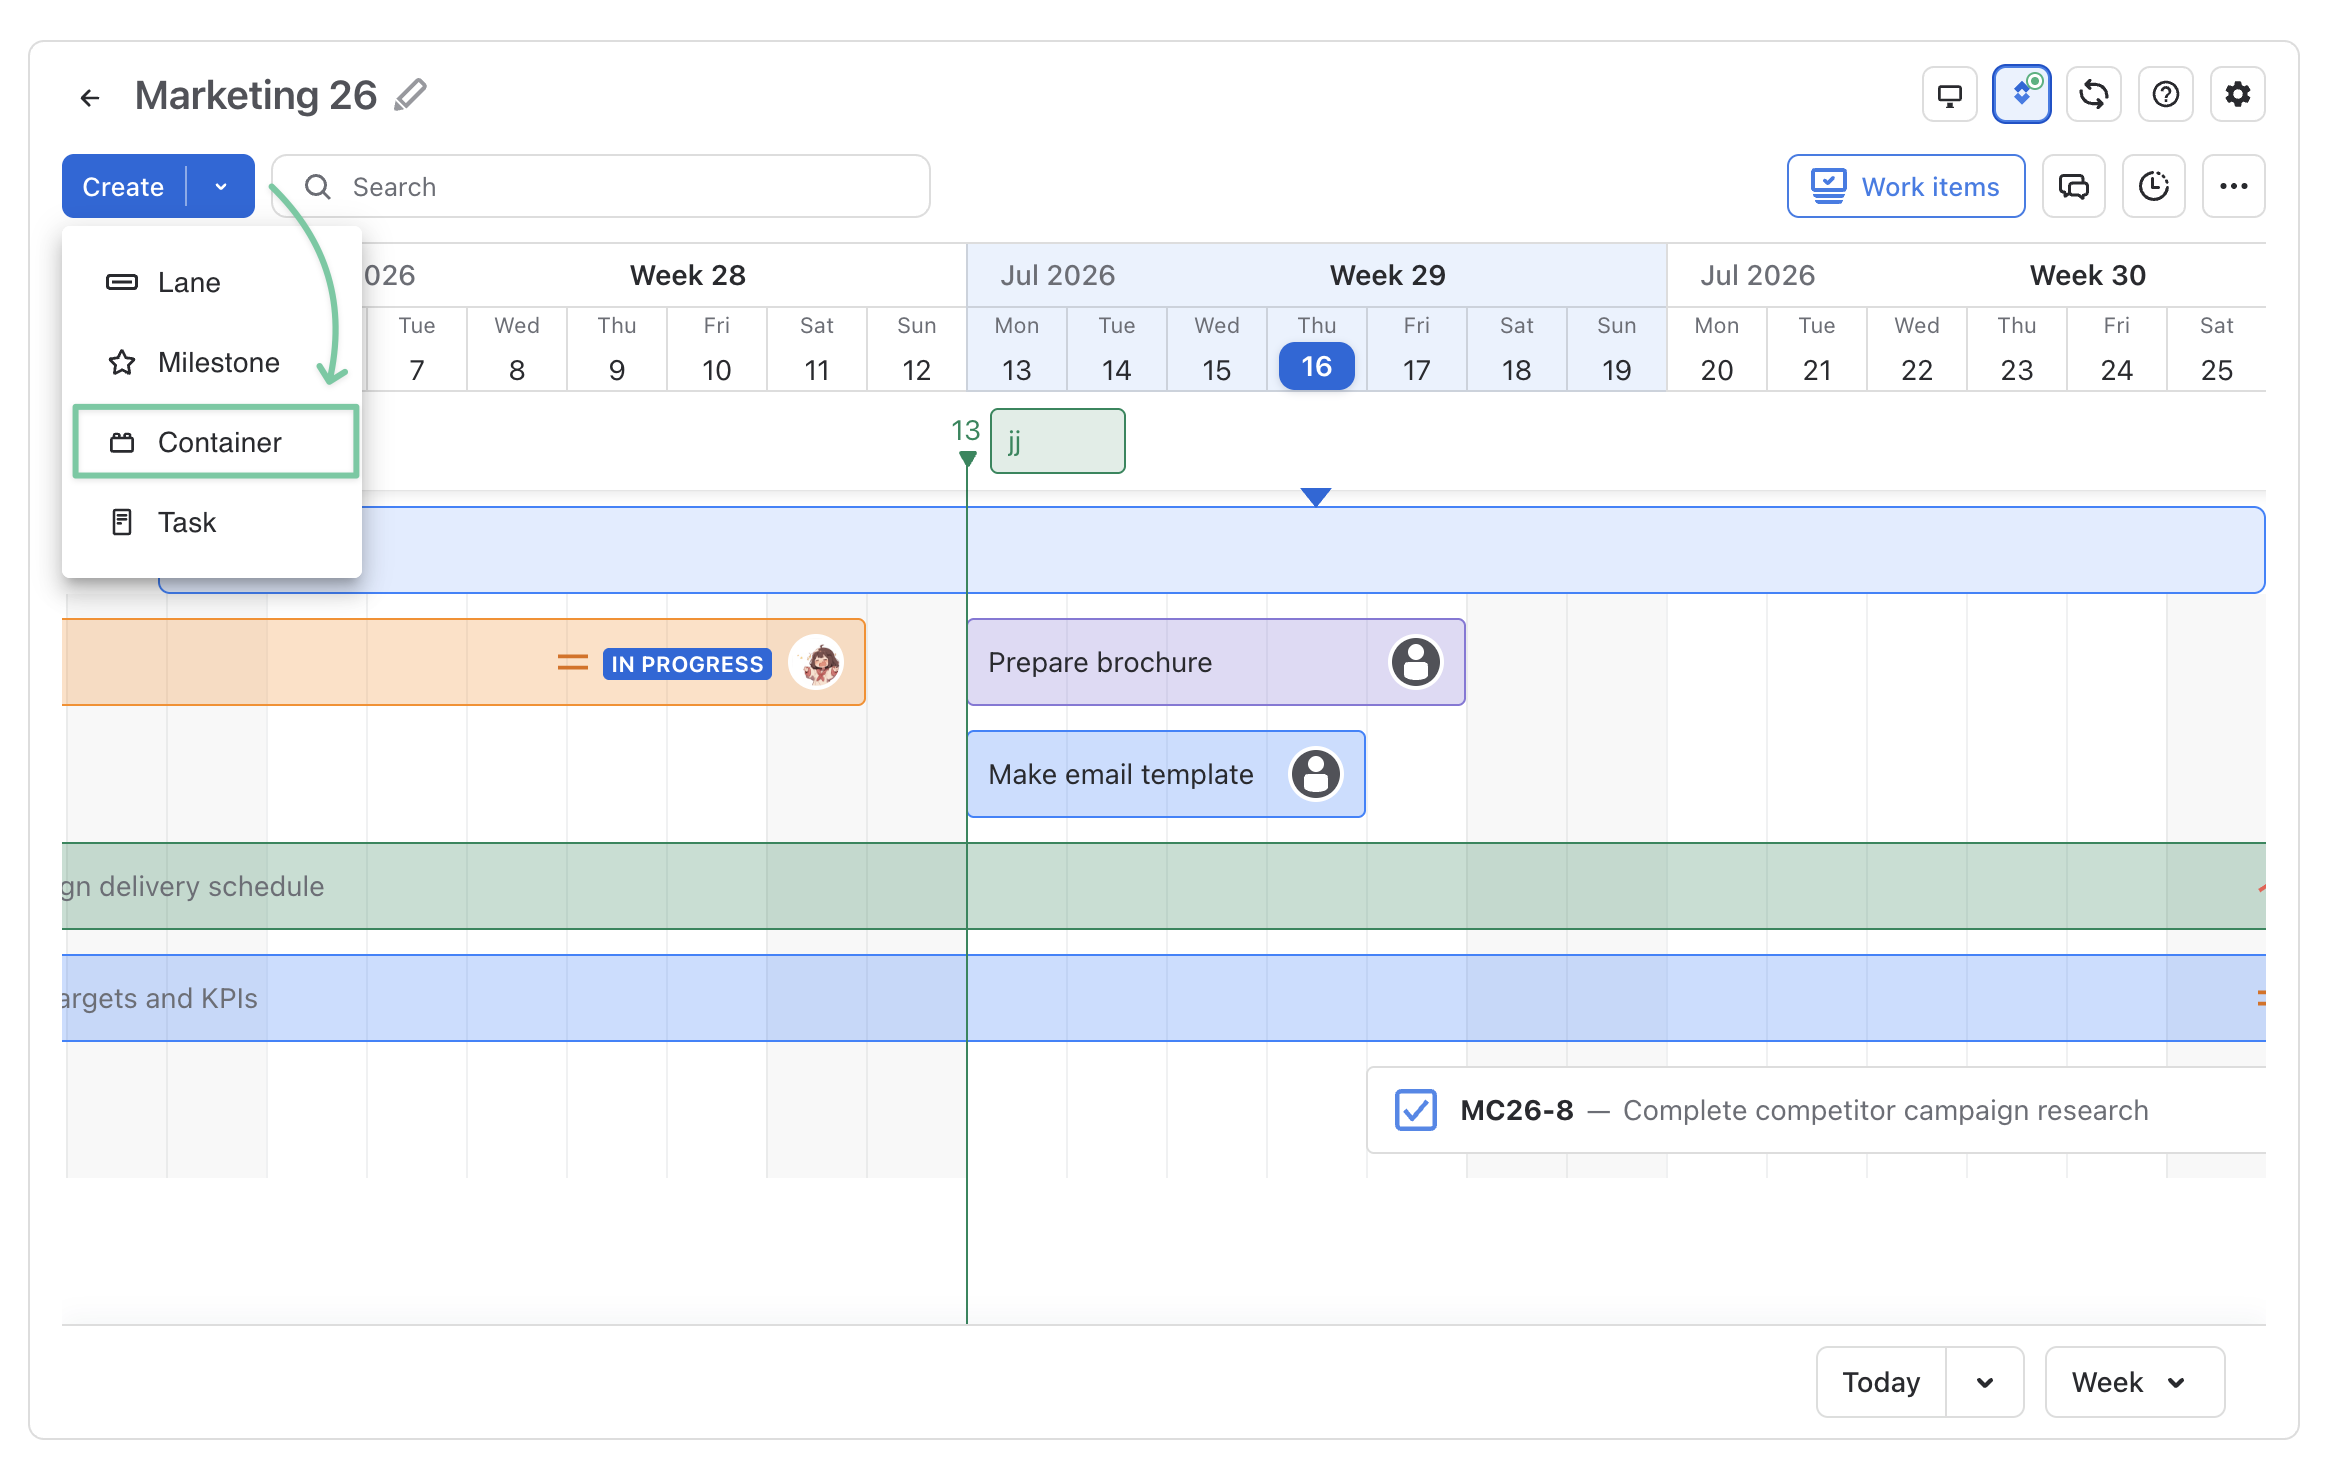
Create: this allows you to create a new Lane, Milestone, Container, and Task.
-
Search tasks: you can use search to find a specific task in the roadmap.
-
Work items: this is where you can connect ConfluPlan’s board with Jira spaces and
-
Field mapping: this allows you to map the board’s starting and ending dates with Jira data fields. It is only accessible when Jira integration is enabled.
-
Jira integration: you can enable or disable this feature to sync the board with Jira spaces.
-
Refresh: this helps update the board with all changes made to the board.
-
Help: it opens a menu where you can find ConfluPlan’s user guide and contact support.
-
Settings: this opens the board’s settings to make any adjustments later on.
-
Comments: it allows you and your team members or stakeholders to give feedback directly in the roadmap.
-
Activities: it works as a log history, recording any action taken in the roadmap.
-
More options: this is where you can find the Export button to download the roadmap as a PNG image for external usage. Besides, you can also access Display settings to decide how you want to render your roadmap.
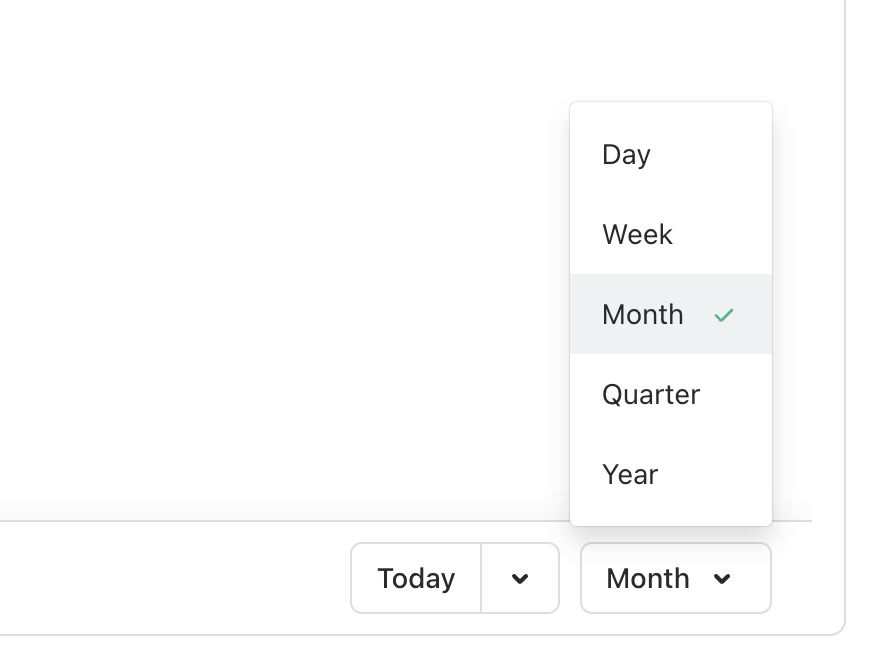
2. View mode
You will find this option at the bottom right of the screen. It allows users to change the view mode of Routemap for Confluence from daily, weekly, monthly, quarterly, or even yearly.
Additionally, you can quickly go to today’s tasks or any specific date on the roadmap by using the Jump-to-Date feature.
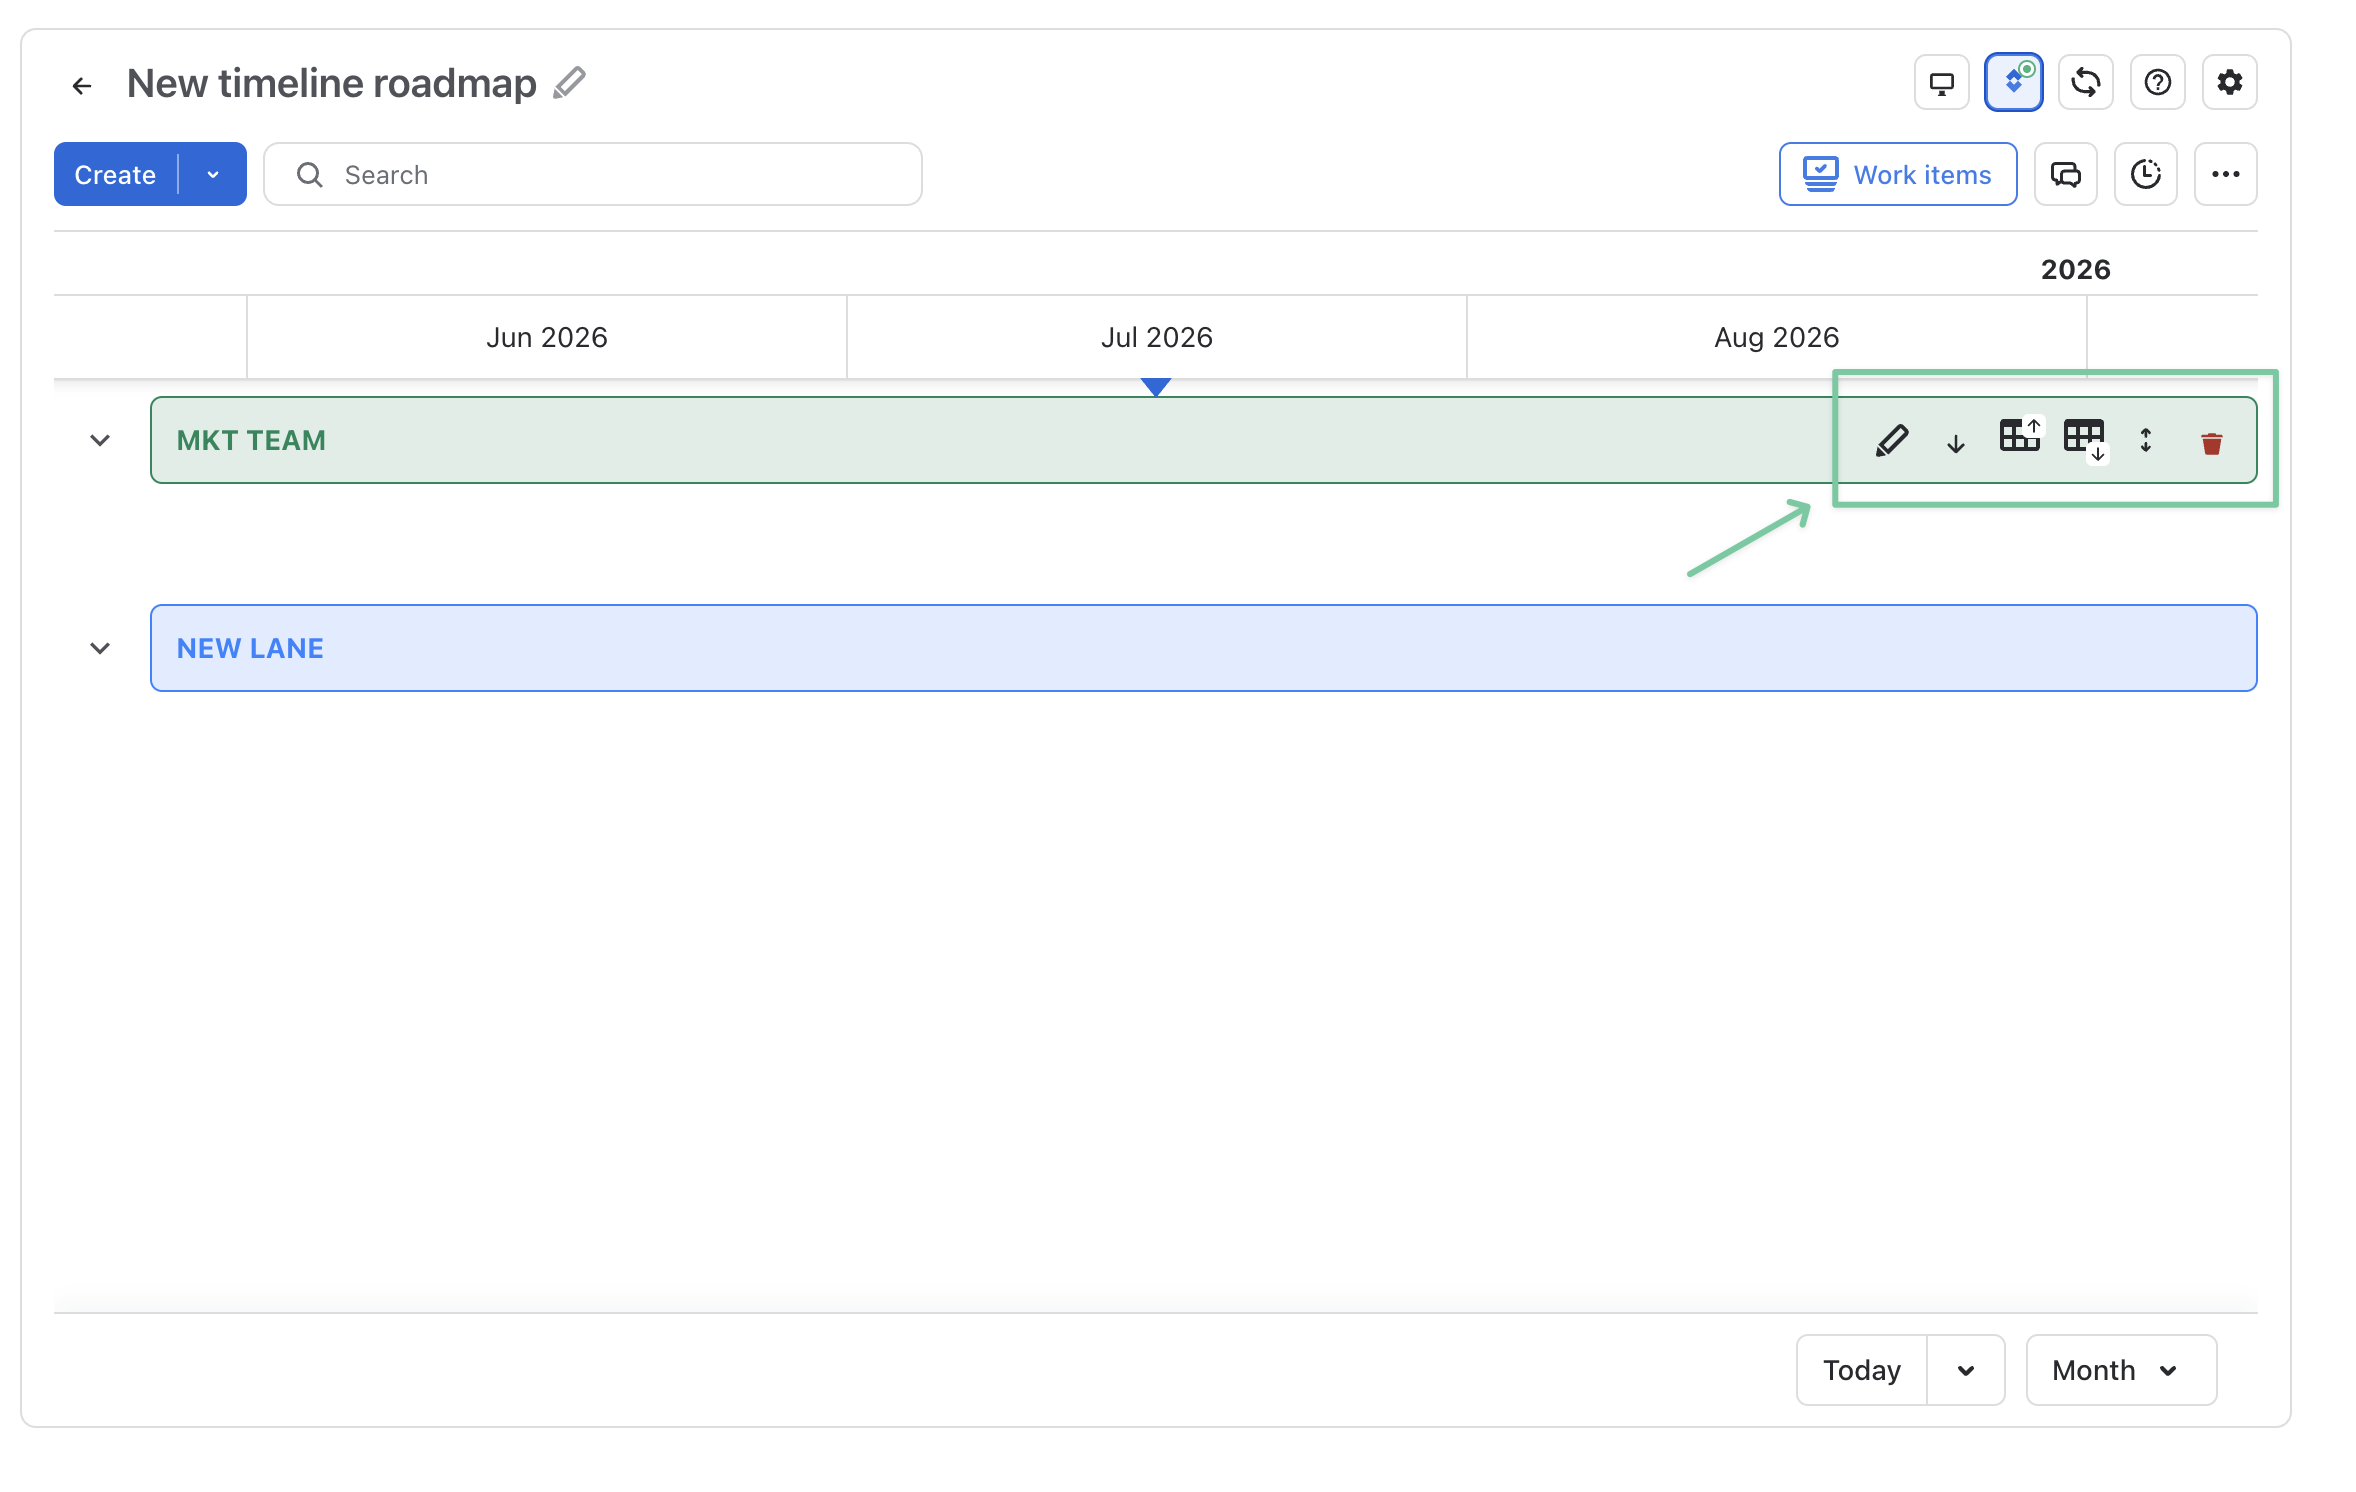
3. Adding new a lane
To start using the Issue Timeline feature, you will have to create a new lane first.
You can click Create to add a new one or click on the empty roadmap.
After creating a new lane, you can click on the 3 dots symbol at the end of the new lane to make any adjustments. You can:
-
Edit a lane (change its name and color)
-
Move Up or Down (when there are multiple lanes)
-
Insert Above, Insert Below
-
Expand/Collapse all containers inside that lane
-
Delete lane.
4. Adding a new task
Once you have added a lane to the roadmap, you can now create a new task directly.
Click on the space in the roadmap or click Create → choose Task. There will be a modal to help you plan new tasks.
At this step, you can set an Assignee to the task, input the task’s name or its Summary add a Description (optional), set a Start and End date for this task, adjust its Progress, and pick a color for it.
Then, you can click Plan.
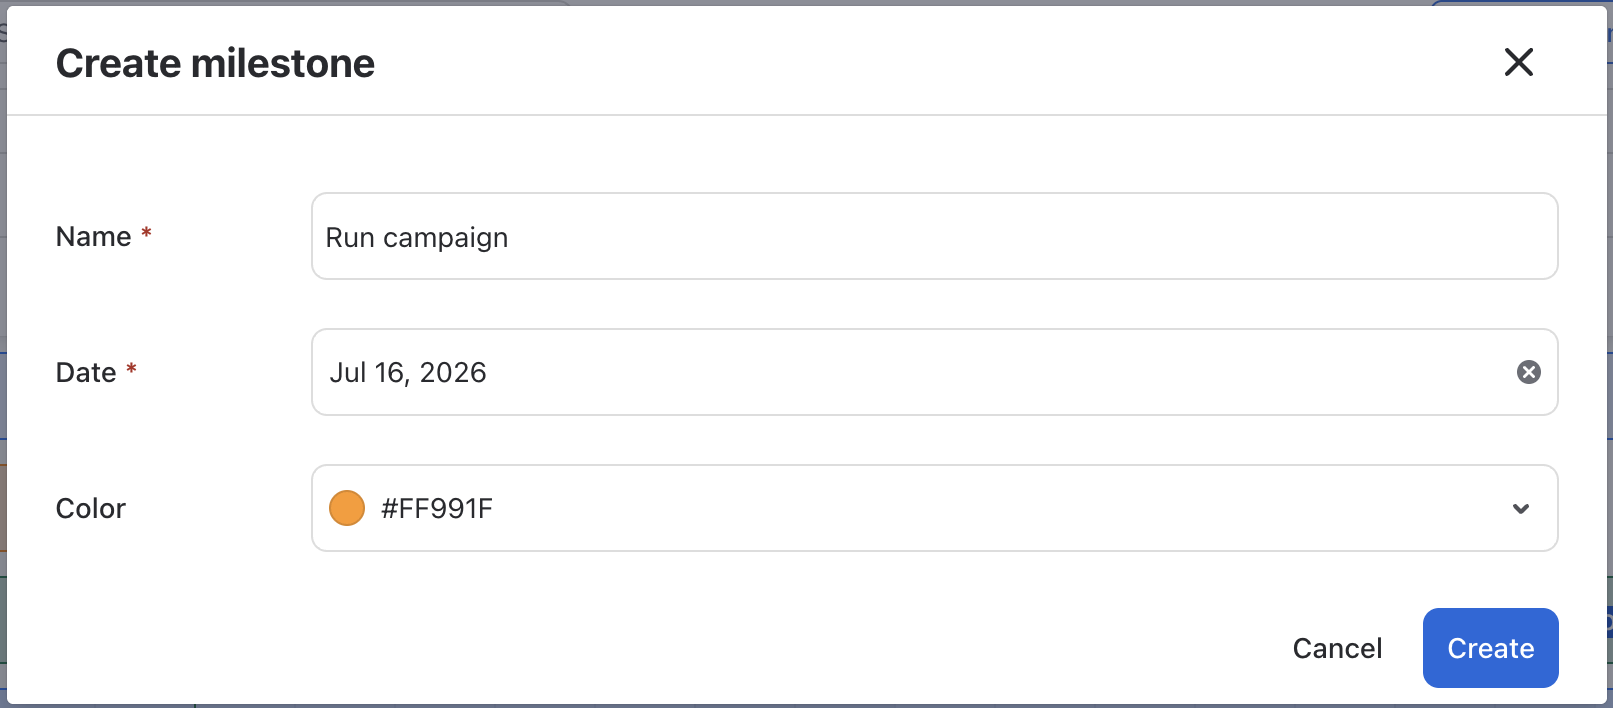
5. Creating a Milestone
Milestone works as a marker in the roadmap, notifying every member and stakeholder about an important date or event in the project.
To add a milestone, you can click Create and choose Milestone, or you can click a specific date on the timeline (showing “Add milestone”) to create one.
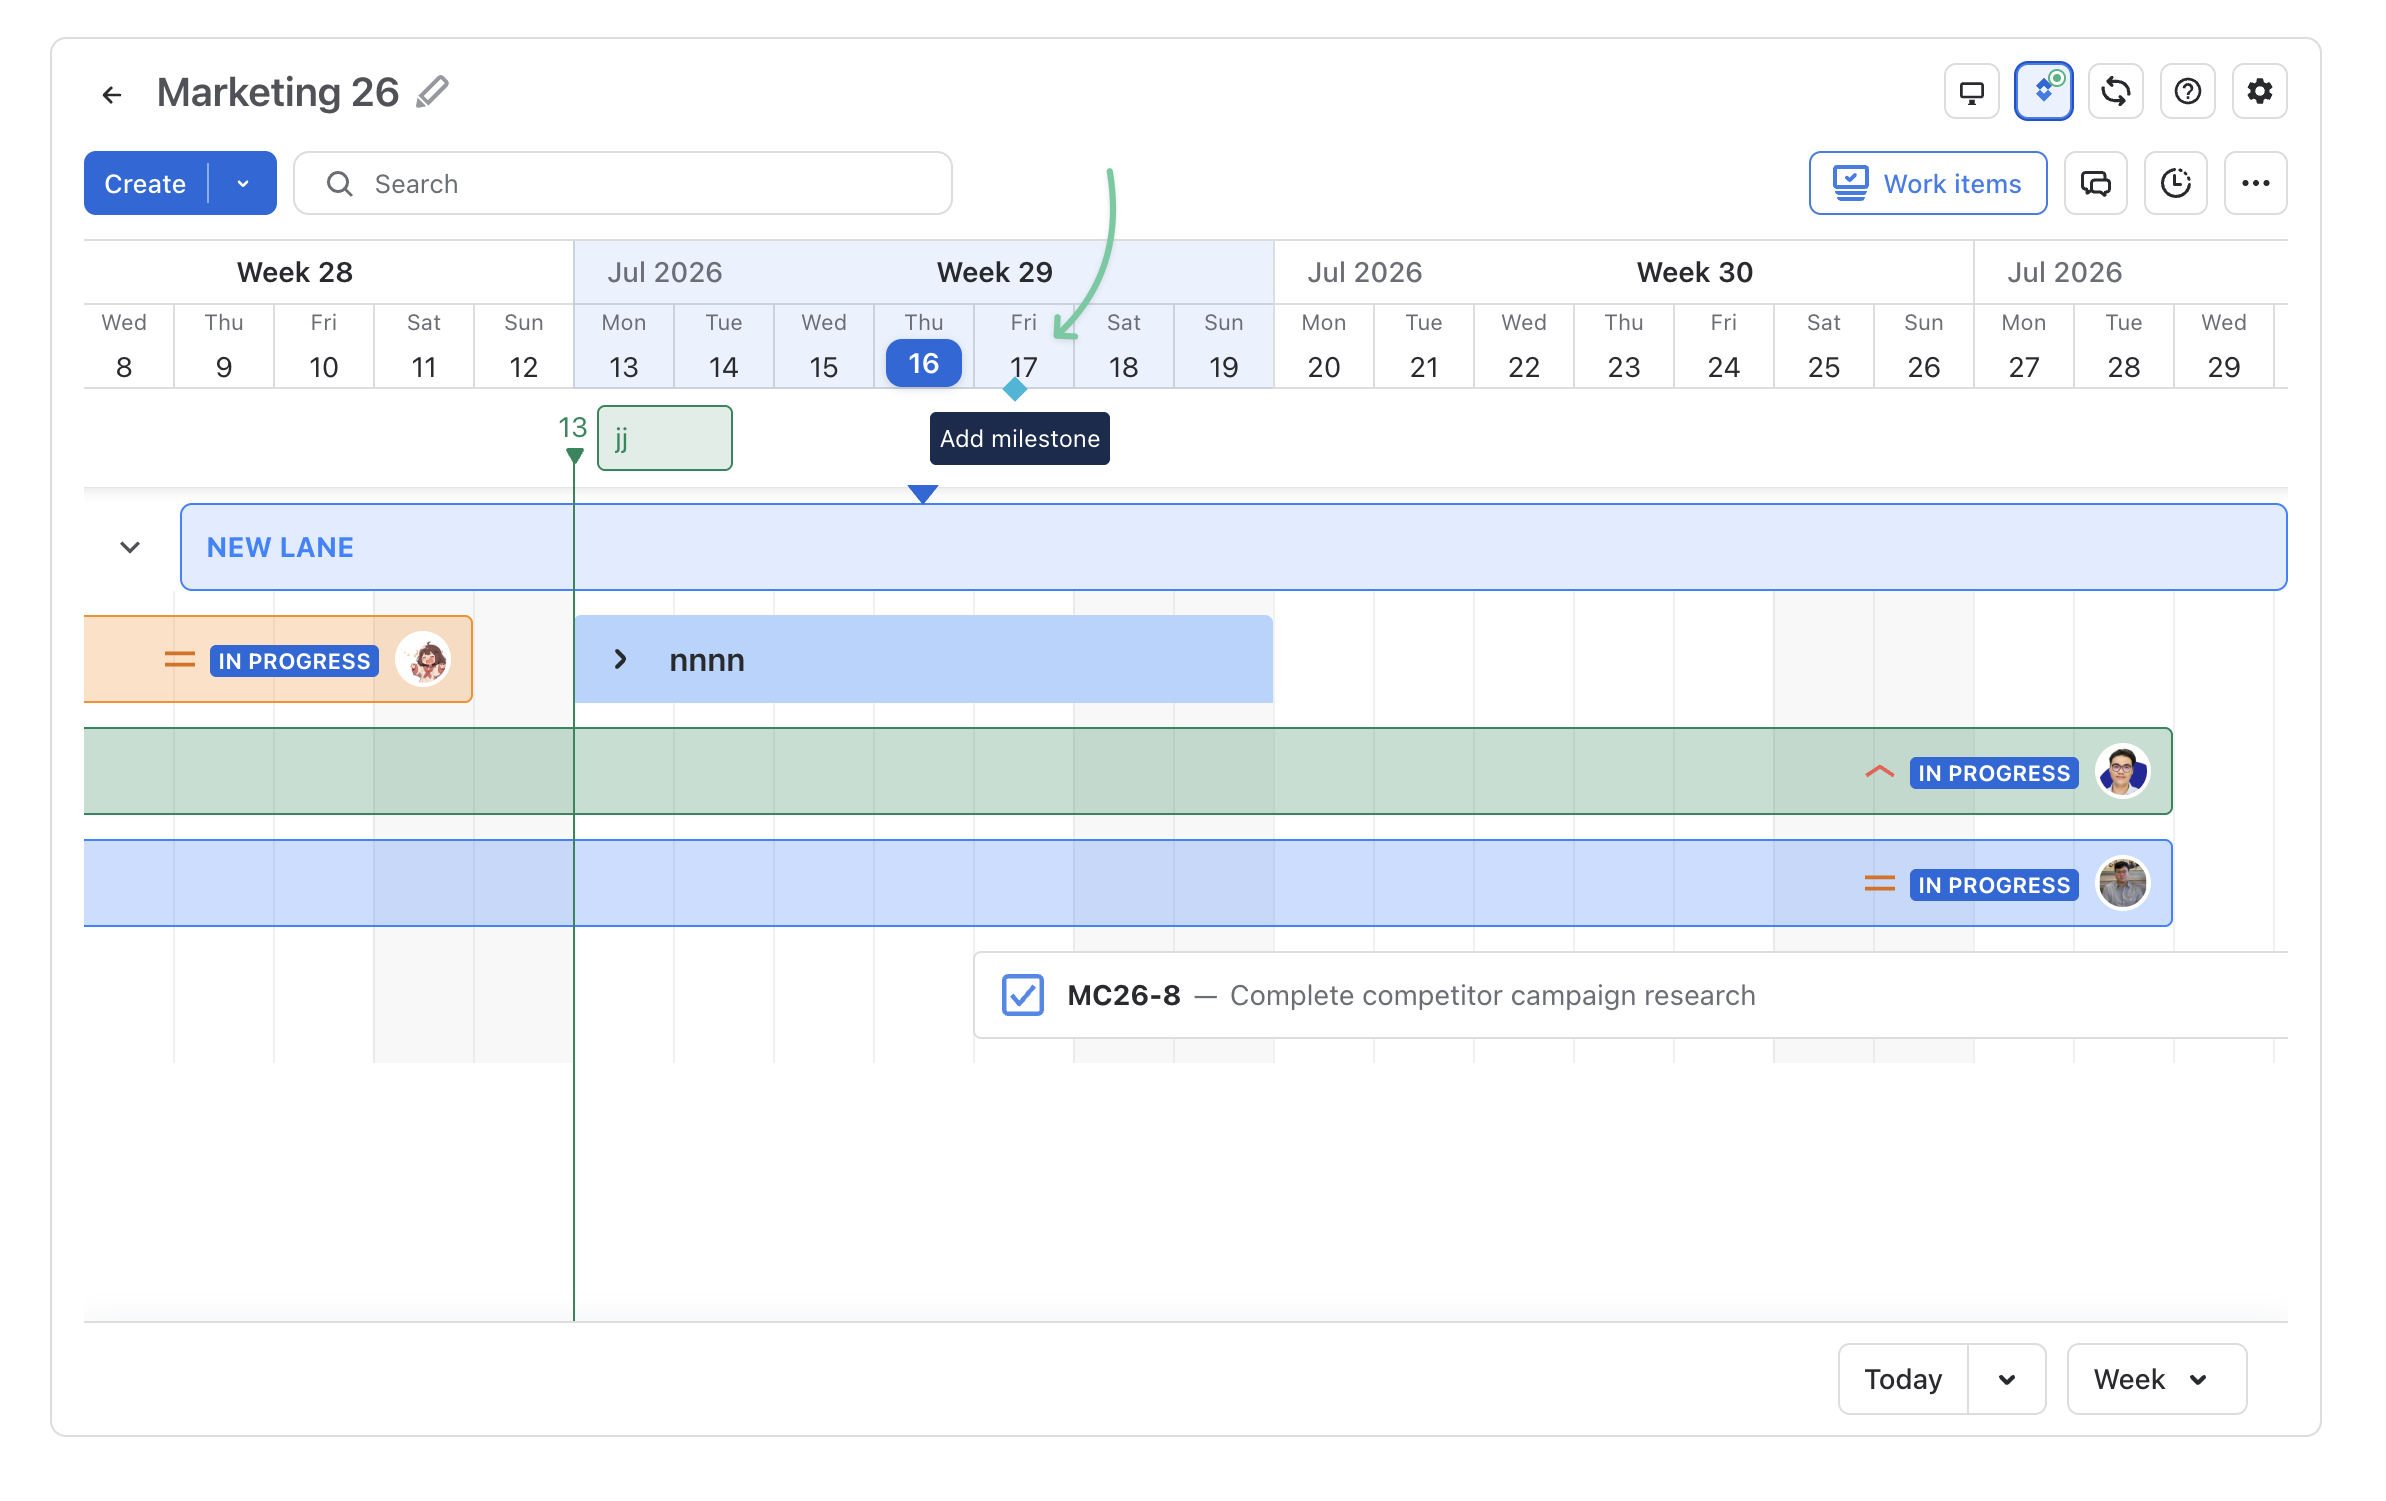
All you have to do now is name this milestone, choose a color by clicking the color circle, adjust the date, and click Add.
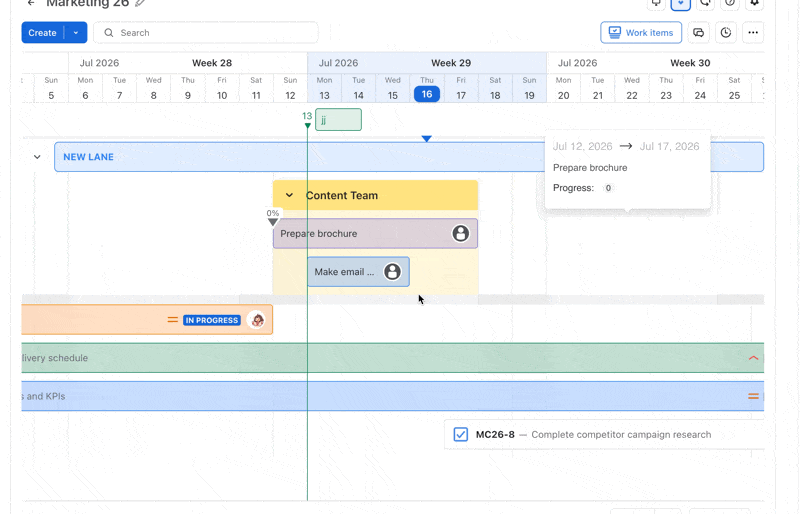
6. Adding a Container
Containers help combine tasks as a whole for better management. It can represent the tasks of a member, a team, etc.
To create a Container, from the Create button select Container. Then, you can fill in the title, choose the Lane where this container belongs, set the Start and End dates, and don’t forget to pick a color for this container.
You can now drag tasks into this newly created container for better management.
7. Adjusting the task Progress
You can adjust it directly by dragging the slider on the bar or in the task details.
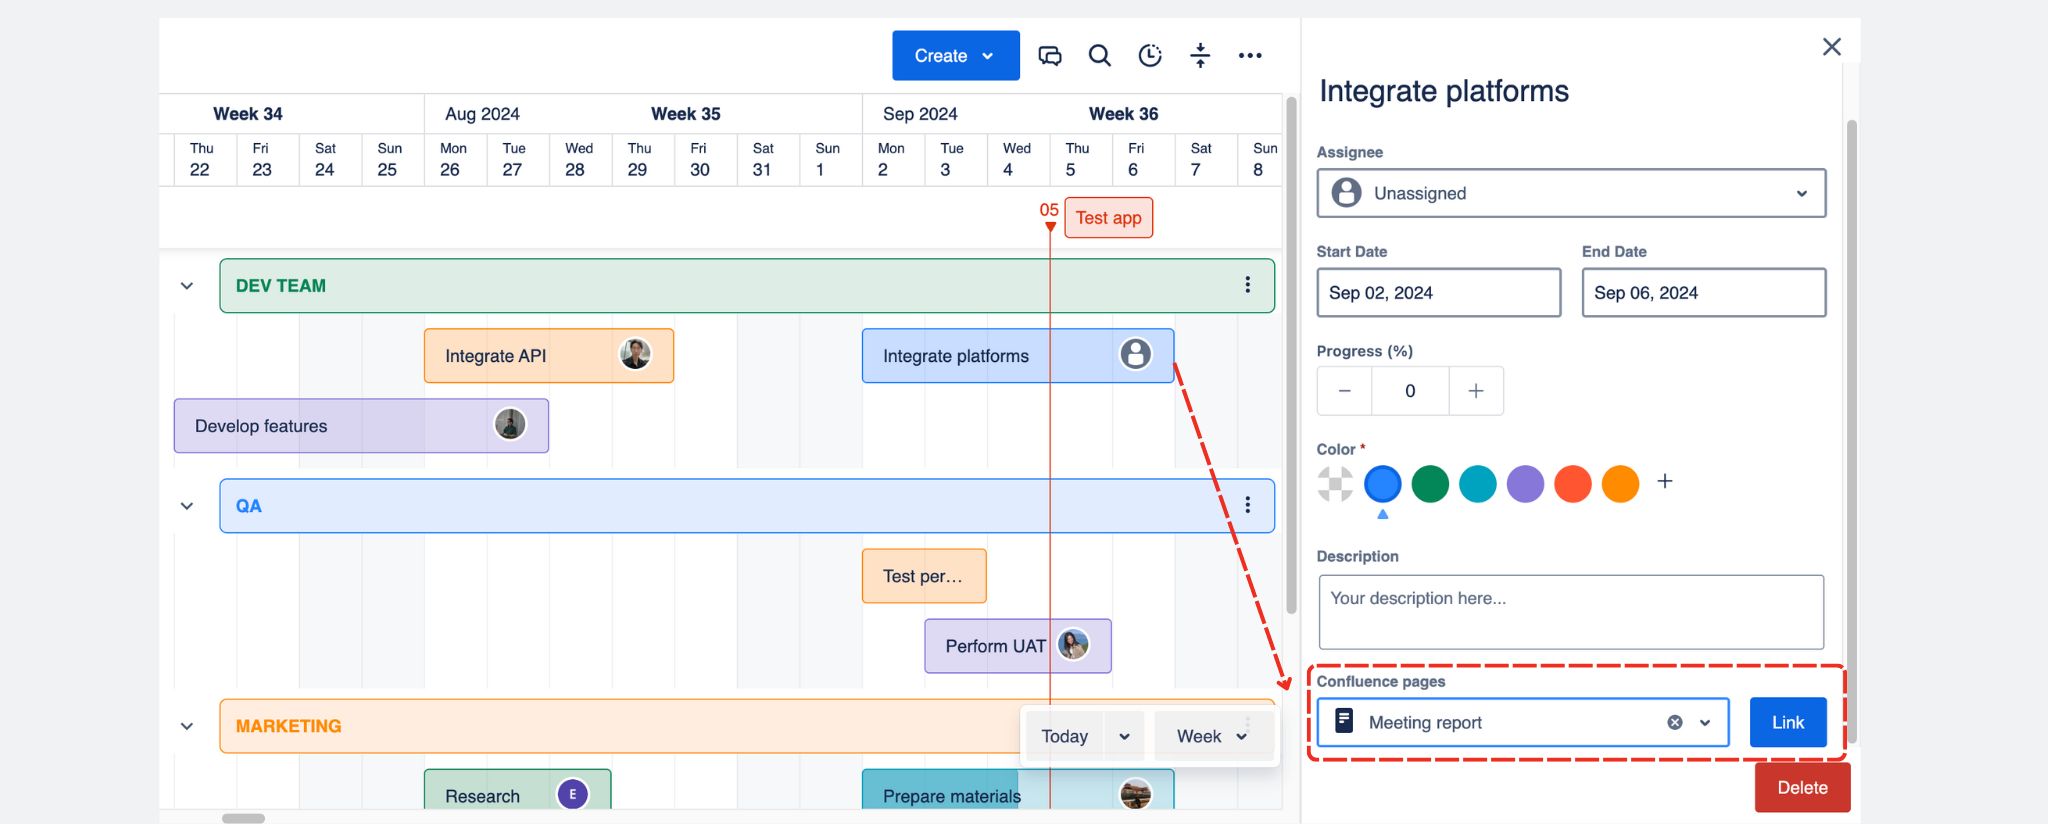
8. Link Confluence pages
From version Confluence 1.1.6-AC, you can link Confluence pages and blog posts to roadmap bars.
This will come in handy if you want to link reports, meeting agendas, or notes, etc., as references for a specific task.
Simply click on the bar to open the modal, and you’ll find the link to Confluence pages when scrolling down to the bottom.