Discuss stage
The Discussion stage is where the team dives deep into the prioritized reflection groups, sharing insights, clarifying ideas, and planning next steps.
This collaborative conversation ensures everyone’s thoughts are heard and helps the team create actionable outcomes from the retrospective.
Discuss stage components
The Discuss stage screen contains 3 columns for users to interact with
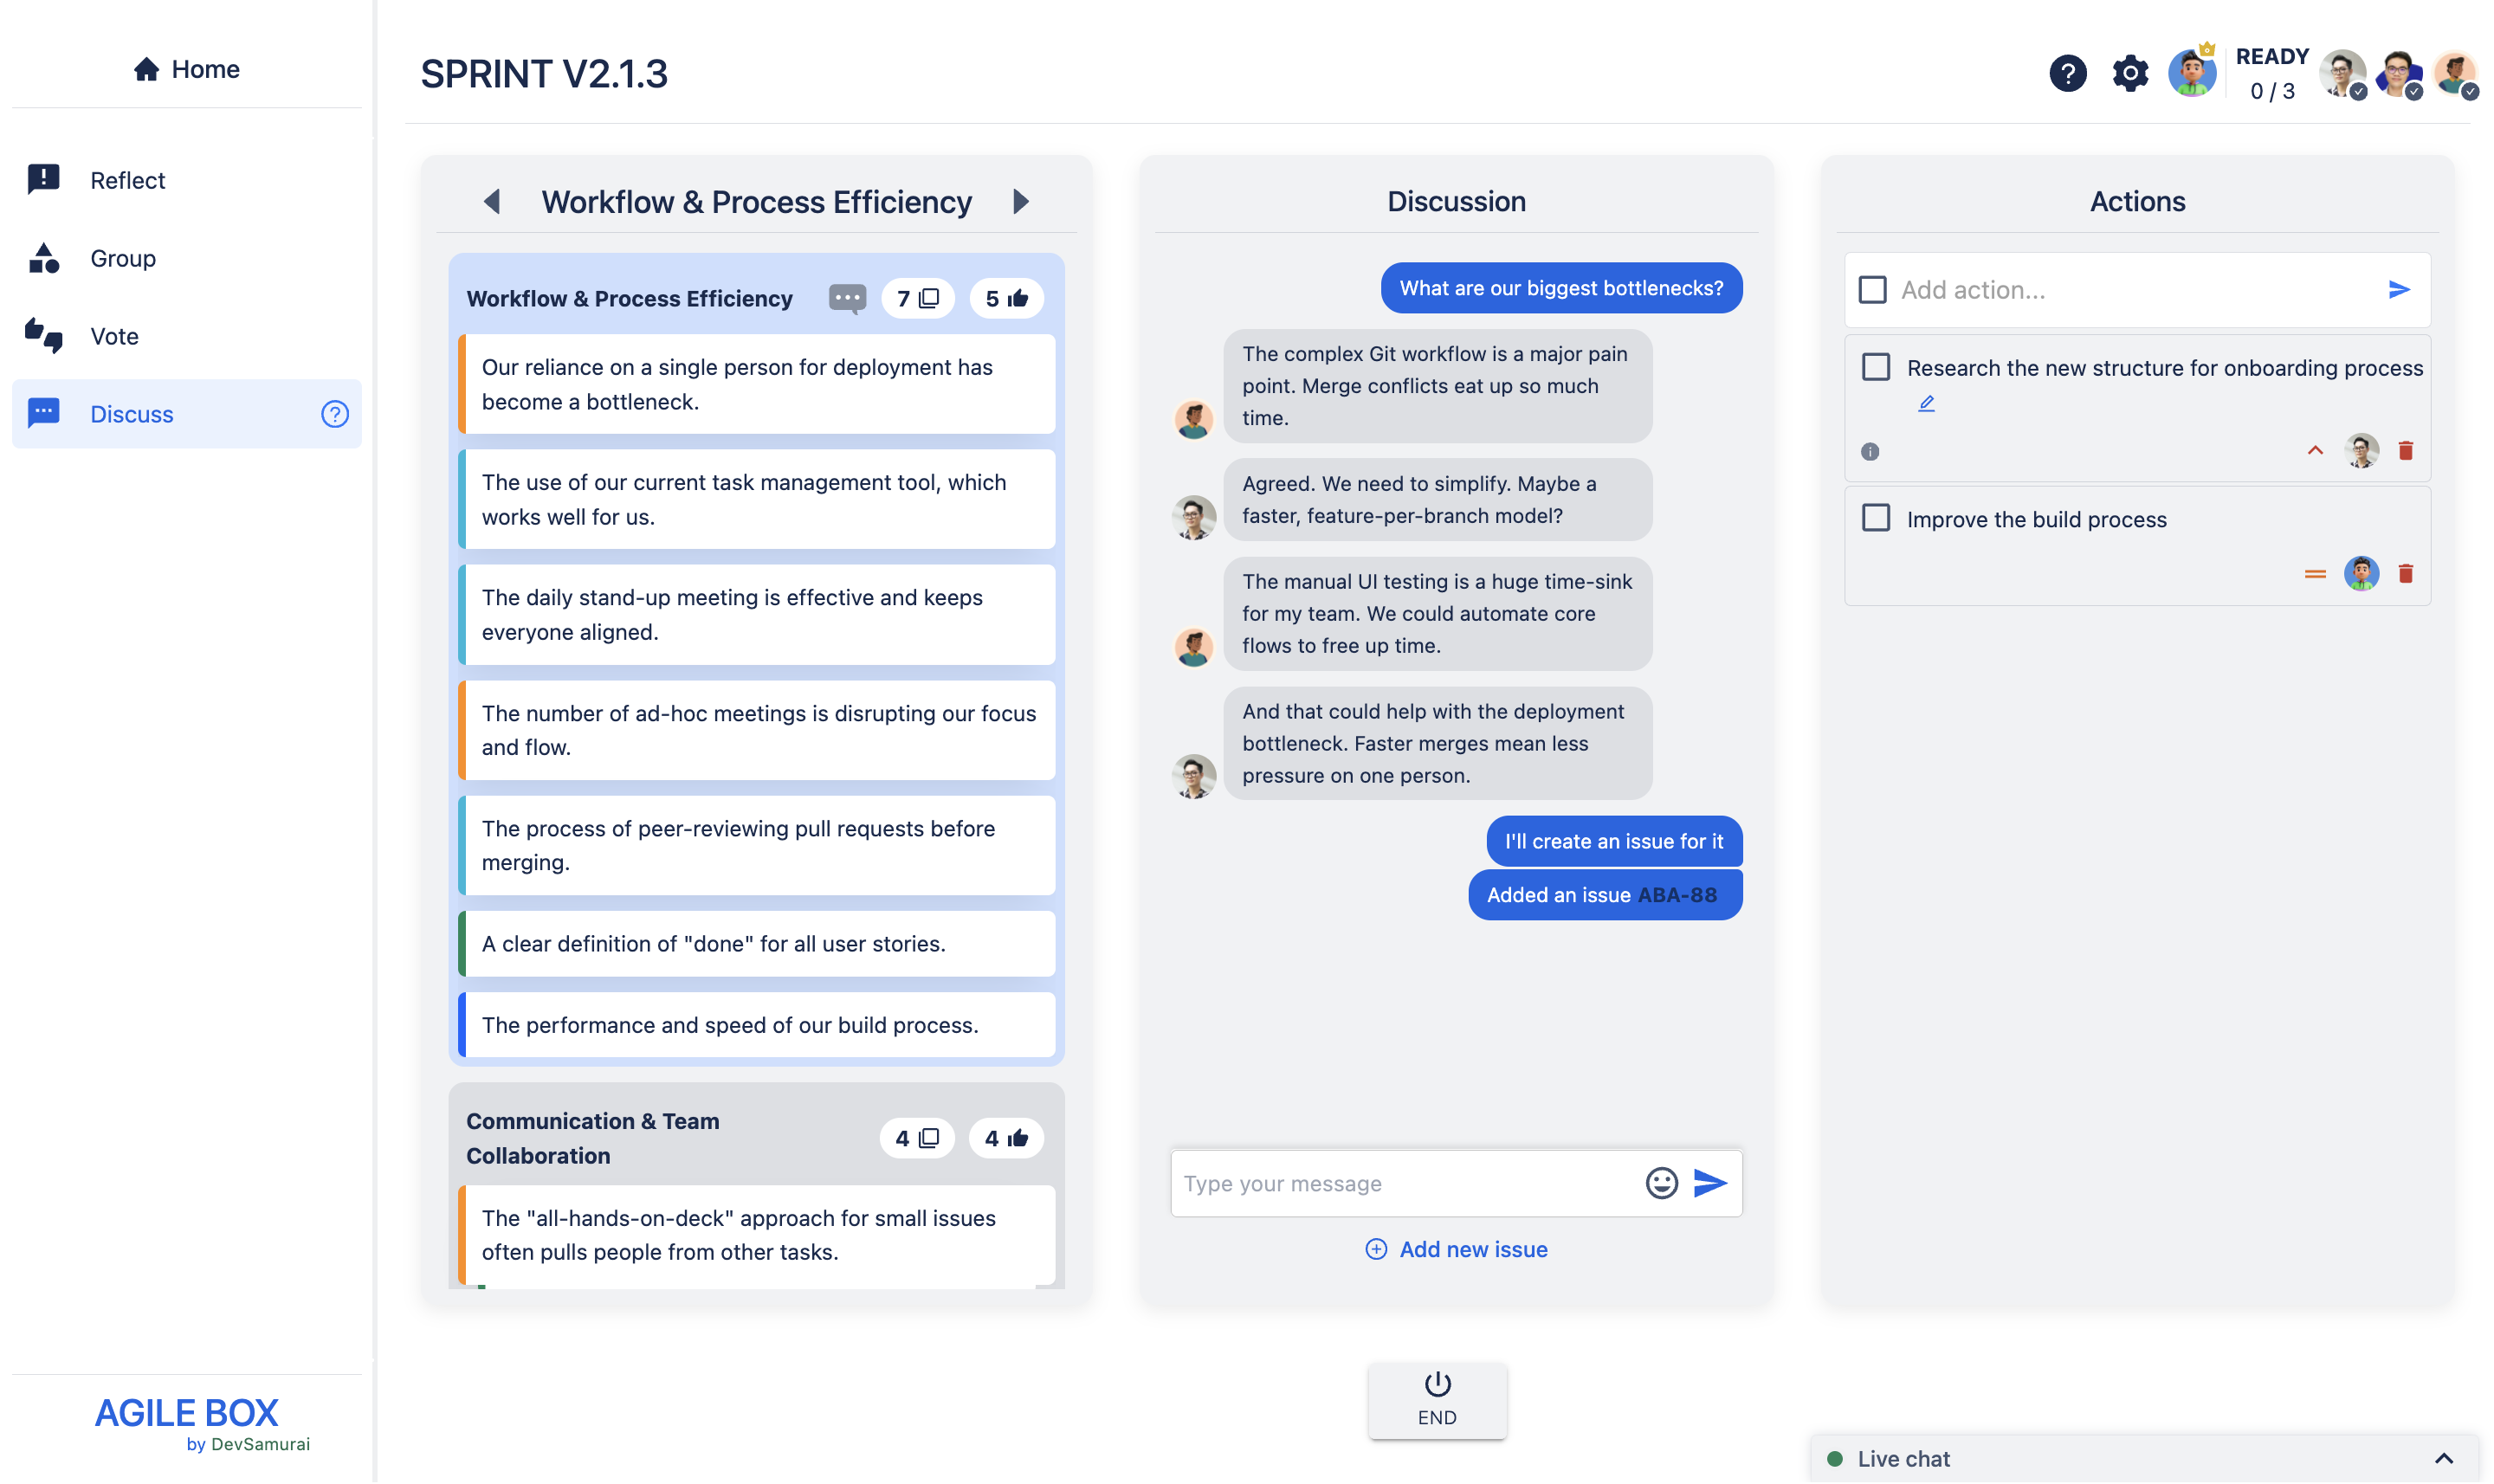
Reflection groups
All the reflection groups created earlier are displayed here, sorted by the number of votes they received in the Vote stage. This ranking highlights the most important topics, so the team knows where to focus their discussion first.
Users can click on a group’s name or title to expand and view all the detailed reflections within that group.
Discussion
This section serves as the conversation space for each reflection group. Each group has its own dedicated discussion thread with a chat interface where team members can share thoughts and take notes. This organized flow keeps discussions focused and easy to follow.
Users can also create new Jira issues directly within the discussion by clicking the Add Issue button next to the chat input and filling out the issue form.
Actions
In this column, team members add and submit any tasks or action items that arise from the discussion.
These notes serve as reminders or checklists to be addressed after the meeting, helping ensure that improvements are tracked and implemented.
Start the Discuss stage
Step 1: Choose a Topic to Discuss
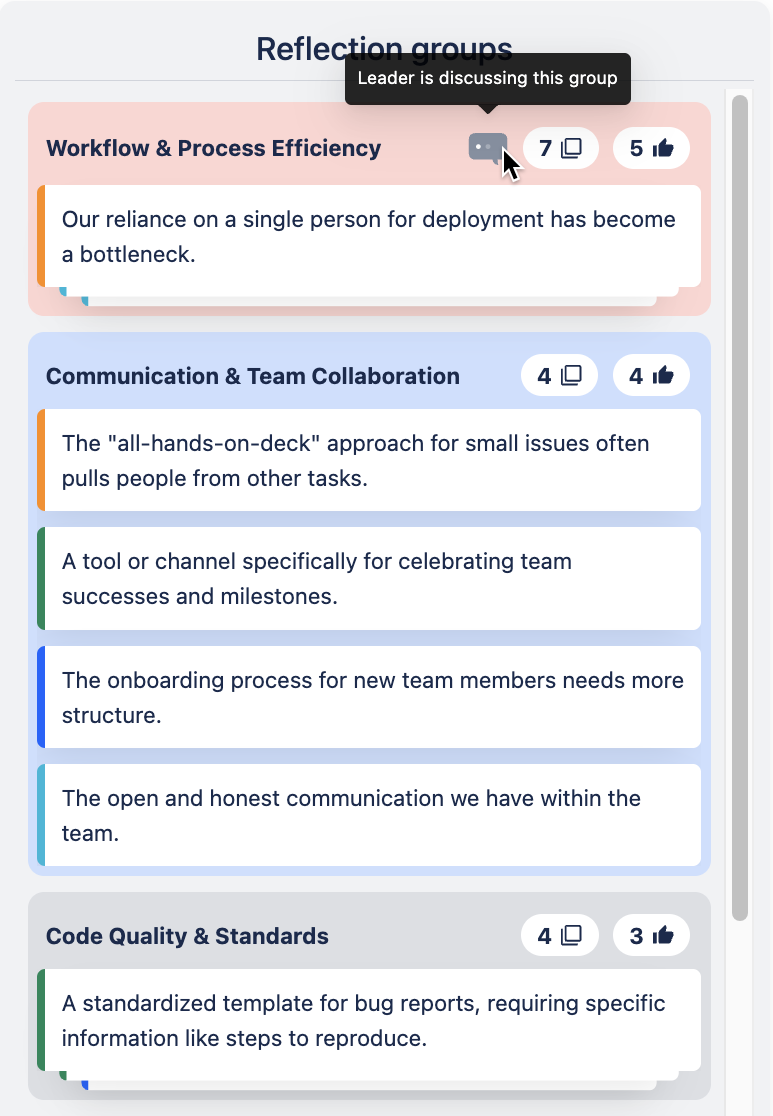
The facilitator selects which reflection group to start discussing first. The chosen group is indicated by a bubble chat :logo_chat: icon.
Participants viewing a different group than the facilitator will see:
A blue 🔵 highlight showing the group they are viewing
A red 🔴 highlight showing the facilitator’s current discussion group
Step 2: Participate in the Discussion
Team members contribute to the conversation using the chat box on the right. To create a Jira issue, click the Add Issue button next to the chat input and complete the issue form.
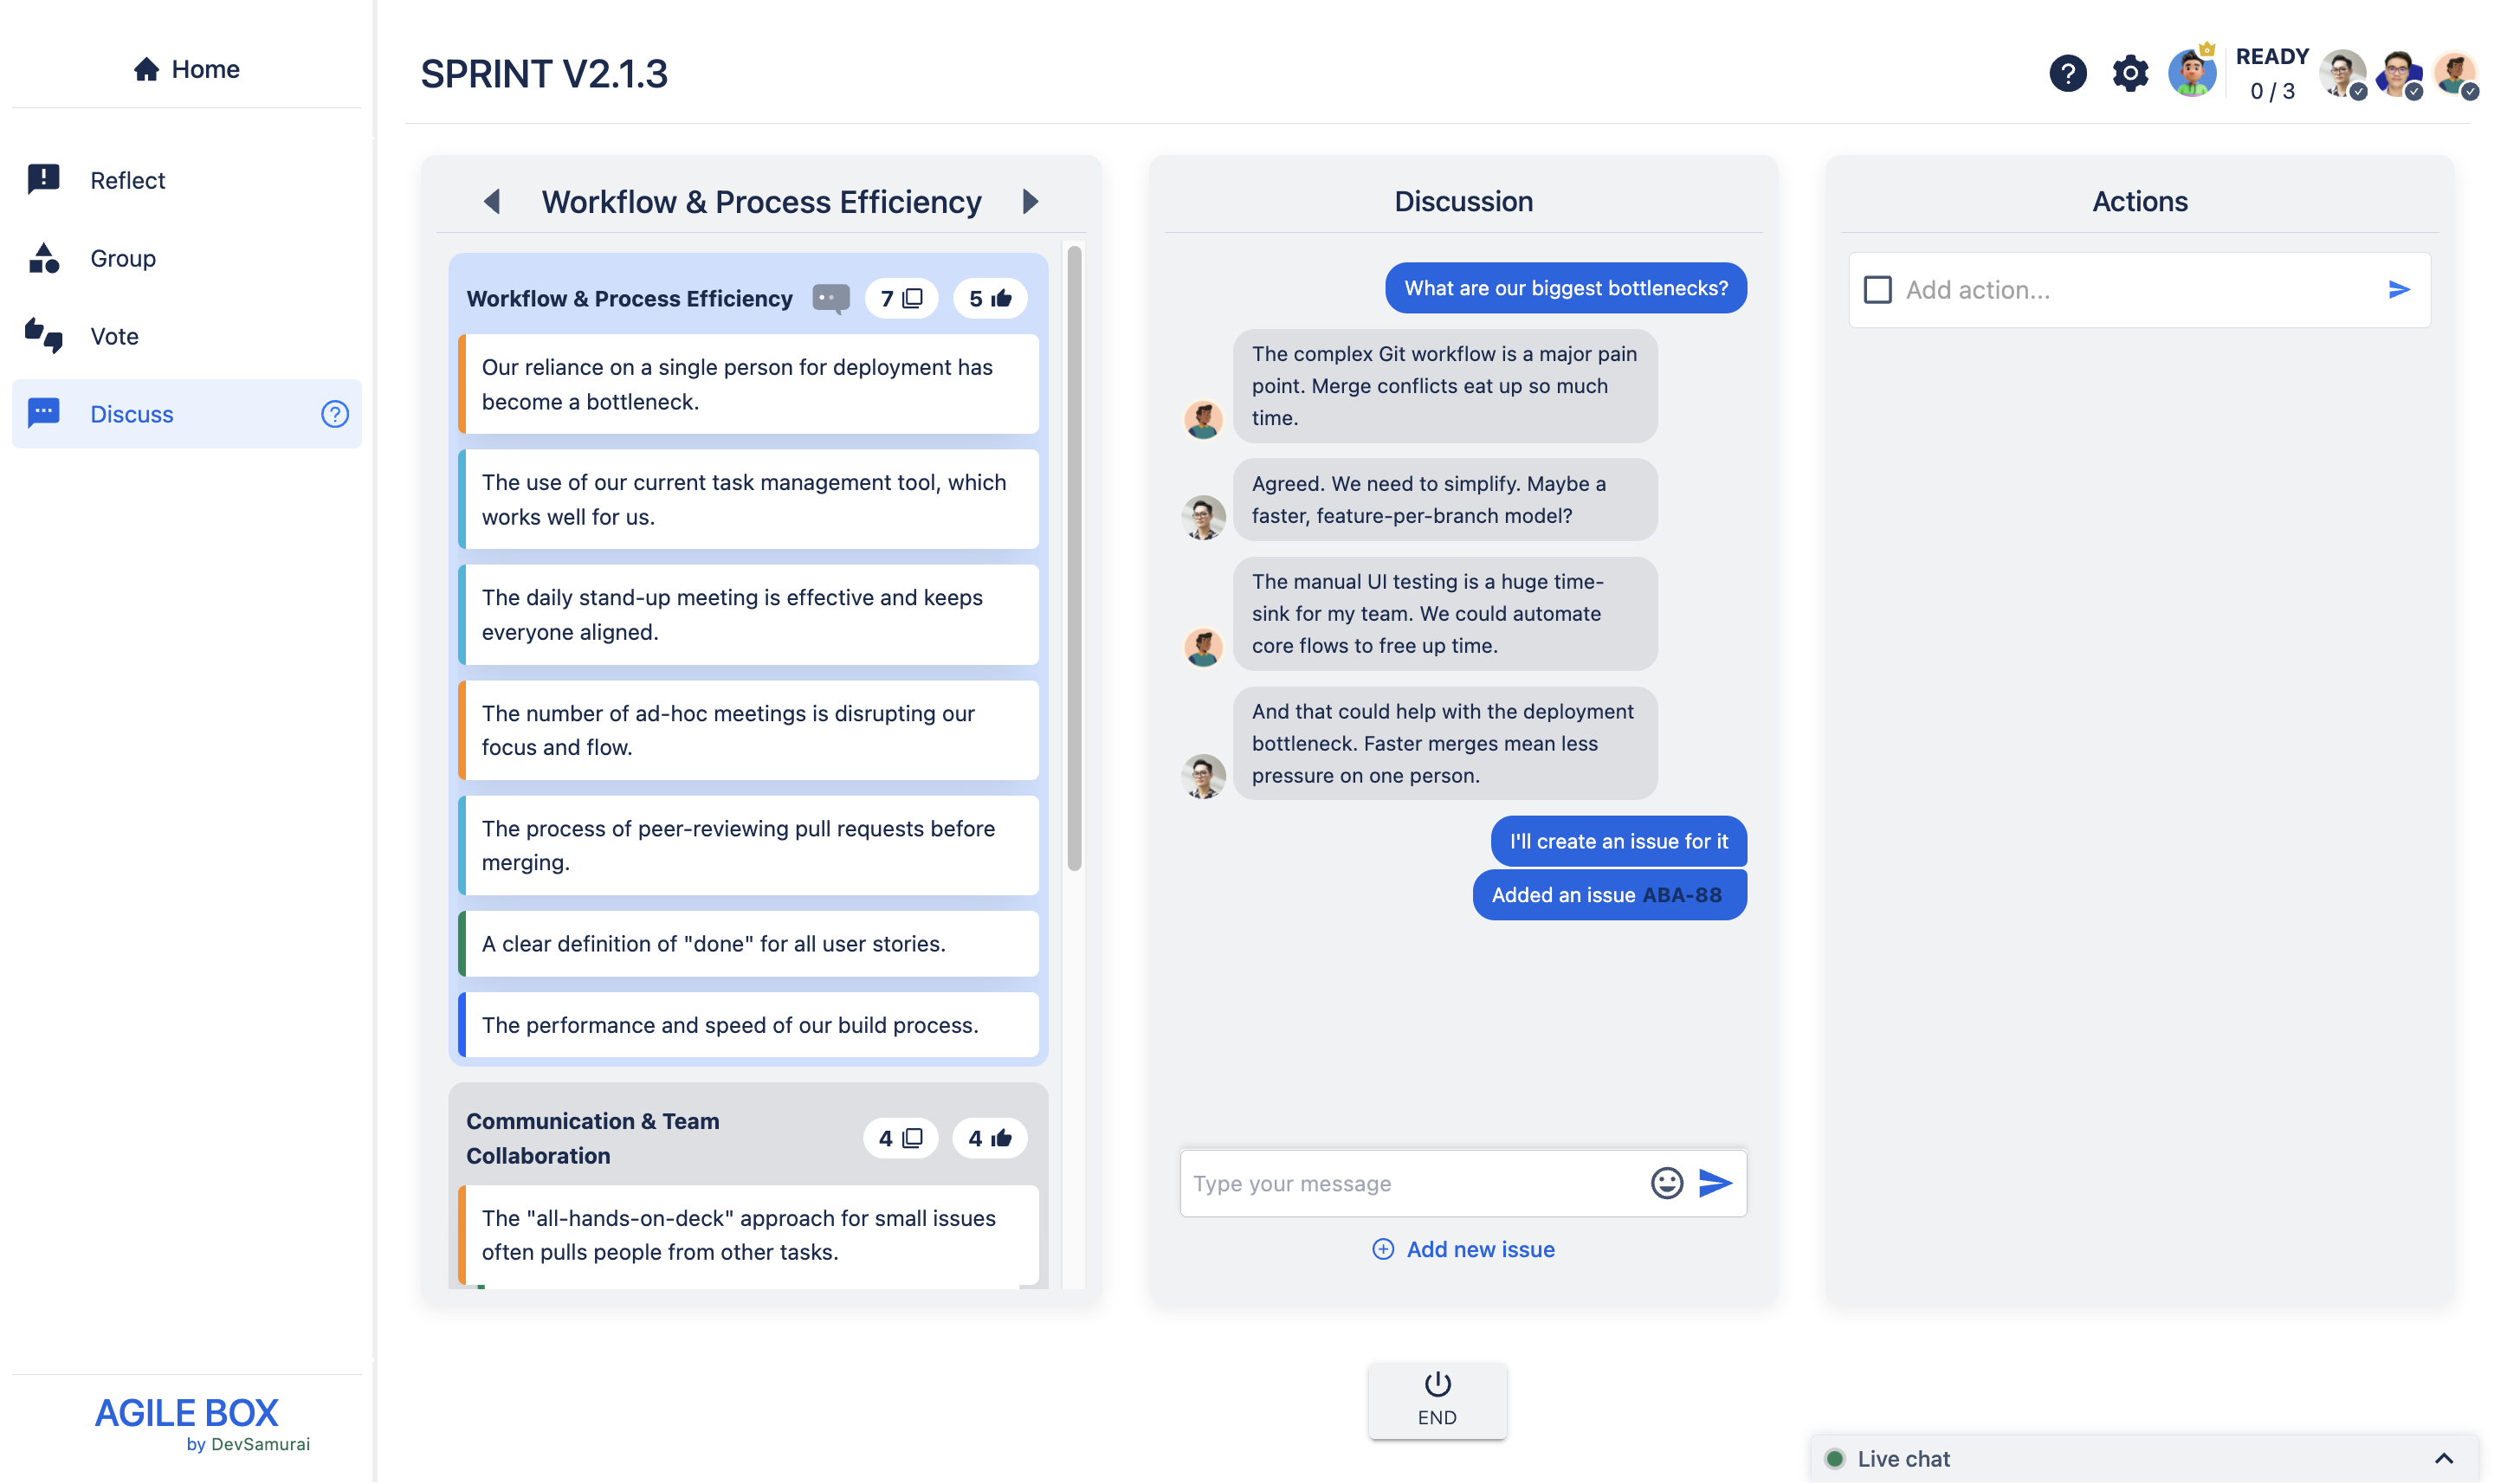
Step 3: Create actions
During the discussion, participants can add any action plans in the Actions column for follow-up after the meeting.
With the created actions, you can:
Assign members: Click on the avatar to choose the assignee.
Set priorities: Click the priority icon to select the priority level; the default is medium.
View change history: Click the information (i) icon at the bottom left to see a log of changes.

Step 4: Ready and Close the meeting
👥 Participants |
|---|
When you finish the discussion, click READY to indicate you are done. 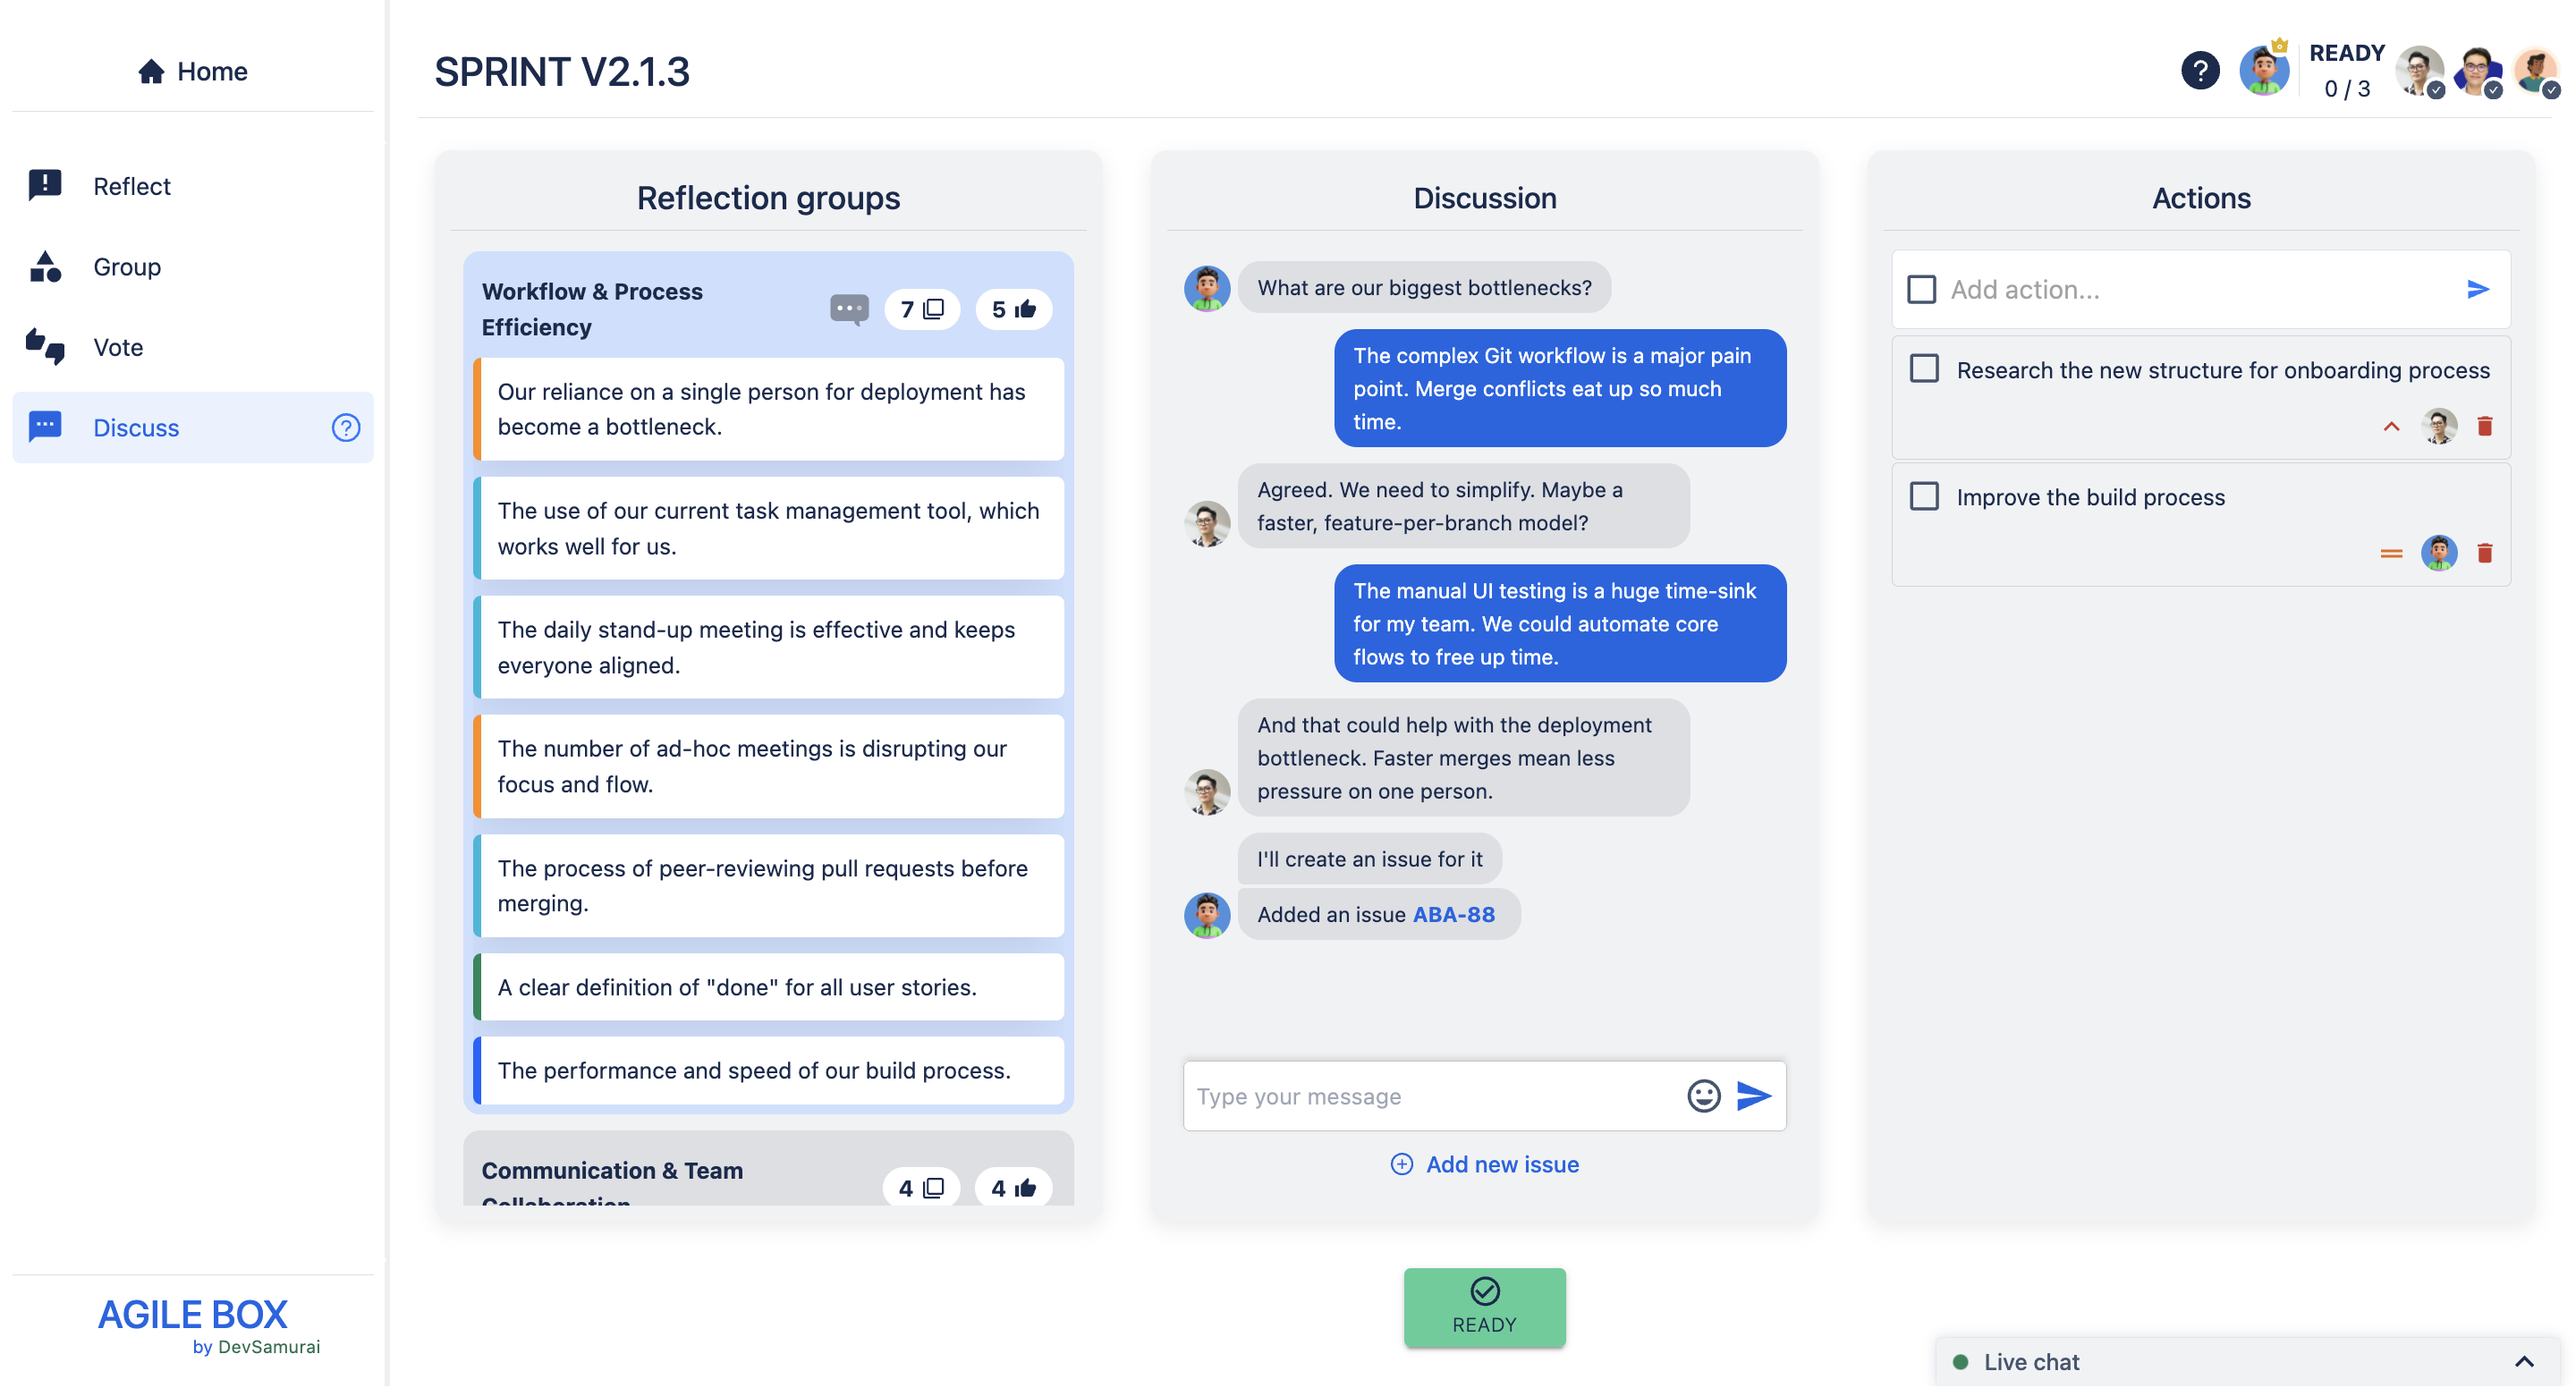 Once marked ready, you can no longer modify the discussion stage unless you click RE-JOIN before the facilitator moves the session forward.  |
👑 Facilitator |
|---|
Everyone can see all participants’ ready statuses in the top right corner.  Once everyone or most are ready, the facilitator clicks CLOSE to end the retrospective meeting. |
.png)