.png)
The Group stage is where your team takes individual reflections from the previous step and organizes them meaningfully. By grouping related ideas, the team surfaces common themes, uncovers patterns, and prepares for focused discussion.
This collective process helps build alignment and ensures everyone’s opinions are considered as your retrospective moves forward.
Group stage components
In the Group stage, the screen displays three separate columns:
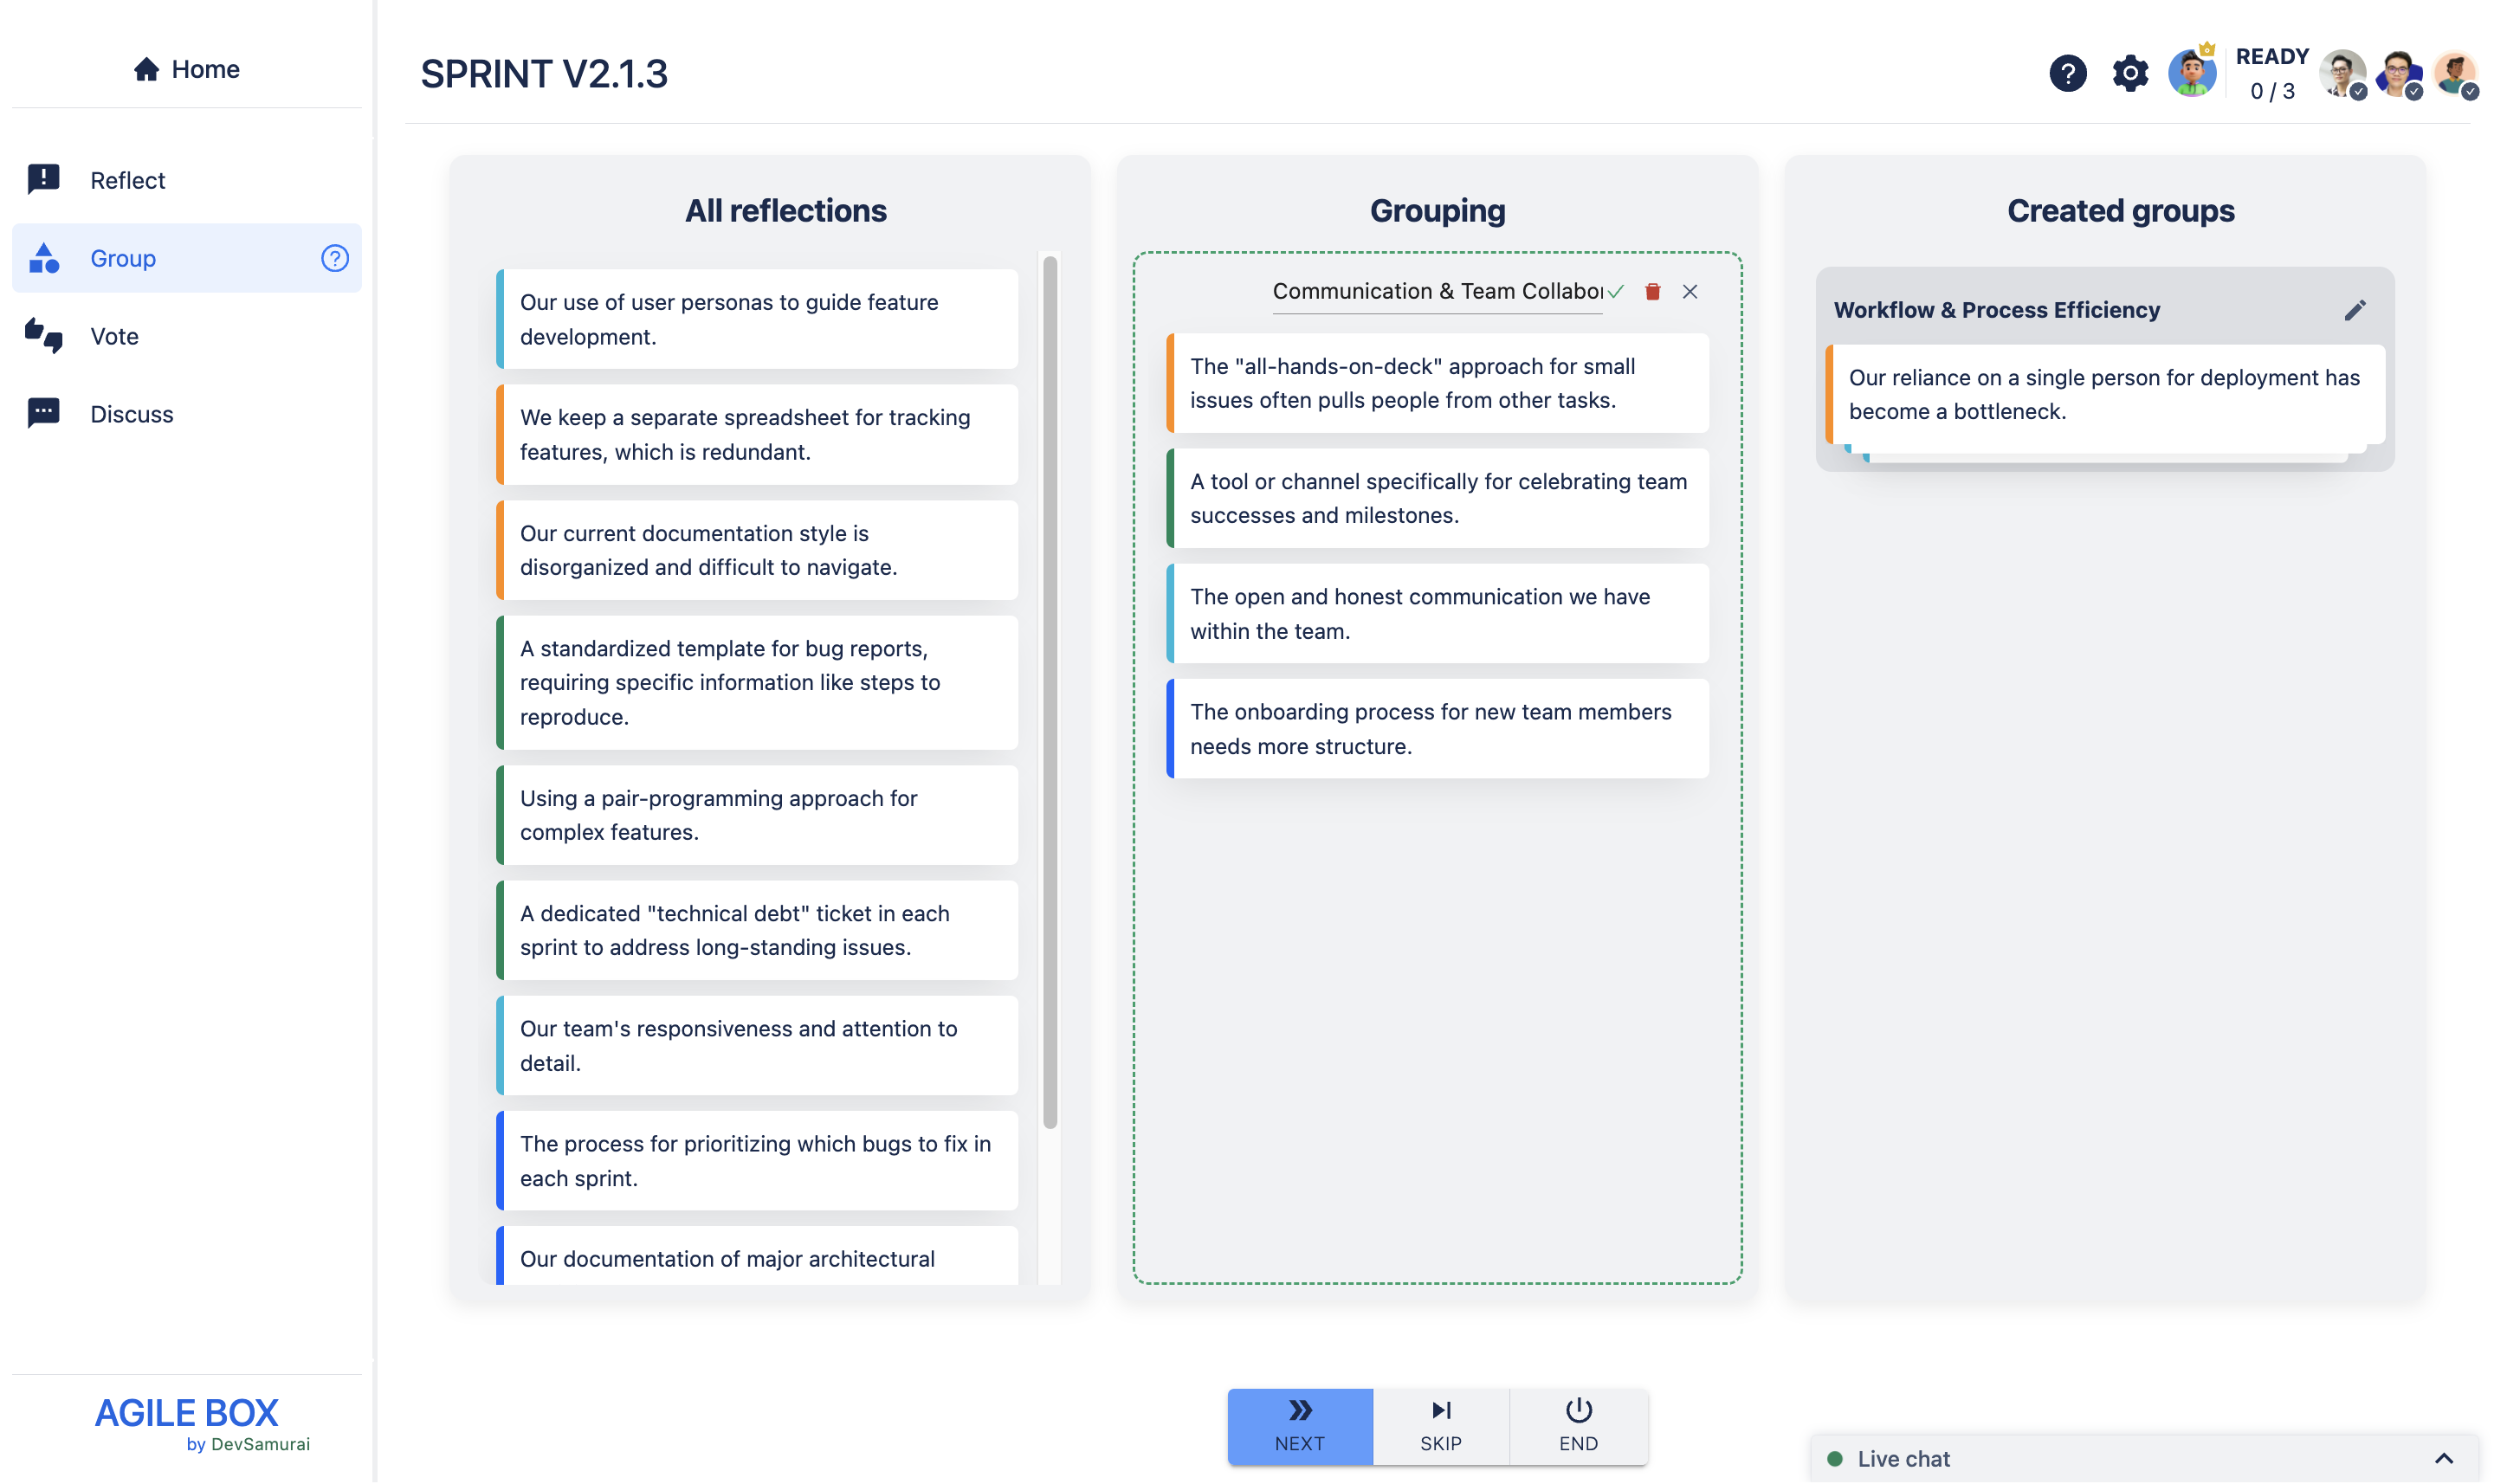
All reflections
This column lists every reflection your team entered during the Reflect stage. Cards are color-coded on the left to indicate which reflection column from the template they belong to.
Grouping
Here, reflections with similar topics can be dragged and dropped together into clusters, helping categorize feedback for easier review.
Created groups
All groups formed in the Grouping column will appear here. The entire team can see the created groups, and by clicking a group name, everyone can expand it to view the included reflection cards.
Start the Group stage
Step 1: Group relevant reflections
All opinions are displayed in the All reflections column. Everyone can participate by dragging and dropping cards with matched topics into the Grouping column.
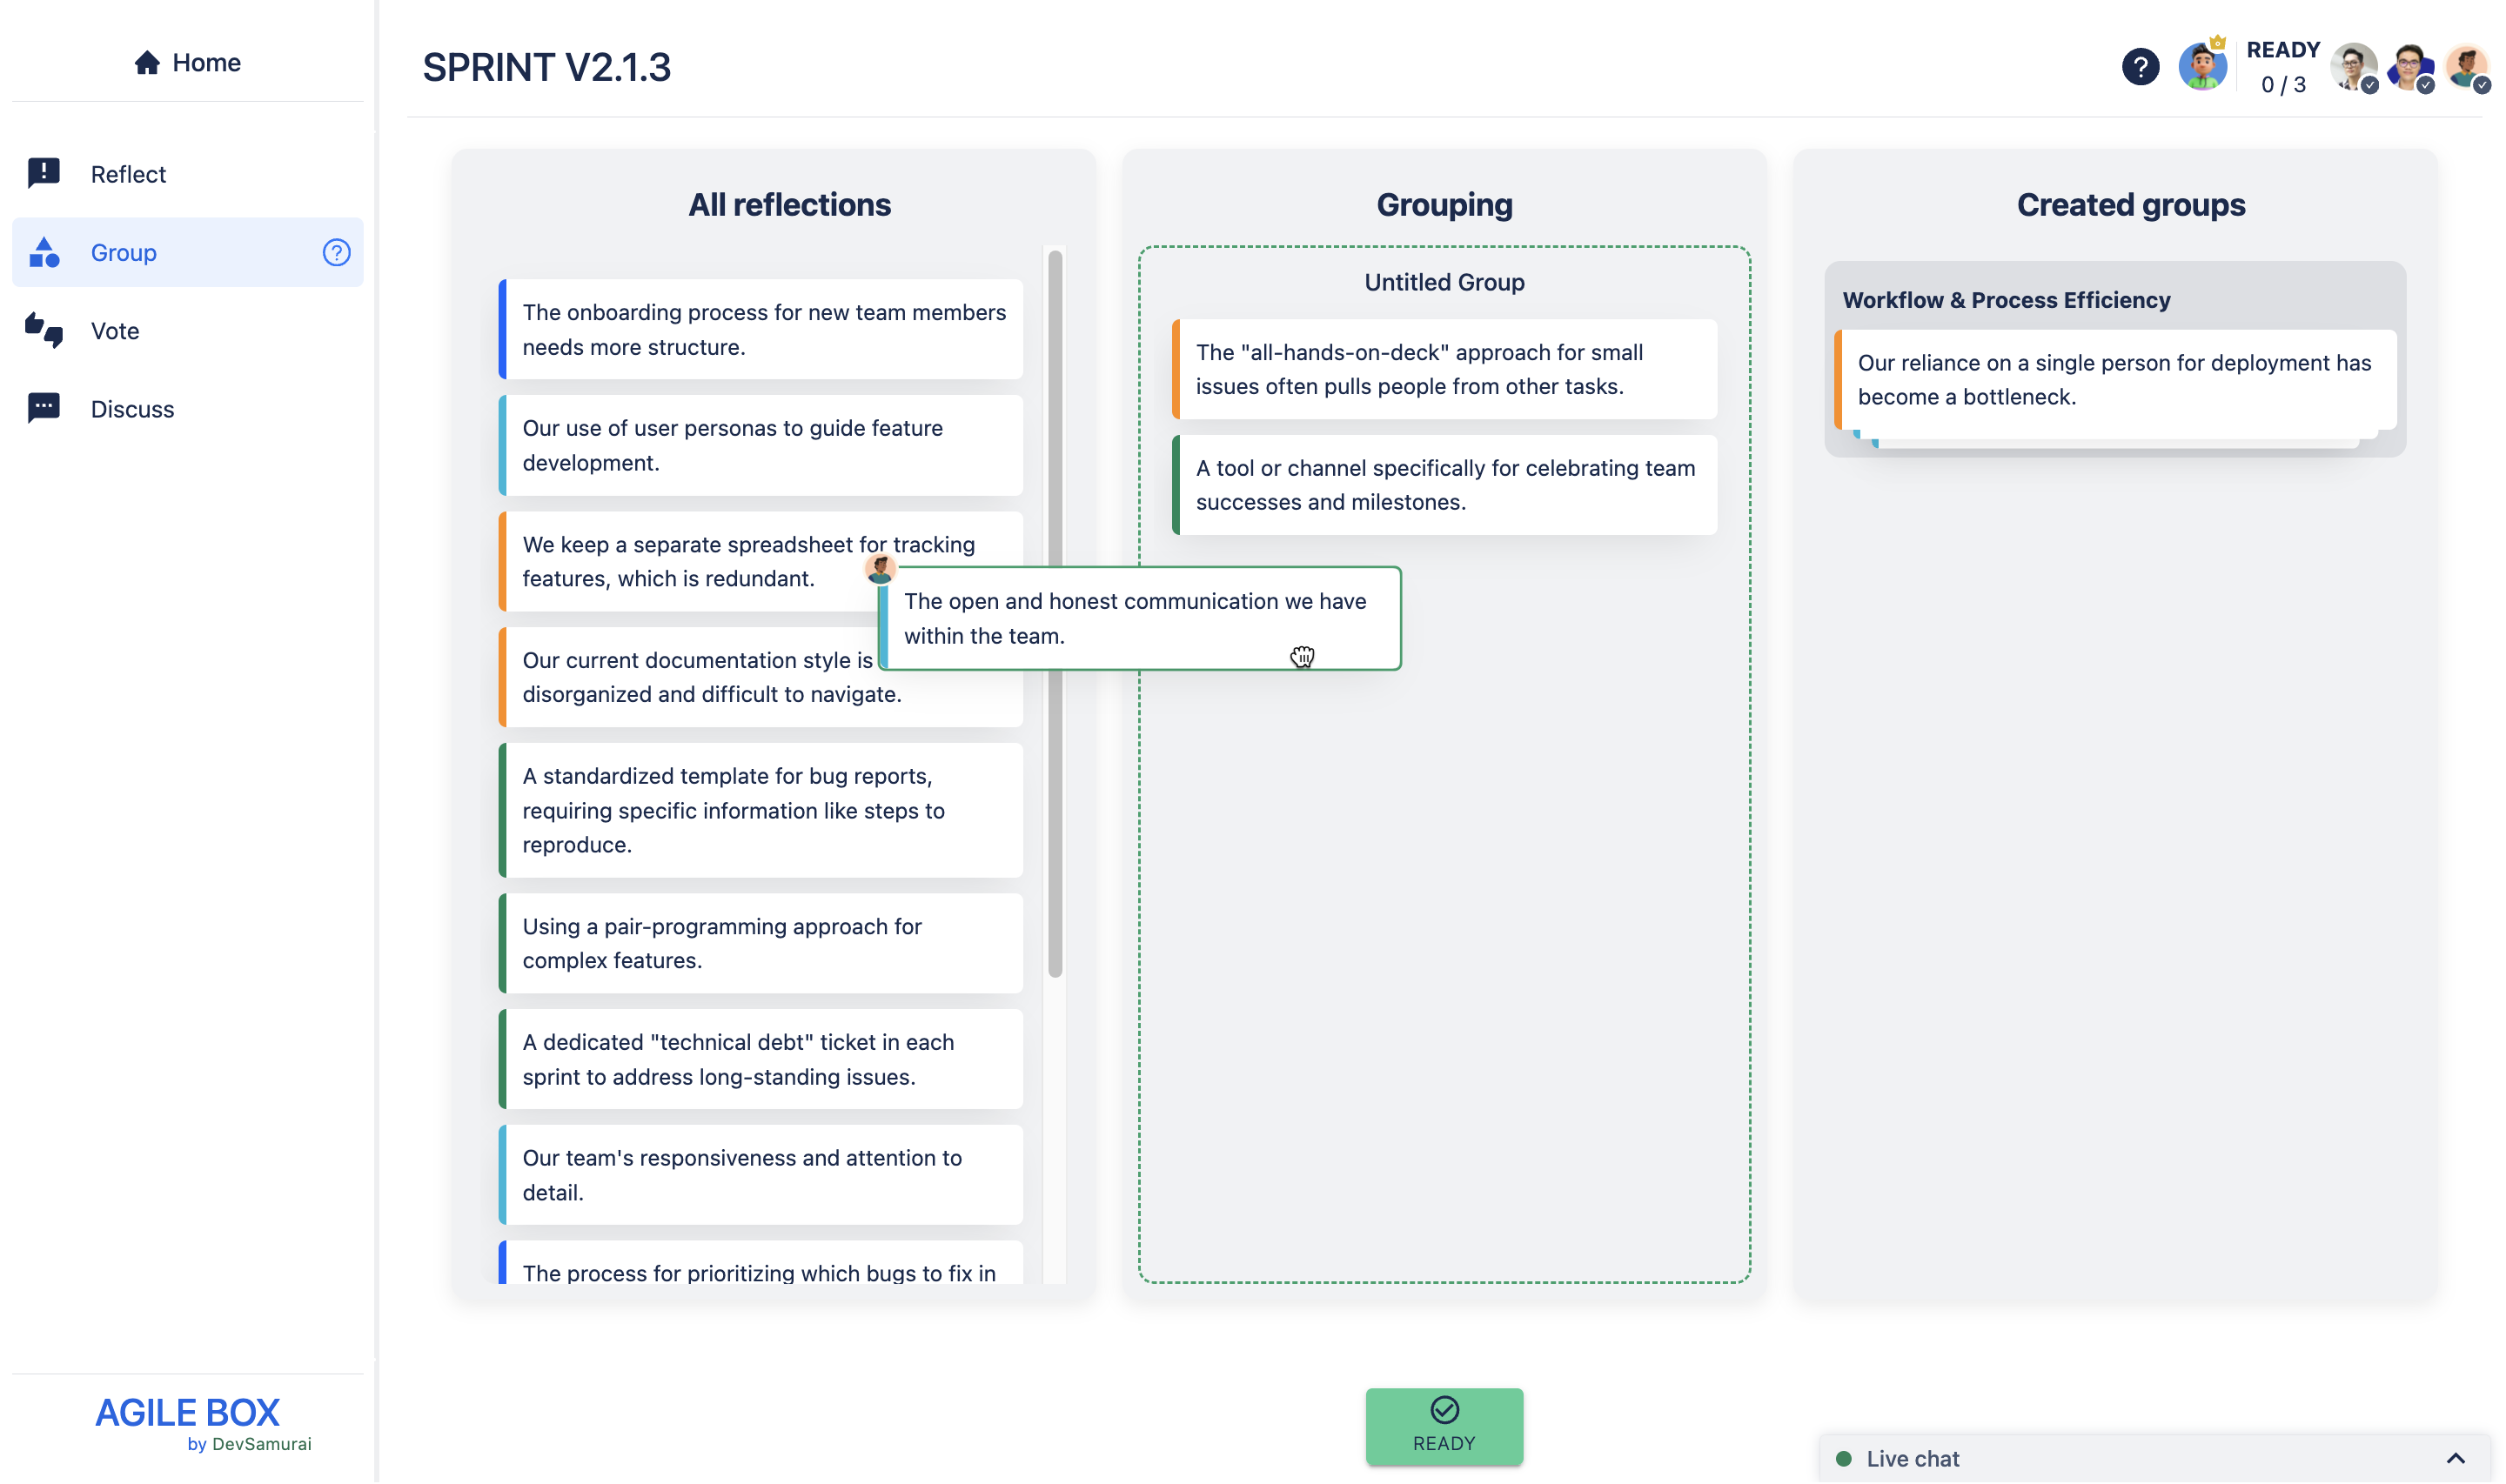
The avatar of the member currently moving a card is shown at the top left of that card.
Step 2: Name and Create groups
Once related cards are clustered in the Grouping column, only the facilitator can enter a group title.
💡 Tips: The group name should be kept as concise as possible.
Click the save icon ✔️ to confirm—new groups will then appear in the Created groups column
To see the reflection cards in each group, all members can click on the group name to expand it.
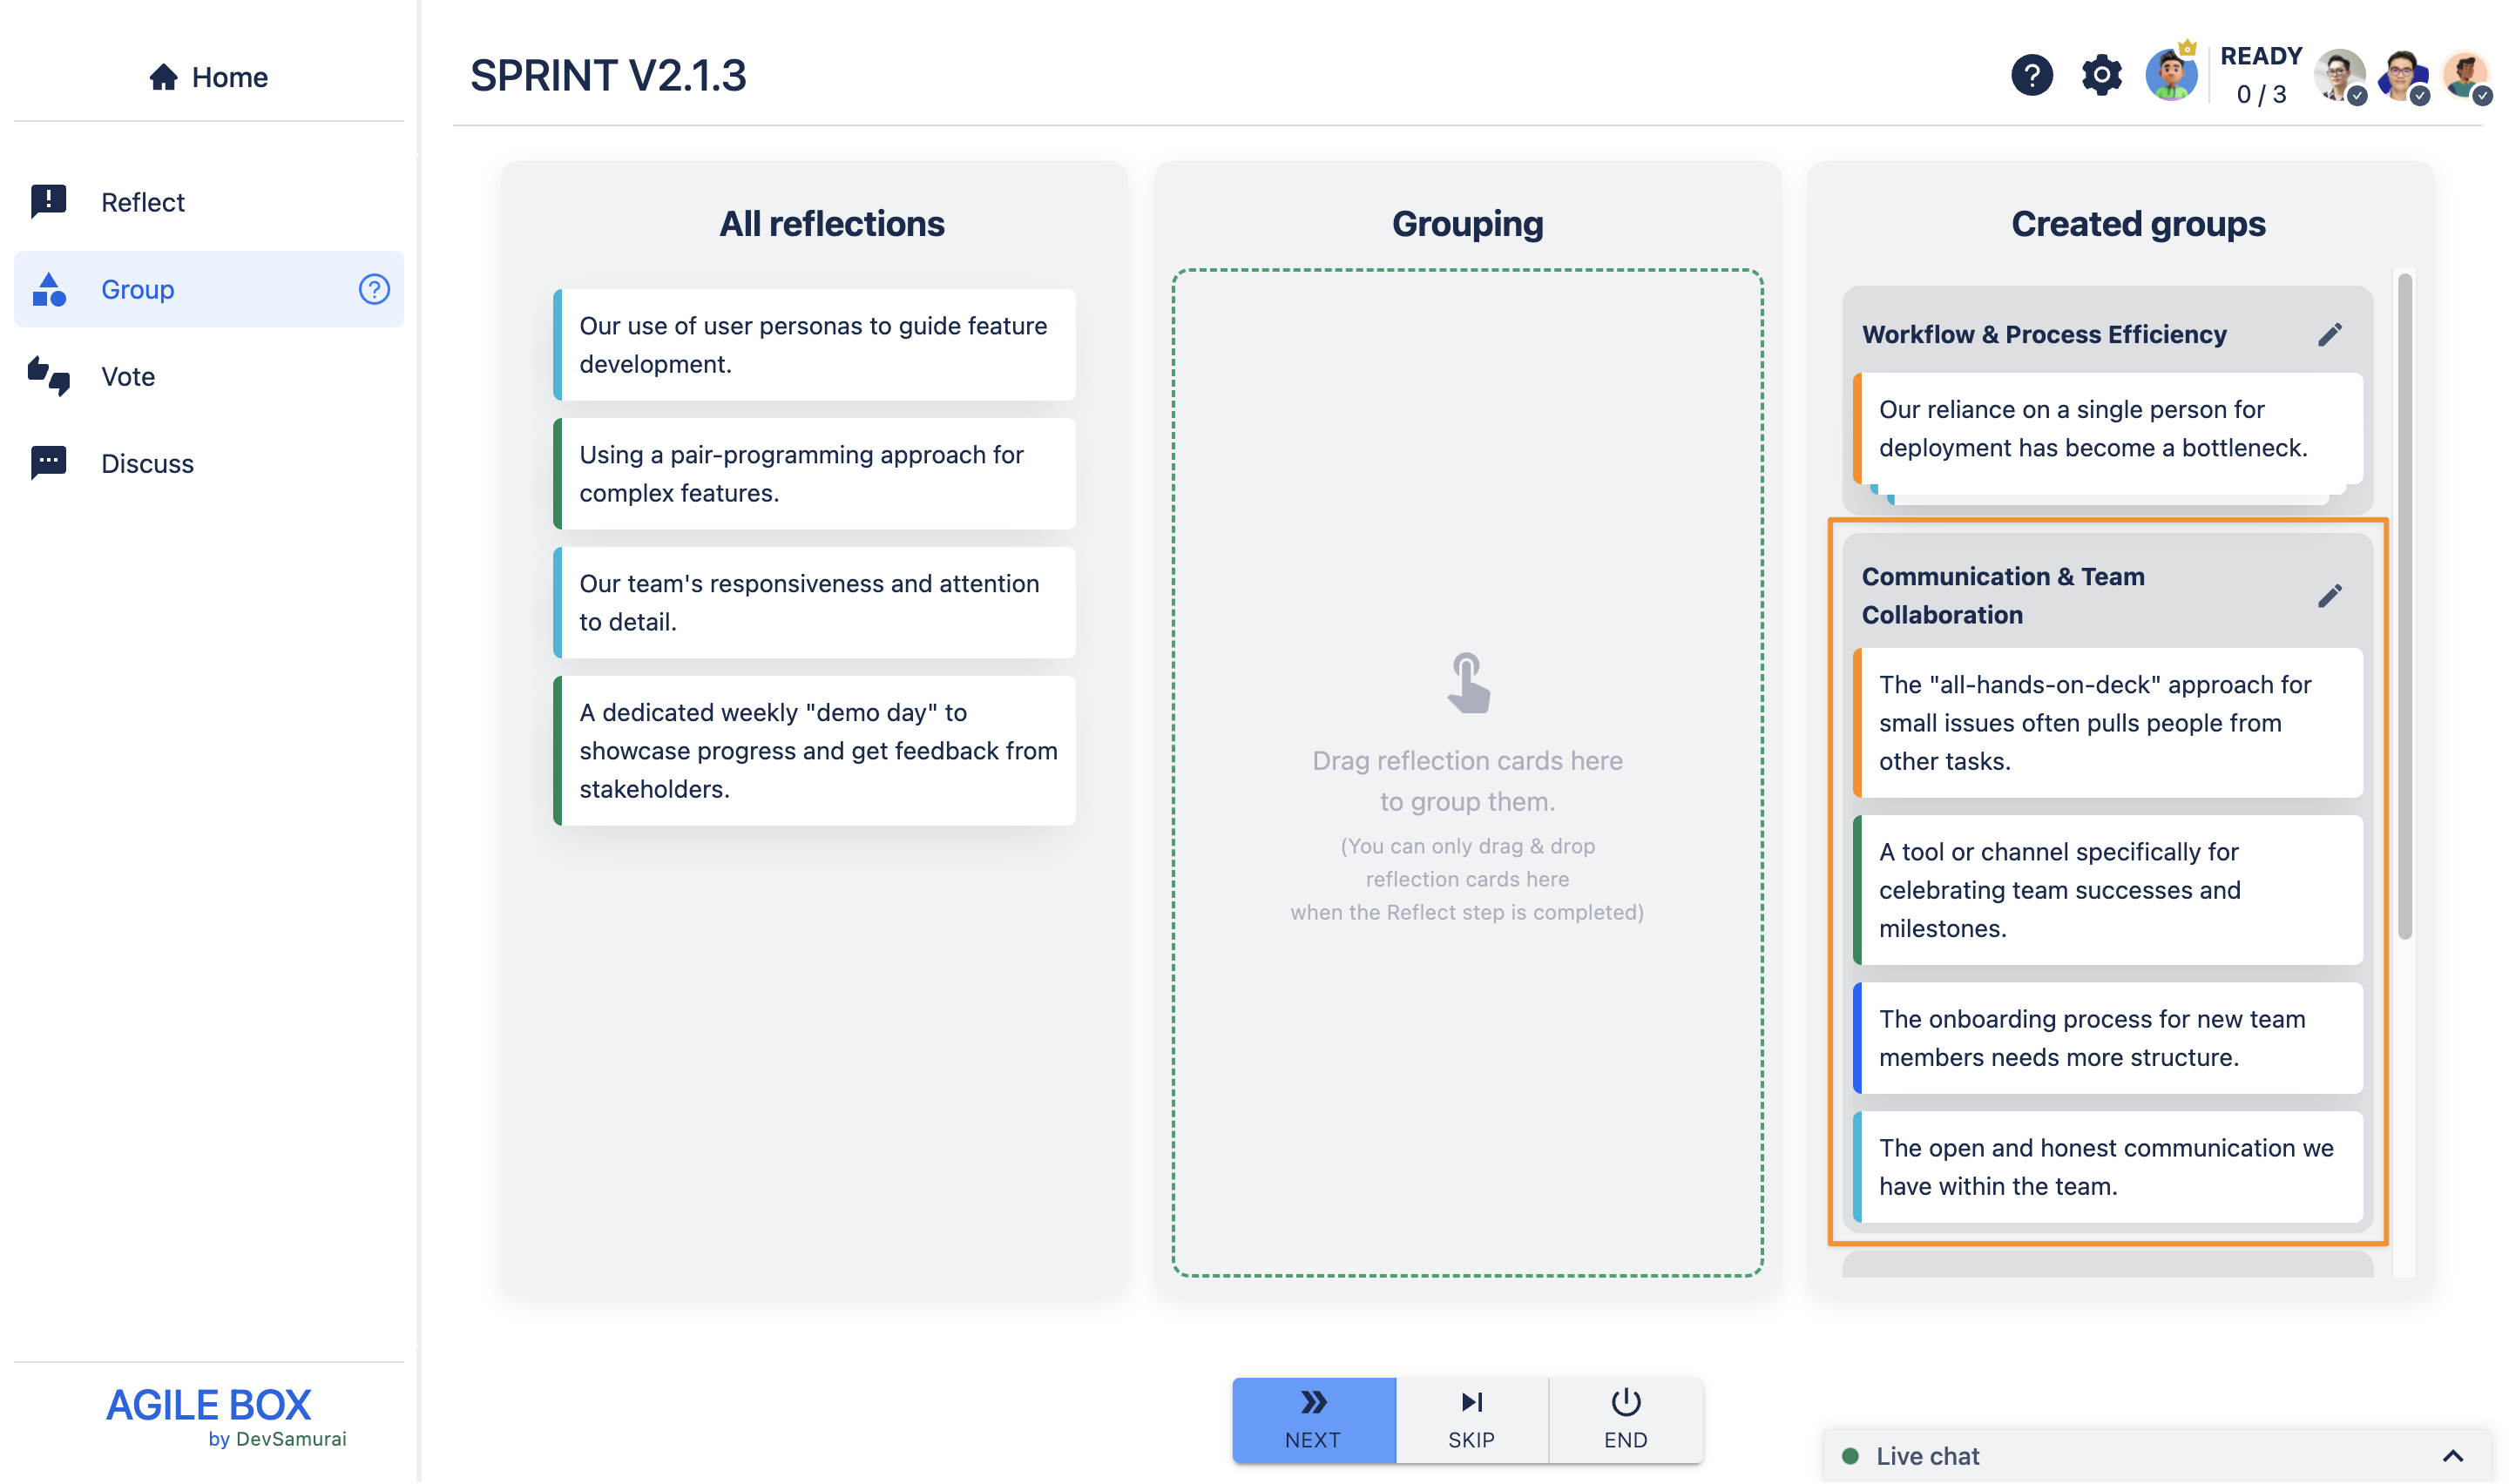
Step 3: Edit Groups
The facilitator can revise any group in Created groups by clicking the pencil ✏️ icon, returning it to the Grouping column for edits. Here, the team can:
-
Add or remove reflection cards (all members)
-
Rename the group (facilitator only)
-
Delete the group (facilitator only; deleted group’s cards return to All reflections)
Step 4: Repeating the process
Keep grouping until the team is satisfied. Any reflections left ungrouped will automatically be placed in a group called “Others.”
Step 5: Ready and move to the next stage
|
👥 Participants |
|---|
|
When you finish with the grouping, click READY to indicate you are done. 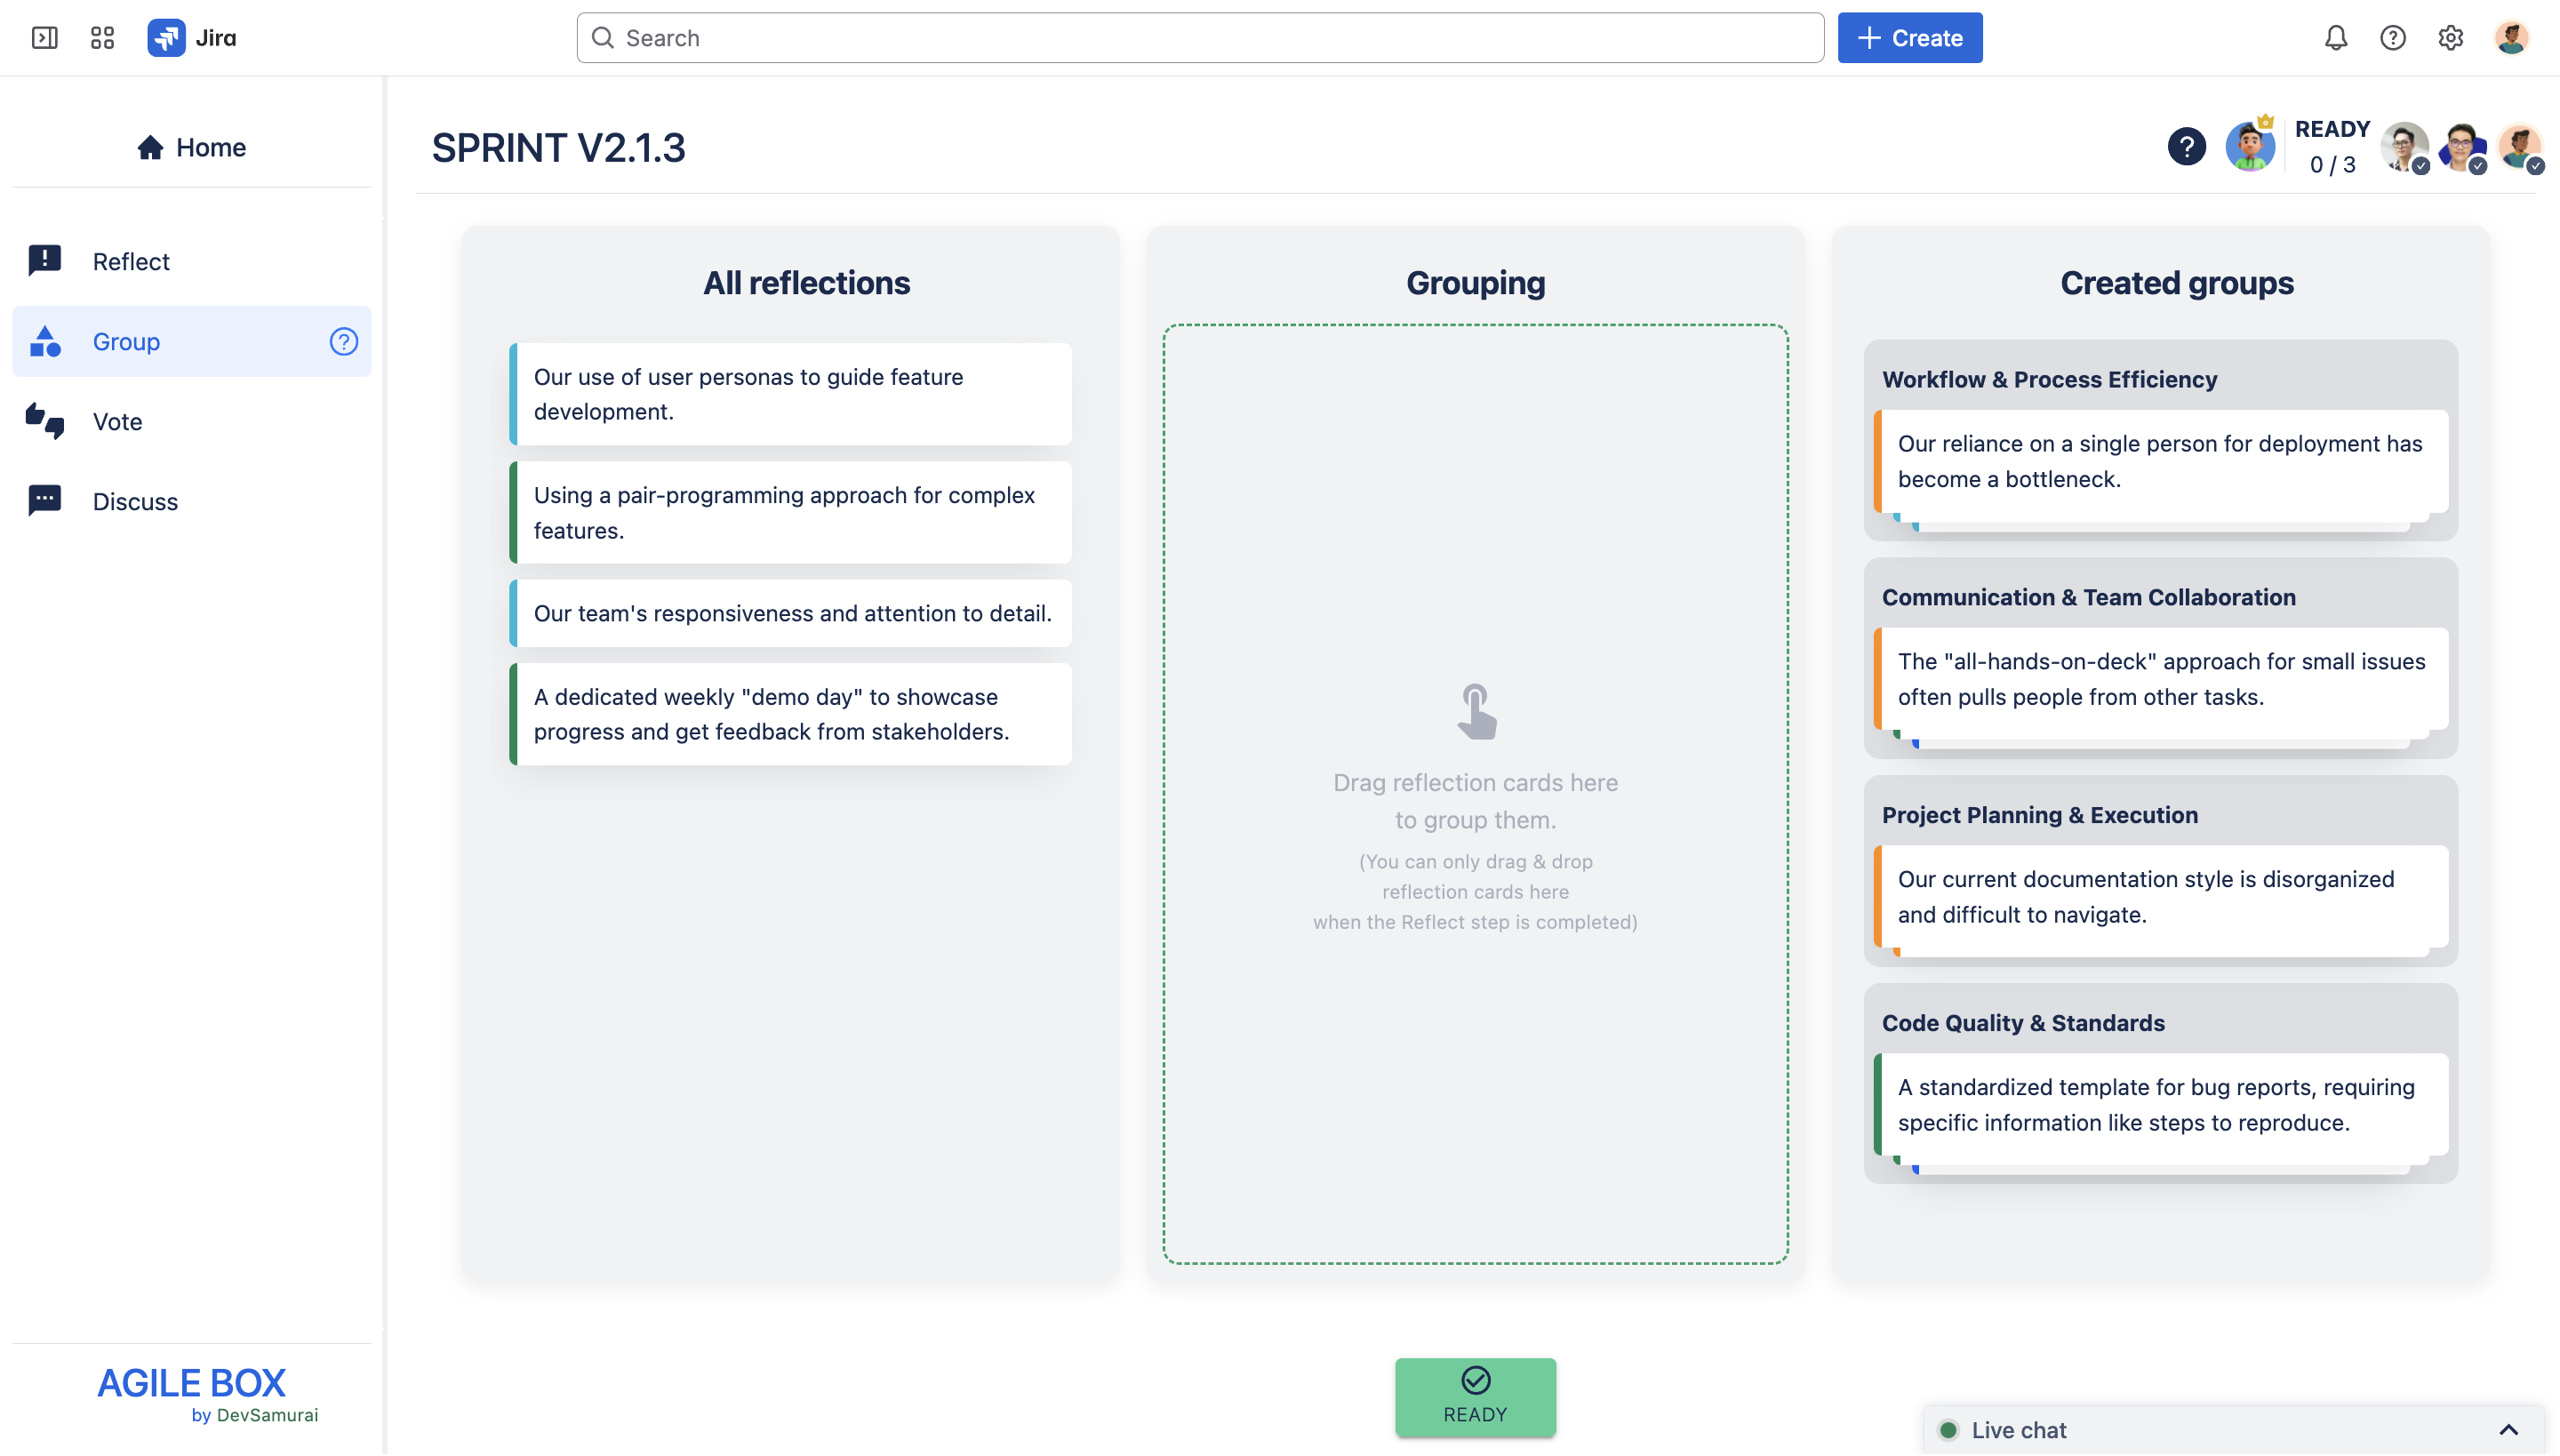
Once marked ready, you can no longer modify your cards unless you click RE-JOIN before the facilitator moves the session forward. 
|
|
👑 Facilitator |
|---|
|
Everyone can see all participants’ ready statuses in the top right corner. 
When all or most participants are ready, the facilitator clicks NEXT to proceed to the Vote stage. 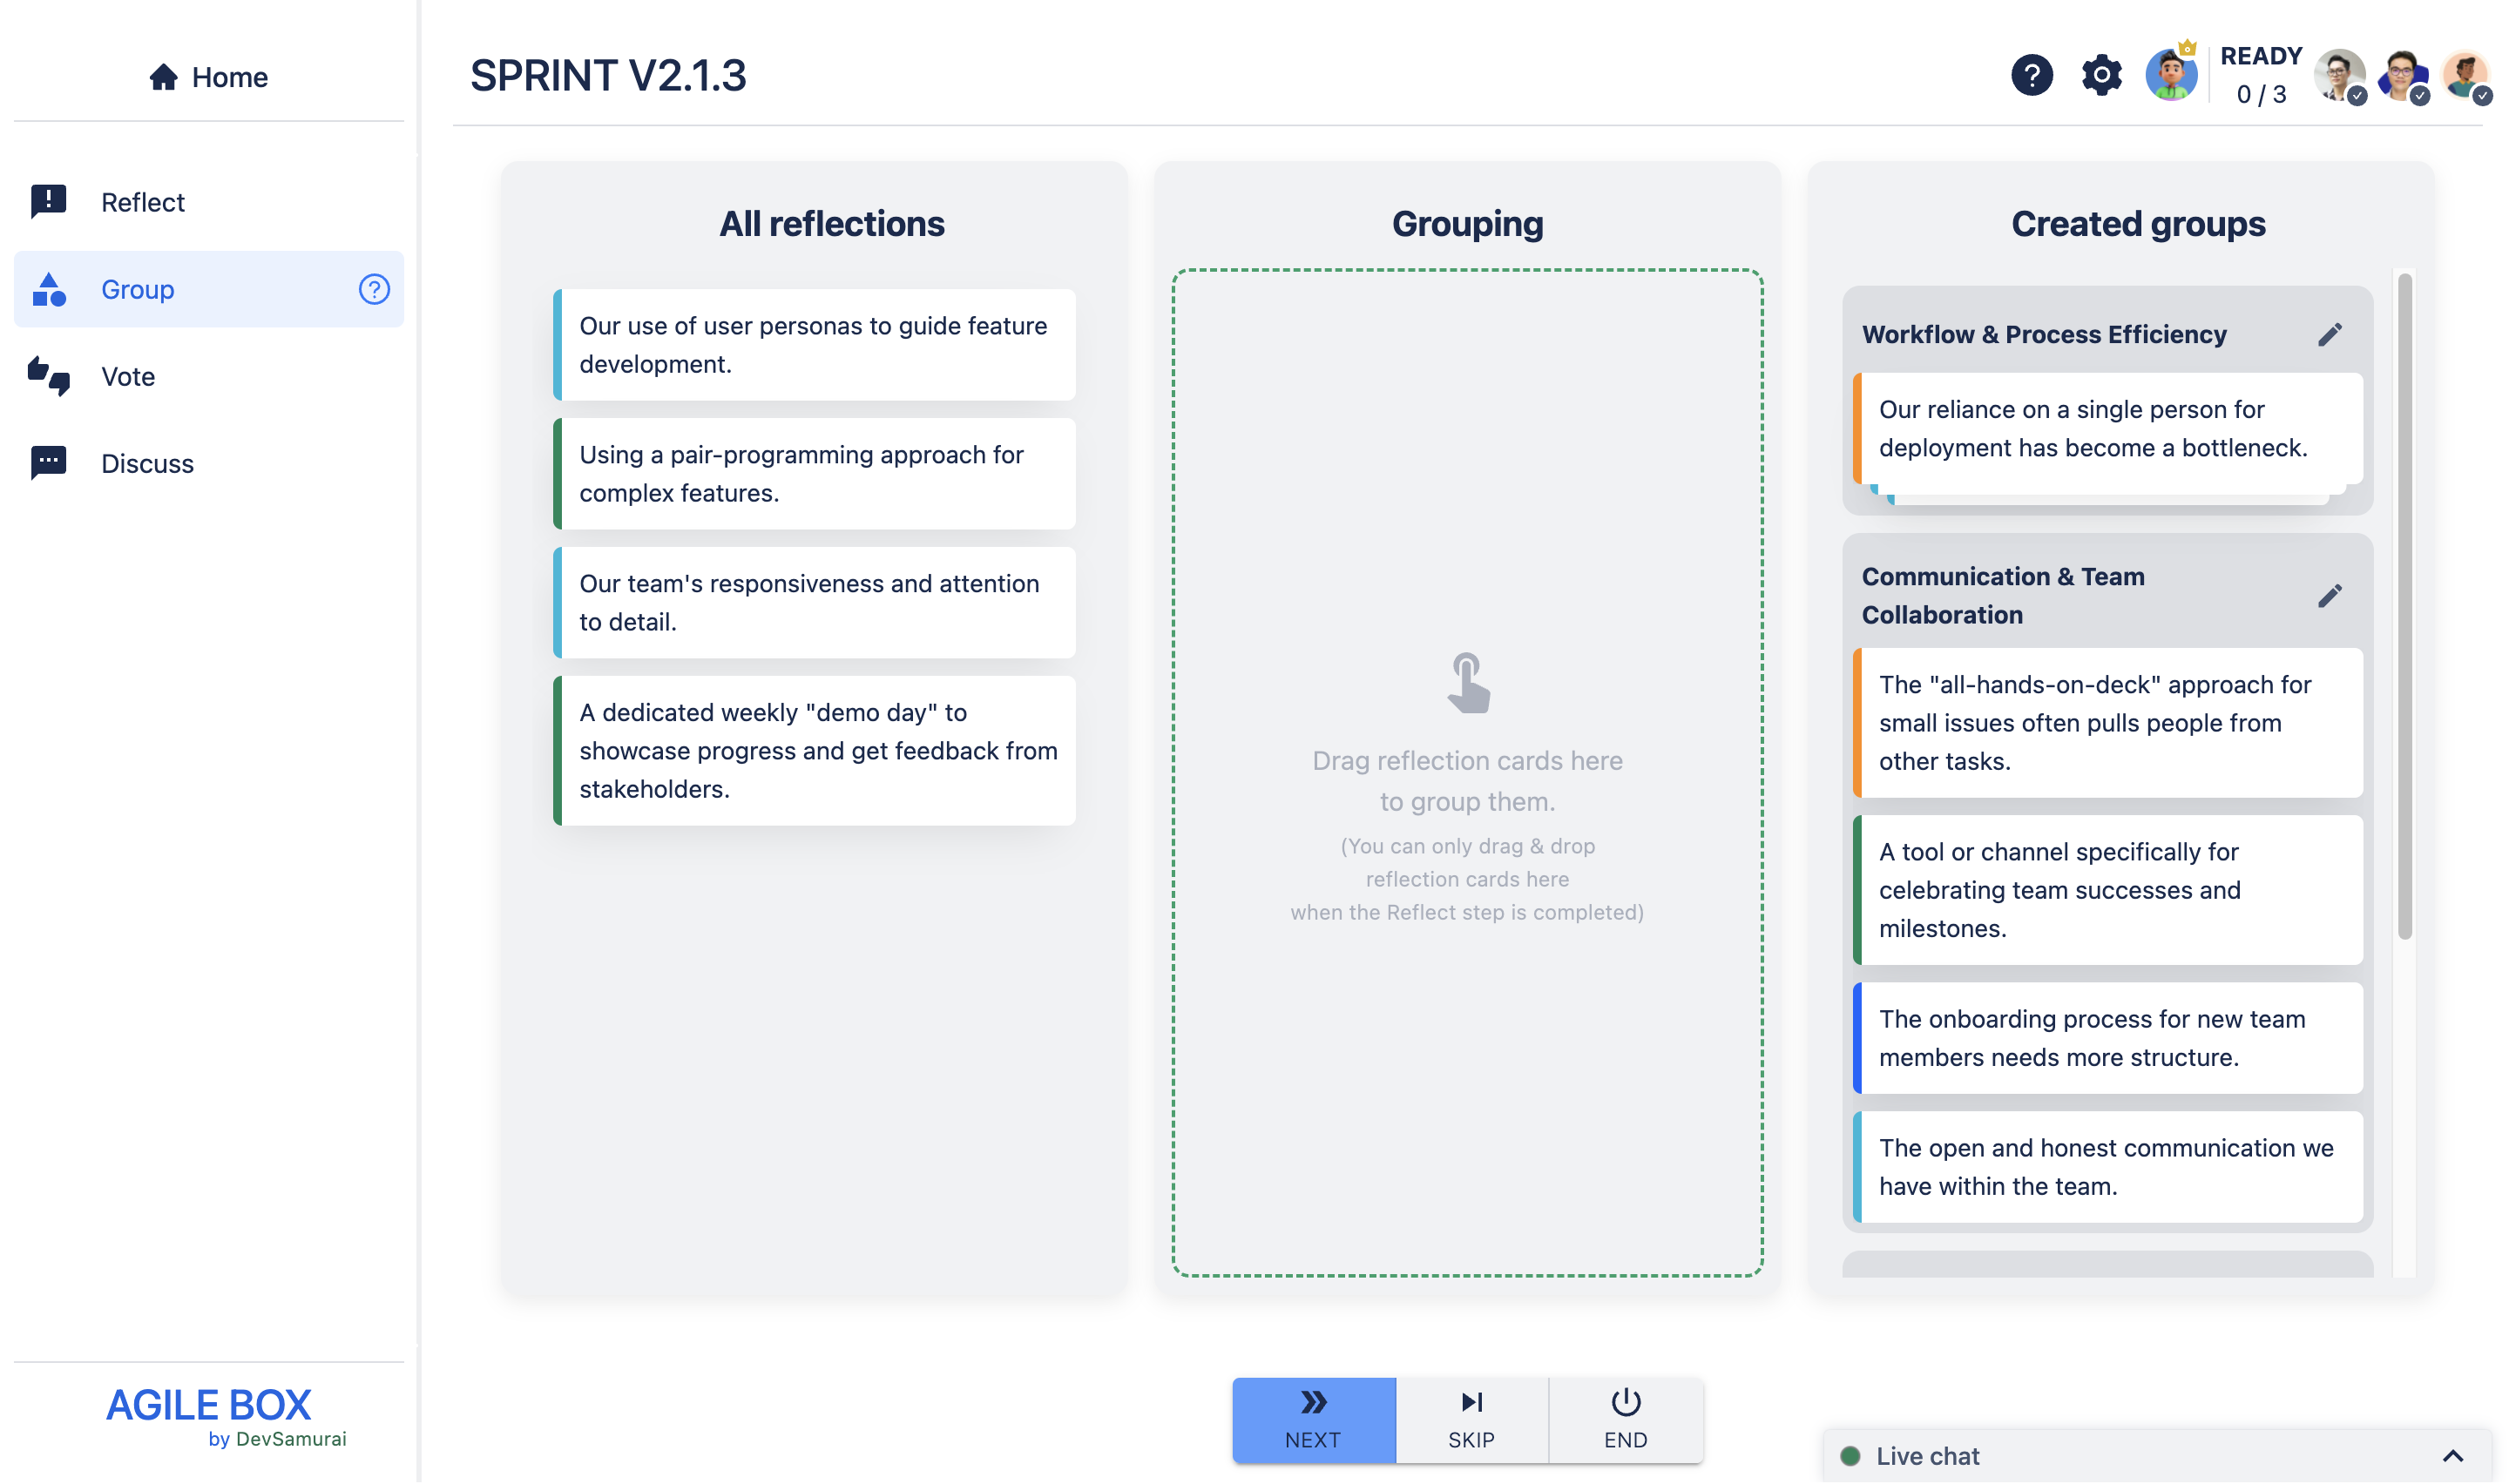
|
Skip the Group stage
You can skip this stage at any time using the Skip button at the bottom of the screen.
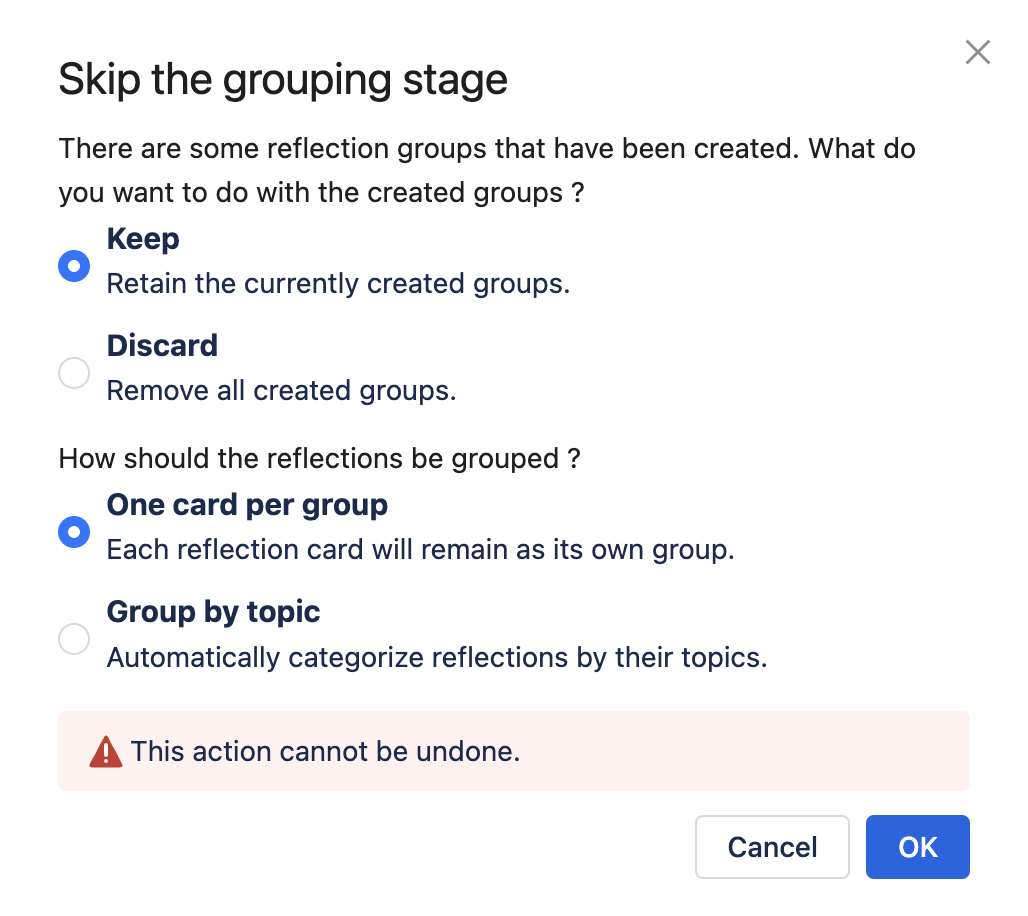
If you skip:
-
If any groups have already been created, you’ll be asked whether to Keep (retain groups) or Discard (remove groups).
-
You can choose how reflections will be grouped:
-
One card per group: Each reflection stays in its own group.
-
Group by topic: Cards are automatically grouped by similar topics.
-
Be sure to select your options, click Agree, and then OK to proceed.