.png)
Managing groups allows you to organize members into teams based on roles, departments, or project requirements. This helps you organize resources into manageable units.
Creating a new group
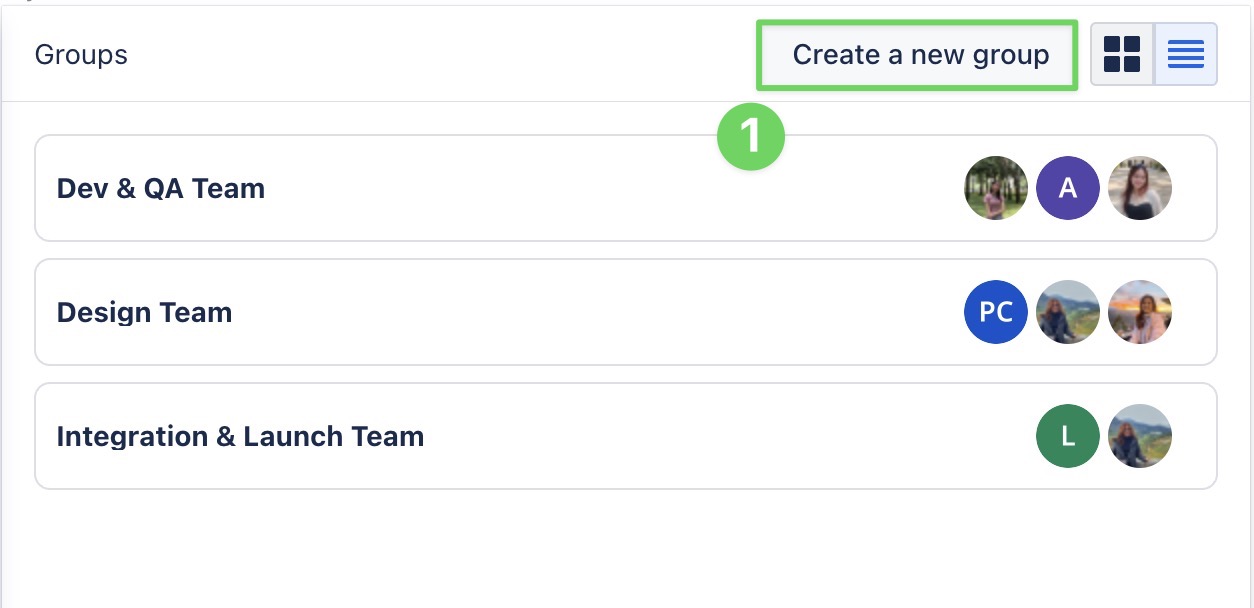
To create a new group, go to the Resource Board:
-
Click on the Create a new group button in the Groups panel
-
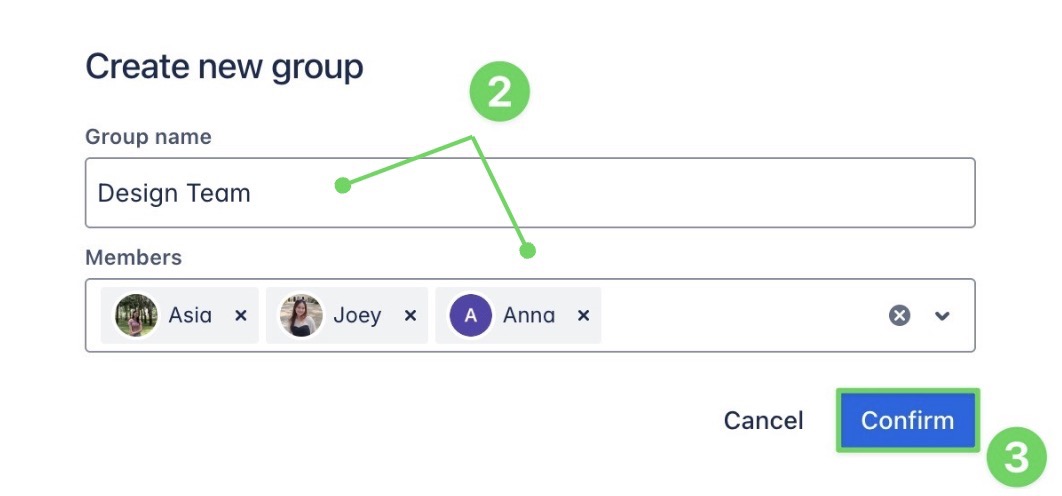
In the pop-up window, enter a group name and select the members to include.
-
Click

Adding members to the group
You can add members to a group in two ways:
-
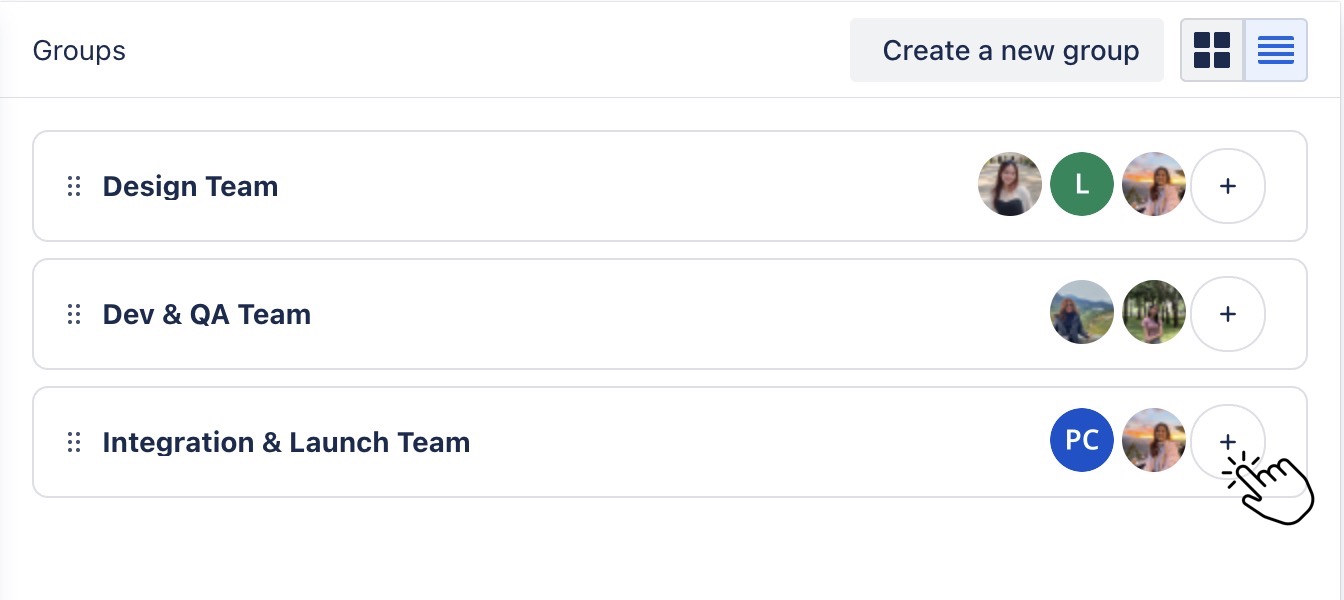
Click the ➕ button on the group card. Select the members you want to add from the dropdown list.
Or
-
Drag and drop members from the Members panel directly into the group.

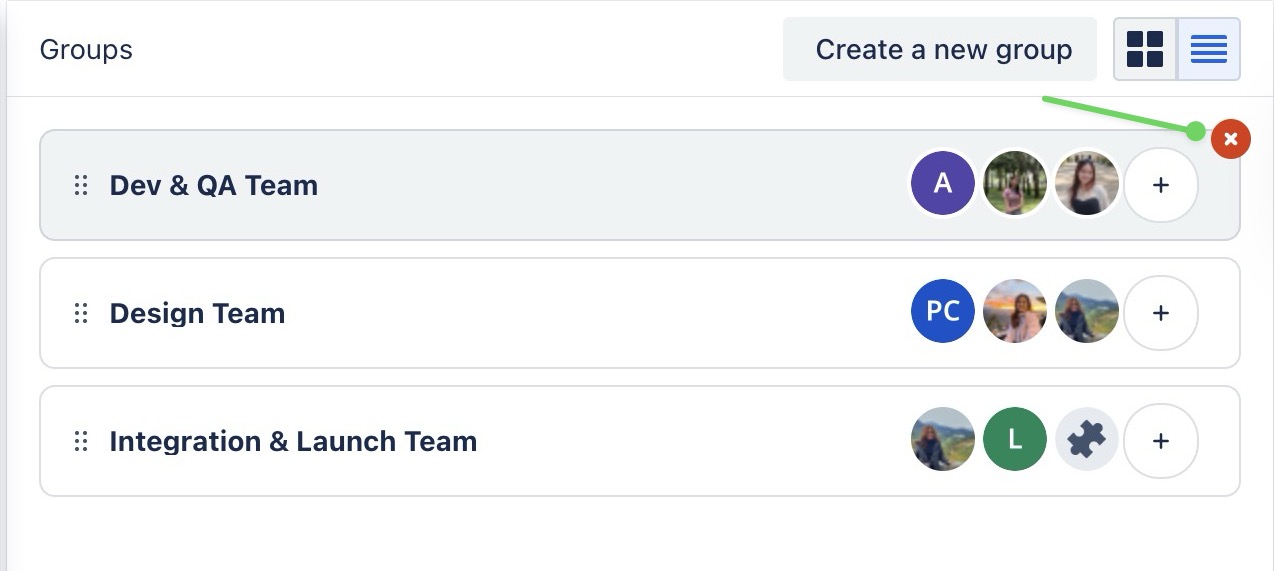
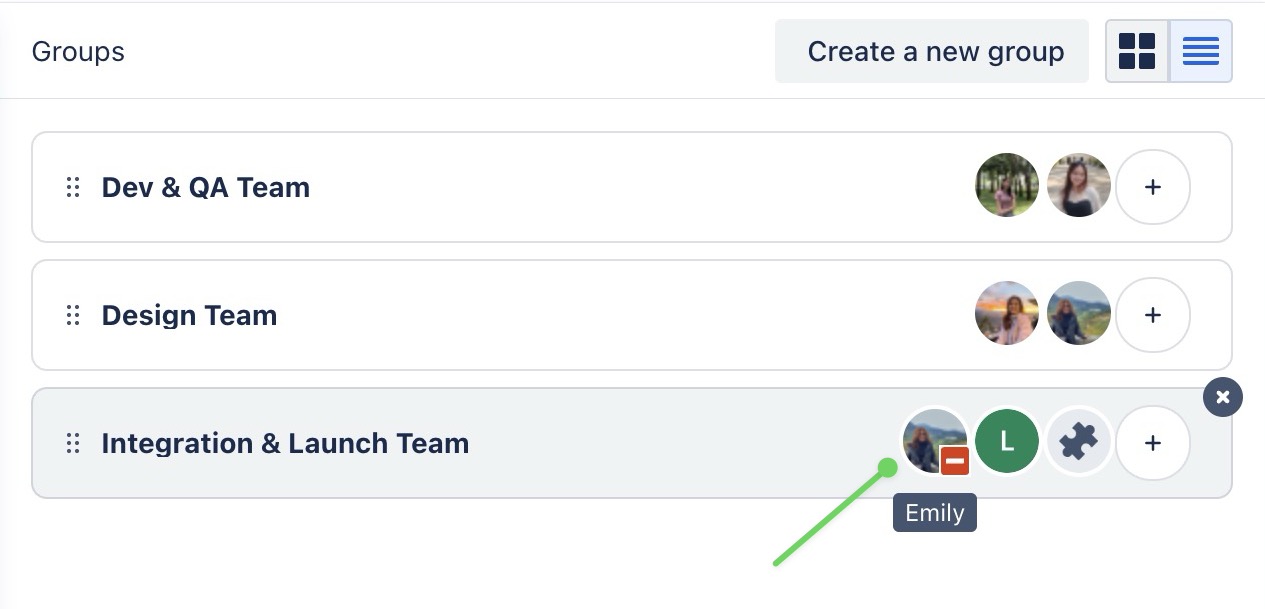
Removing members from the group
To remove a member from a group, hover over the member’s name and click the icon that appears next to it.
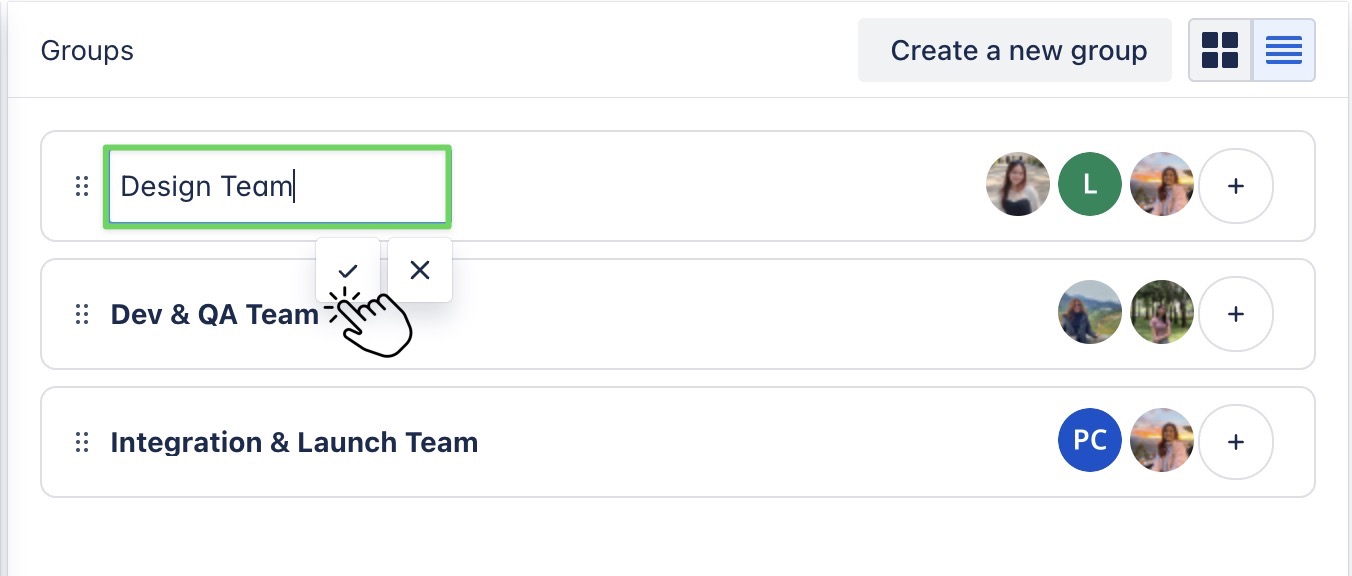
Renaming groups
To rename a group, click on the group’s name to make it editable. Type the new name, then click the ✔️ button to save your changes.
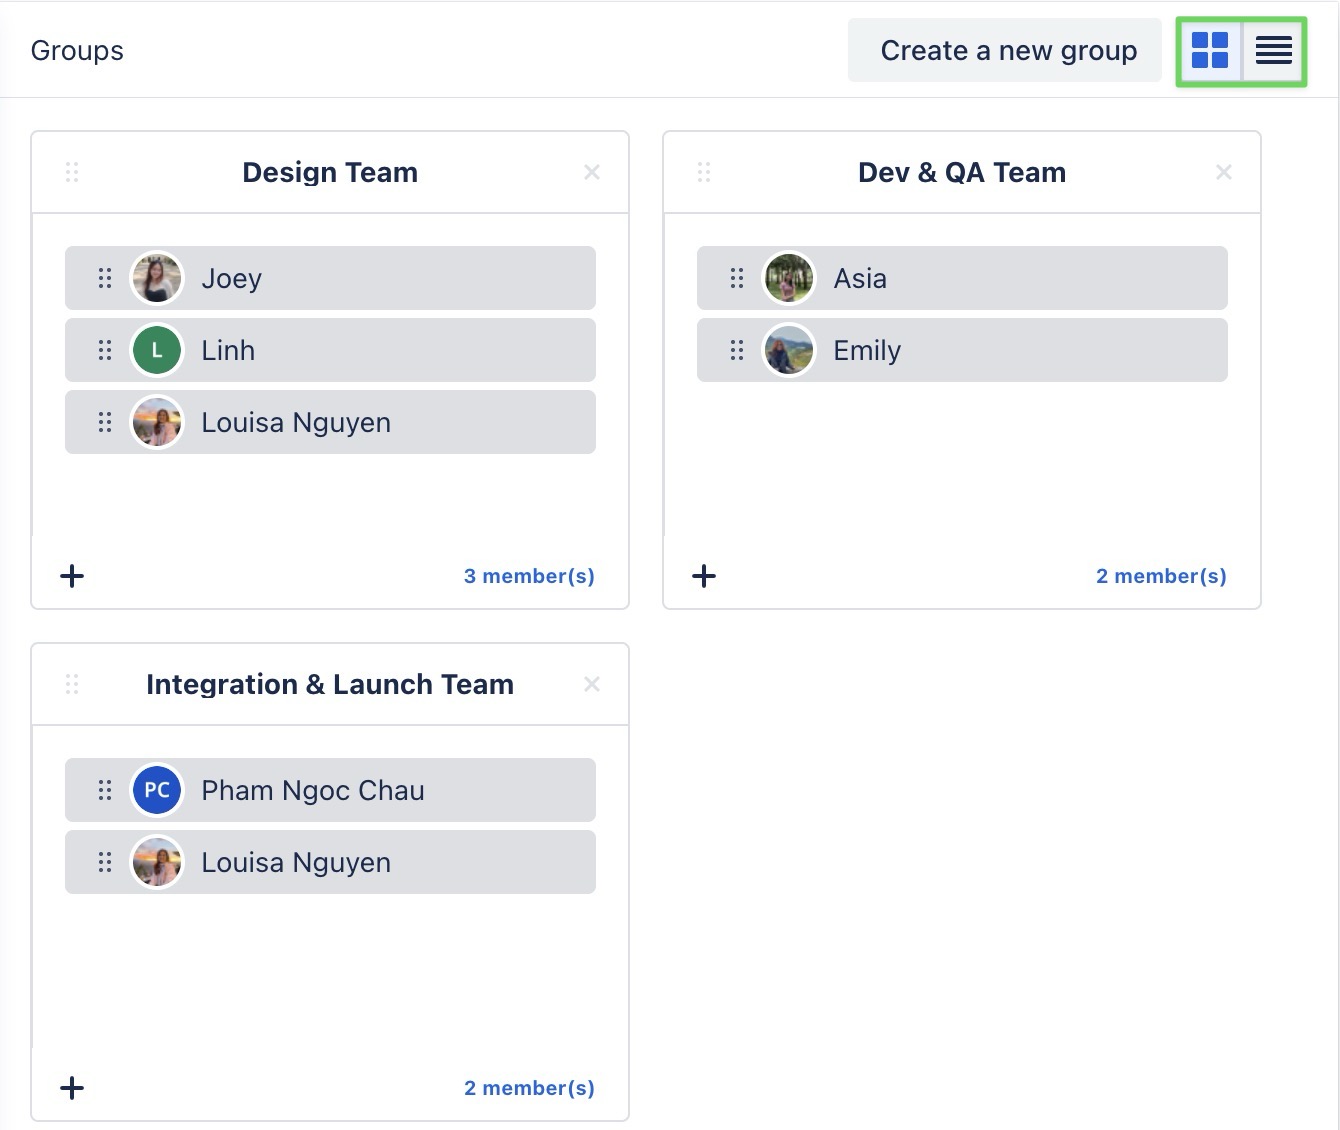
Viewing groups
You can view your groups in two different modes in the Resource Board:
-
List view: Displays all groups in a compact list format
-
Grid view: Shows each group in a box with its members listed inside.

Deleting groups
To delete the group, hover over the group card, then click on the