.png)
You can manage tasks in both Gantt and Timeline boards using the same steps. This guide focuses on managing tasks in the Gantt Board.
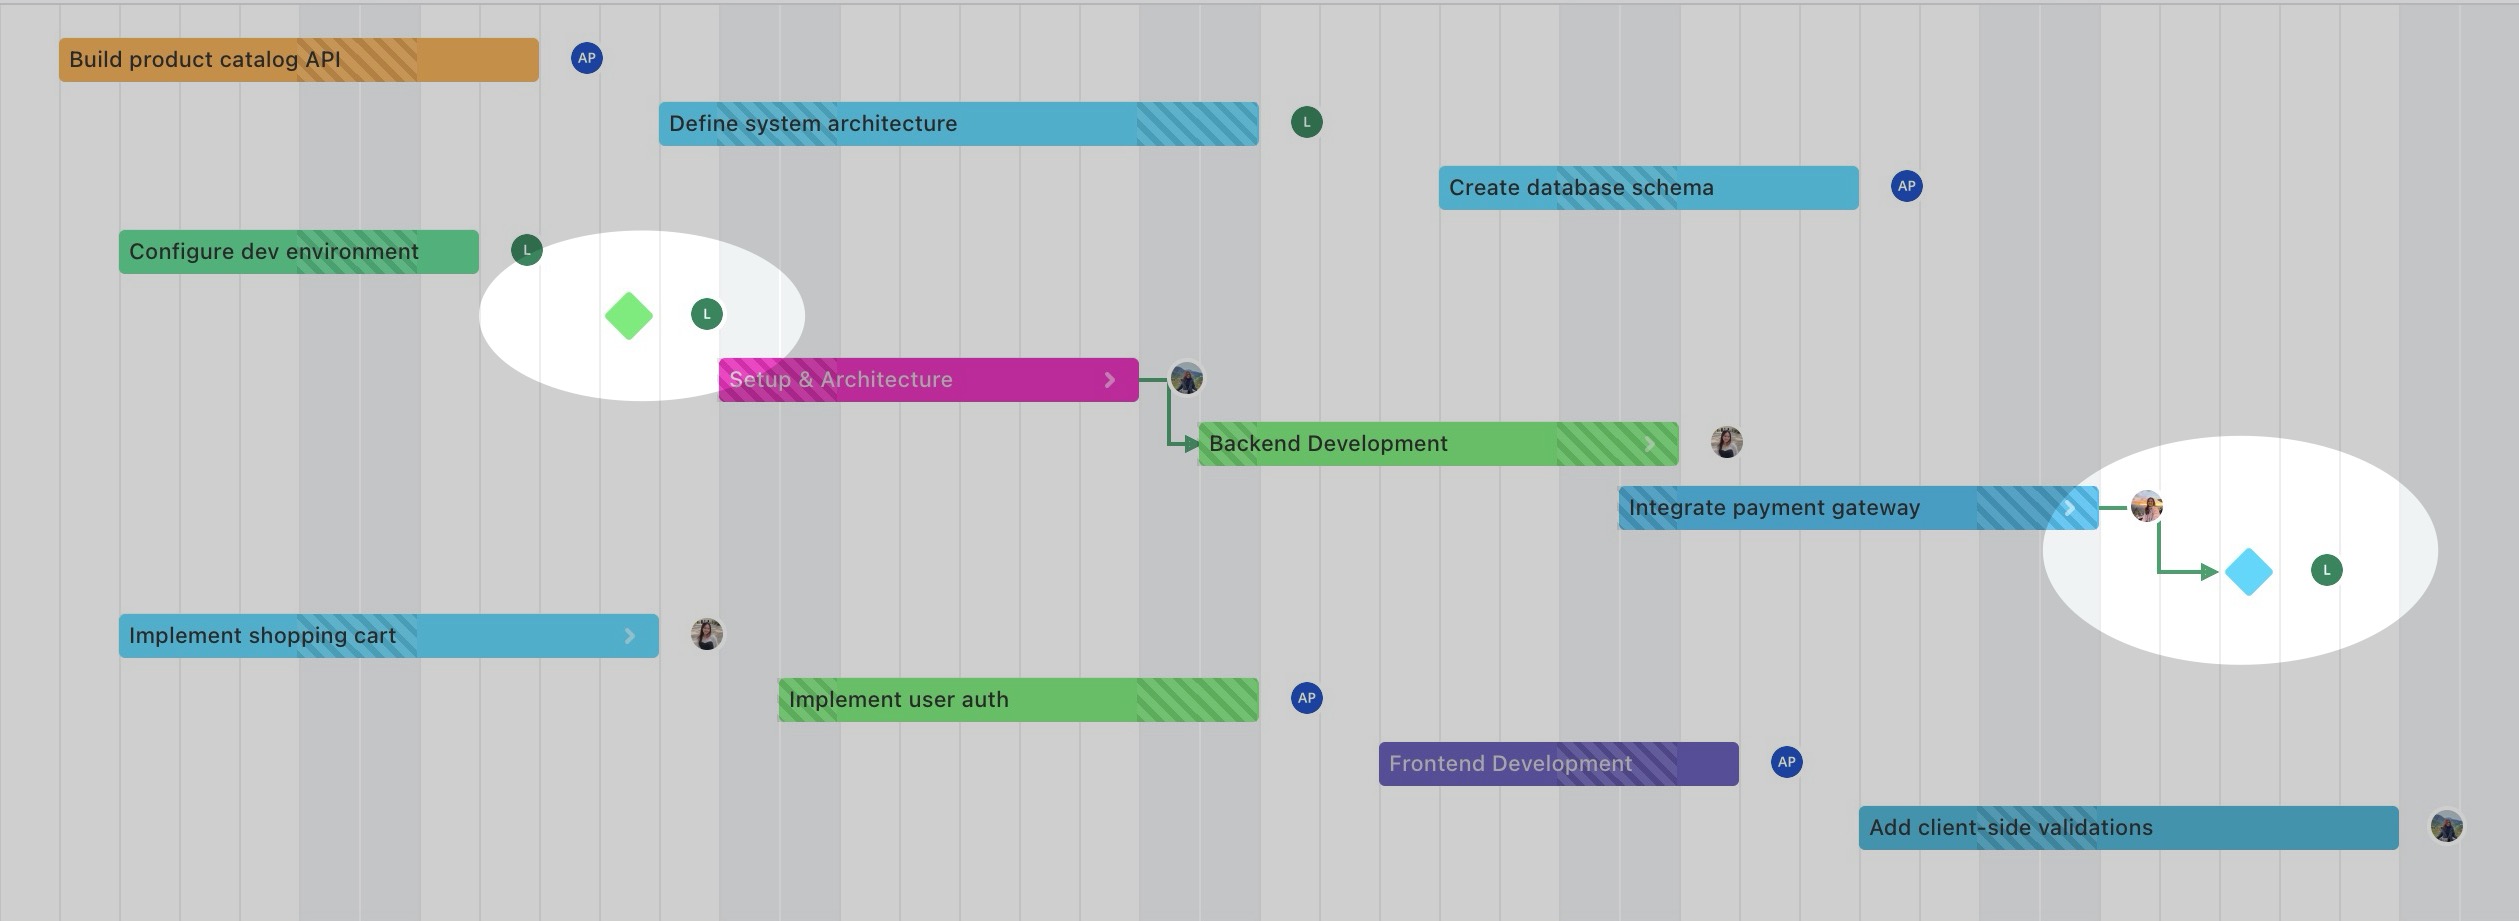
In the Gantt or Timeline view, each task appears as a horizontal bar, with its length representing the time between the start and due dates. Tasks without dates will not be displayed.
From the Gantt Board, you can:
-
Plan tasks and assign them to team members
-
Reschedule tasks by dragging and dropping on the timeline
-
Adjust task duration by resizing task bars
-
Edit tasks with the context menu
-
Perform bulk task editing to quickly update multiple tasks at once
Planning tasks
On the Gantt Board, you can plan tasks in two ways:
Plan directly on the Gantt Board (Quick Planning)
You can click on a timeline cell or drag across multiple cells directly on the timeline to rapidly plan and adjust tasks. This feature helps you save time and make the planning process more efficient, especially when scheduling tasks for larger projects.
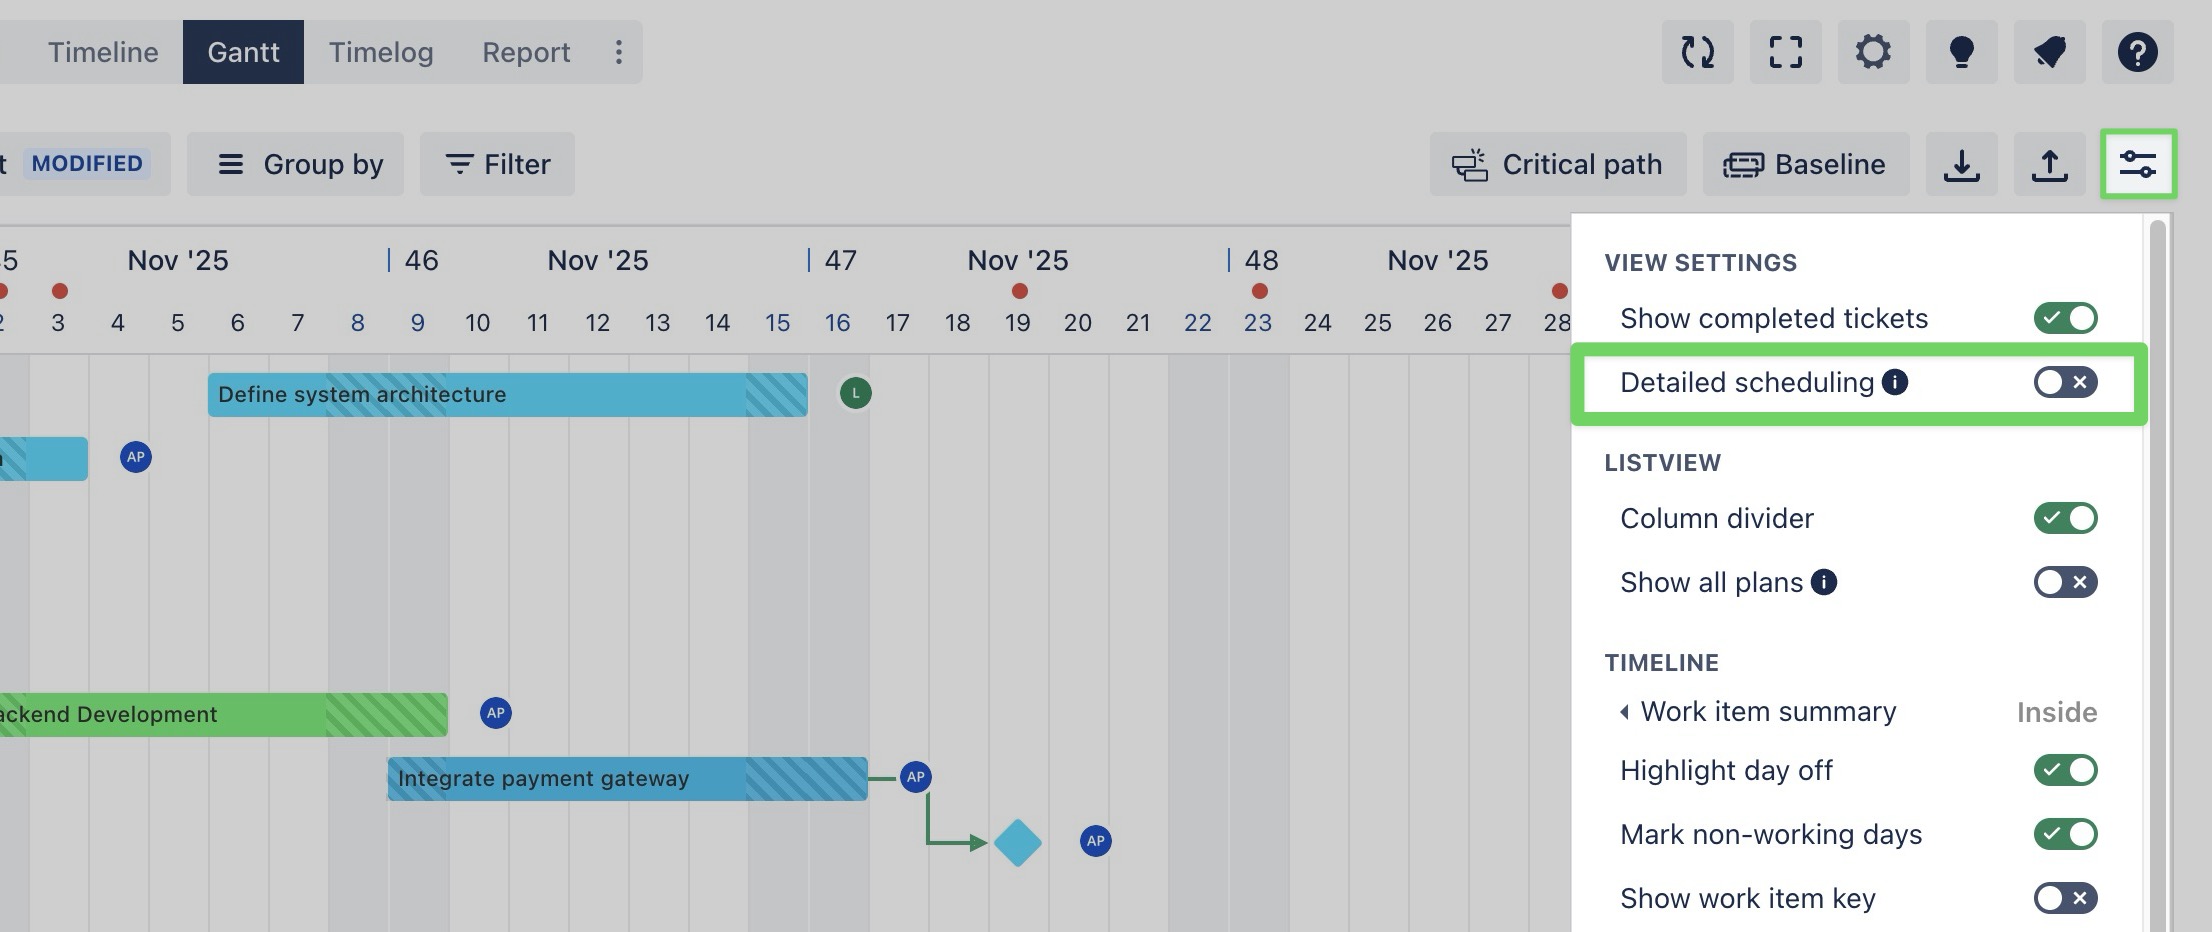
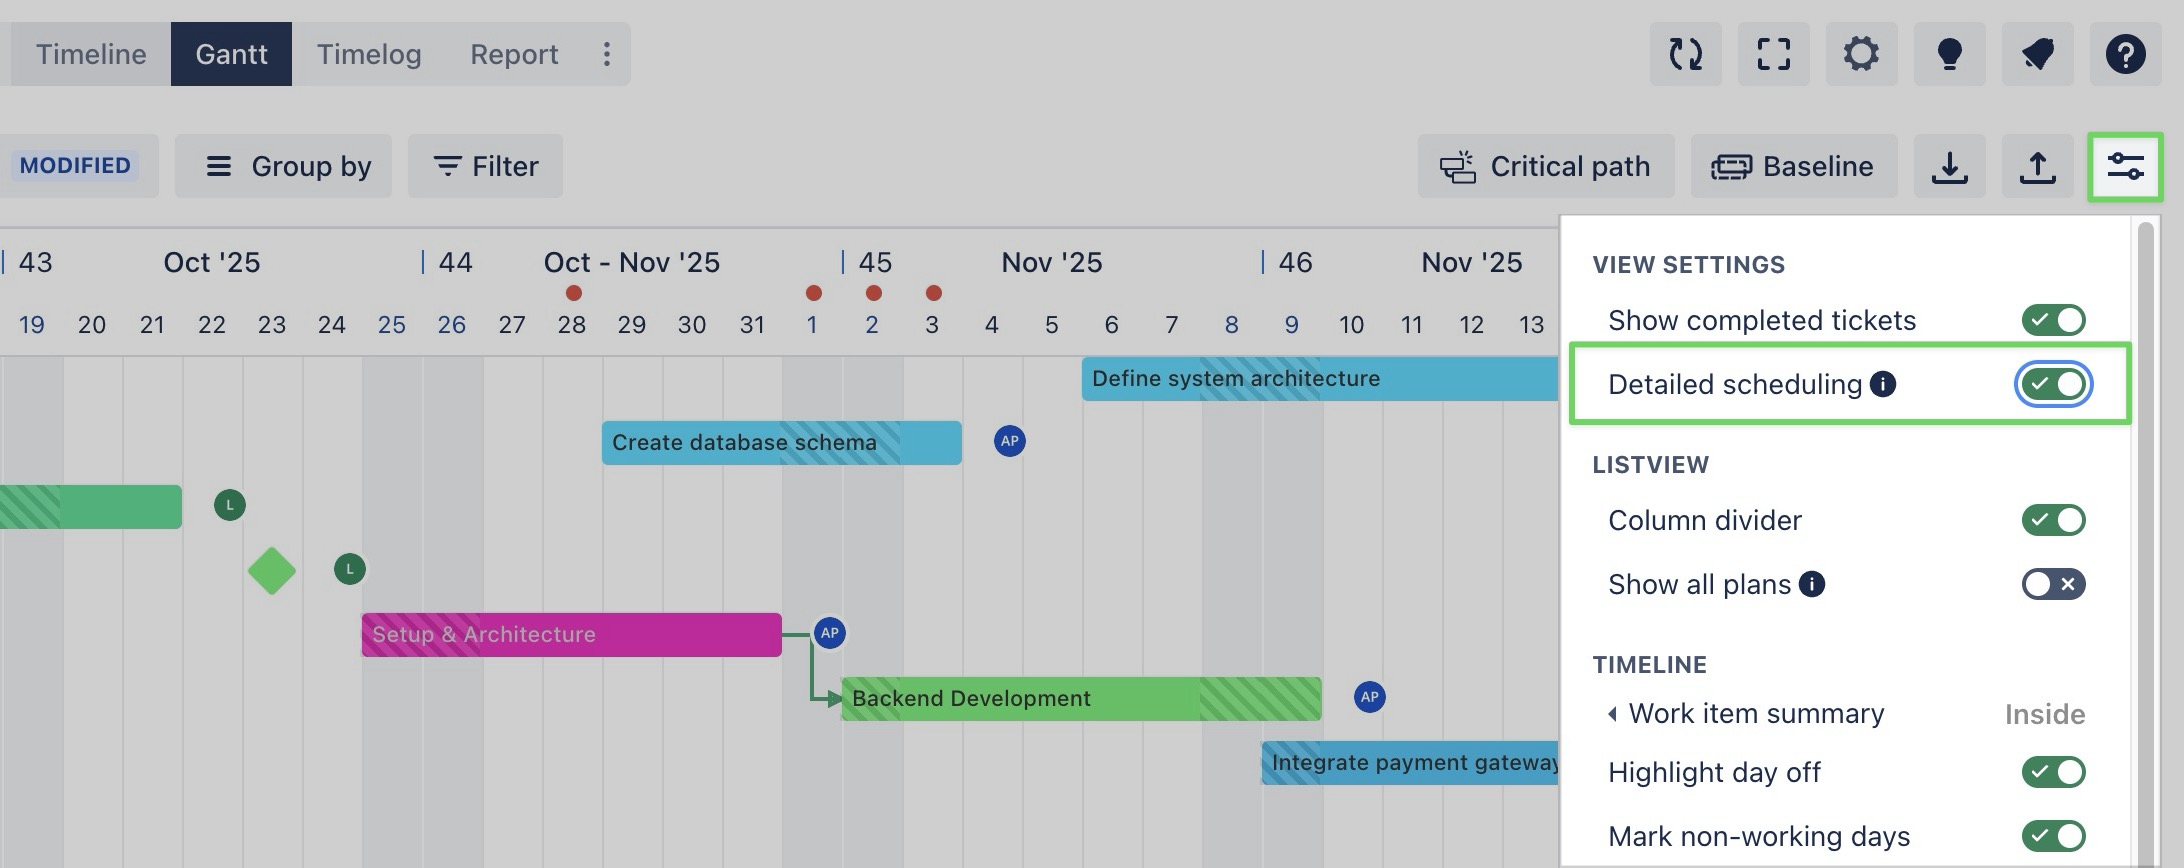
To use this feature, first open View Settings in the top-right corner and disable the Detailed Dialog option.
Steps:
-
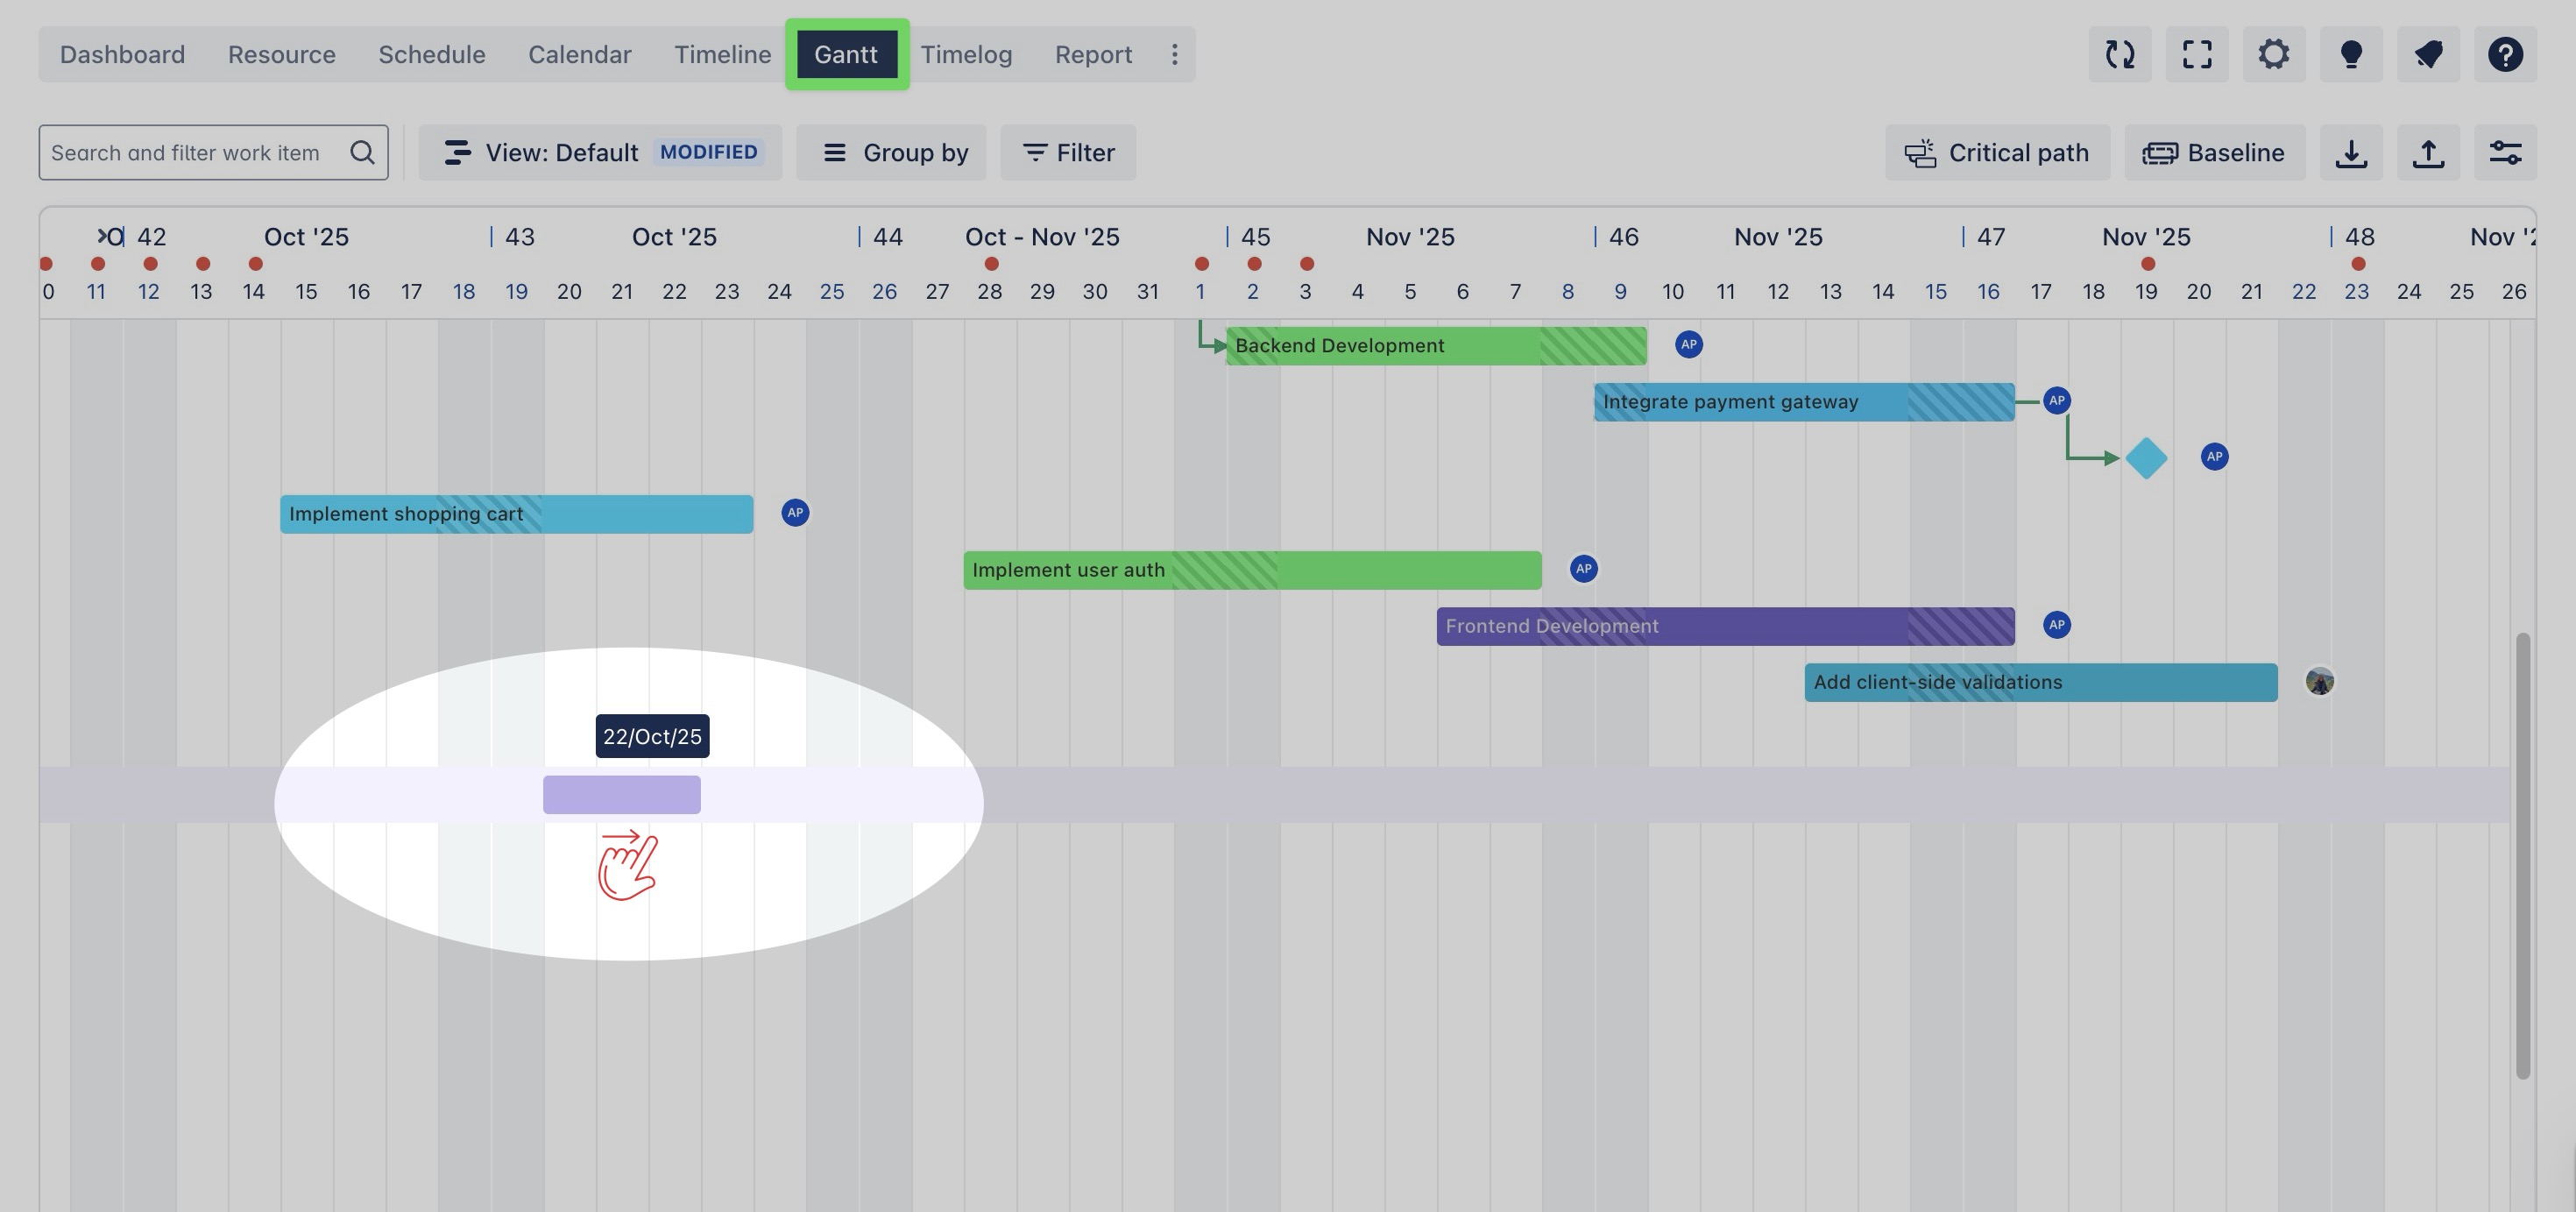
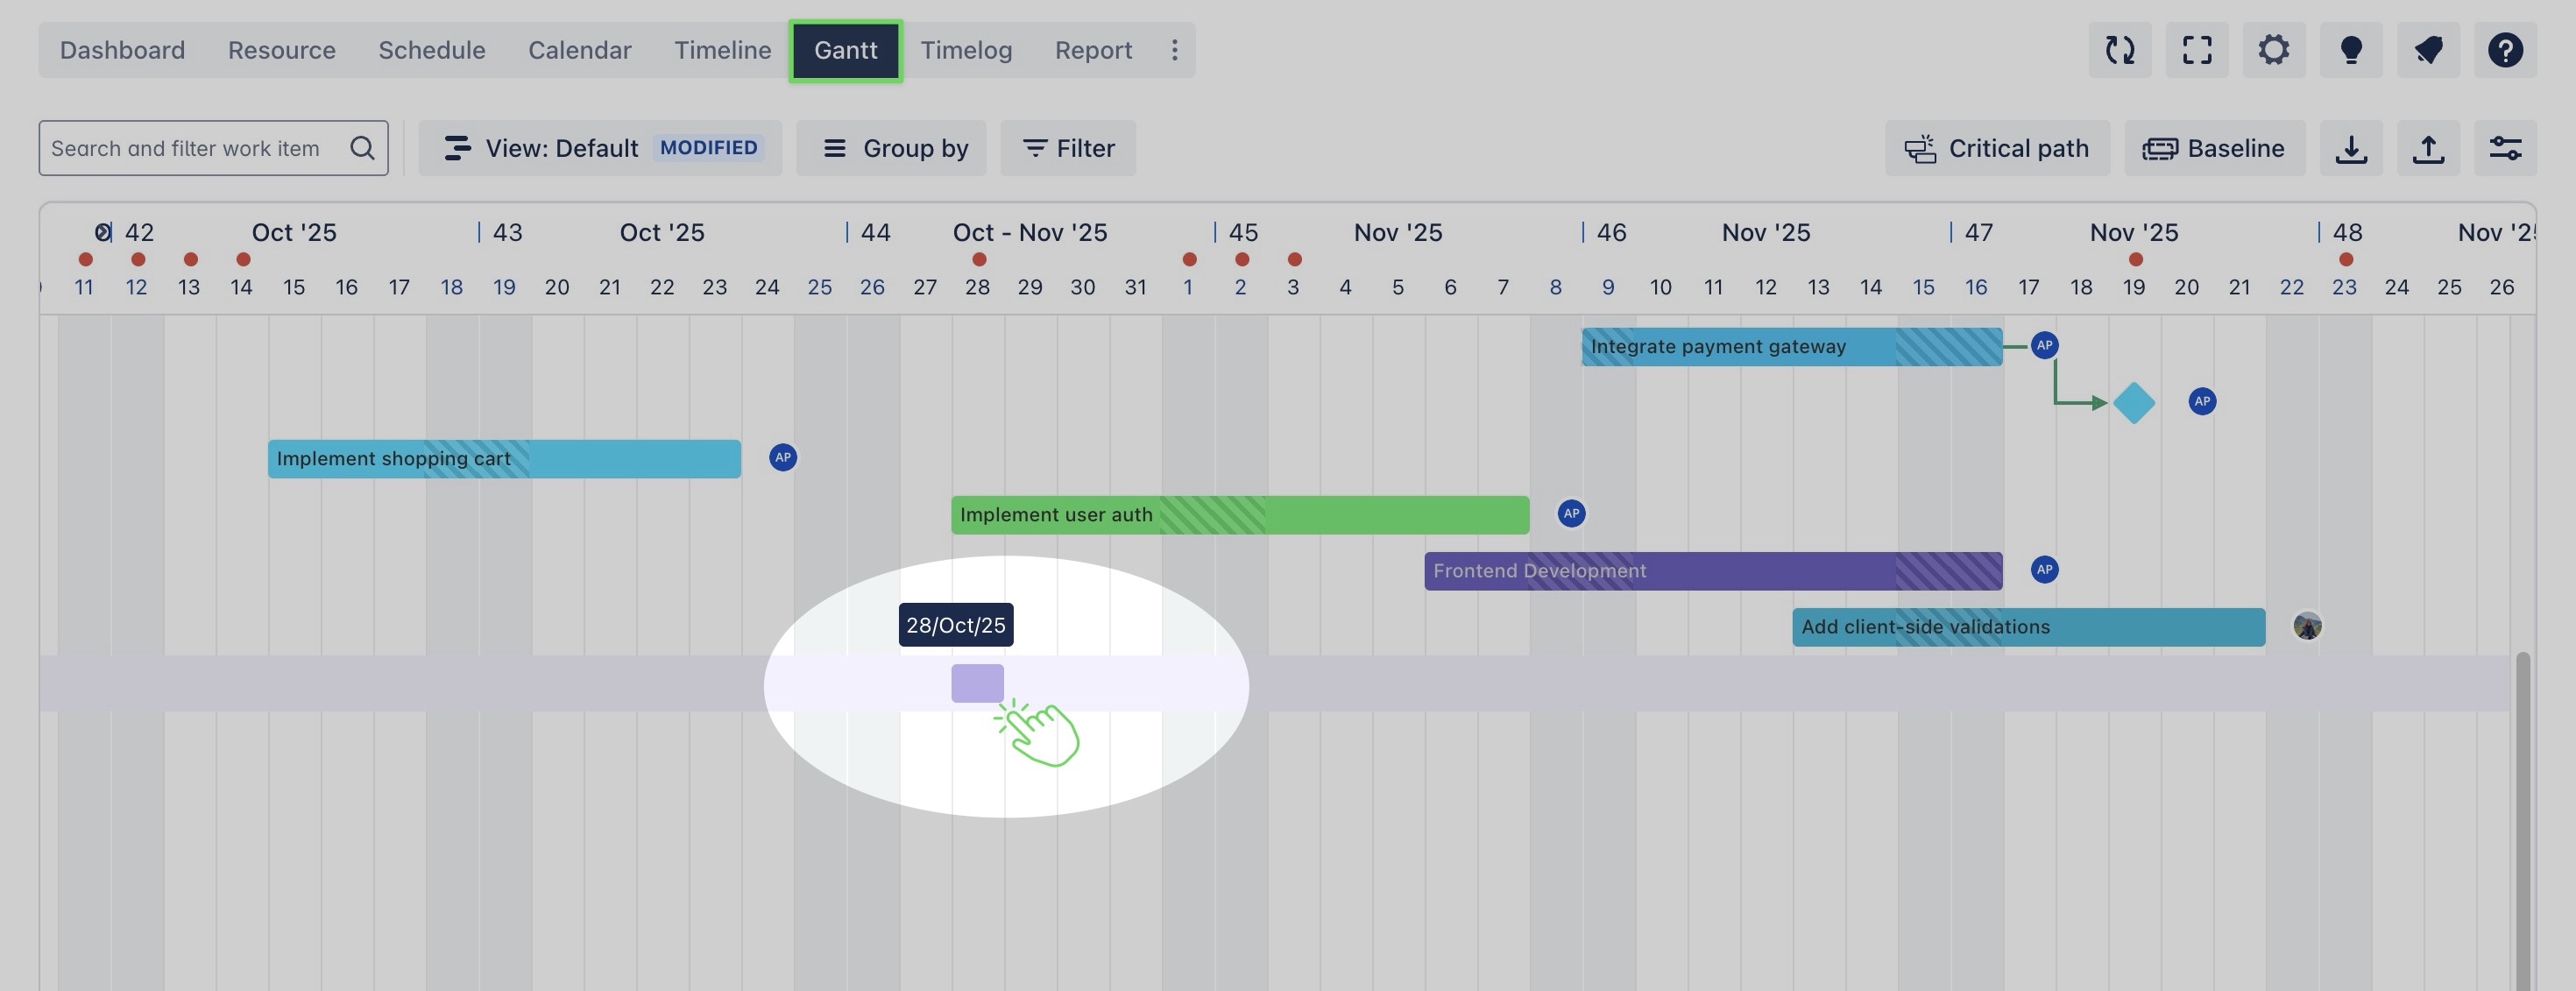
Go to the Gantt Board from the top navigation bar.
-
On the Gantt view, click on a cell or drag across multiple cells where you want to plan a task.
-
A quick planning bar will appear:
-
In the Hour box, input the scheduled hours for the task.
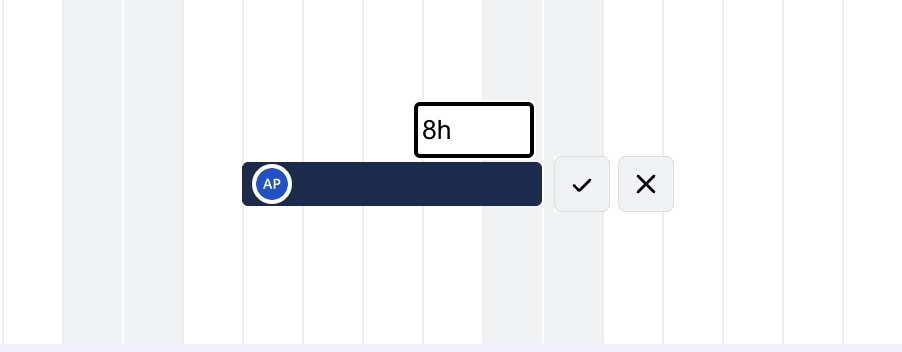
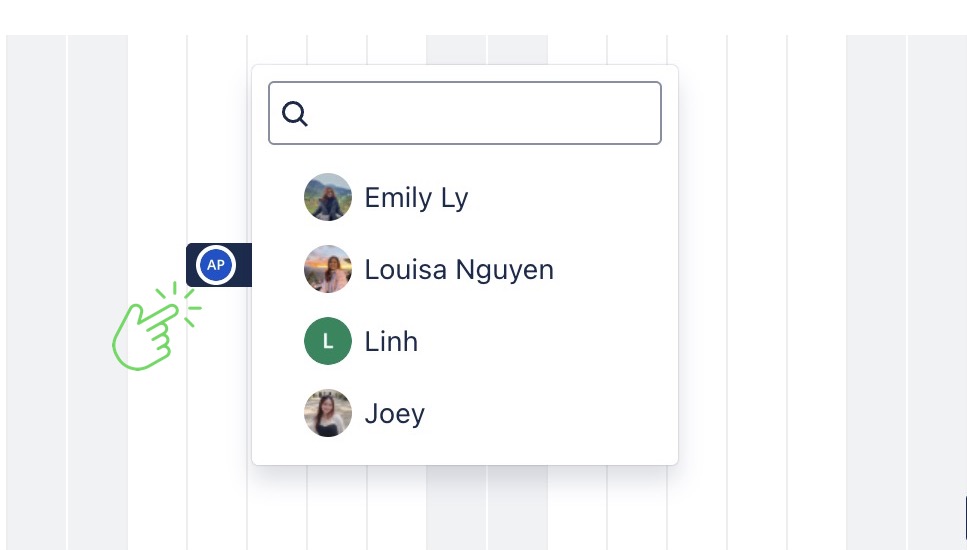
-
Click the assignee icon to change the assigned team member.
-
Press Enter or click the ✔ Check button to add the plan. (Use the ✖ Close button if you want to cancel the action.)

Tip: To plan multiple tasks at once on a timeline, you can select multiple ranges of cells and then add them simultaneously to the timeline.
Plan via the Detailed Planning Dialog
To use this feature, first open View Settings in the top-right corner and enable the Detailed Dialog option.
Steps to plan a task via the Detailed Planning Dialog:
-
Navigate to the Gantt Board from the top navigation bar.
-
On the Gantt view, click on a timeline cell to open the Detailed Planning Dialog
-
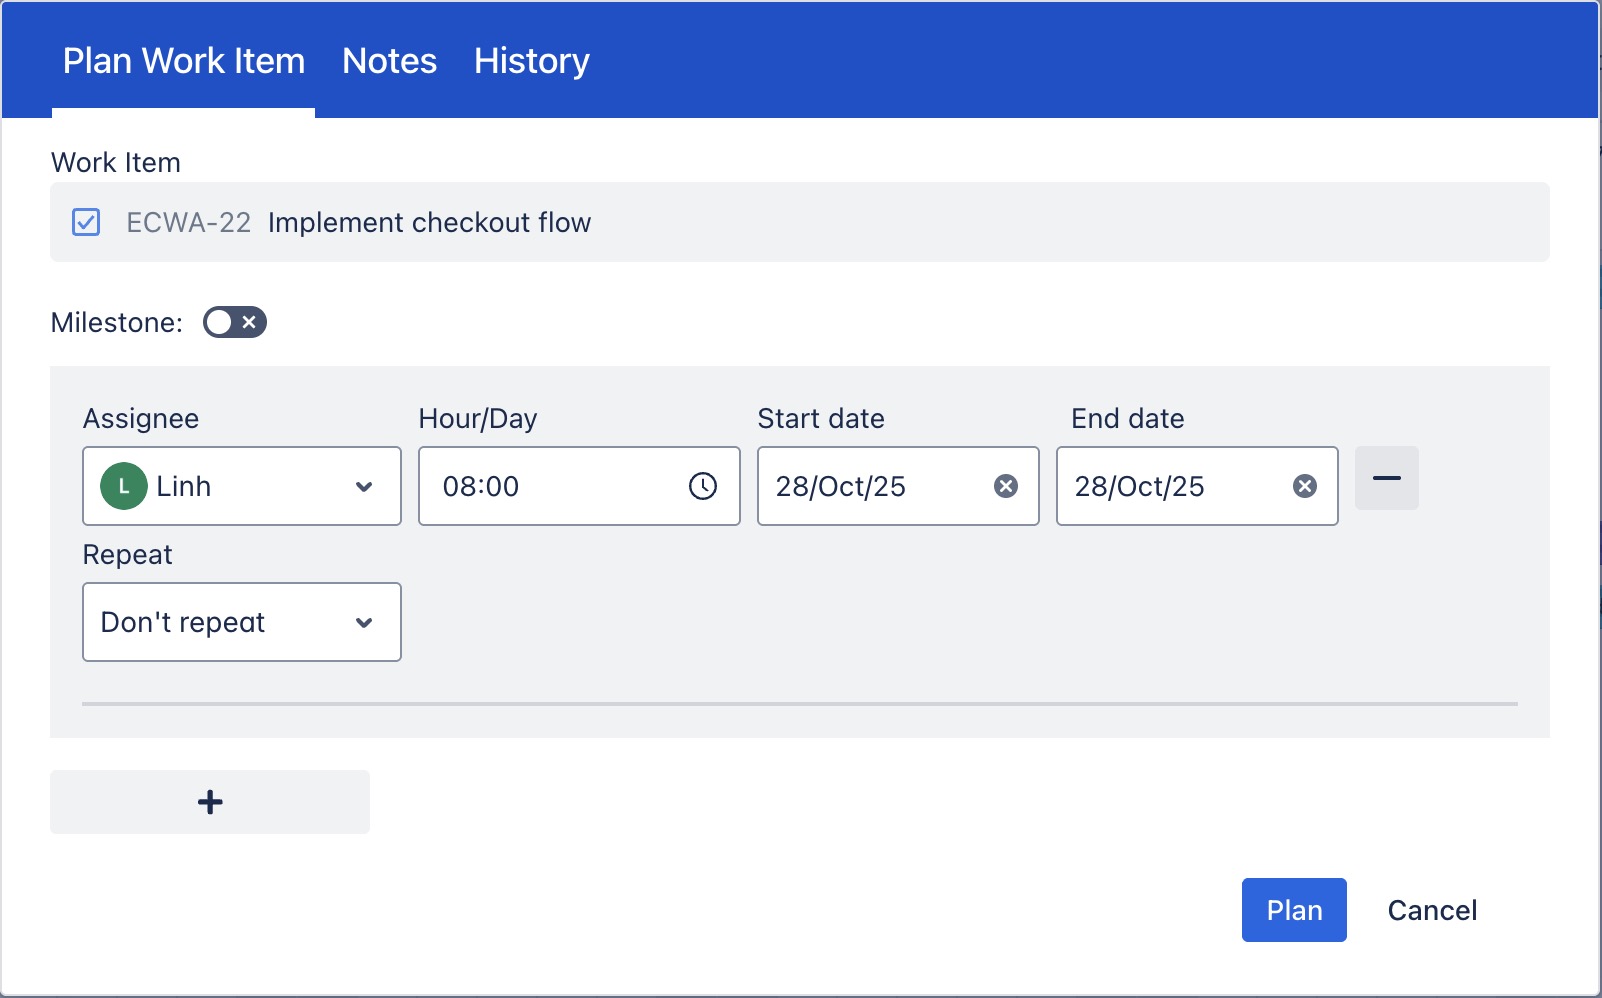
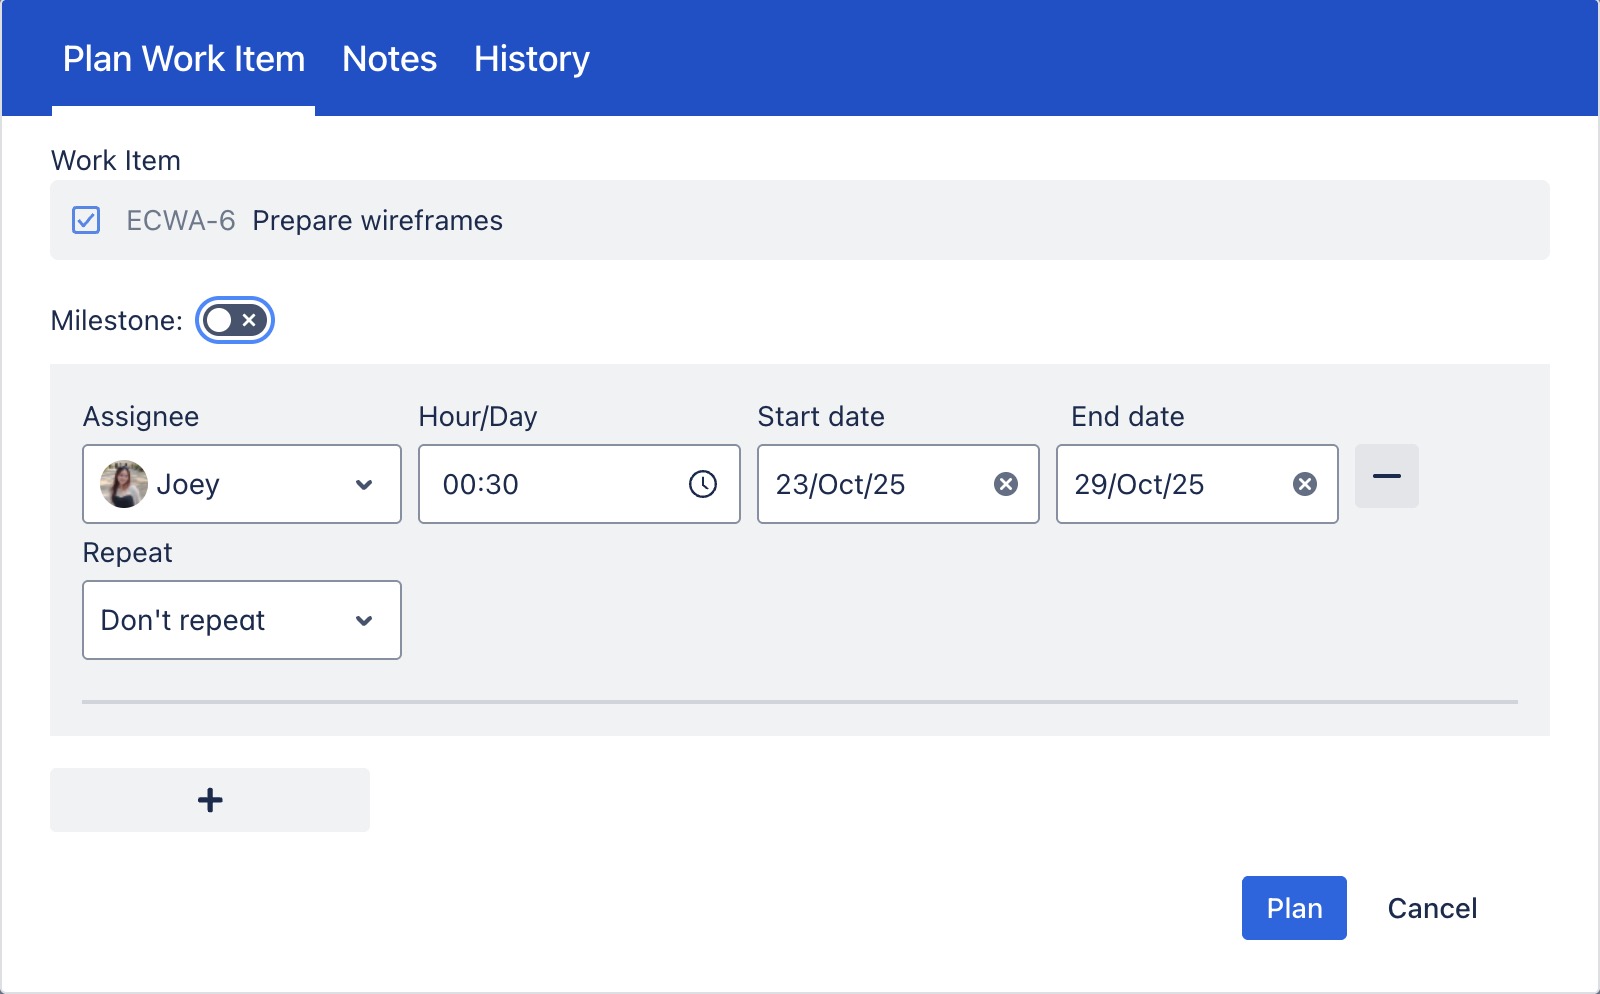
Complete the task details in the dialog:
-
Assignee: The team member responsible for completing the task.
-
Start date: The date the task is scheduled to begin.
-
End date: The date by which the task should be completed.
-
Hours/Day: Refer to how many working hours per day a person is planned to work on the task.
-
Repeat: Choose if you want to repeat the task (e.g., daily, weekly) by selecting the appropriate repeat option.
-
Click

You can also plan a task for multiple members via the planning dialog on the Gantt Board by clicking 
Scheduling tasks
You can easily modify tasks after they are created: Simply drag a task bar and drop it to a different date or range on the Gantt view.
Adjusting task duration
-
Hover over the edge of a task’s bar.
-
When the cursor changes to a resize icon, click and drag the edge to adjust the task's start or end date.
-
Release the mouse to save the new task duration.

Editing tasks with the context menu
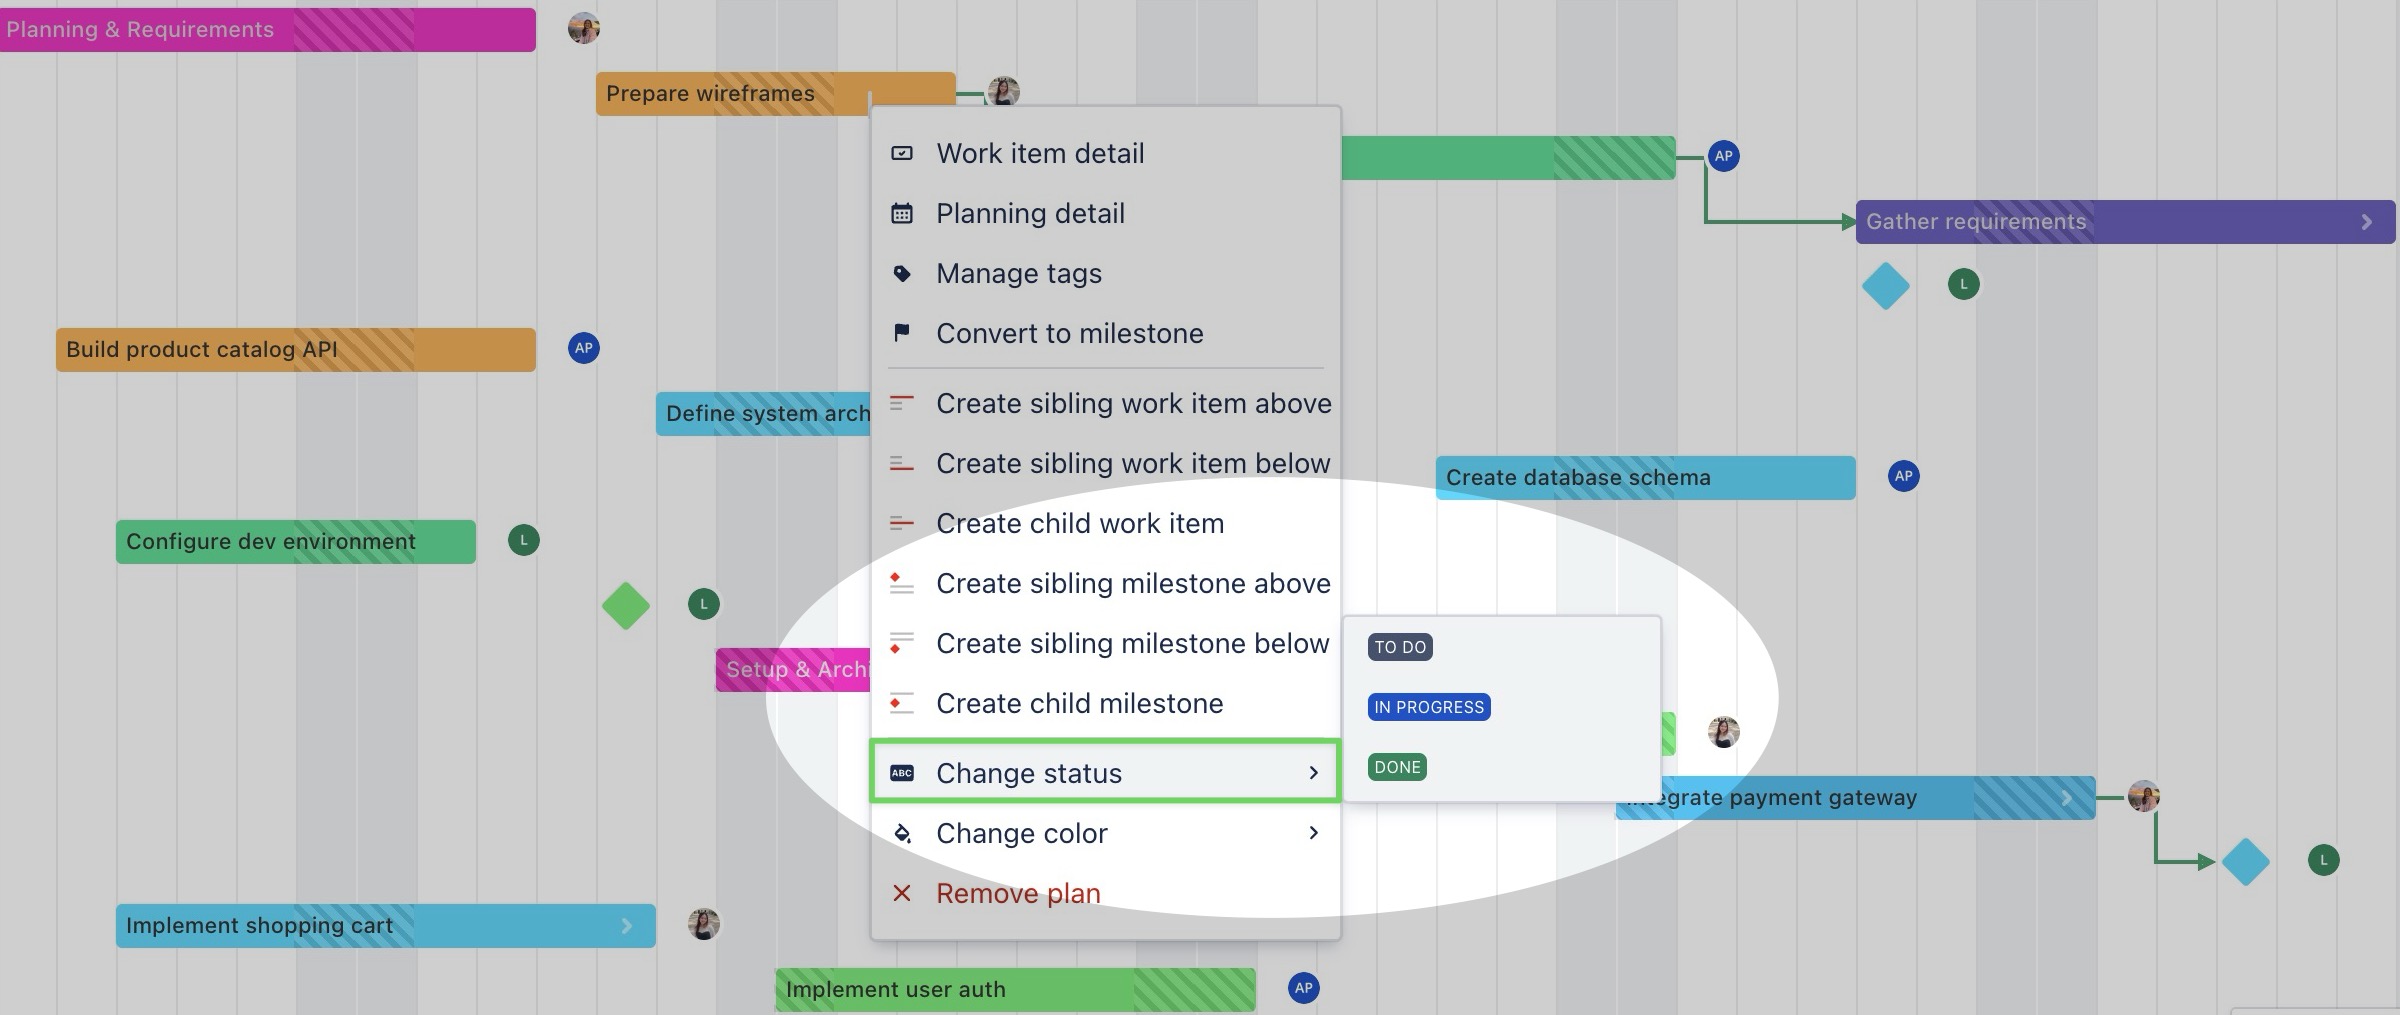
The context menu in ProScheduler provides a list of actions relevant to the currently selected task. This allows users to quickly access and perform various actions, such as editing task details, changing status, or converting to a milestone.
To open the context menu: Right-click on a task in the Gantt or table view > Select an option for editing.

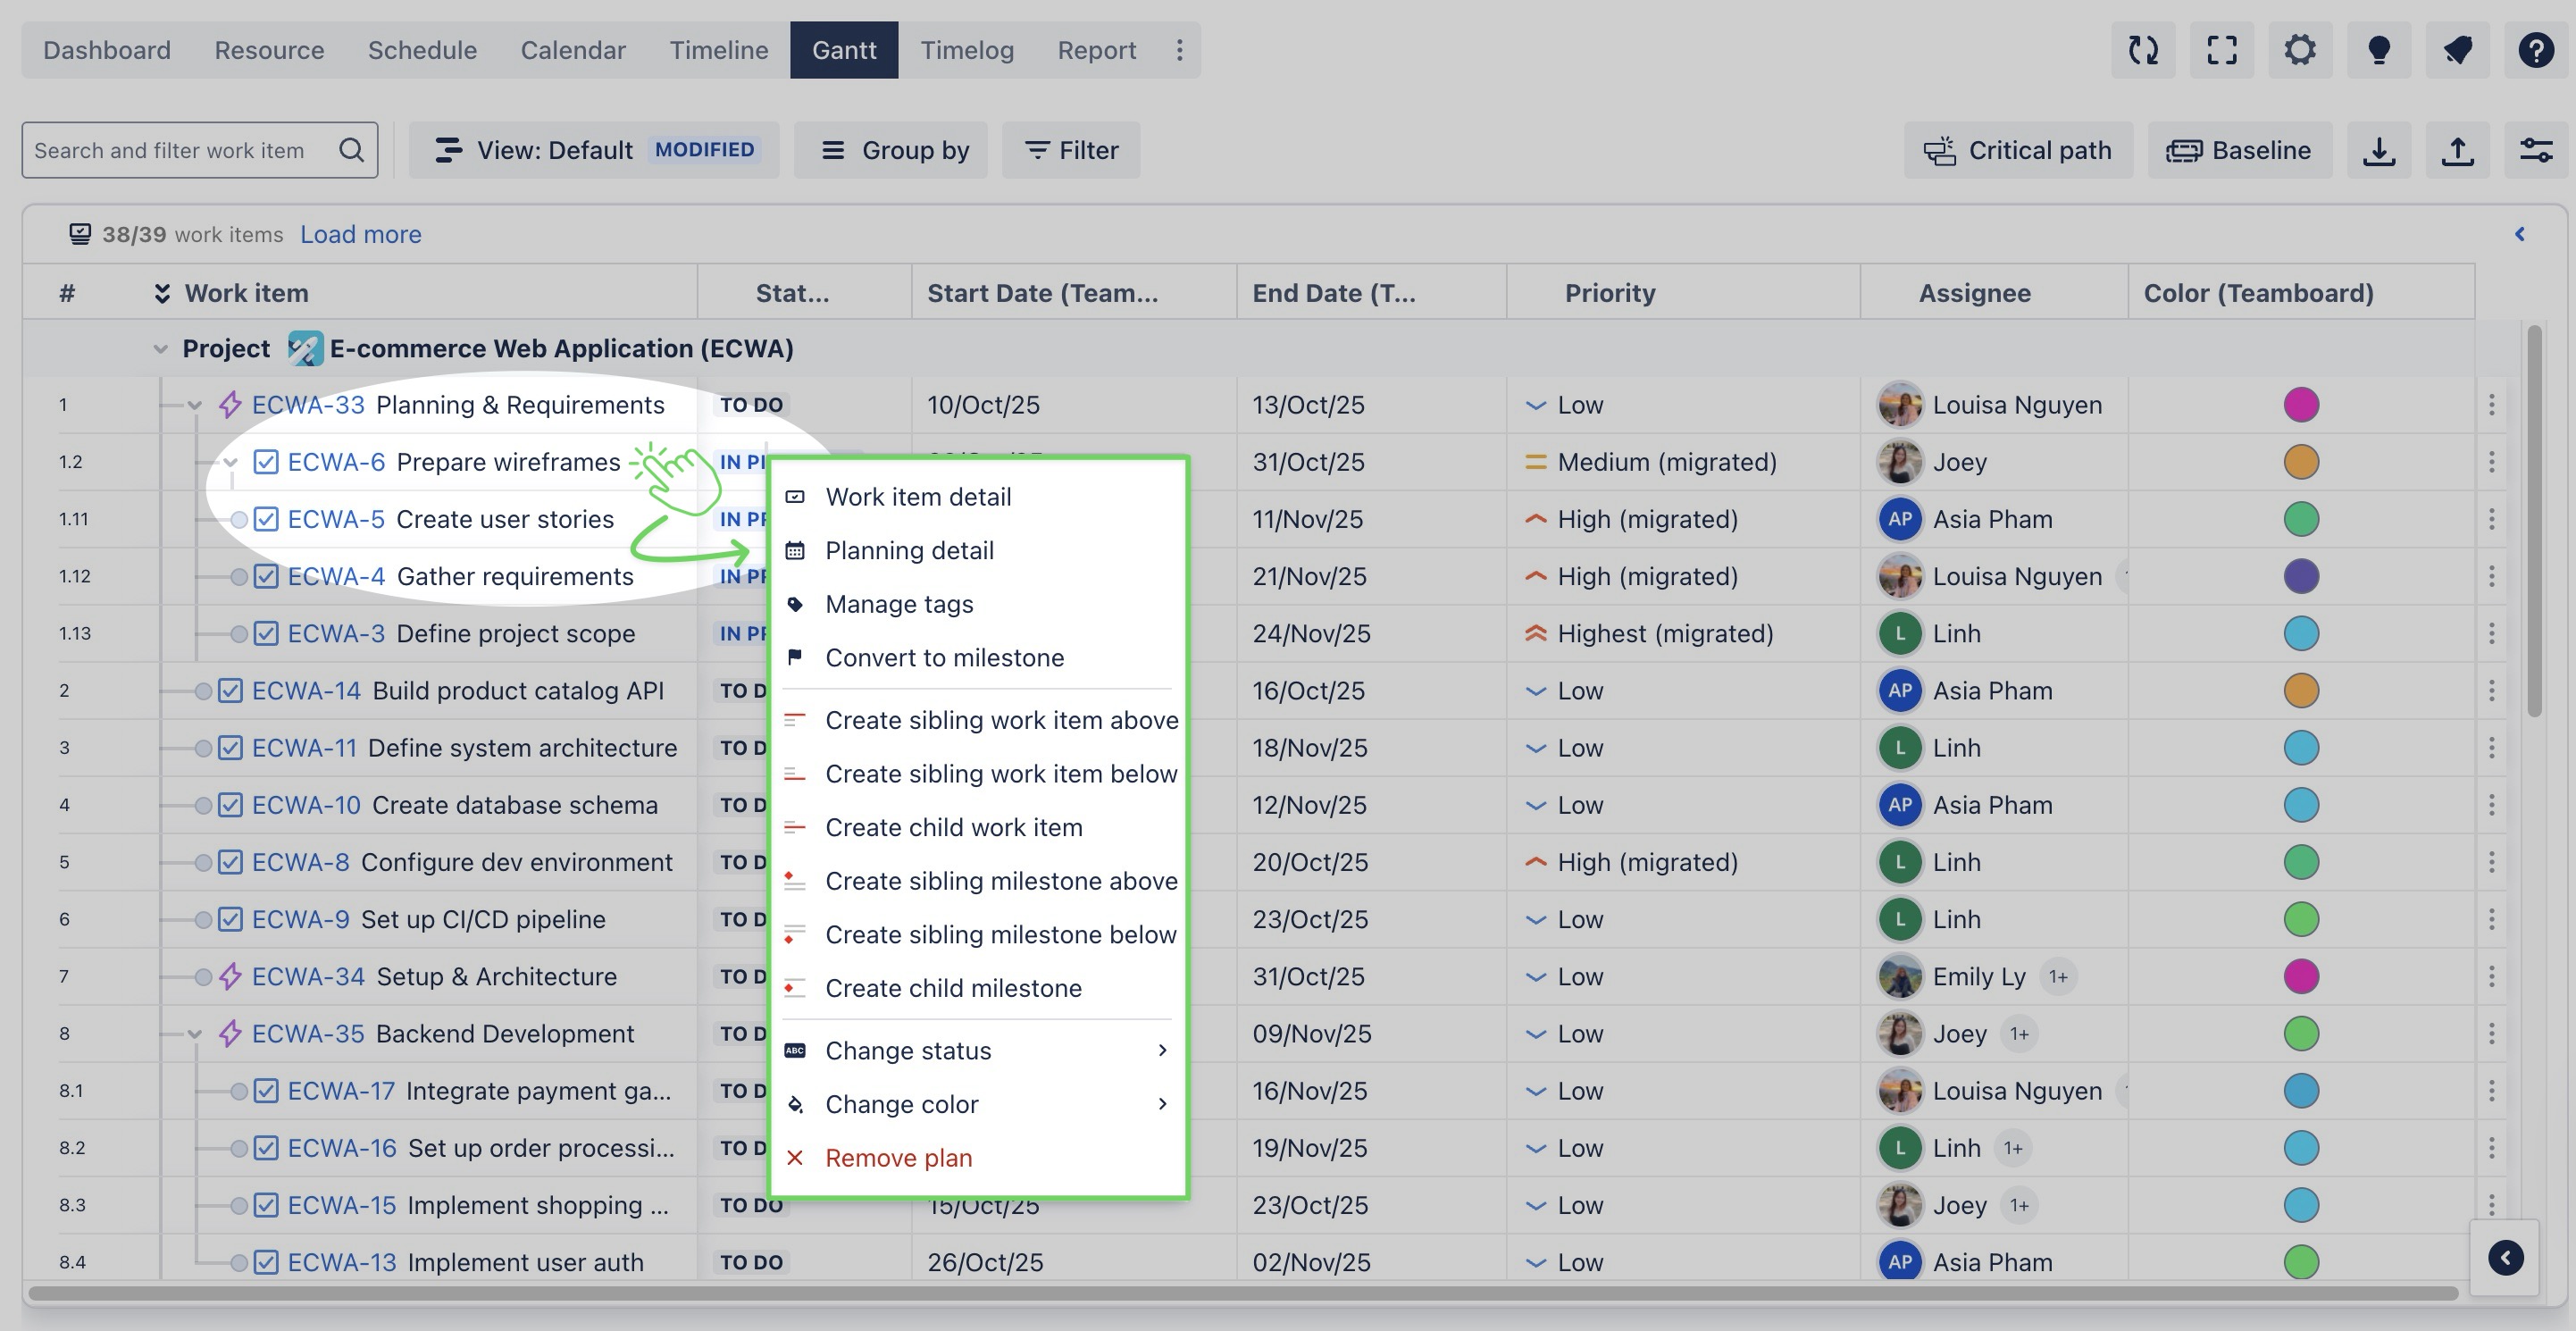
With the context menu, you can:
|
Actions |
How it works |
|---|---|
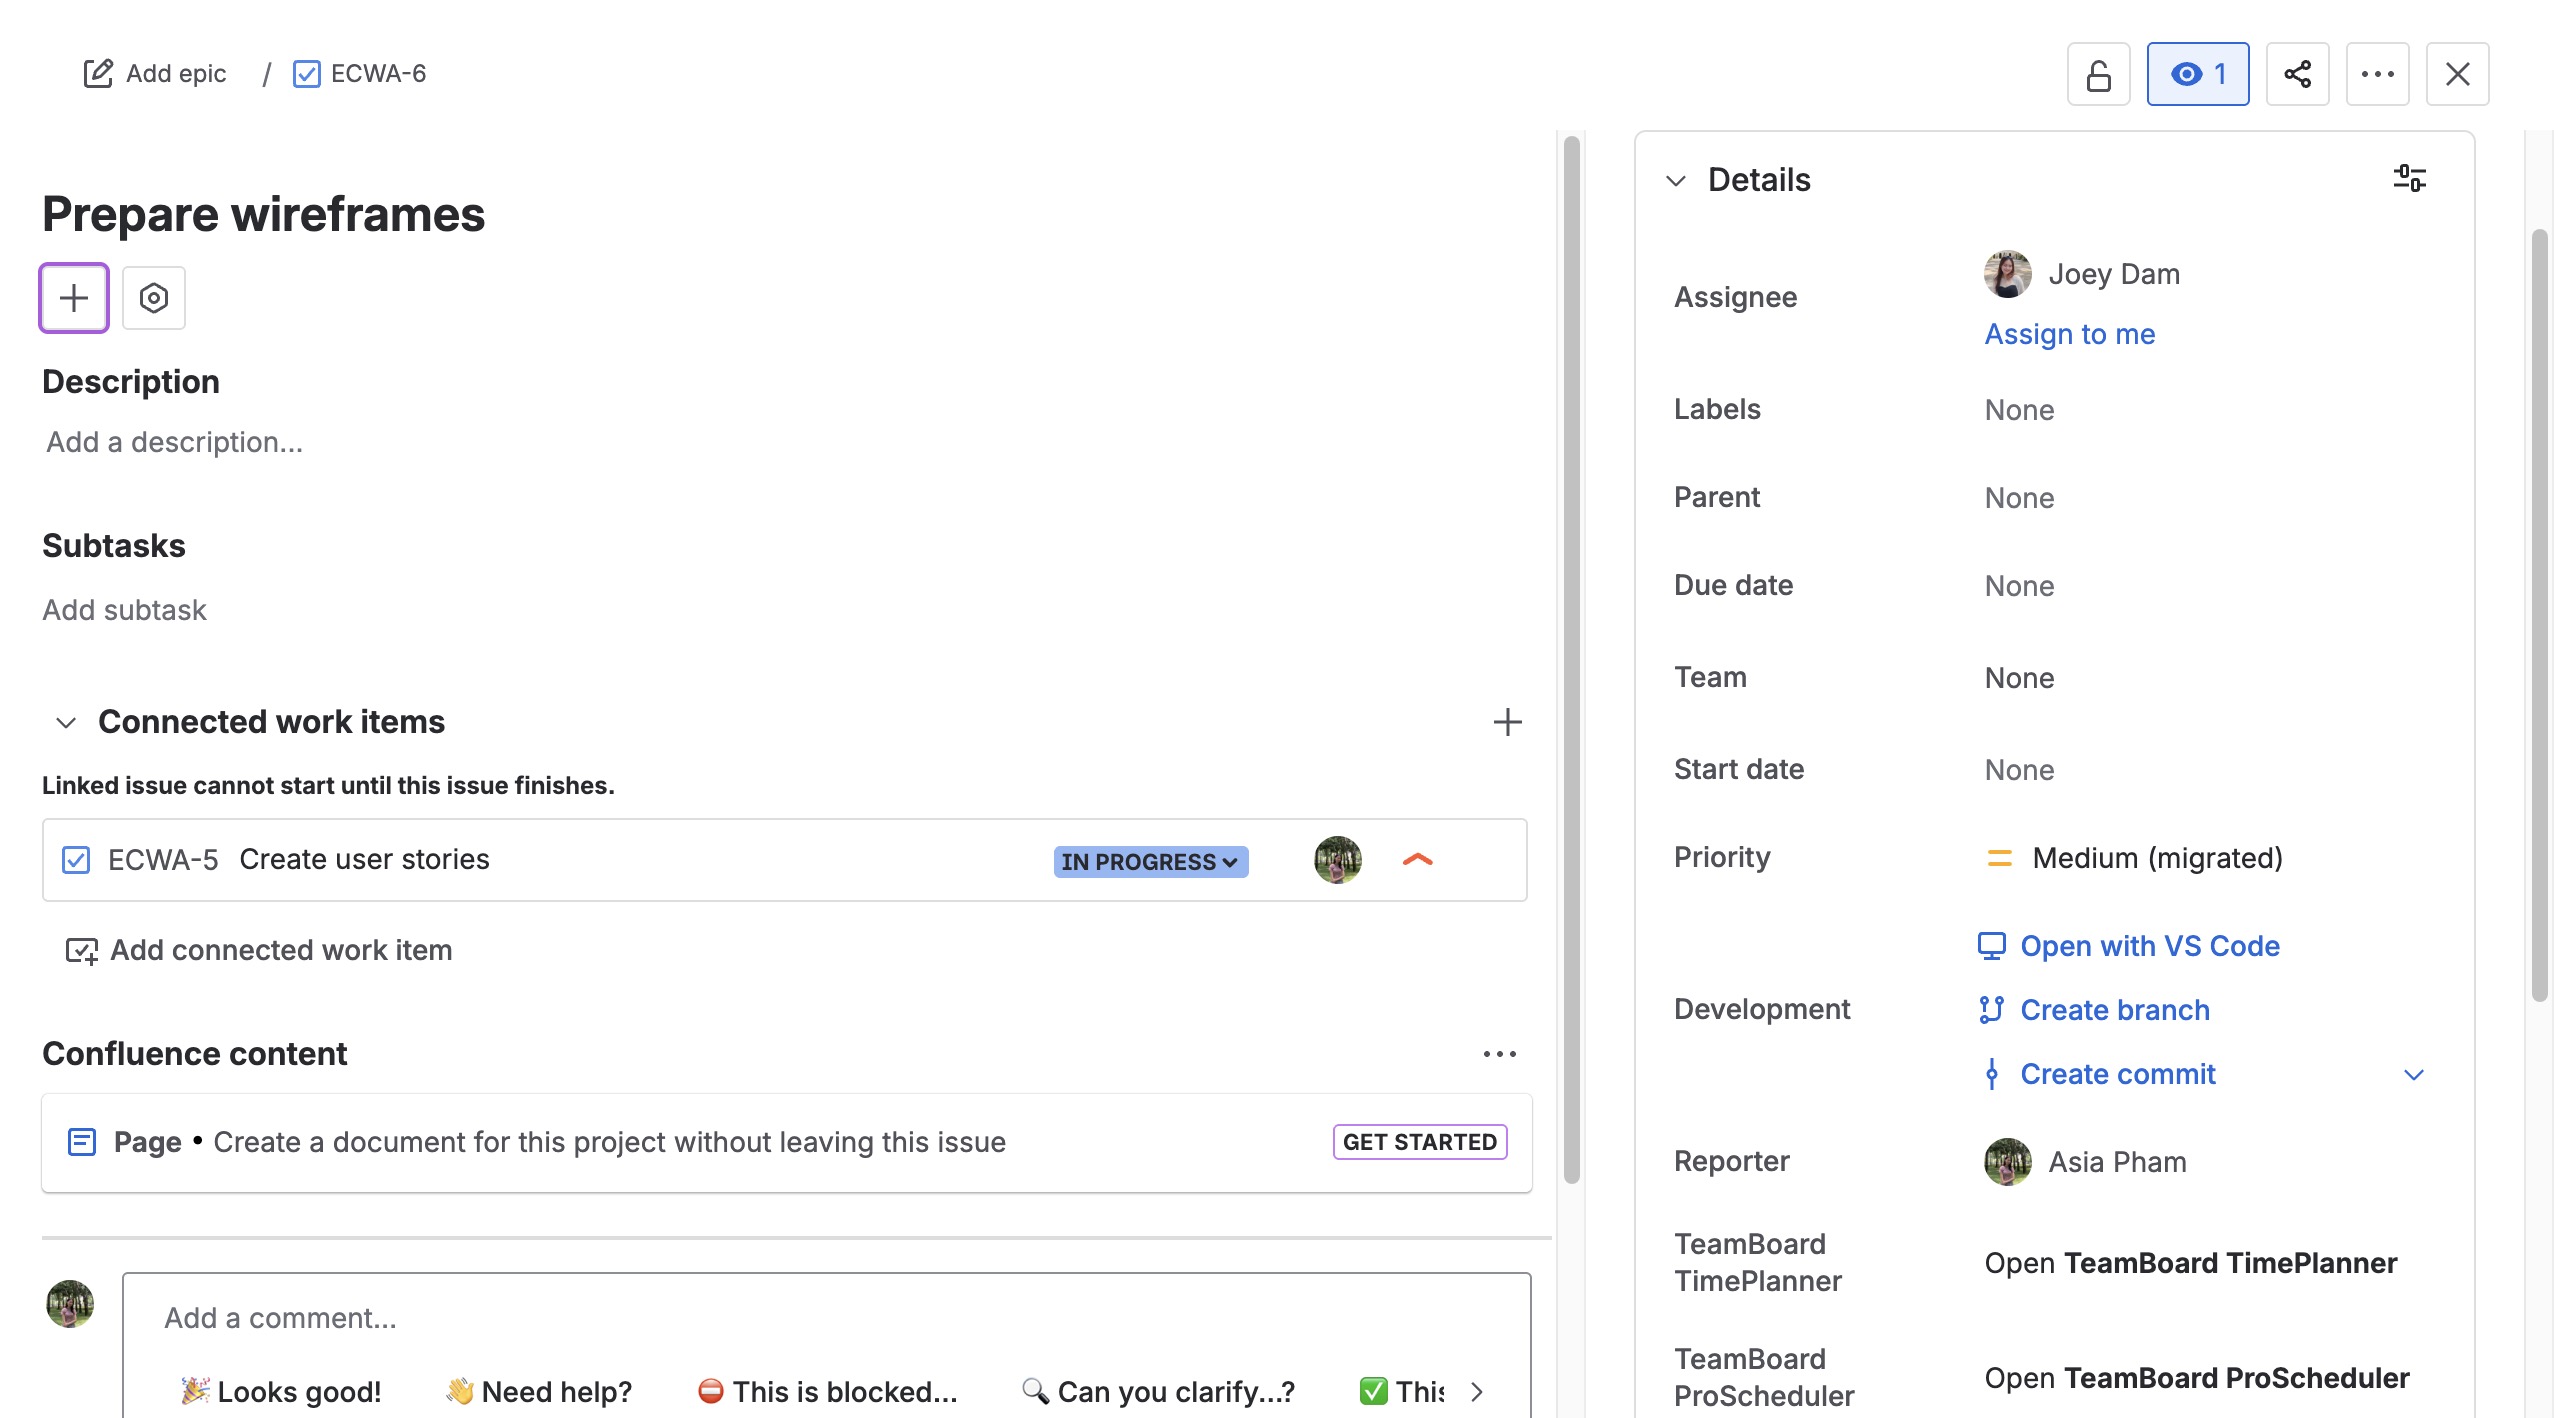
|
→ Modify task details such as dates, assignees, and hours. |
|
|
→ Adjust task details like dates, assignees, and scheduled hours. |
|
|
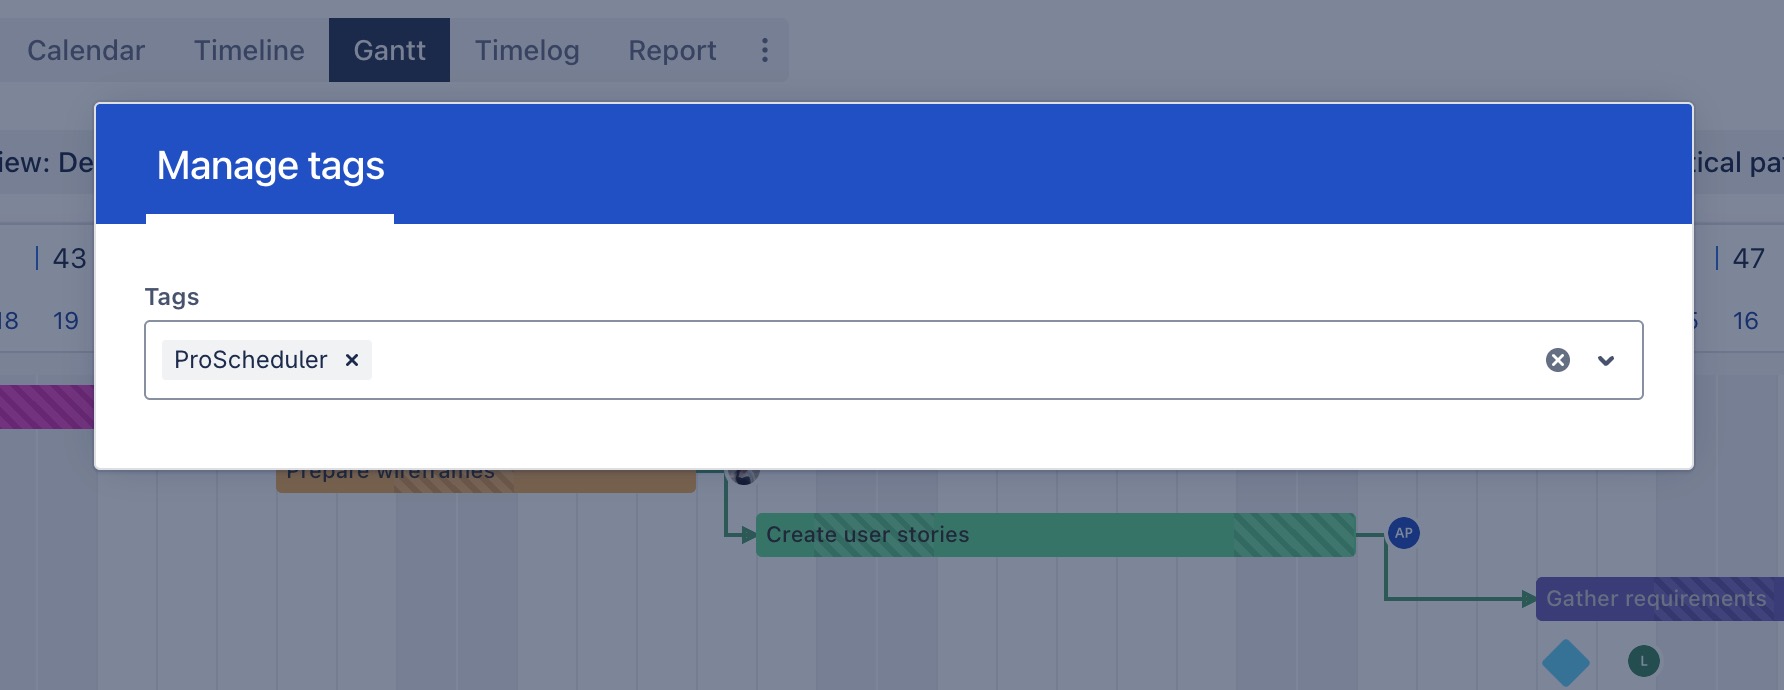
→ Add or remove tags to categorize and filter tasks on the Gantt Board.
|
|
|
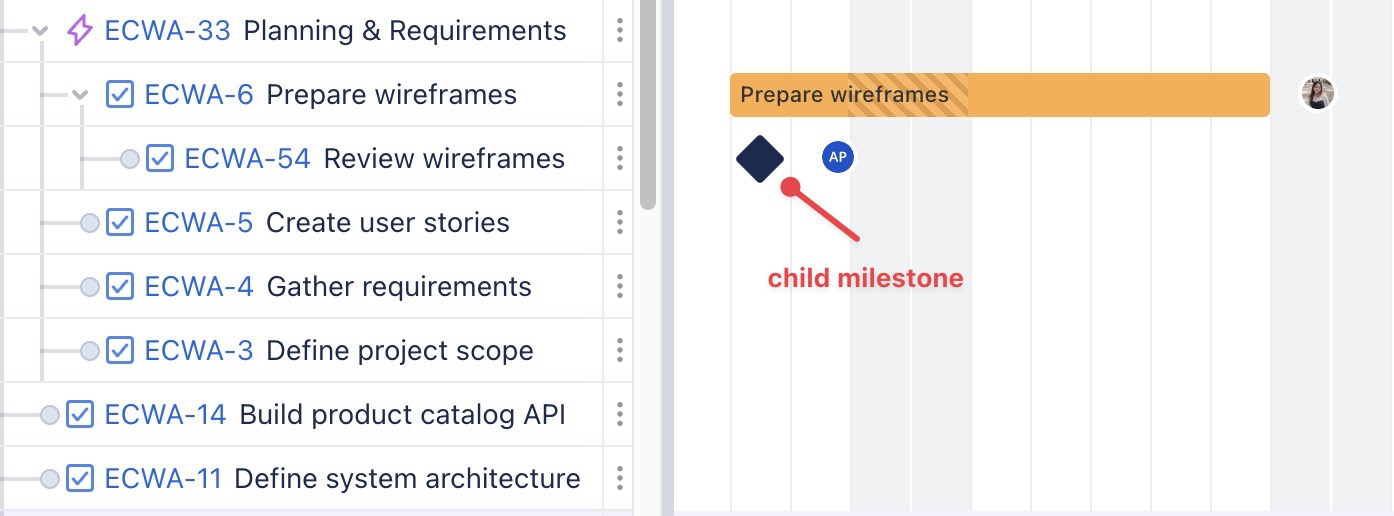
→ Mark the task as a milestone, which will be displayed as a diamond shape on the timeline. |
|
|
→ Update the task status ( To Do In Progress Done ). |
|
|
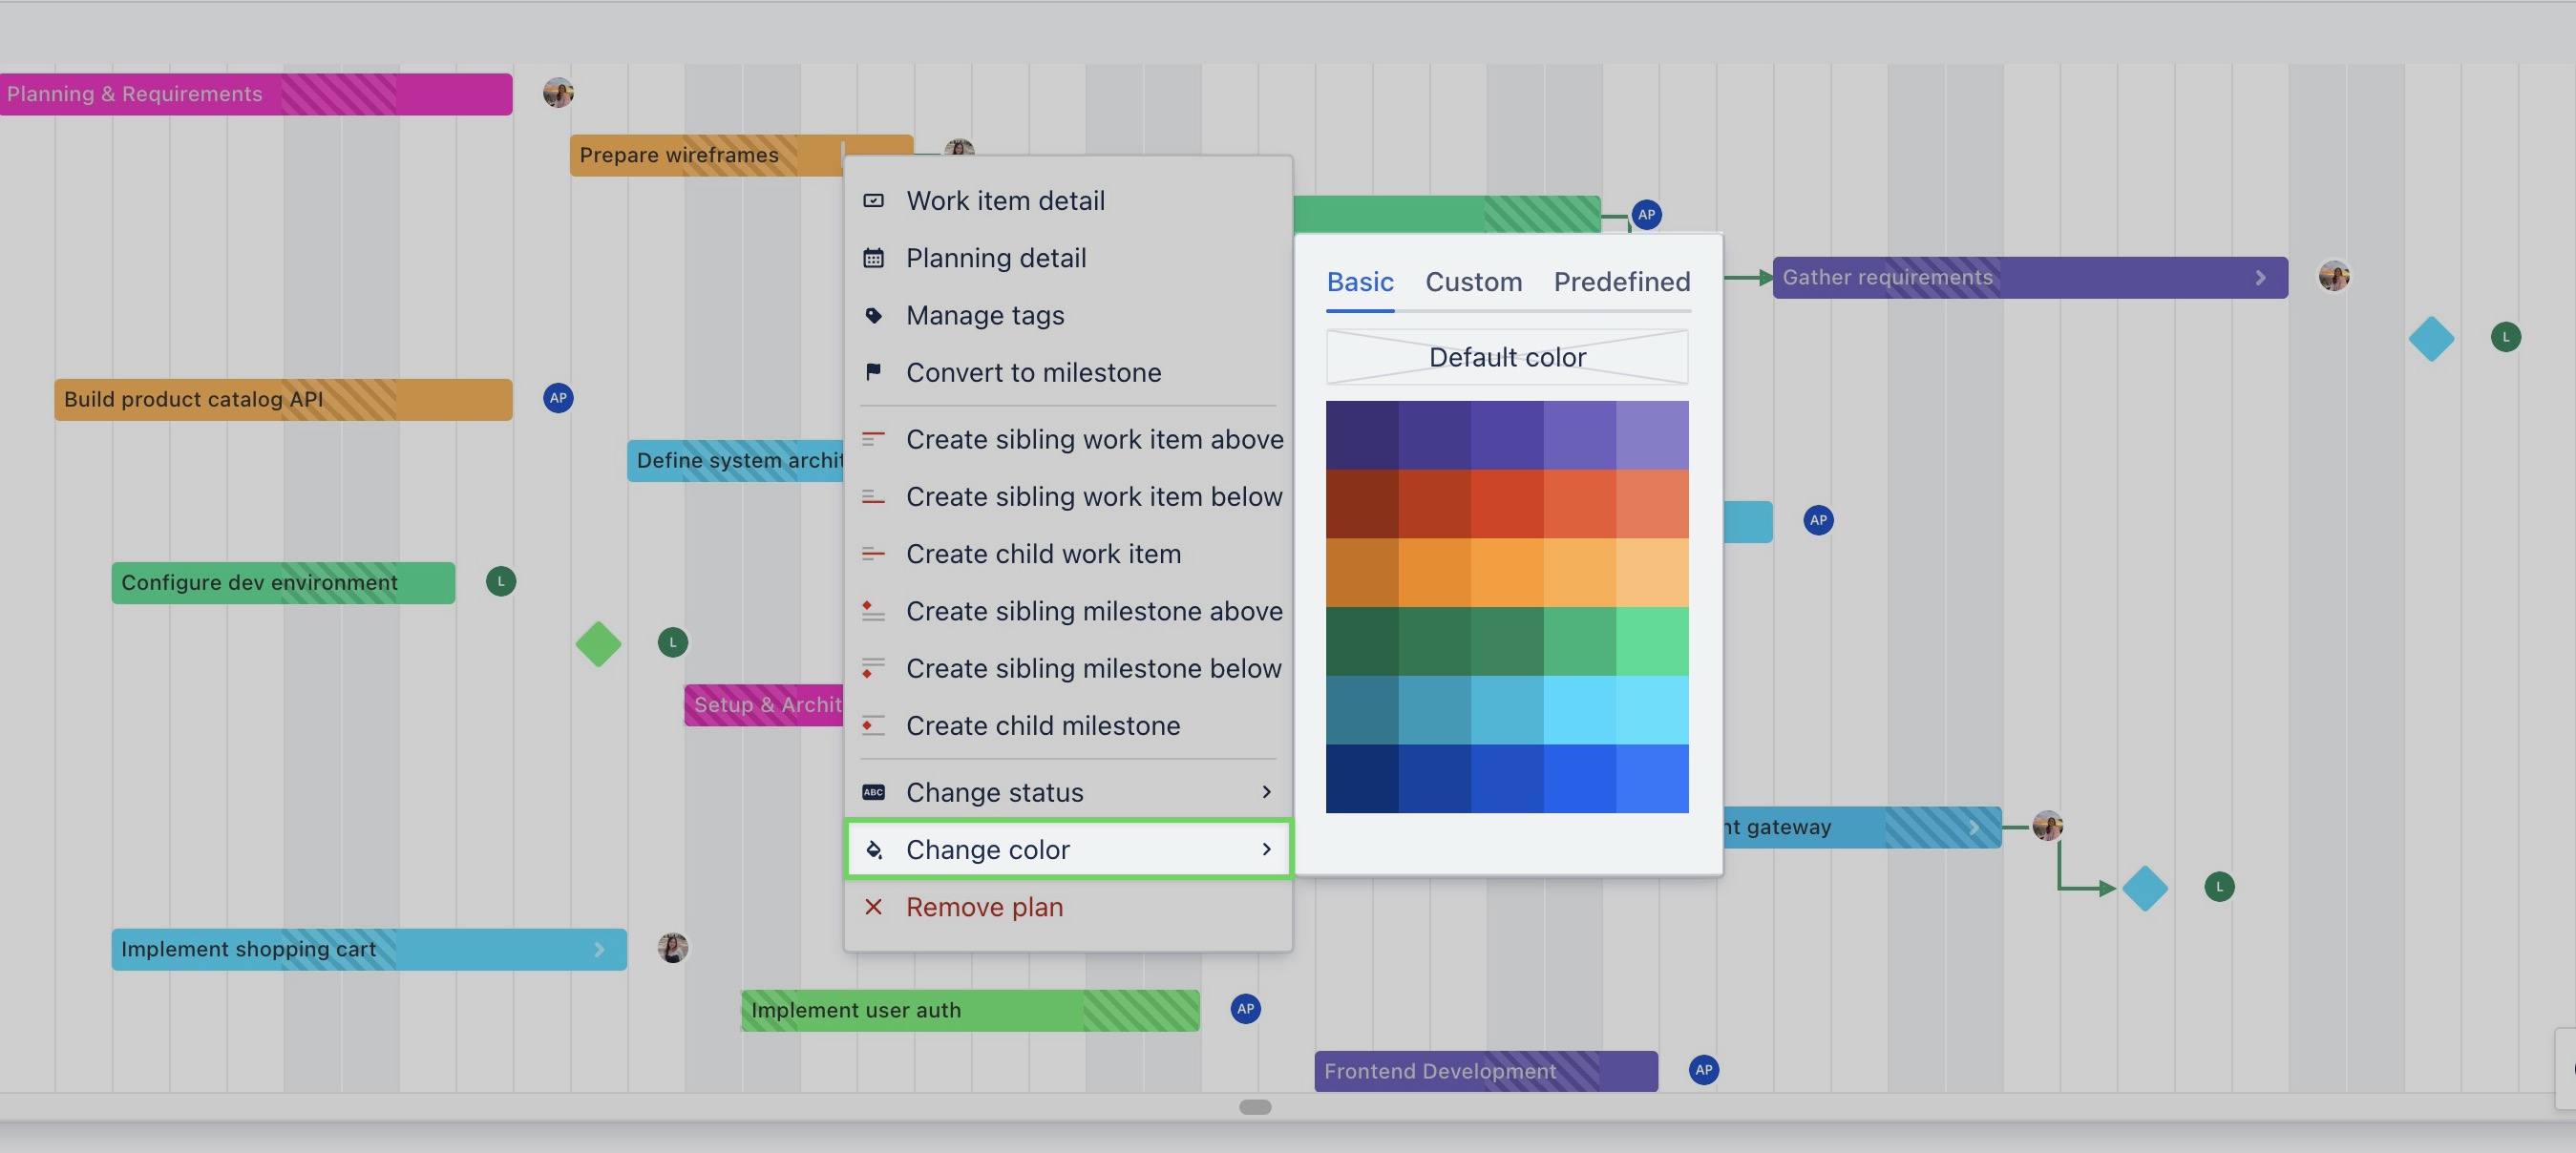
→ Pick a different color to help visually organize or highlight the task bar on the board. |
|
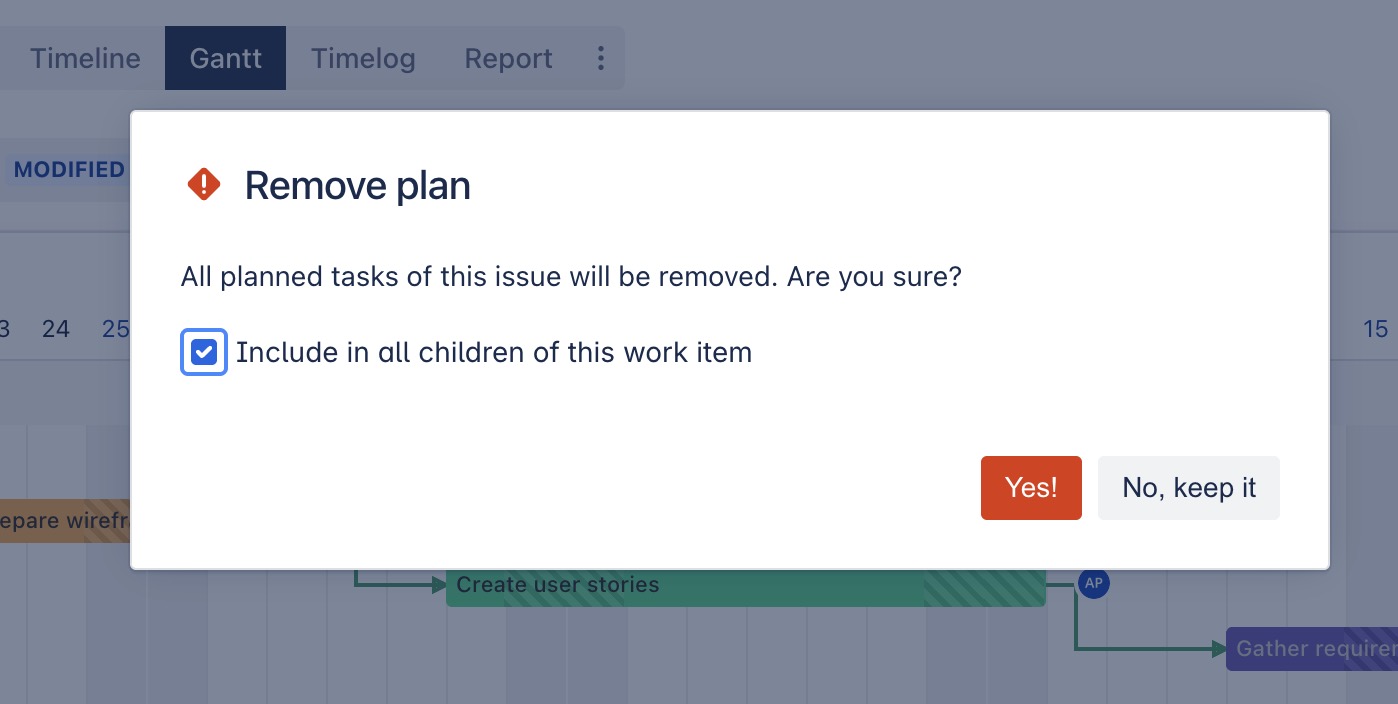
|
→ Remove the task from the board. |
|

Creating sibling tasks
This feature is only available in the Gantt Board. In ProScheduler, the default hierarchy in the Gantt view uses Work Breakdown Structure (WBS). This hierarchy is managed within the app and does not affect the work item structure in Jira.
Note: Creating sibling tasks is not supported when the board is grouped, filtered, or sorted. Please reset the view to its default state before using this action.
A sibling task is a task that shares the same parent as another task in a hierarchy. In other words, sibling tasks exist at the same level within a project structure.
On the Gantt Board, you can create a sibling task in two ways:
Via the Work Item Table
Steps:
-
From the table, locate the ➕ Create button in the bottom row.
-
Click it to open the creation options.
-
Select the work type (e.g., Epic, Task, Story, Bug).
-
Type the task name, then press Enter to add the sibling task.
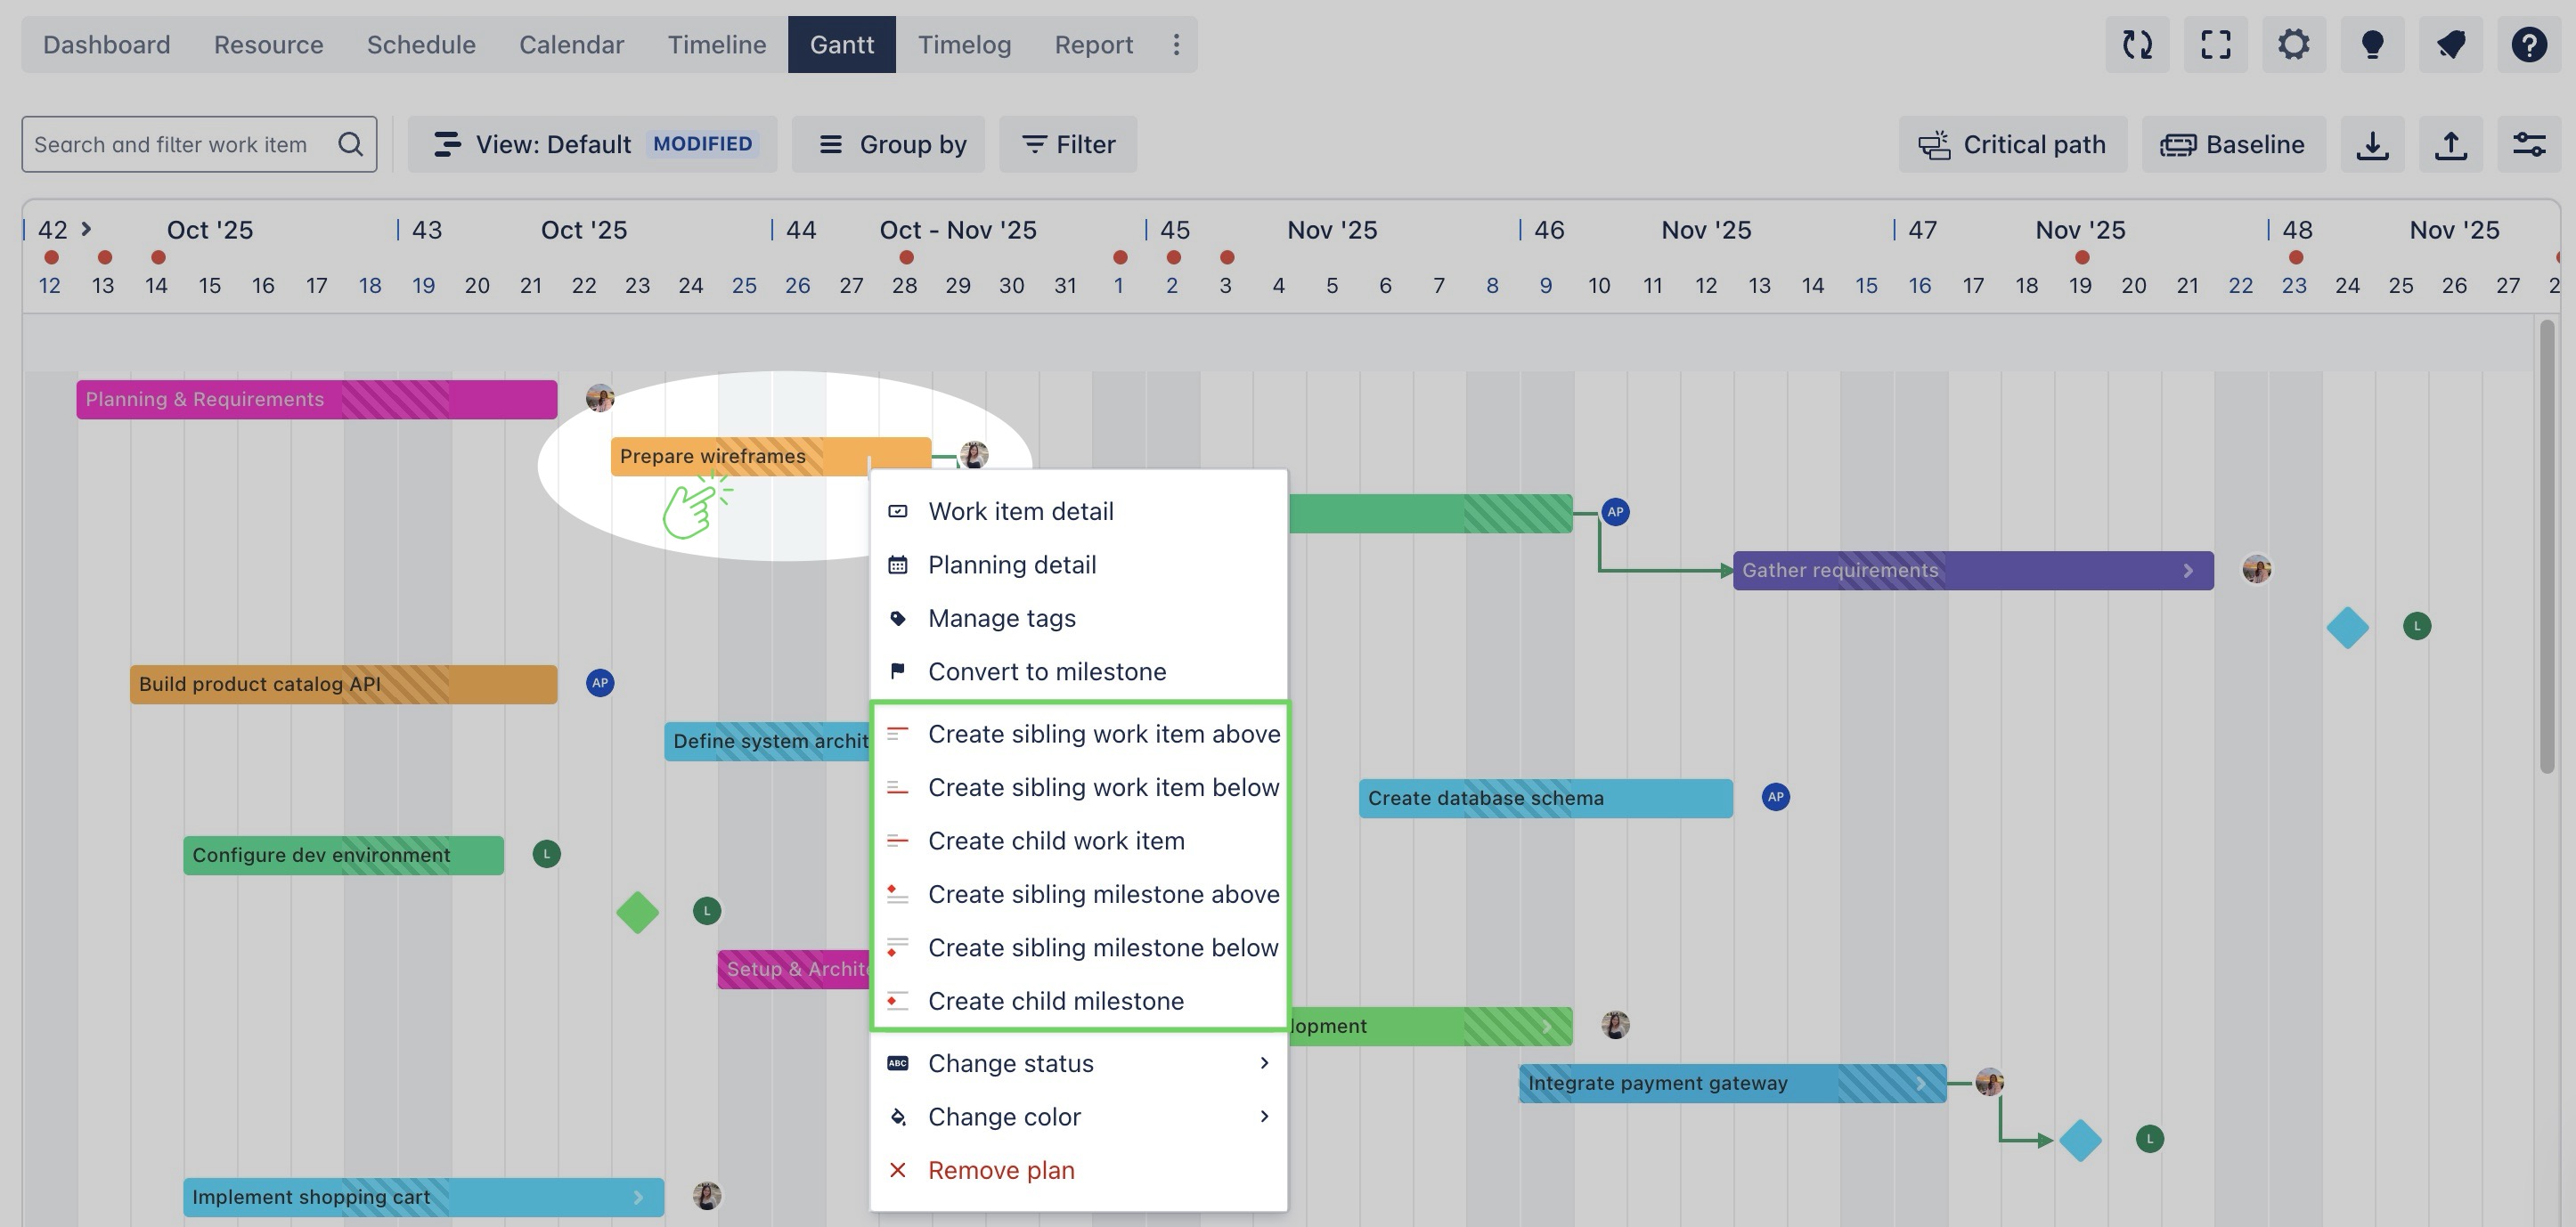
Via the Context menu
-
From the Gantt Board, right-click on a task or milestone to open the context menu.
-
Choose from the following options:
|
Actions |
How it works |
|---|---|
|
Create sibling work item above: Adds a new work item at the same hierarchy level as the selected work item, placed above it. |
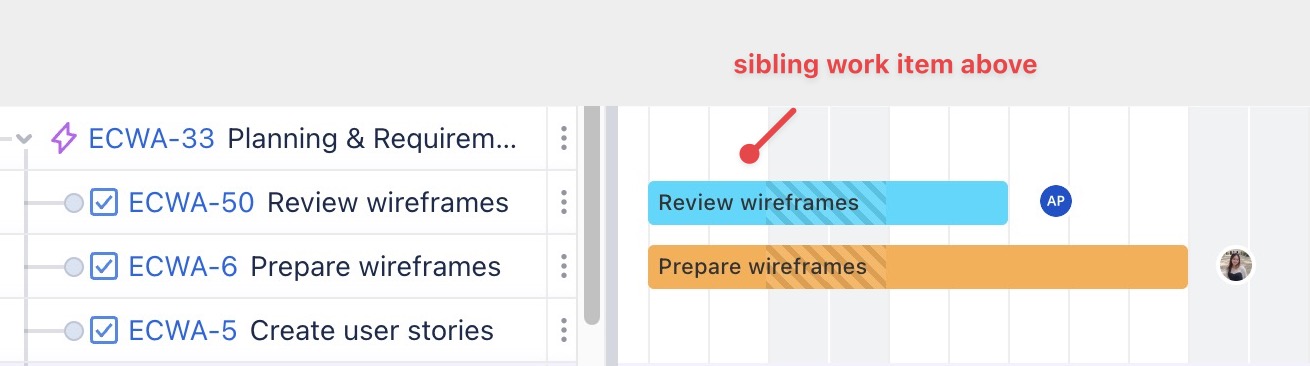
|
|
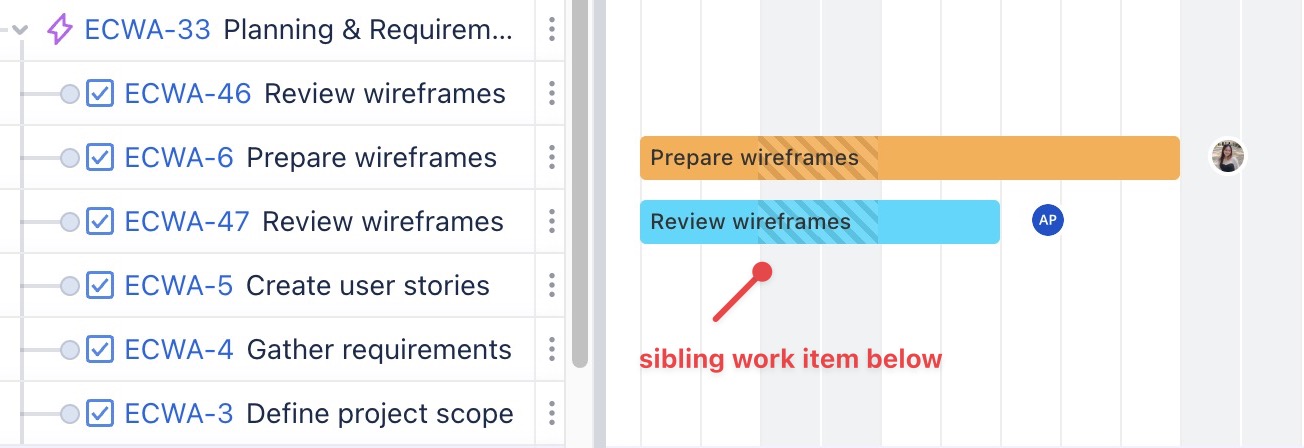
Create sibling work item below: Adds a new work item at the same hierarchy level as the selected work item, placed below it. |
|
|
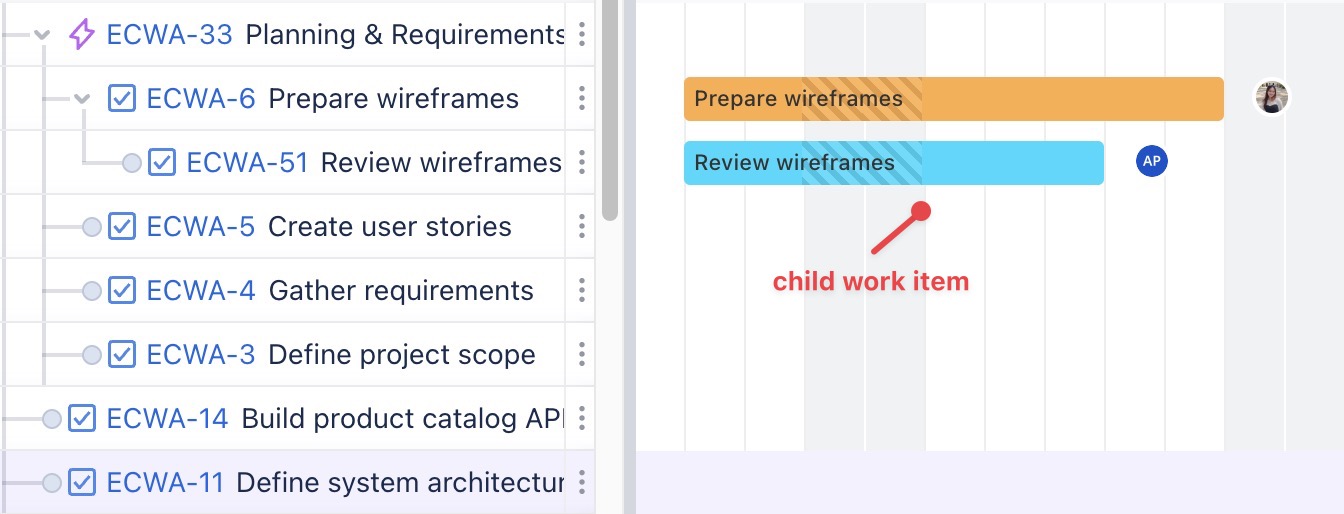
Create child work item: Adds a new work item as a child under the selected work item. |
|
|
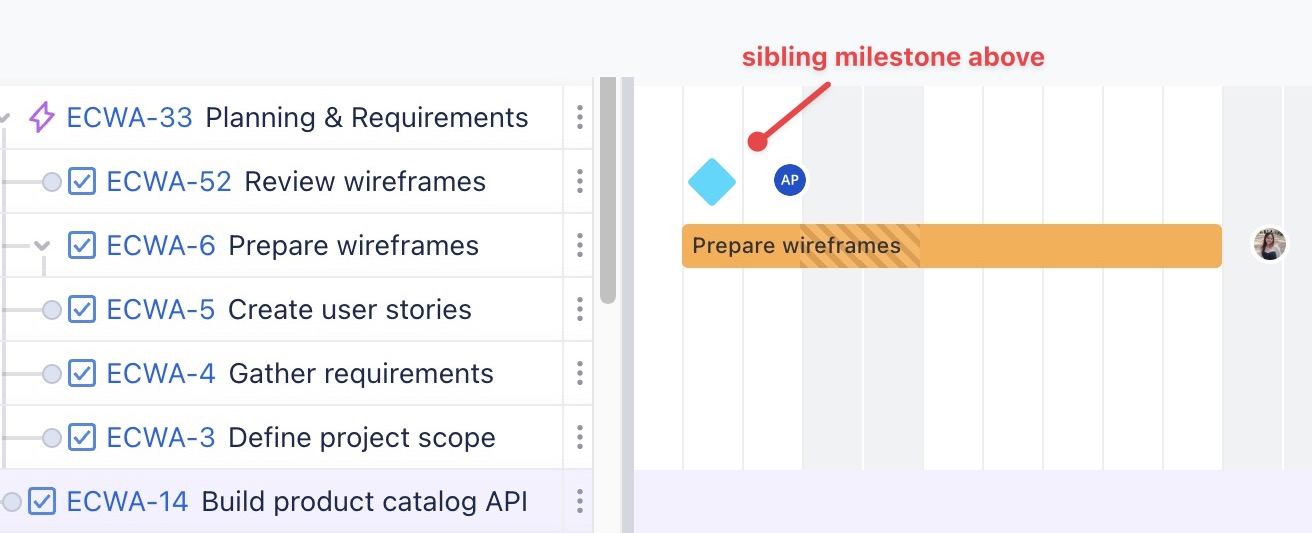
Create sibling milestone above: Adds a milestone at the same hierarchy level as the selected task, placed above it. |
|
|
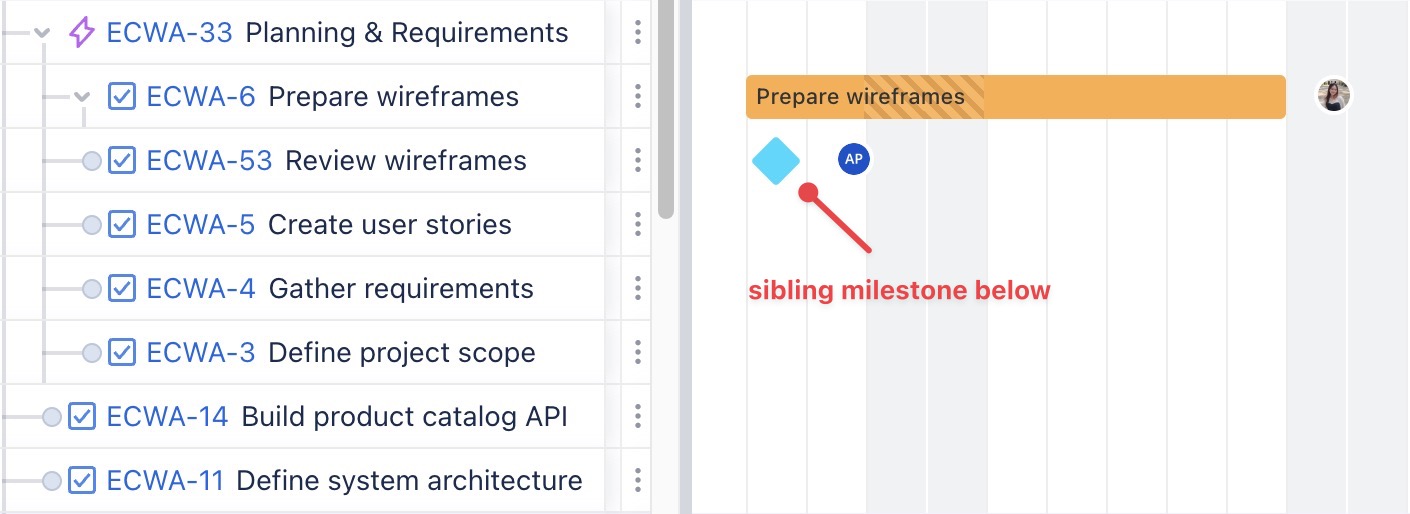
Create sibling milestone below: Adds a milestone at the same hierarchy level as the selected task, placed below it. |
|
|
Create child milestone: Adds a milestone as a child under the selected task. |
|
Performing bulk tasks
Bulk editing does not apply to Recurring Tasks or Jira Field Mapping projects.
Improve task management by selecting multiple tasks and applying changes simultaneously:
To select multiple tasks:
-
Check the box next to each task in the task table.
-
Once selected, a bulk action toolbar will appear on the board (this toolbar can be moved to different positions for flexibility).
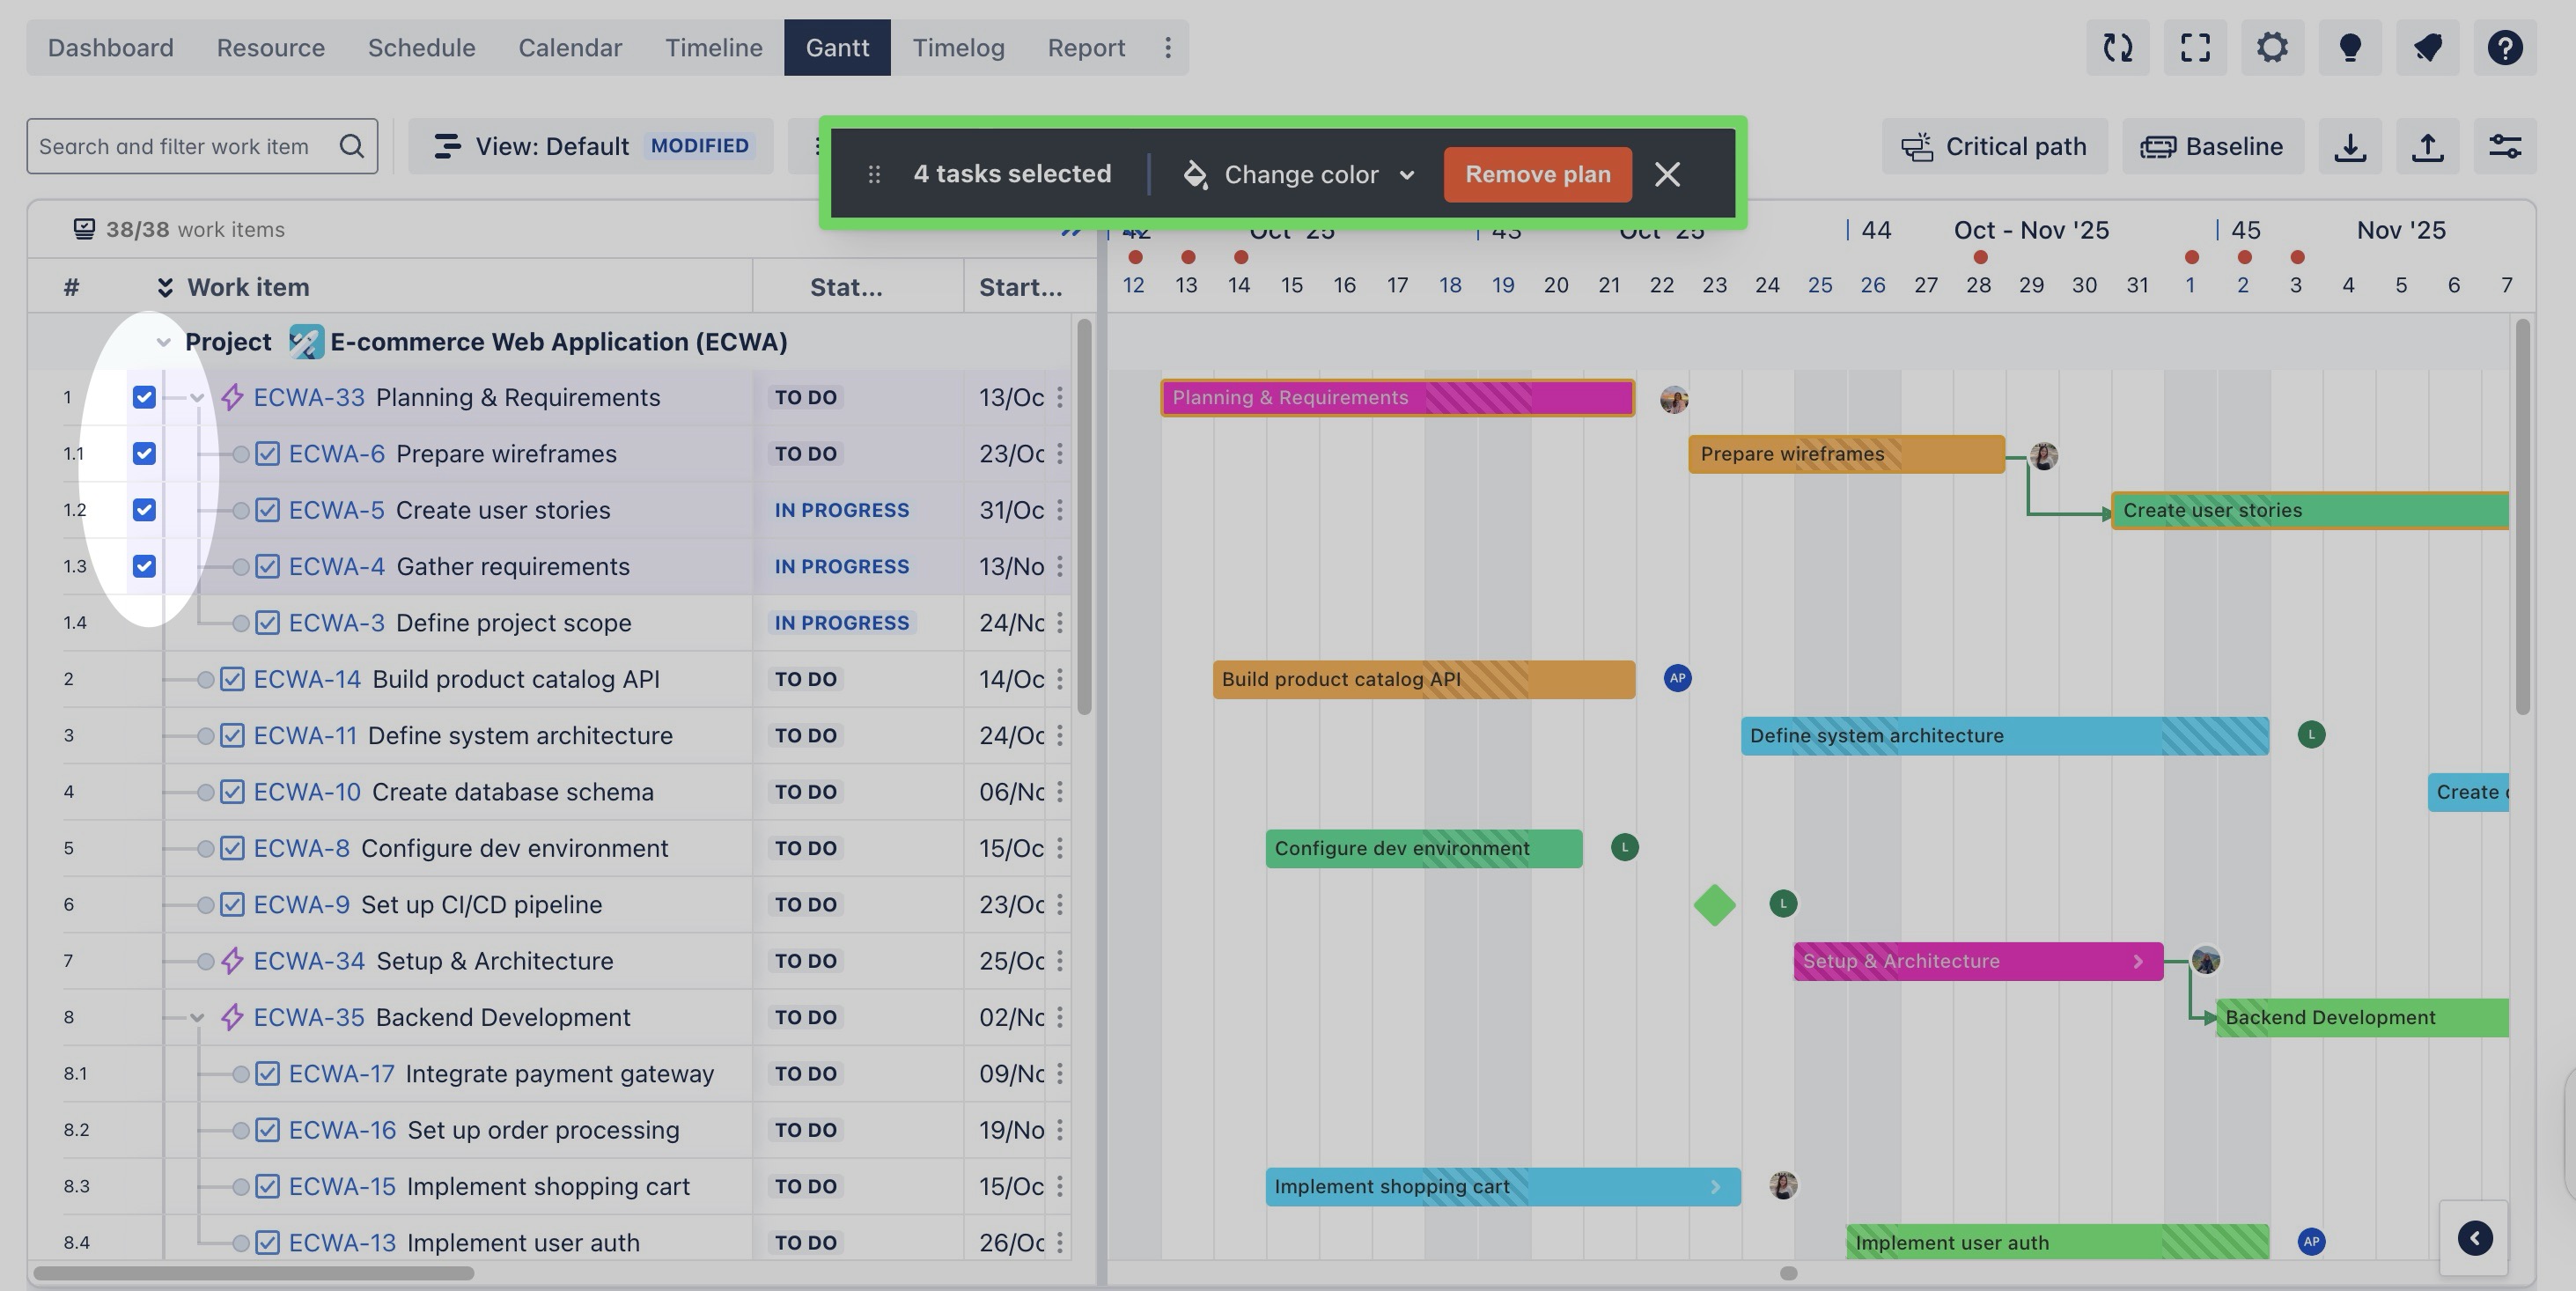
From the bulk action toolbar, users can:
-
Change color: Adjust the task color for better visual organization.
-
Unplan tasks: Remove tasks from the board.