Planning time off
In TeamBoard ProScheduler, the "Time Off" feature allows users to schedule and manage periods when team members are unavailable for work due to reasons like vacations, personal leave, or other absences. This helps in accurately planning resources and managing team capacity, as unavailable time is automatically reflected in the schedule, workload planner, and timesheets.
To allow members to create, edit their Time Off, go to ⚙️ Settings >  General > enable this option > Click
 ![]() .
.
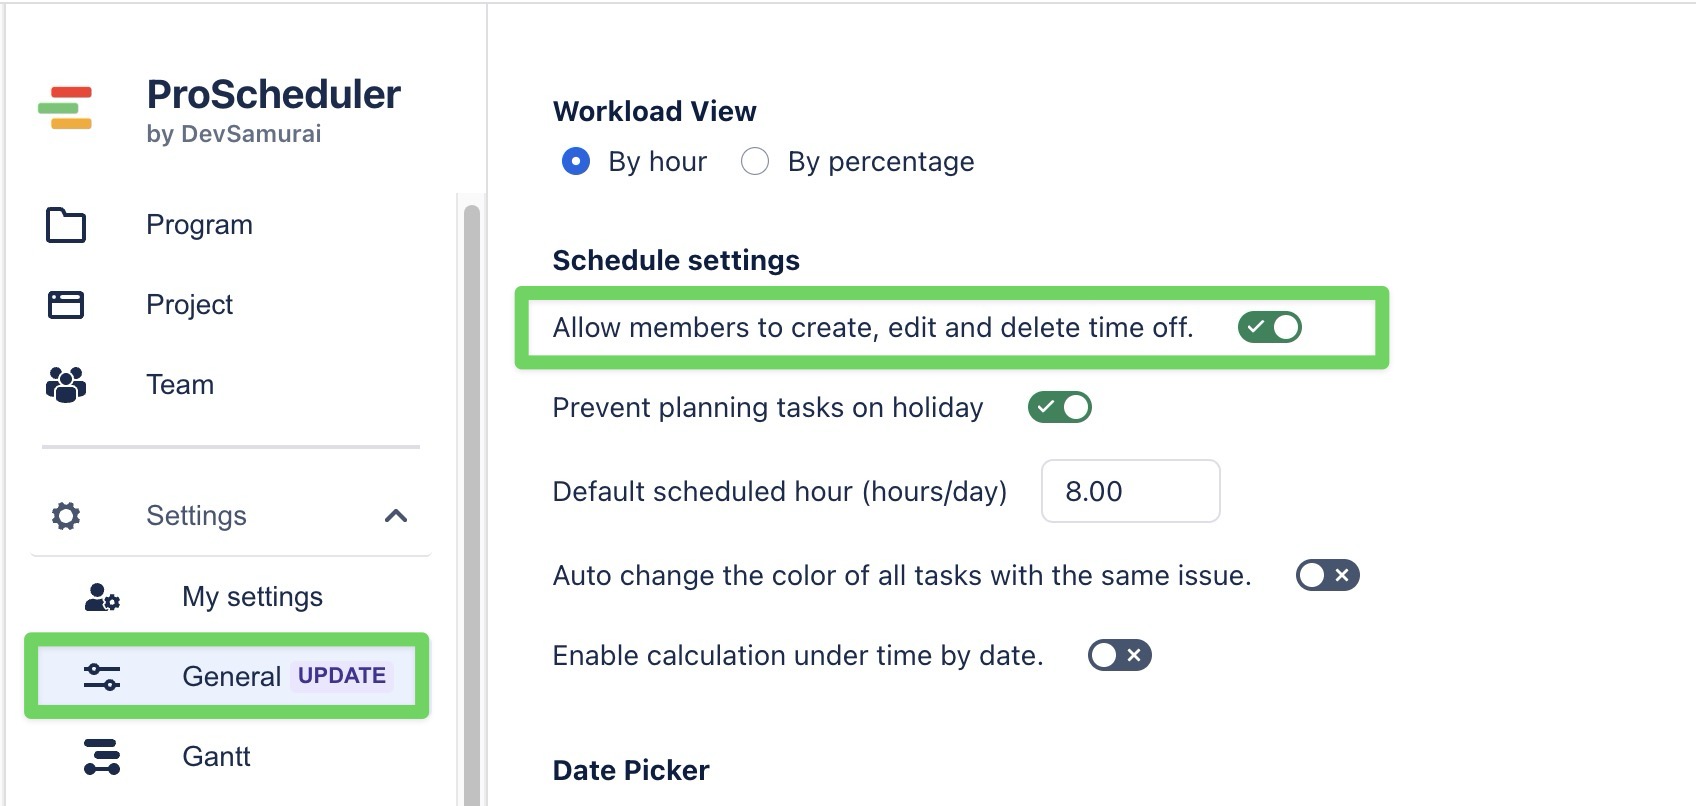
Only Jira admins and App admins can set up permissions.
Creating time off
You can create a time off via the Planning Dialog. Follow these steps:
Open the Planning Dialog
From the Schedule Board, Click
in the top-left corner.

Or, click on a date cell or drag across multiple cells to open the Planning Dialog.
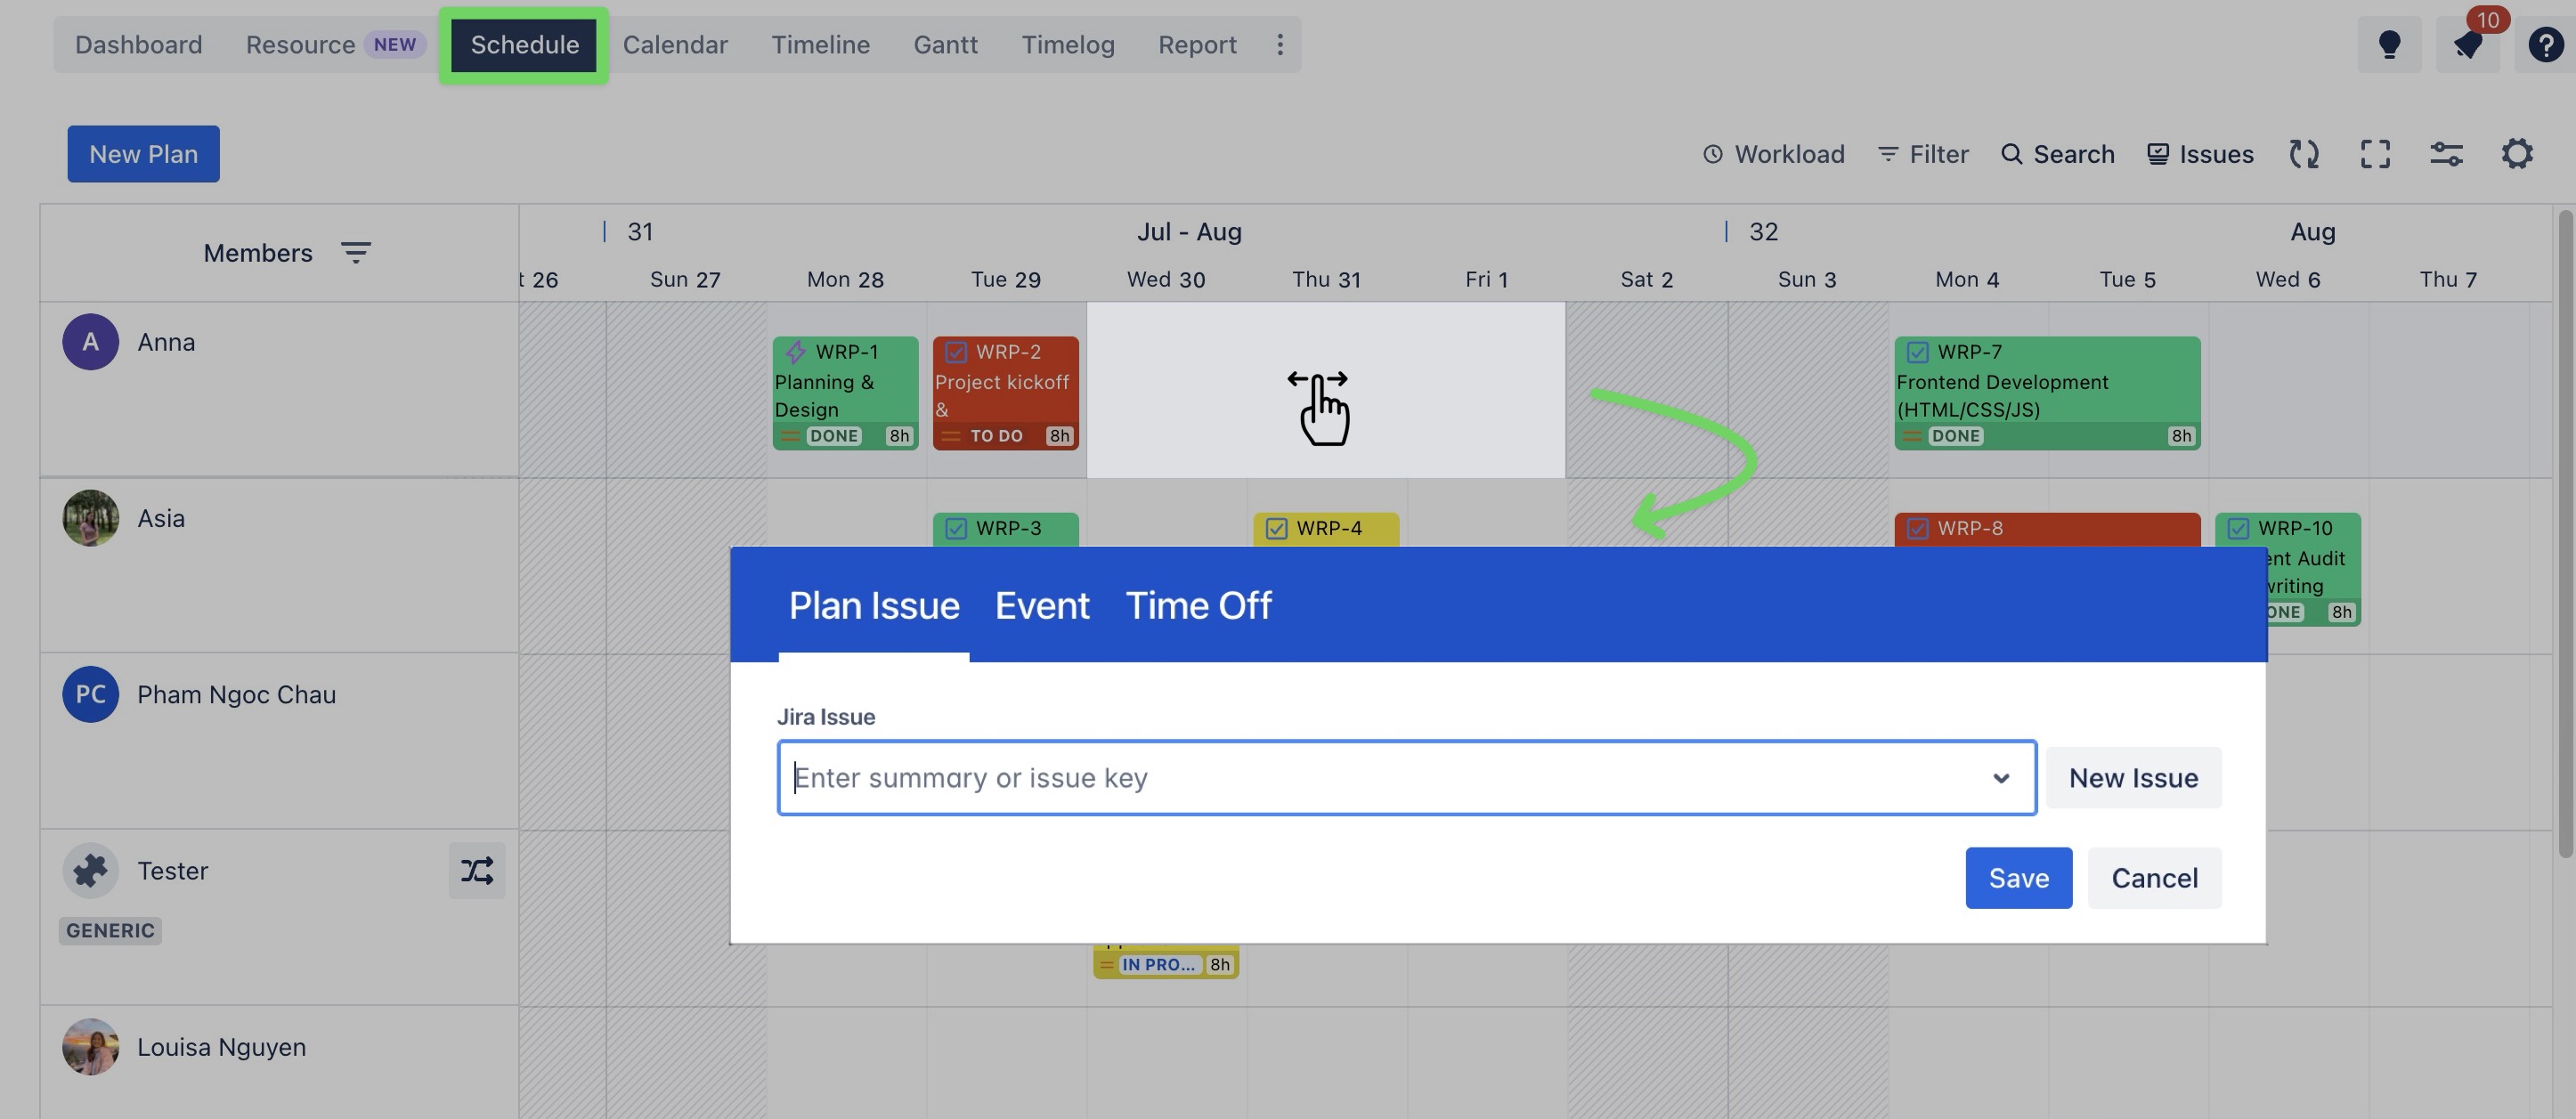
You can also open the Planning Dialog from the Calendar Board.
Within the dialog, select the Time Off tab.
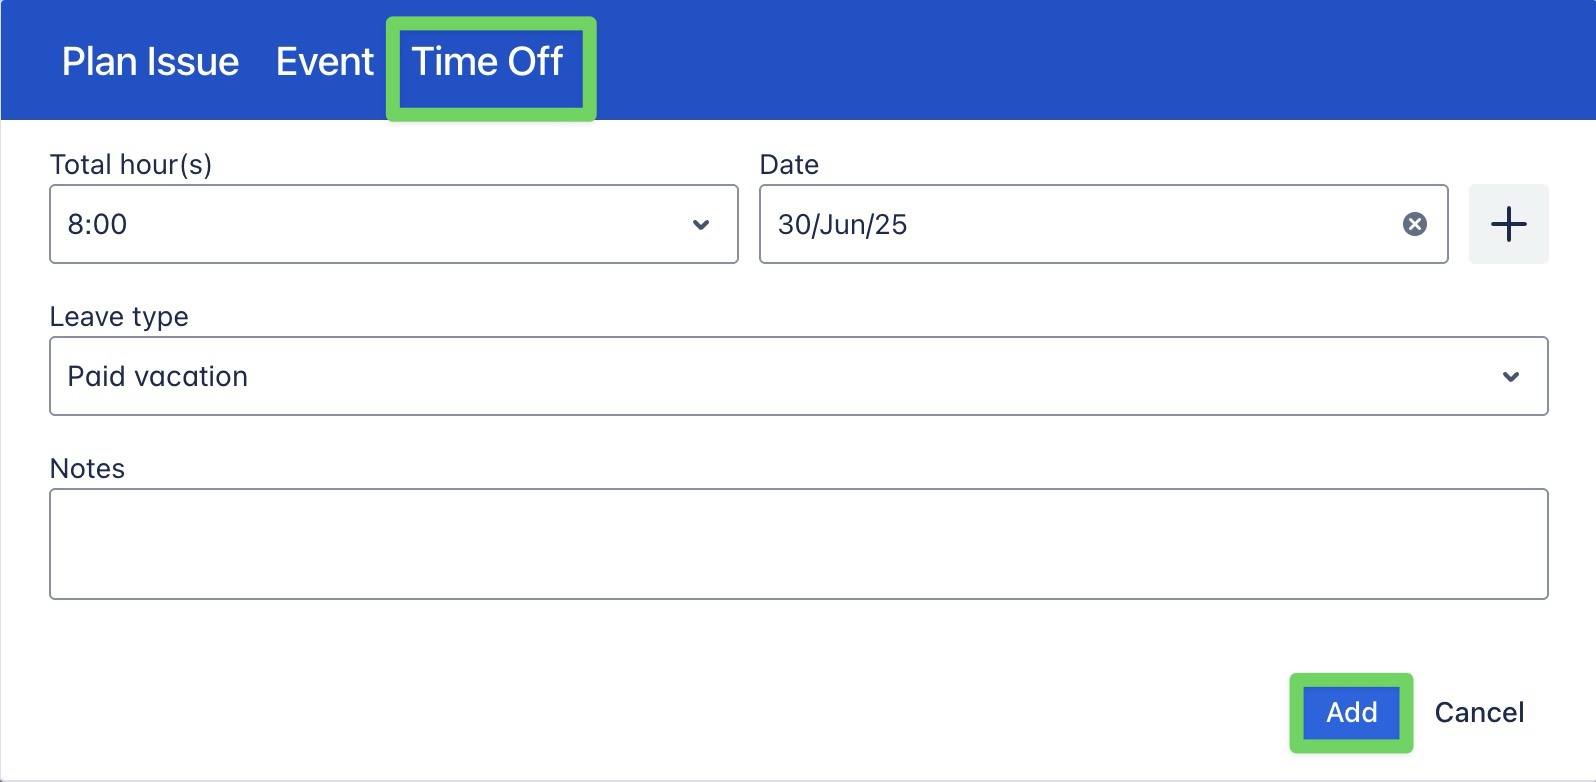
Fill in the following fields:
Total hour(s): Enter how many hours are being taken off (e.g., 8 for full day).
Date: Select the specific date for the time off using the date picker. (Click the
+button to add multiple days if needed)Notes: (Optional) Add comments for context (e.g., “Doctor appointment”).
Leave type: Choose the type of leave from the dropdown menu (e.g., Paid vacation, Sick leave, etc.).
Leave types (e.g., Vacation, Sick Leave, Personal Leave) are predefined in the App settings by an app admin.
Click
 to create the time off, and this will schedule the time off in the Schedule Board.
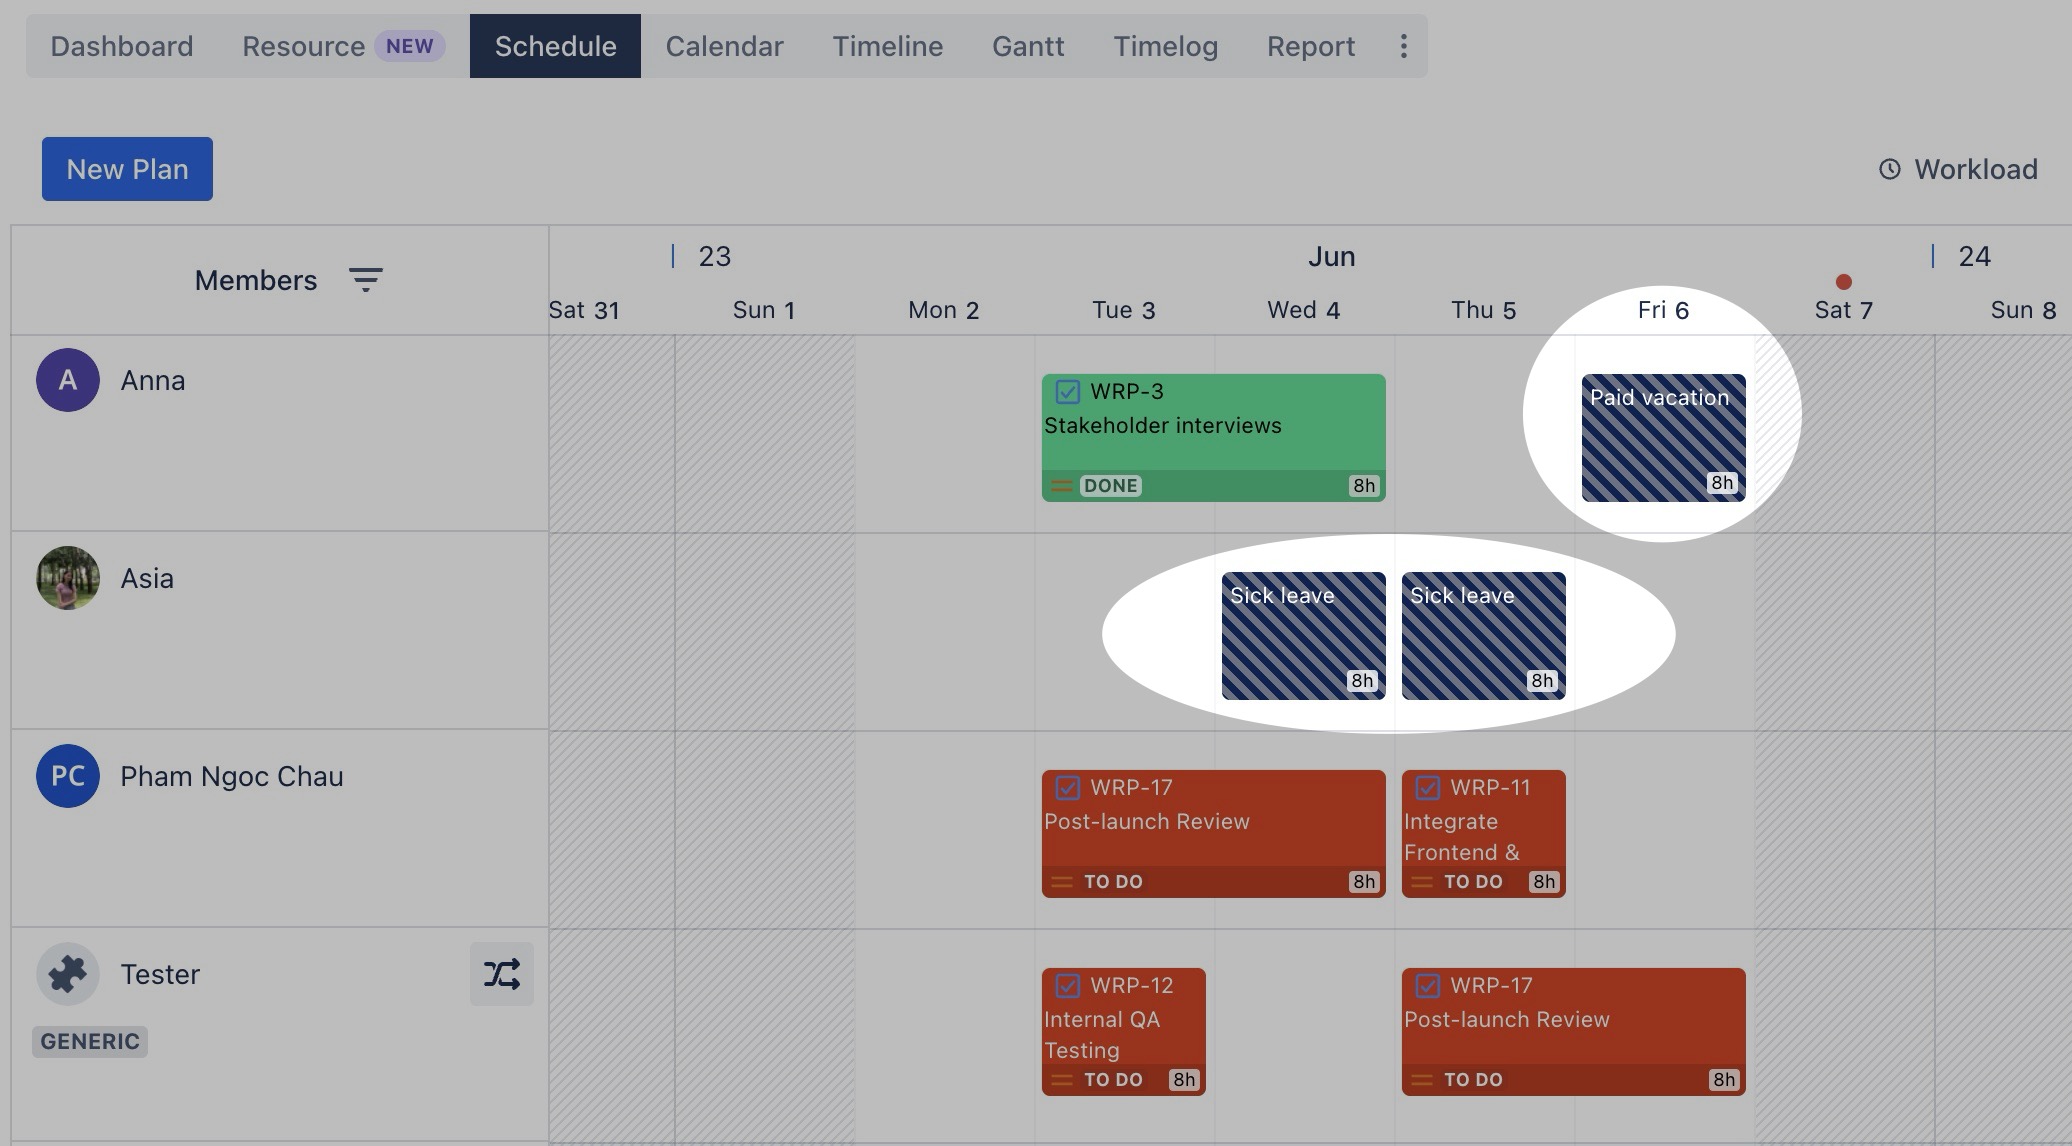
The time off will now appear on your Schedule Board:
Editing or deleting time off
Note: Only creators can edit or delete time off.
To update or delete time off, follow these steps:
Updating the time off
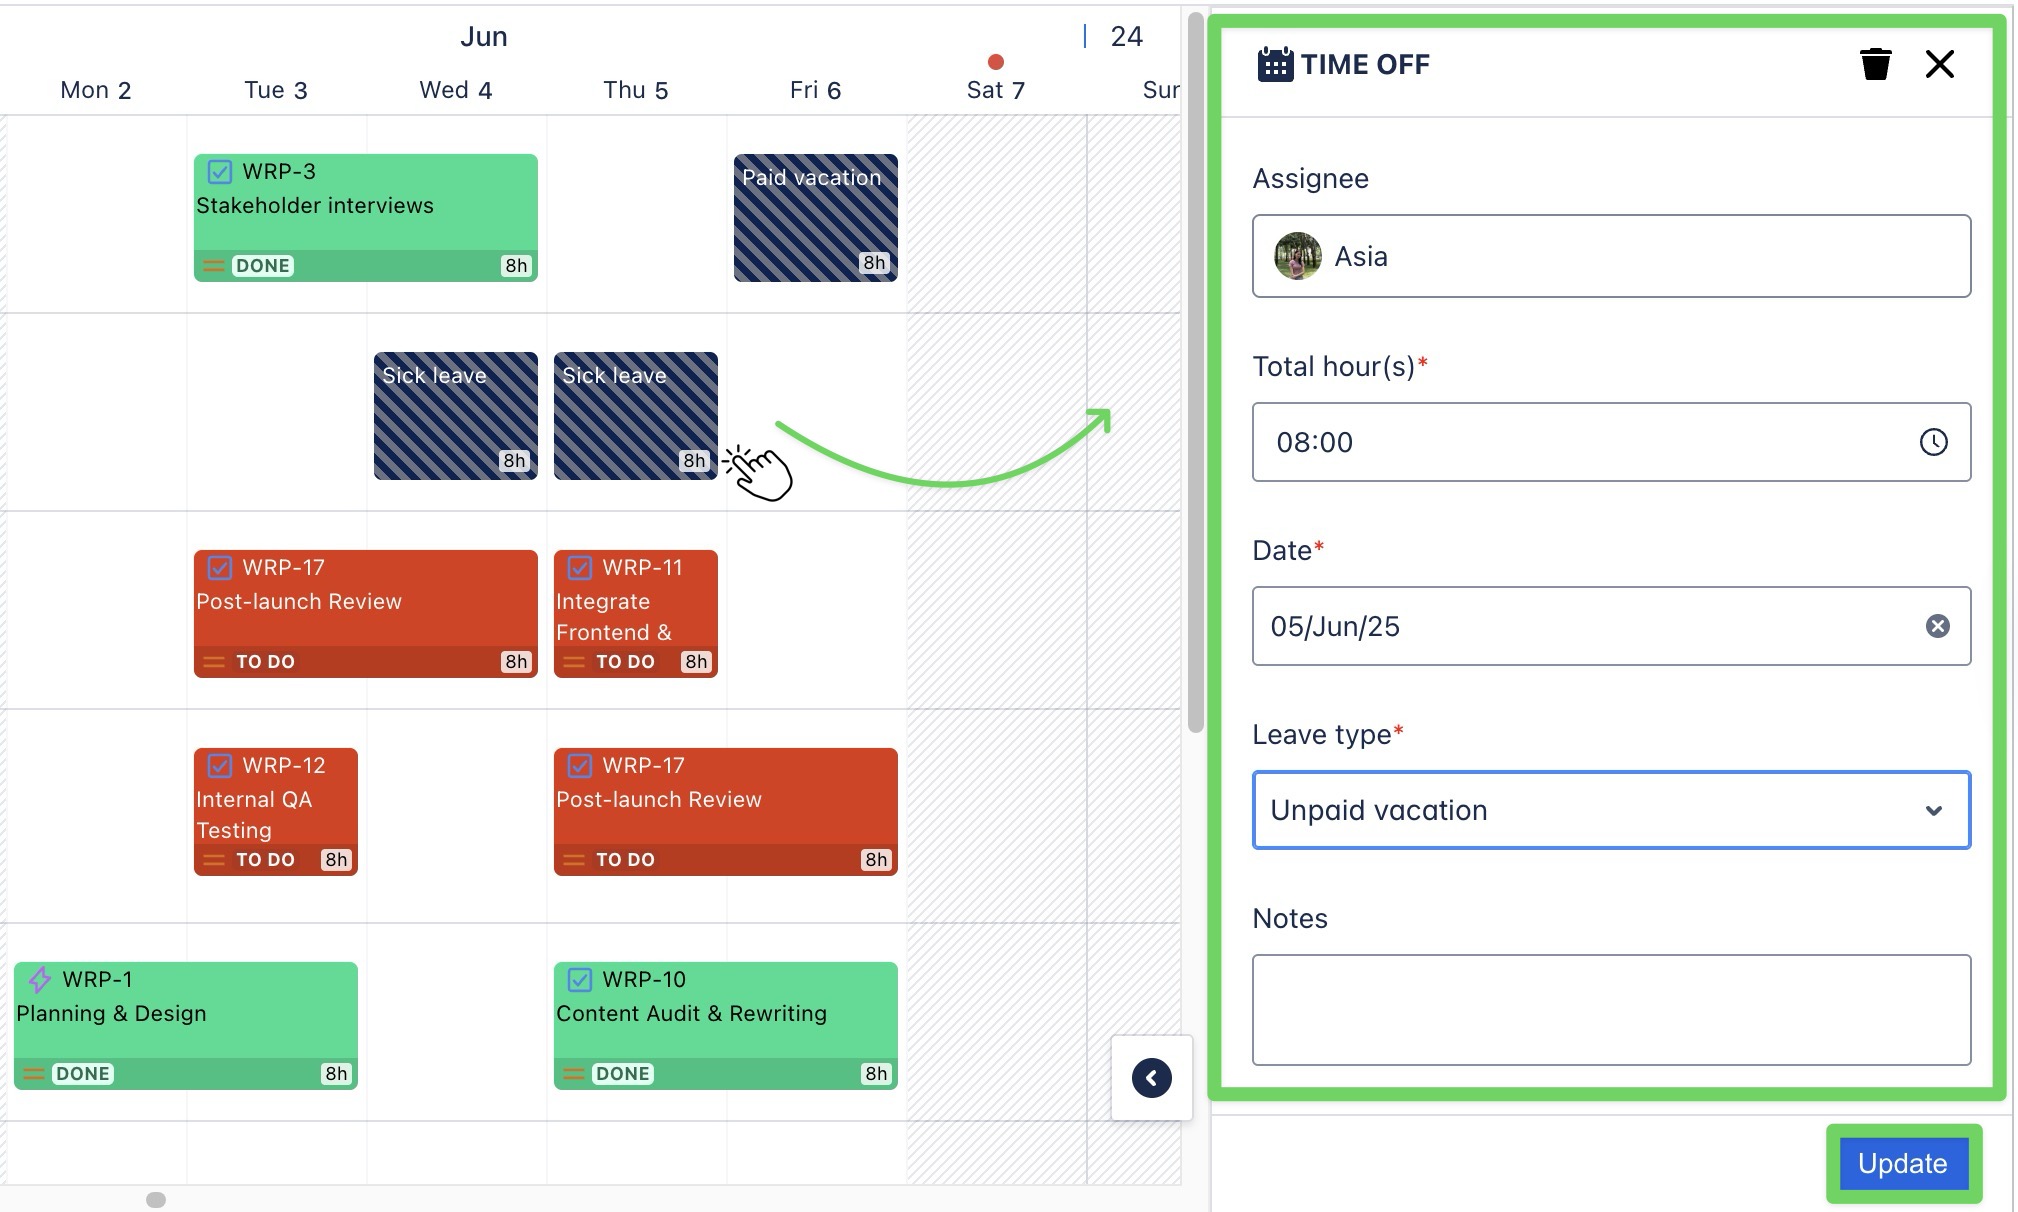
Click the time off entry on the Schedule Board
The Time Off Details panel will appear on the right-hand side.
In the right panel, you can edit the following details: Total hour(s), Date, Leave type, and Notes.
Click
 to save your changes.
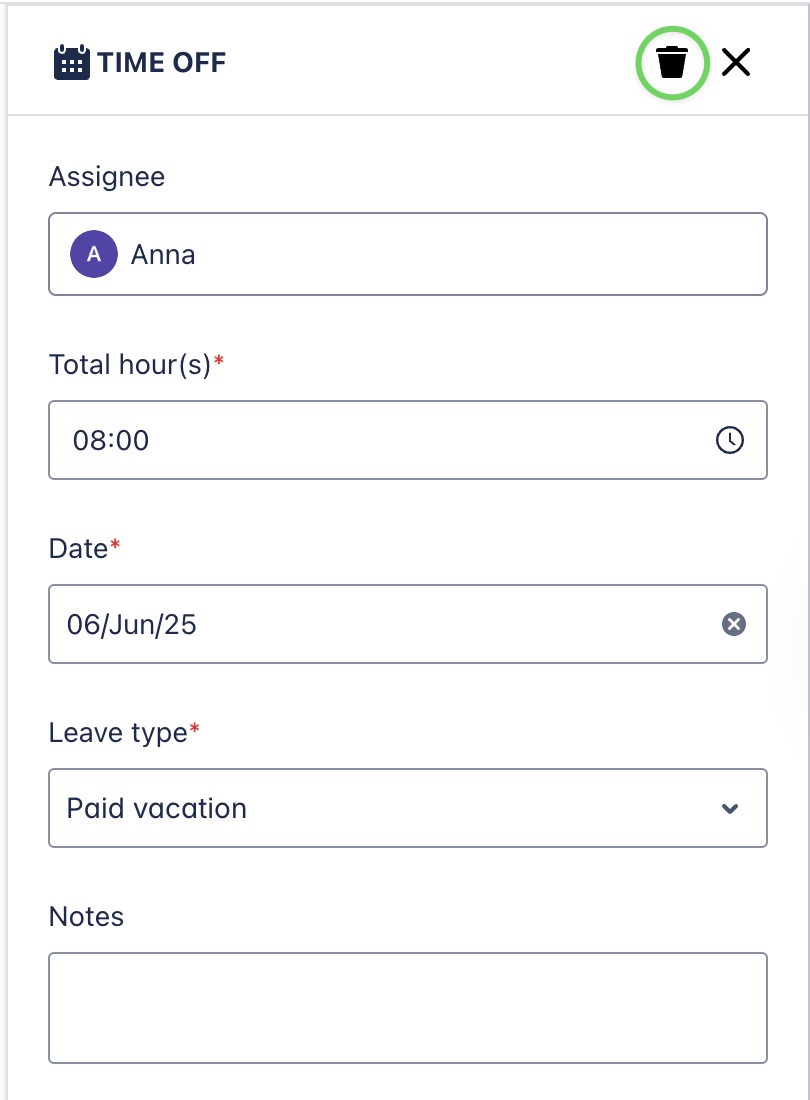
Deleting the time off: Click
 at the top of the Time Off details panel to delete the time off.
You can also edit or delete Time Off directly from the Calendar Board in the same way.
.png)