.png)
Only individual members can log their own time entries. Other members cannot create or update time logs on behalf of others.
What is time logging?
Time logging refers to the process of recording the time spent on various tasks or activities within a project. In ProScheduler, this feature allows users to track and record the time spent on specific tasks, helping project managers optimize workflow and ensure efficient use of resources.
Timelog Board in ProScheduler
The Timelog Board provides a calendar-style interface to visually track and manage time spent on tasks. Users can log time for scheduled and unscheduled tasks, as well as manage time off.
Timelog Board Components
-
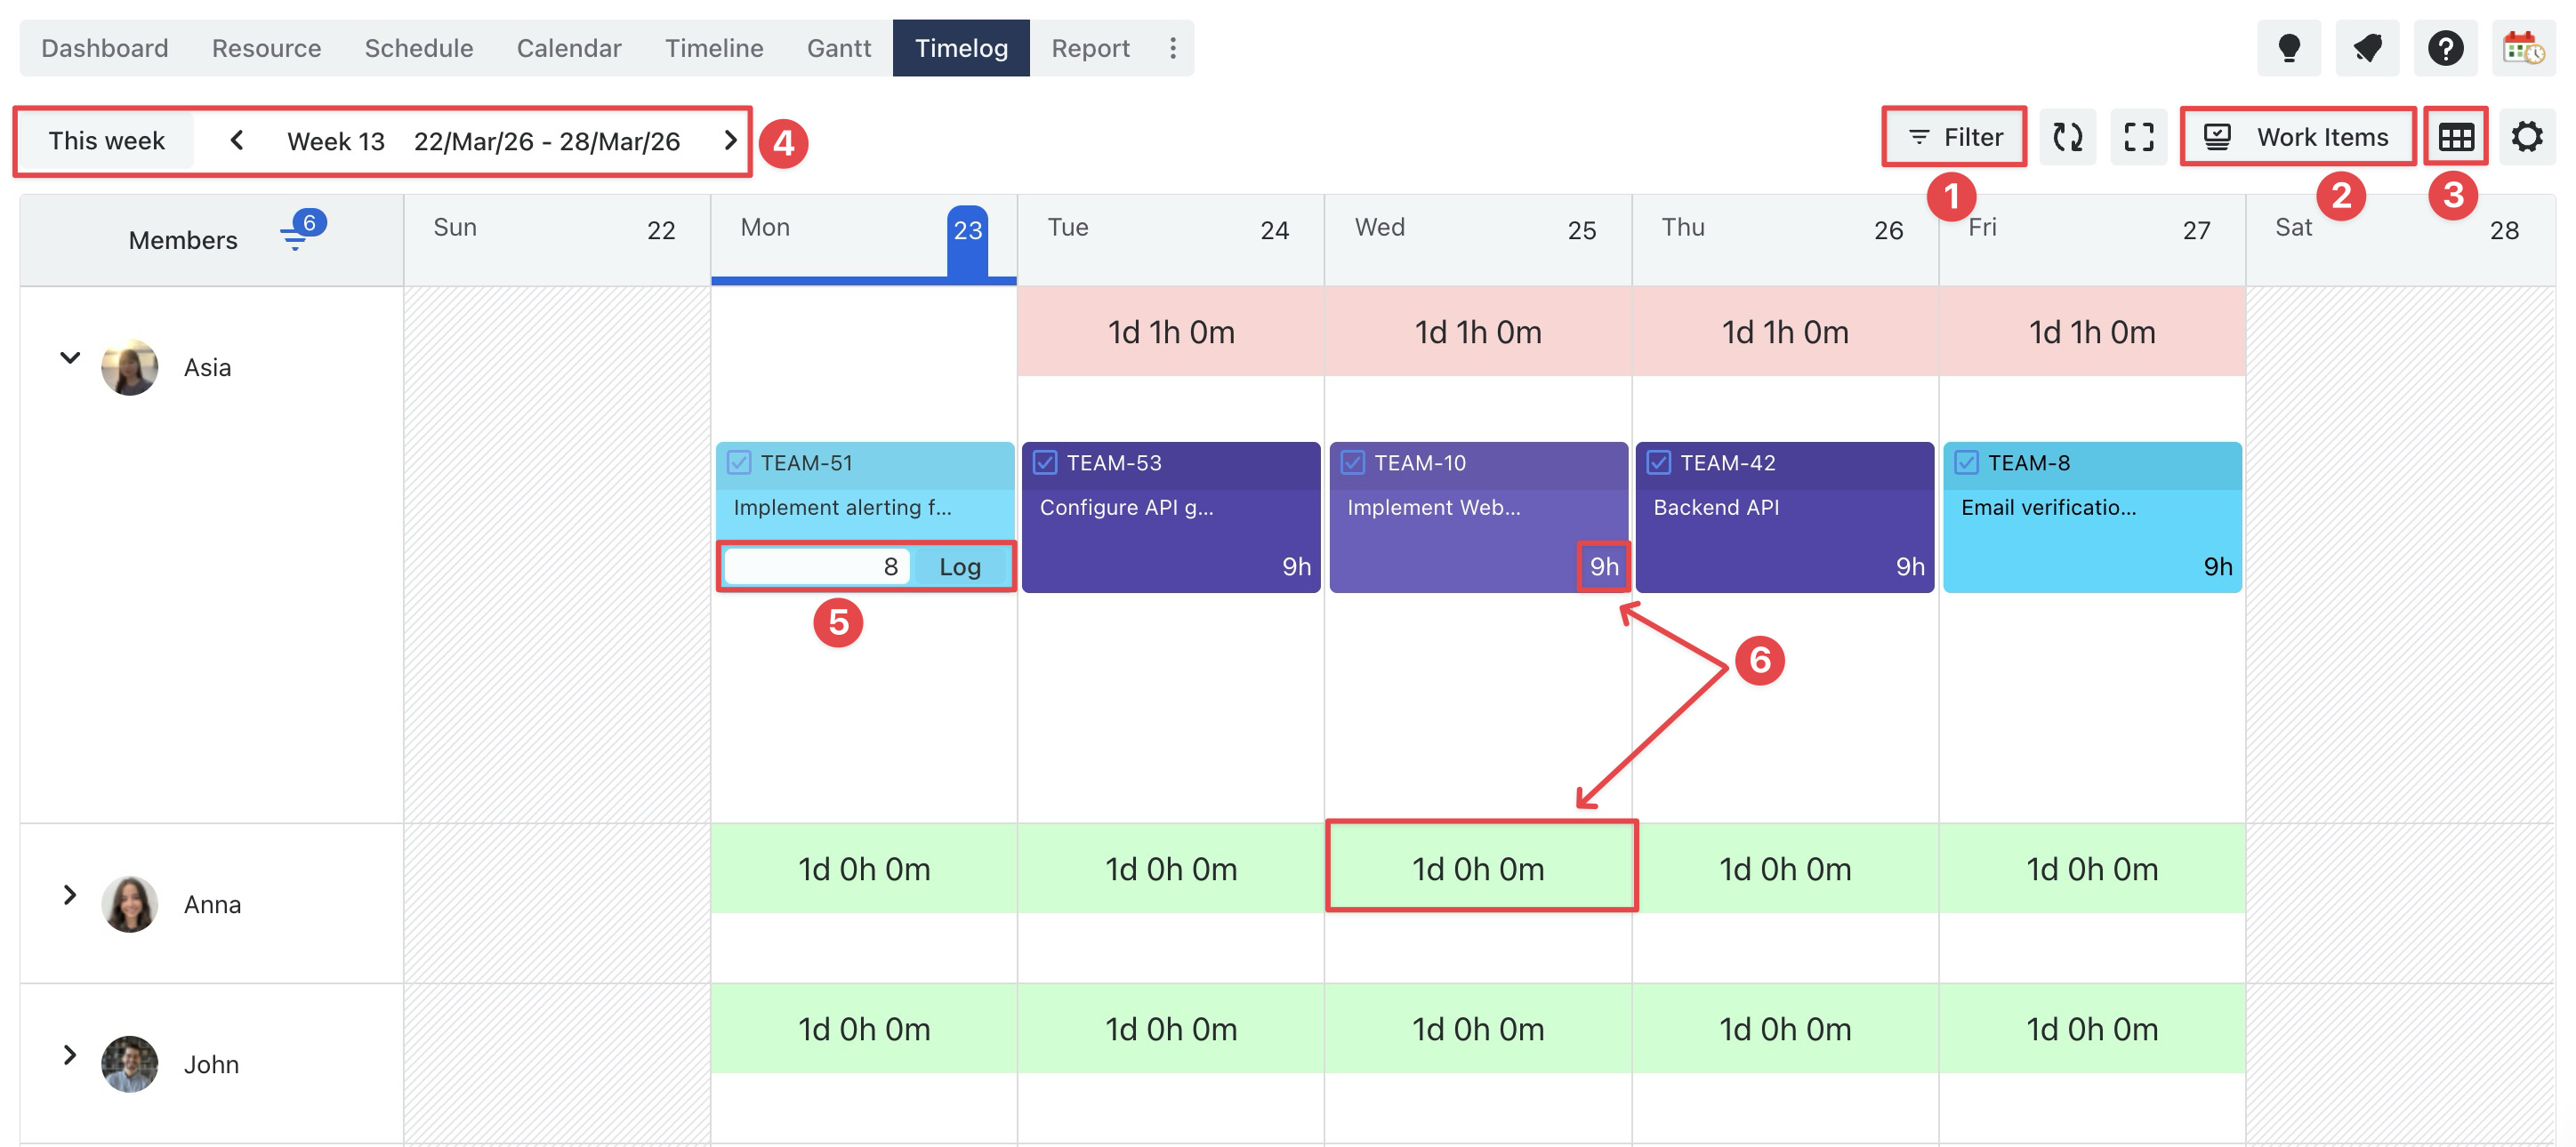
Filter: Use filters to refine the displayed tasks based on Work type, Status, Priority, and Tags. These filters apply across both the Schedule Board and the Timelog Board.
-
Work items box: Enables users to quickly drag tasks onto the Timelog board to log time, bypassing the need to pre-plan them on a separate Schedule Board.
-
Table settings: Customize how the board is displayed by choosing to show or hide dates, day names (e.g., Mon, Tue), and weekends.
-
Time view range: allows users to navigate between different weeks to view or record time entries for specific date periods.
-
Time Logged: Refers to the total amount of time that has been tracked and recorded for each task. Helps track progress and compare planned vs. actual effort
-
Log entries: Allow users to log hours for scheduled tasks directly from the Schedule board. Simply enter the number of hours in the task cell to record time
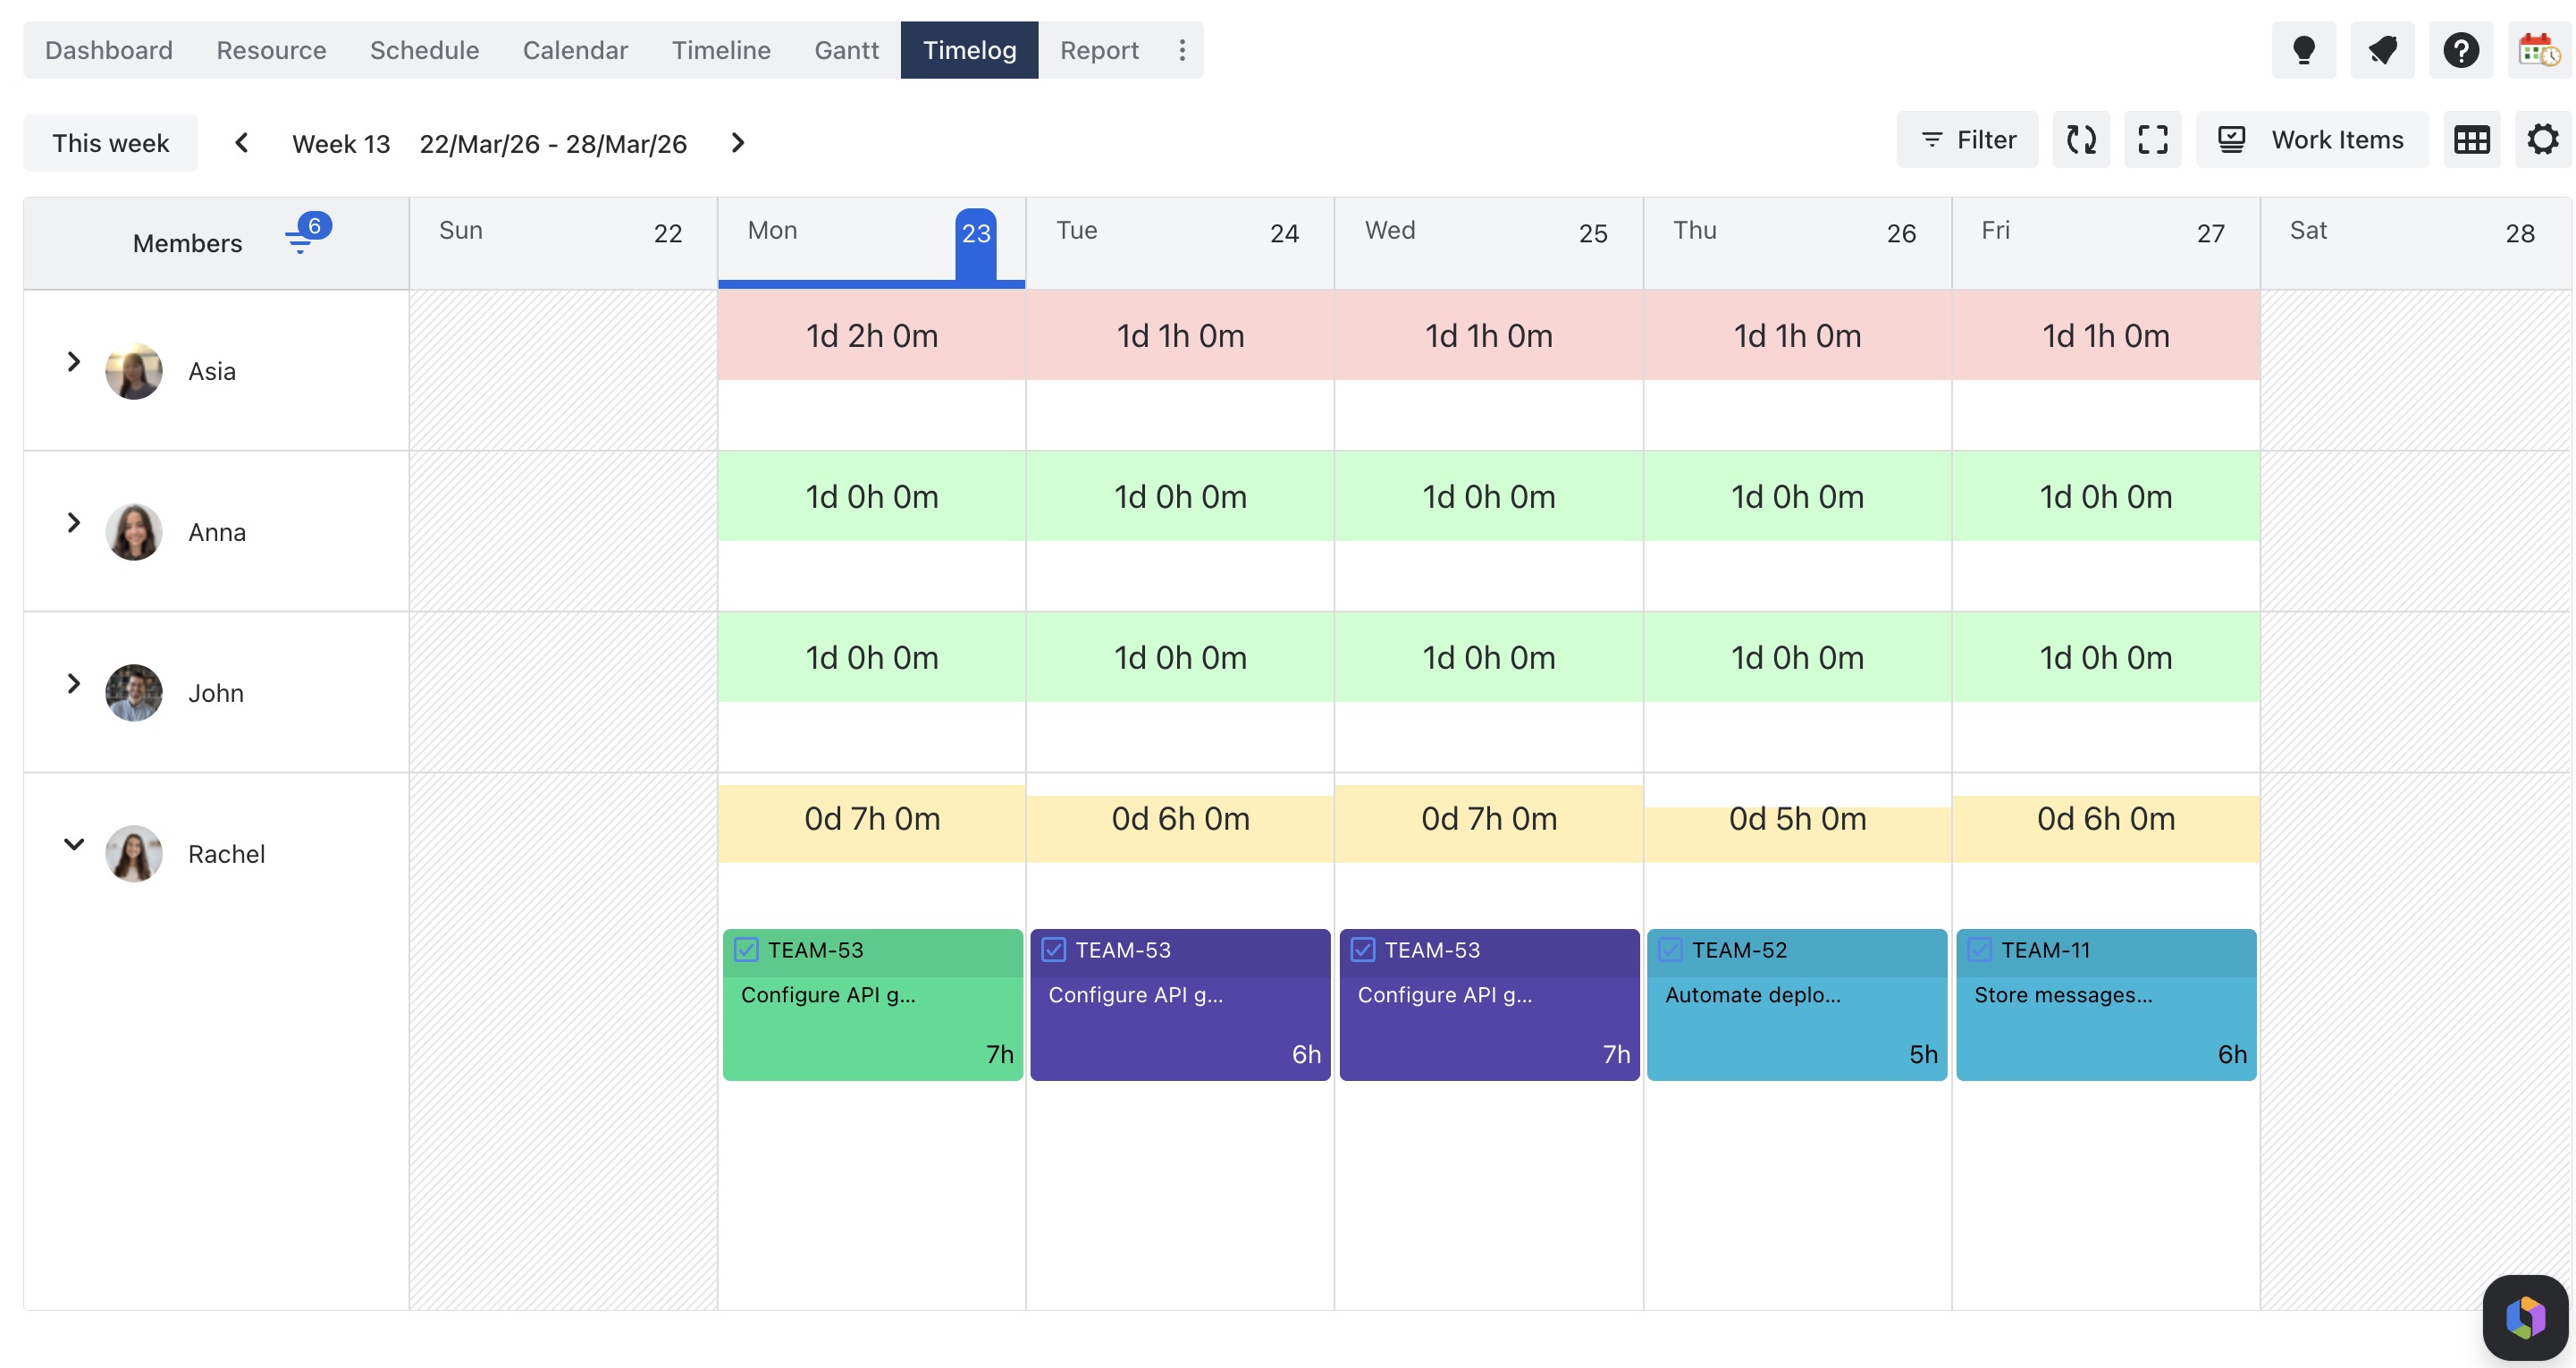
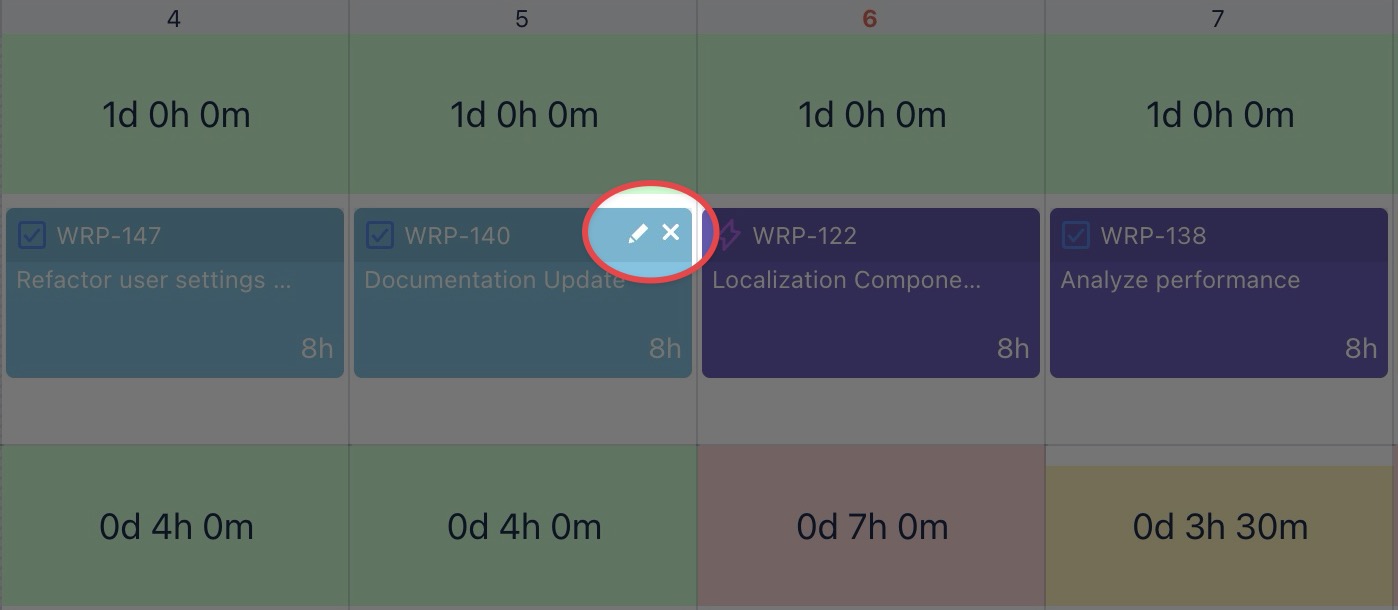
Color-coded indicators
The Timelog Board uses color-coded indicators to visually show how logged time on tasks compares with a resource's available working capacity:
-
Green: Logged time matches the full capacity.
-
Orange: Logged time is under capacity.
-
Red: Logged time exceeds the available working capacity.
Logging time in ProScheduler
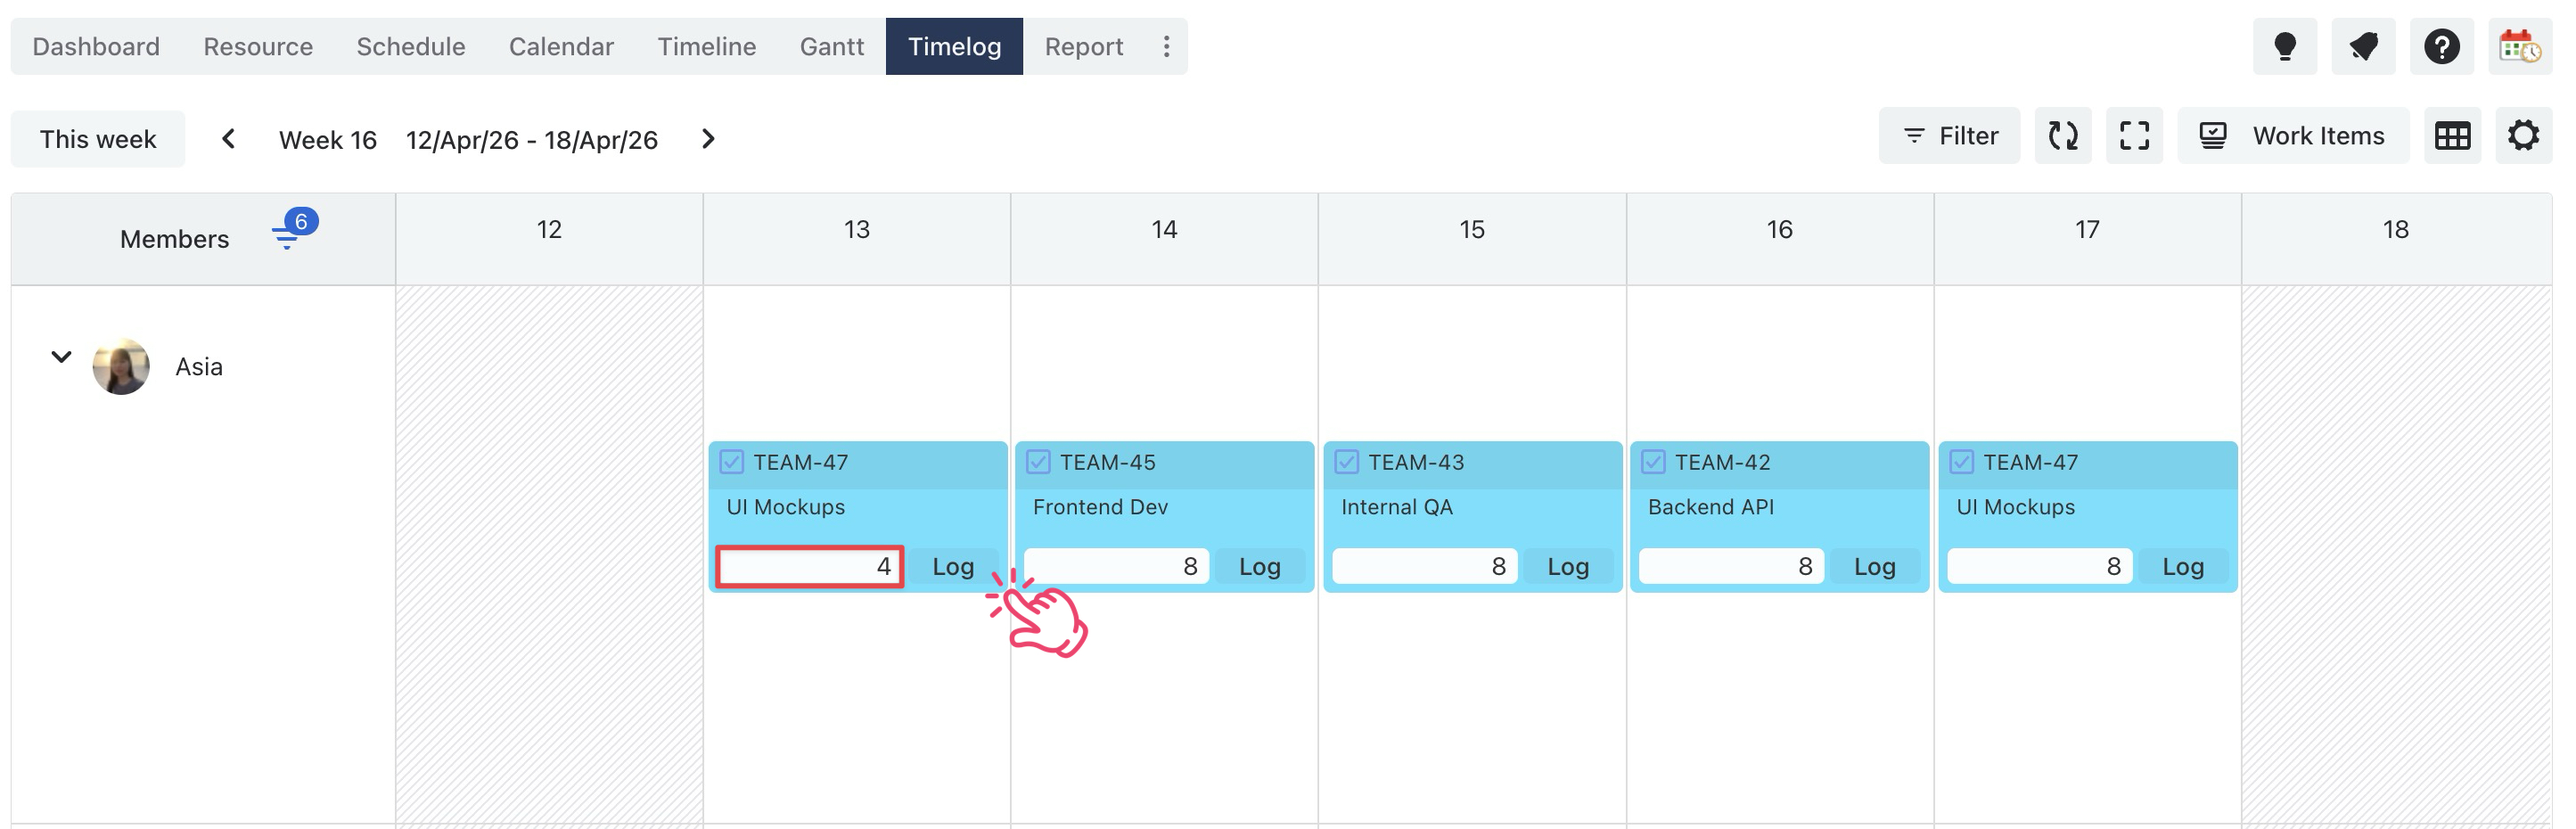
Logging time for scheduled tasks
If a task is already scheduled on the Schedule Board, it automatically appears on the Timelog Board.
To log time for these tasks:
-
Locate the task on the Timelog Board.
-
In the time log entry field, enter the number of hours worked.
-
Click Log to save your time entry.
Logging time for unscheduled tasks
You can log time for tasks that have not been scheduled in two ways.
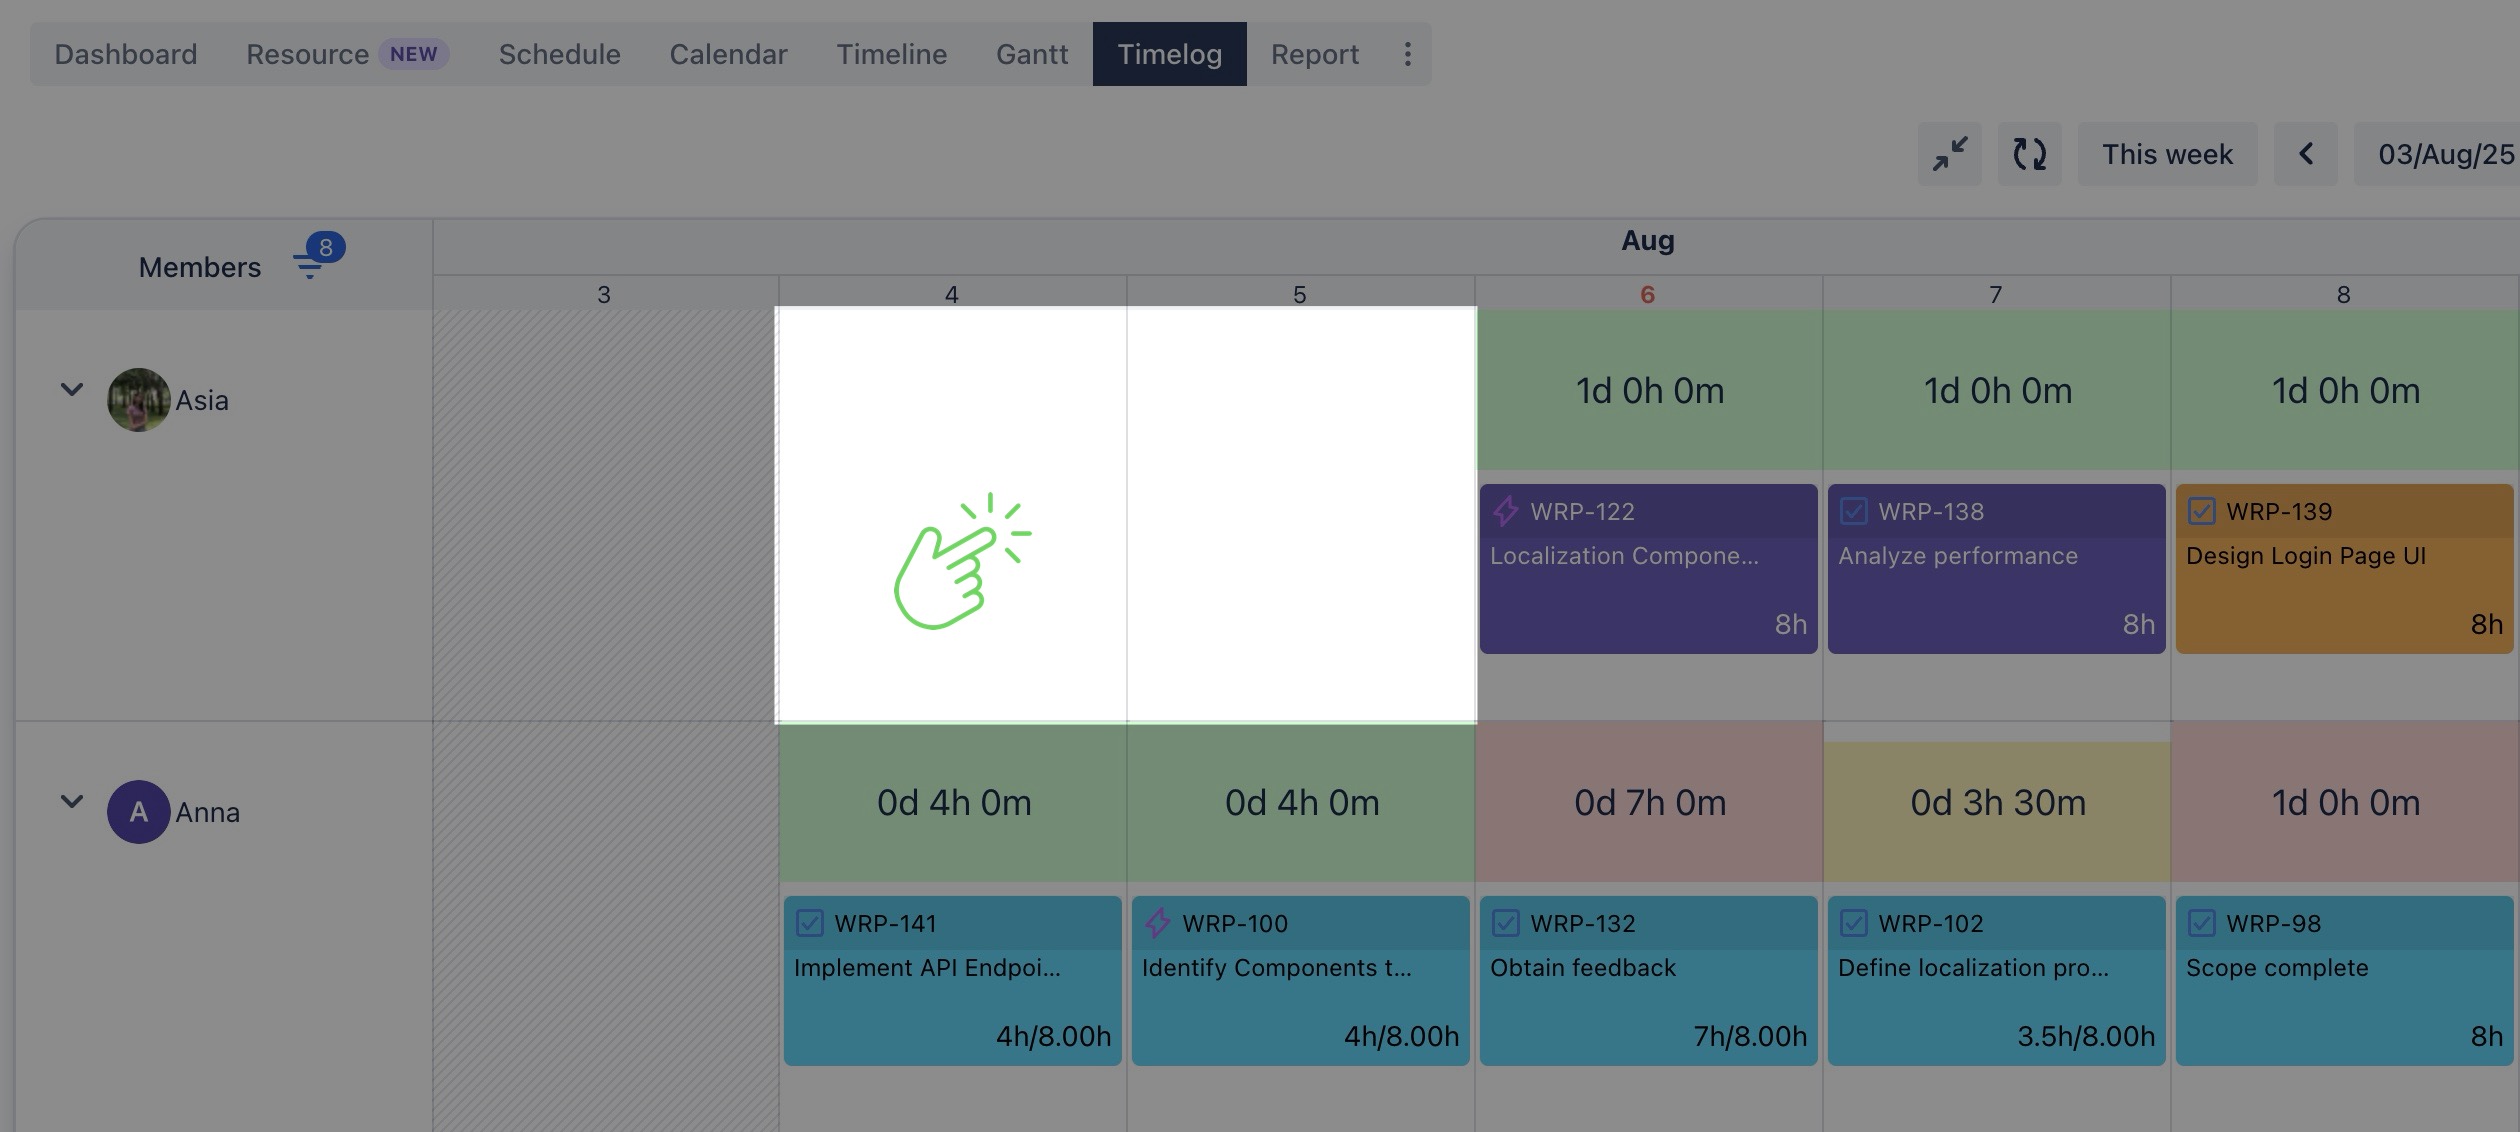
Option 1 Using the Planning Dialog
-
Click on an empty cell in the desired day on the Timelog Board.
-
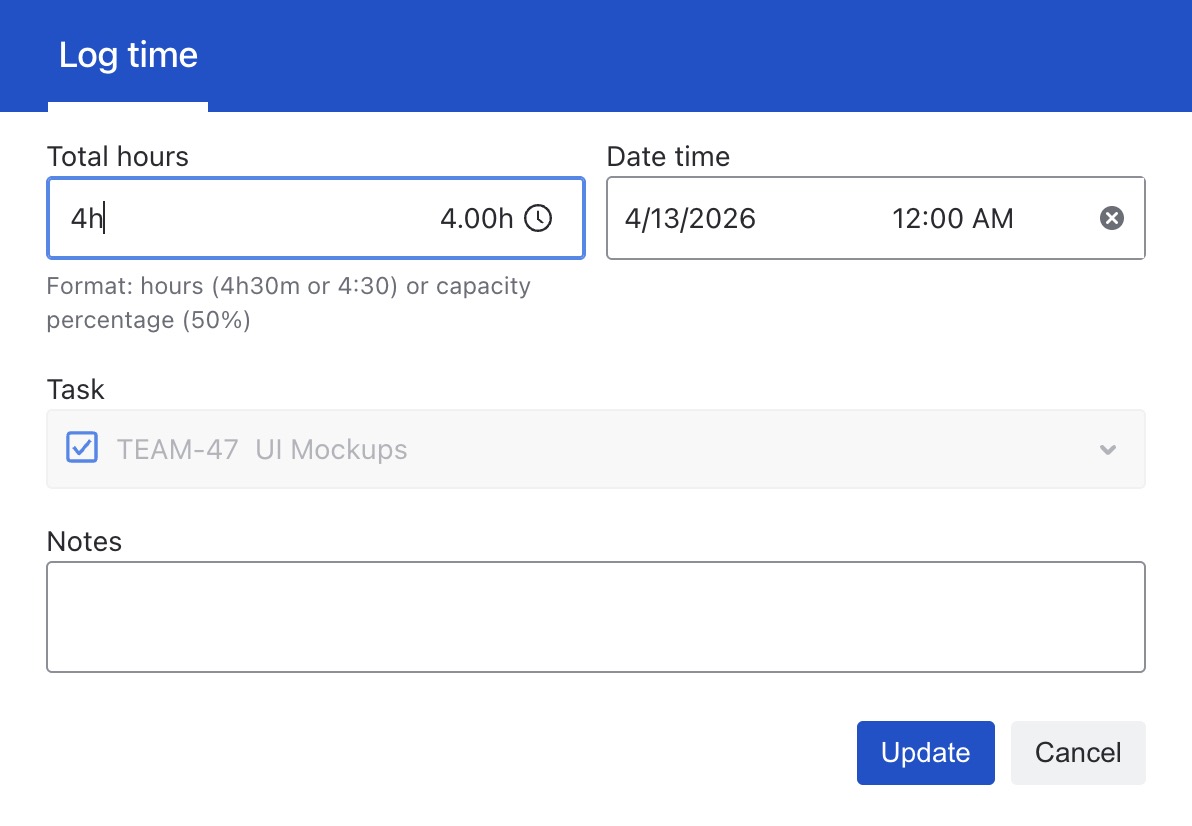
A dialog box will appear where you can log your time.
-
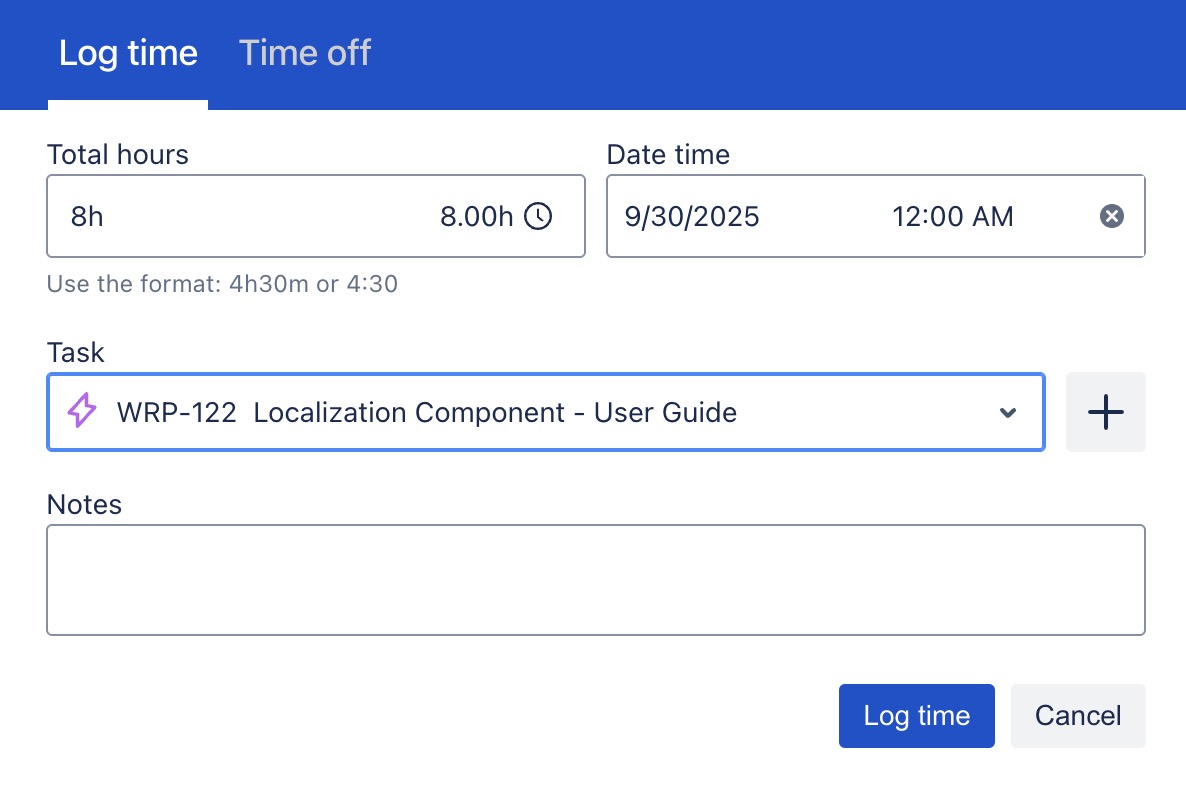
Fill in the following details:
-
Total hours: Enter the number of hours worked.
-
Date time: Select the date and time for the time log entry.
-
Jira Work Item: Enter summary or work item key. Or click

-
Notes: Add any relevant comments or details about the task.
-
Click

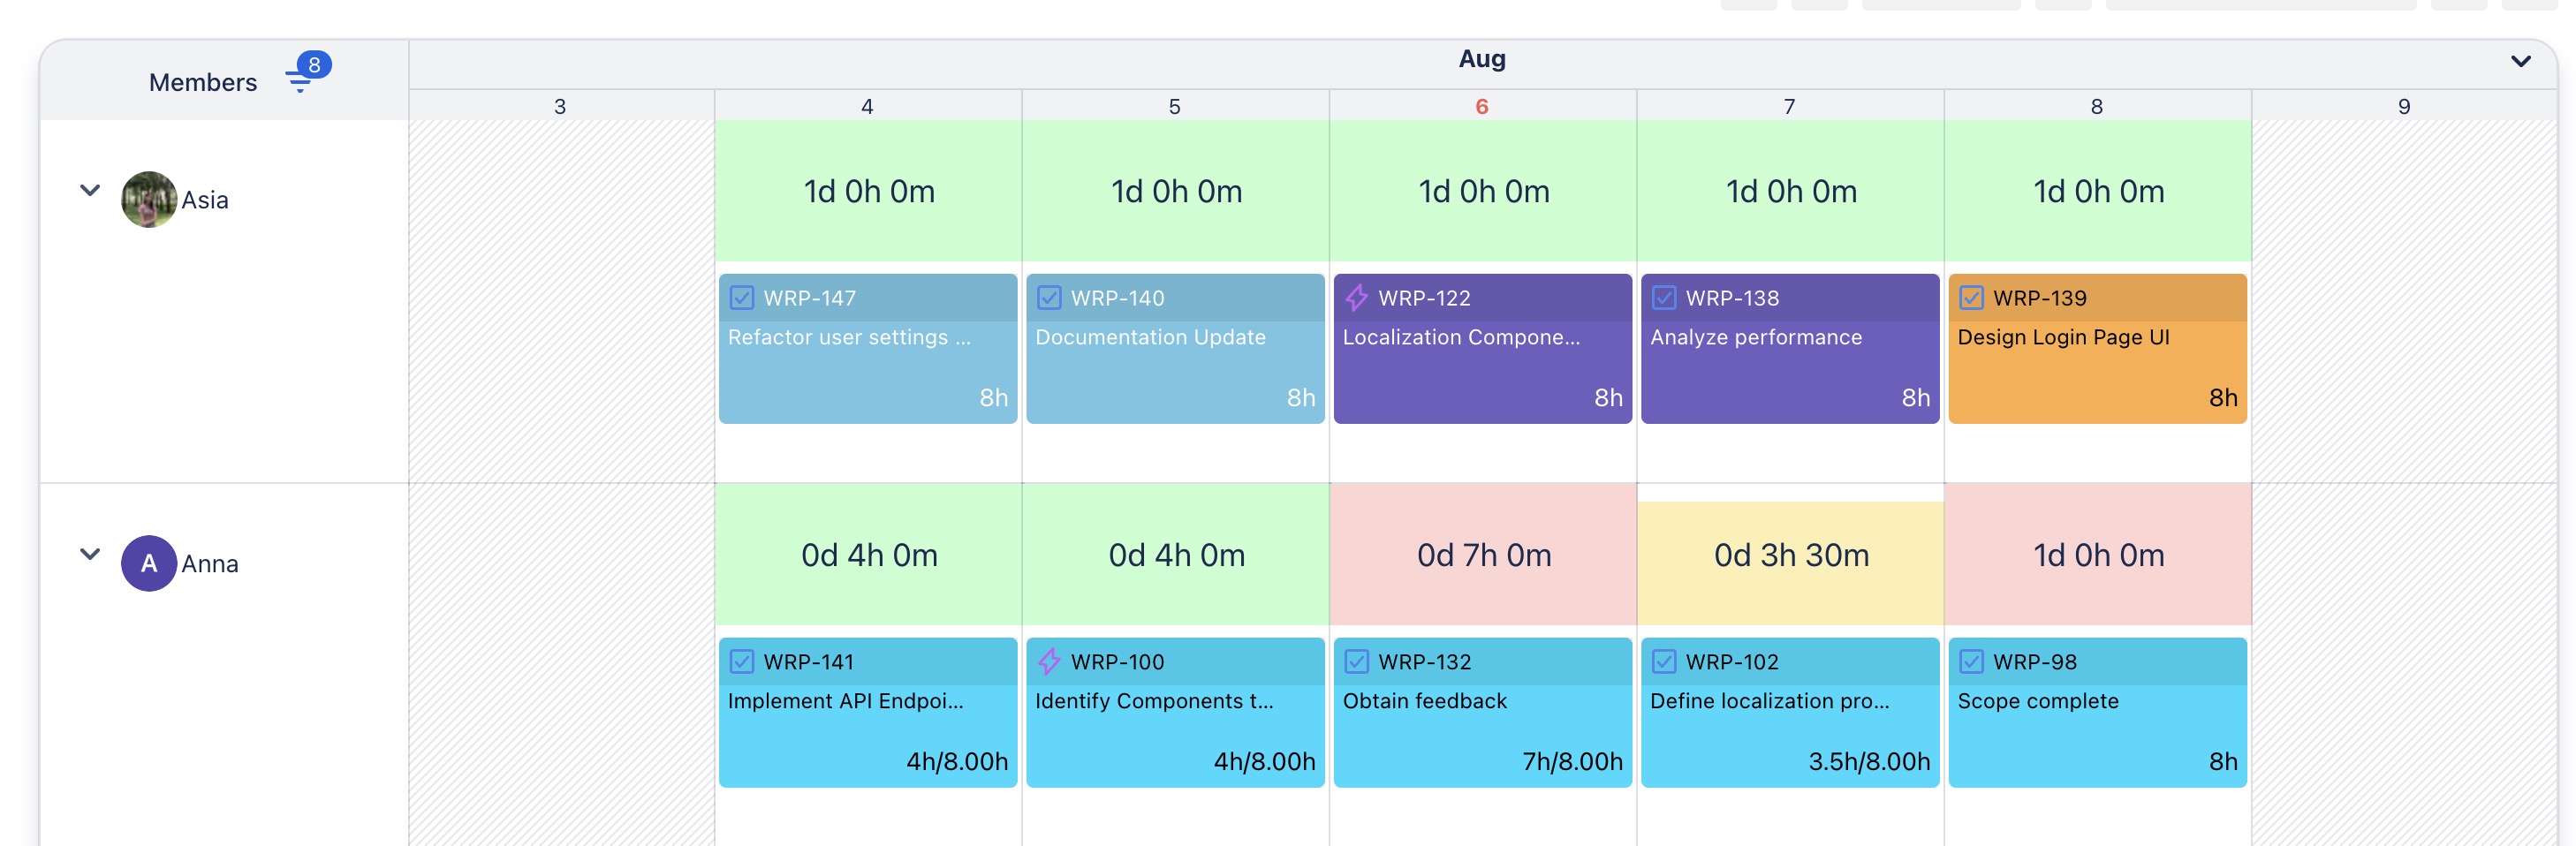
Below is the result after the time has been logged:
Option 2 Using the Work Items Box
-
Click Work Items in the toolbar to open the Work Items box.
-
Drag a task onto the desired date cell.
-
A dialog box will appear where you can complete the details.
-
Click
Editing a Time Log Entry
-
Hover over the task card associated with the time log.
-
Click the

-
Update the time log as needed.
-
After making your changes, click

Deleting a Time Log Entry
-
Hover over the task card associated with the time log.
-
Click the X icon to delete the work log.
Logging time in Jira work item details screen
Please note that the ability to log time in the work item details screen without accessing the ProScheduler board is specific to the Cloud edition of Jira.
In the Server or Data Center edition, ProScheduler integrates natively with Jira Worklogs. In this case, you can simply log time within Jira, and it will automatically sync with ProScheduler.
You can log time directly from Jira Work item details screen without needing to navigate to the ProScheduler board. Here is how to do it:
-
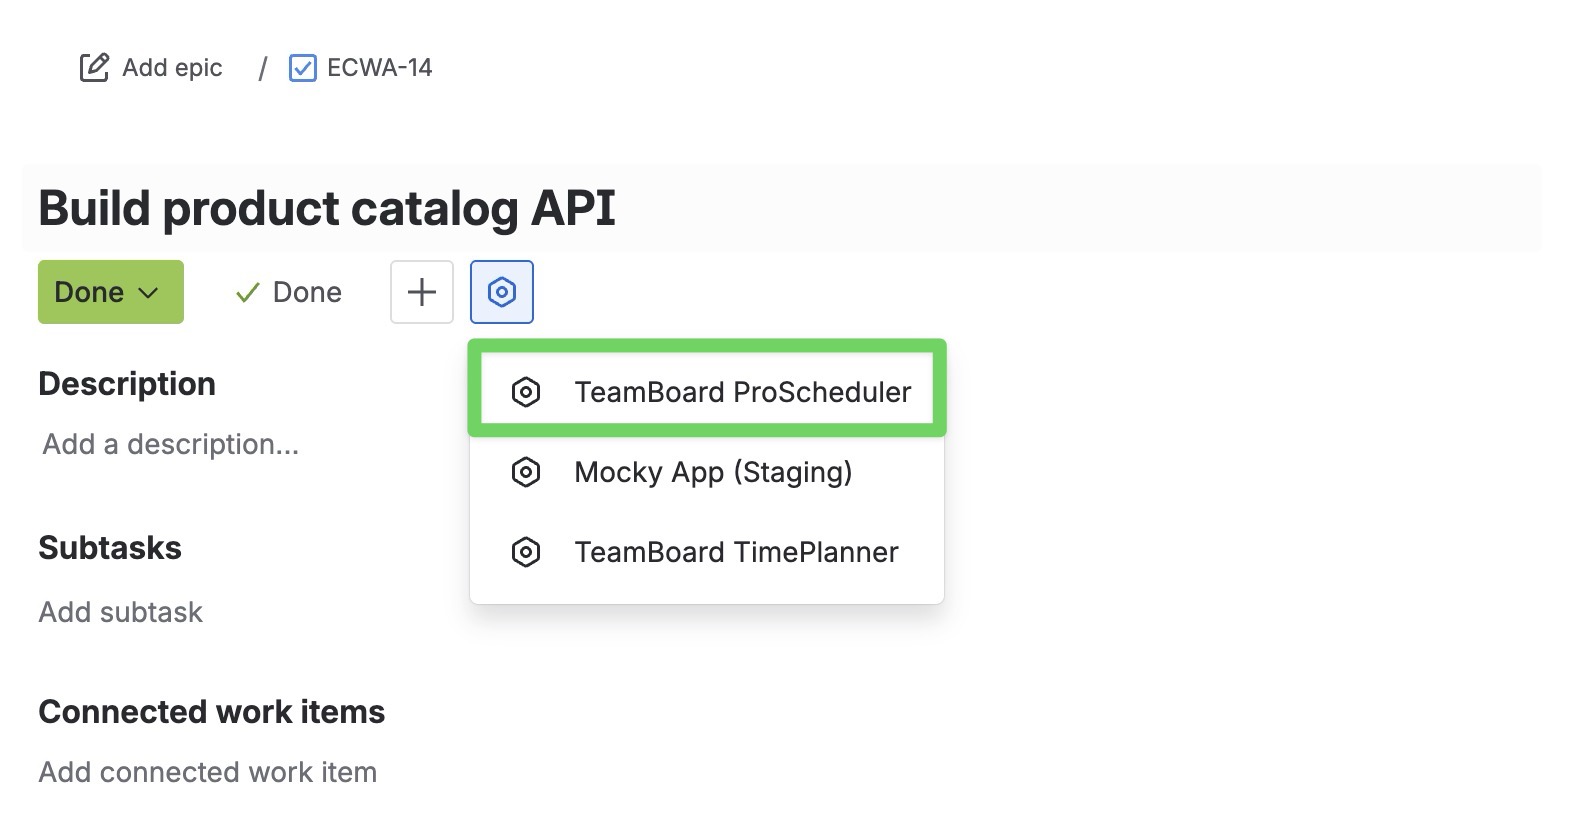
Open the specific work item you want to log time for.
-
From the top left corner of the work item screen, click

-
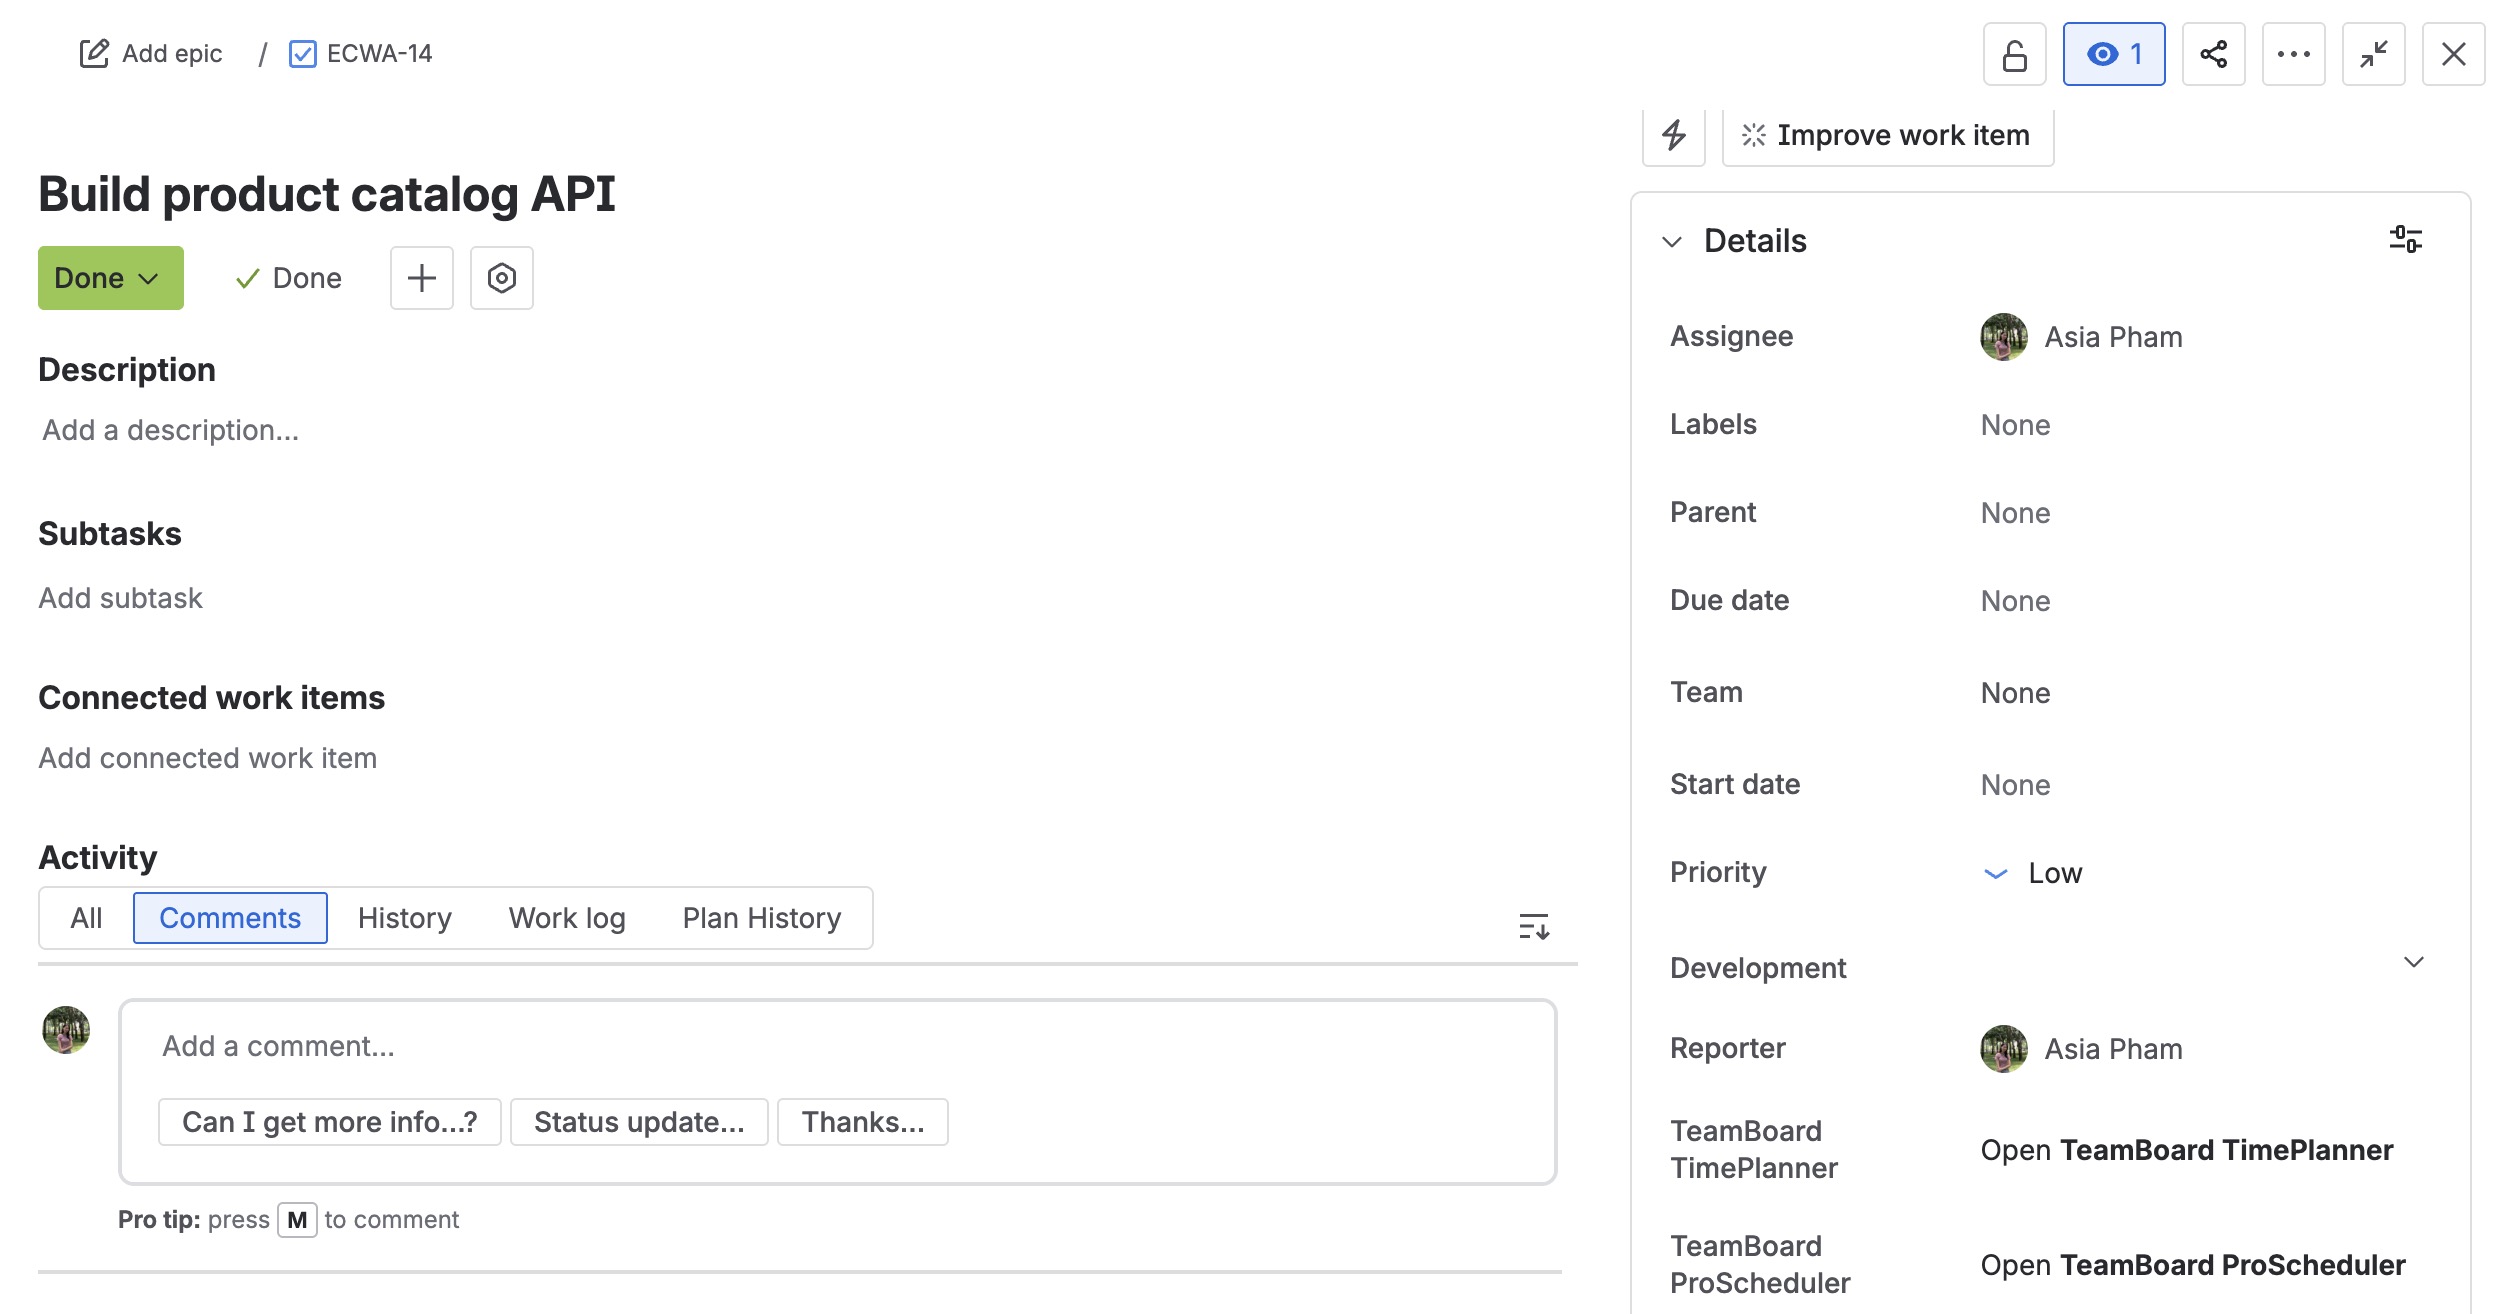
The ProScheduler Timelog section will appear within the Jira work item details screen.
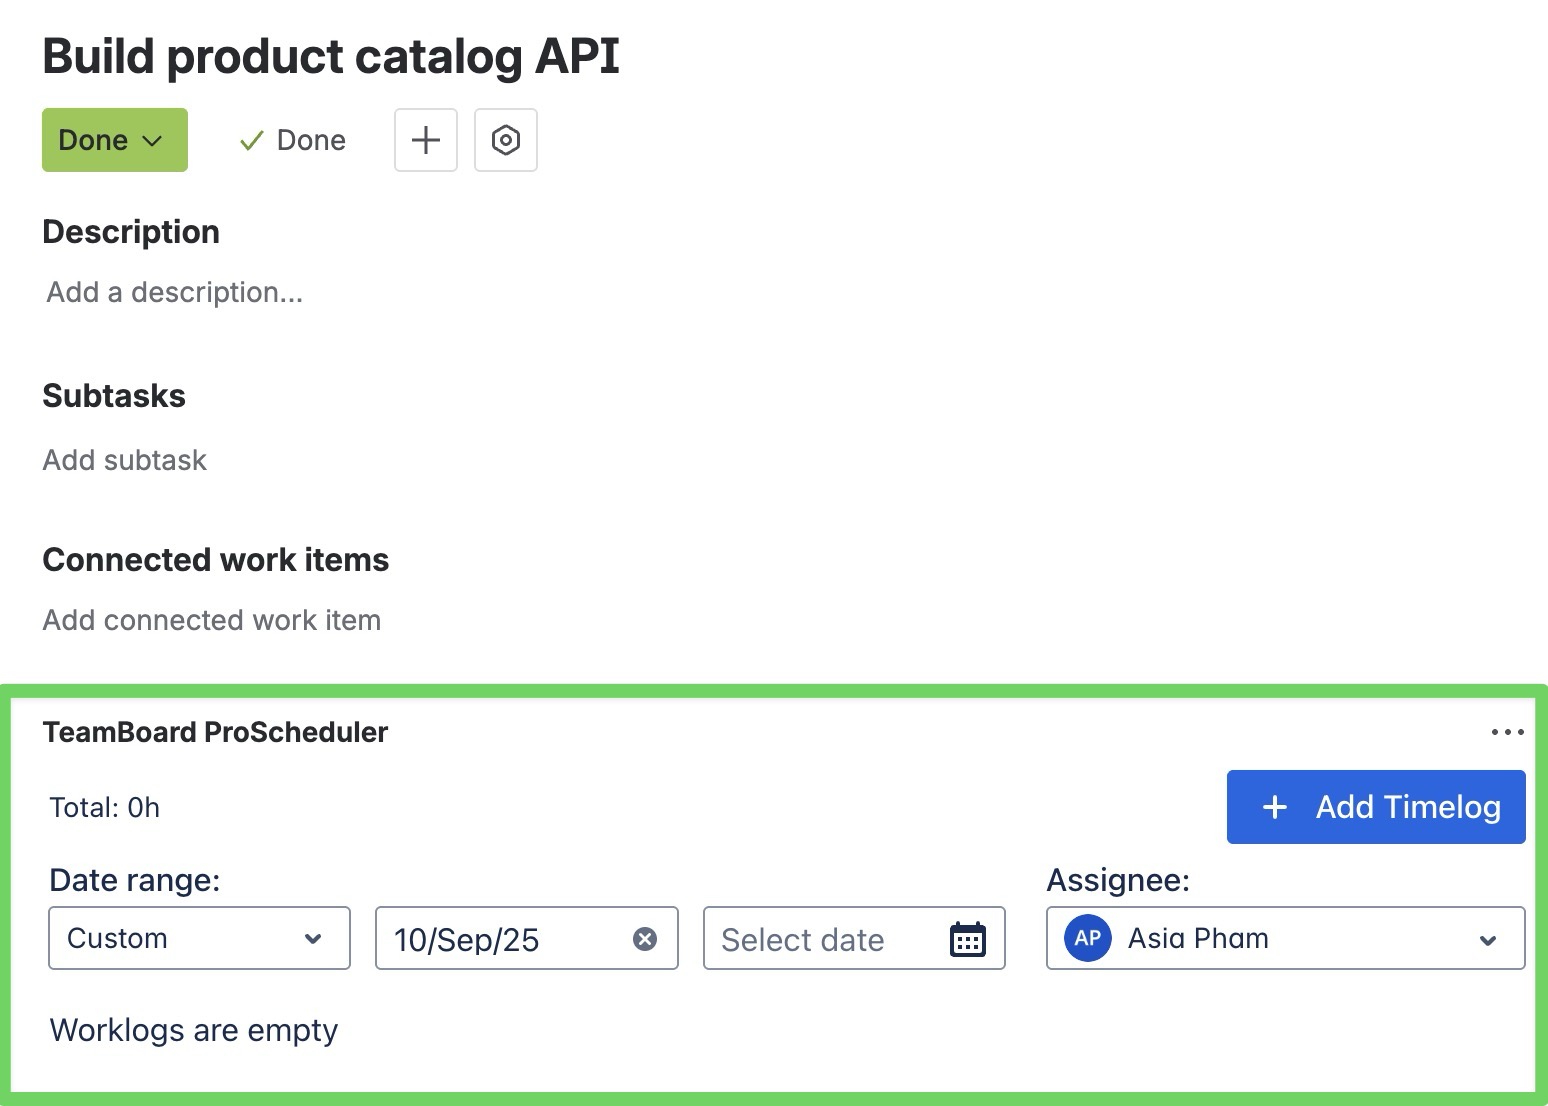
-
Within the ProScheduler timelog section, click

-
In the timelog entry form, enter the duration or hours you have spent on the task.
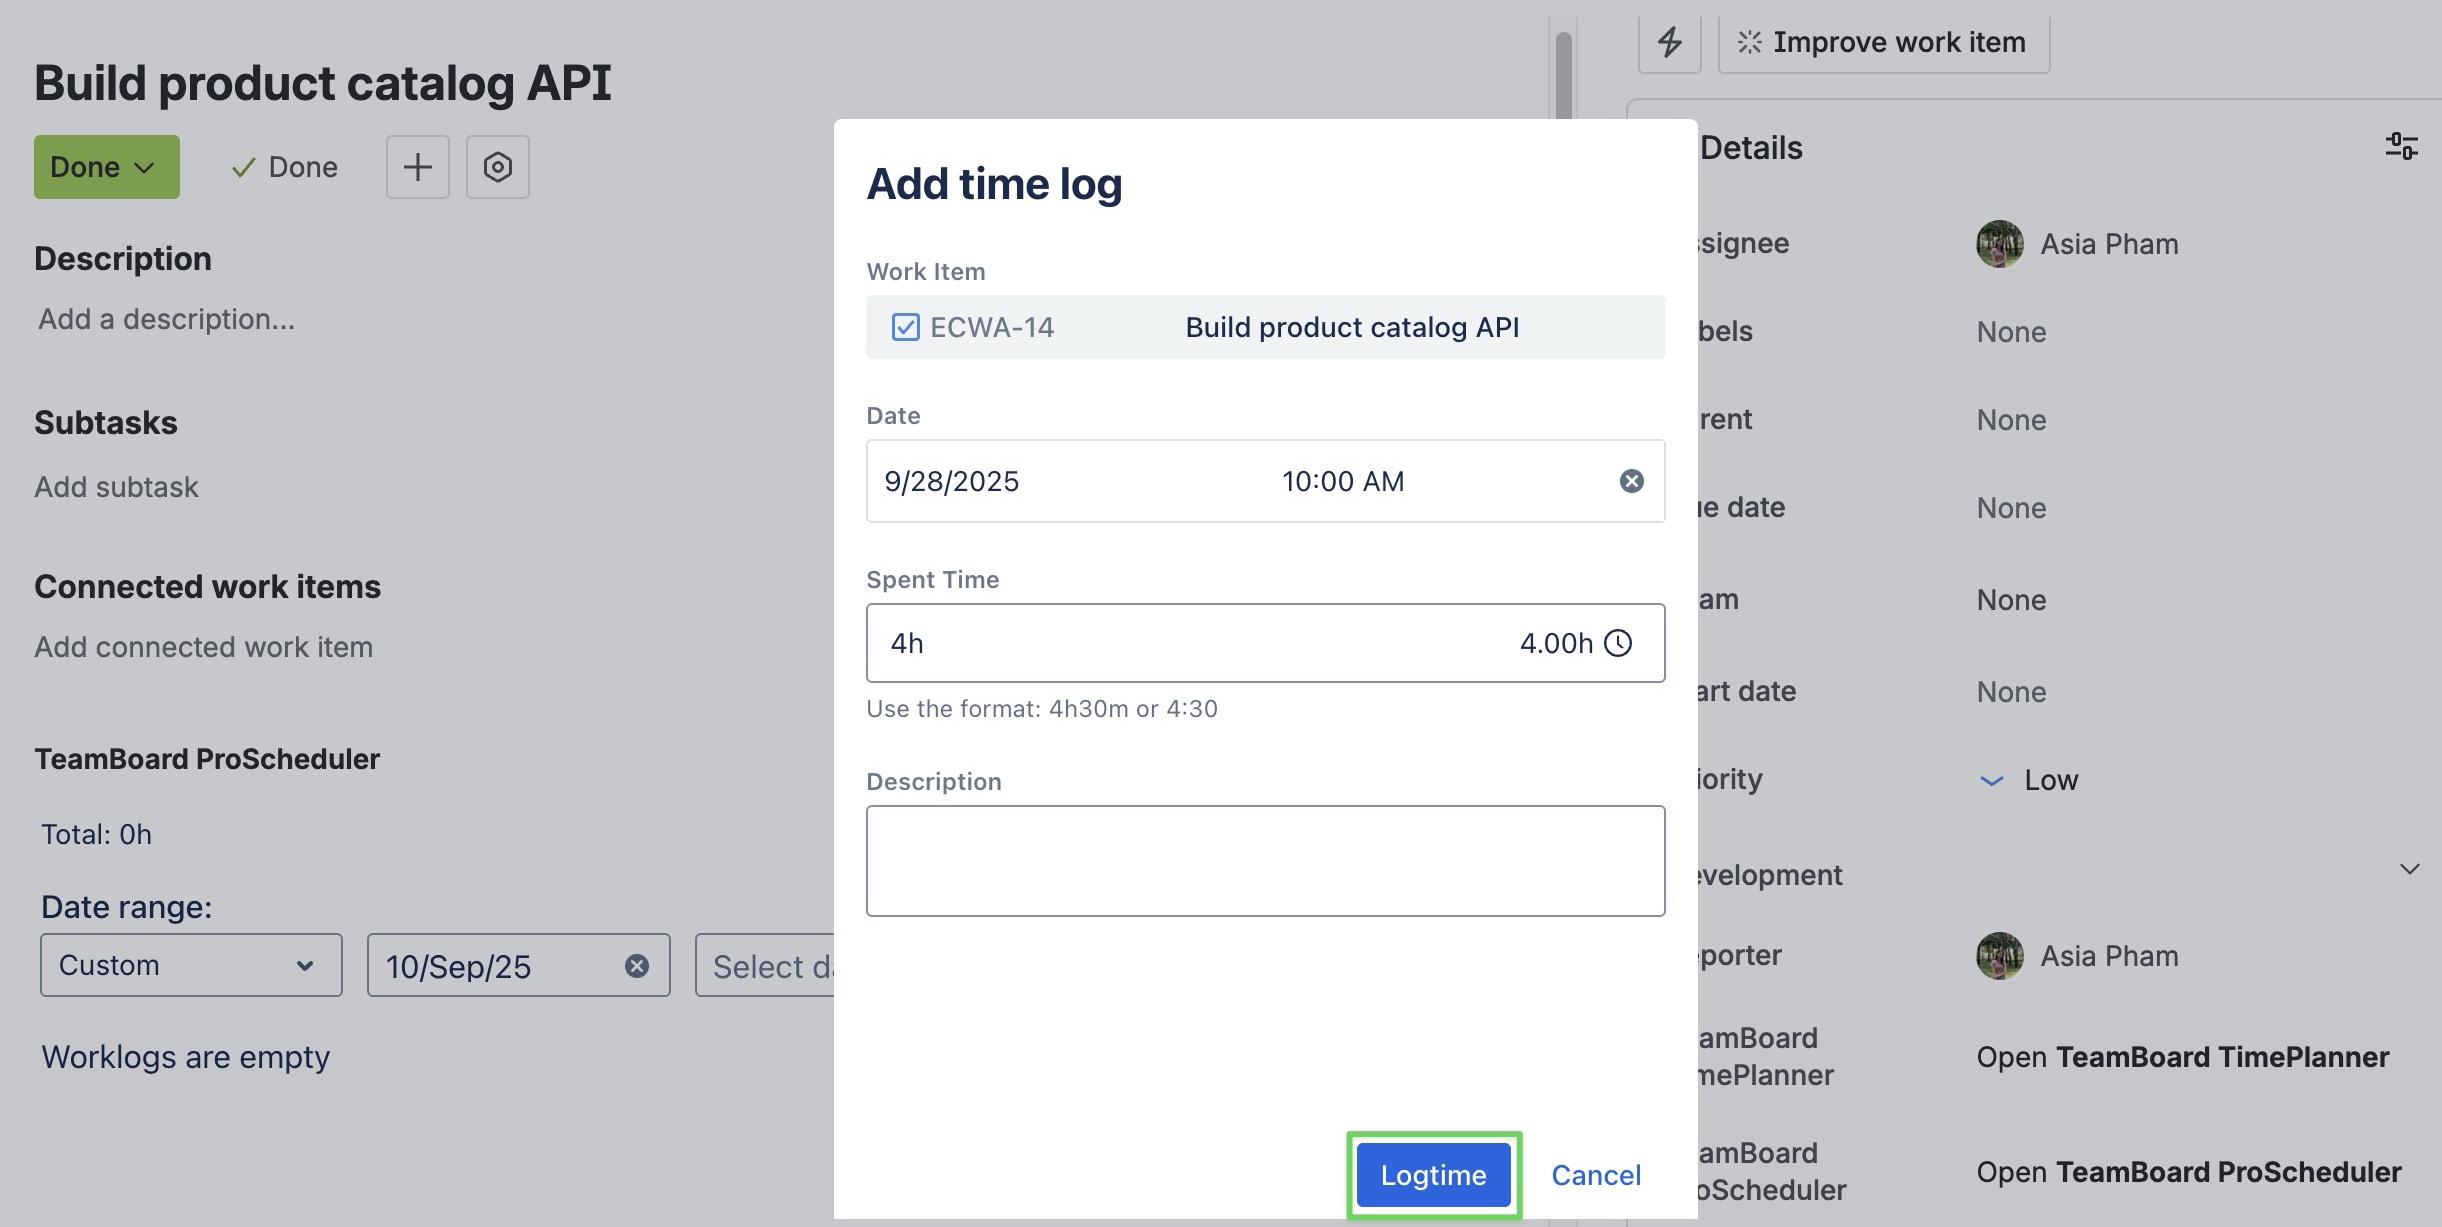
-
Once you have entered the time, click

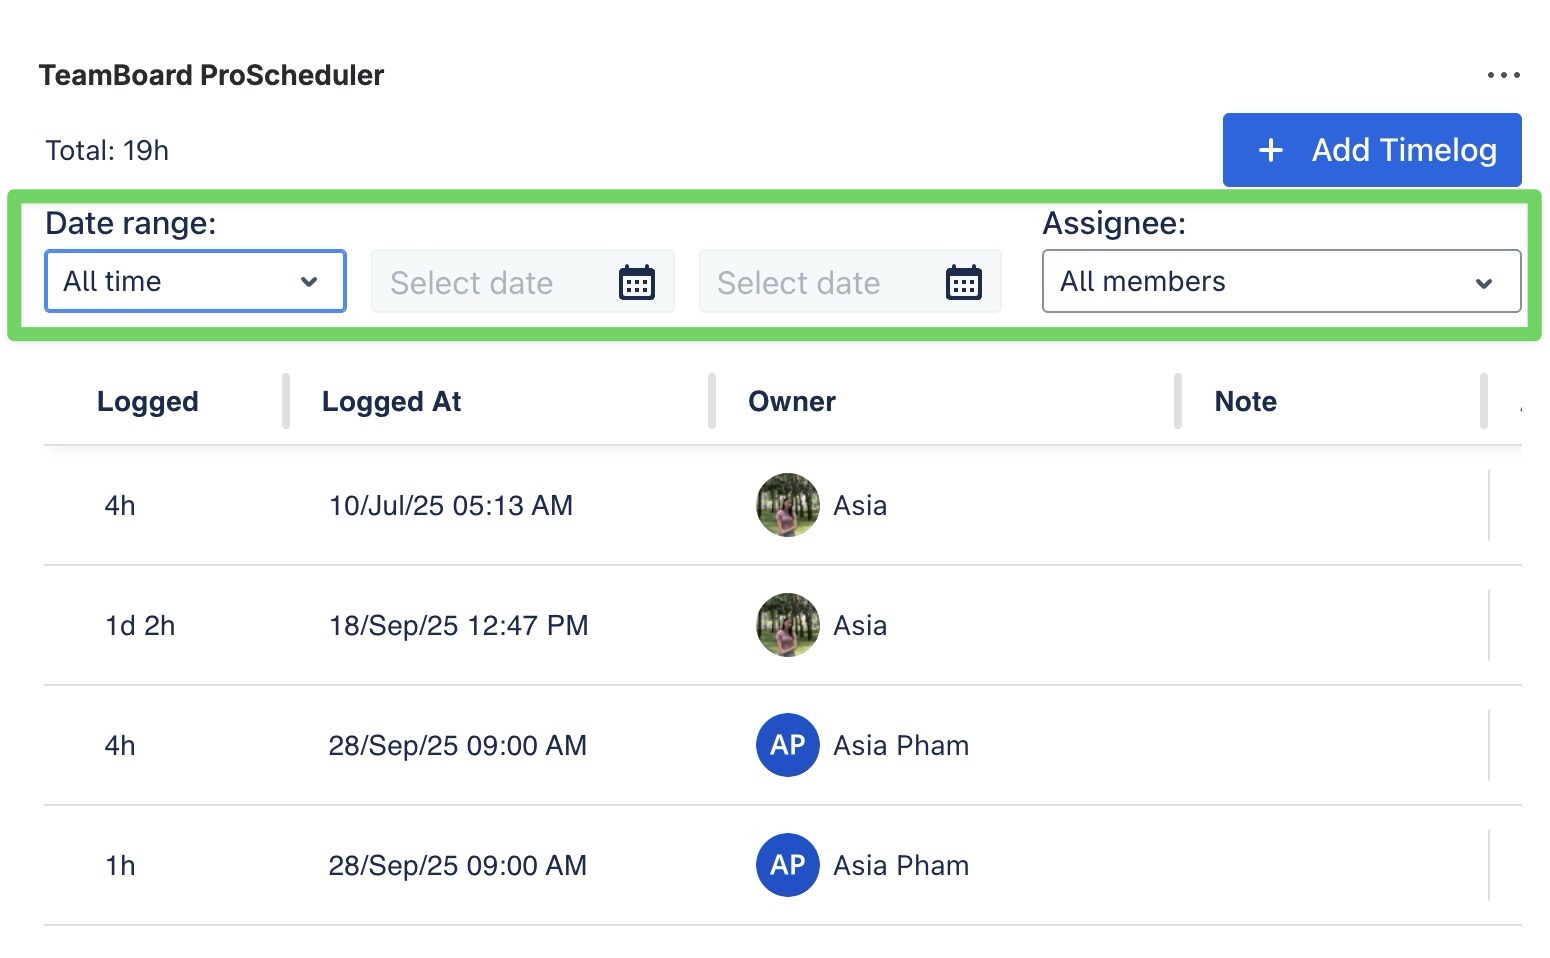
Below is the result after logging time in the Jira work item details screen:
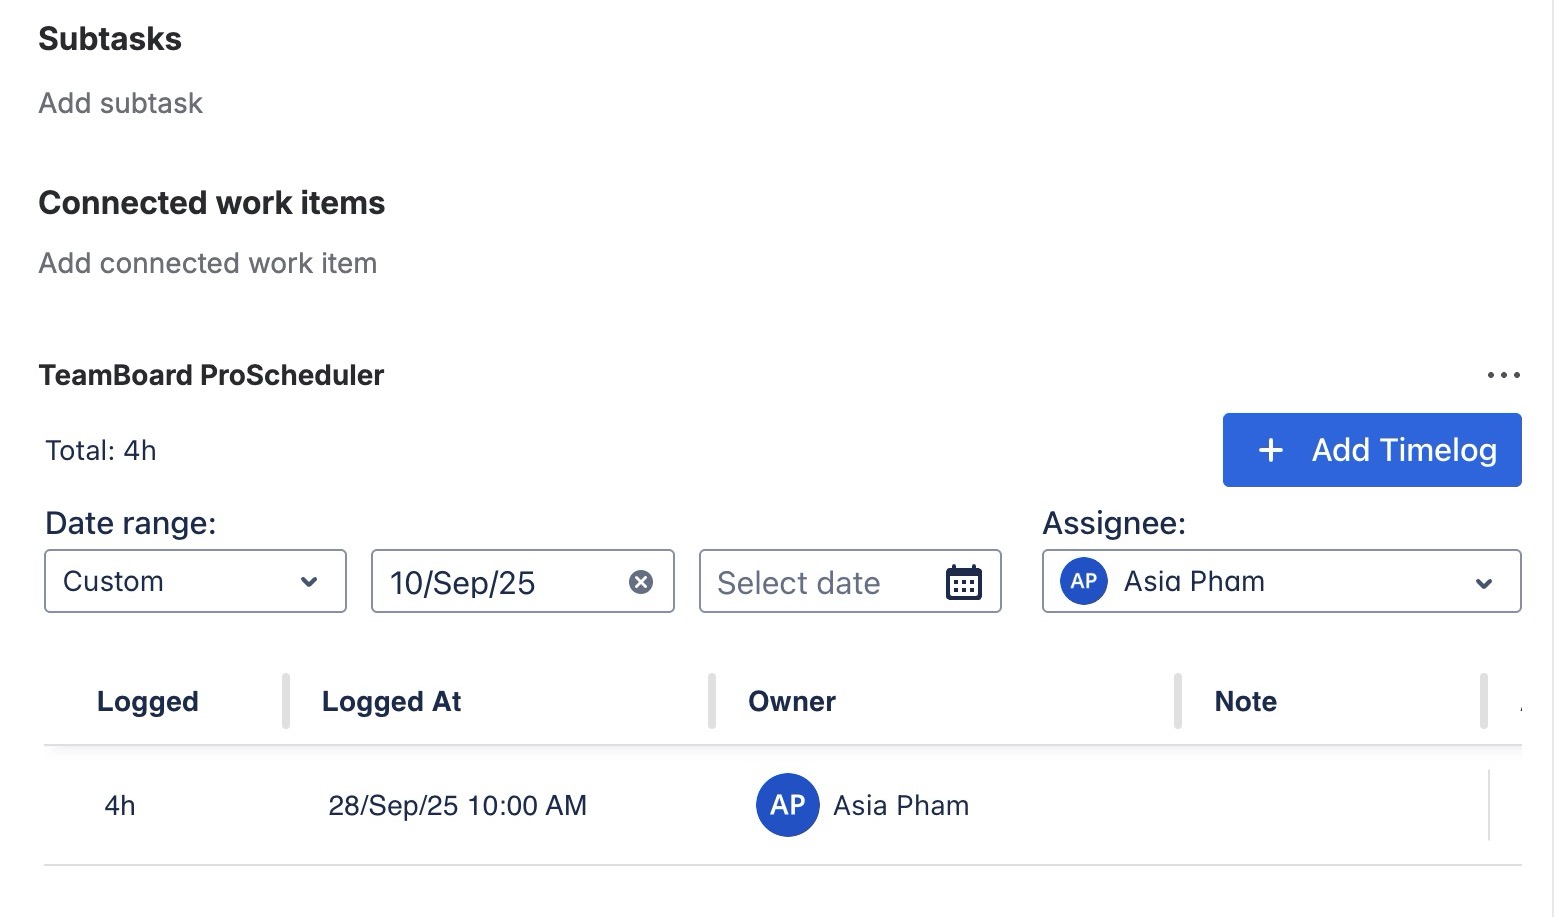
Tip: For tasks that are logged by multiple members or have several time entries, use the Date range and Assignee filters to quickly narrow down the records.