.png)
-
Regular members can only log their own timelog entries.
-
App Admins /Team Admins / Team Leaders can log and submit time on behalf of other team members. (Learn more about granting these permissions here.)
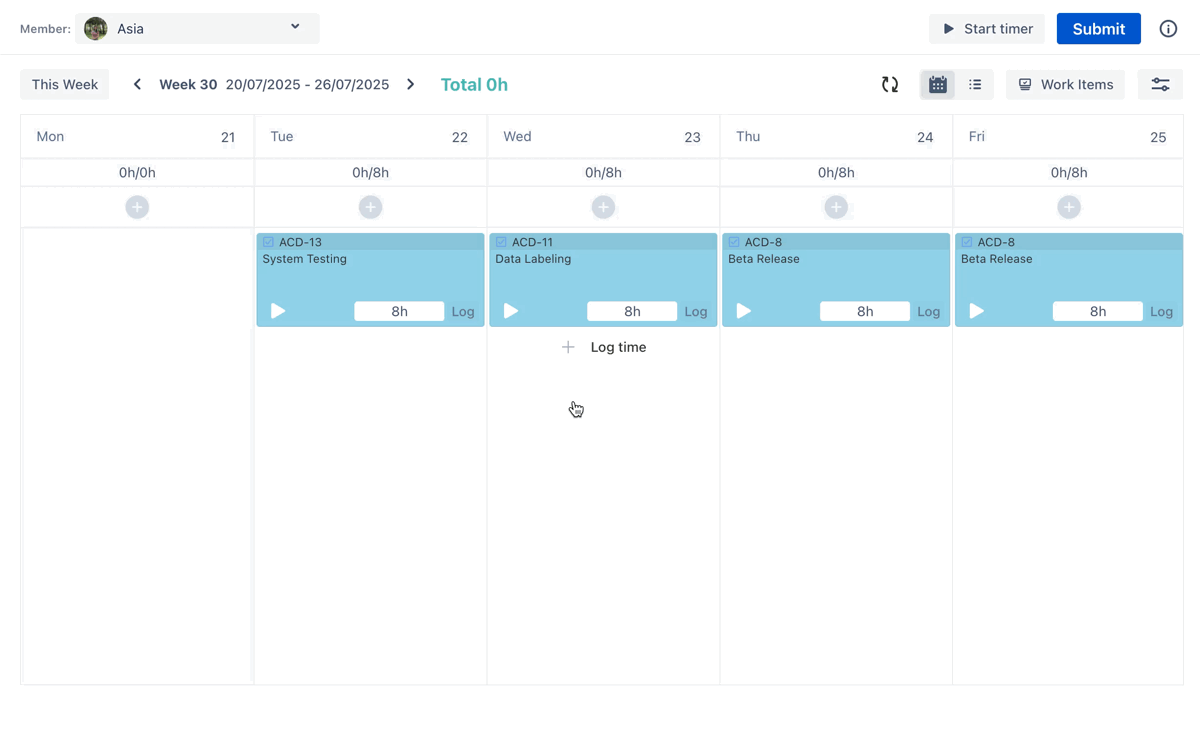
Your Timelogs are the same data in Calendar view, List view, or Jira Work Item Details. You can easily log, edit, and view your time entries in any format, depending on your preference.
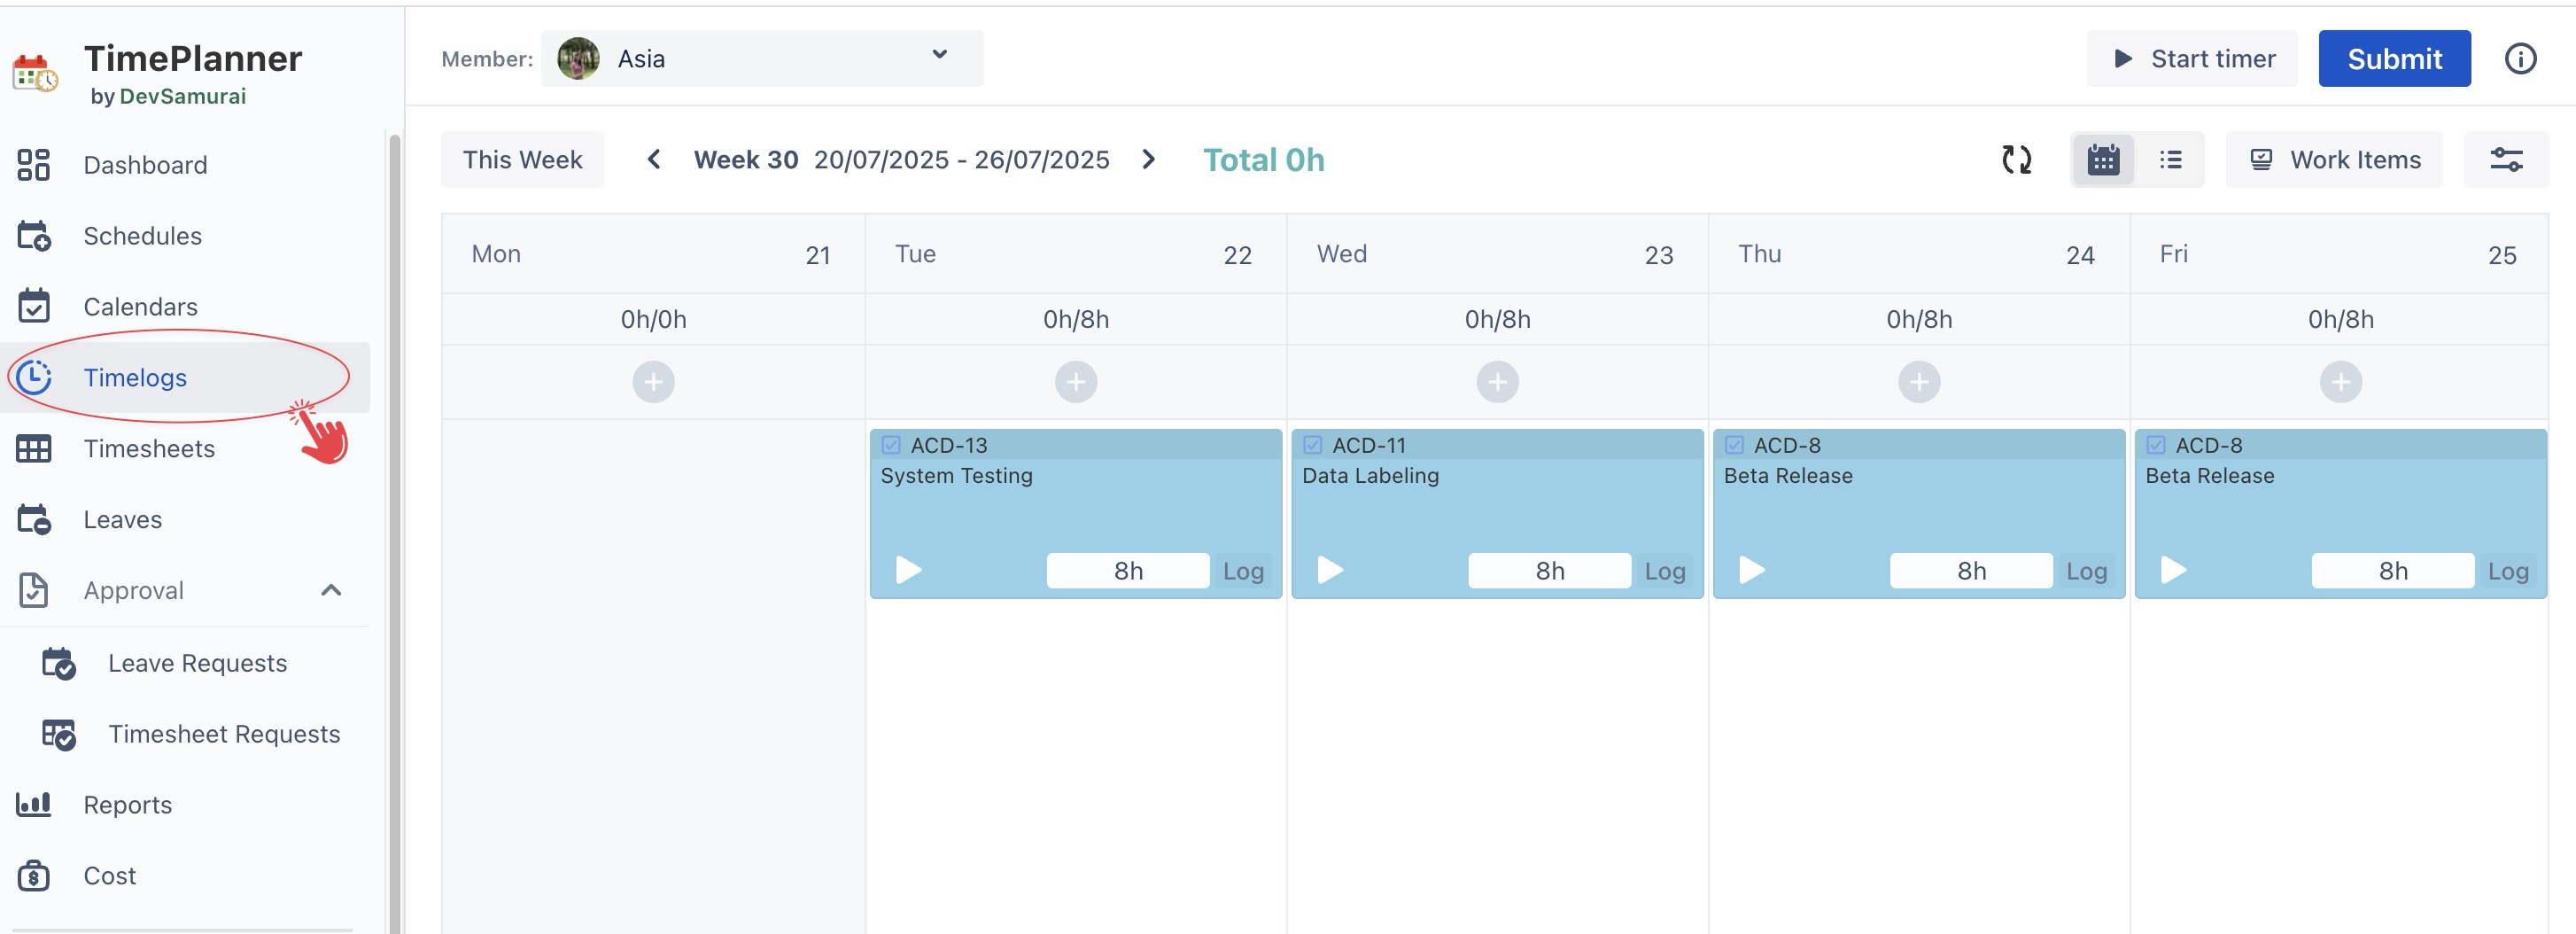
You can log time from several locations:
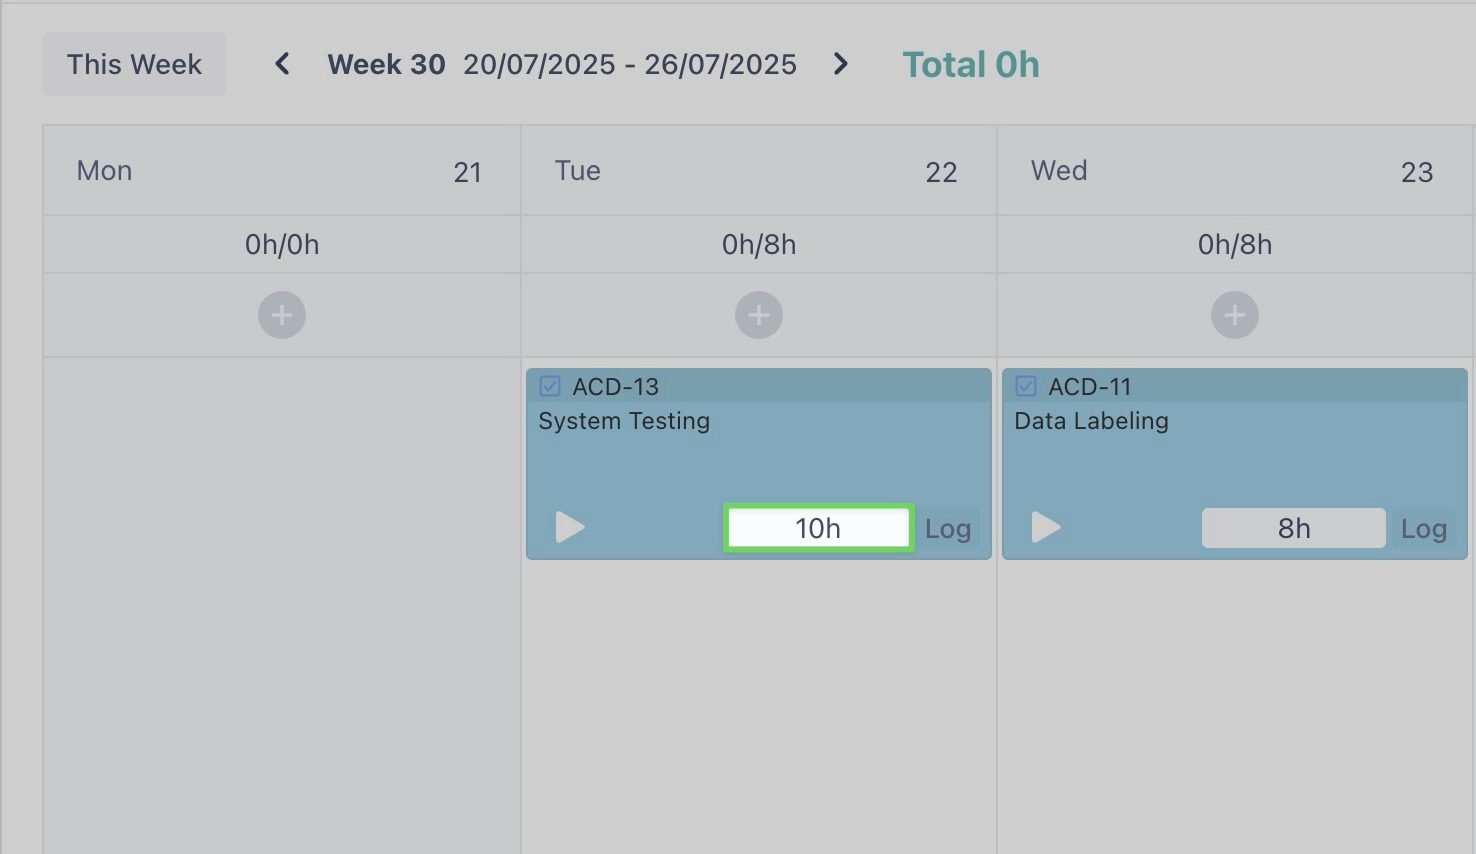
Log Time in the Time Log Section
From Calendar View
Log Time for Scheduled Tasks
Your scheduled tasks in TimePlanner are automatically synchronized with the Timelog board, allowing you to log time entries efficiently. Follow these steps to log your time for scheduled tasks:
-
Navigate to

-
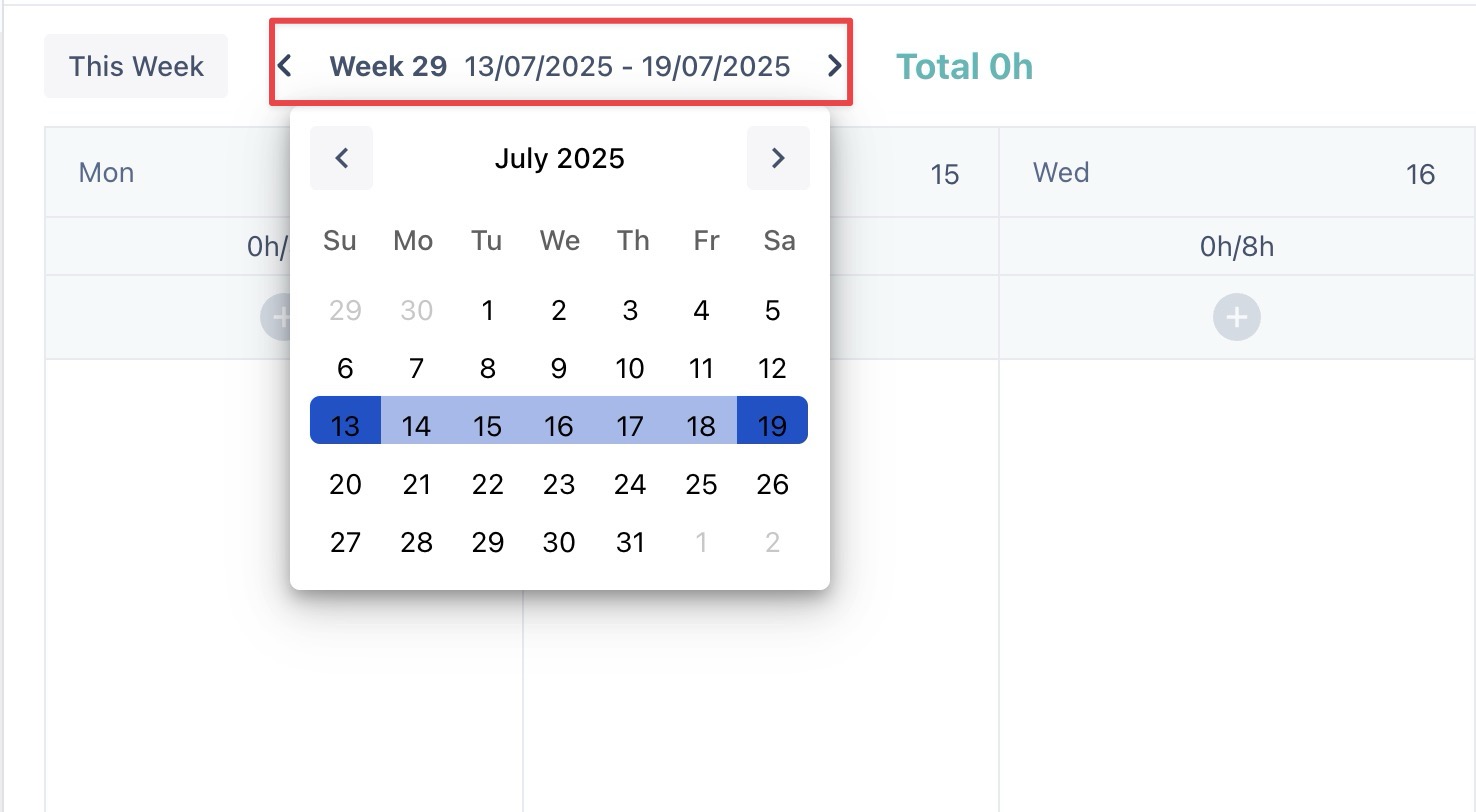
Select the date and time range for which you want to log your time.
-
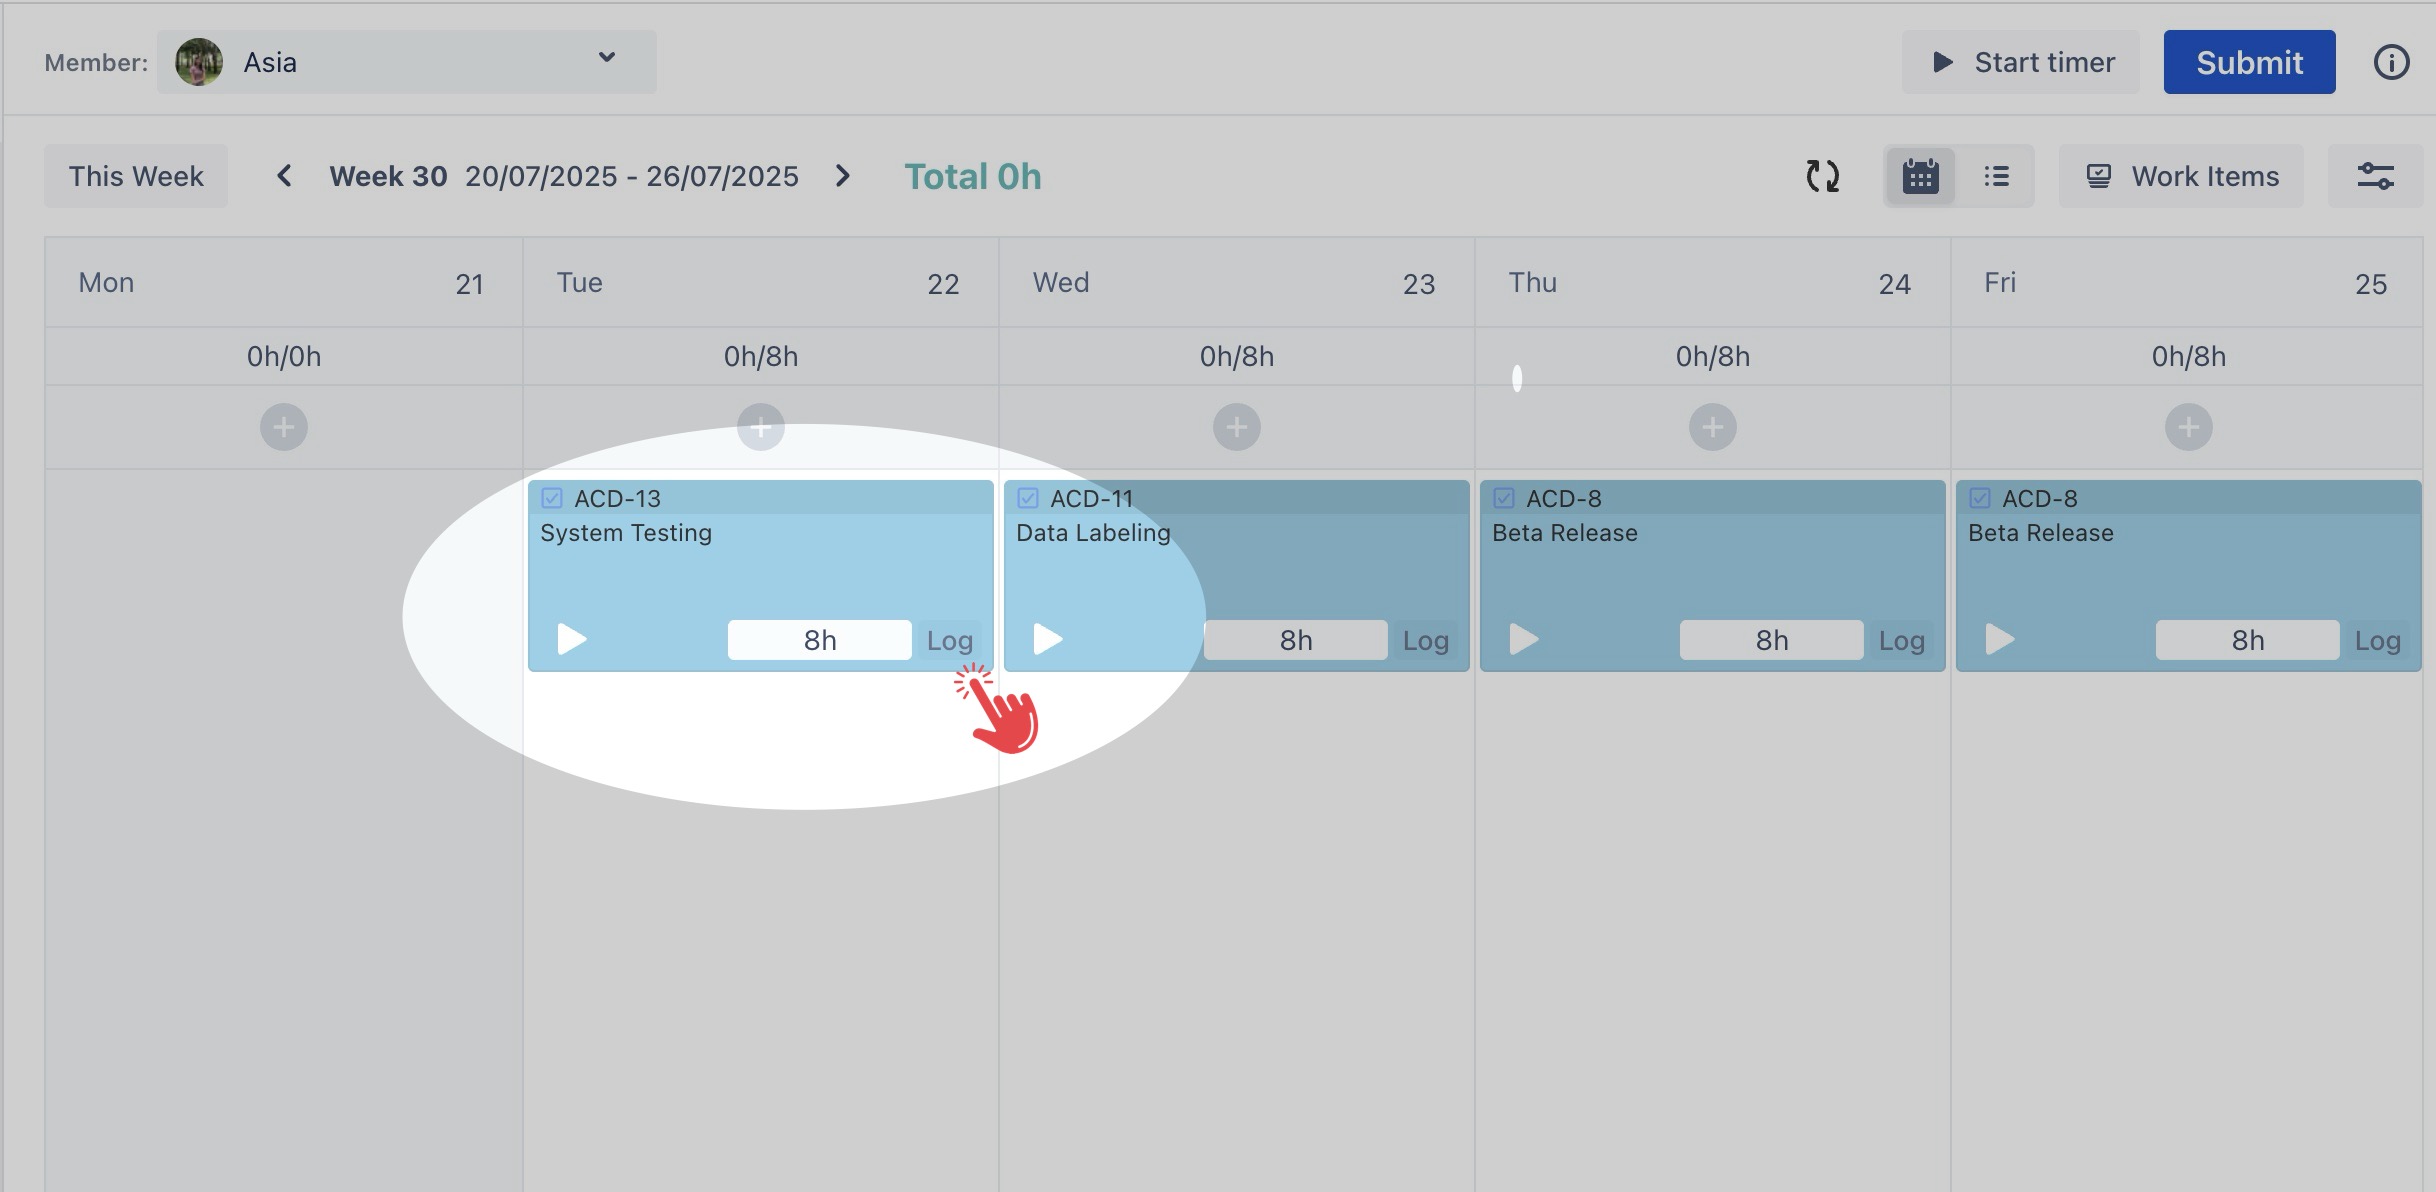
Locate the scheduled task in the calendar view that you want to log time for.
-
Enter the time spent on the task in the Timelog entry field.
-
Click the Log button to save your time entry.
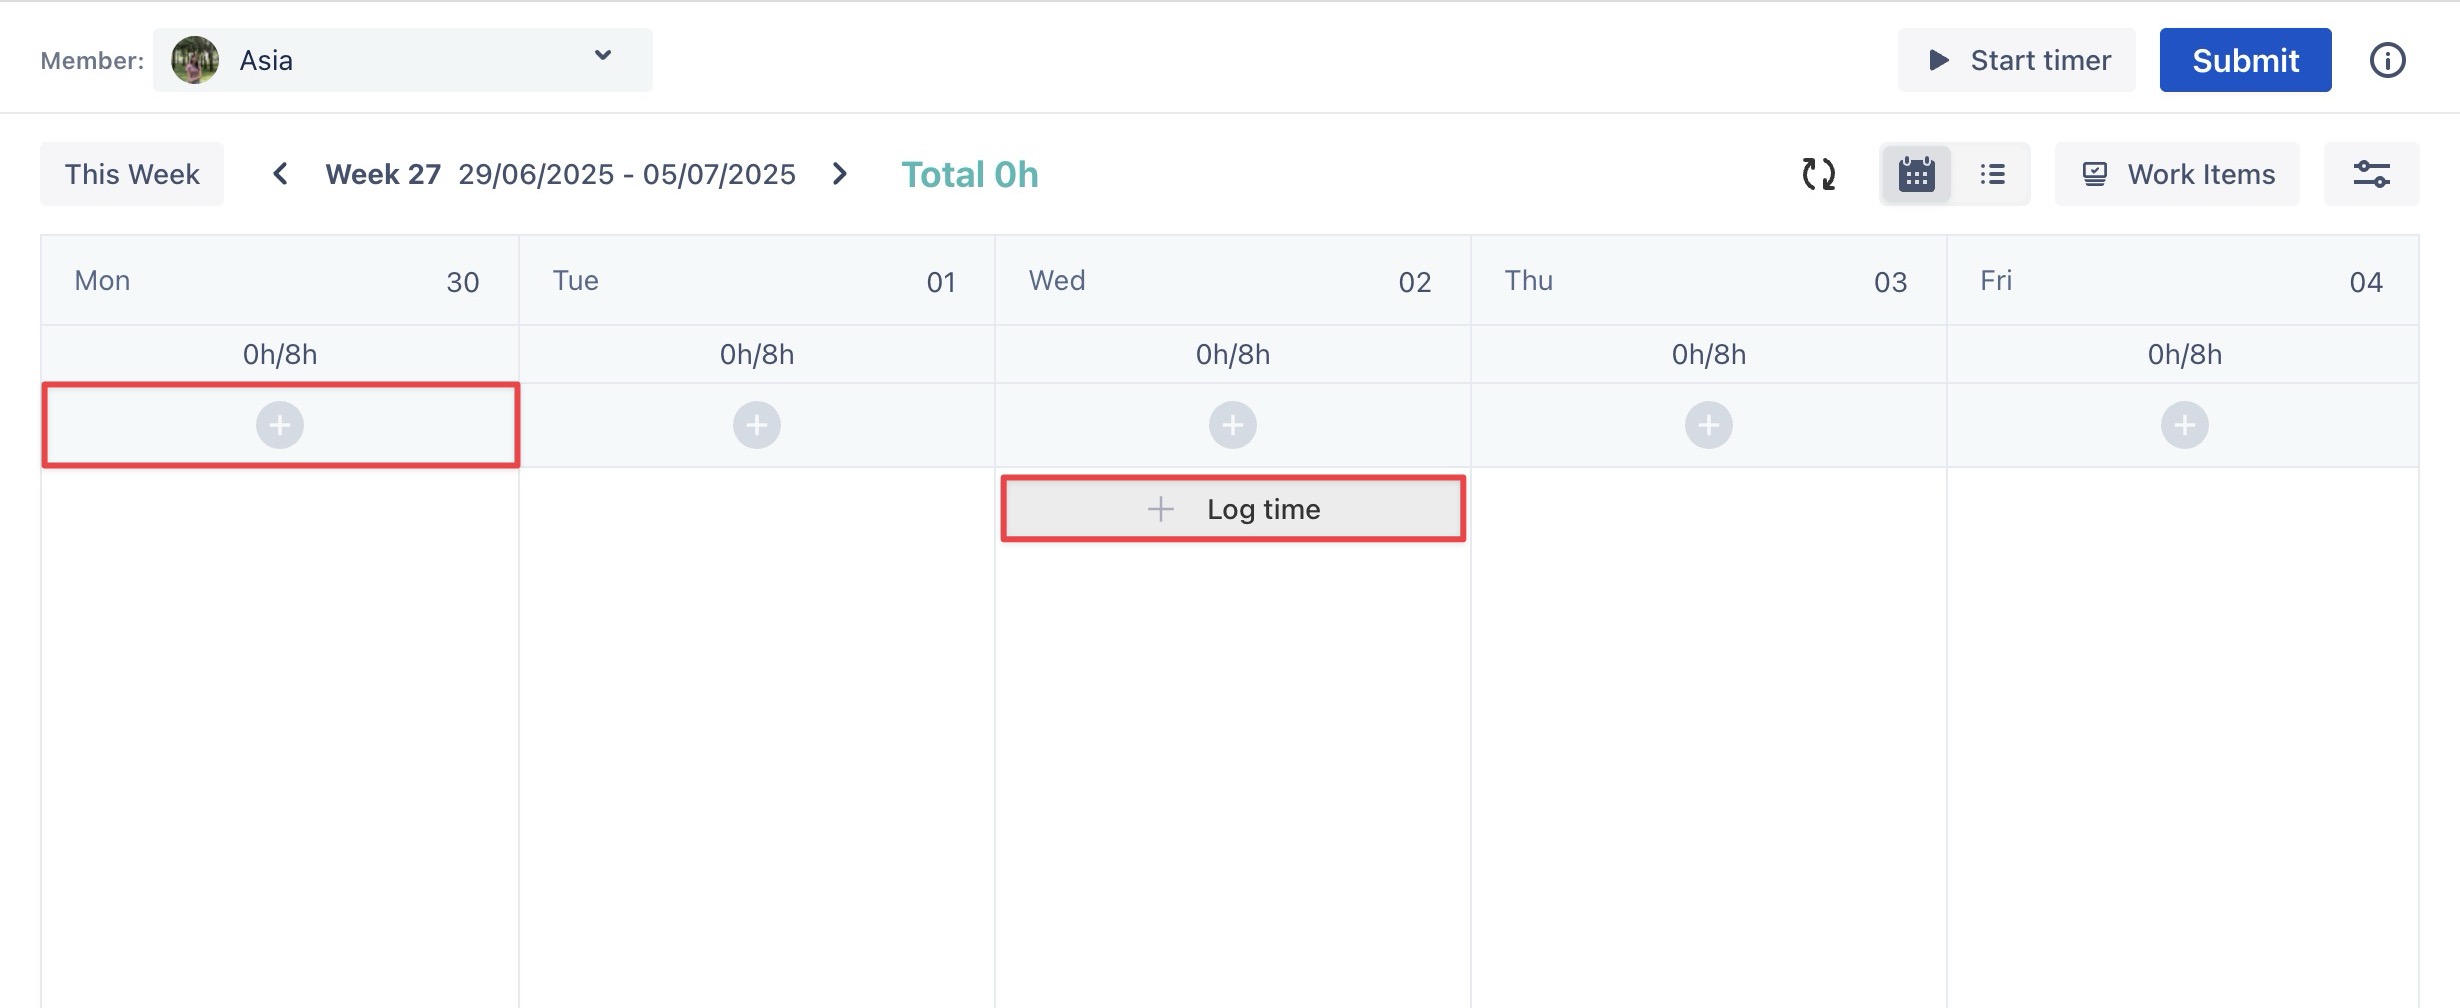
Log Time for Unscheduled Tasks
If a task is not scheduled yet, you can log time by following these steps:
-
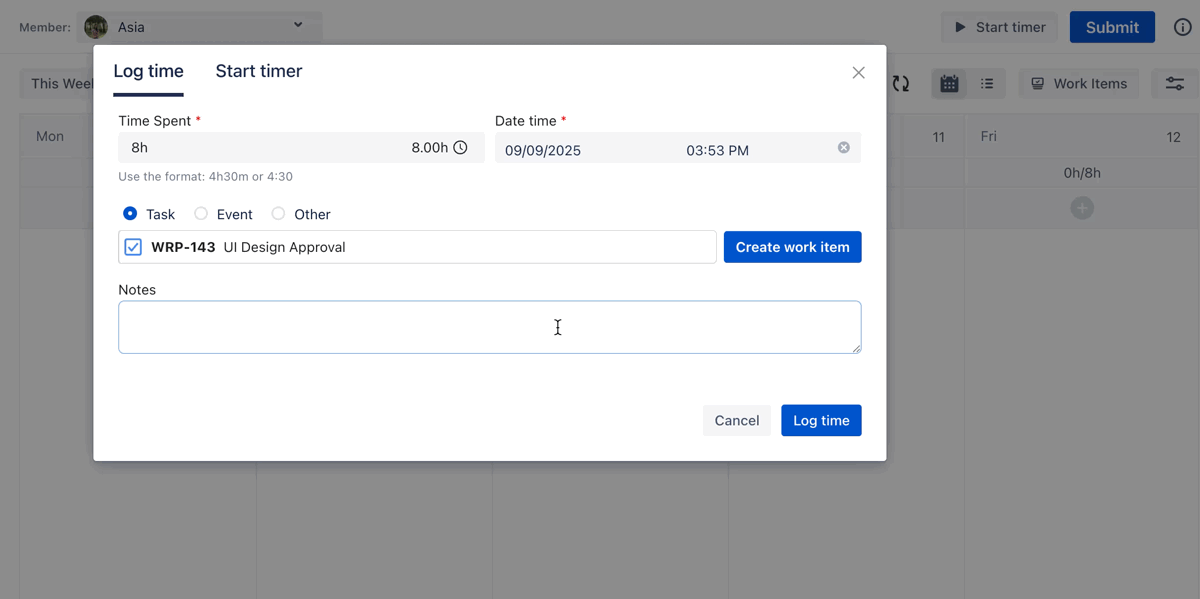
Click the (+) icon, or hover over any date cell and click

-
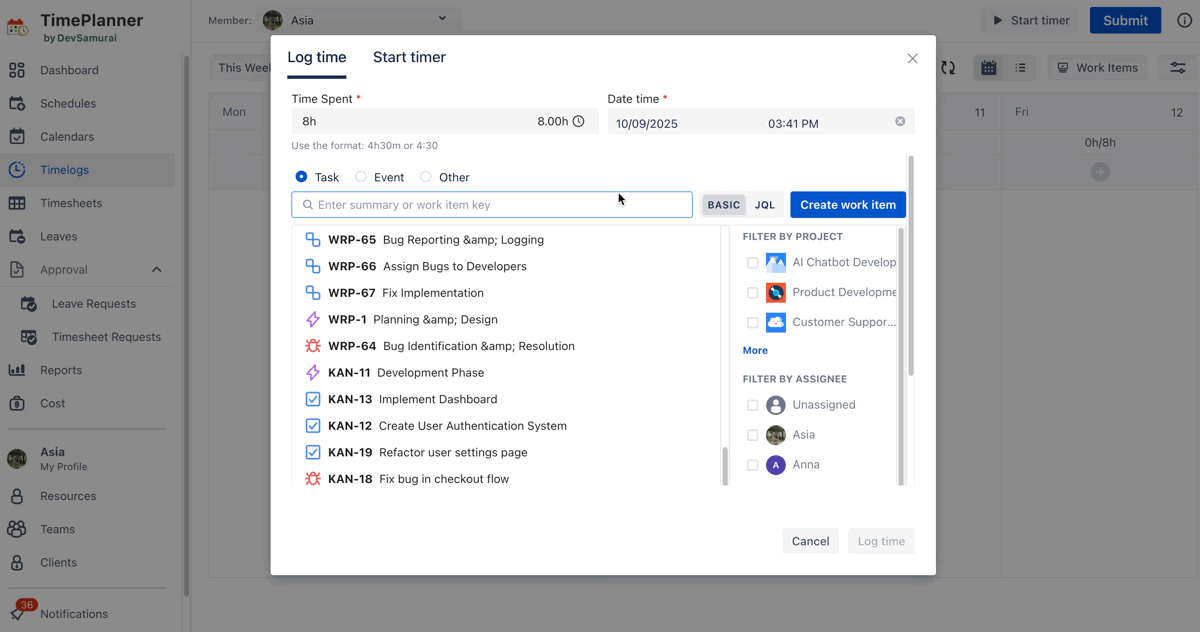
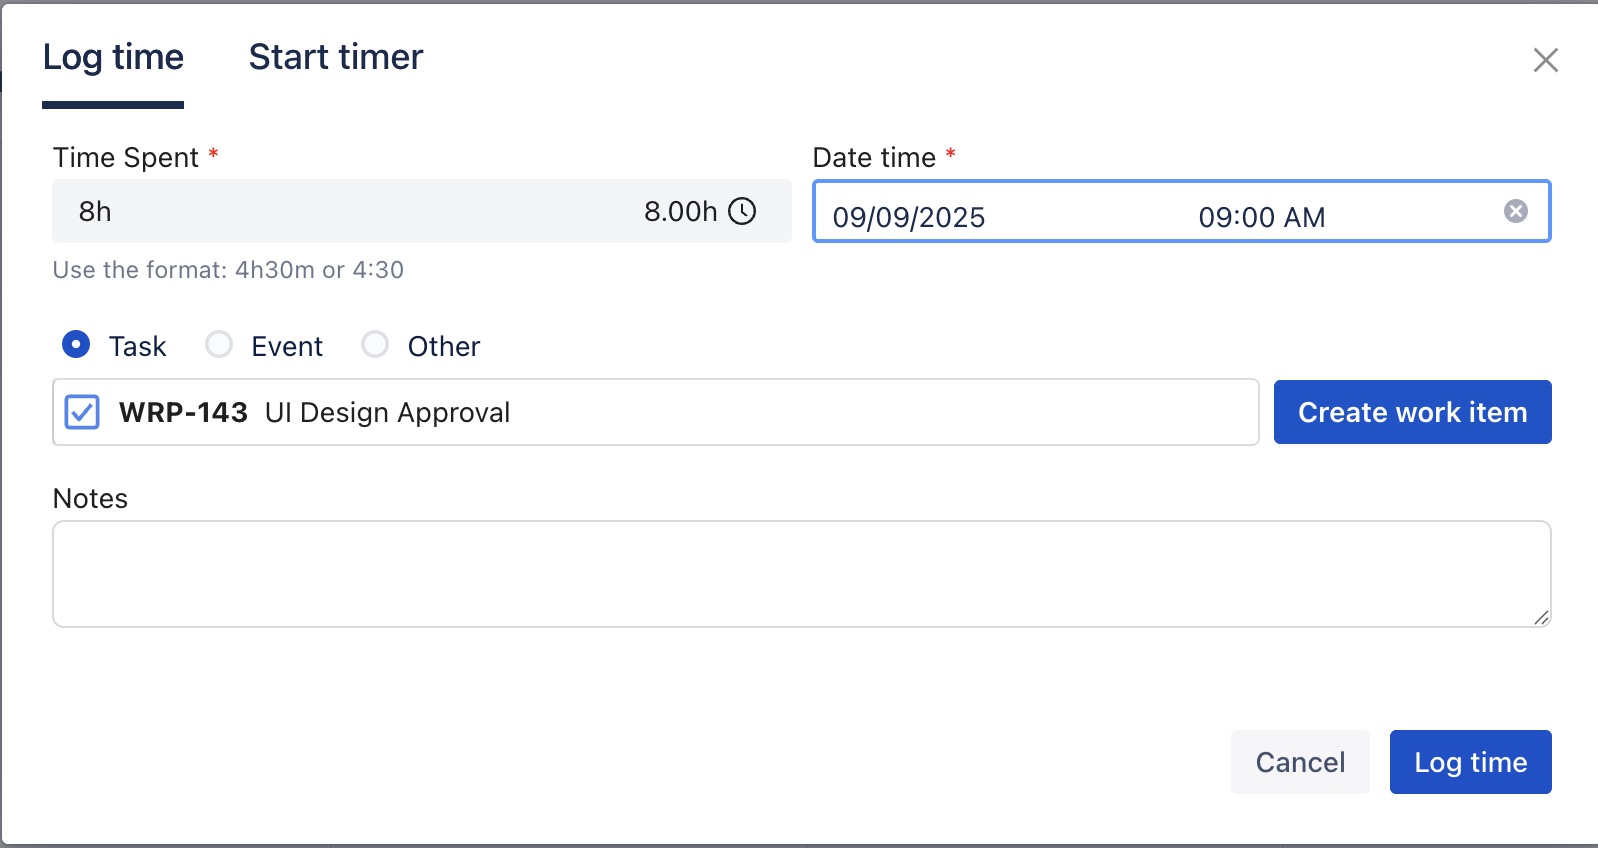
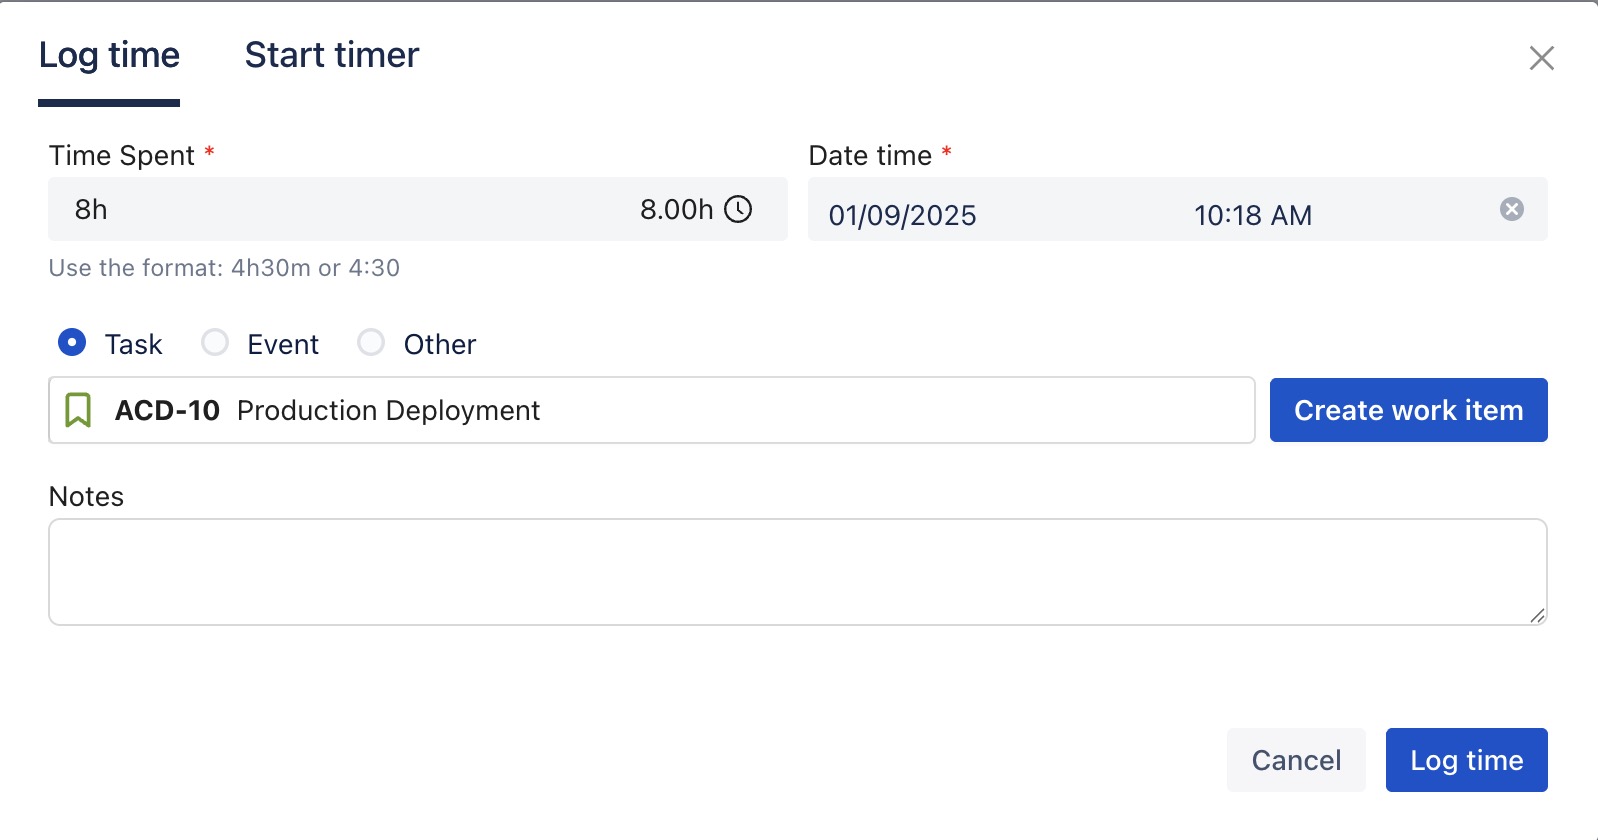
Within the dialog, choose an existing work item or click

-
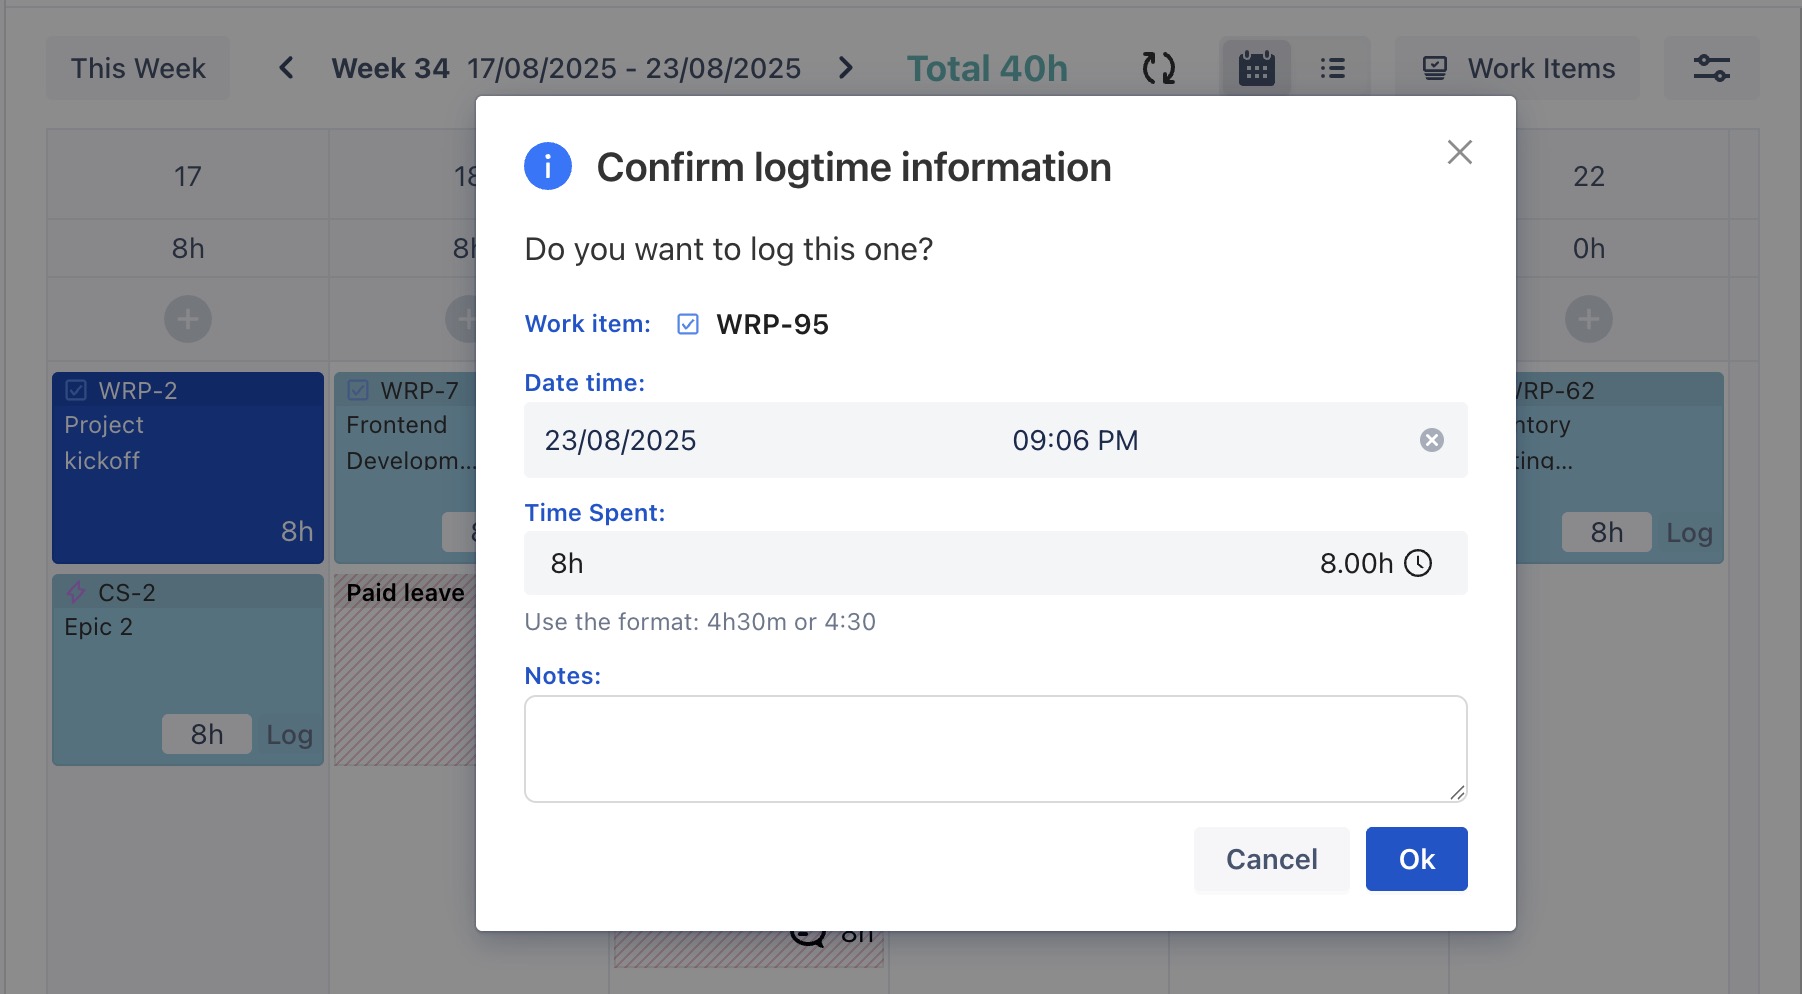
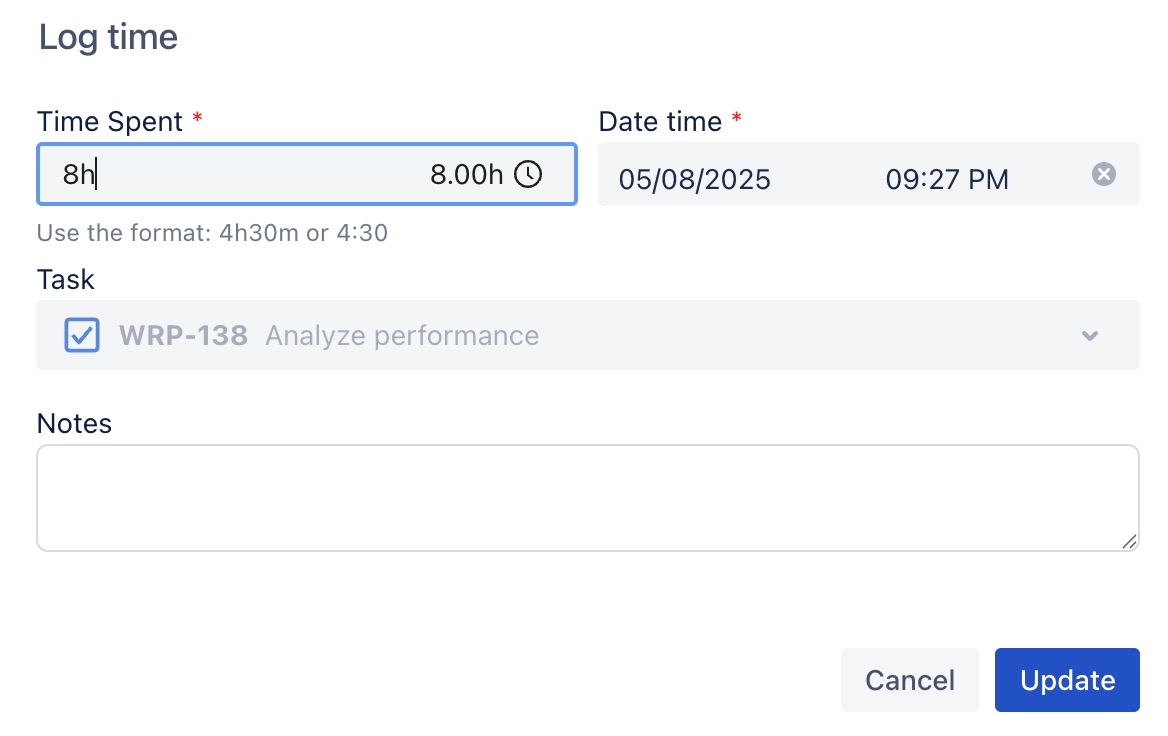
Fill in the following details:
-
Time Spent: Enter the duration of time spent on the task.
-
Date Time: Select the date and time to specify when the work was completed.
-
Notes: Add any relevant comments or details about the task.
-
Once completed, click

Drag Task From Work Item Box
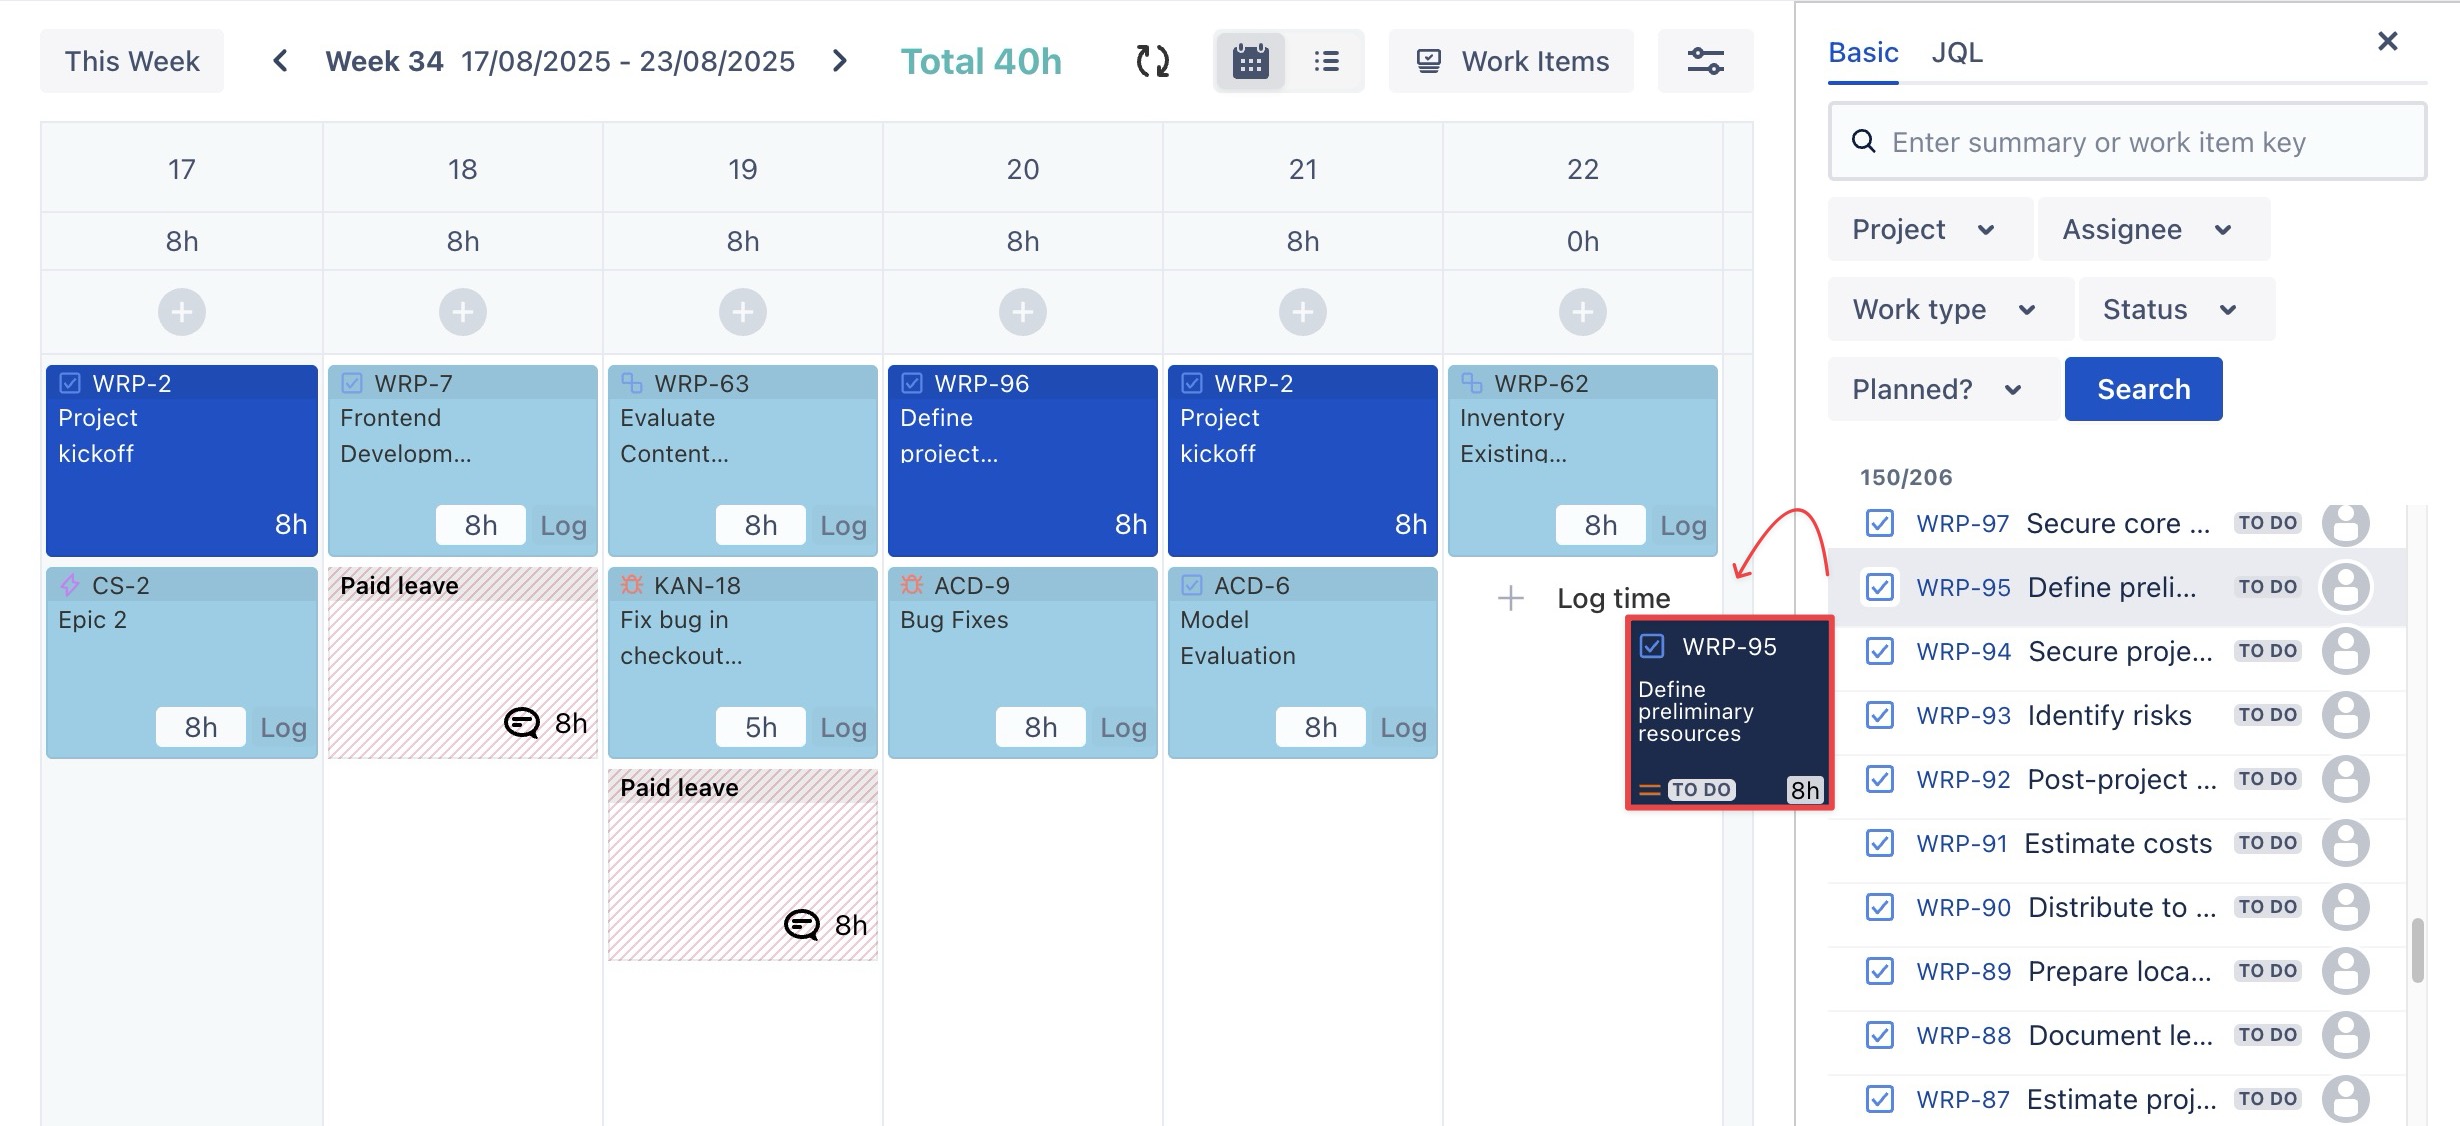
You can quickly log an unscheduled task from the Work Item Box by following these steps:
-
Click

-
Use the search bar to find a specific work item by typing its summary or key.
-
Drag and drop the desired work item onto the board.
-
The Log Time form will appear. Fill in the details, then click OK to save the time log entry.
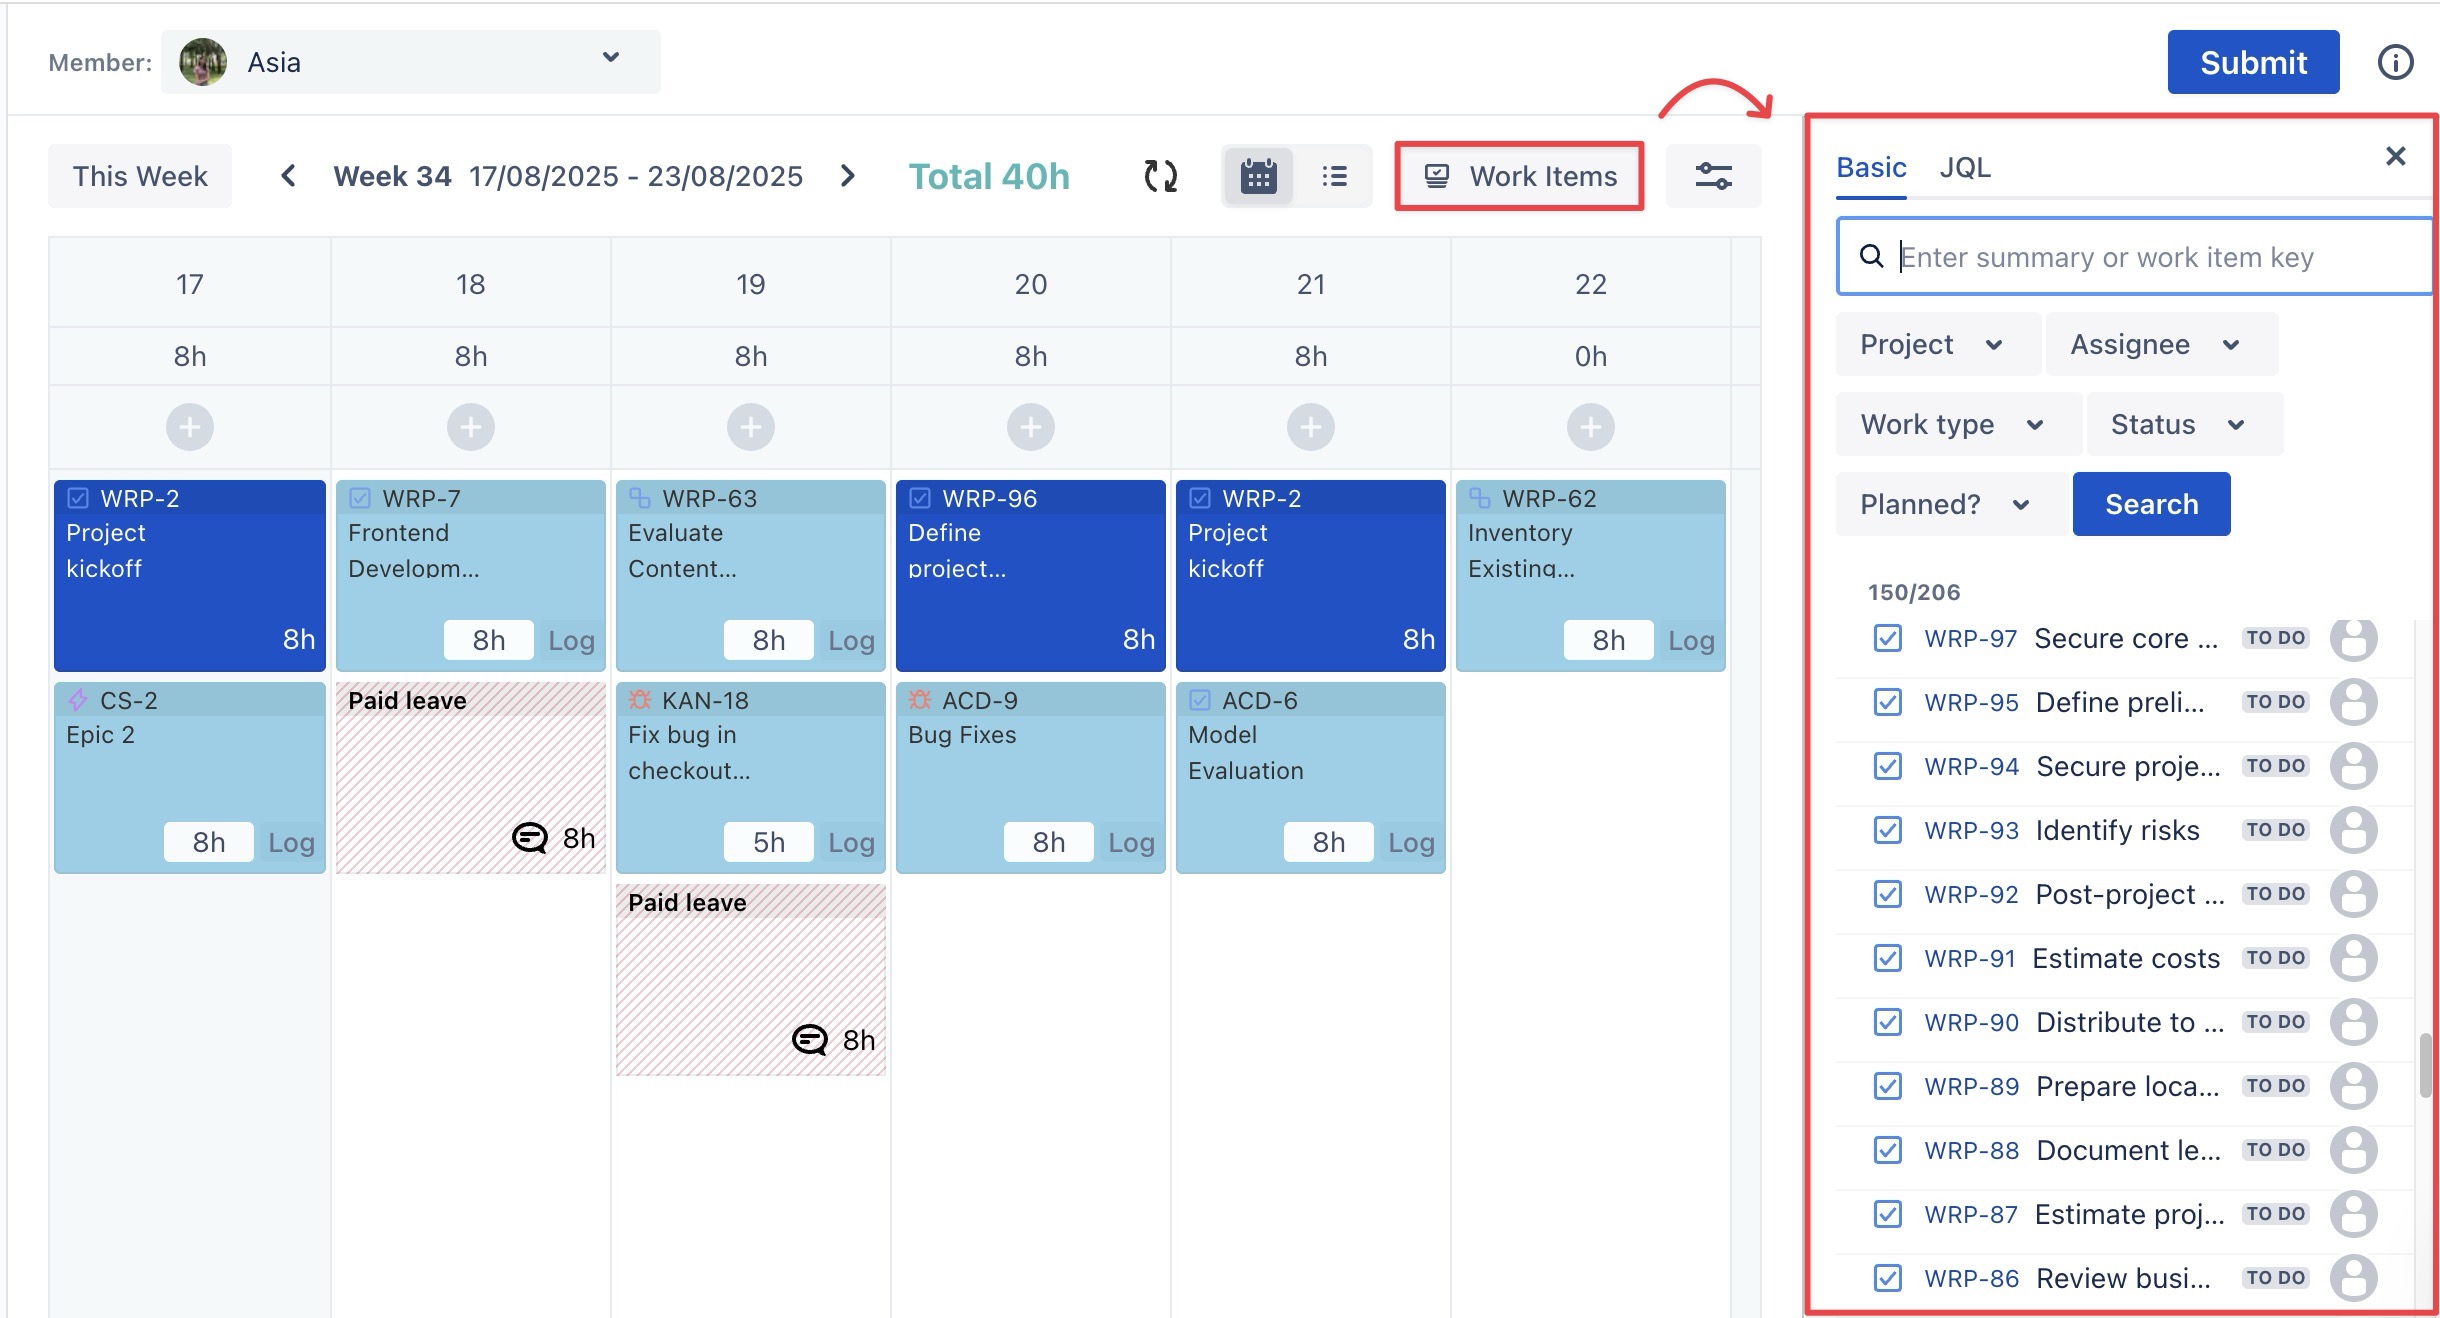
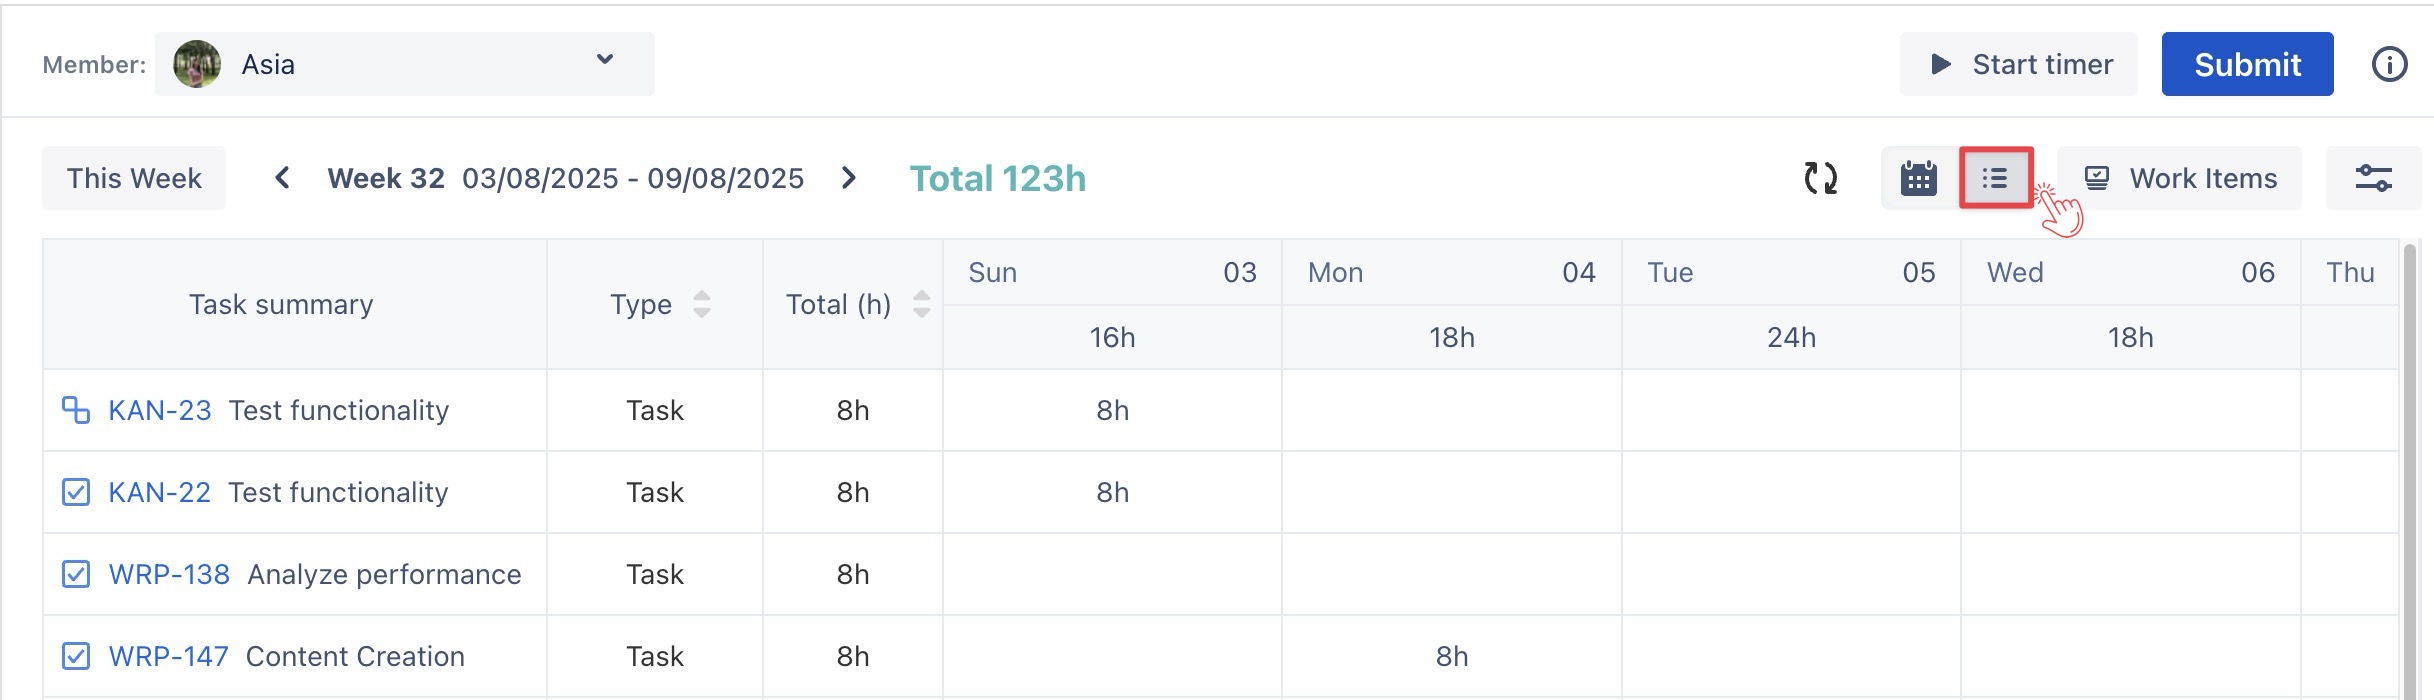
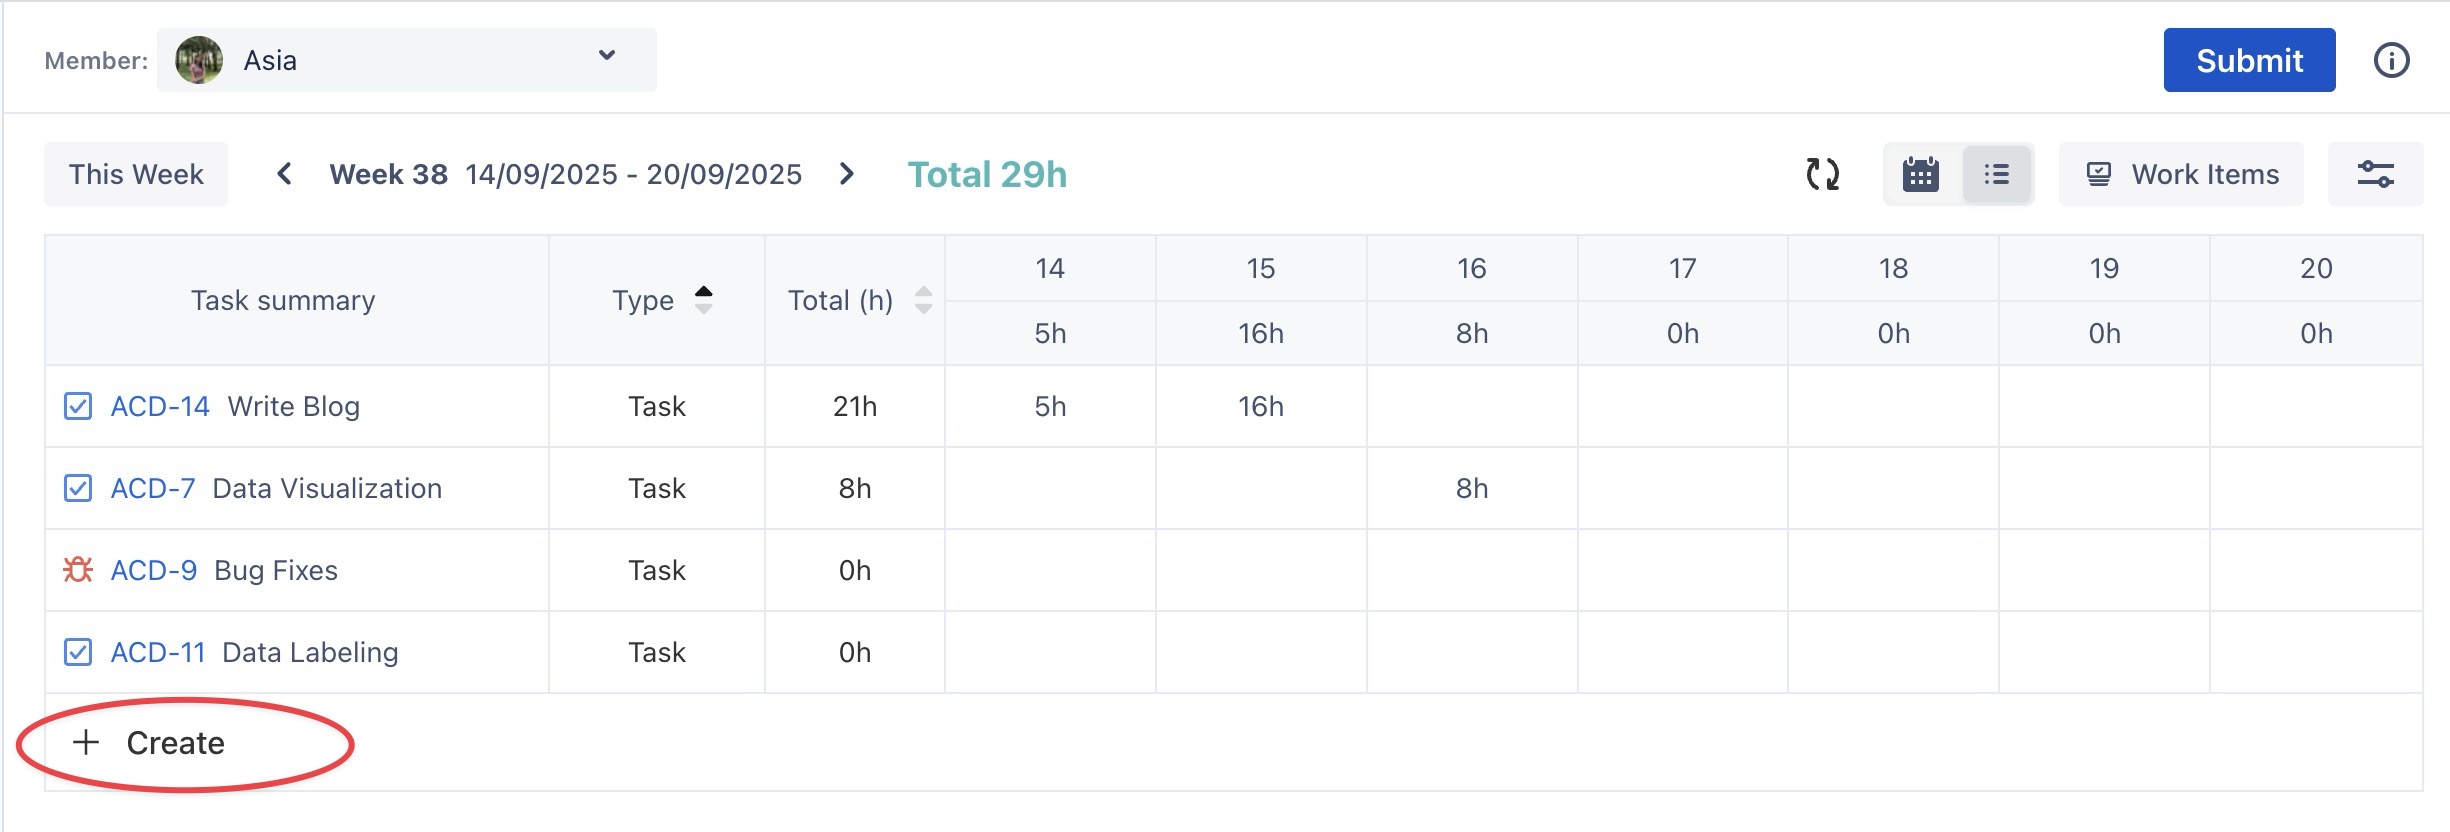
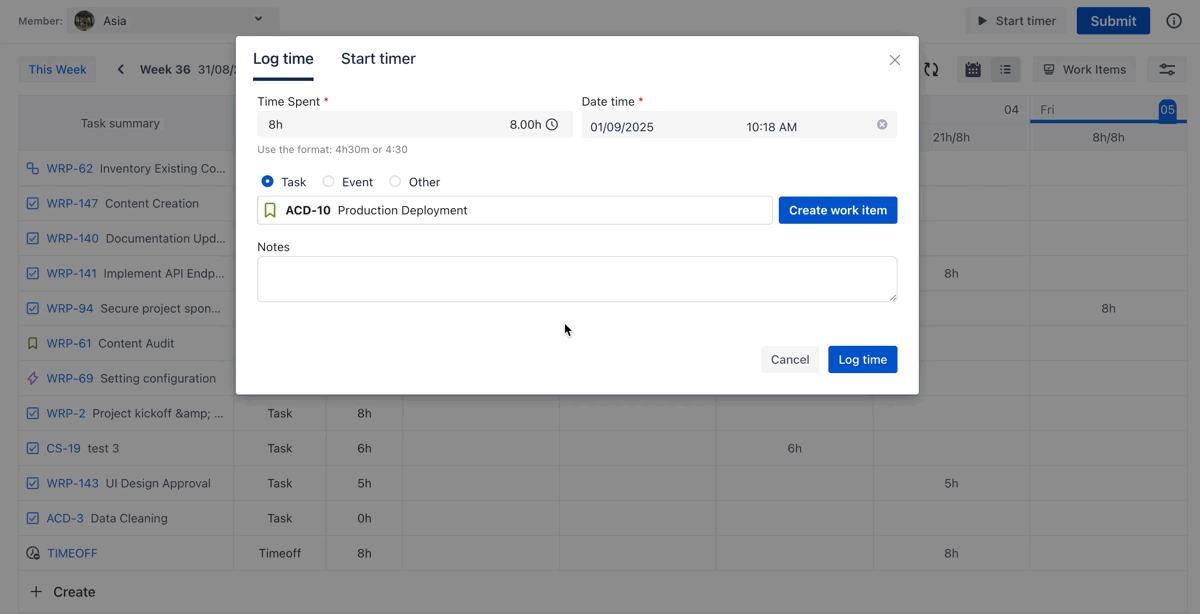
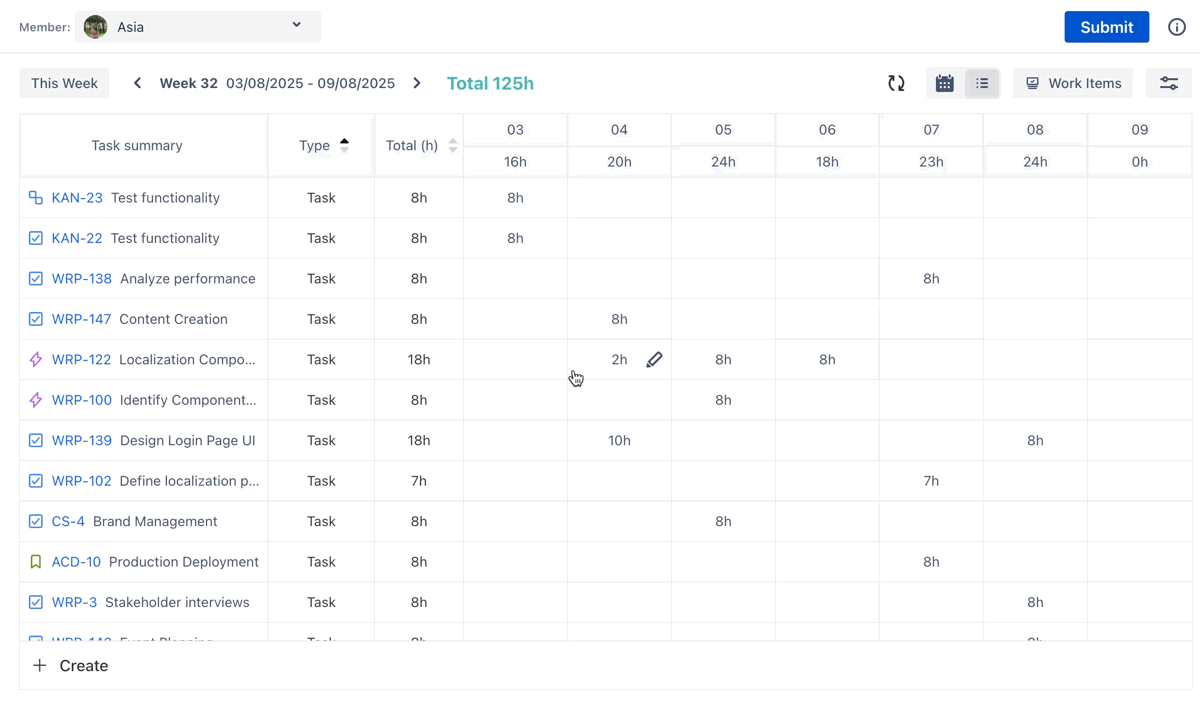
From List View
Log Time for Scheduled Tasks
To log time for tasks that are already created, follow these steps:
-
Navigate to
-
Switch to the List View by selecting

-
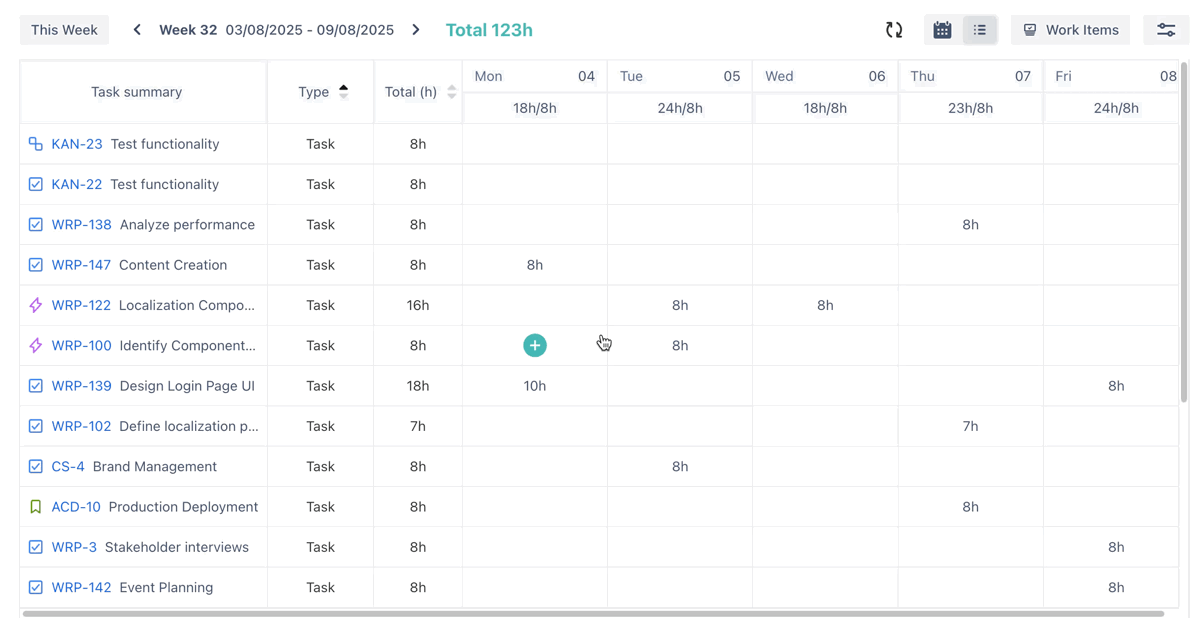
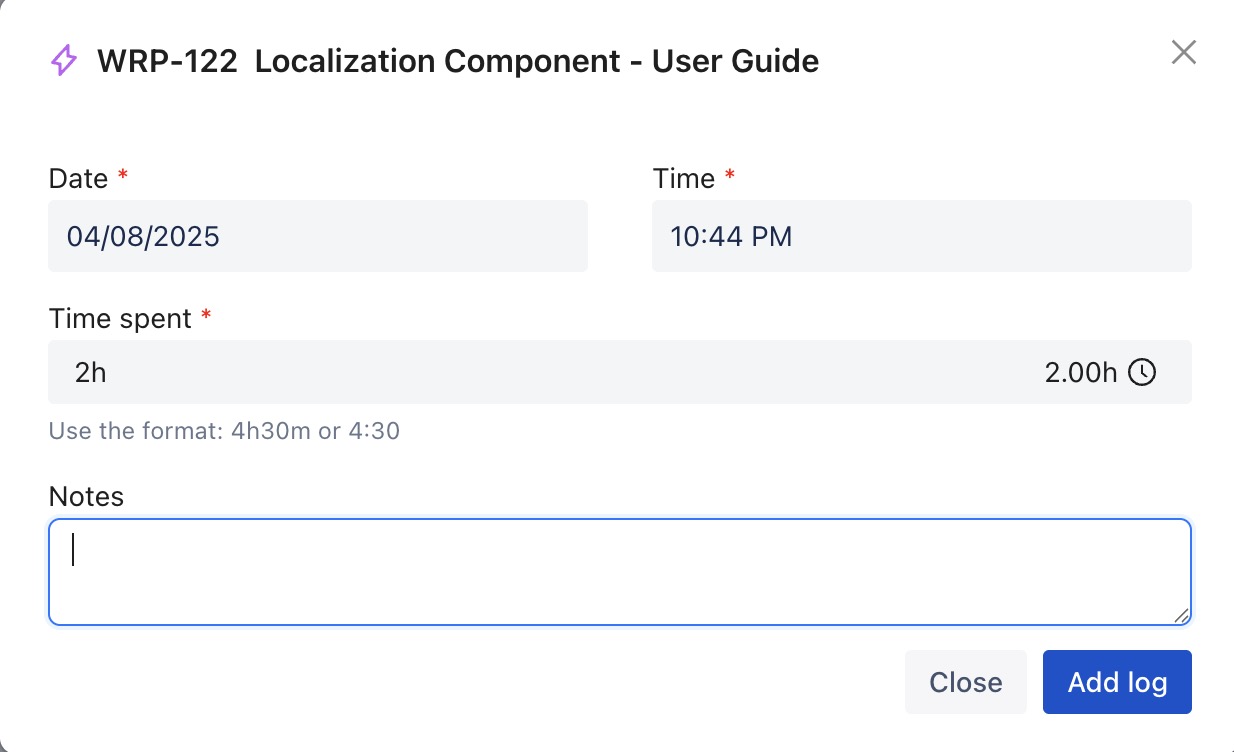
Hover over the empty cell for a task, then click the (+) button to open the Log Time form.
-
Fill in the following details:
-
Time Spent: Enter the duration of time spent on the task.
-
Date Time: Select the date and time to specify when the work was completed.
-
Notes: Add any relevant comments or details about the task.
-
Click

Log Time for New Tasks
If a task is not scheduled yet, follow these steps:
-
Click the + Create button located below the table to open the Planning Dialog.
-
Within the dialog, choose an existing work item or click
-
Fill in the following details:
-
Time Spent: Enter the duration of time spent on the task.
-
Date Time: Select the date and time to specify when the work was completed.
-
Notes: Add any relevant comments or details about the task.
-
Click

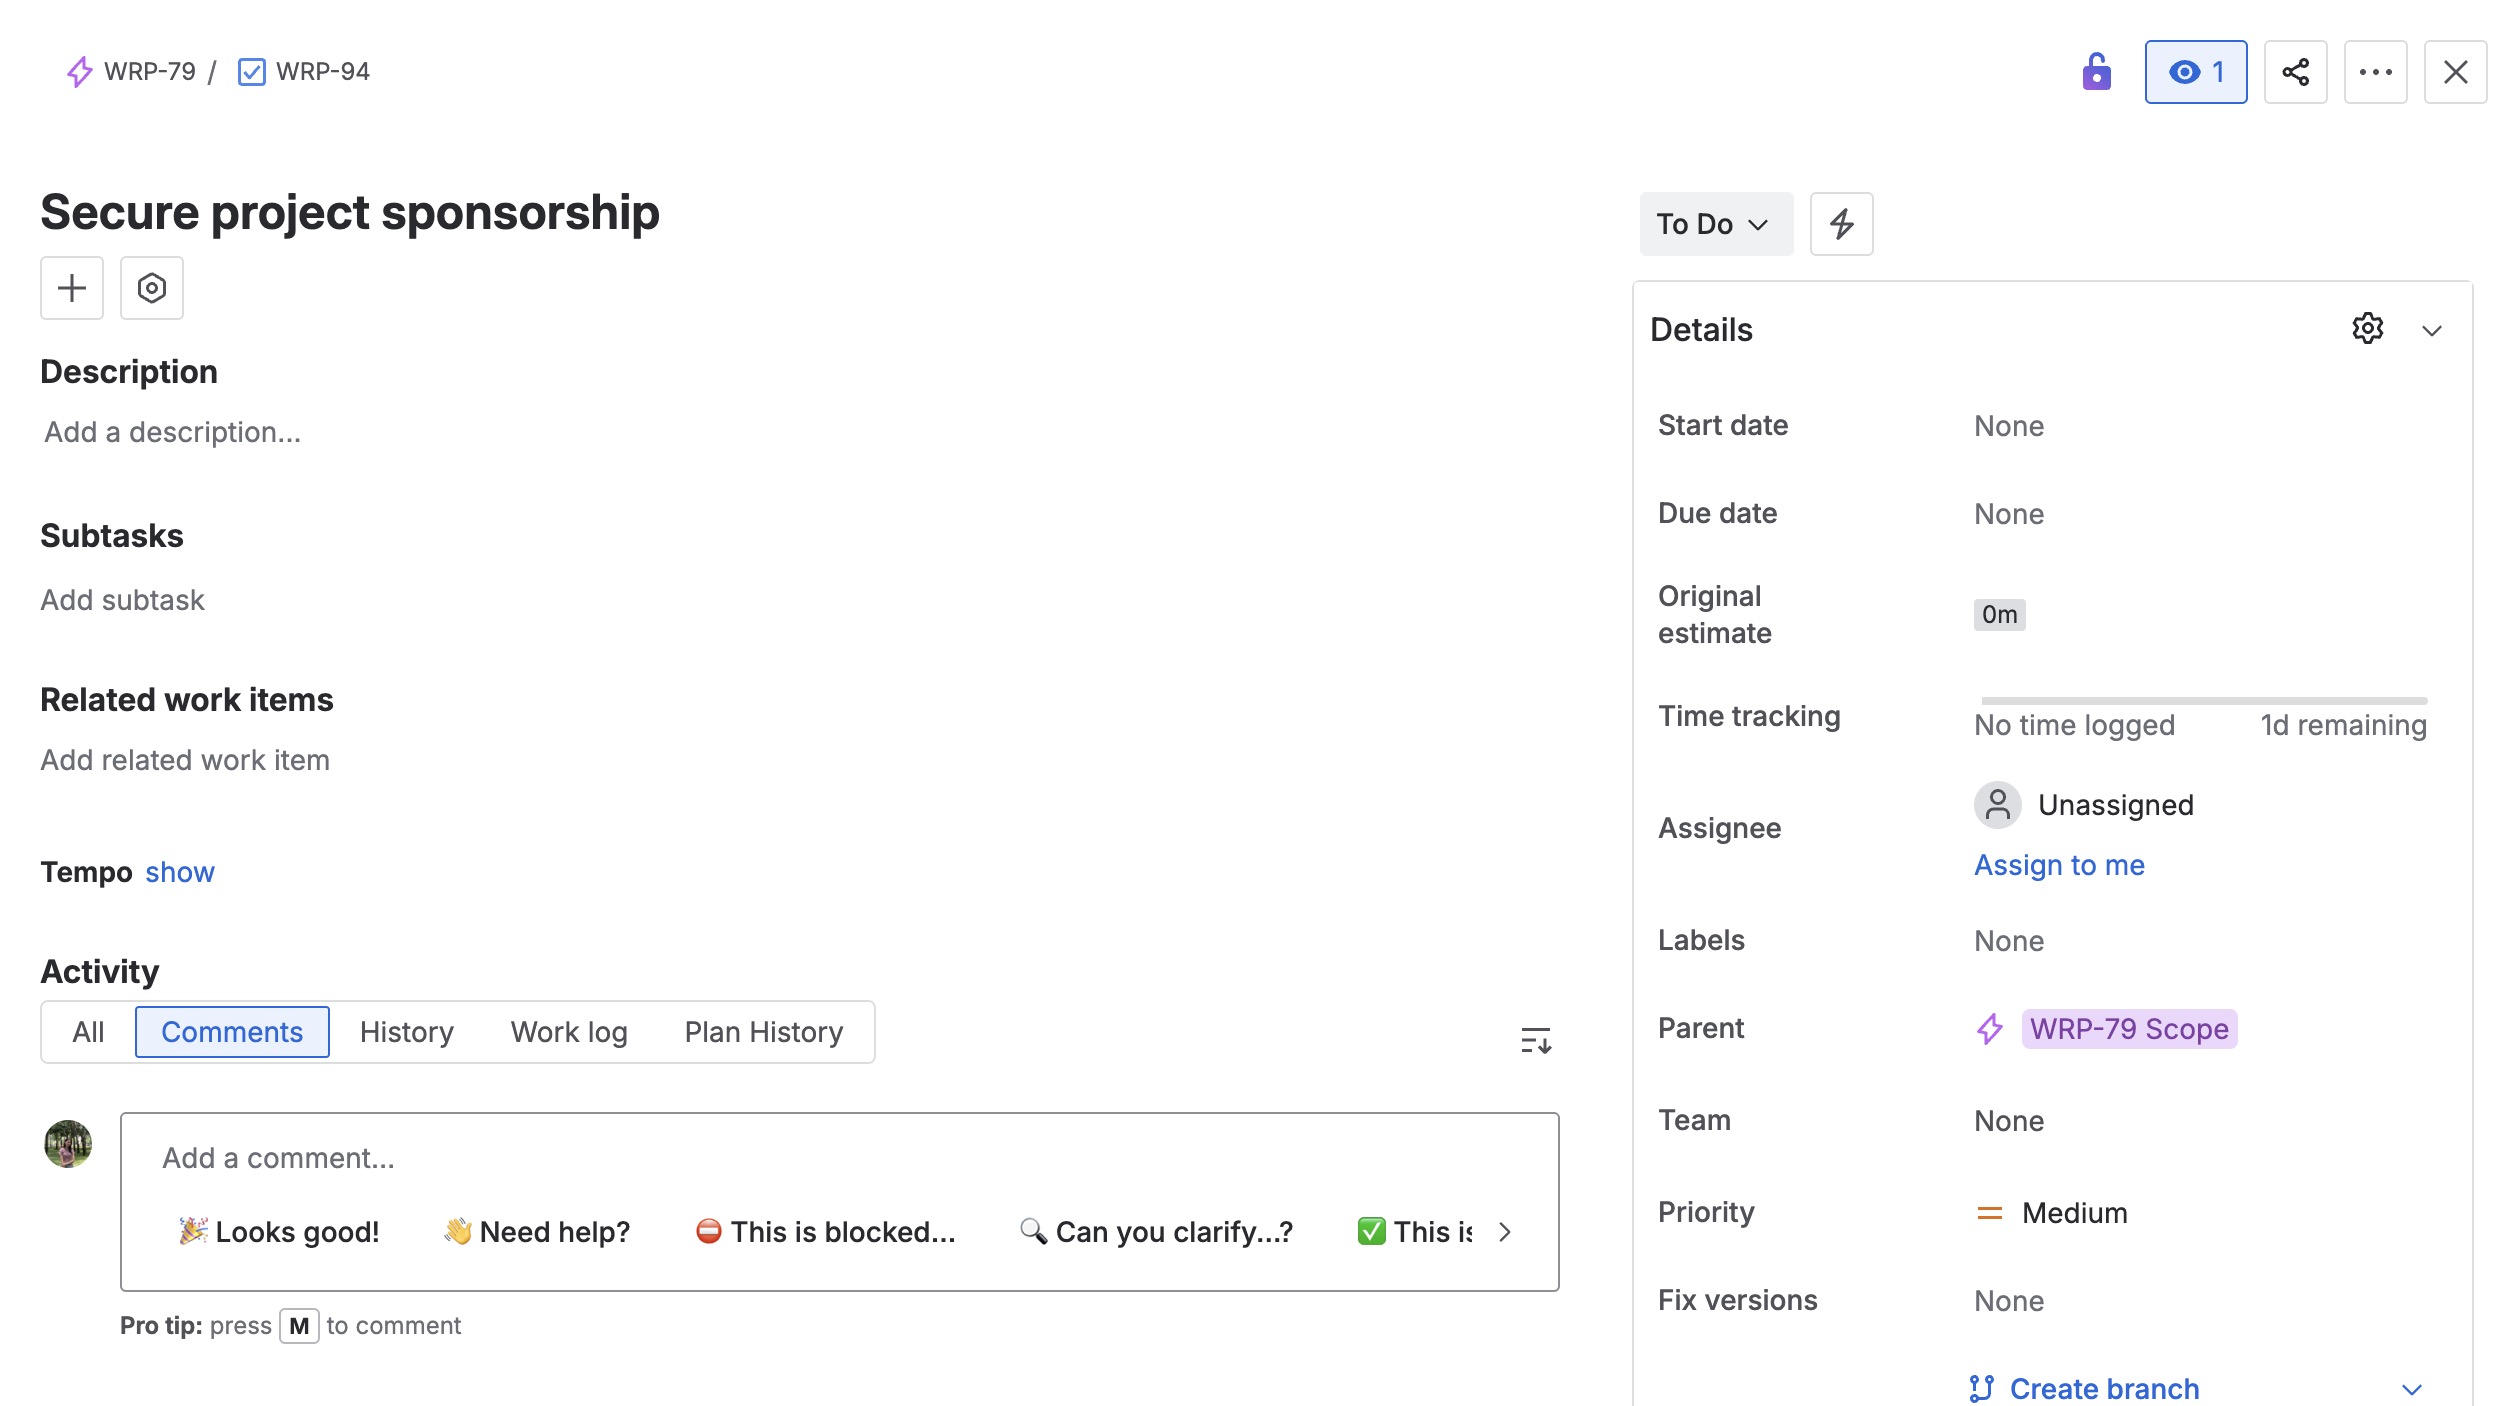
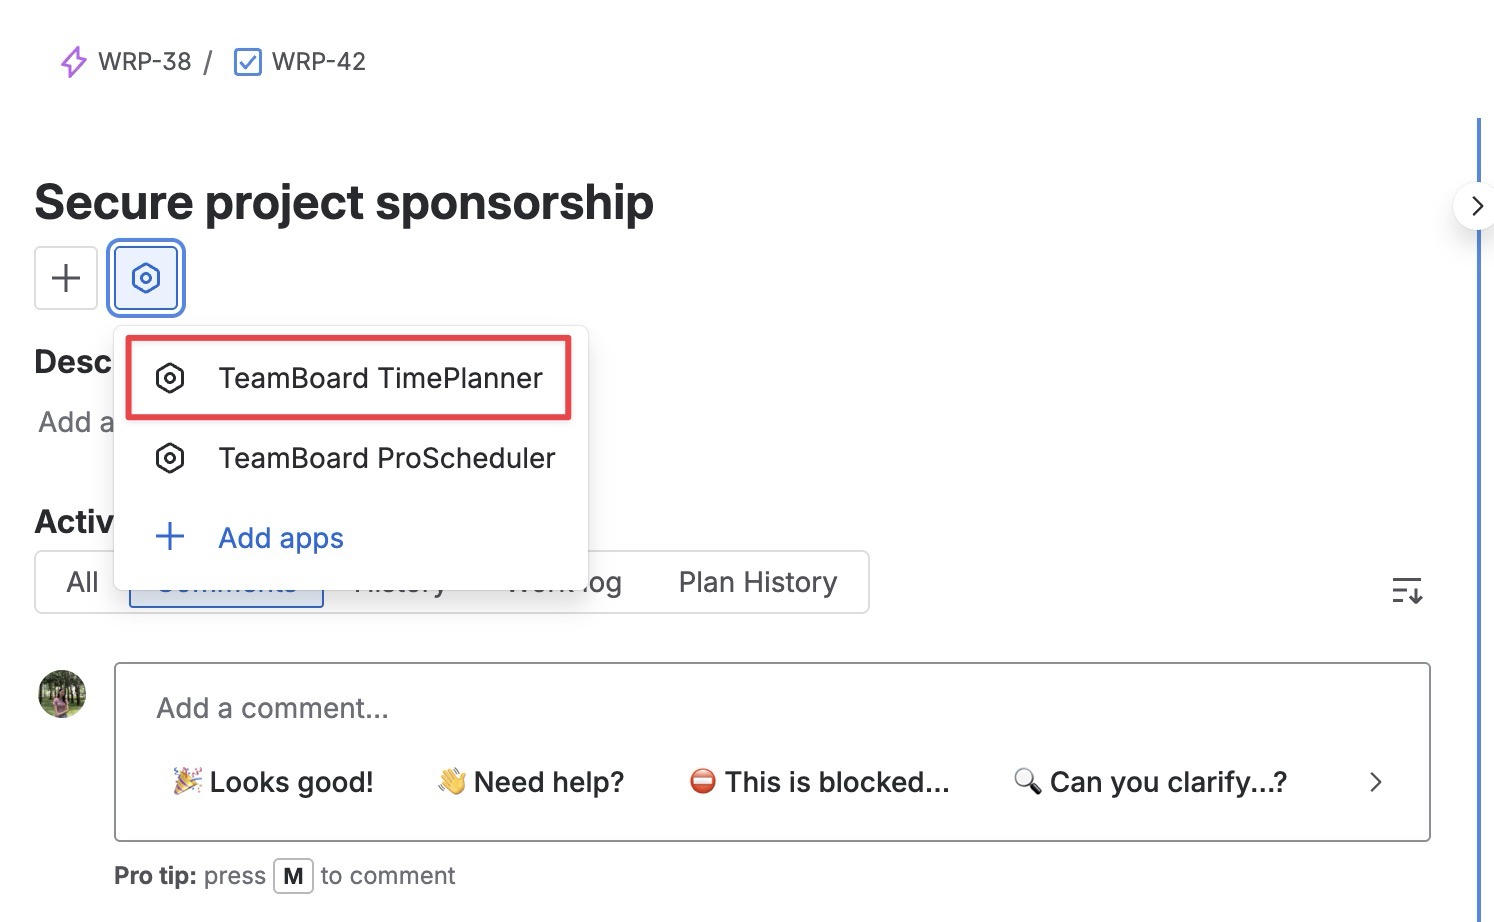
From Jira Work Item
You can log time directly from a Jira Work Item without opening the TimePlanner app. Follow these steps:
-
Open the Jira work item you want to log time for.
-
From the top left corner, click

-
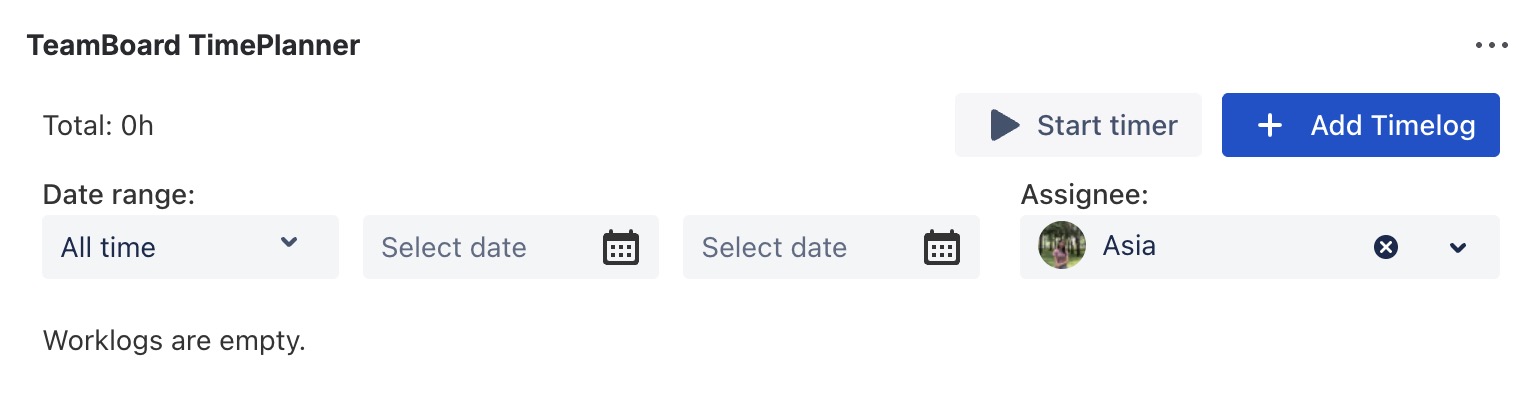
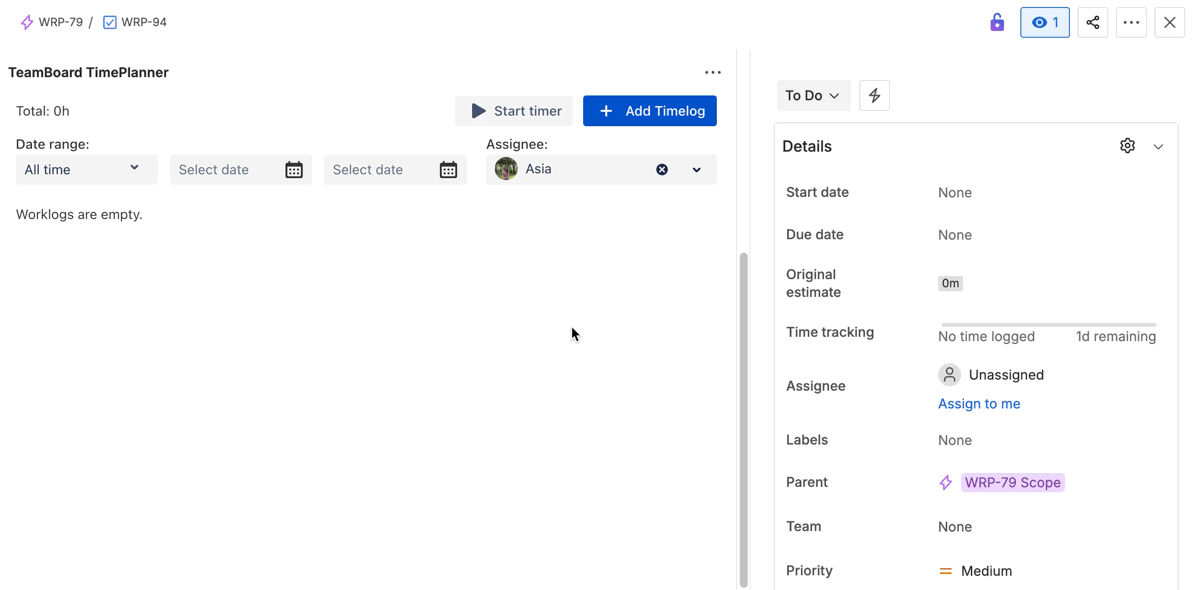
The TimePlanner section will appear within the Jira work item details screen.
-
Click

-
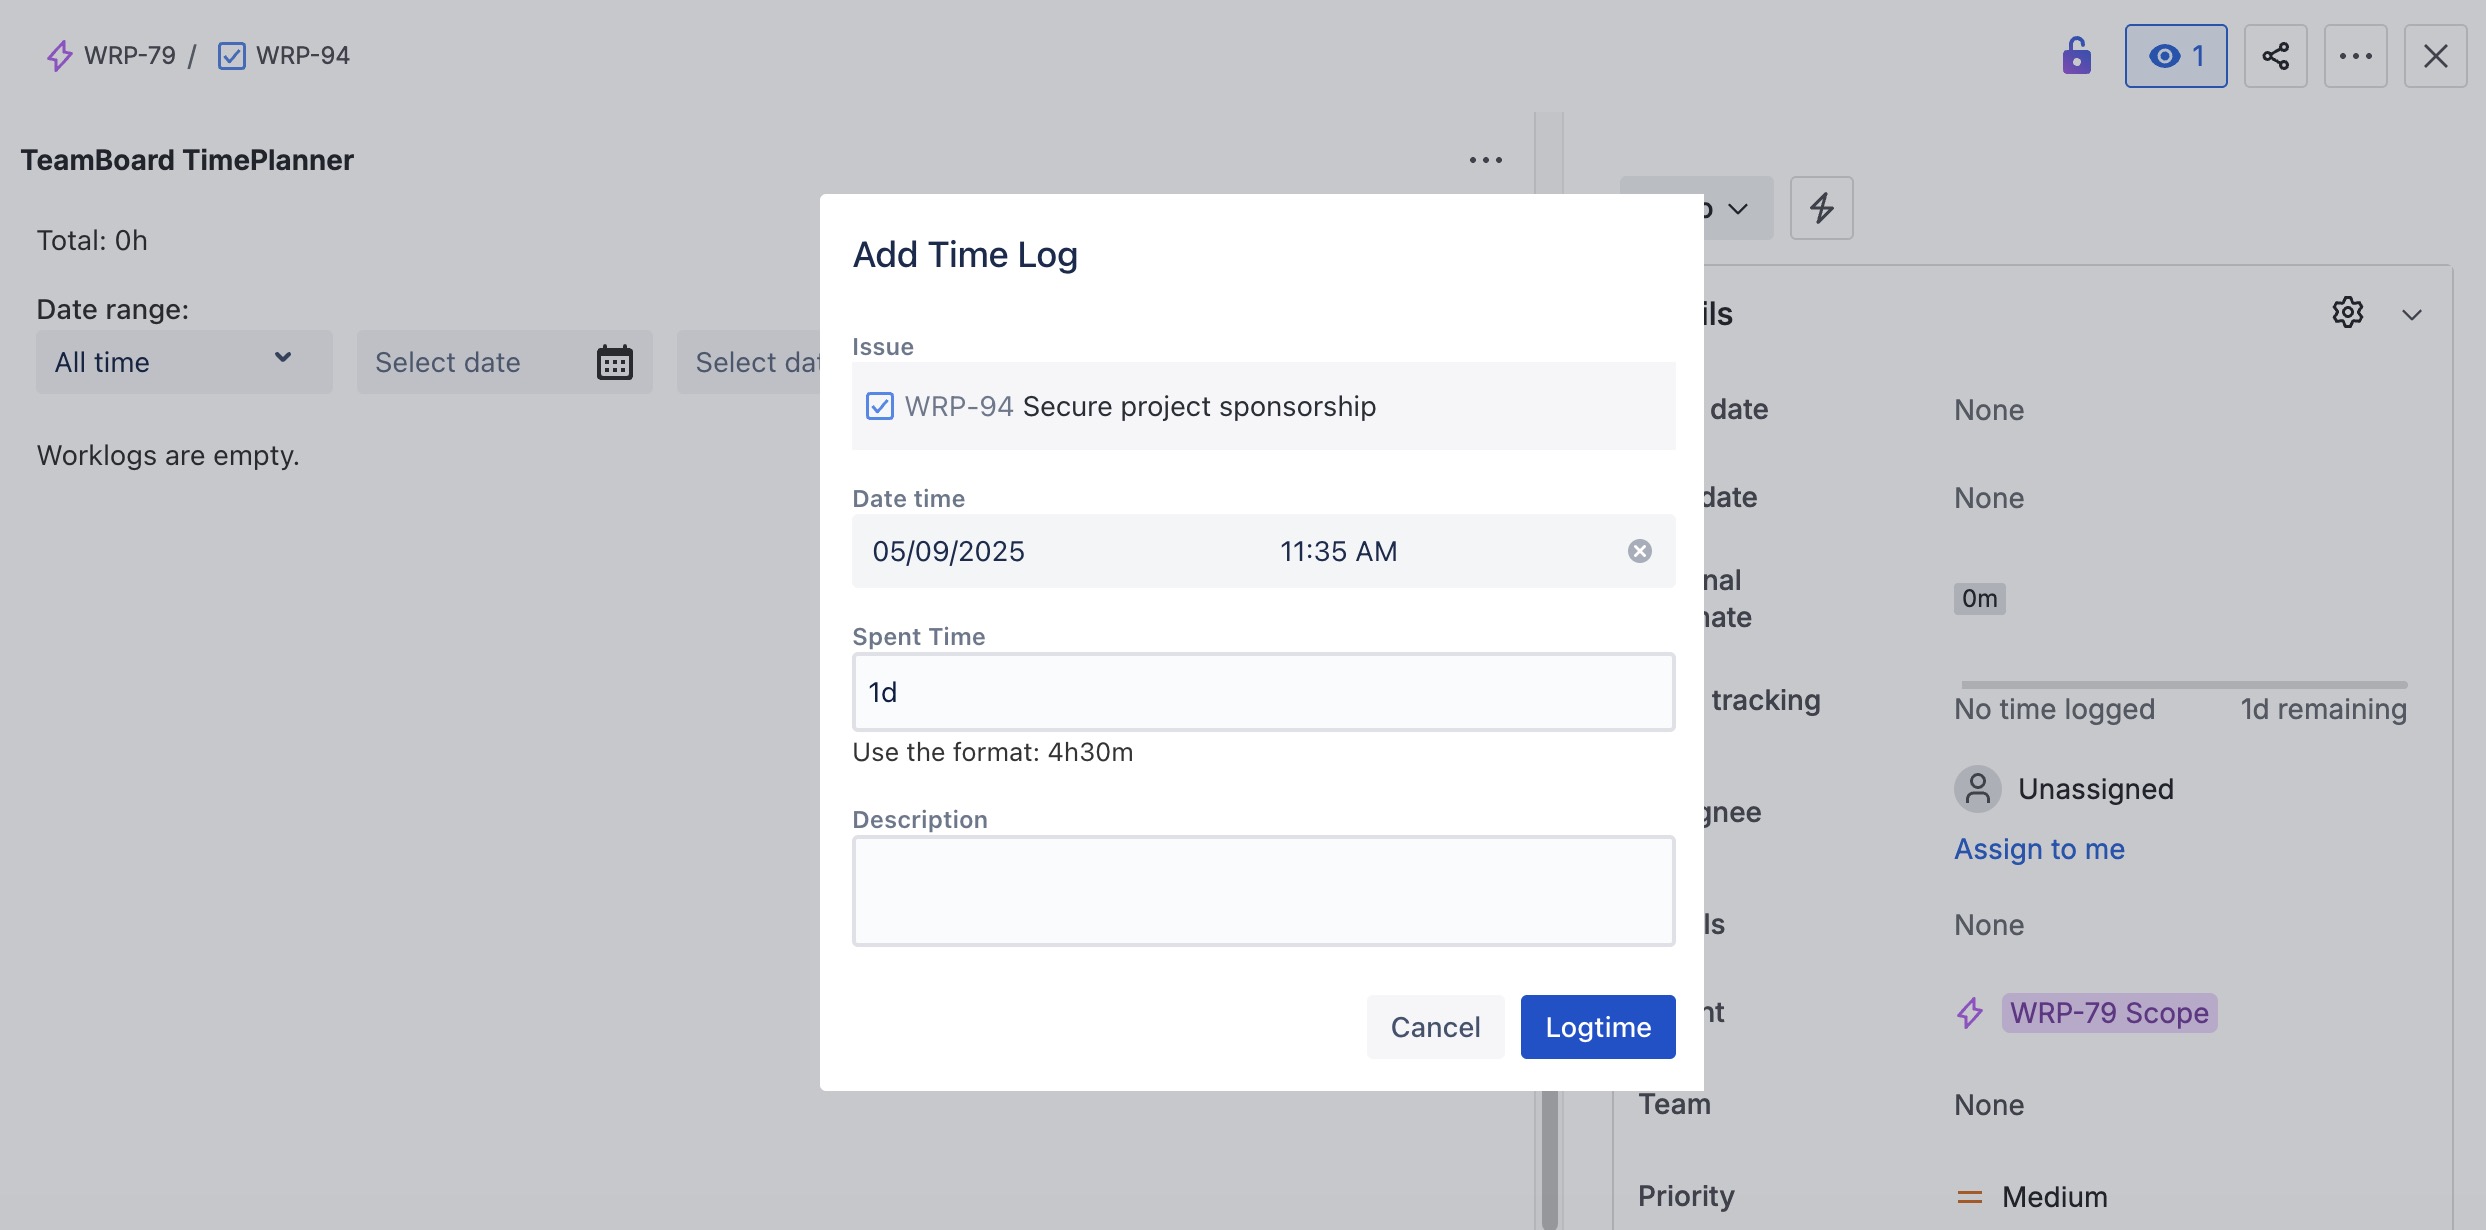
In the Log Time Form, fill in the following details:
-
Date Time: Select the date and time to specify when the work was completed.
-
Spent Time: Enter the duration of time spent on the task.
-
Description: Add any relevant comments or details about the task.
-
Click

This will record your time within Jira and also sync it with TeamBoard TimePlanner for reporting and tracking.
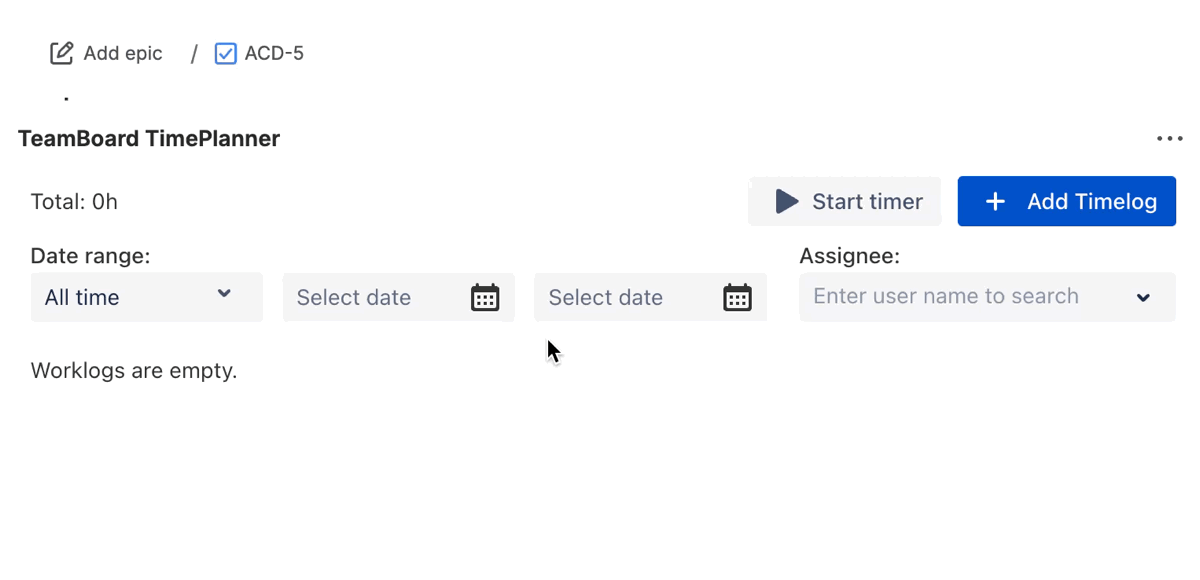
Log Time using the Start Timer
The Start Timer feature in TeamBoard TimePlanner allows you to track your work in real-time. Once you start the timer, it records the duration of the task you’re working on. When you finish, simply stop the timer to save a timelog entry for the current day.
1. Start Timer in Calendar View
You can use the Start Timer feature directly within the Calendar View to track time for tasks associated with specific dates. Here’s how:
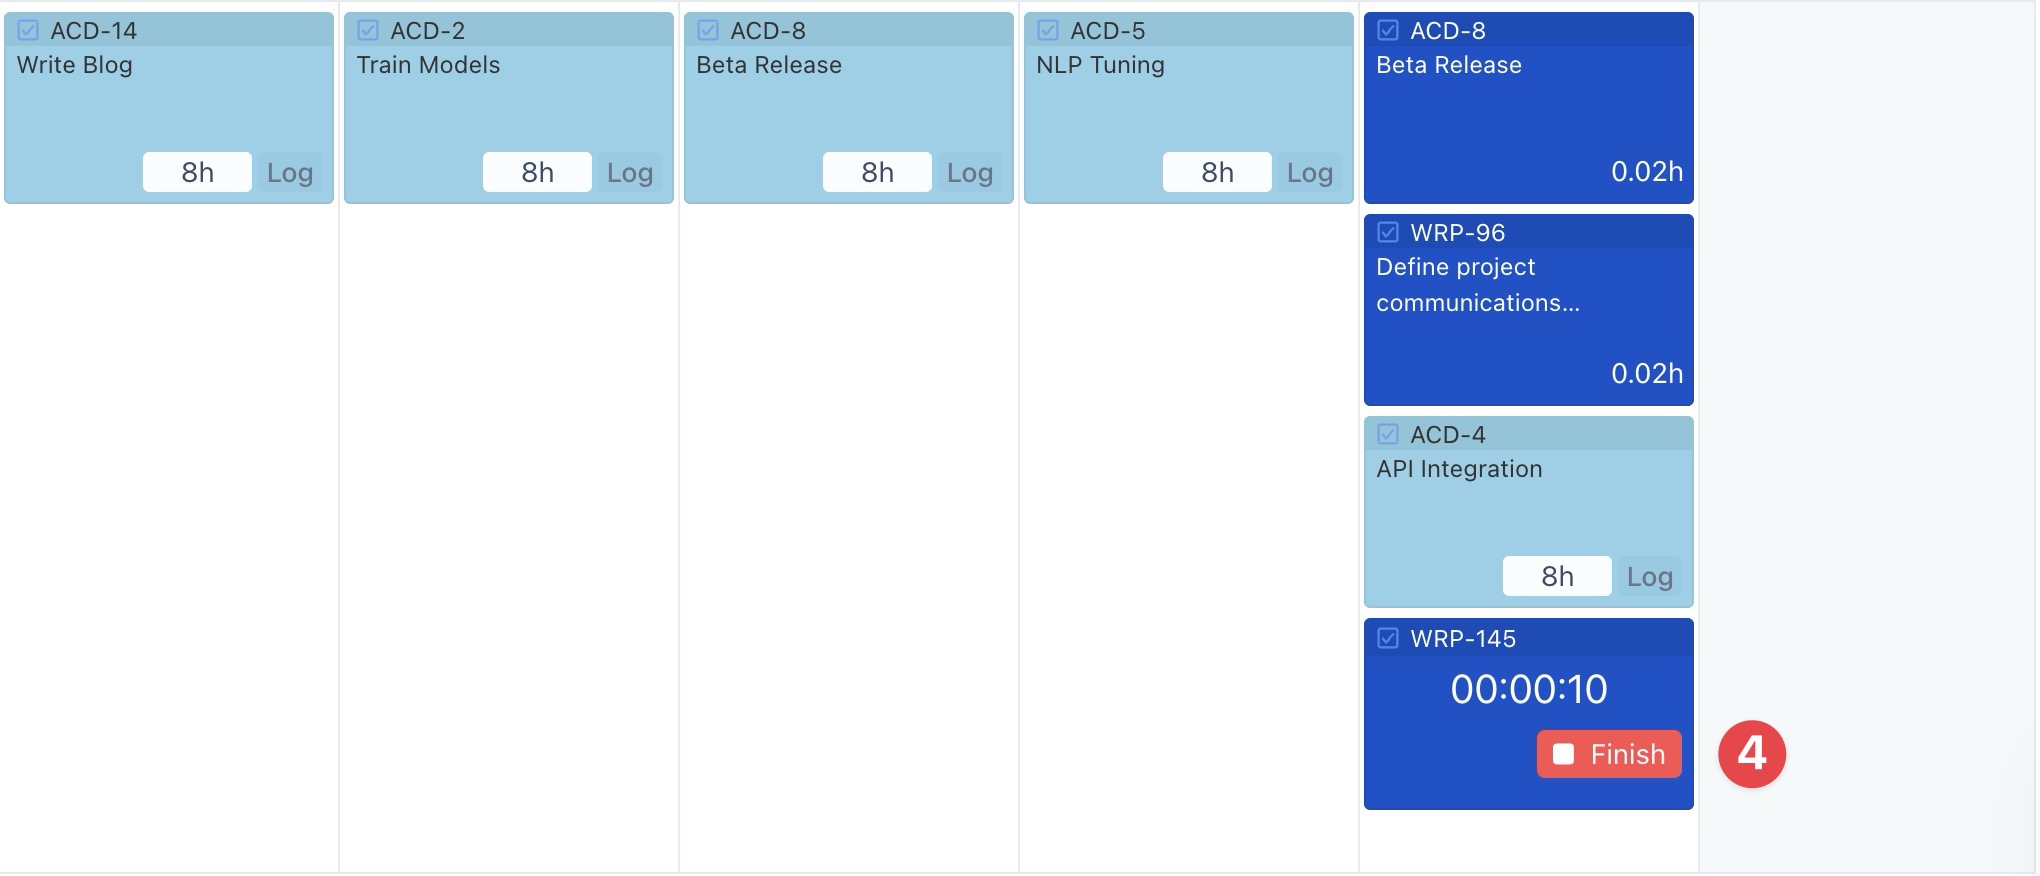
a. Start Timer from the Task Card
-
From the Calendar View, locate the task you want to track time for.
-
Press

-
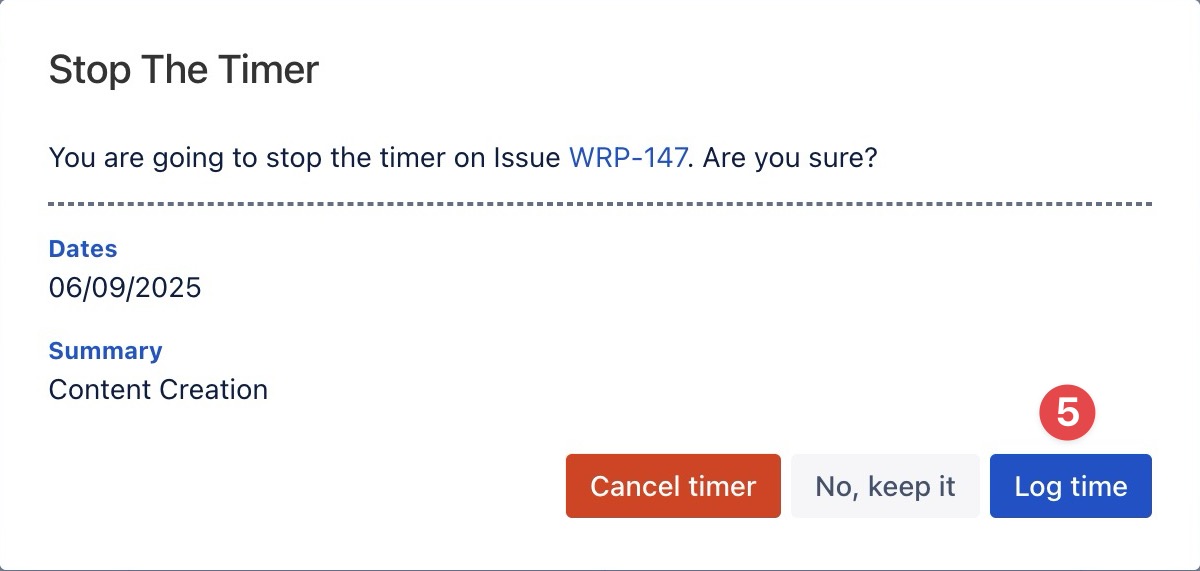
Once you complete the task, click Finish.
-
A confirmation pop-up will appear: select
b. Using Start Timer Button
-
From the Calendar or List View, click

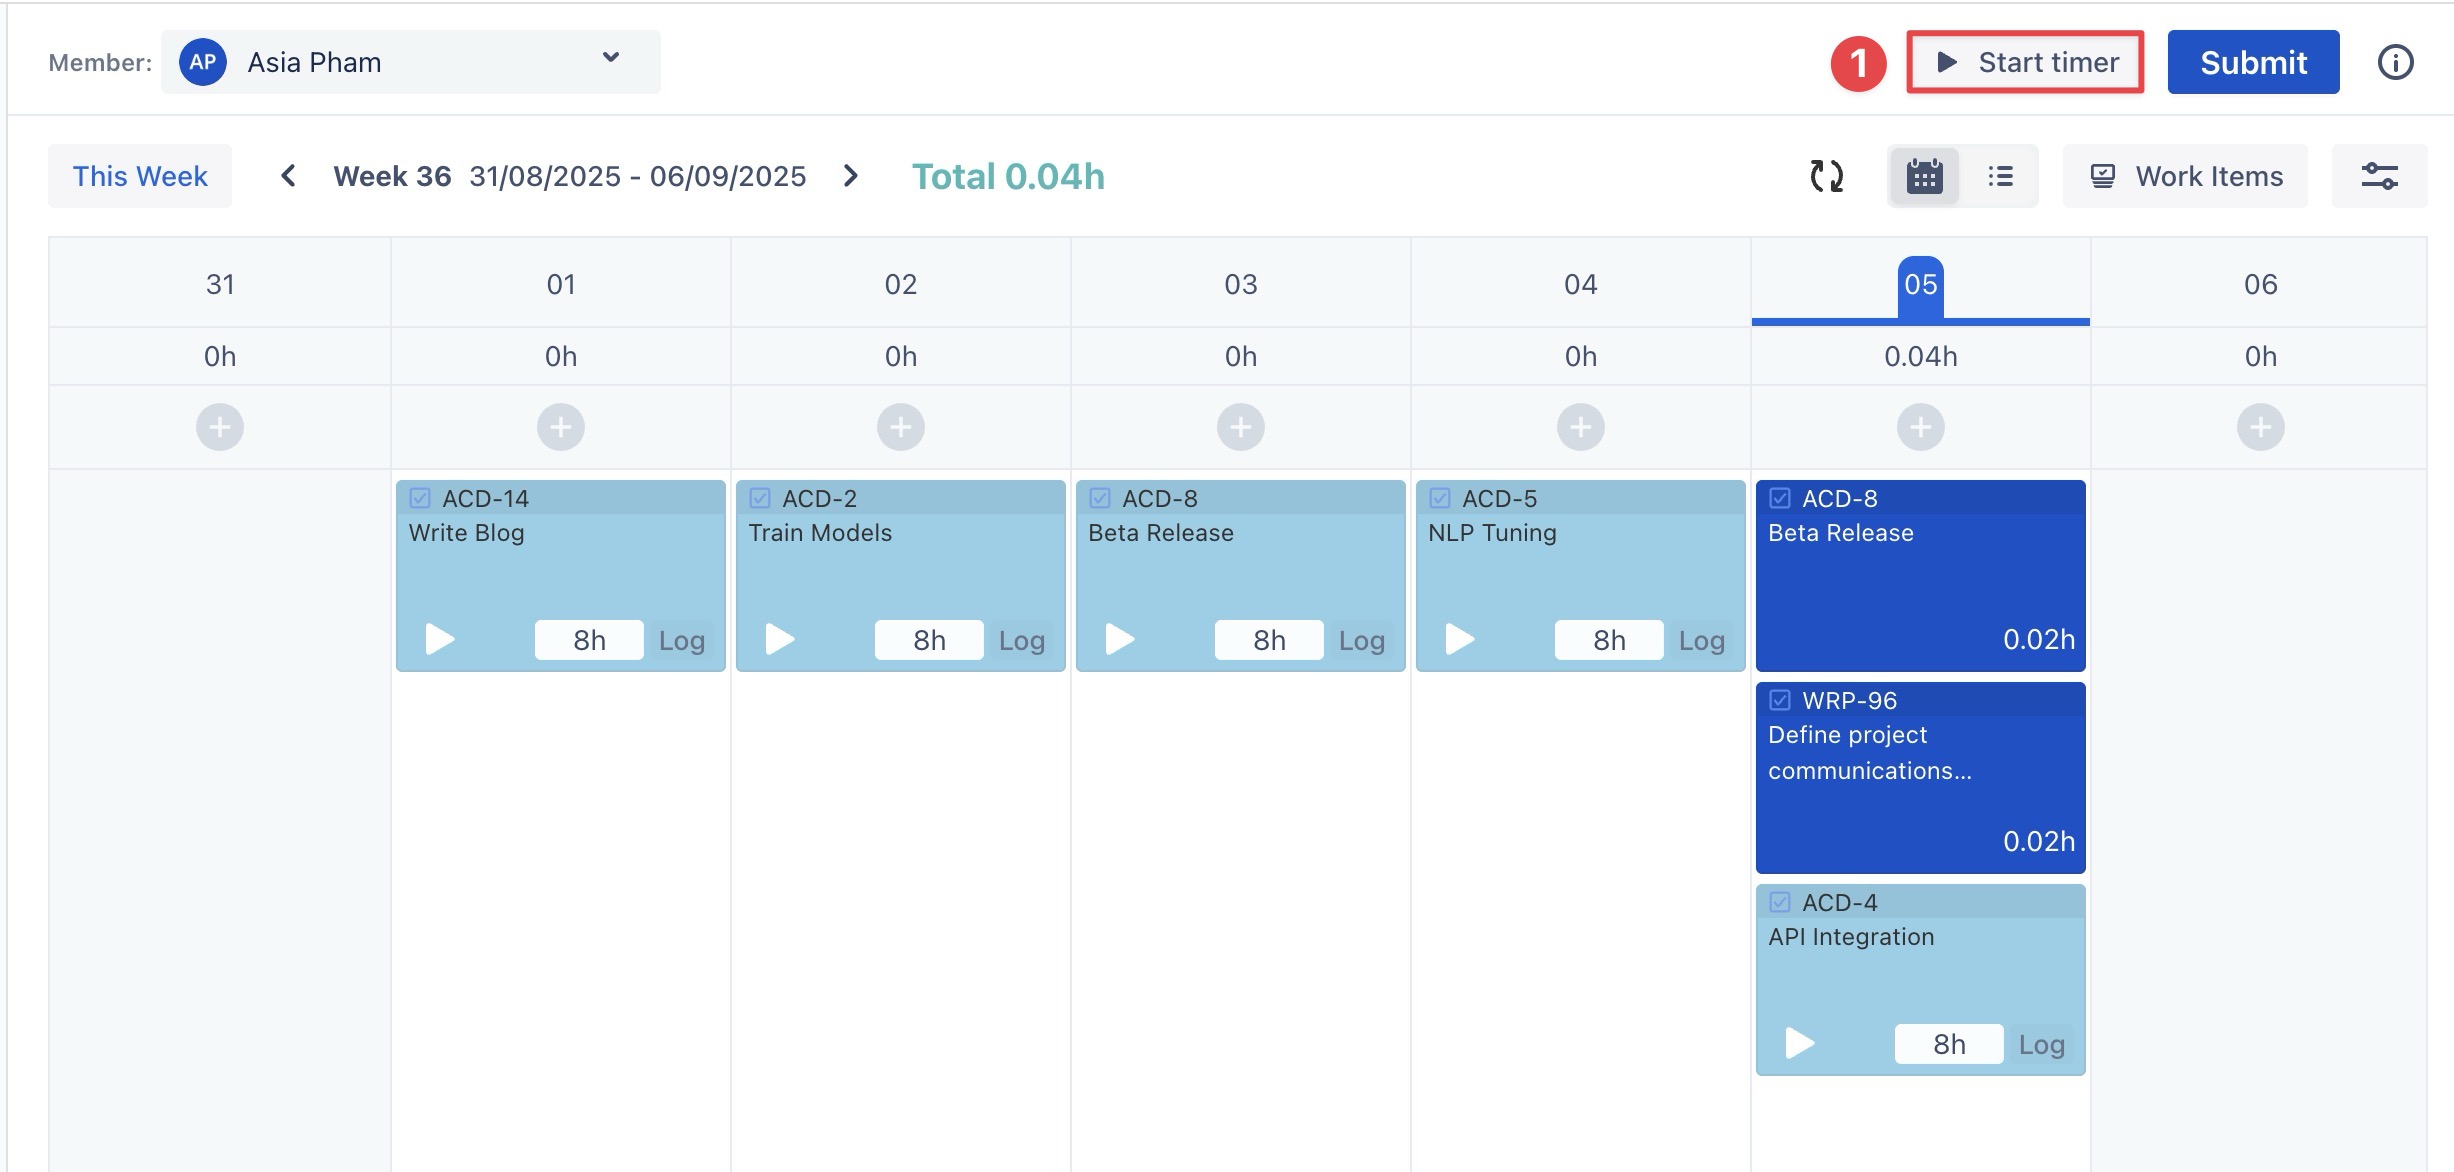
-
Select an existing task or click

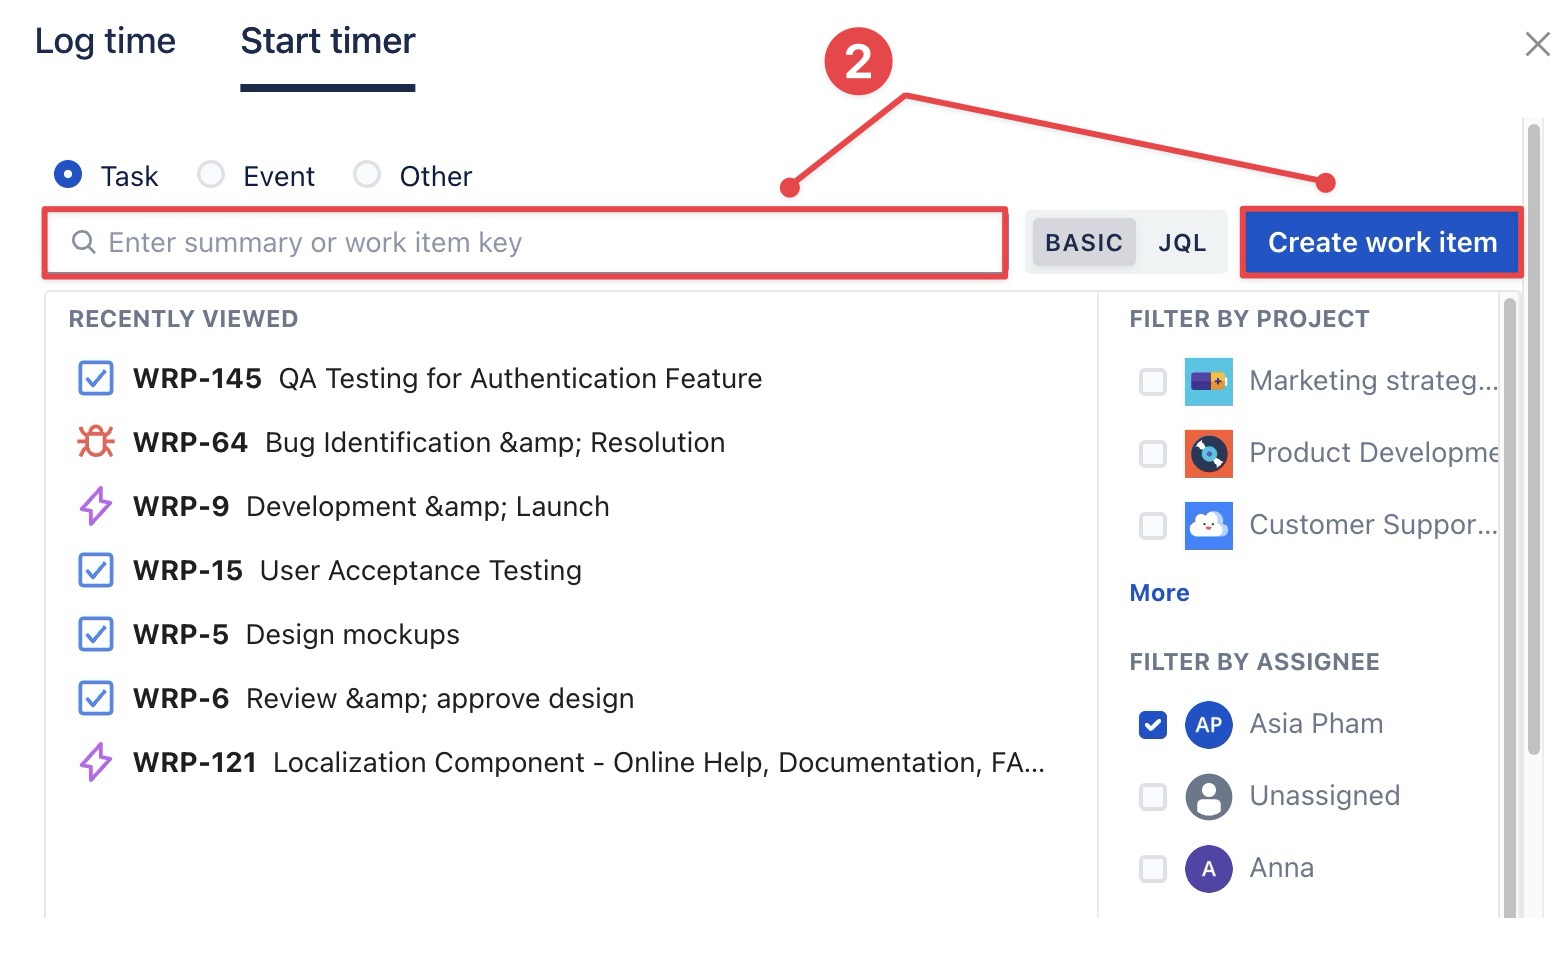
-
Click

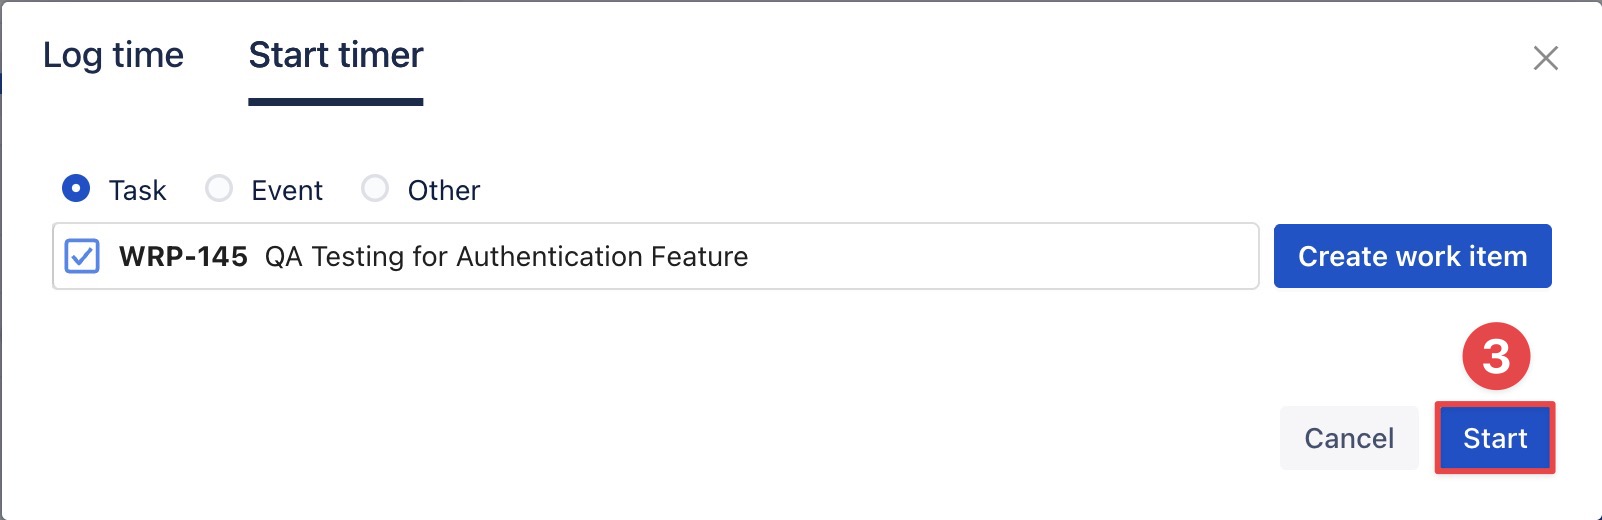
-
Once you complete the task, click Finish.
-
A confirmation pop-up will appear: select
2. Start Timer on Jira Work Item
You can start the timer directly from a Jira Work Item without opening the TimePlanner app:
-
Open the work item you want to log time for.
-
From the top-left corner, click


-
The TimePlanner section will appear within the Jira work item details.
-
In the TimePlanner section, click

When you’ve finished, click Stop on the timer. Your timelog entry will automatically be saved for reporting and tracking.
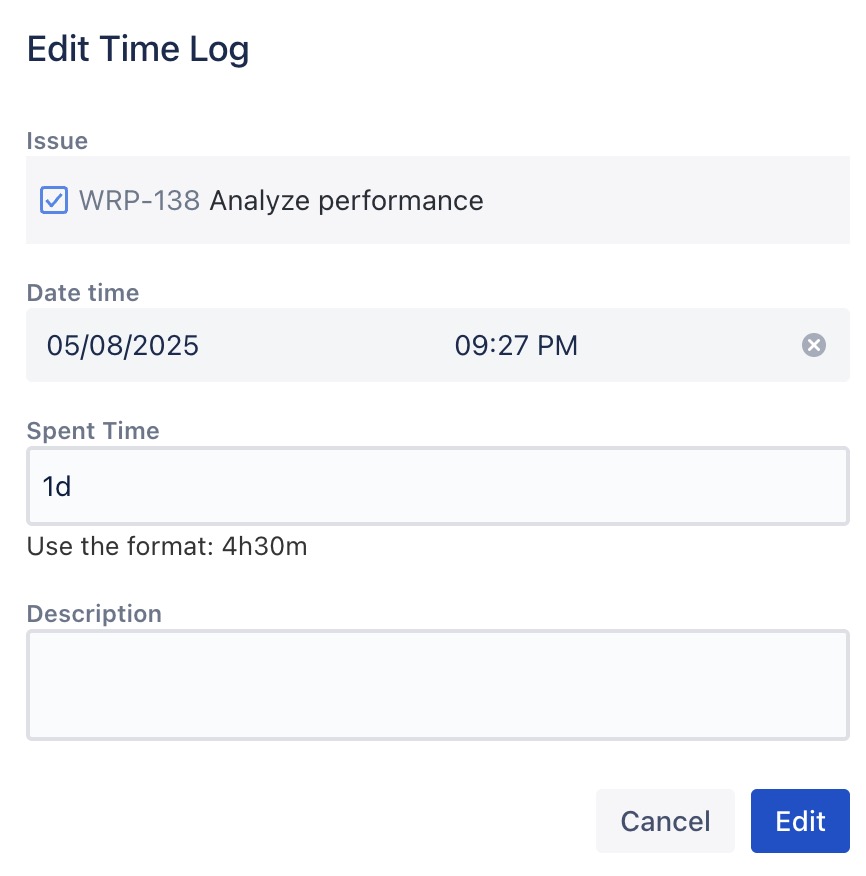
How to Edit or Delete a Timelog Entry
1. From the Calendar View
To edit or delete a timelog entry: Hover over the task card associated with the time log.
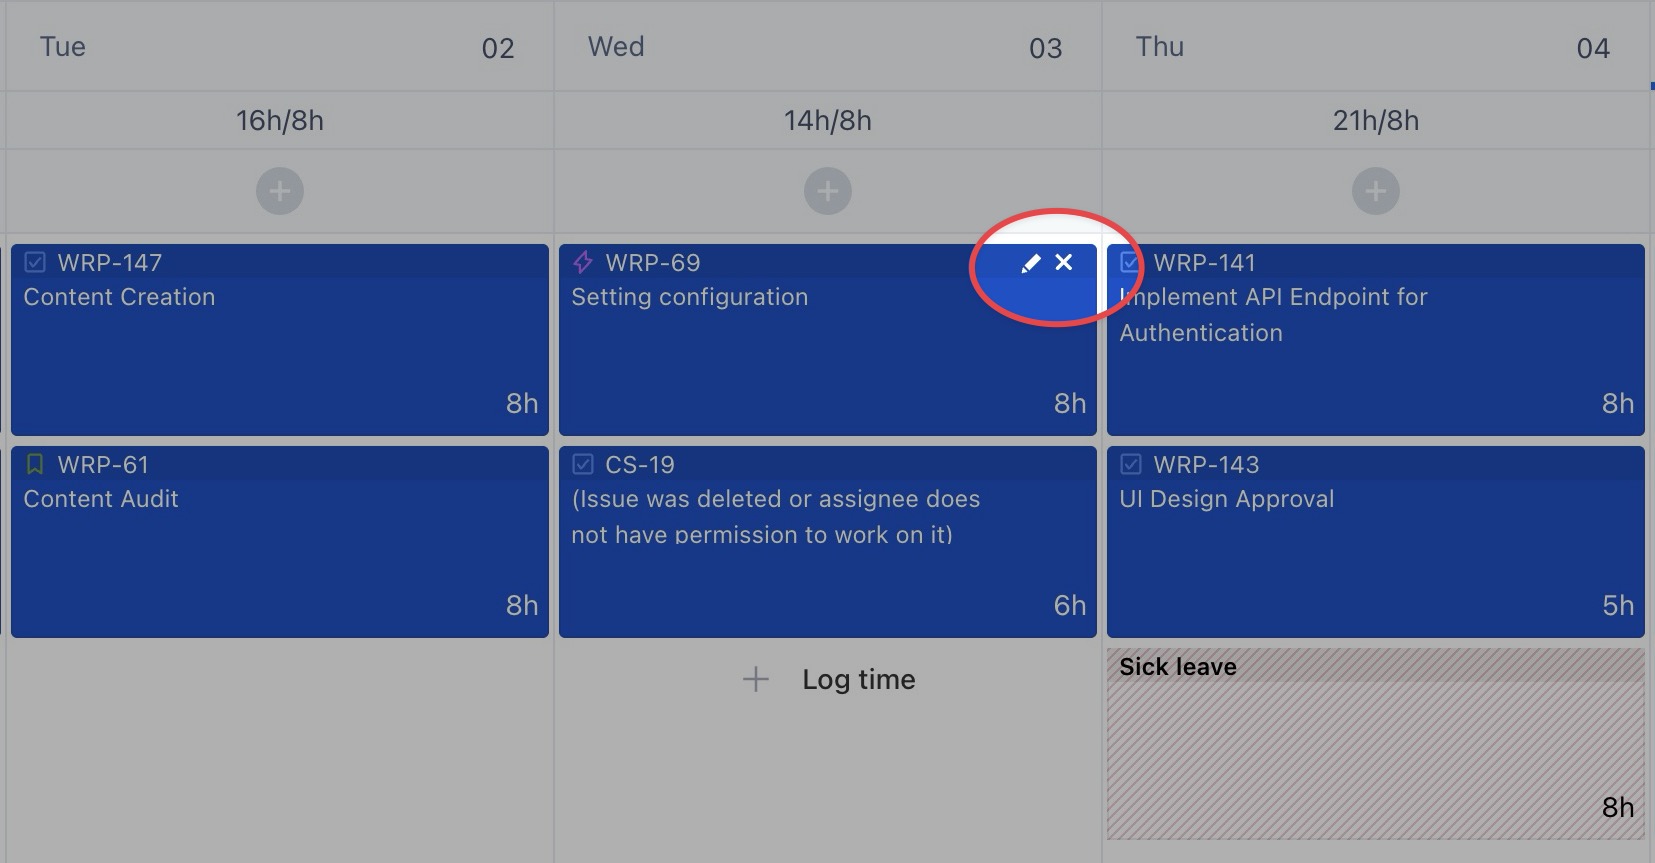
-
Click the edit icon (

-
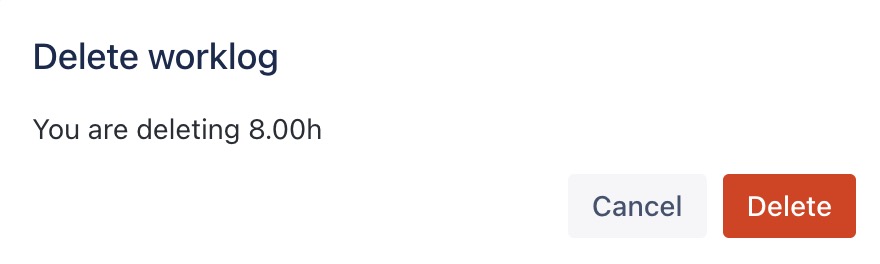
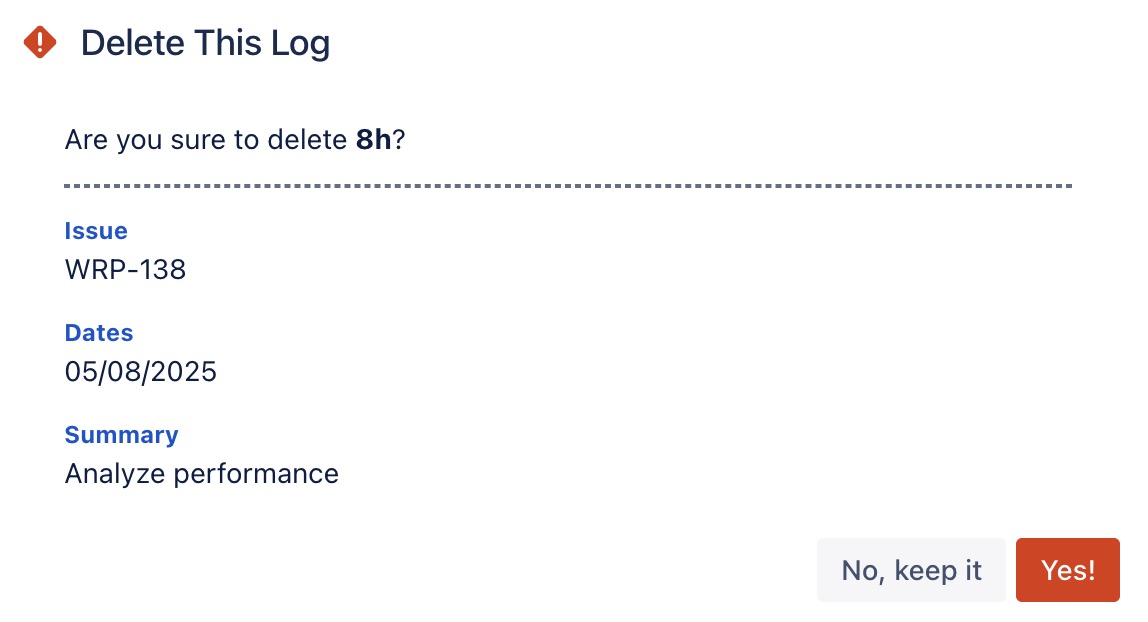
Click the "X" icon to remove the timelog entry.
2. From the List View
To edit or delete a timelog entry: Hover over your time log > click the edit icon ( ![]()
-
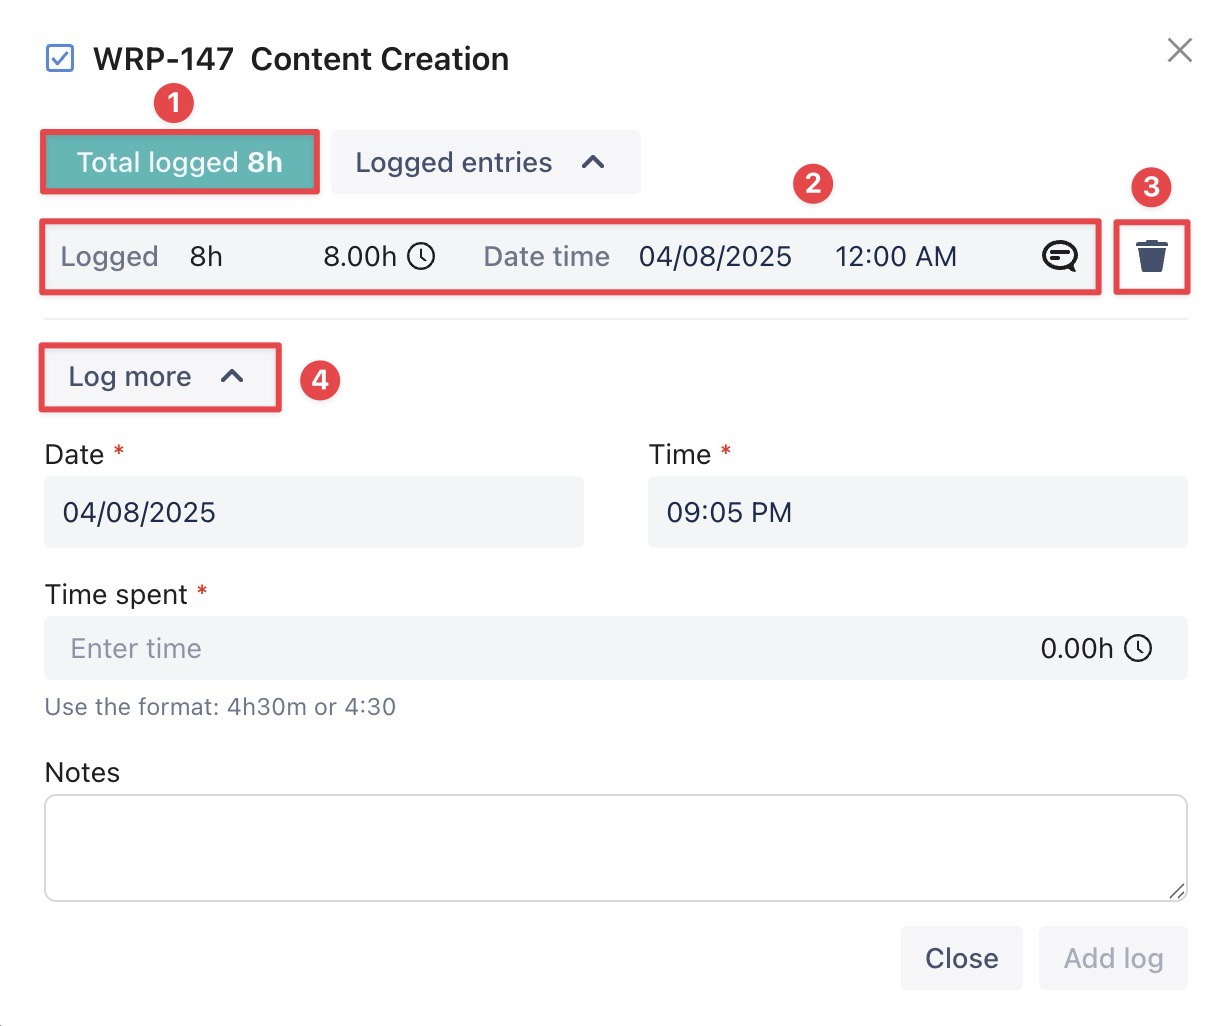
In the details, you can:
-
View the total time logged.
-
Update time, date & notes
-
Delete the current time logged
-
Add more time logs.
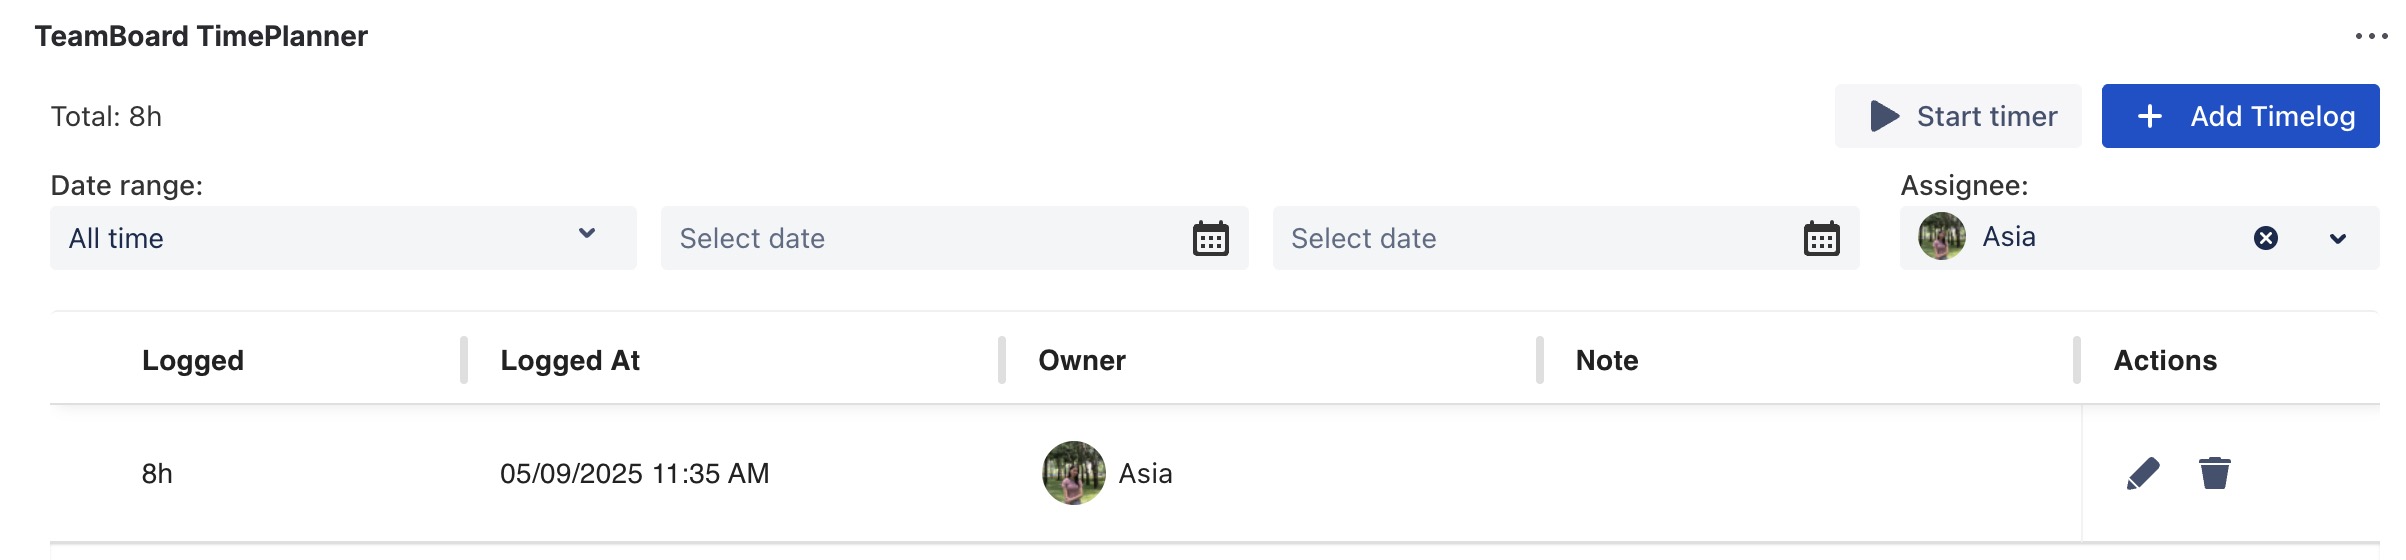
3. On the Jira Work Item Details
-
Open the work item you want to edit.
-
From the top left corner, click
-
In the Time Log Details section, locate the entry you want to modify.

-
Click the edit icon (

-
Click the delete icon (