.png)
Your personal profile and settings tab allow you to maintain the information and preferences connected to your own account.
Only you can access your Settings tab. Other members and App Admins cannot open or change another member’s personal settings.
Editing Your Profile Information
All users can view professional information, skills, and experience. Members can update only their own profile information.
Open your own Profile tab to update your professional details.
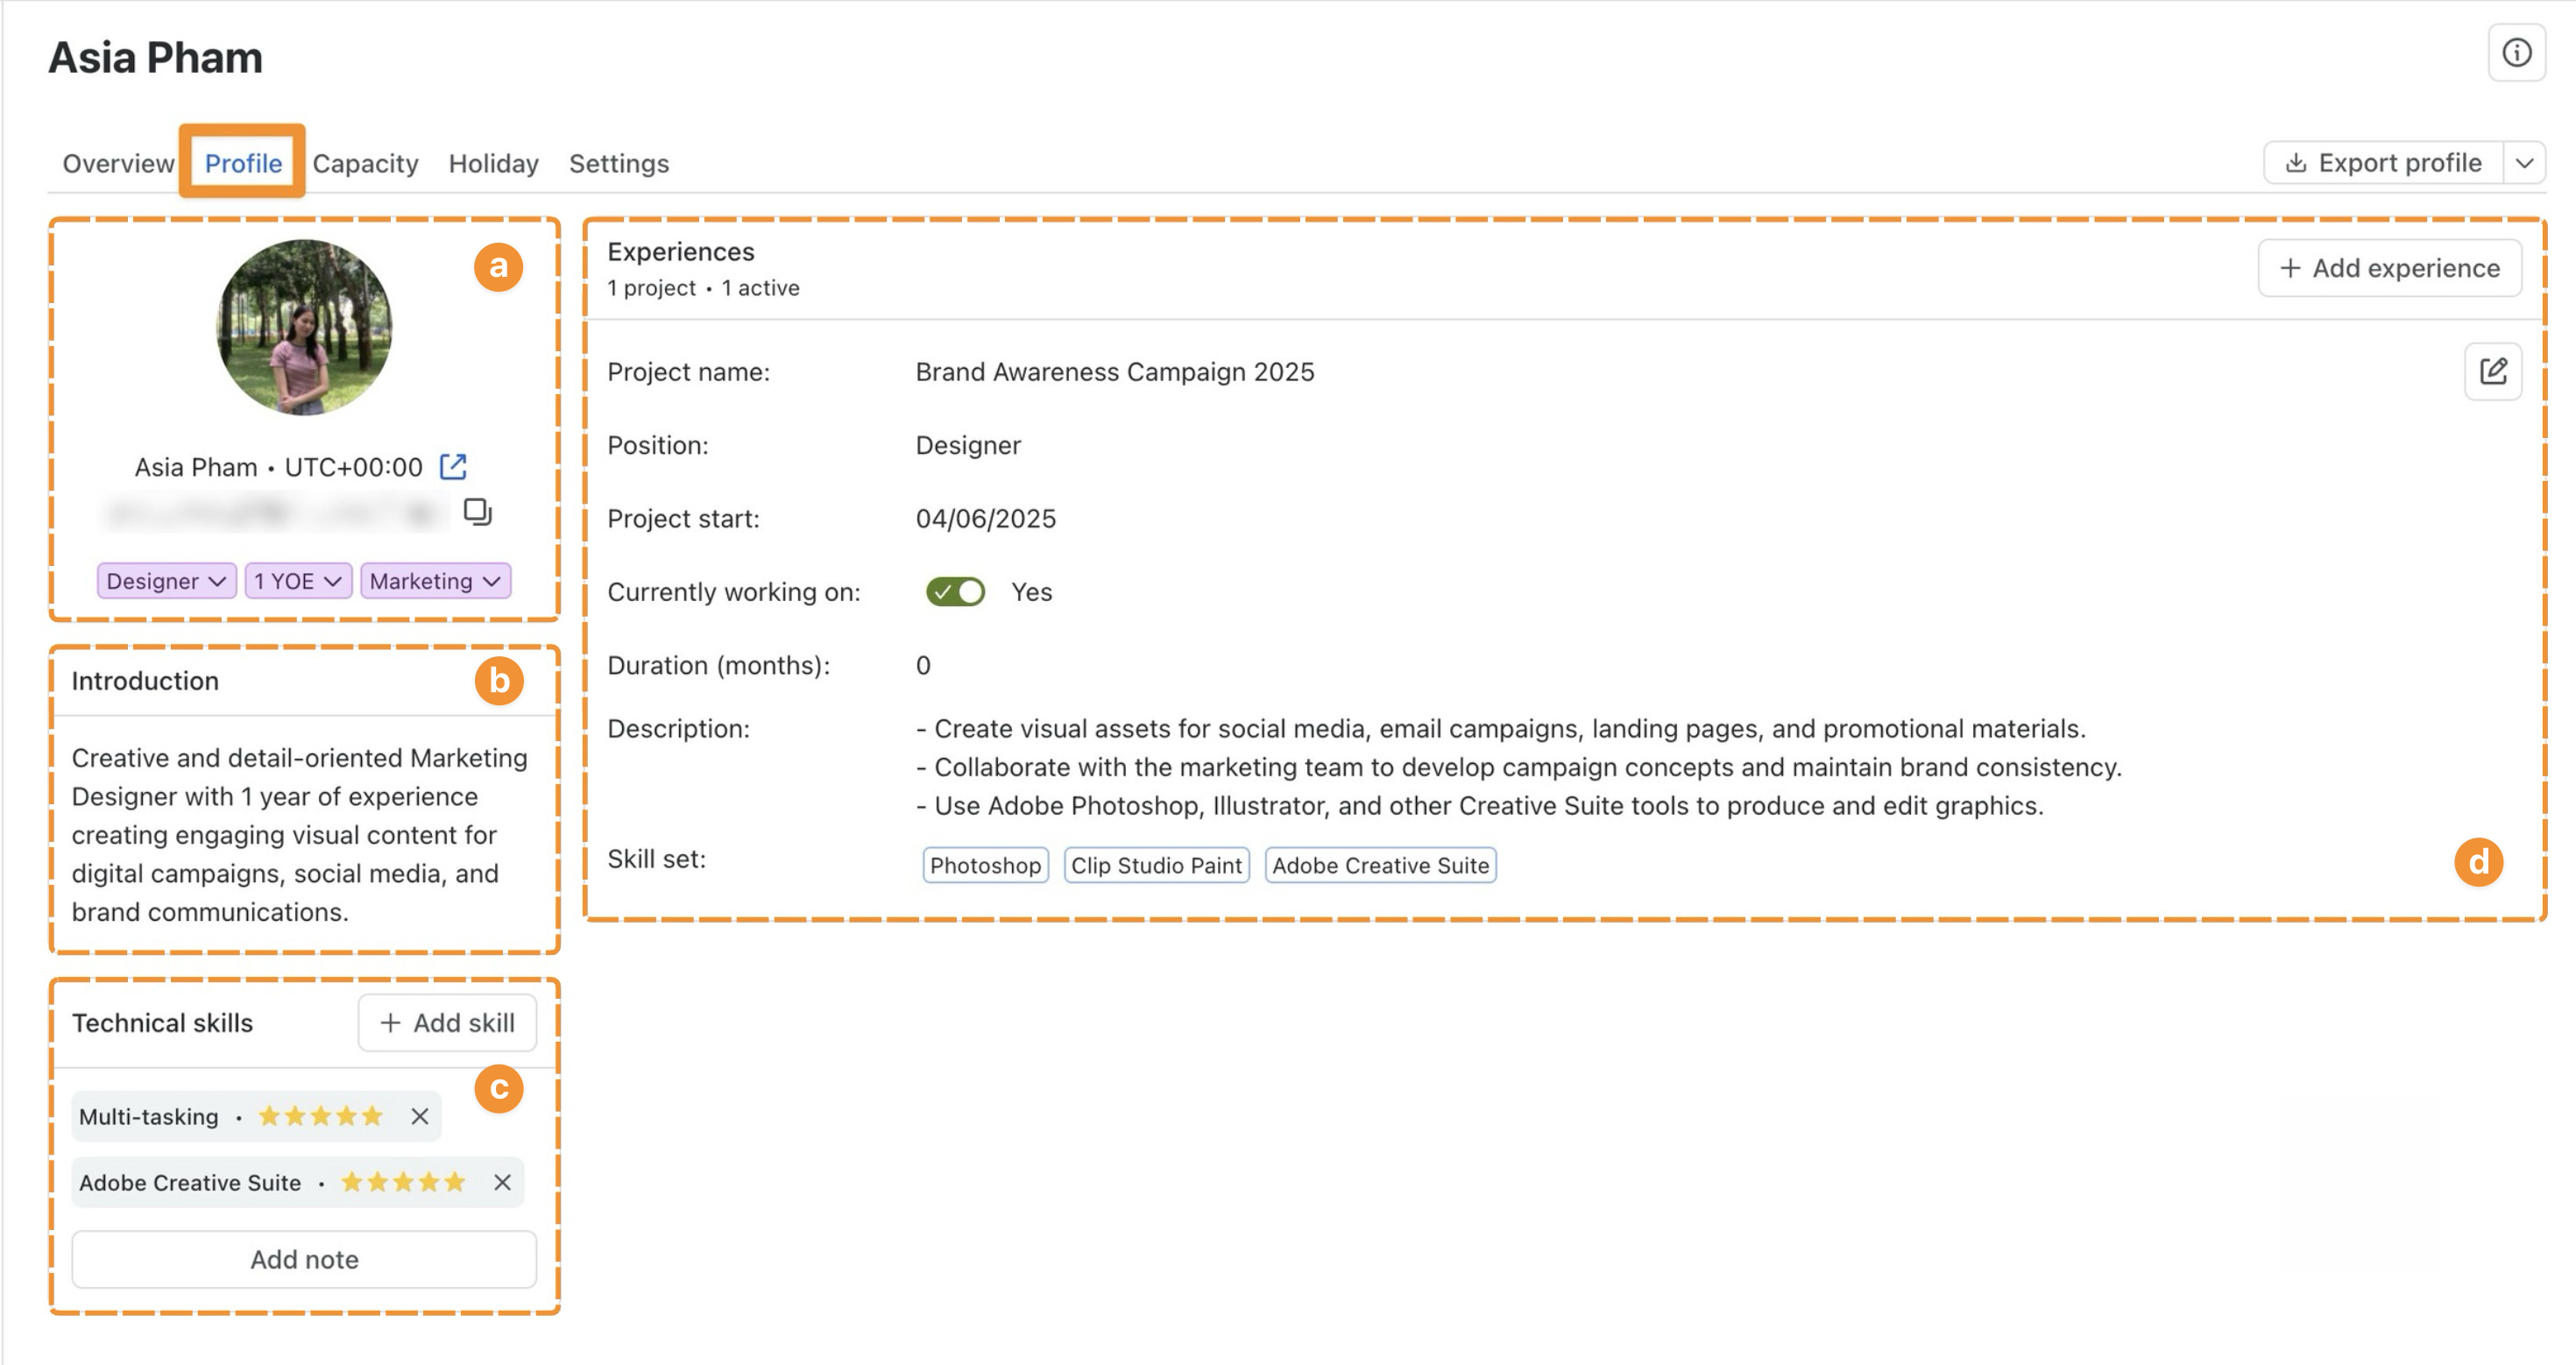
a. Profile details
The profile card displays your name, profile photo, email address, and time zone, along with editable tags for your job title, years of experience, and department.
To update your professional details:
-
Select the Job title dropdown and choose your current role.
-
Select the Years of experience dropdown and choose the appropriate value.
-
Select the Department dropdown and choose your department.
Your name, profile photo, email address, and time zone may be linked to your Jira account and not be editable directly in TimePlanner.
b. Introduction
The Introduction section contains a short professional summary that helps others understand your background and areas of expertise.
To update your introduction:
-
Select the Introduction section.
-
Enter a short summary of your experience, responsibilities, and professional strengths.
-
Click the checkmark to save your changes.
c. Technical skills
The Technical skills section lists your skills and proficiency levels.
To add a skill:
-
Navigate to Technical skills section, then select

-
Choose a skill from the available list.
-
Rate your proficiency using the star icons.
-
Click
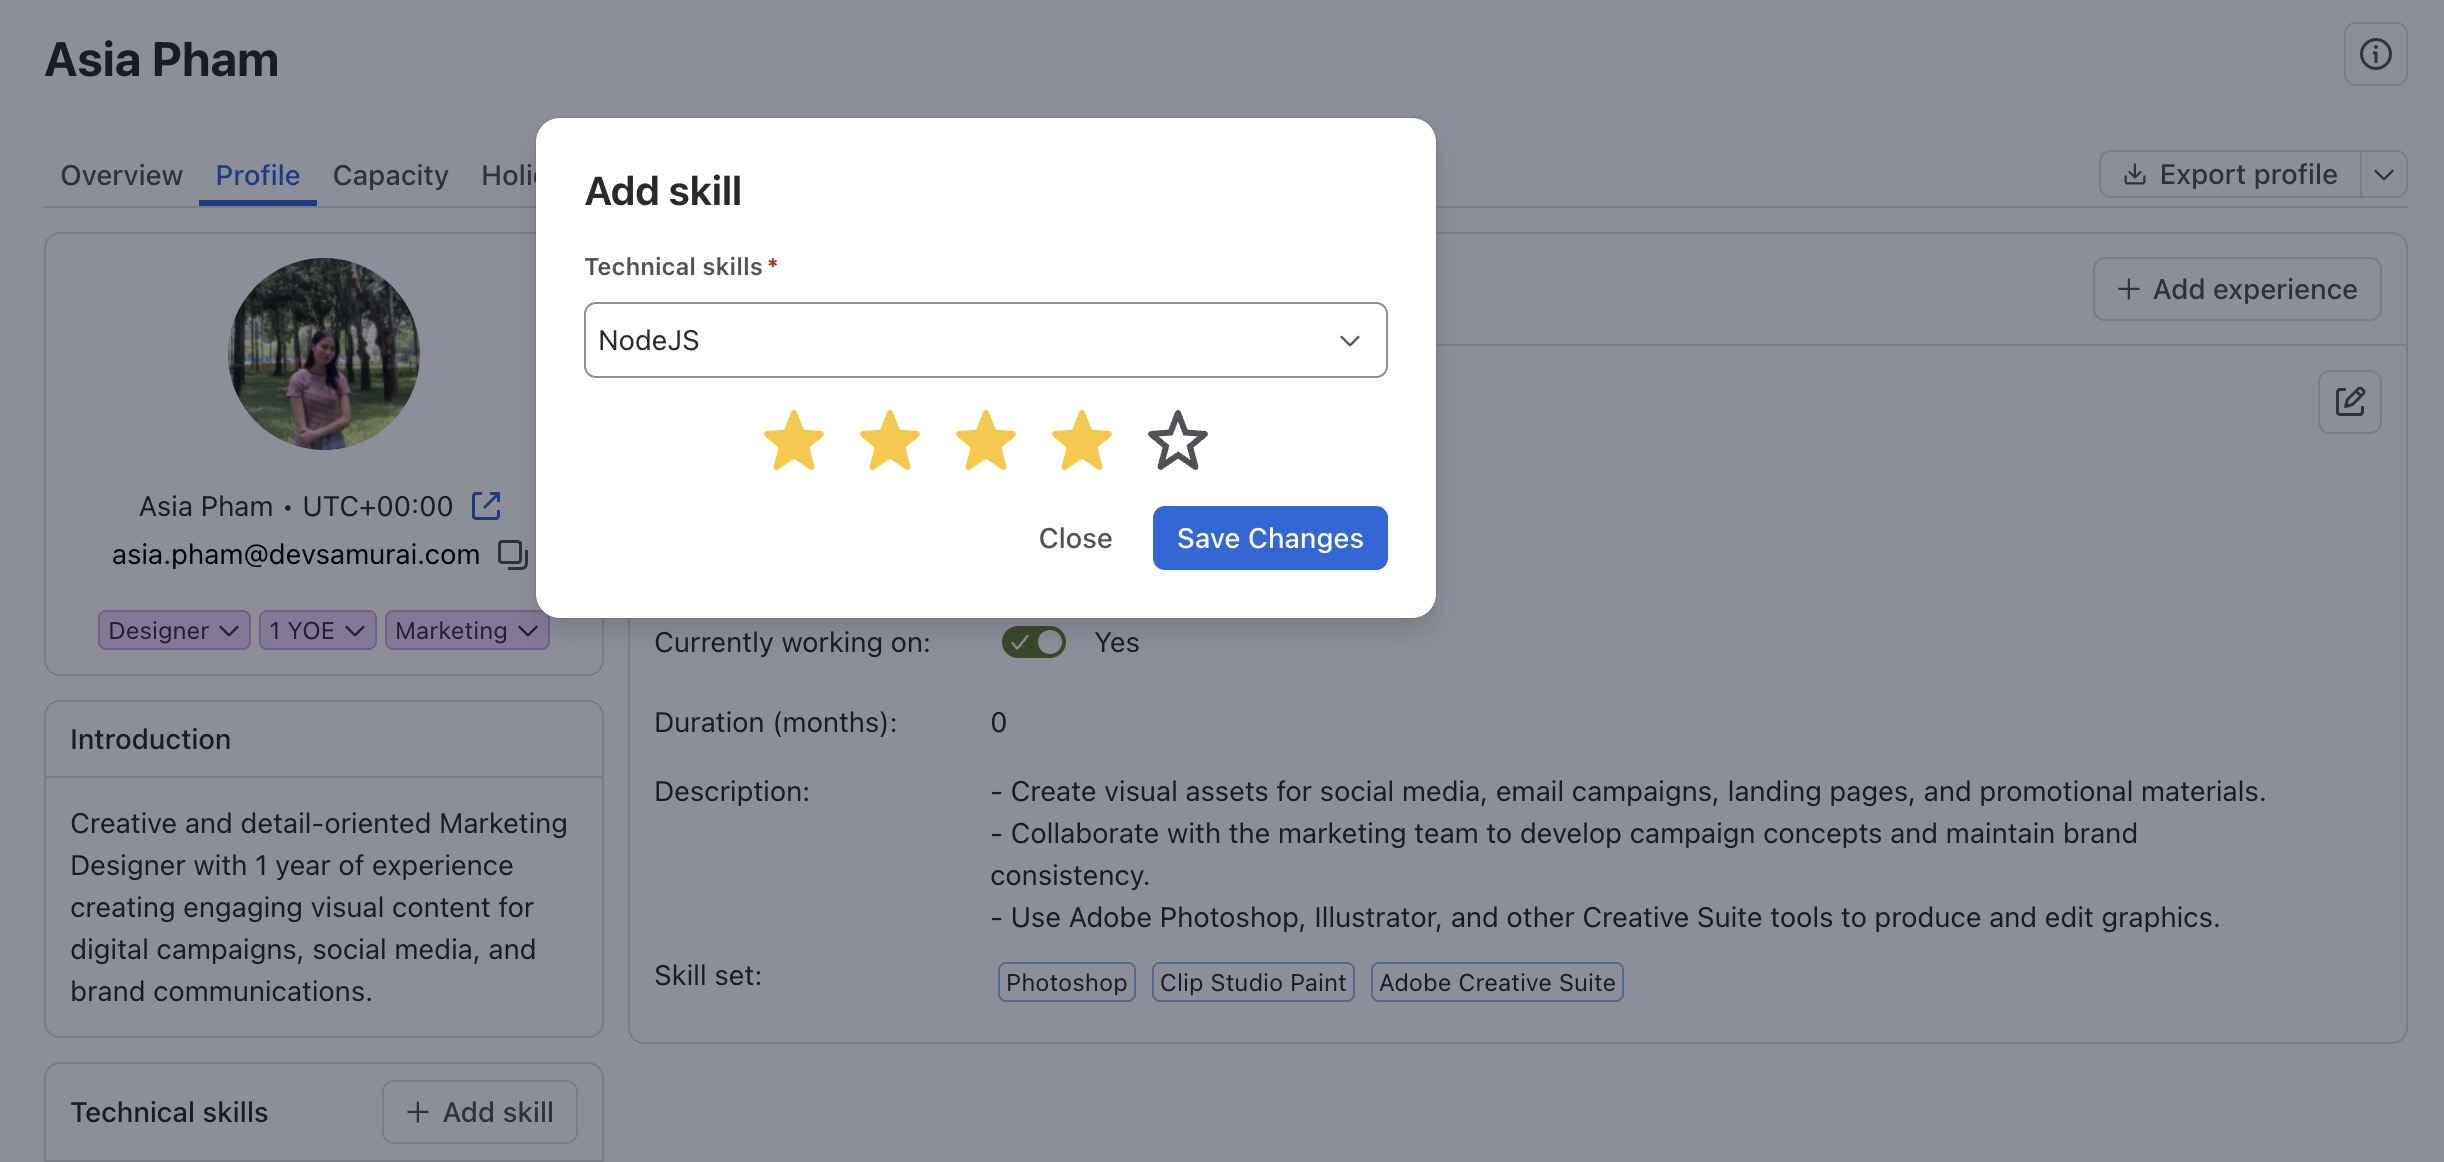
✍️ To update an existing skill, adjust its proficiency rating or note. Select the X icon beside a skill to remove it from your profile.
d. Experiences
The Experiences section records your current and previous project experience, and shows how many projects are recorded and how many are currently active.
To add an experience:
-
Navigate to the Experiences section, then select Add experience.
-
Complete the fields:
-
Project name
-
Position
-
Project start date
-
Currently working on (toggle)
-
Duration (months)
-
Description
-
Skill set
-
-
Select

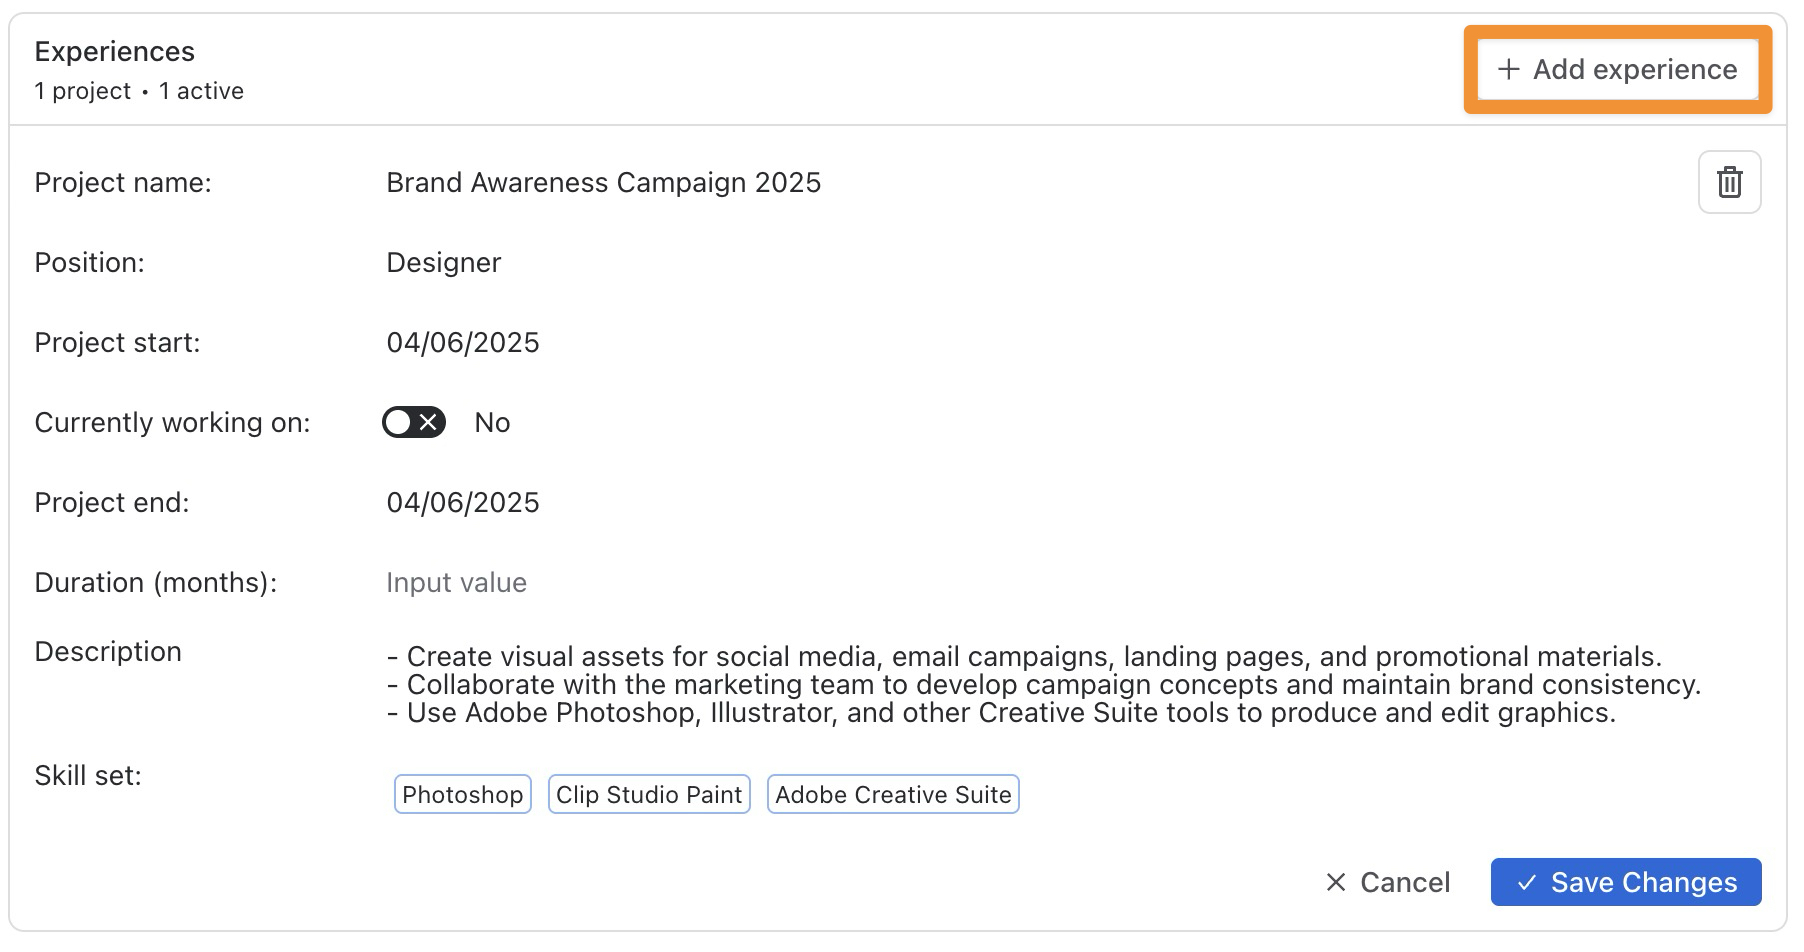
✍️ To update an existing record, select 
The options available in the dropdown menus—such as Job Titles, Departments, and Skills—are managed by users with App Admin permission, set up in the Data Field section under Settings.
To learn more about how this works, see the Data Field Guide.
Did you know?
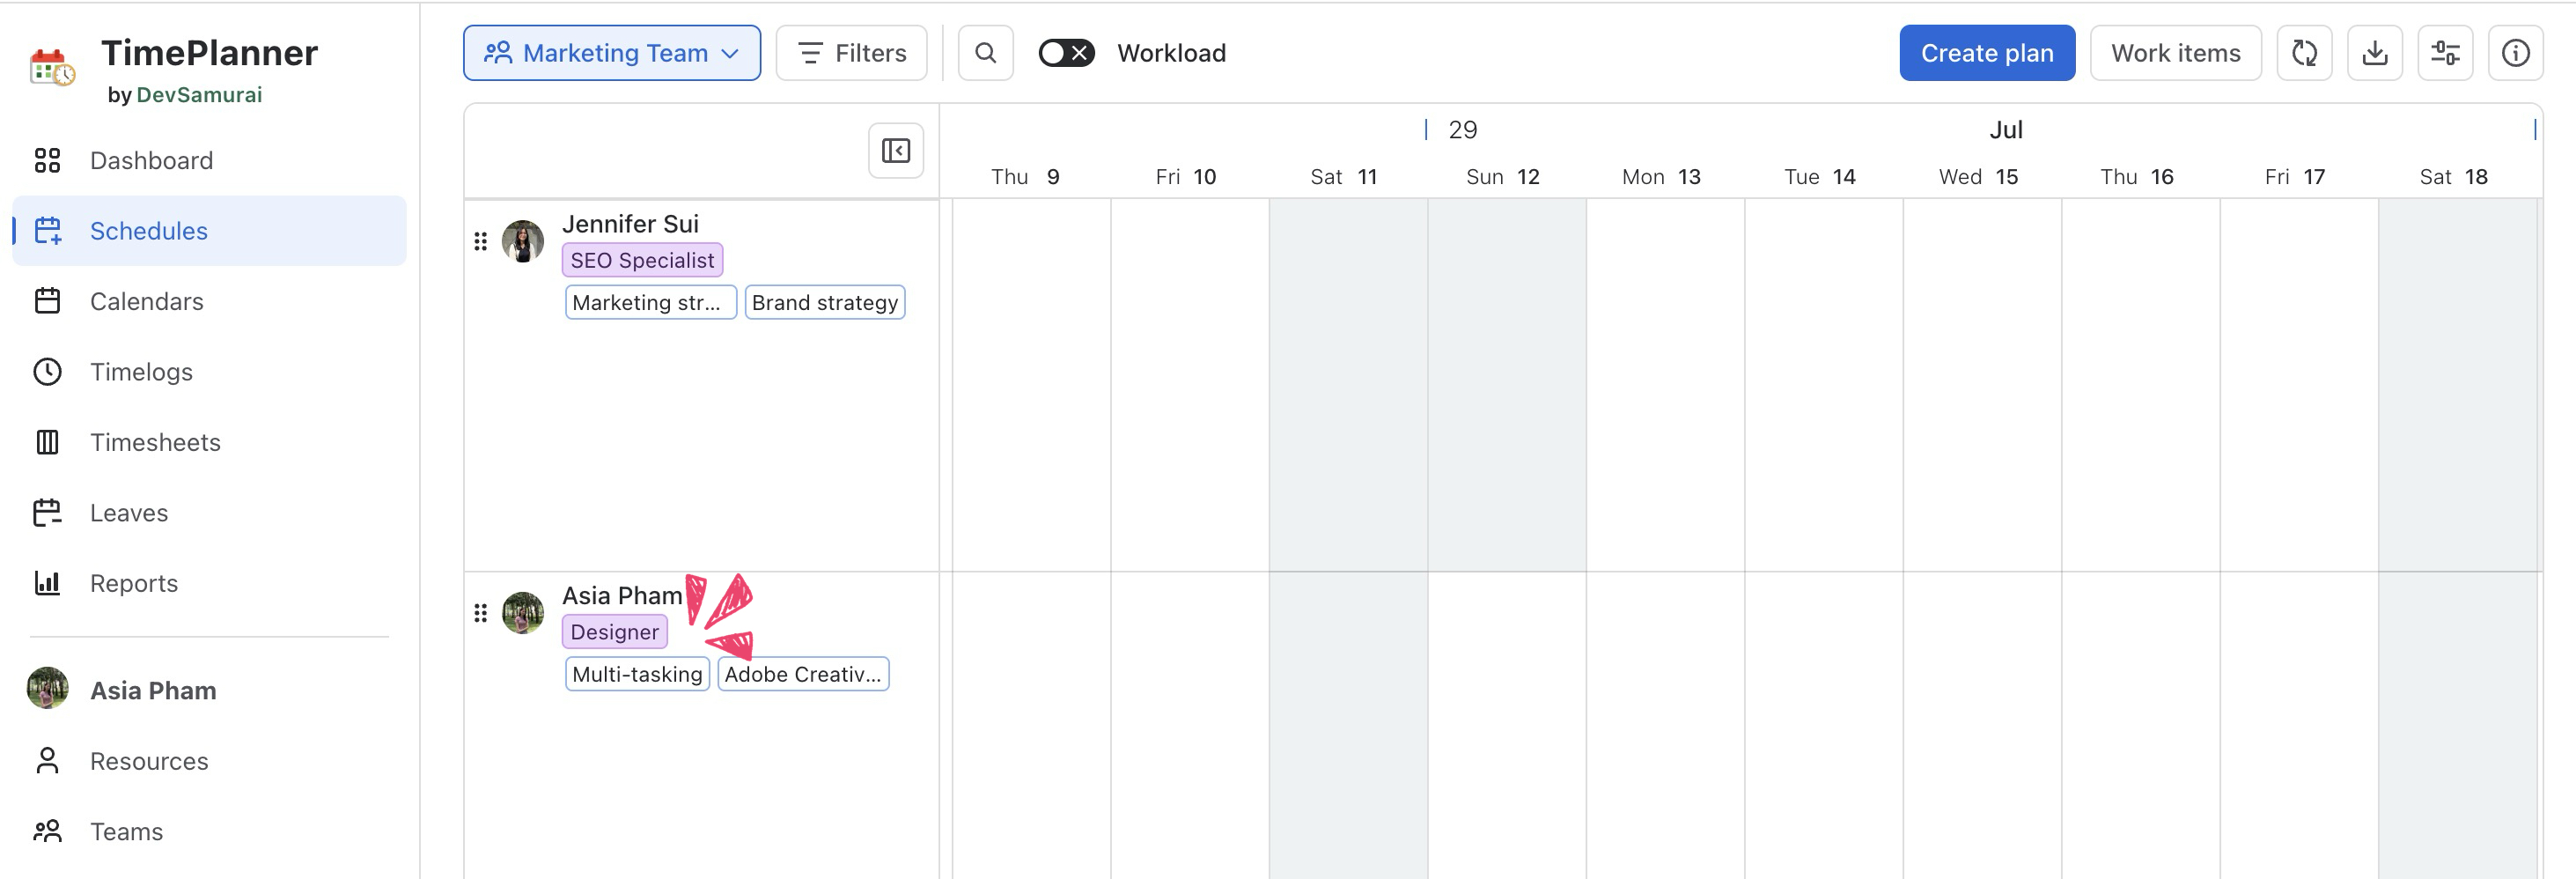
Your updated profile information will appear under your name on the Schedule Board:
Exporting Your Profile
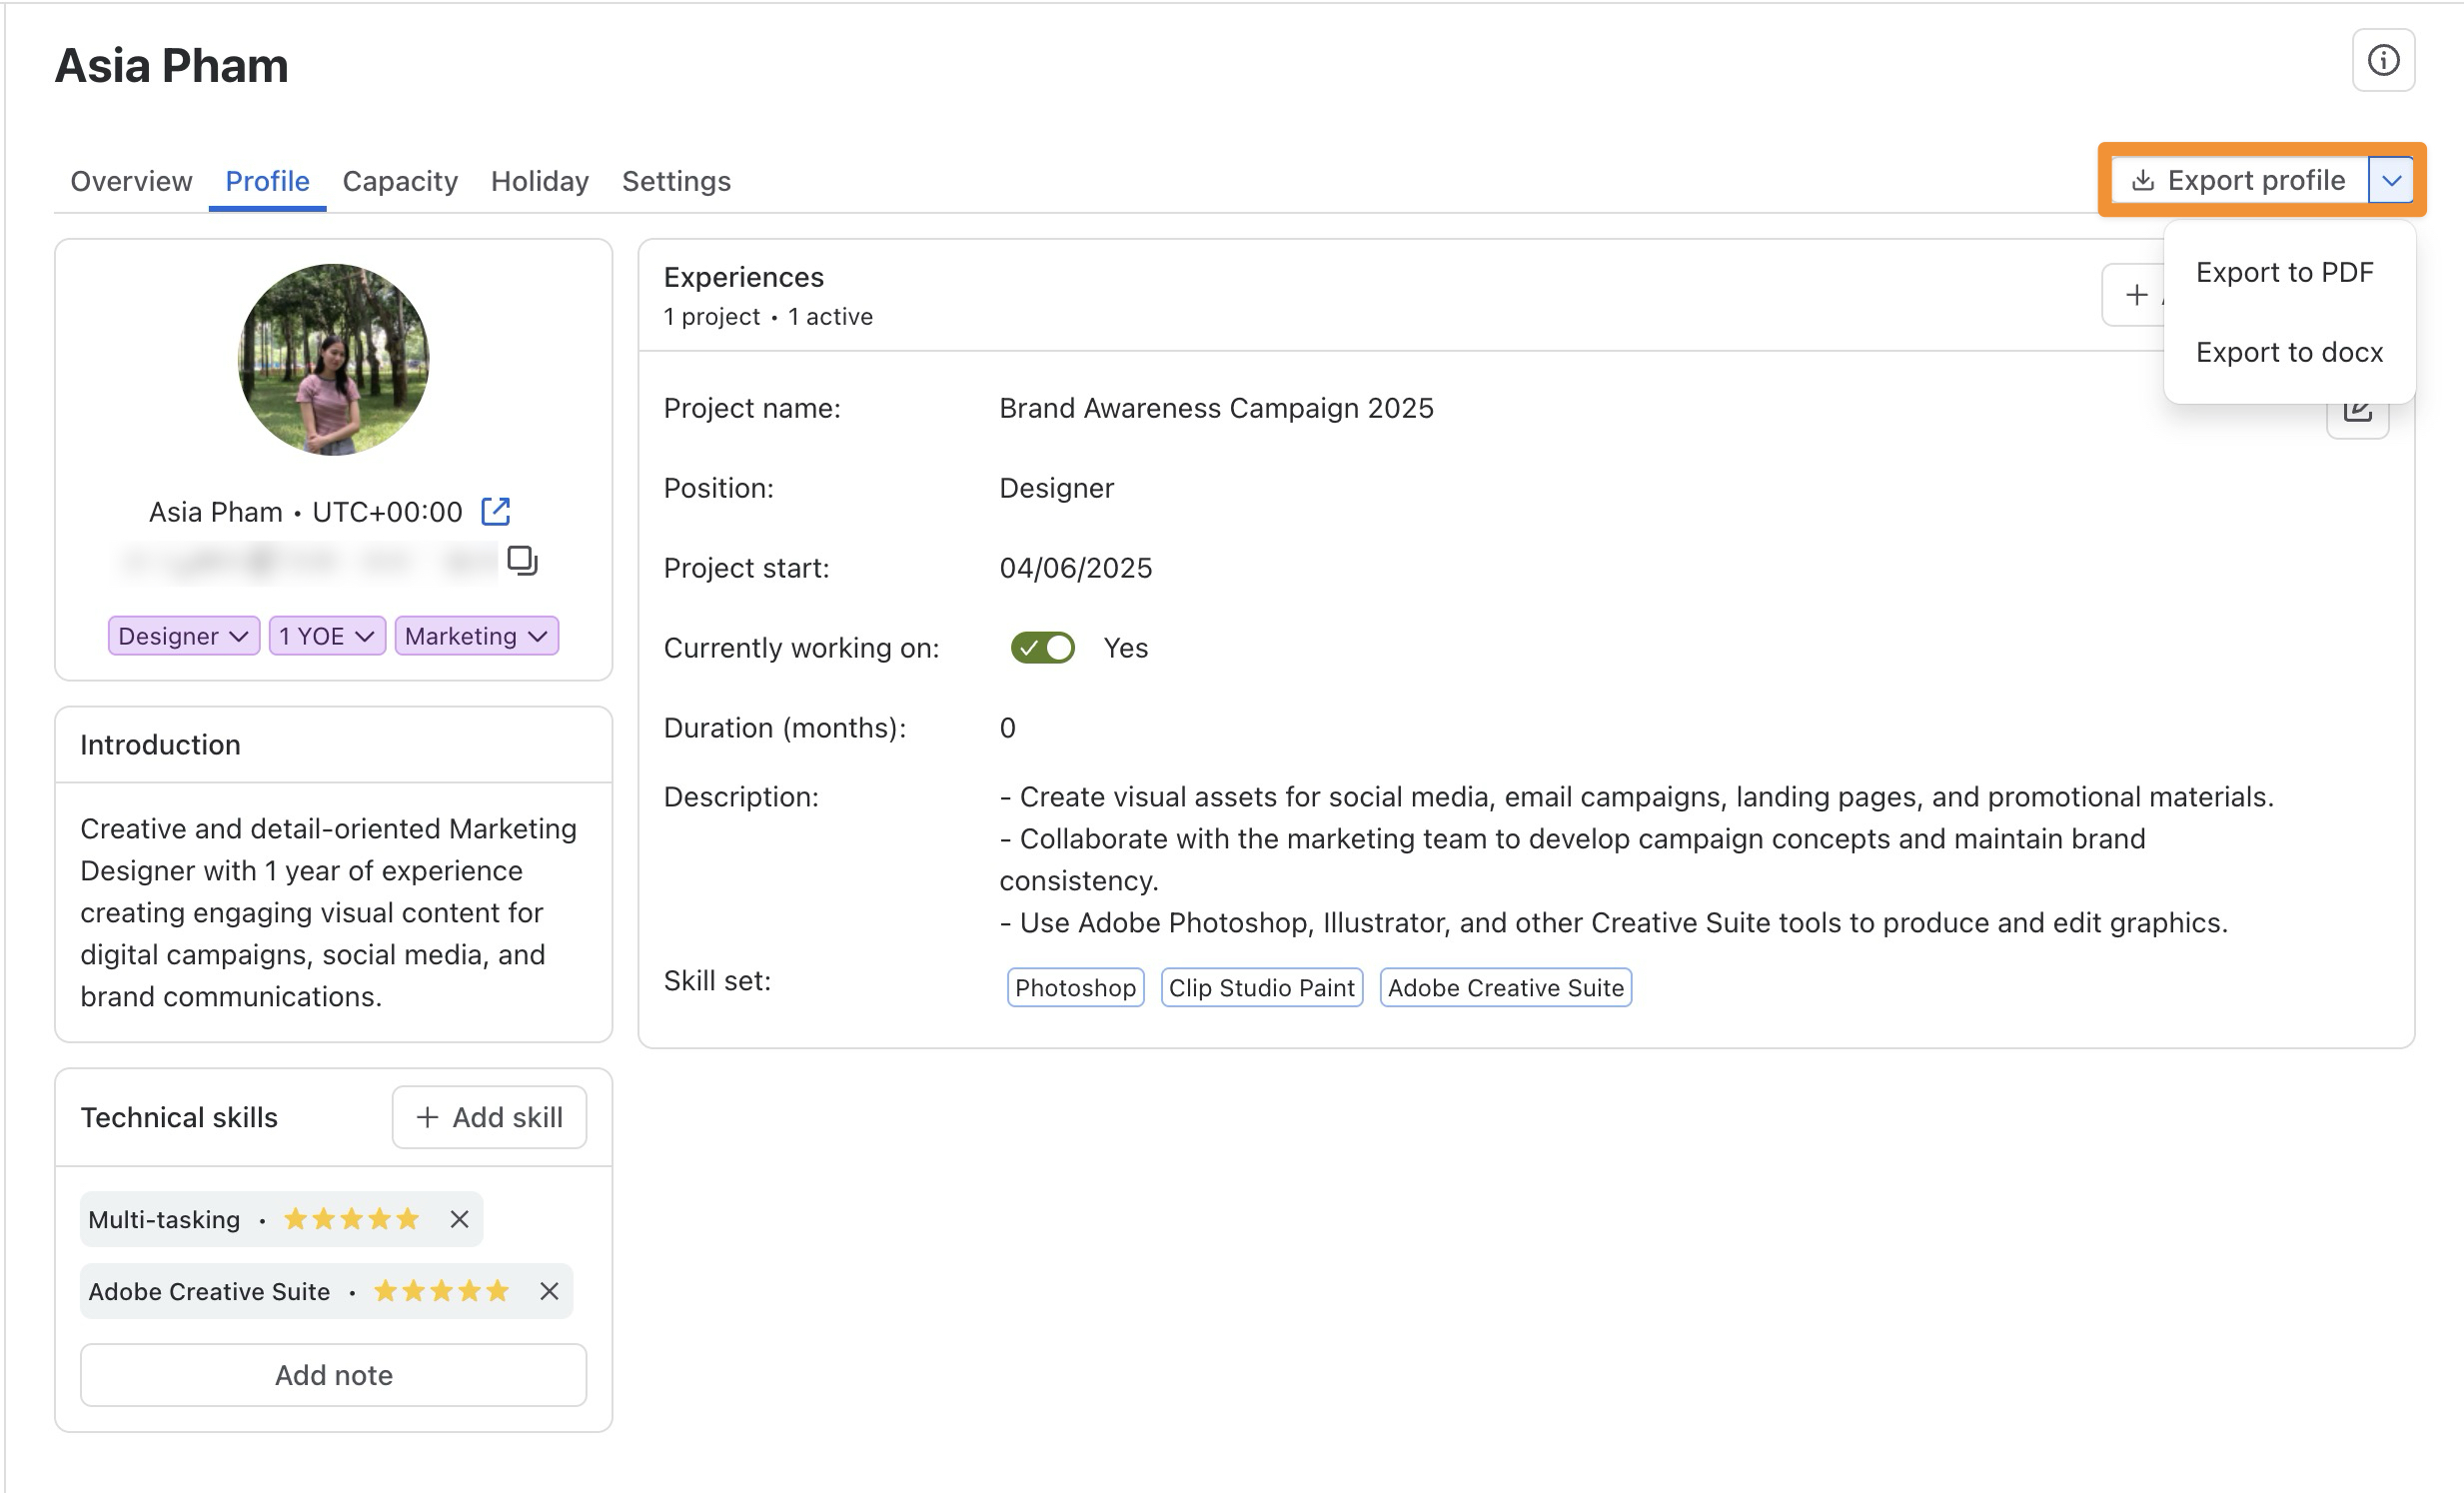
To export your profile:
-
Select Export profile in the upper-right corner.
-
Choose one of the available formats:
-
Export to PDF
-
Export to DOCX
-
The exported file includes the professional information recorded in your profile.
Managing Your Personal Settings
Members can view and manage only their own settings. Other users and App Admins cannot access another member’s Settings tab.
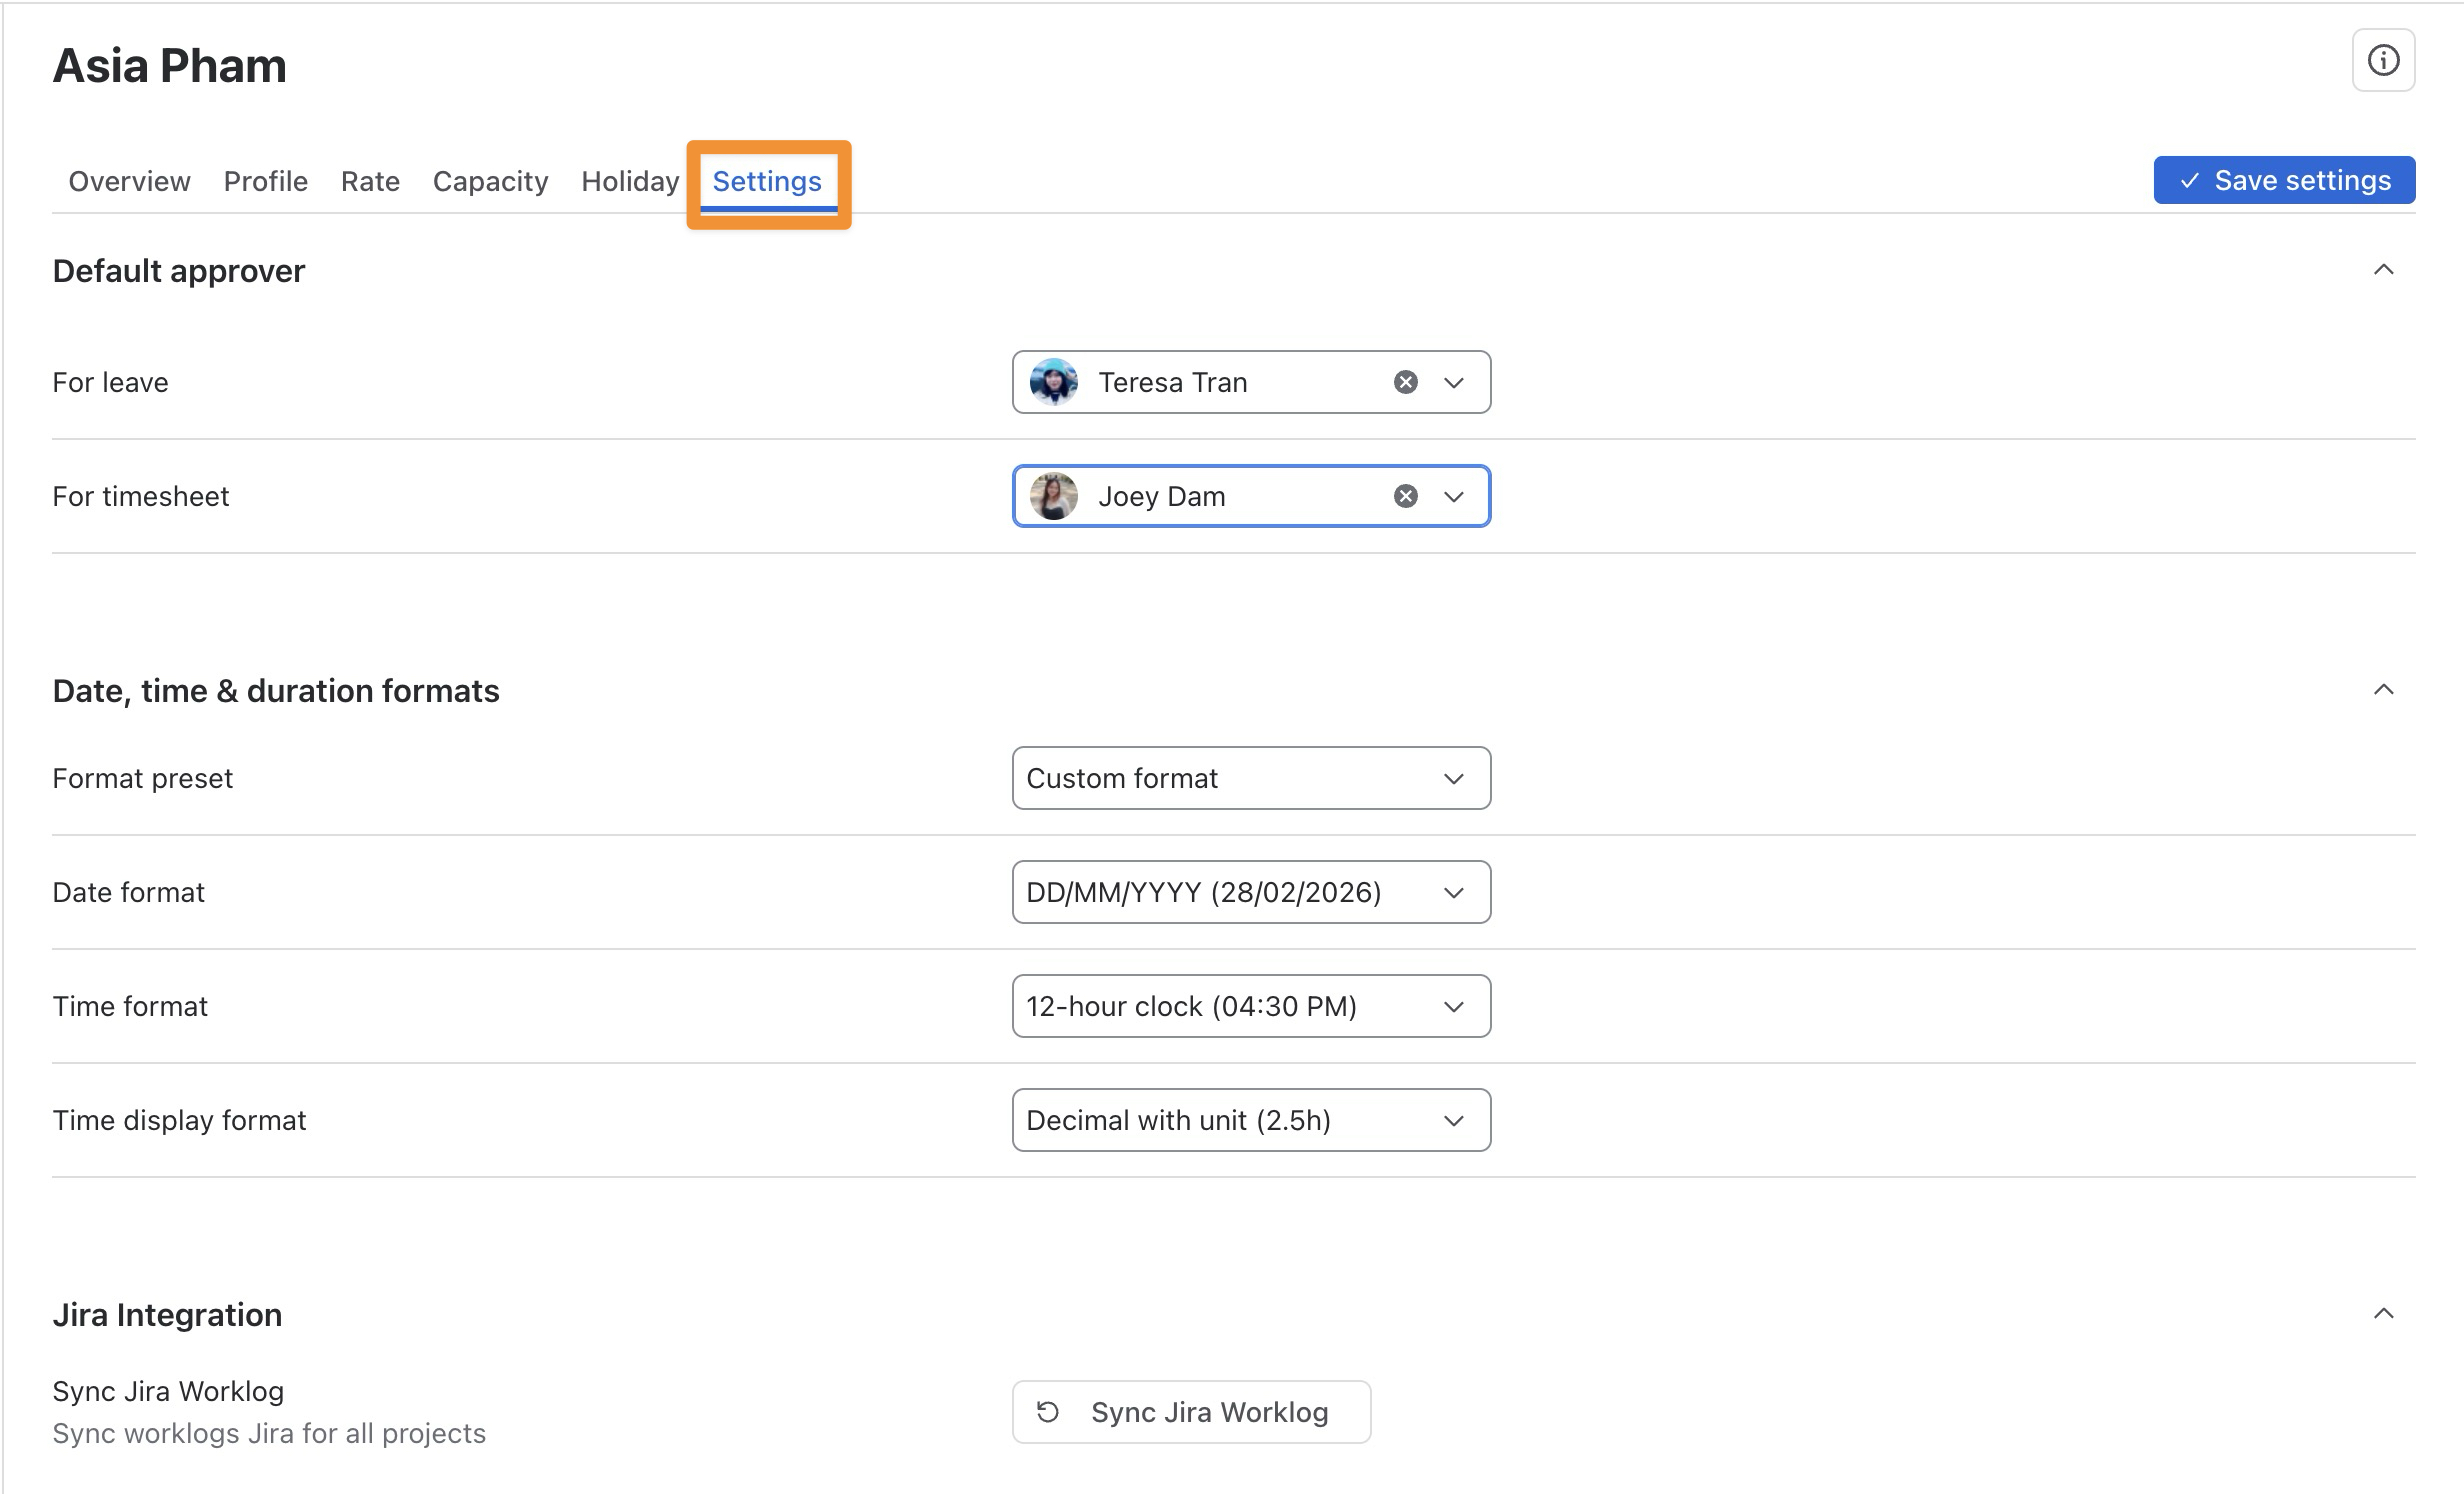
Open your own Settings tab to manage your approval, formatting, Jira integration, and notification preferences. After making changes, select 
a. Default approvers
The Default approver section determines who reviews your leave requests and timesheets.
-
For leave: Select the person who should approve your leave requests.
-
For timesheet: Select the person who should approve your submitted timesheets.

You can only search and assign users who have the Approver permission. For more information, refer to the Permission Guide.
b. Date, time & duration formats
The Date, time & duration formats section controls how these values appear across TimePlanner. Choose one of:
Select one of the following:
-
Default Formats: Uses the format configured by the App Admin.
-
Custom format: Lets you choose your own date, time, and duration display preferences.
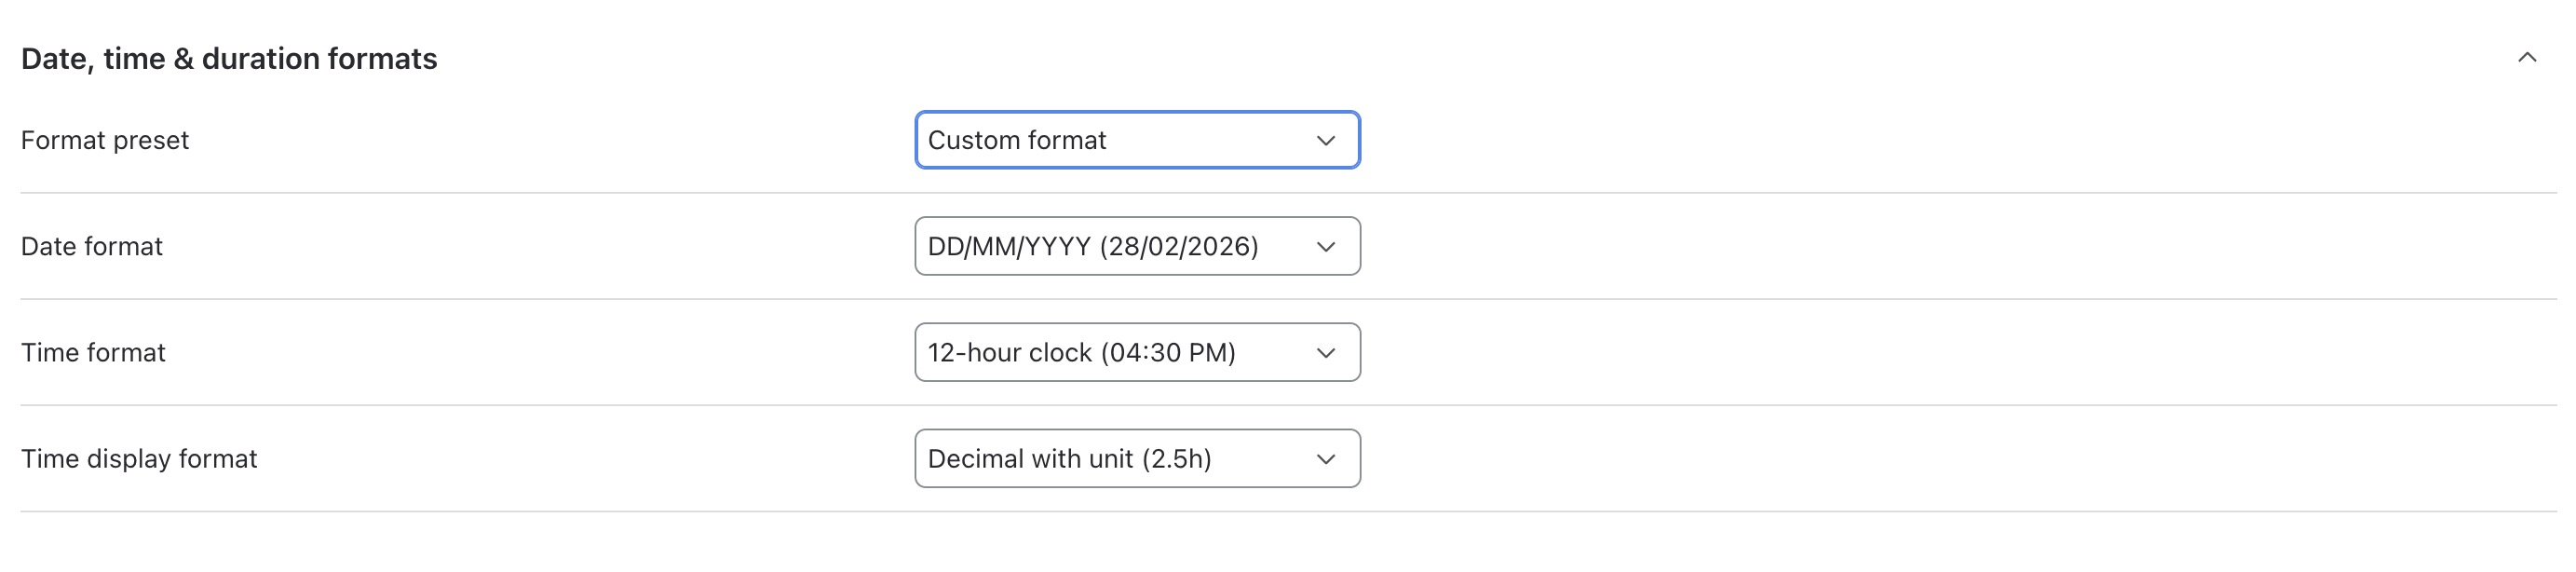
When Custom format is selected, configure the following fields:
Date format
-
DD/MM/YYYY -
MM/DD/YYYY -
YYYY-MM-DD -
MMM DD, YYYY
Time format
-
12-hour clock, such as
04:30 PM -
24-hour clock, such as
16:30
Time display format
-
Decimal with unit, such as
2.5h -
Readable time, such as
2h 30m -
Days, such as
2d
c. Jira integration
The Jira integration section lets you synchronize your worklogs between TimePlanner and Jira.
To synchronize your worklogs:
-
Open the Jira Integration section.
-
Select
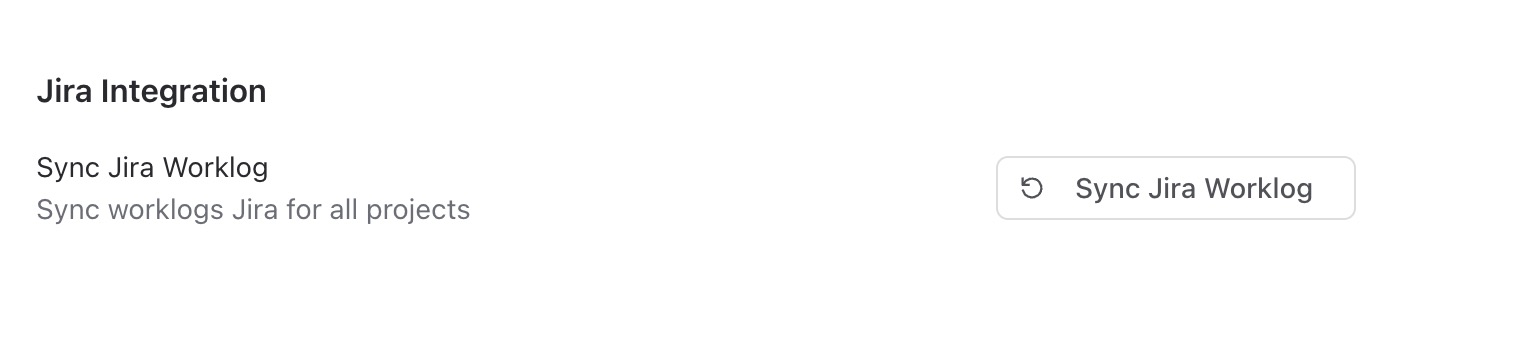
TimePlanner will synchronize supported Jira worklogs across your projects, helping keep time records consistent between TimePlanner and Jira.
d. Notifications
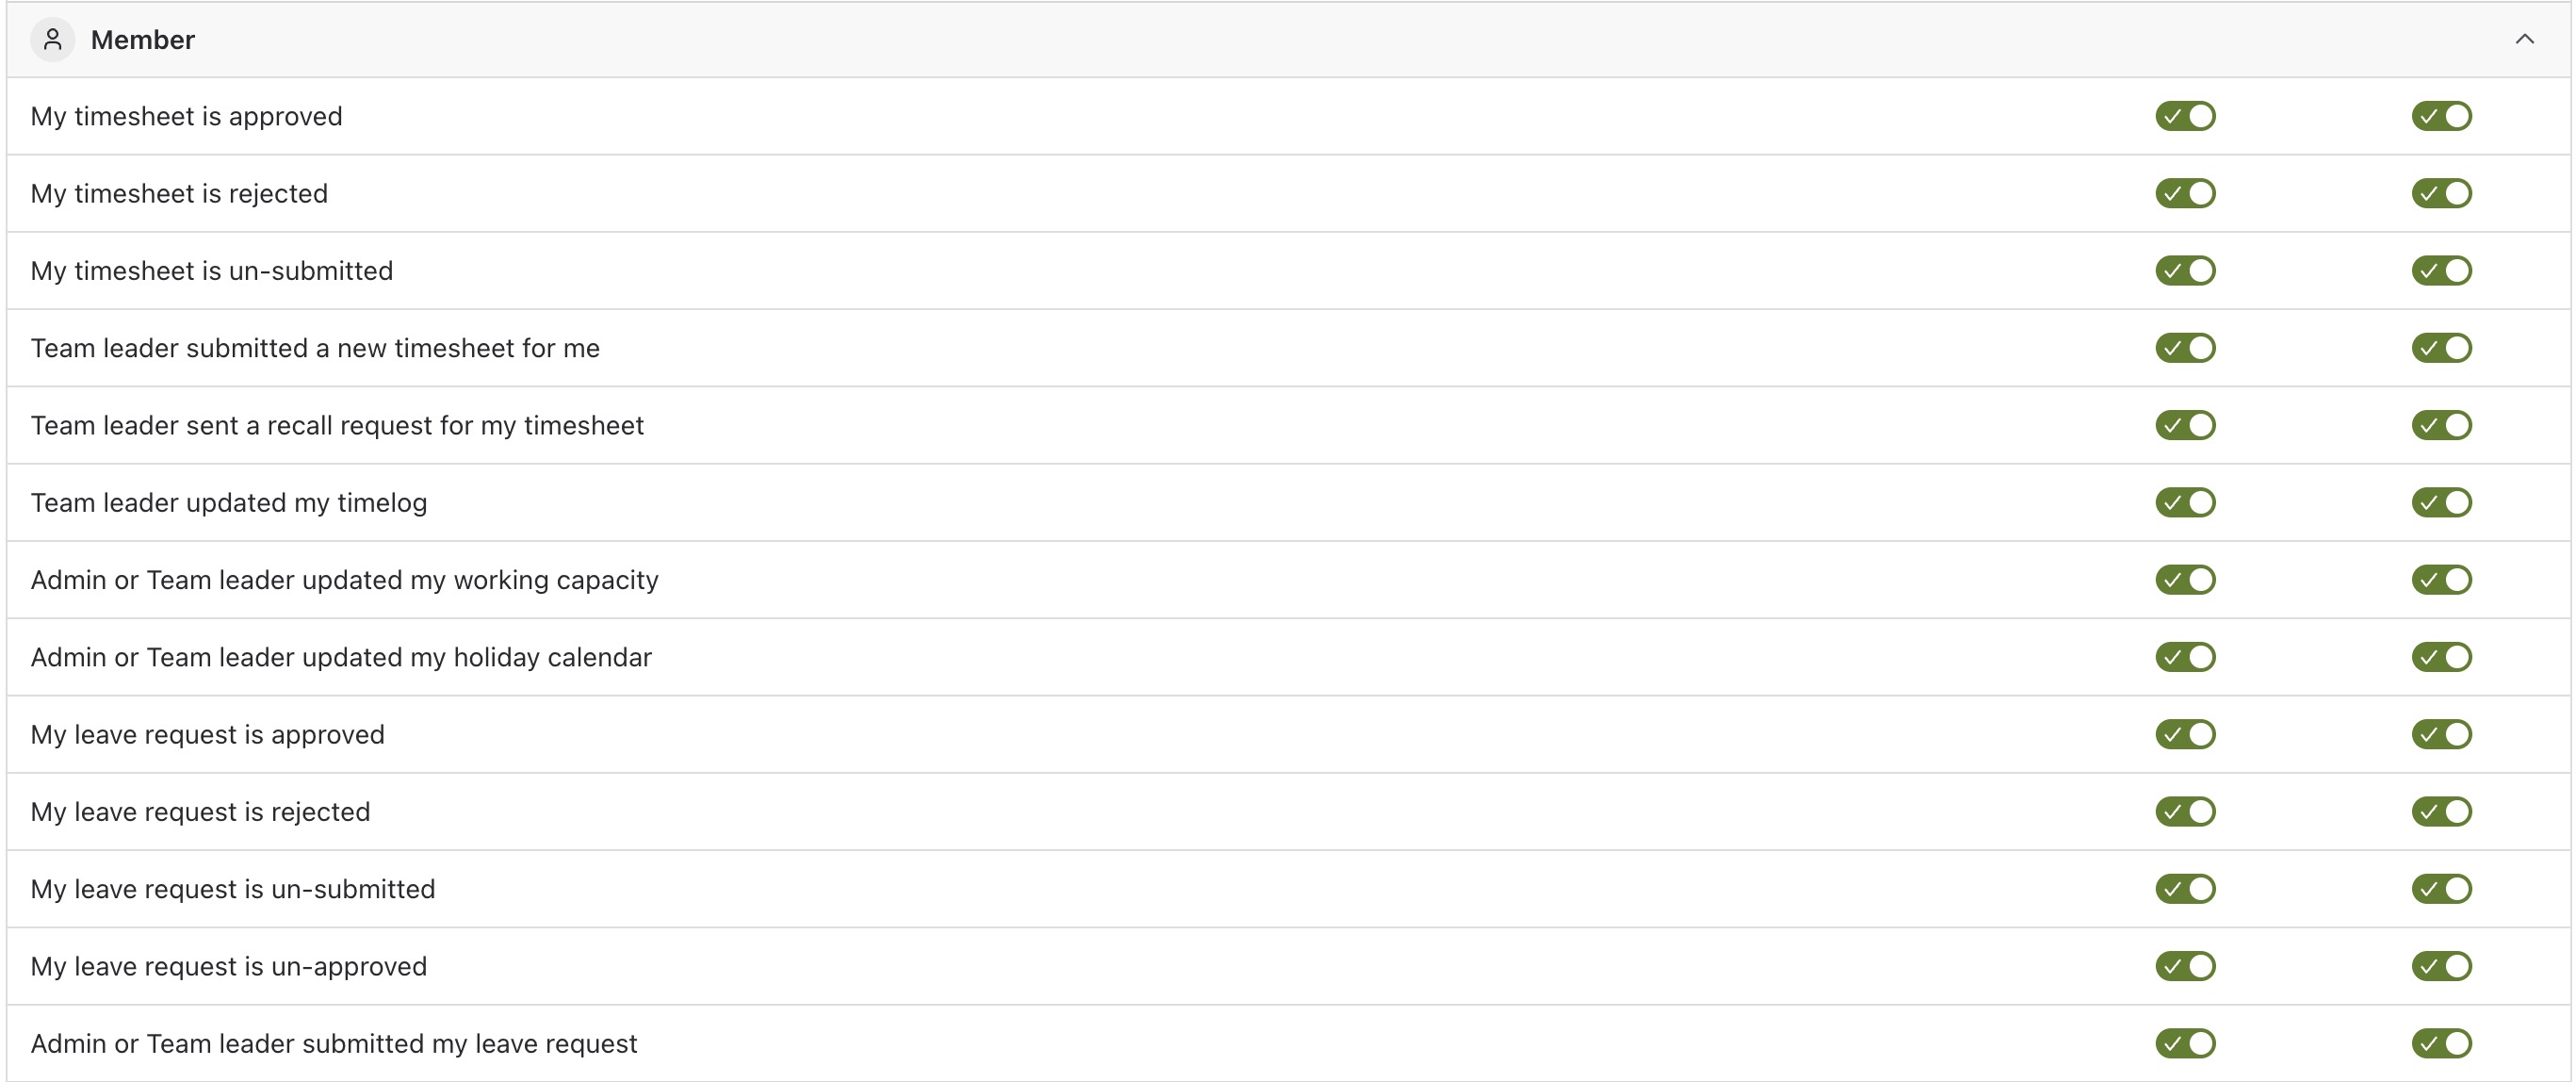
The Notifications section controls which events generate in-app notifications, email notifications, or both. Each event has up to two controls:
-
Notification: enables or disables in-app alerts.
-
Email: enables or disables email alerts.
Settings are organized into groups:
-
Product Updates: Product news and announcements:

-
Member notifications: Updates about your own activity:
-
Approver notifications: Updates for requests routed to you as an approver:
