.png)
Important Note: This feature is only available for date-mapping projects
What is the Original Estimate?
The Original Estimate is a Jira field used to specify the estimated amount of time required to complete a work item, such as hours or days. For example, you might estimate a task will take 8 hours or 2 days.
How TimePlanner Uses the Original Estimate
When Plan with Original Estimation Field is enabled, TimePlanner uses the Jira Original Estimate to calculate how much work should be planned each day.
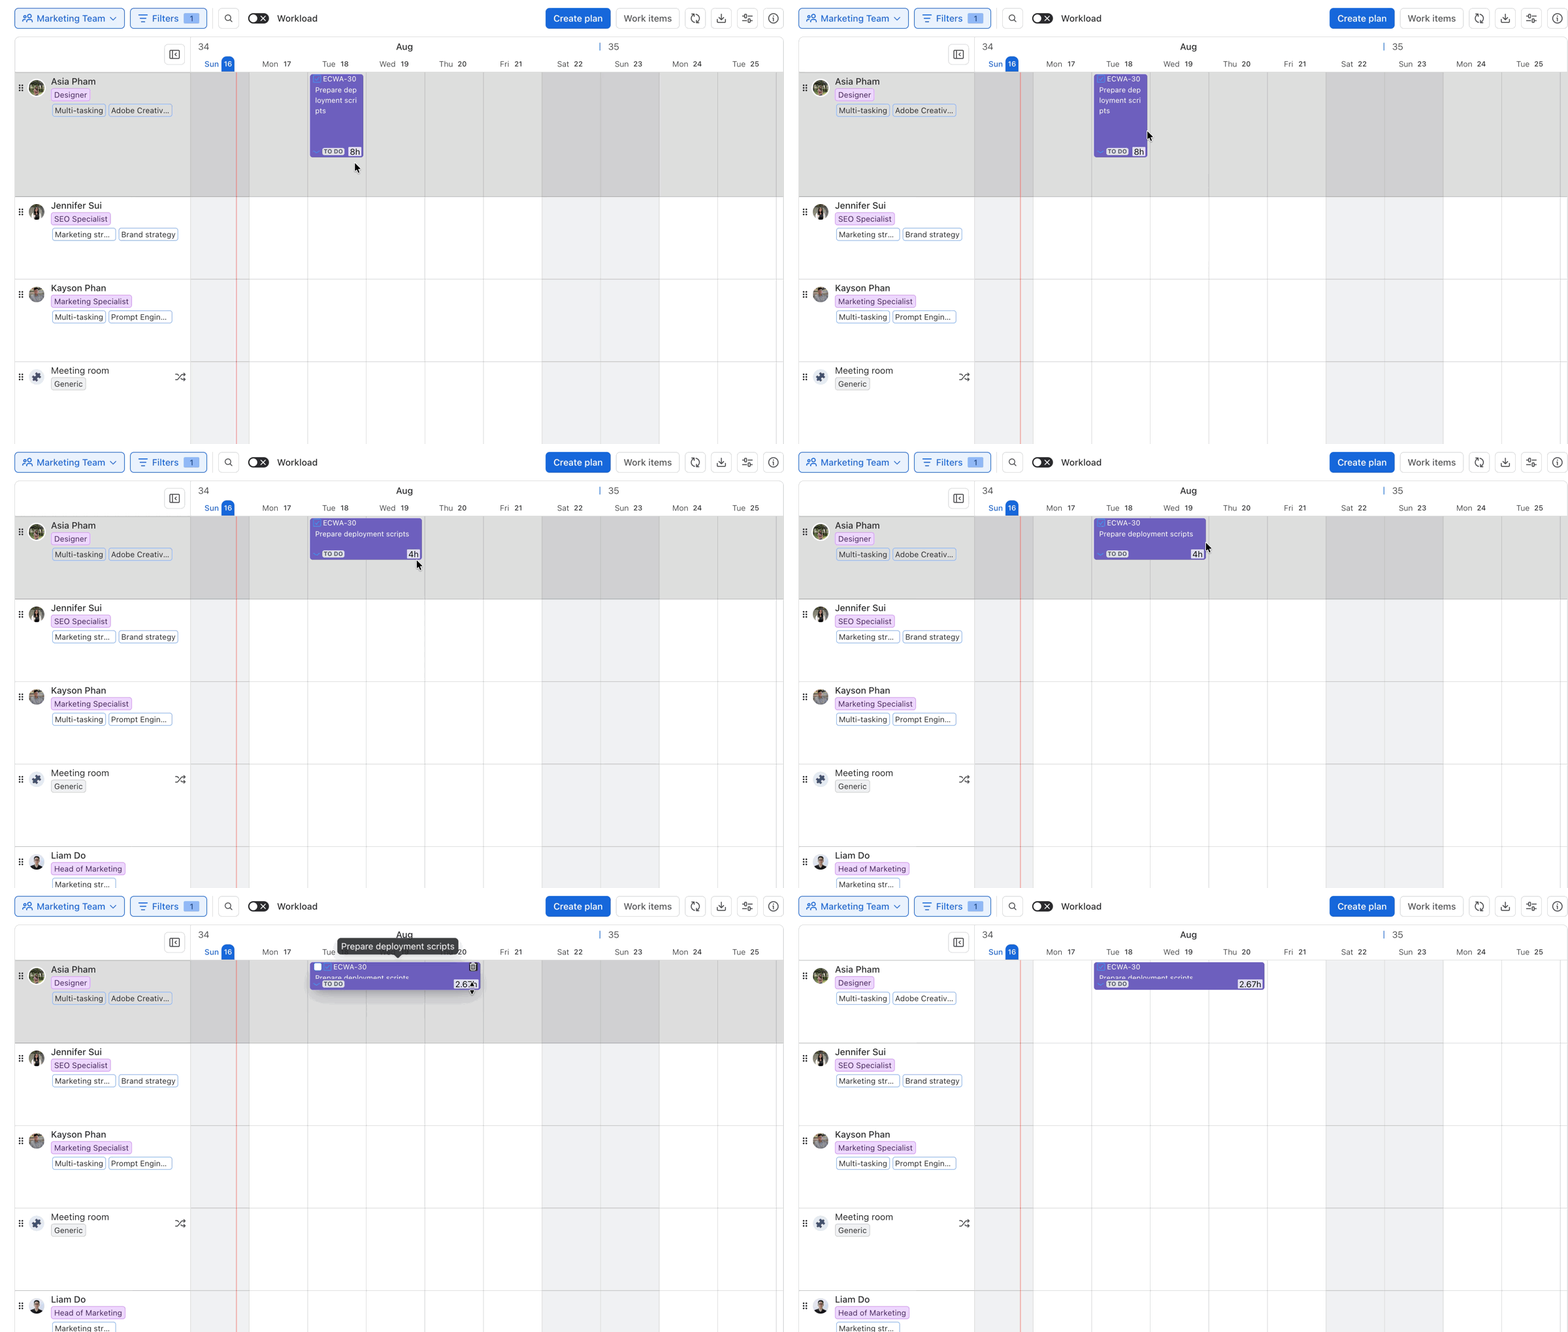
For example, if a task has an Original Estimate of 16 hours and is planned across 2 days, TimePlanner schedules 8 hours per day.
-
Automatic distribution: TimePlanner spreads the Original Estimate across the task's planned date range.
-
Date Mapping required: The project's Start Date and End Date must be mapped with Jira fields.
-
Automatic recalculation: If you change the task's start or end date, TimePlanner recalculates the hours per day automatically.
-
Original Estimate stays the same: Changing the planned dates does not change the Original Estimate stored in Jira.
Example:
Original Estimate = 16h
Planned for 2 days → 8h/day
Extend it to 4 days → 4h/day
The total planned time remains 16 hours.
How to plan a task with the Original Estimate:
step 1 Enable ‘Plan with original estimation field’
Only users with the App Admin role can access and manage General Settings in TimePlanner.
-
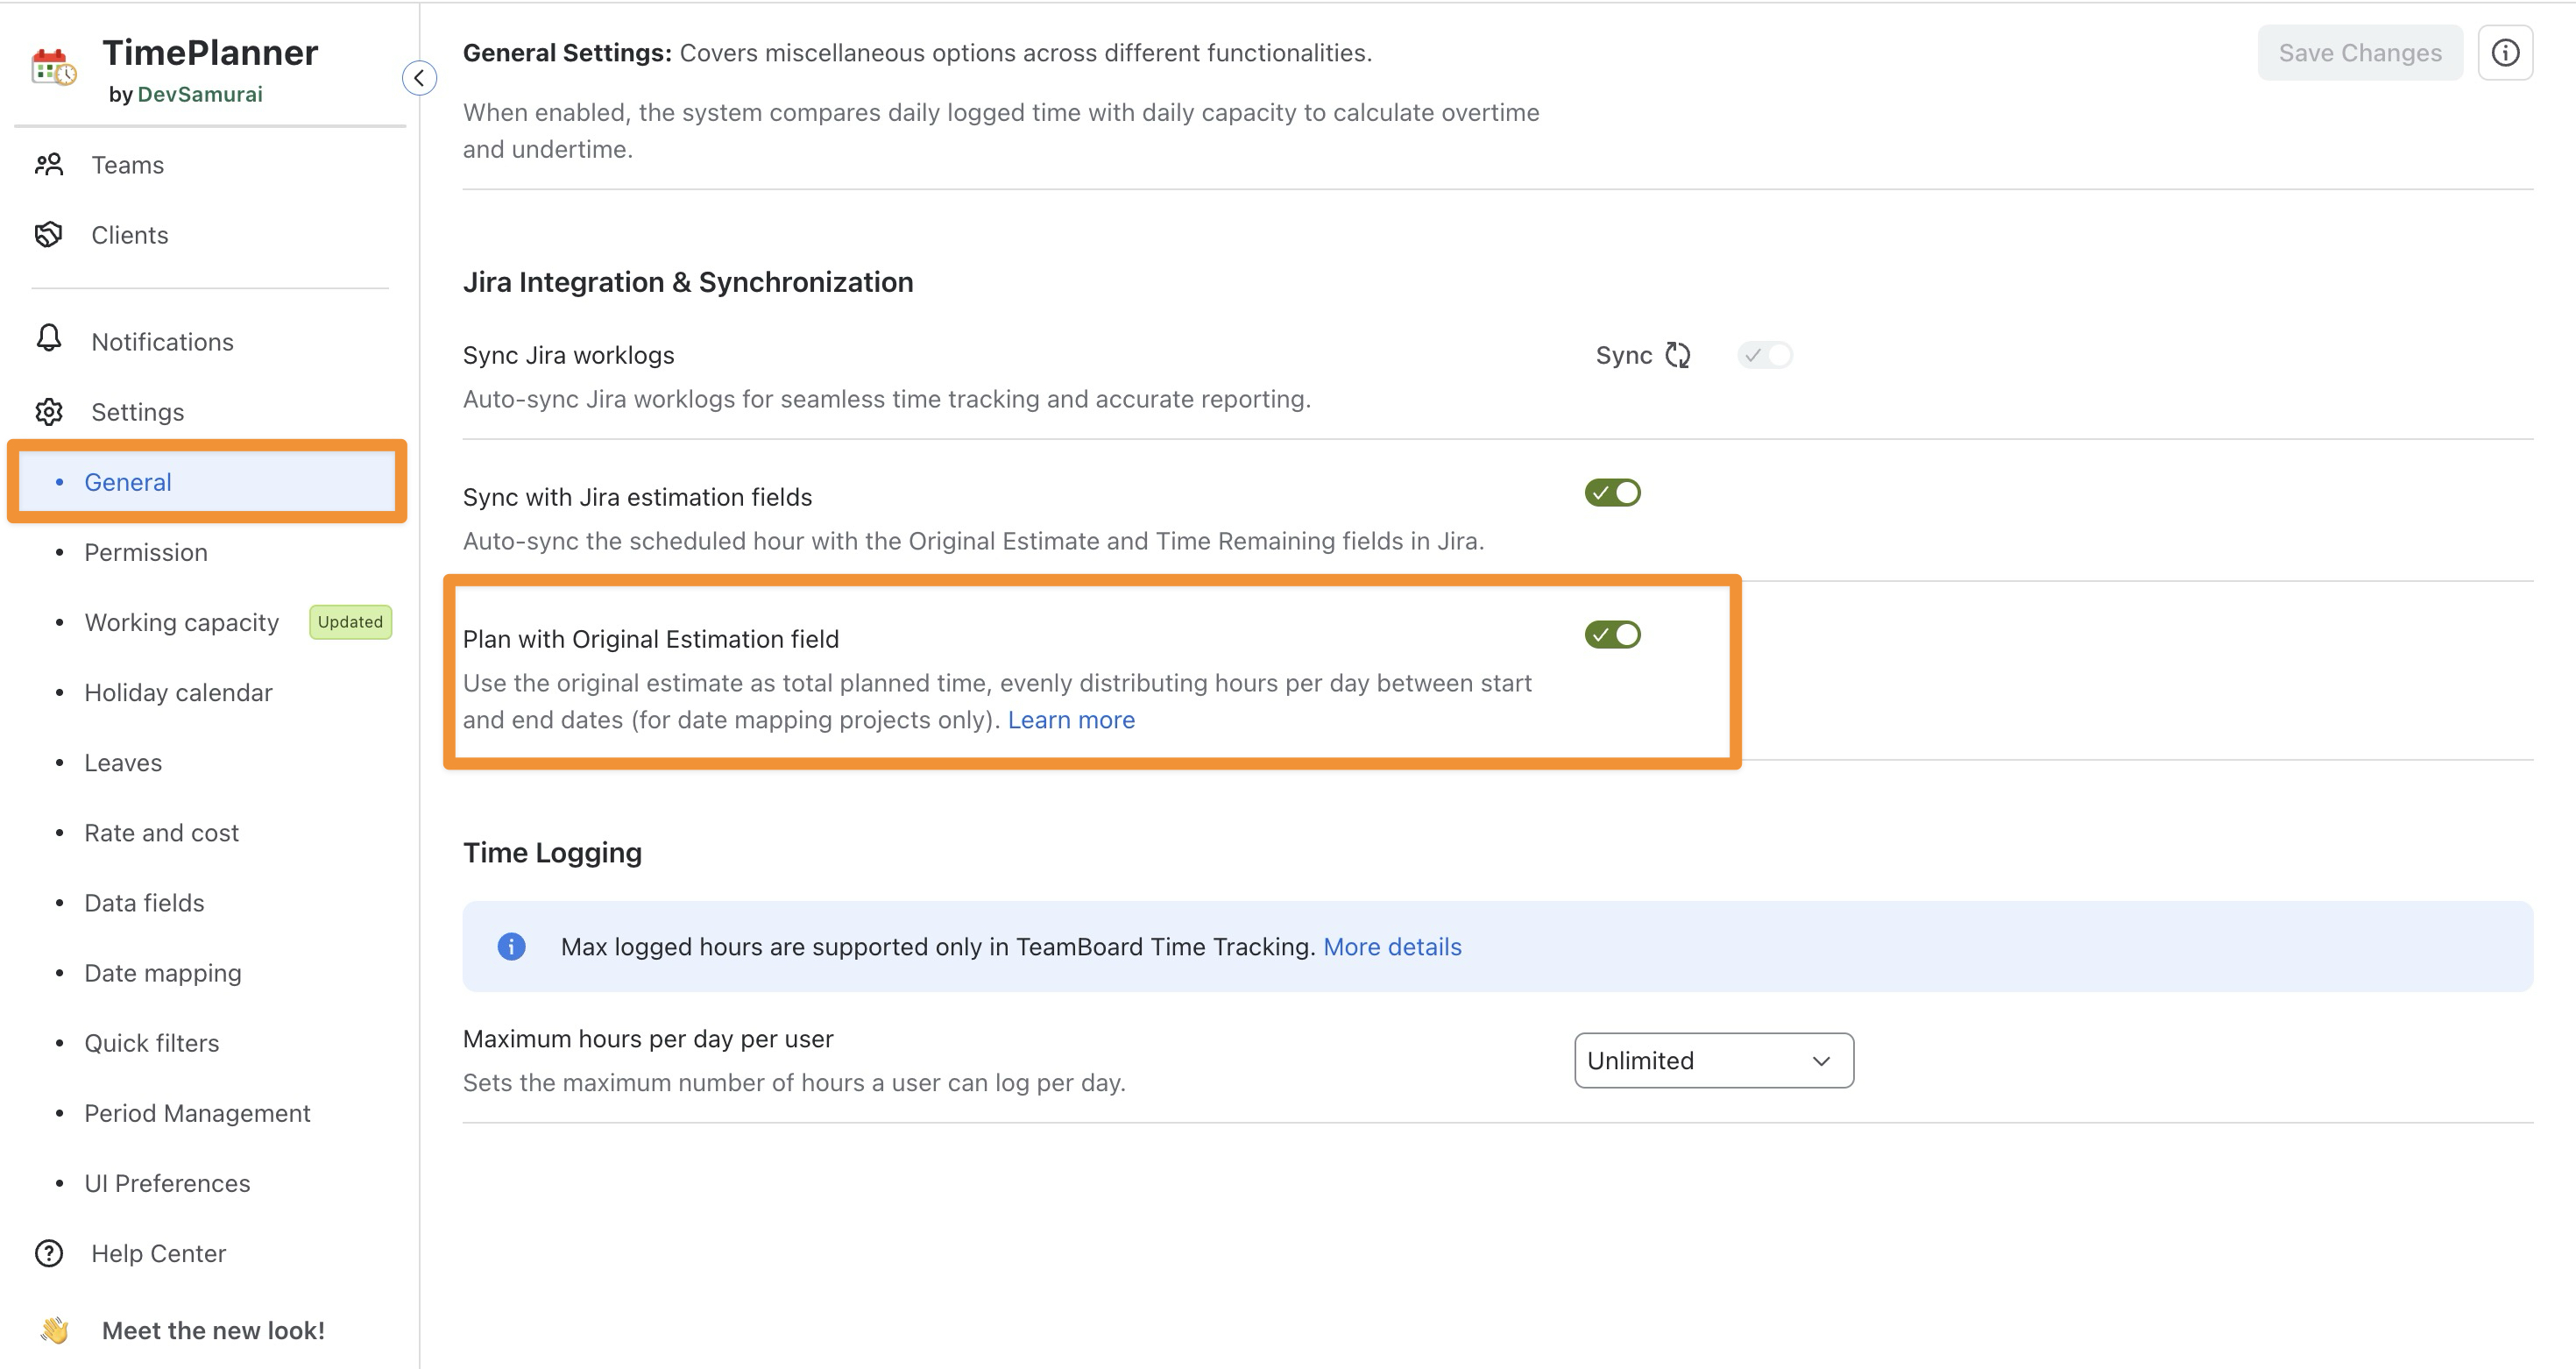
Navigate to

-
Under Settings, select General.
-
Enable Plan with Original Estimation Field.
-
Click

step 2 Map dates with Jira fields
Only users with Jira Admin and App Admin roles can access and manage Date Mapping.
-
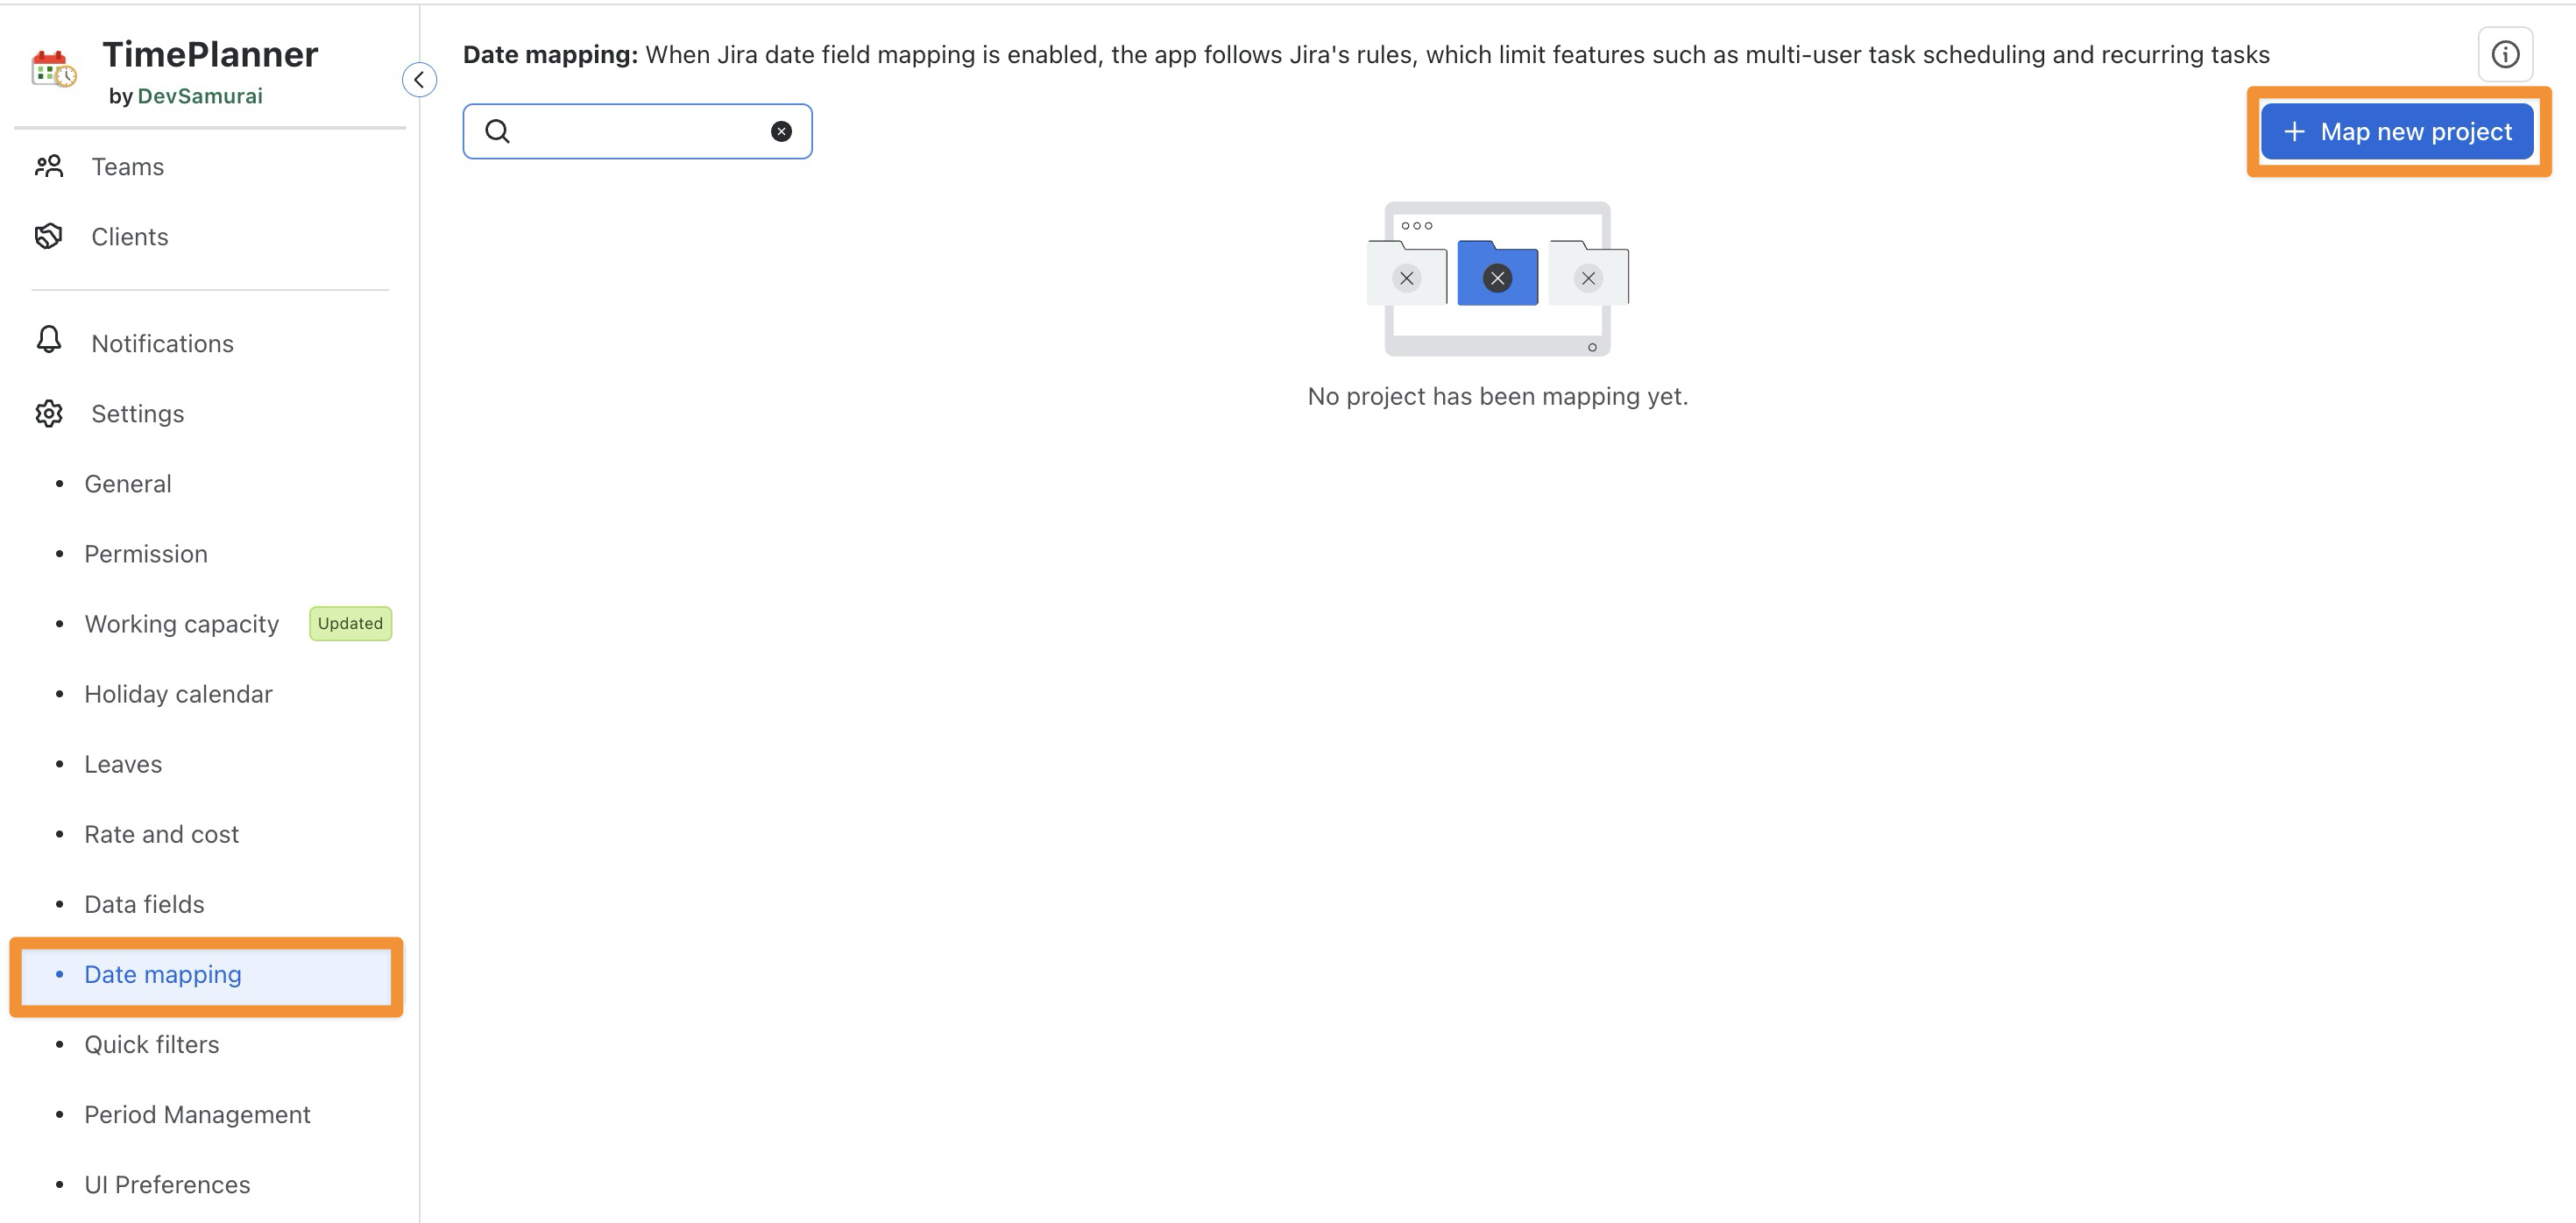
Navigate to
-
Under Settings, select Date Mapping.
-
Click

-
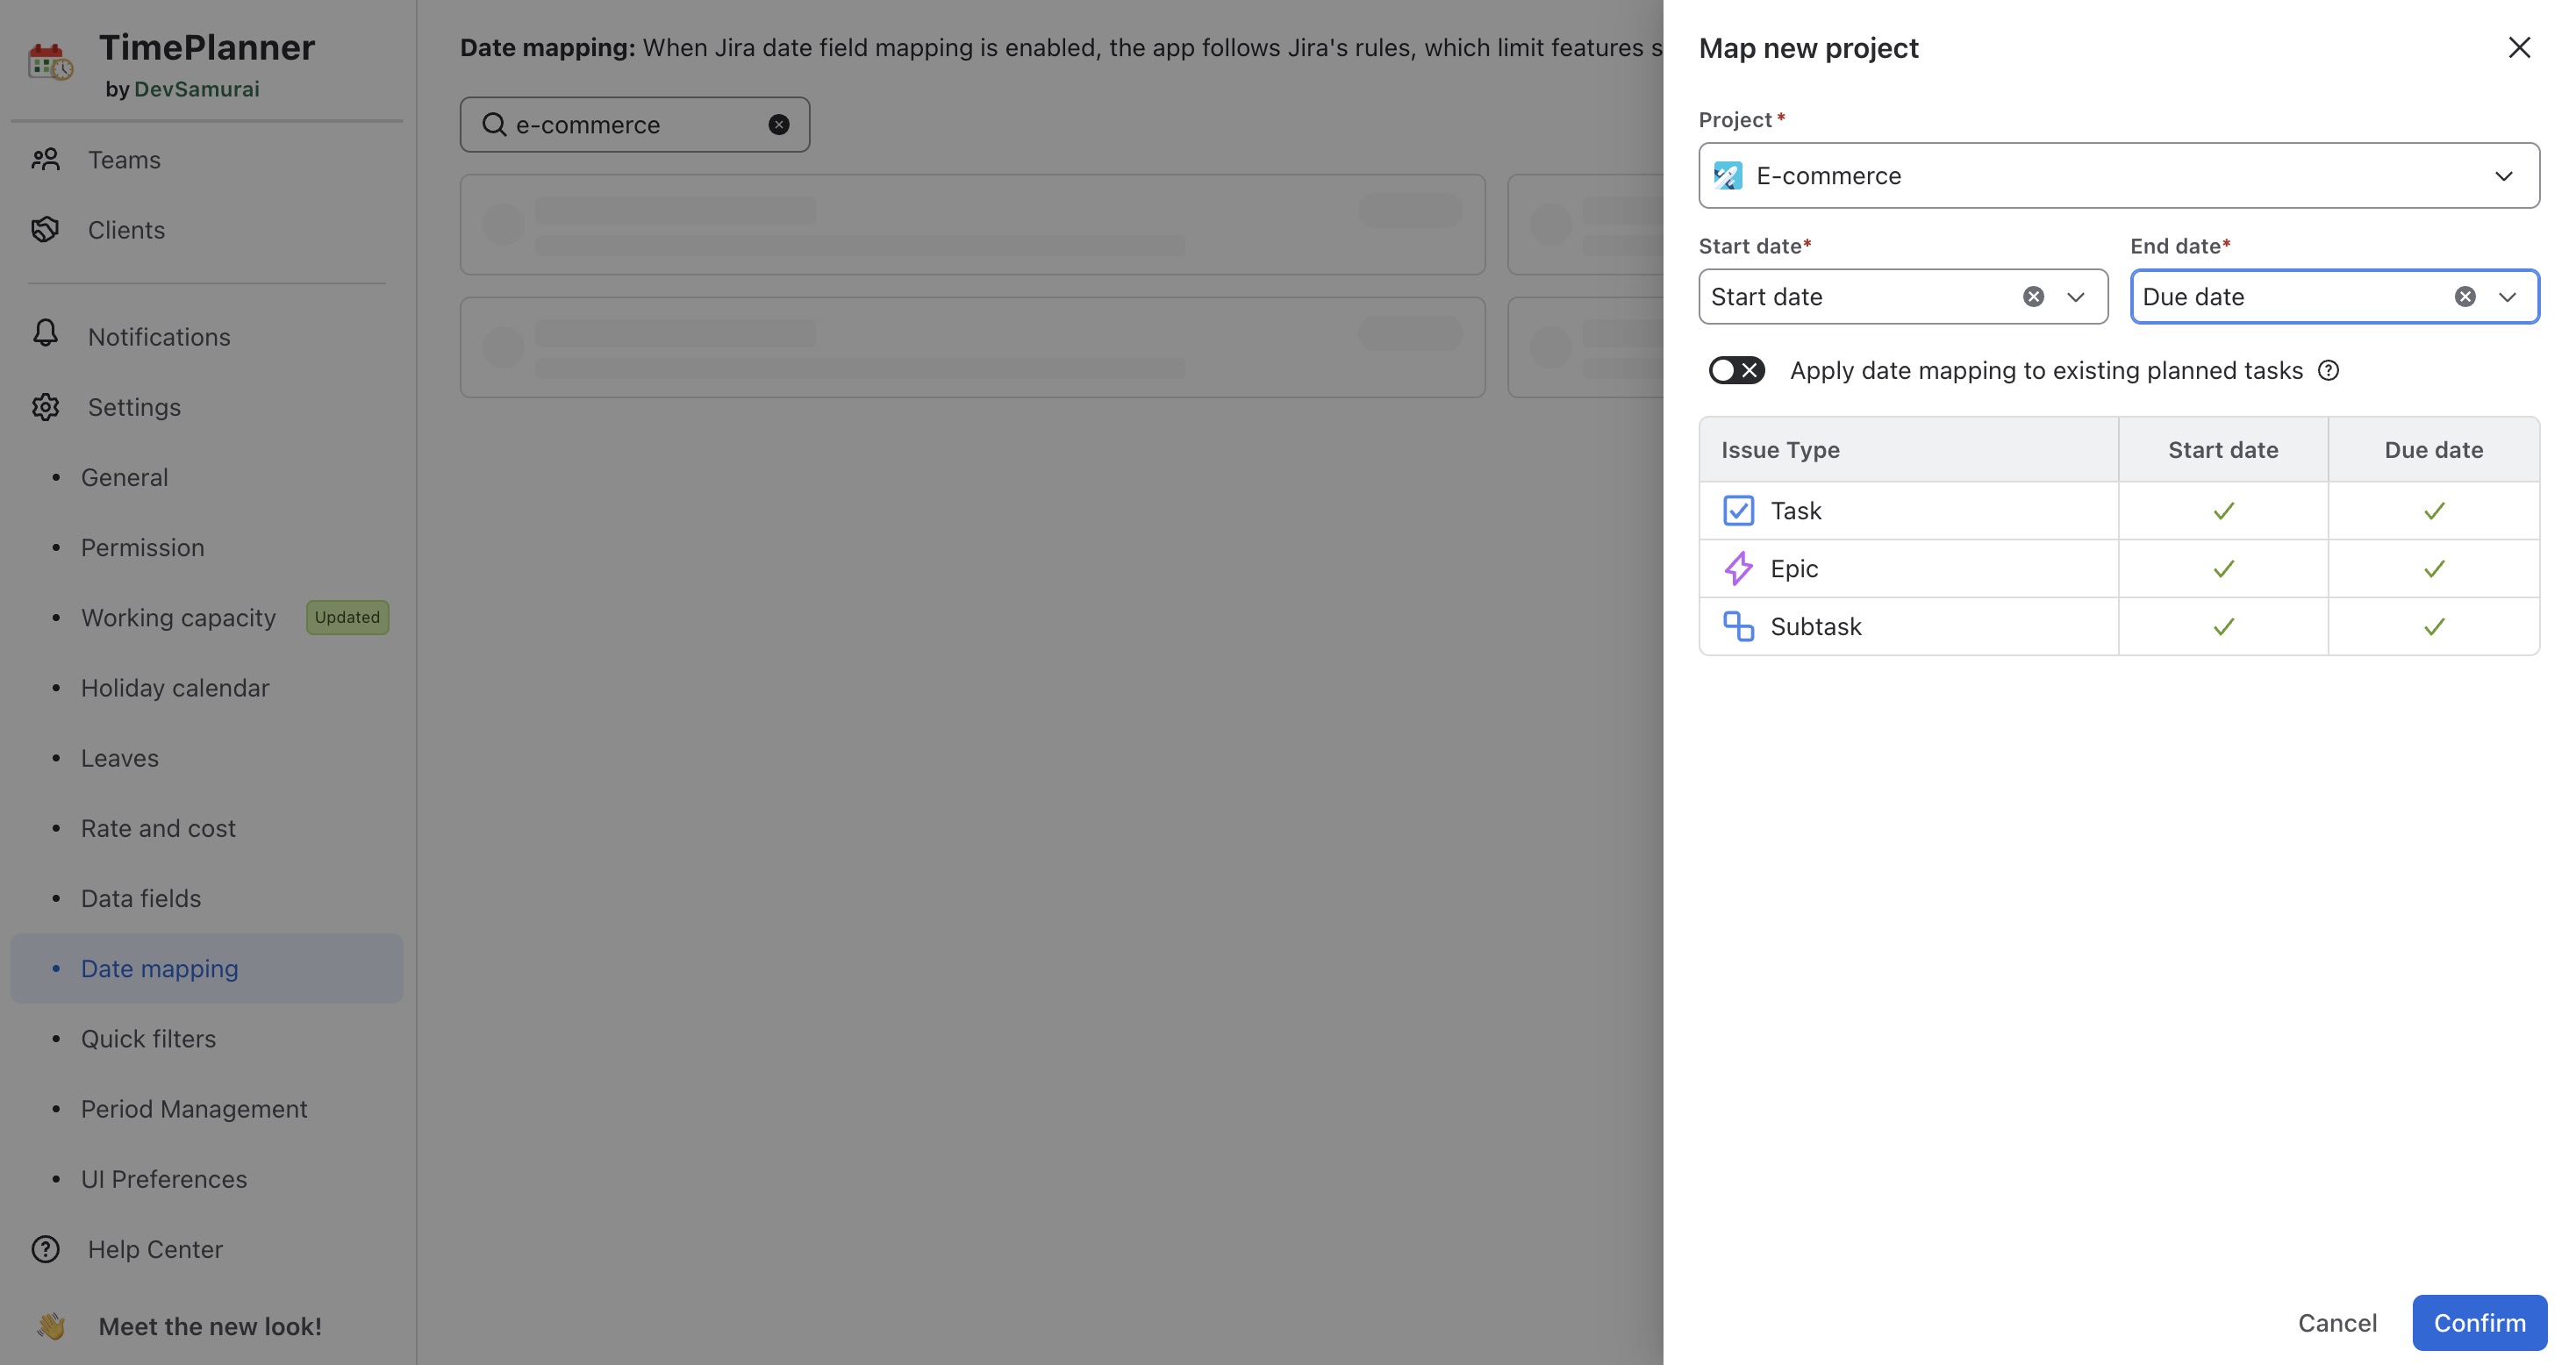
Select the Jira project you want to configure.
-
Choose the Jira date fields to map to the Start date and End date fields in TimePlanner.
-
Choose whether to enable Apply date mapping to existing planned tasks:
-
Enabled: TimePlanner syncs the start and end dates of existing planned tasks to the mapped Jira work items.
-
Disabled: The mapping applies only to future date changes.
-
-
Click

Important Note
-
Make sure you have properly mapped the following Jira fields: Start Date, End Date, Original Estimate, and Assignee for relevant work item types such as Epic, Task, Subtask, Story, Bug, etc.
-
To ensure the feature works, Jira fields must be configured in the Work Item Screen for each specific Work Item Type.
Learn more: How to map Jira date fields
step 3 Plan the task in the Work Item Detail panel
-
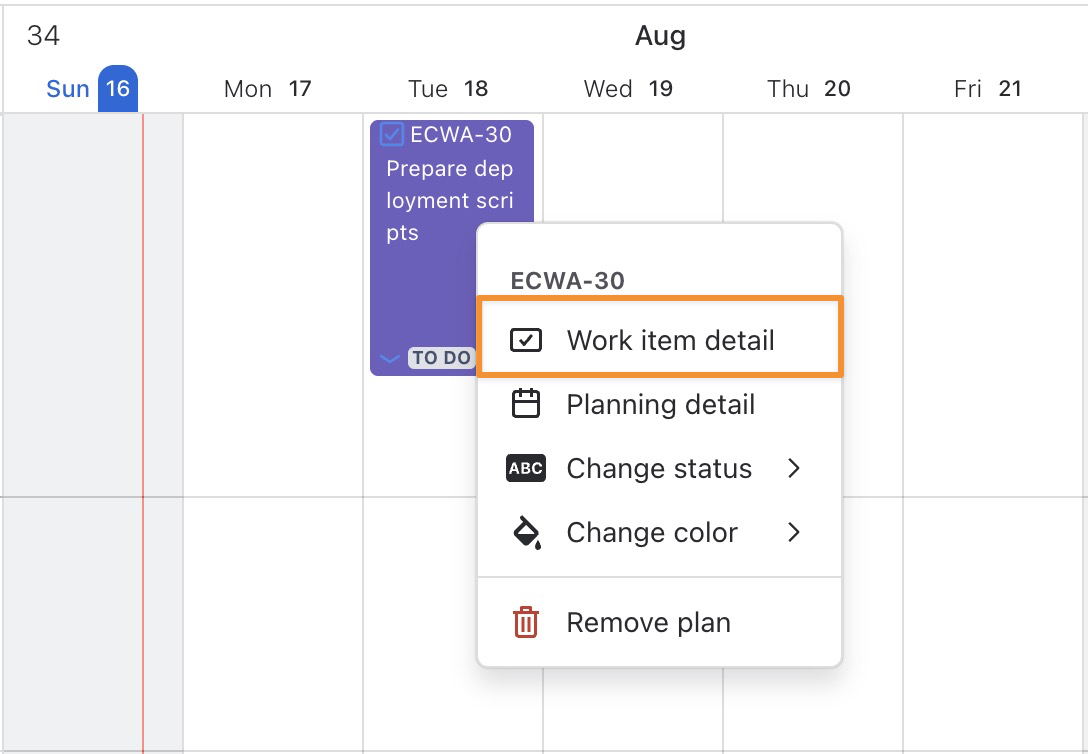
From the Schedule Board, open the Work Item Detail panel in one of these ways:
Click directly on the Work Item Key on the task card to open the Work Item Detail panel.
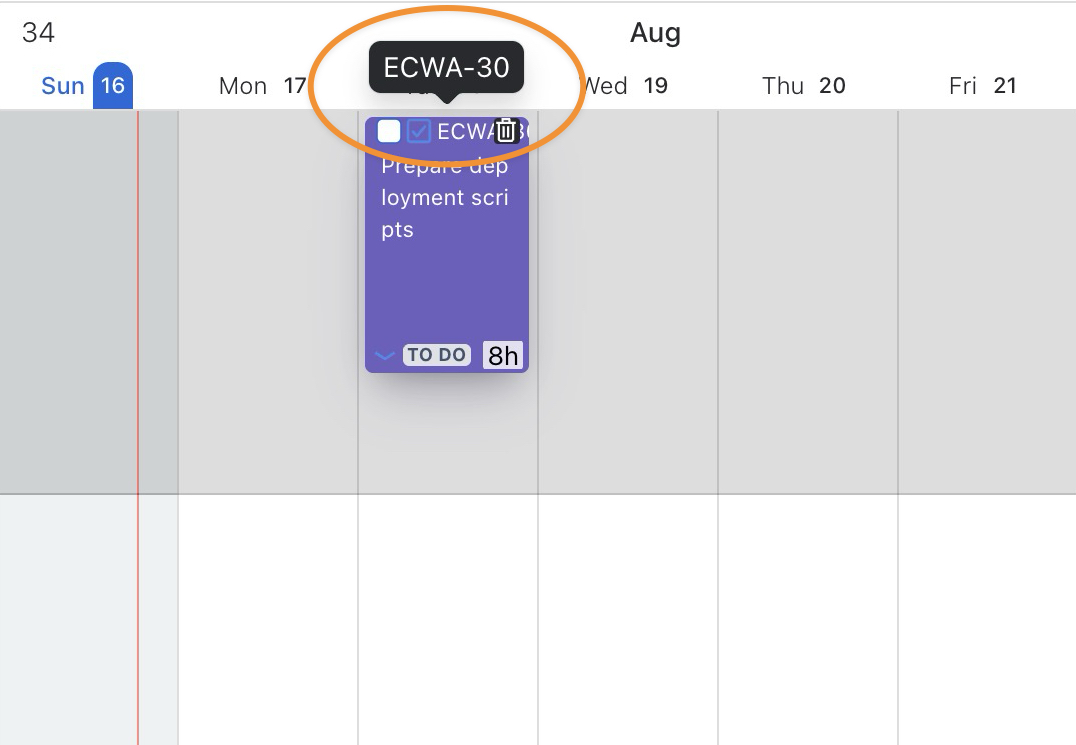
Or right-click on the task card and select 
-
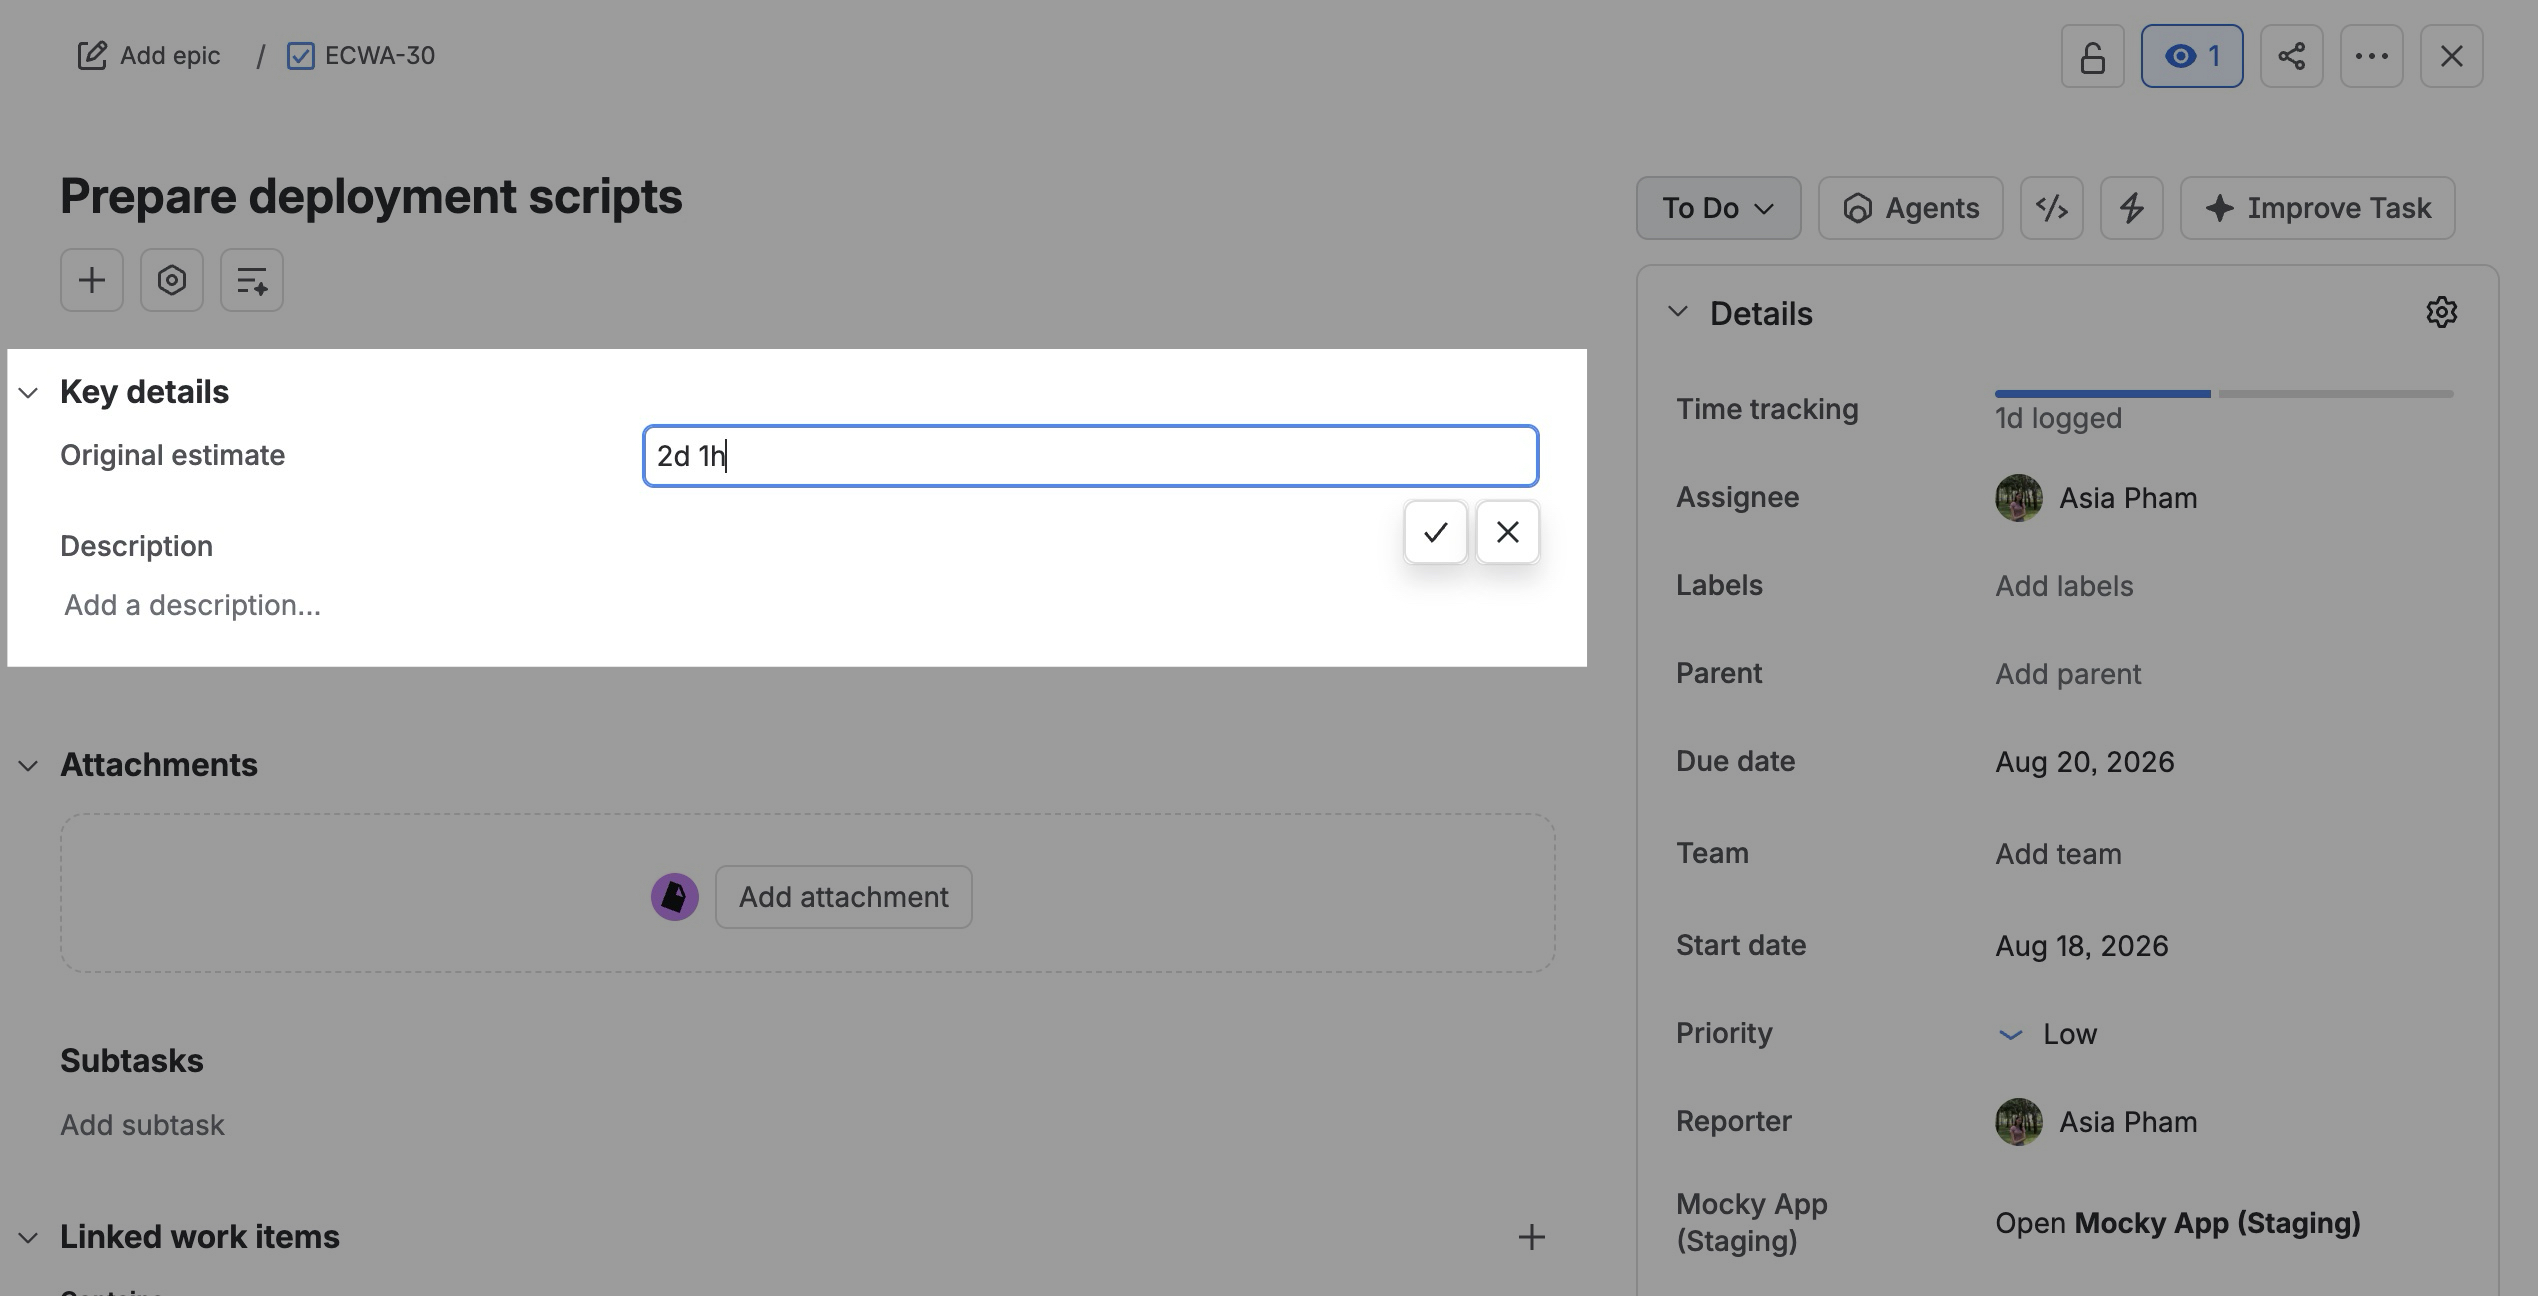
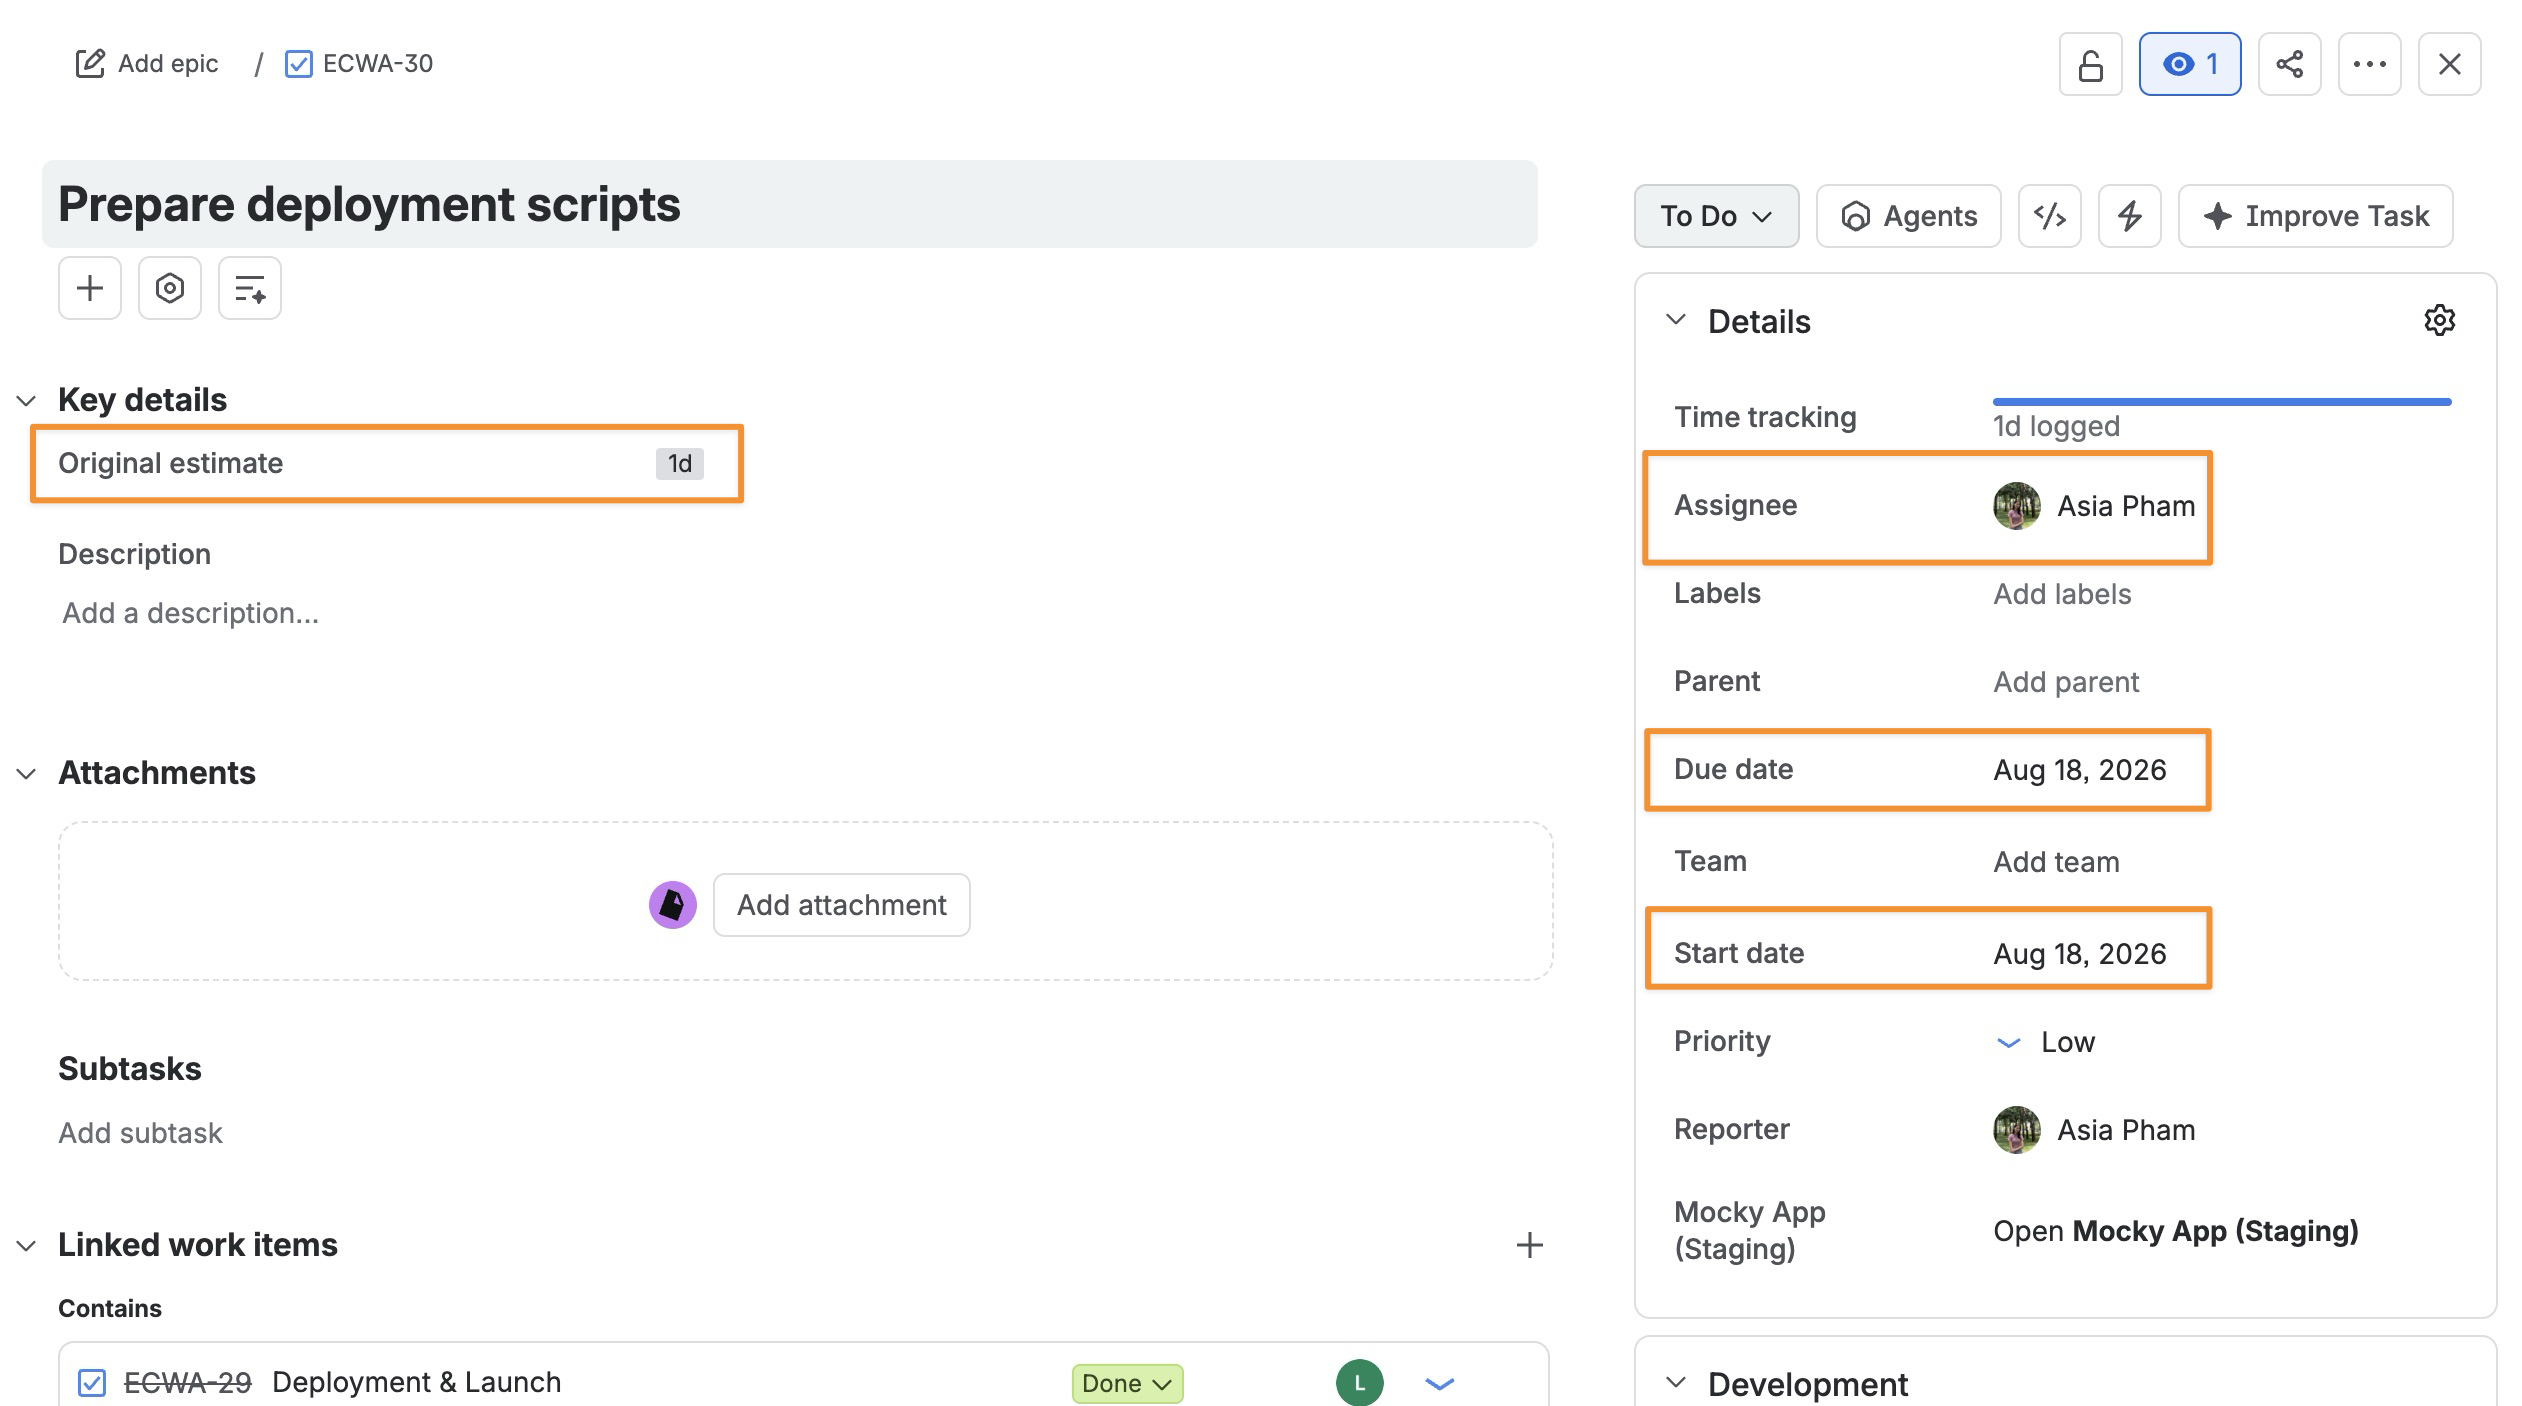
In the Jira work item panel, complete the following fields:
-
-
Original estimate: Enter the estimated time for the task in hours or days (e.g., 8h, 2d 1h).
-
Start date: Set the date when the task is scheduled to begin.
-
Due date: Set the date when the task should be completed.
-
Assignee: Choose the team member who will be responsible for completing the task.
-
STEP 4 Adjust the Planned Dates
Once the task is scheduled, you can adjust its start date and end date directly on the Schedule Board by moving or resizing the task card.
When the planned date range changes, TimePlanner automatically adjusts the task's daily planned hours to keep the total planned time aligned with the Original Estimate.