.png)
Team Admins, App Admins, Jira Admins, and members with the Manage Team Permission can update teams.
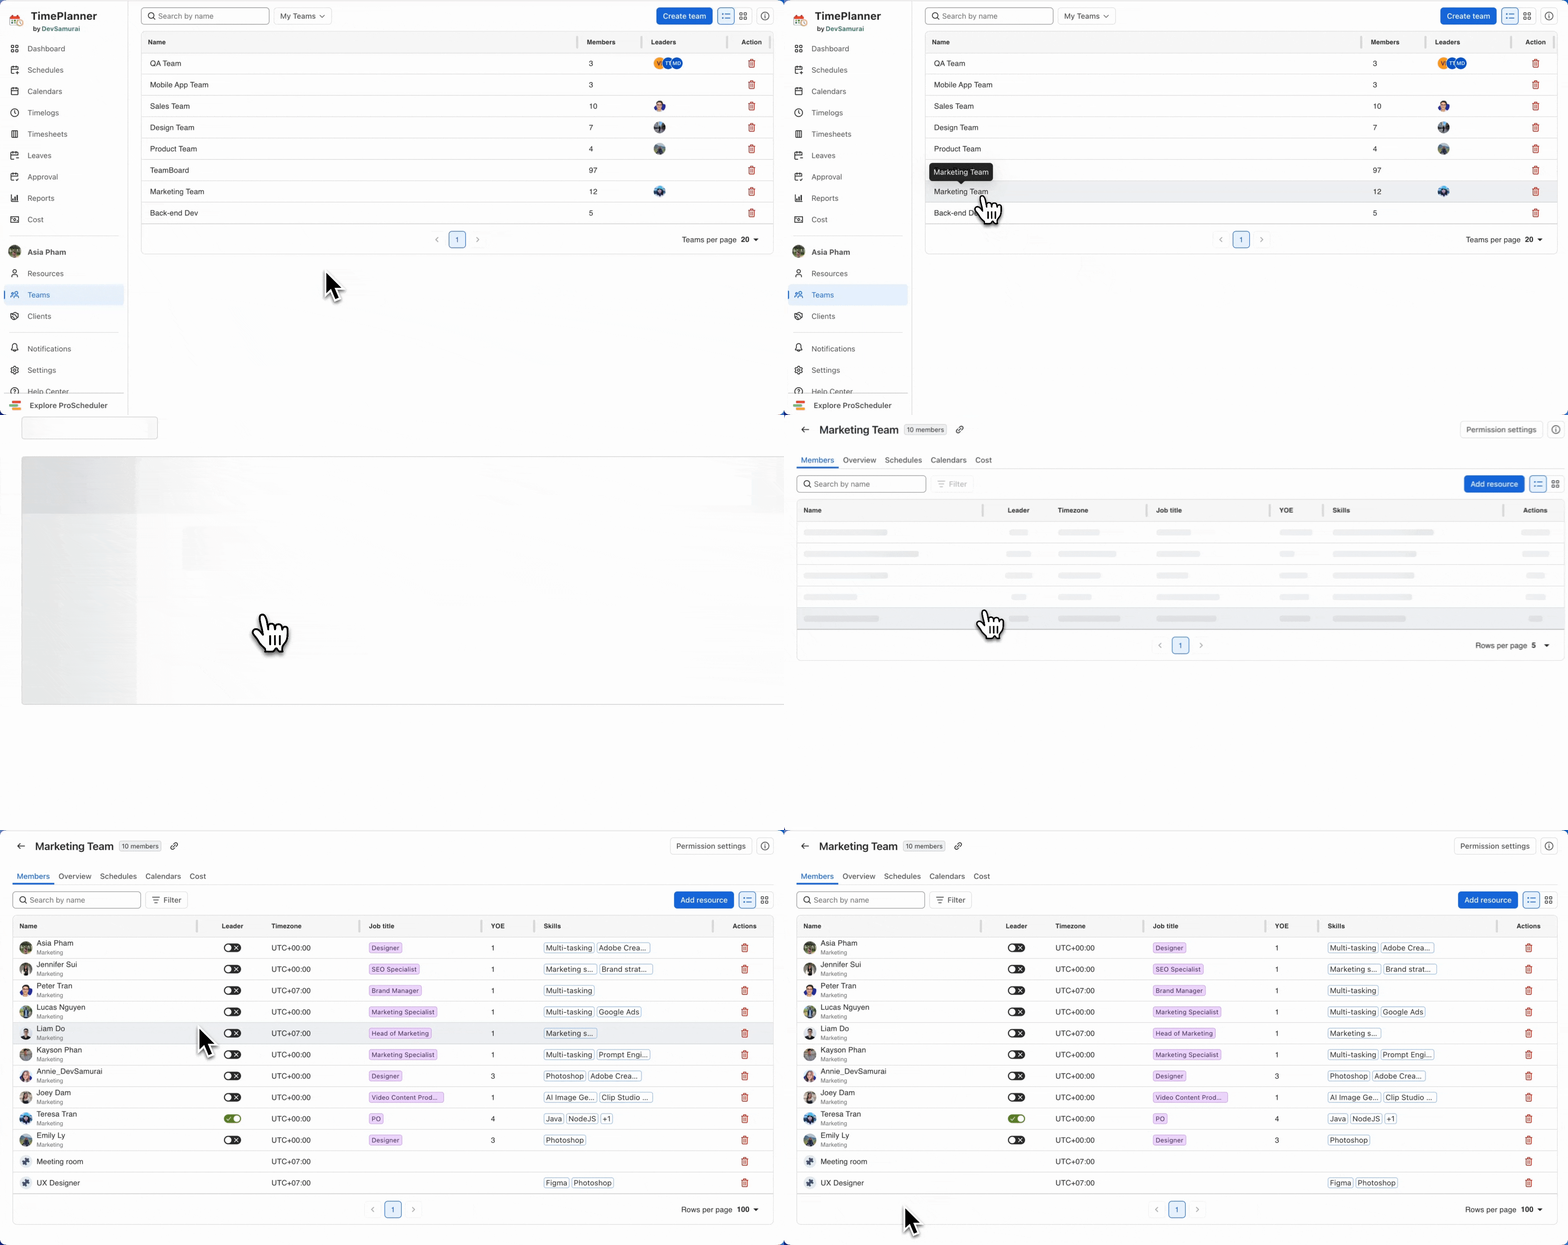
You can update an existing team to change its name, add or remove team members and Generic Resources, or modify team leaders and their roles. Follow these steps to update a team:
Accessing the Team Workspace
-
Go to

-
Locate the team you want to update.
-
Click the Team to open the Team Workspace.
Updating the Team Name
-
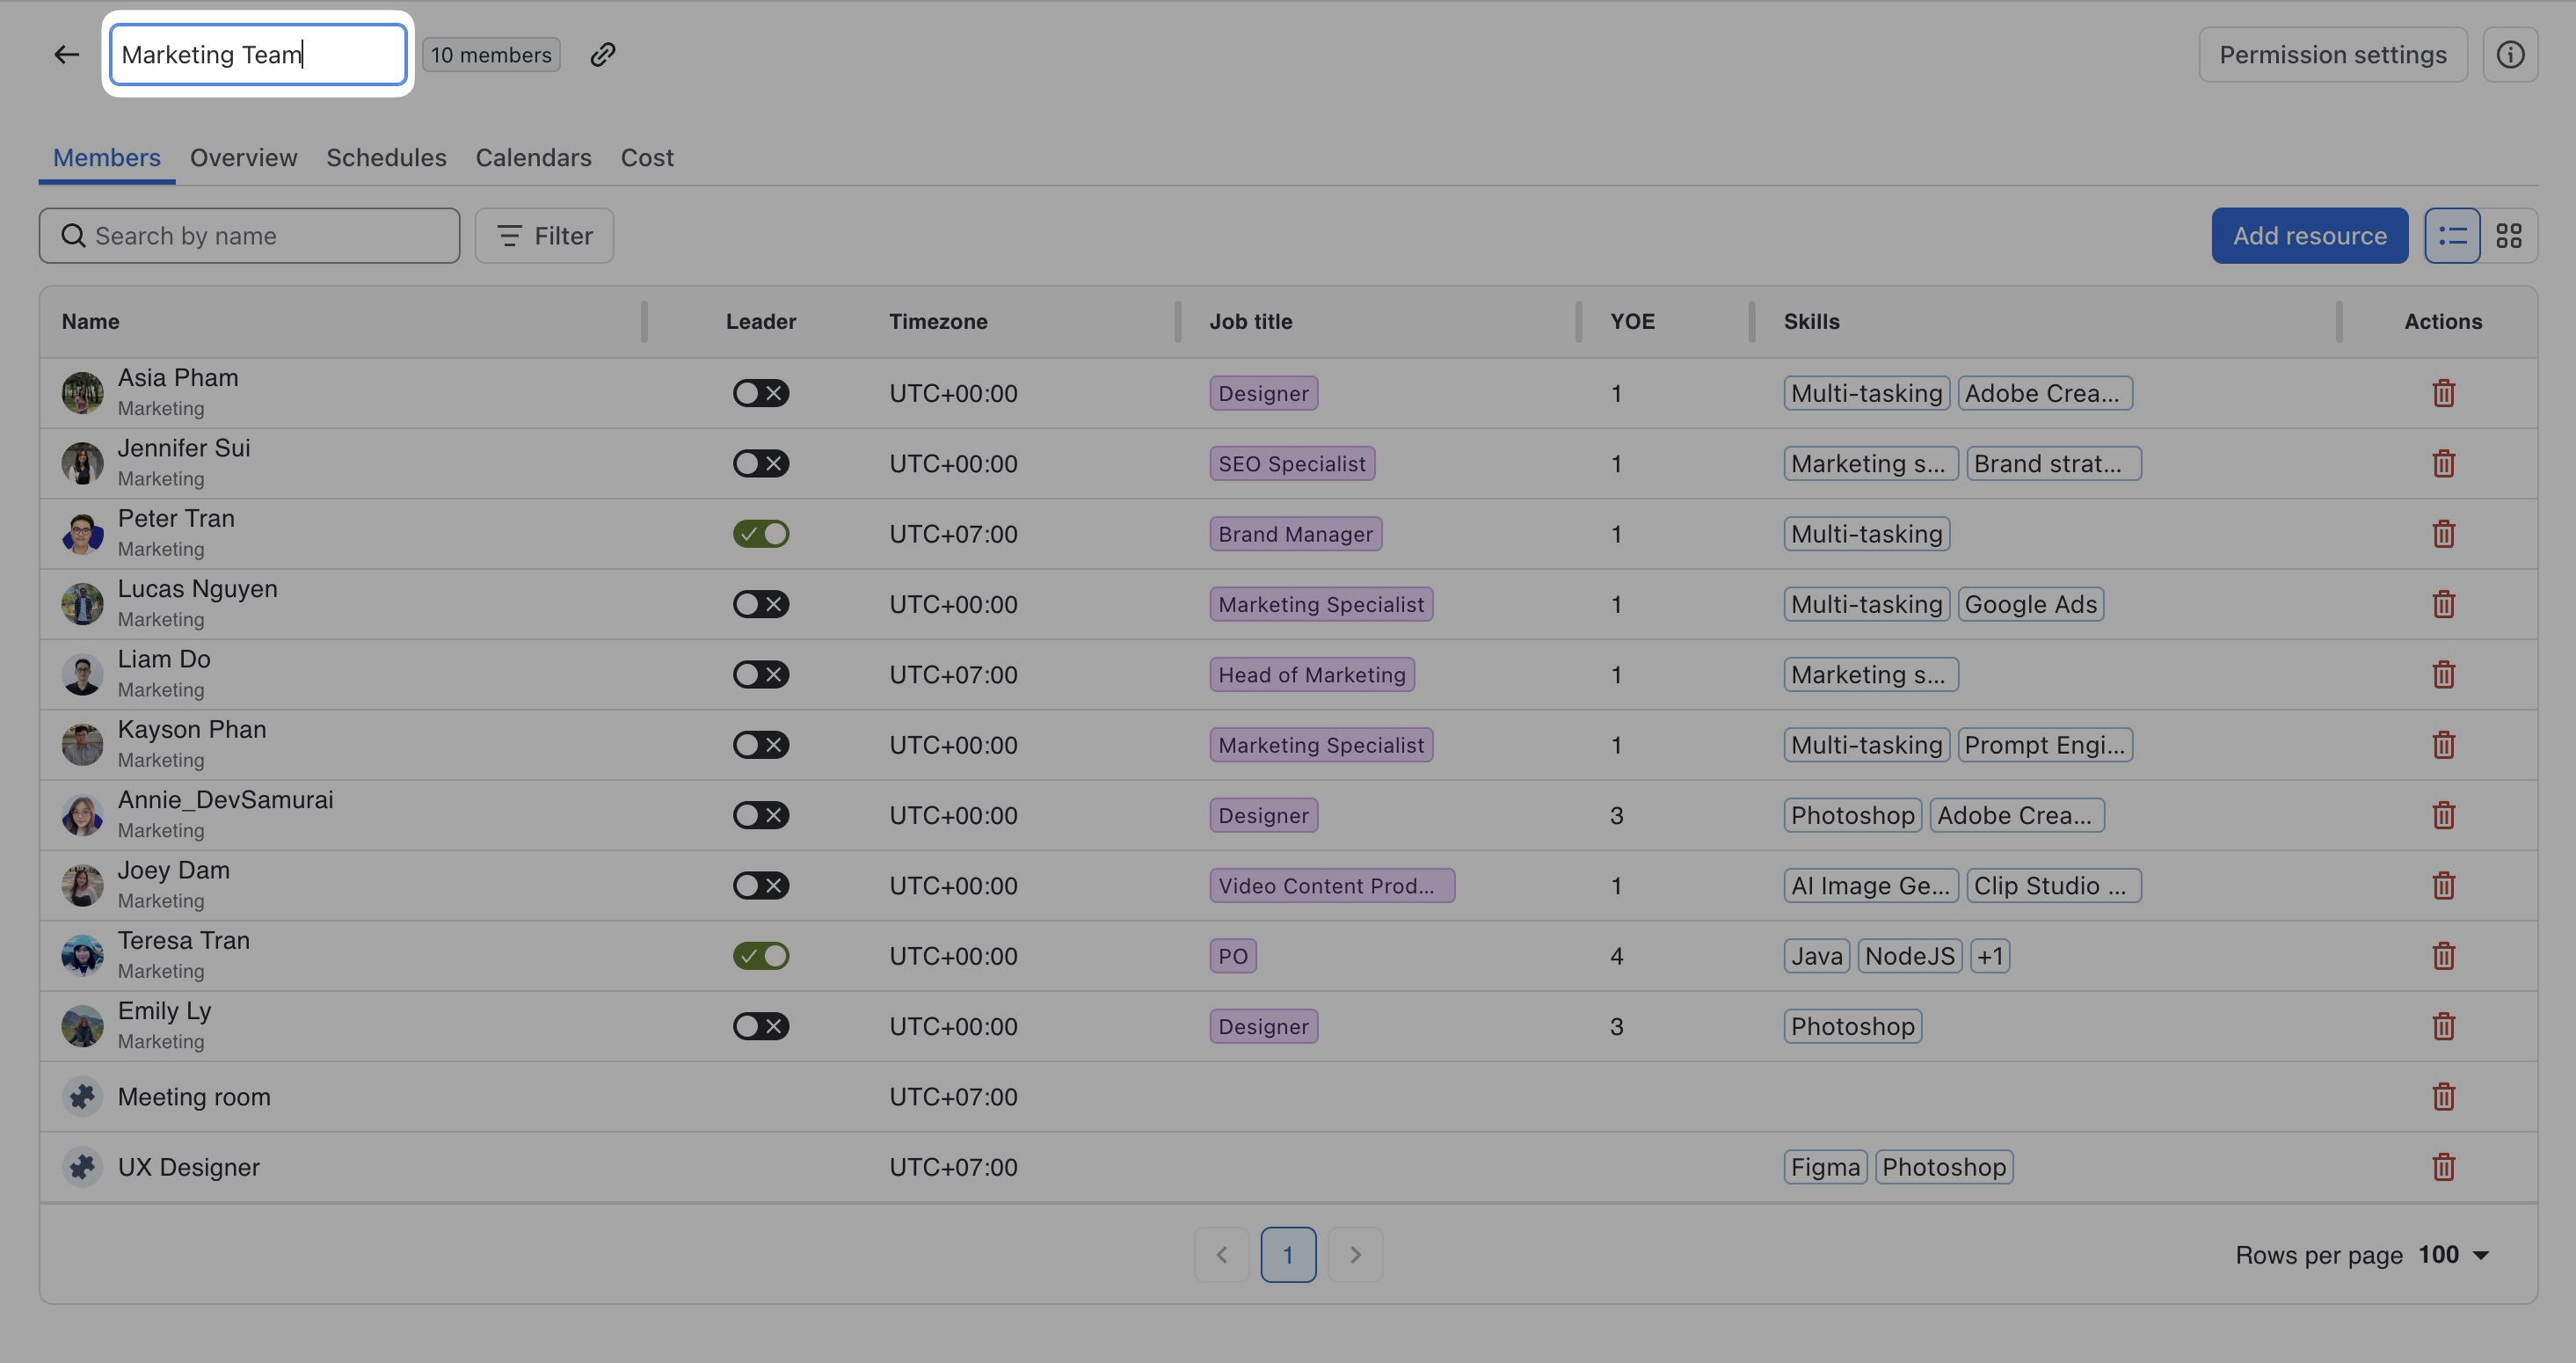
In the Team Workspace, locate the team name at the top of the page.
-
Click the team name to edit it.
-
Enter the new name.
-
Press Enter or click outside the field to save the change.
Searching, Filtering, and Sorting Resources
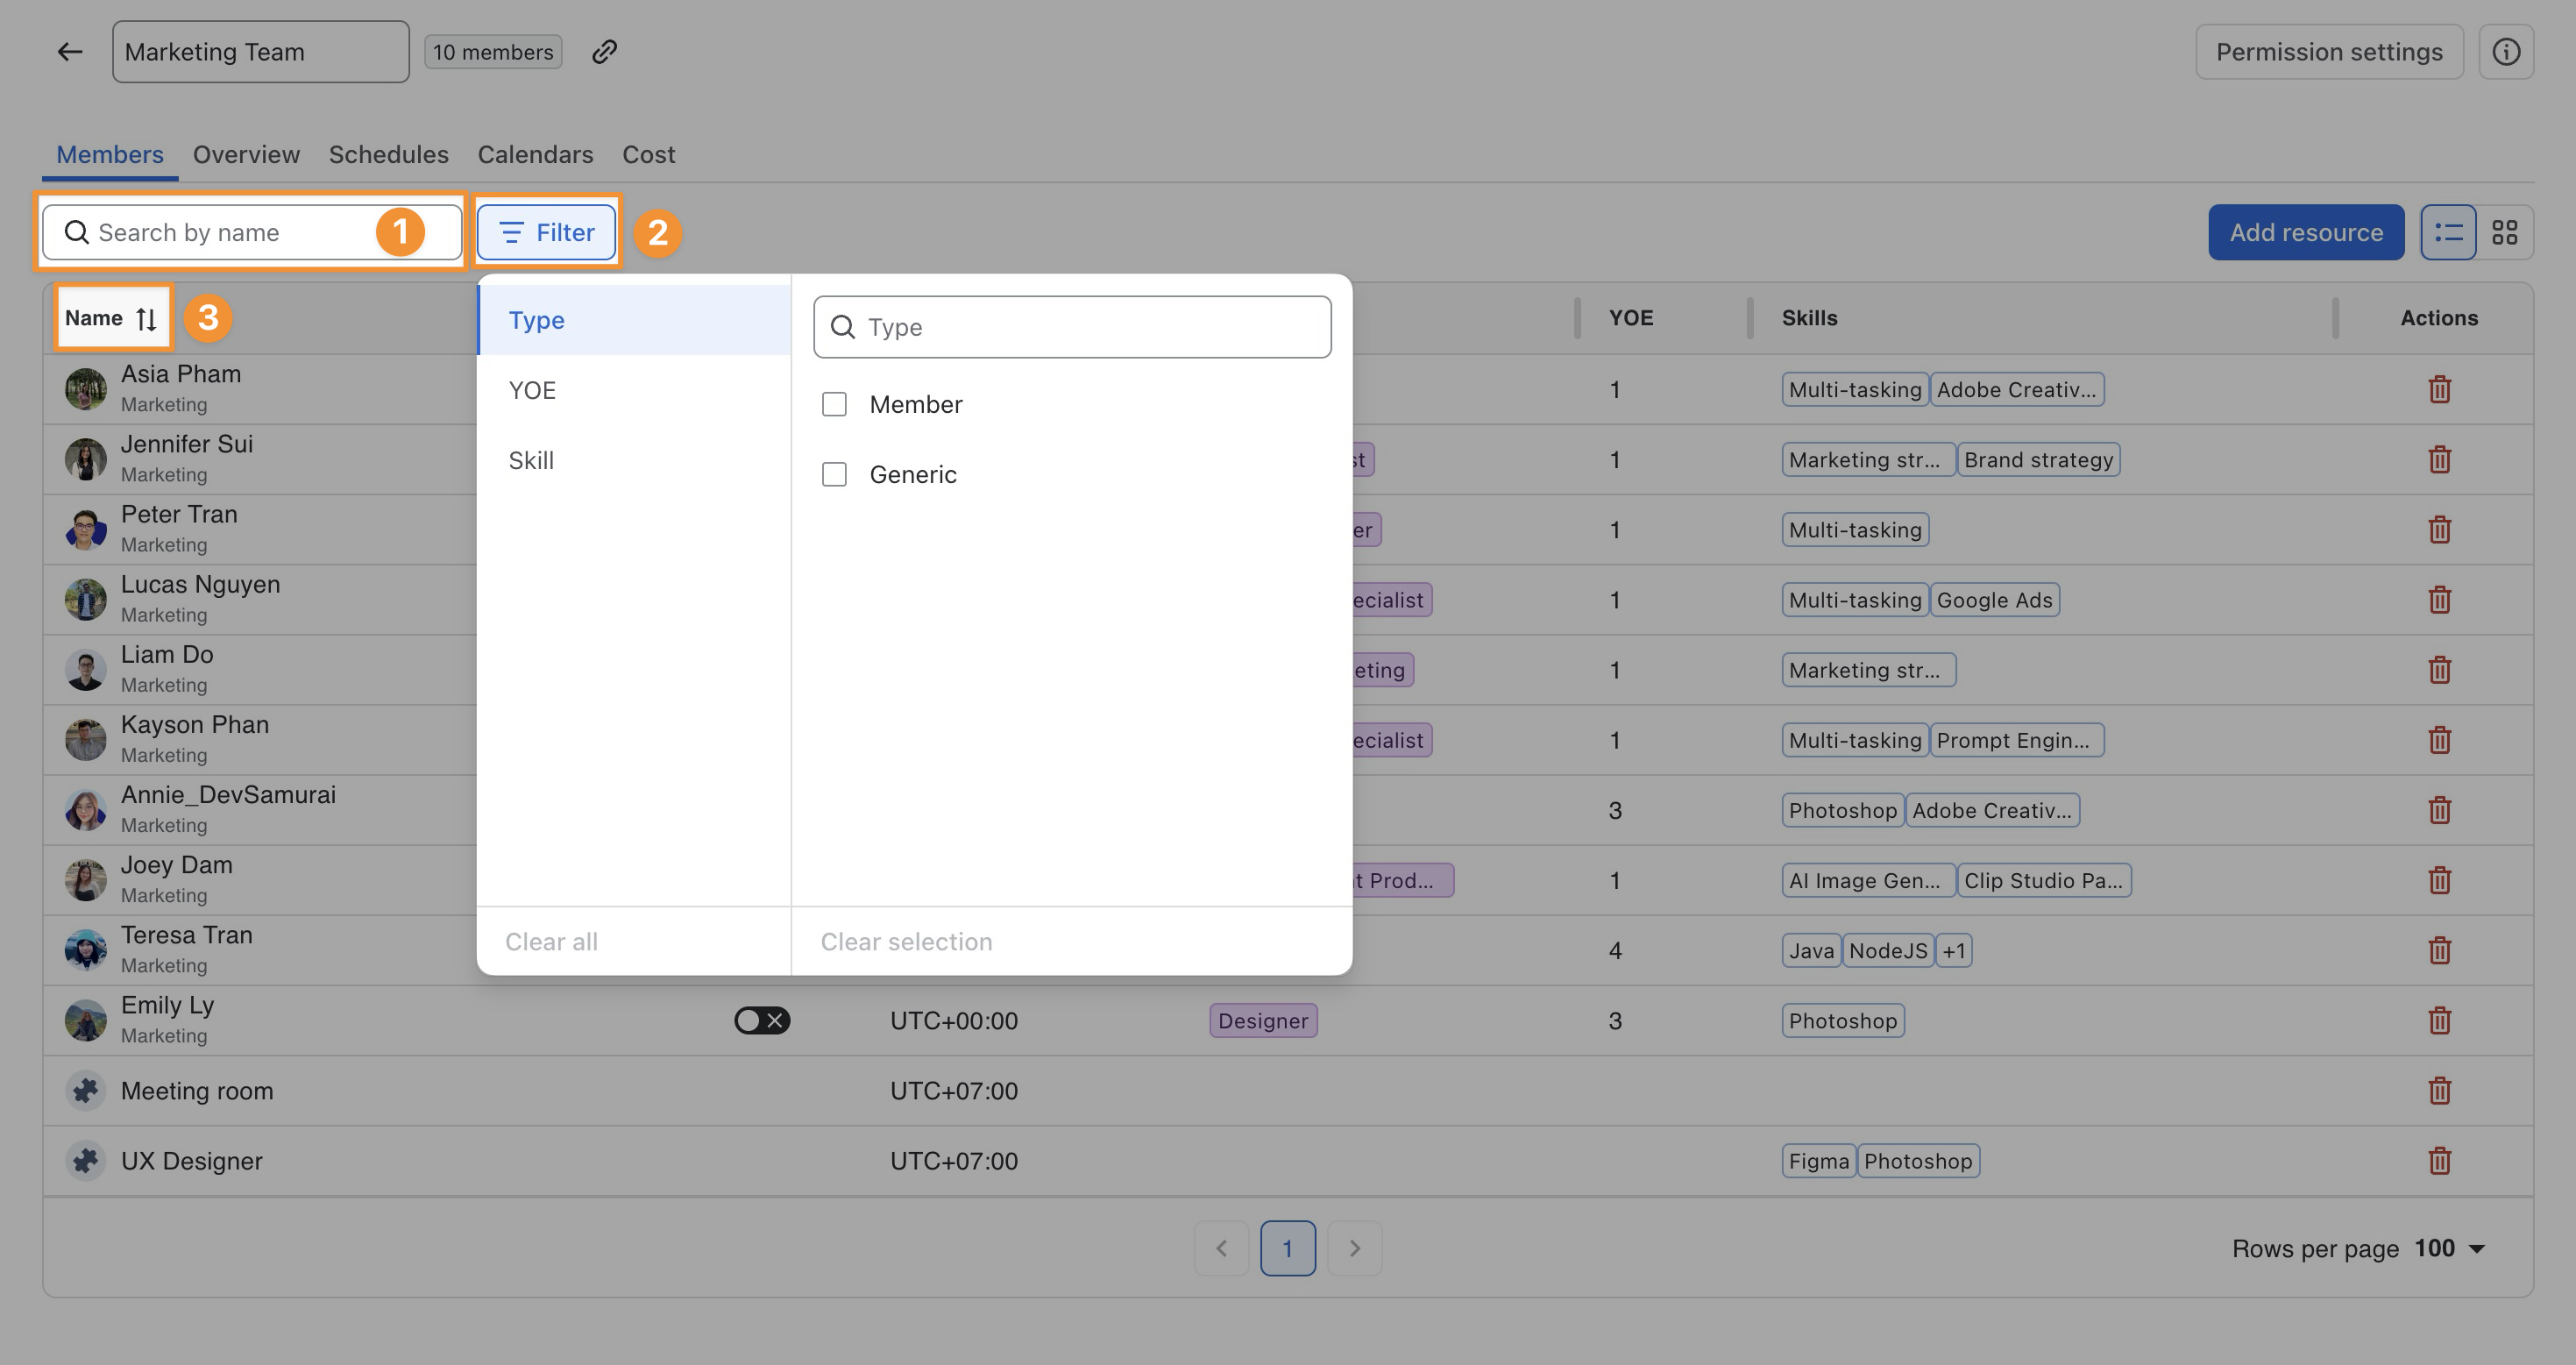
In the Members tab, you can search, filter, or sort the resource list to find members and Generic Resources more easily.
 Searching Resources
Enter a member or Generic Resource name in the Search by name field. The list updates to show matching results.
 Filtering Resources
Click Filter to narrow the resource list by:
-
Type: Member or Generic Resource
-
YOE: Years of experience
-
Skill: Assigned skills
You can combine filters to narrow the results further.
 Sorting Resources
In List View, click a sortable column header to organize the resource list.
You can sort by supported fields such as:
-
Name
-
Timezone
-
Job title
-
YOE
Click the same column header again to switch between ascending and descending order.
Sharing a Team Link
You can share a direct link to a specific Team Workspace with other TimePlanner users.
-
Open the Team Workspace you want to share.
-
Navigate to the tab you want others to open, such as Members, Overview, Schedules, Calendars, or Cost.
-
Click the

-
Copy the link and share it with other users.
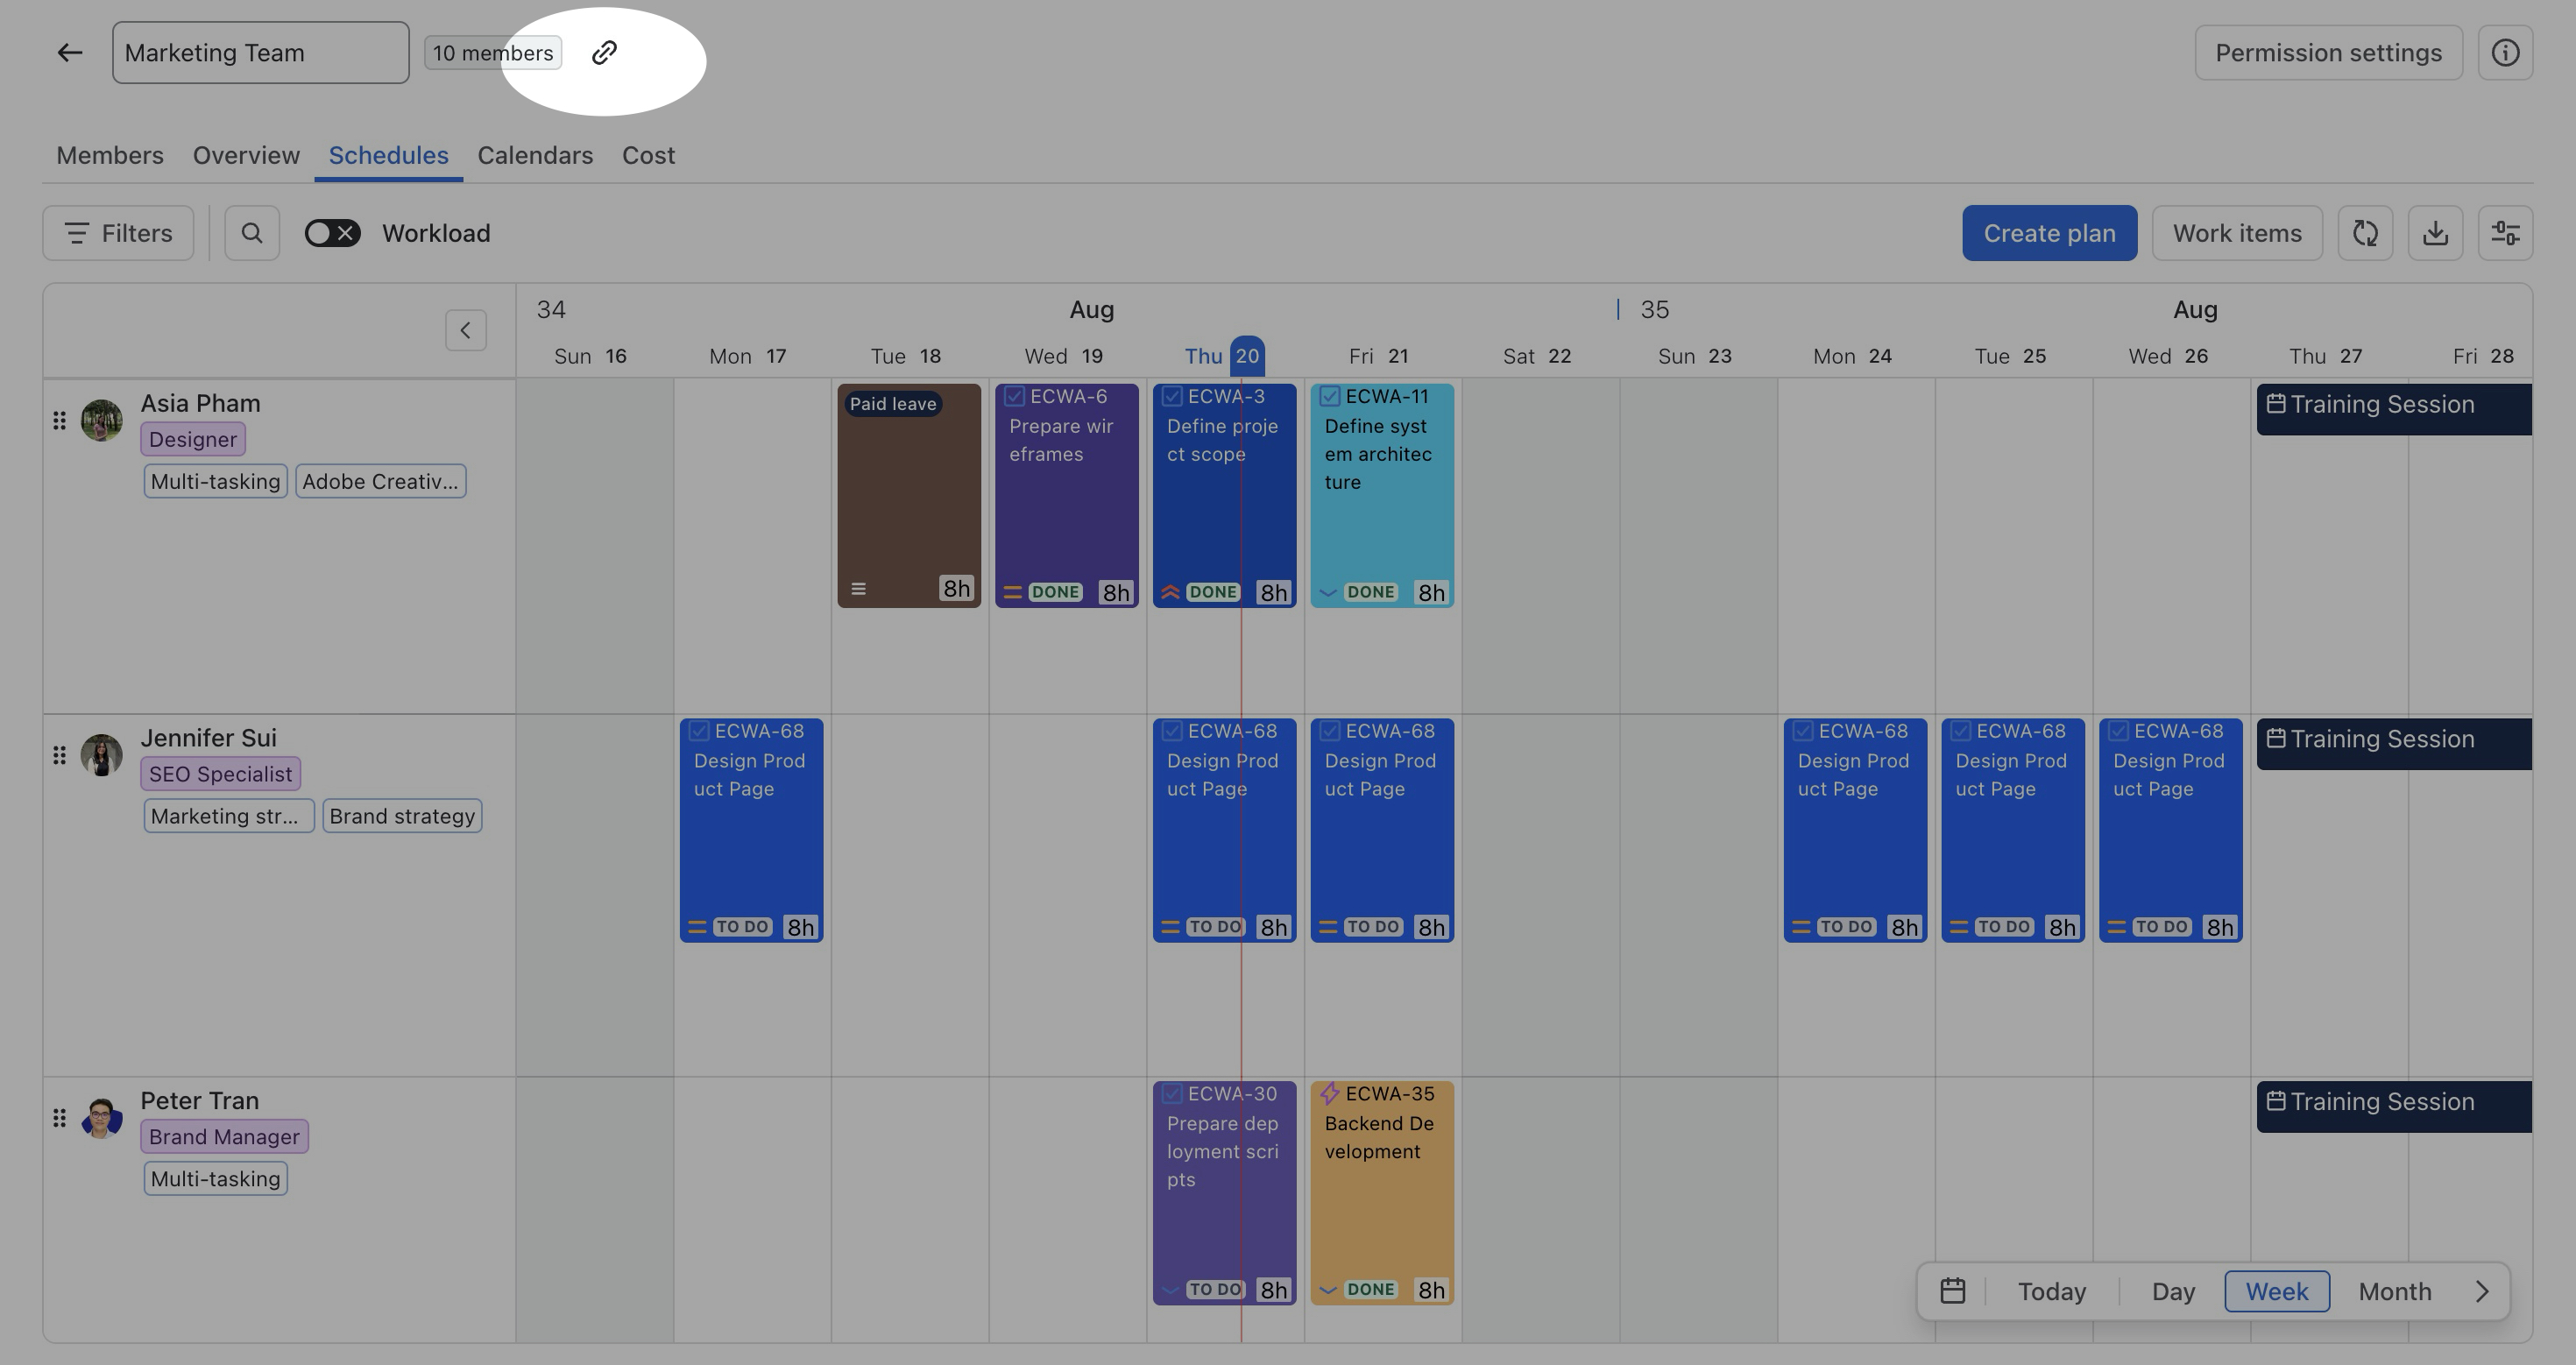
The shared link keeps the currently selected tab, so when another user opens it, they are taken directly to the same team and tab you were viewing.
Updating a Team Leader
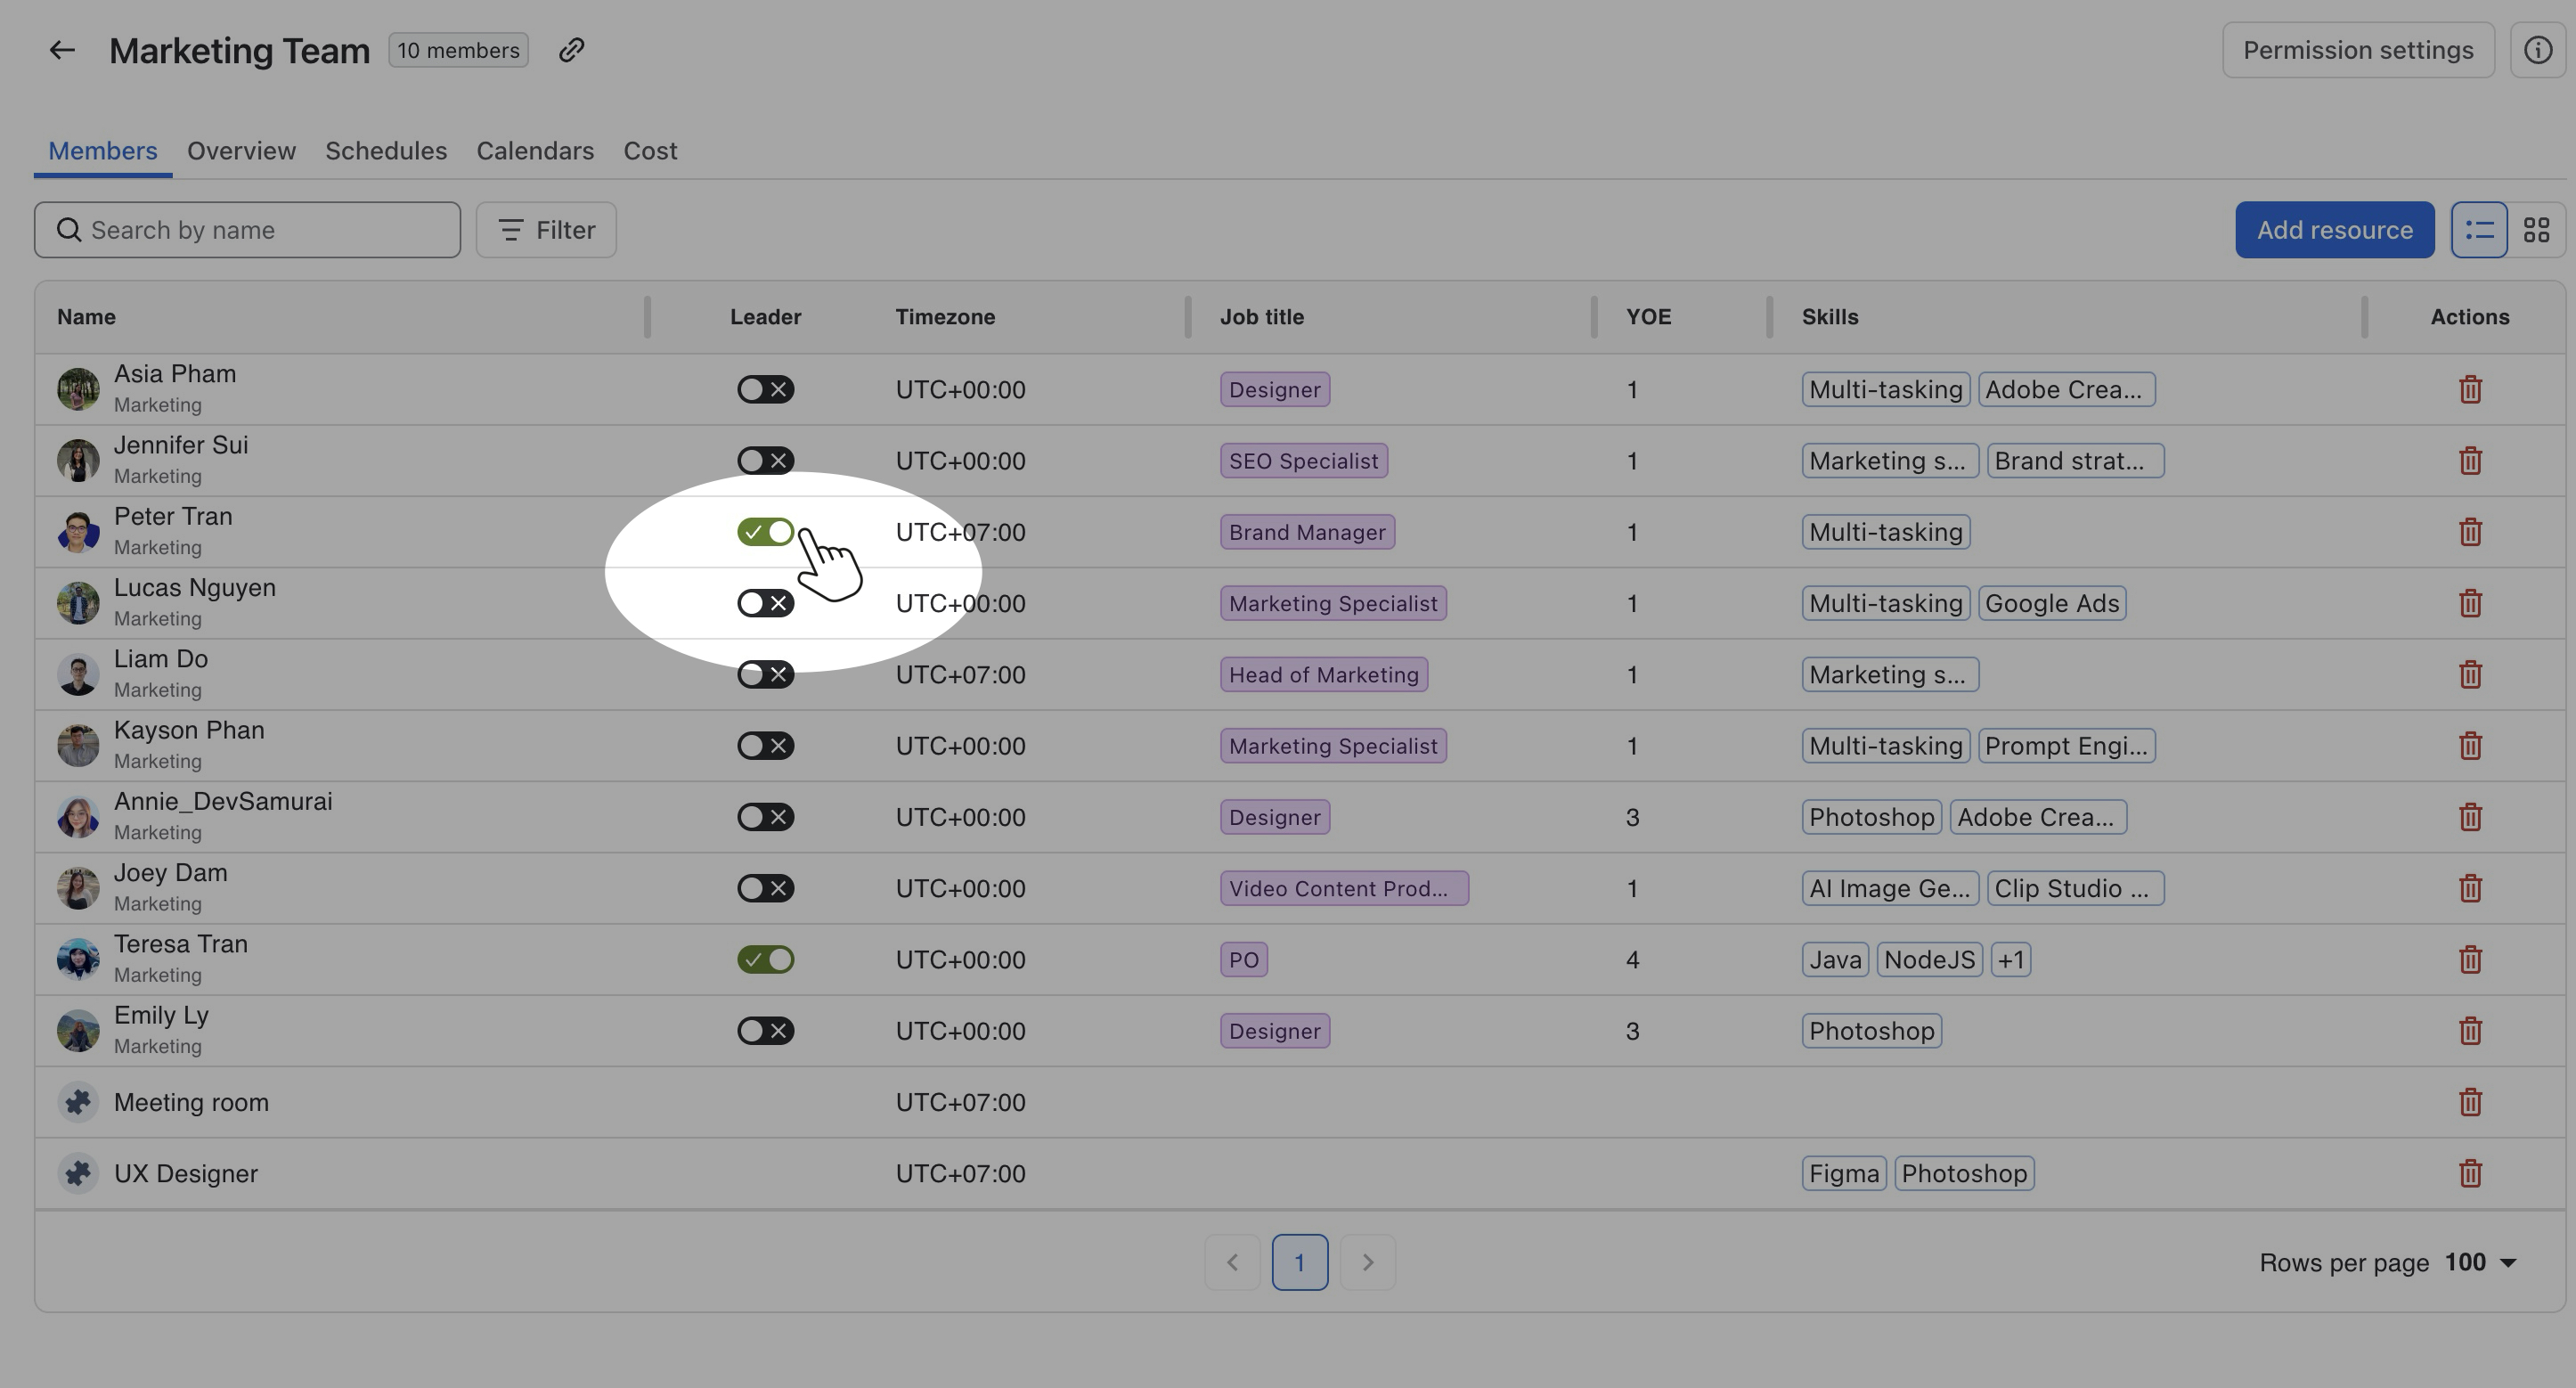
You can assign or remove a Team Leader role directly from the Members tab.
Adding a Team Leader
-
In the Team Workspace, go to the Members tab.
-
Locate the member you want to make a Team Leader.
-
In the Leader column, turn the toggle ON.
The member is immediately marked as a Team Leader.
Removing a Team Leader
-
Locate the Team Leader in the Members tab.
-
In the Leader column, turn the toggle OFF.
The member remains in the team but no longer has the Team Leader role.
Adding Resources to a Team
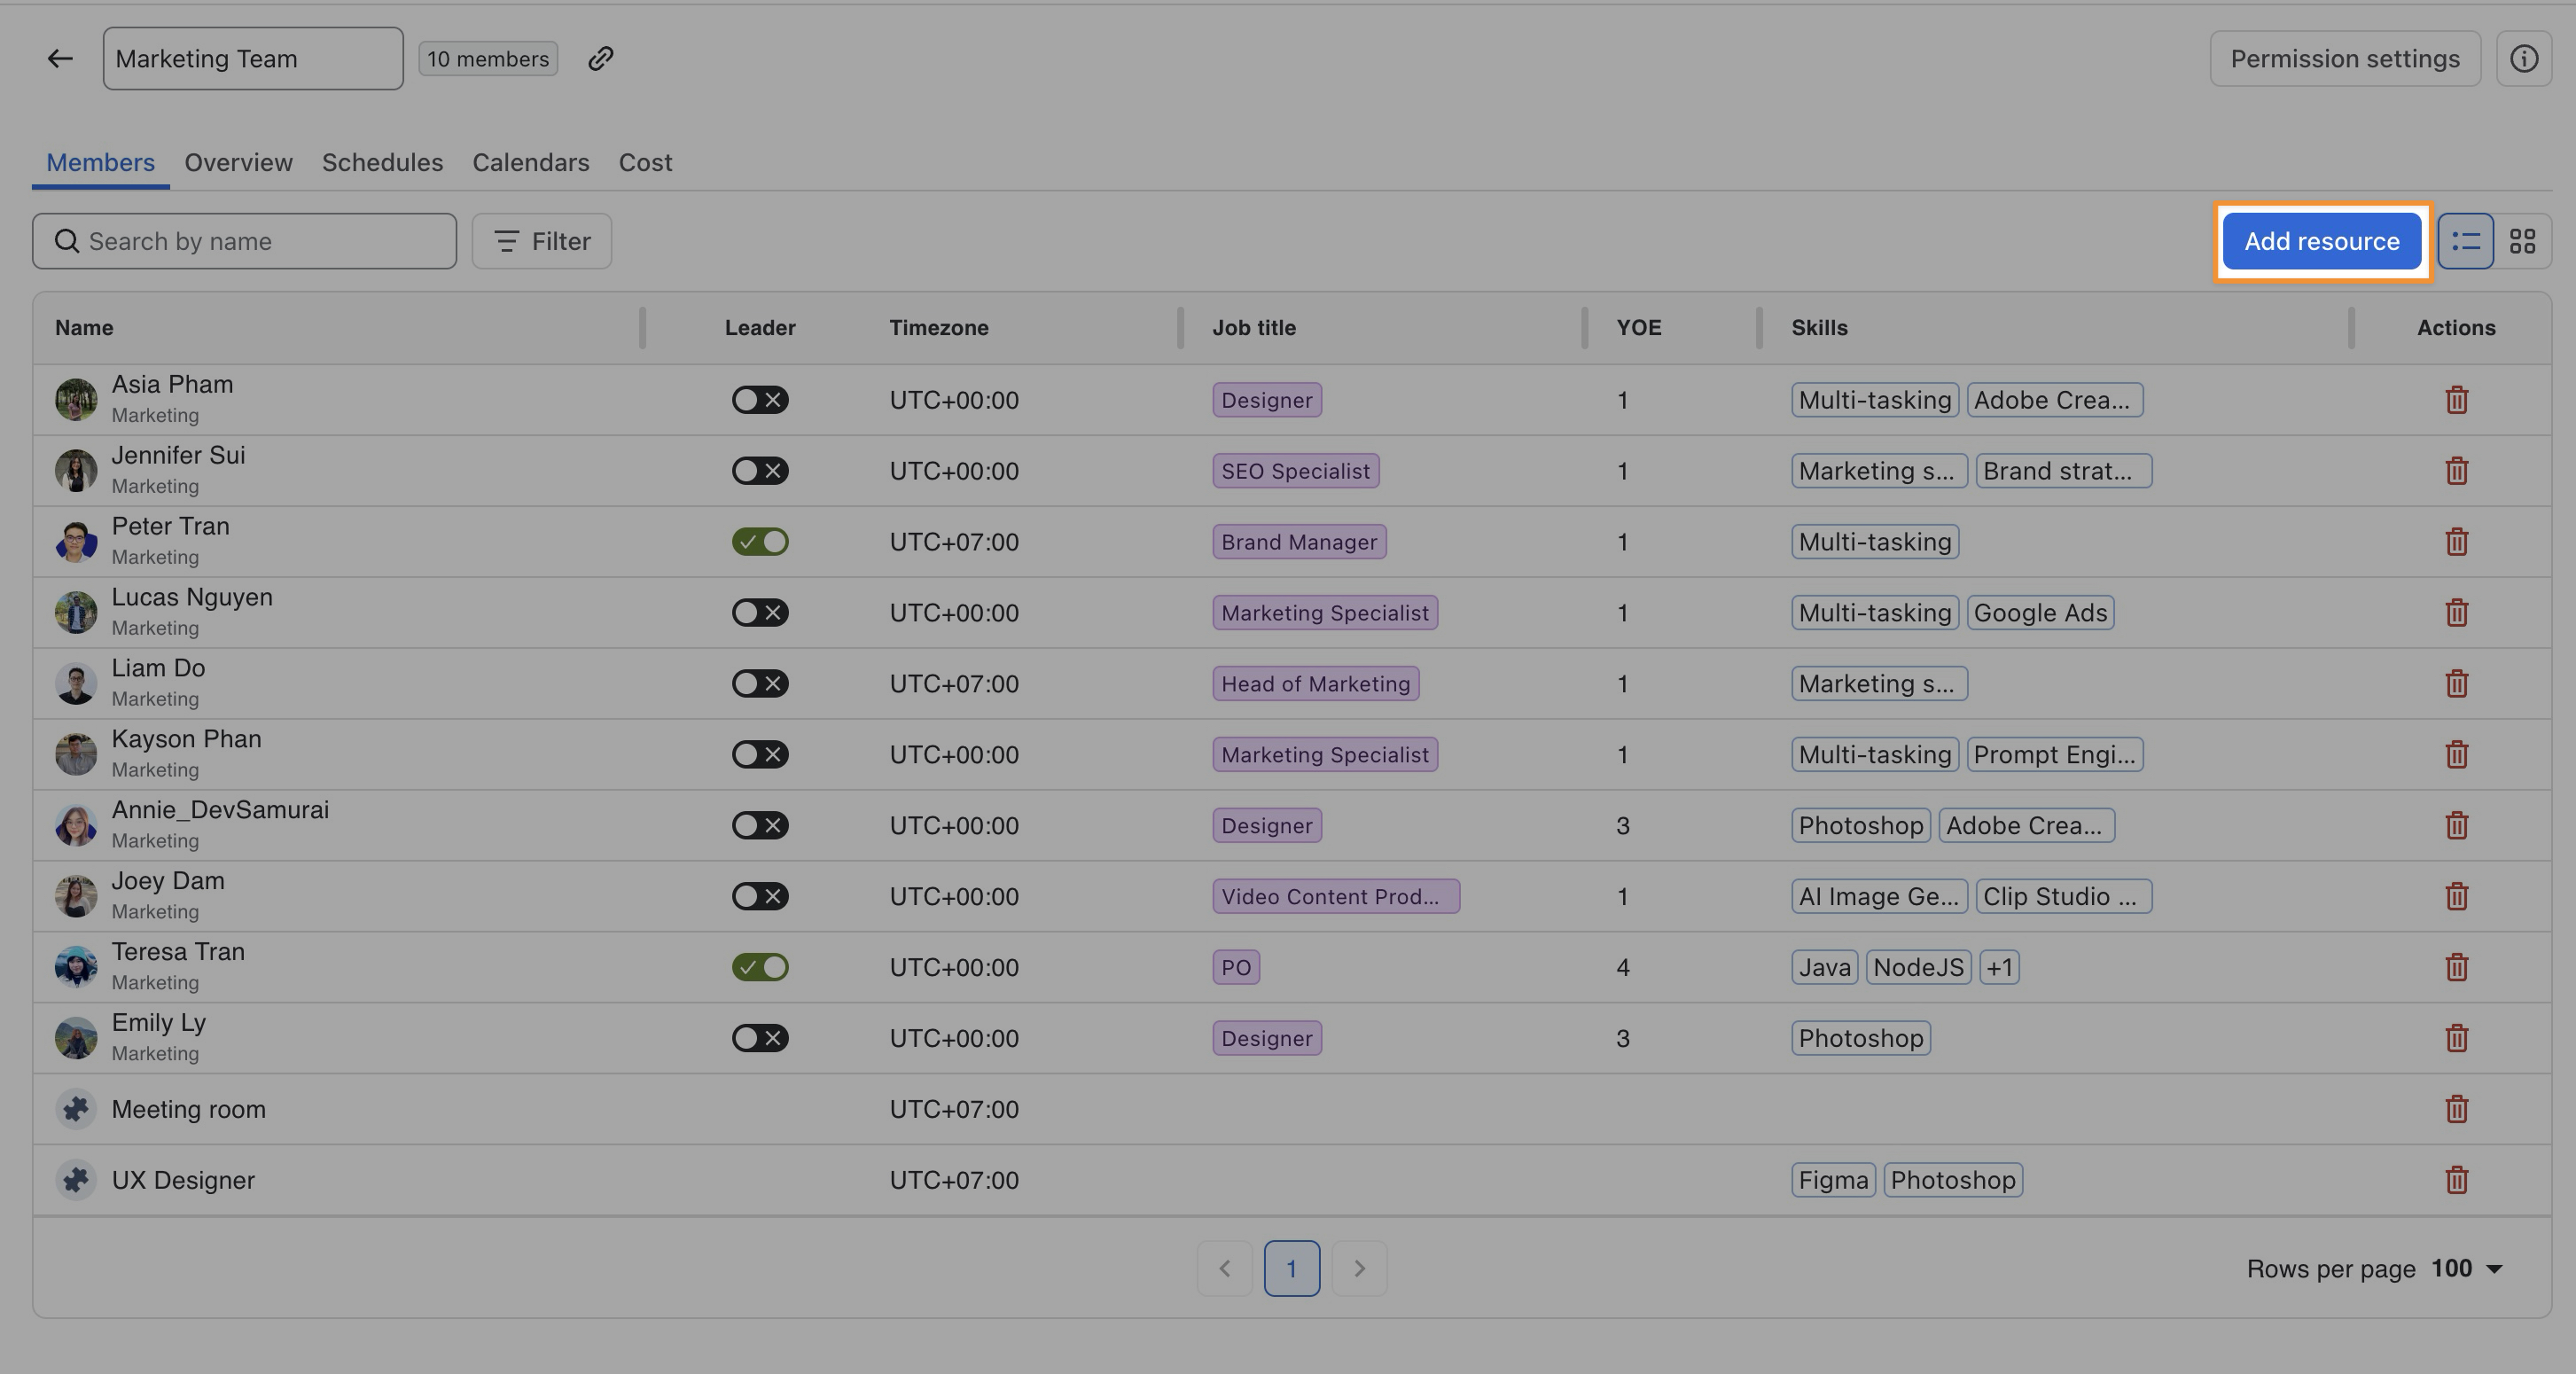
You can add either Members or Generic Resources from the same Add resource panel.
-
Click

-
In the Add resource panel, choose the resource type:
-
Member: Add existing TimePlanner members.
-
Generic Resource: Add existing Generic Resources.
-
Adding a Member
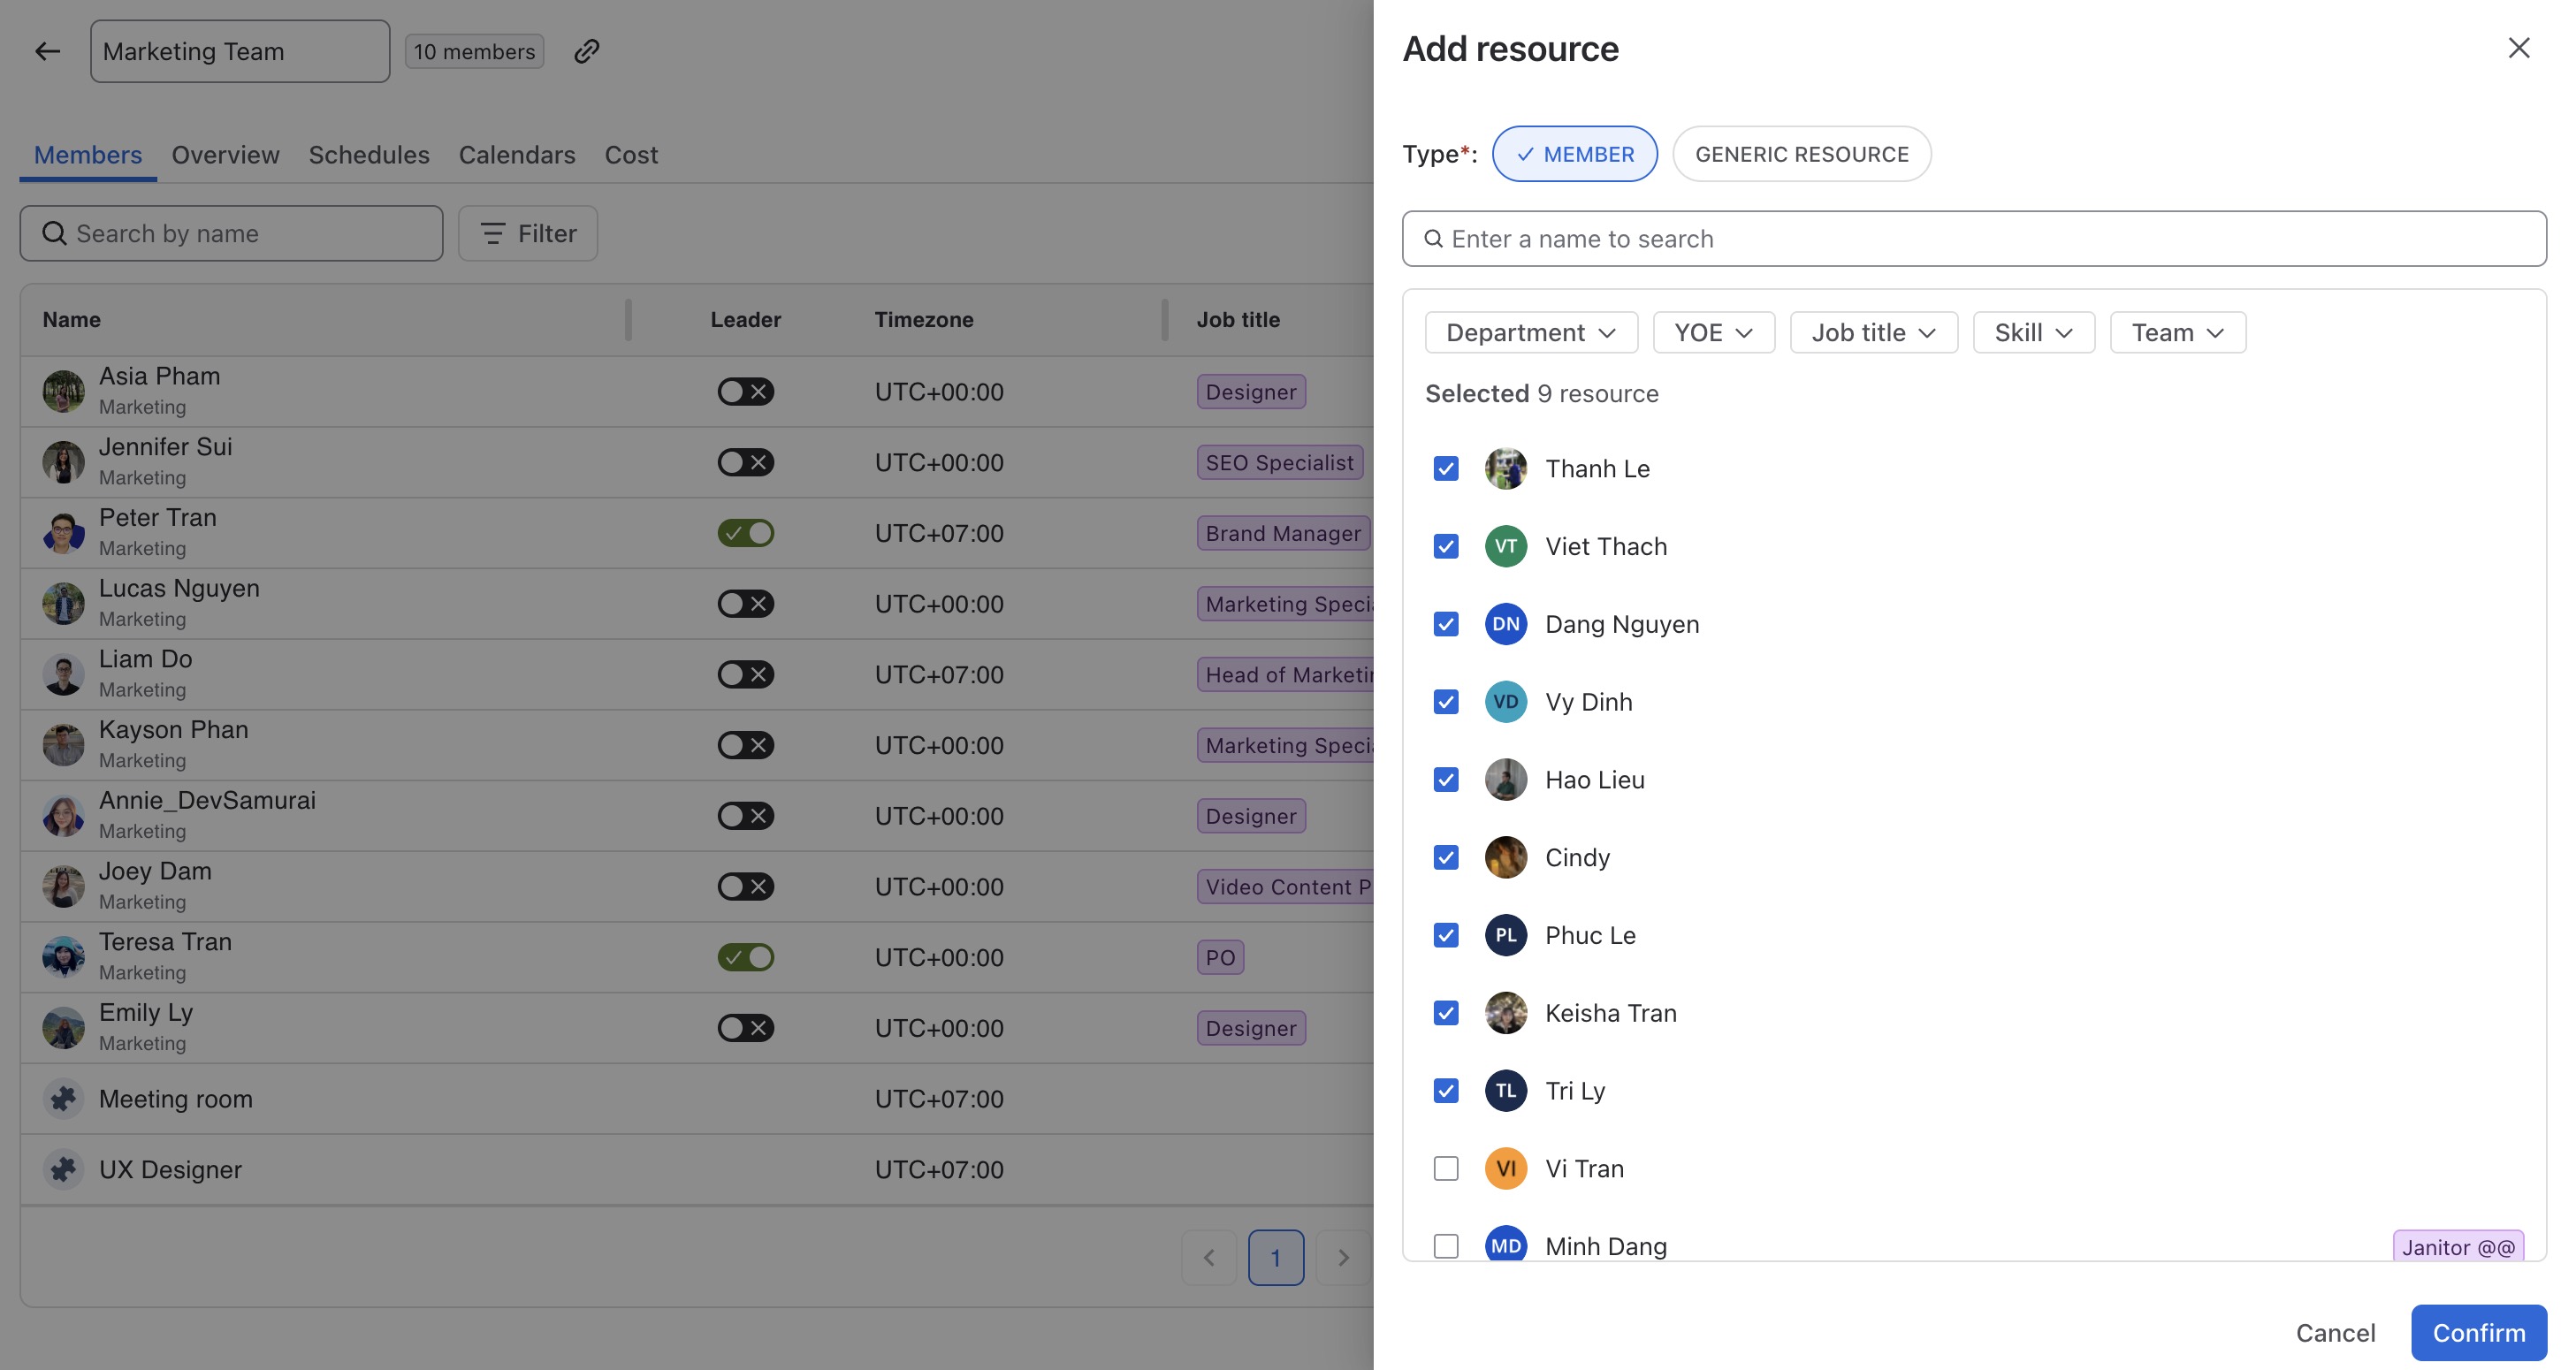
When Member is selected:
-
Find the members you want to add:
-
Scroll through the member list.
-
Use the Search field.
-
Use filters such as Department, YOE, Job title, Skill, or Team.
-
-
Select the checkbox next to one or more members.
-
Click

Adding a Generic Resource
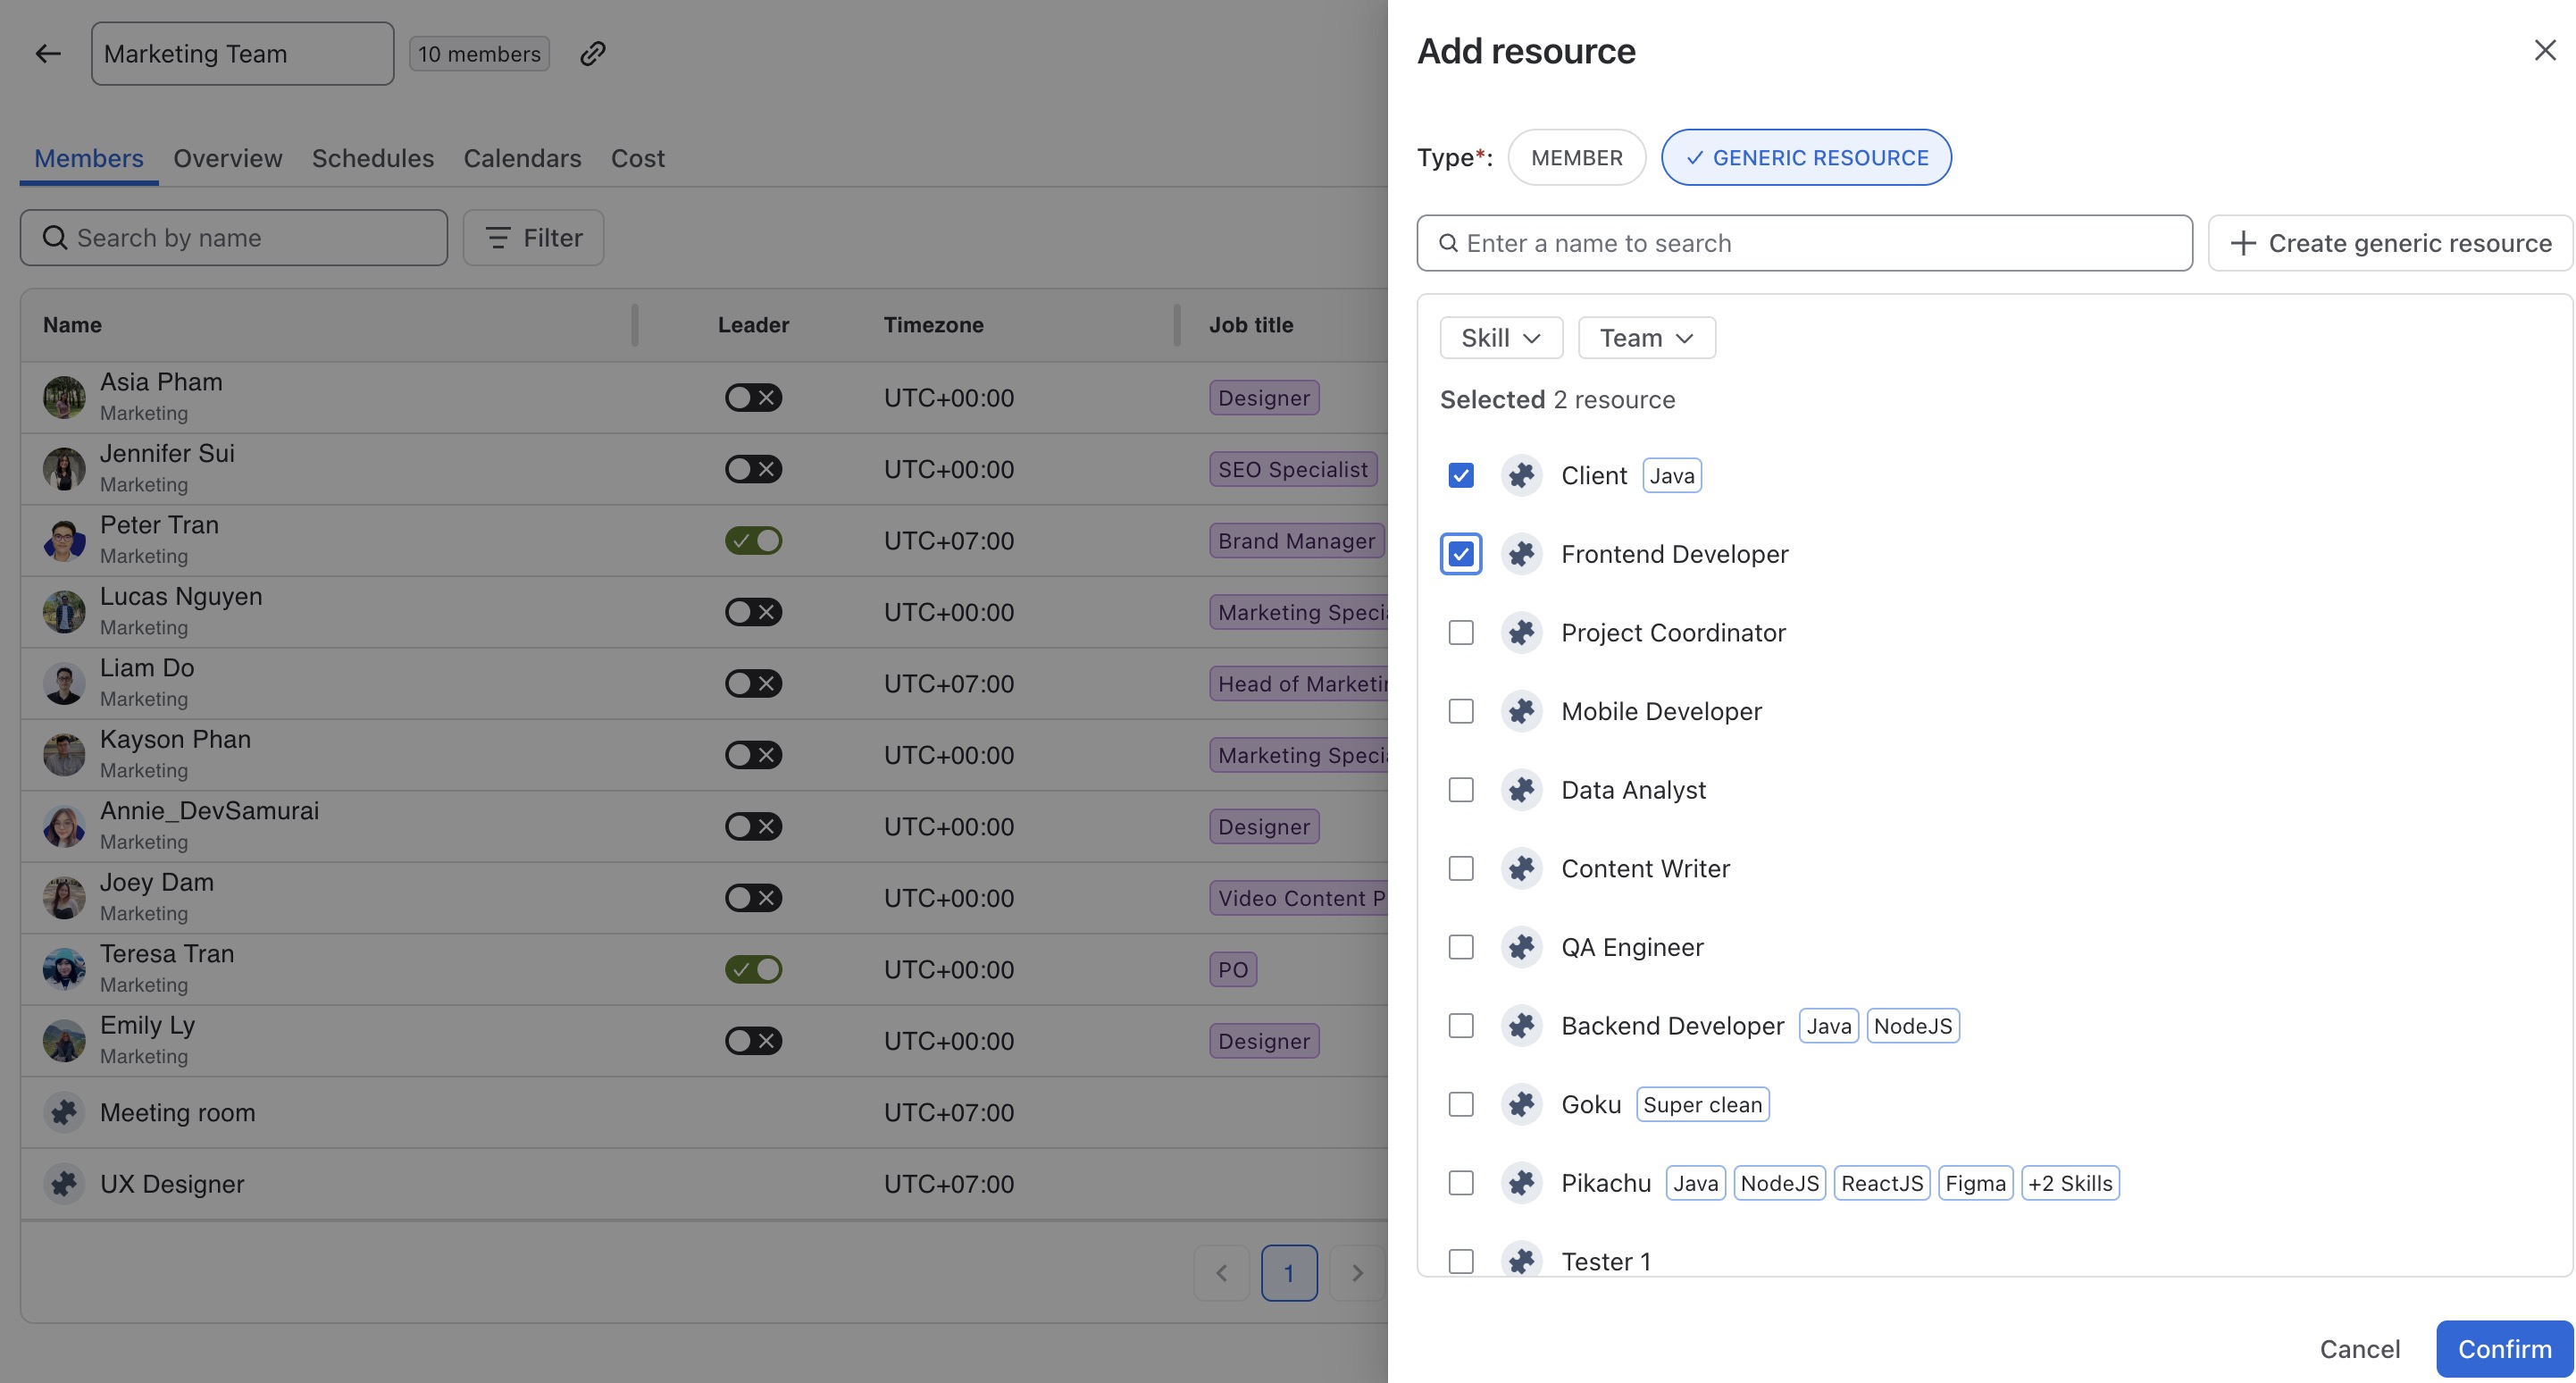
When Generic Resource is selected:
-
Find the Generic Resources you want to add:
-
Scroll through the resource list.
-
Use the Search field.
-
Use Skill or Team filters to narrow the results.
-
-
Select the checkbox next to one or more Generic Resources.
-
Click
If the Generic Resource does not exist yet, click Create generic resource to create one before adding it to the team.
Learn more: Learn how to create and manage Generic Resources.
Removing a Resource
-
In the Members tab, locate the member or Generic Resource you want to remove.
-
In List View, click the

-
Confirm the action to remove the resource from the team.
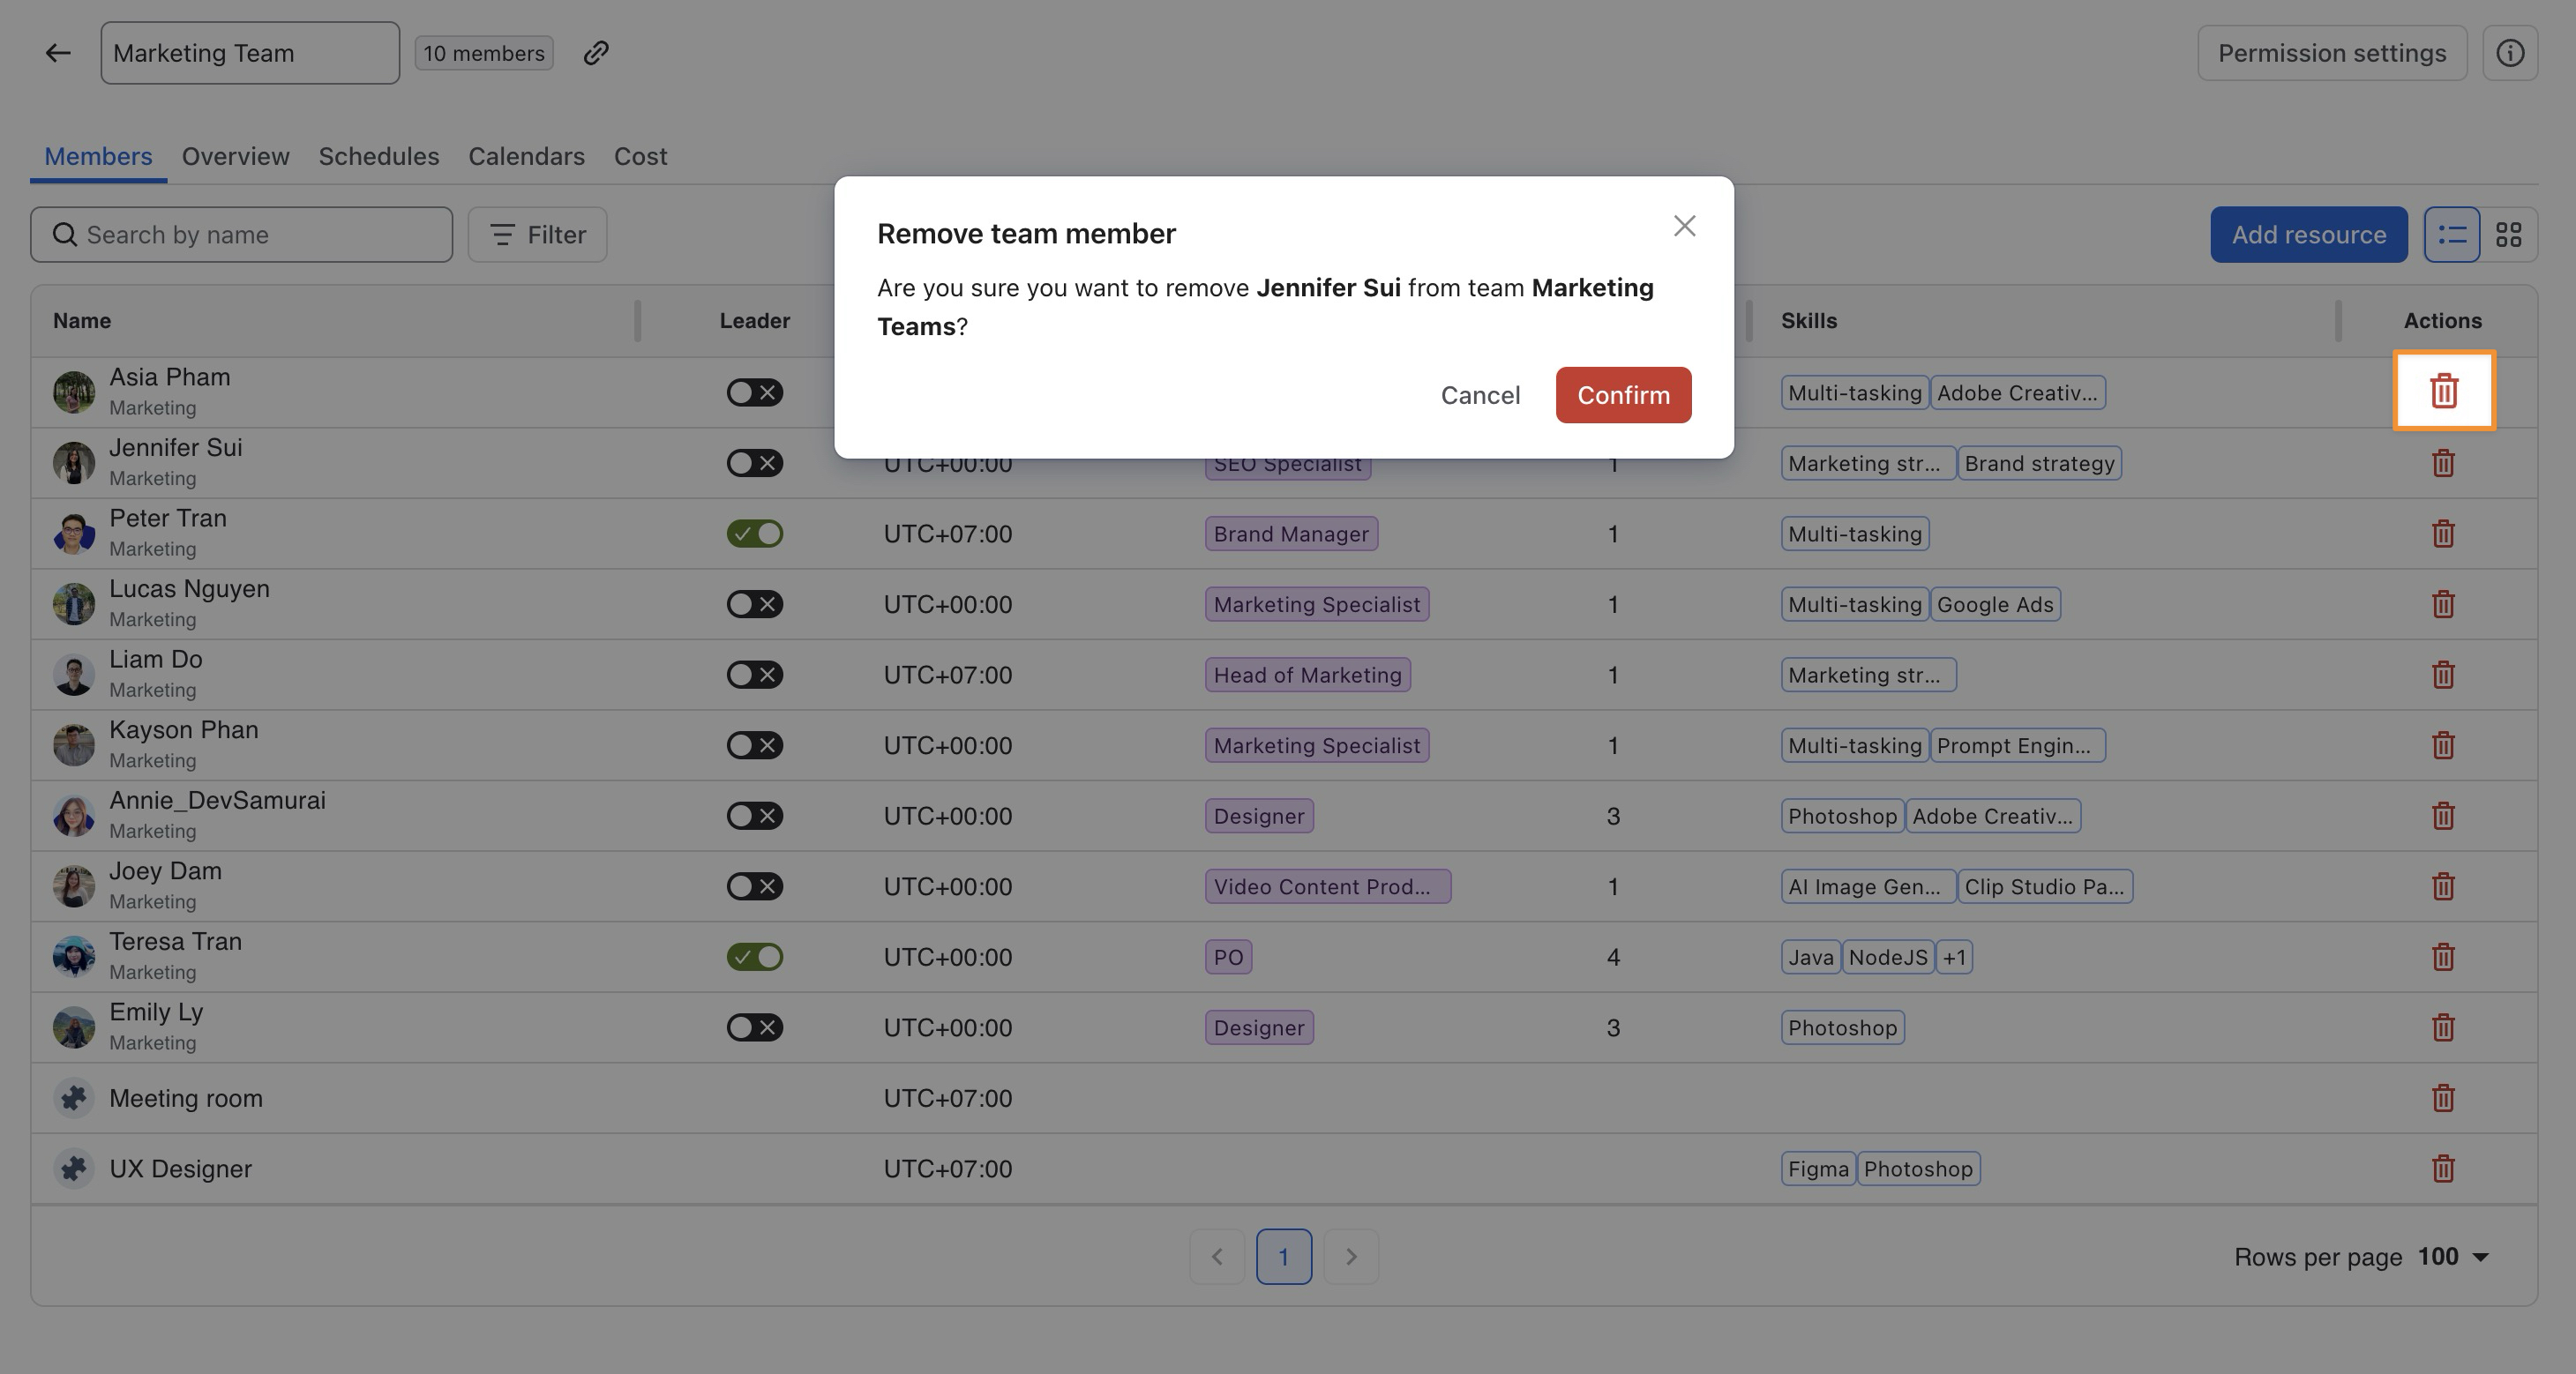
Note: Removing a member or Generic Resource from a team removes it from that team only. It does not delete the resource from TimePlanner.