.png)
All users can manage Precondition, but only the Project and the Jira admins can delete it.
1. Precondition Table Explanation
On the Precondition screen, you can see a list of preconditions.
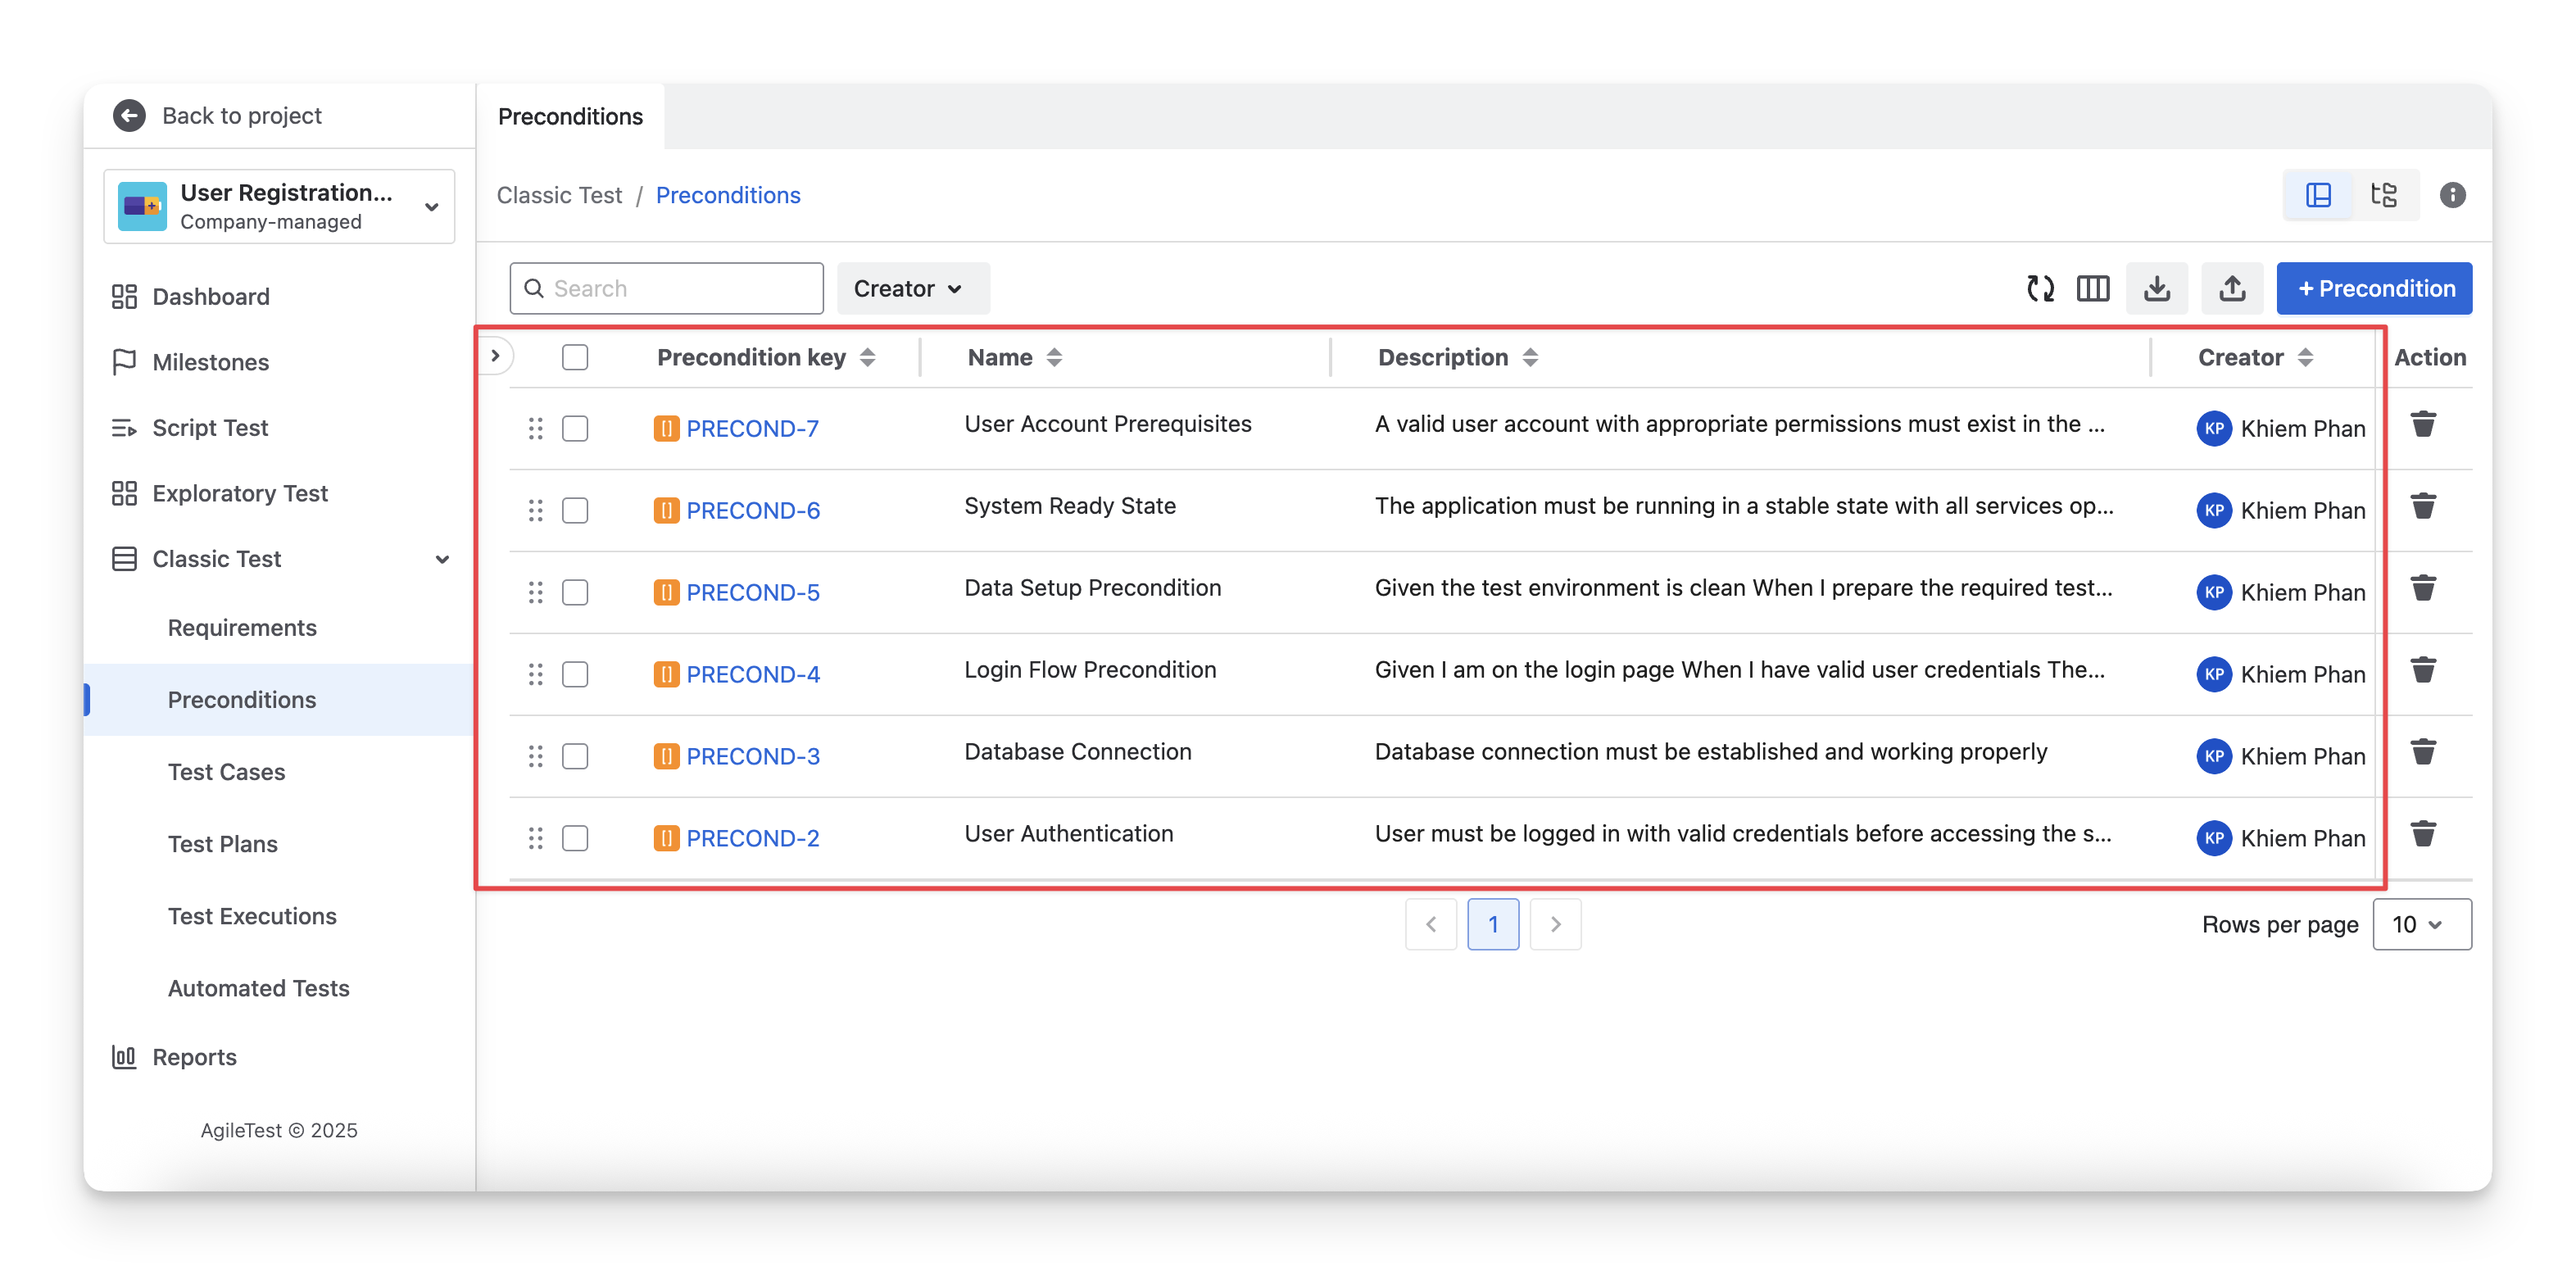
The list of preconditions provides you with information about:
|
Types of Information |
Description |
|---|---|
|
Precondition Key |
An AgileTest unique identifier for the precondition, used to track and link it. |
|
Name |
The title or summary of the precondition provides a brief description of its purpose or scenario. |
|
Precondition Description |
A detailed explanation of what the precondition entails and how it contributes to the test setup. |
|
Creator |
The user who created or initiated the precondition, typically the team member responsible for it. |
|
Last Updated |
The most recent date and time the precondition was modified, indicating the latest changes. |
|
Created At |
The date and time when the precondition was first created in the system. |
2. Precondition Table Actions
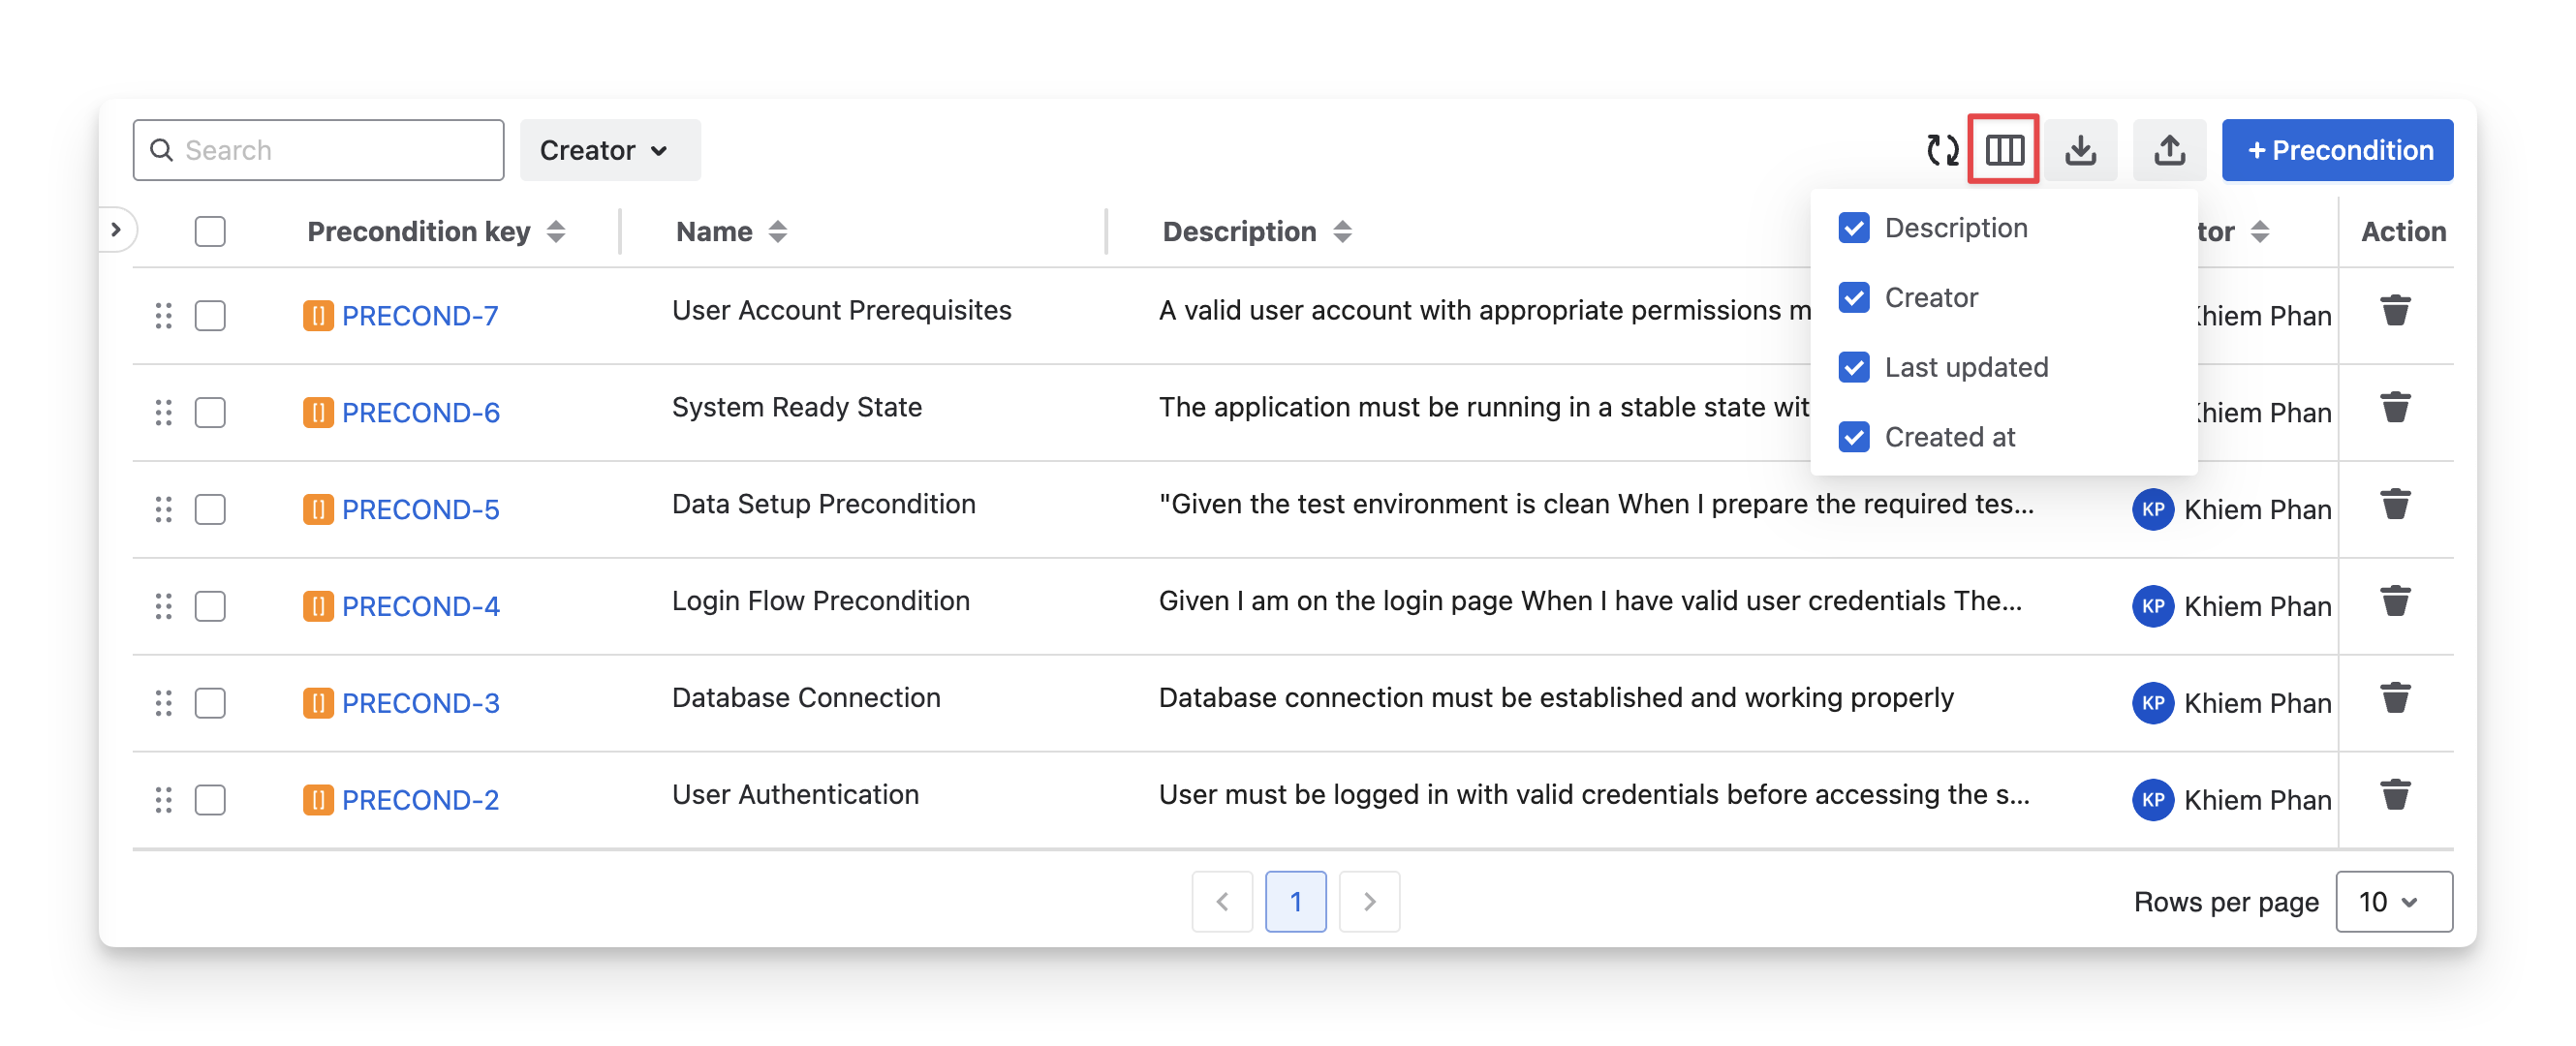
2.1 Show/Hide Column In The Table
You can show or hide columns in the precondition table by clicking the “Display” button and selecting/deselecting the checkbox to display/hide the desired columns in the precondition table.
The Precondition Key and Name Columns are two System Fields, which cannot be hidden.
2.2 Rearrange Precondition Column Orders
To change the display order of columns, drag and drop each column to your preferred position.
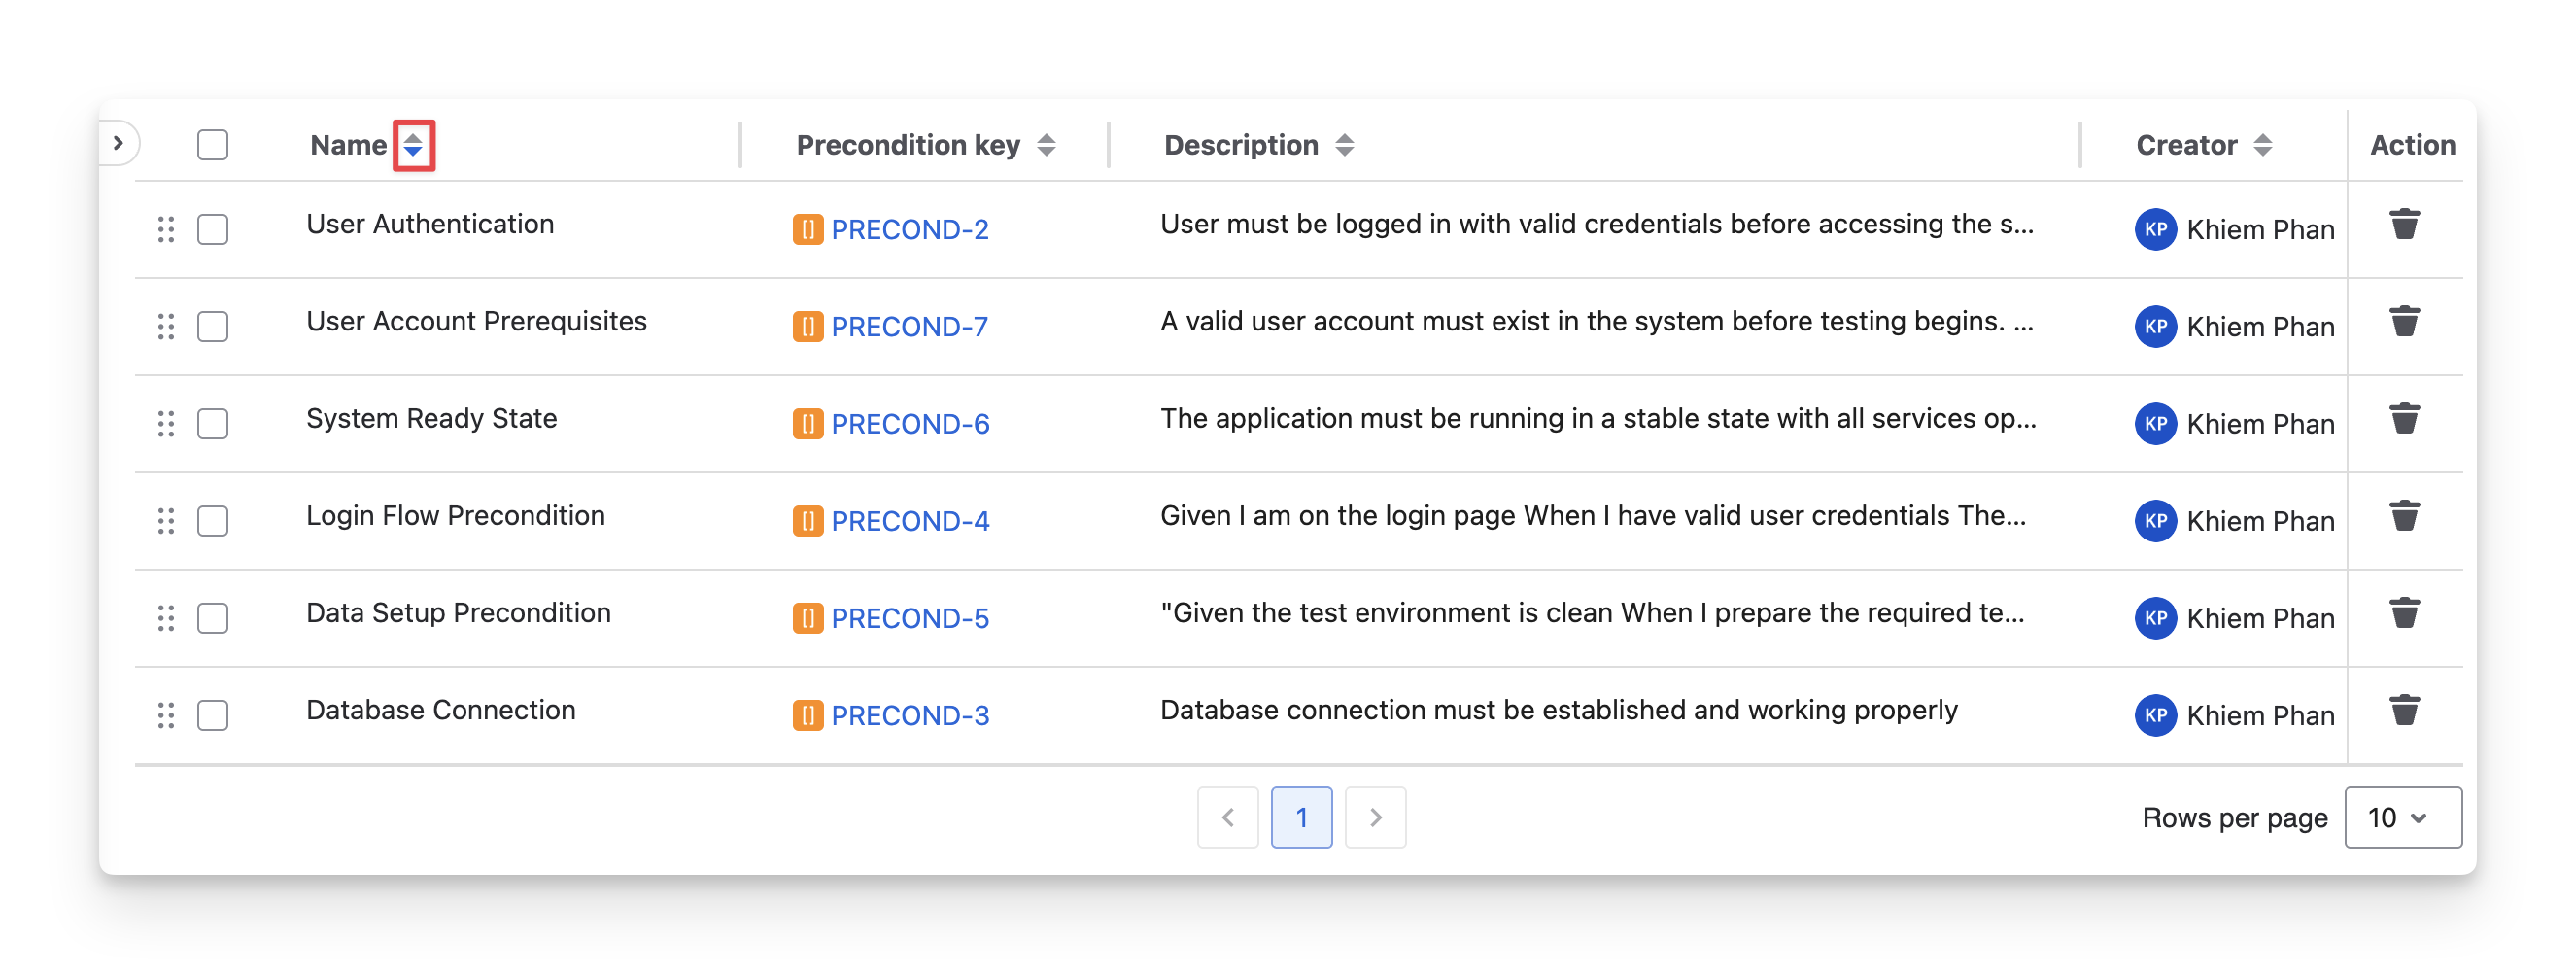
2.3 Sort Preconditions
To sort any column and view the data in ascending or descending order, you can:
-
Choose the 🔼 to sort ascending.
-
Choose the 🔽 to sort descending.
2.4 Filter Preconditions
To quickly identify a specific precondition, you can:
-
Provide Precondition Name, Precondition Key, or the Description in the search bar to find the exact precondition.
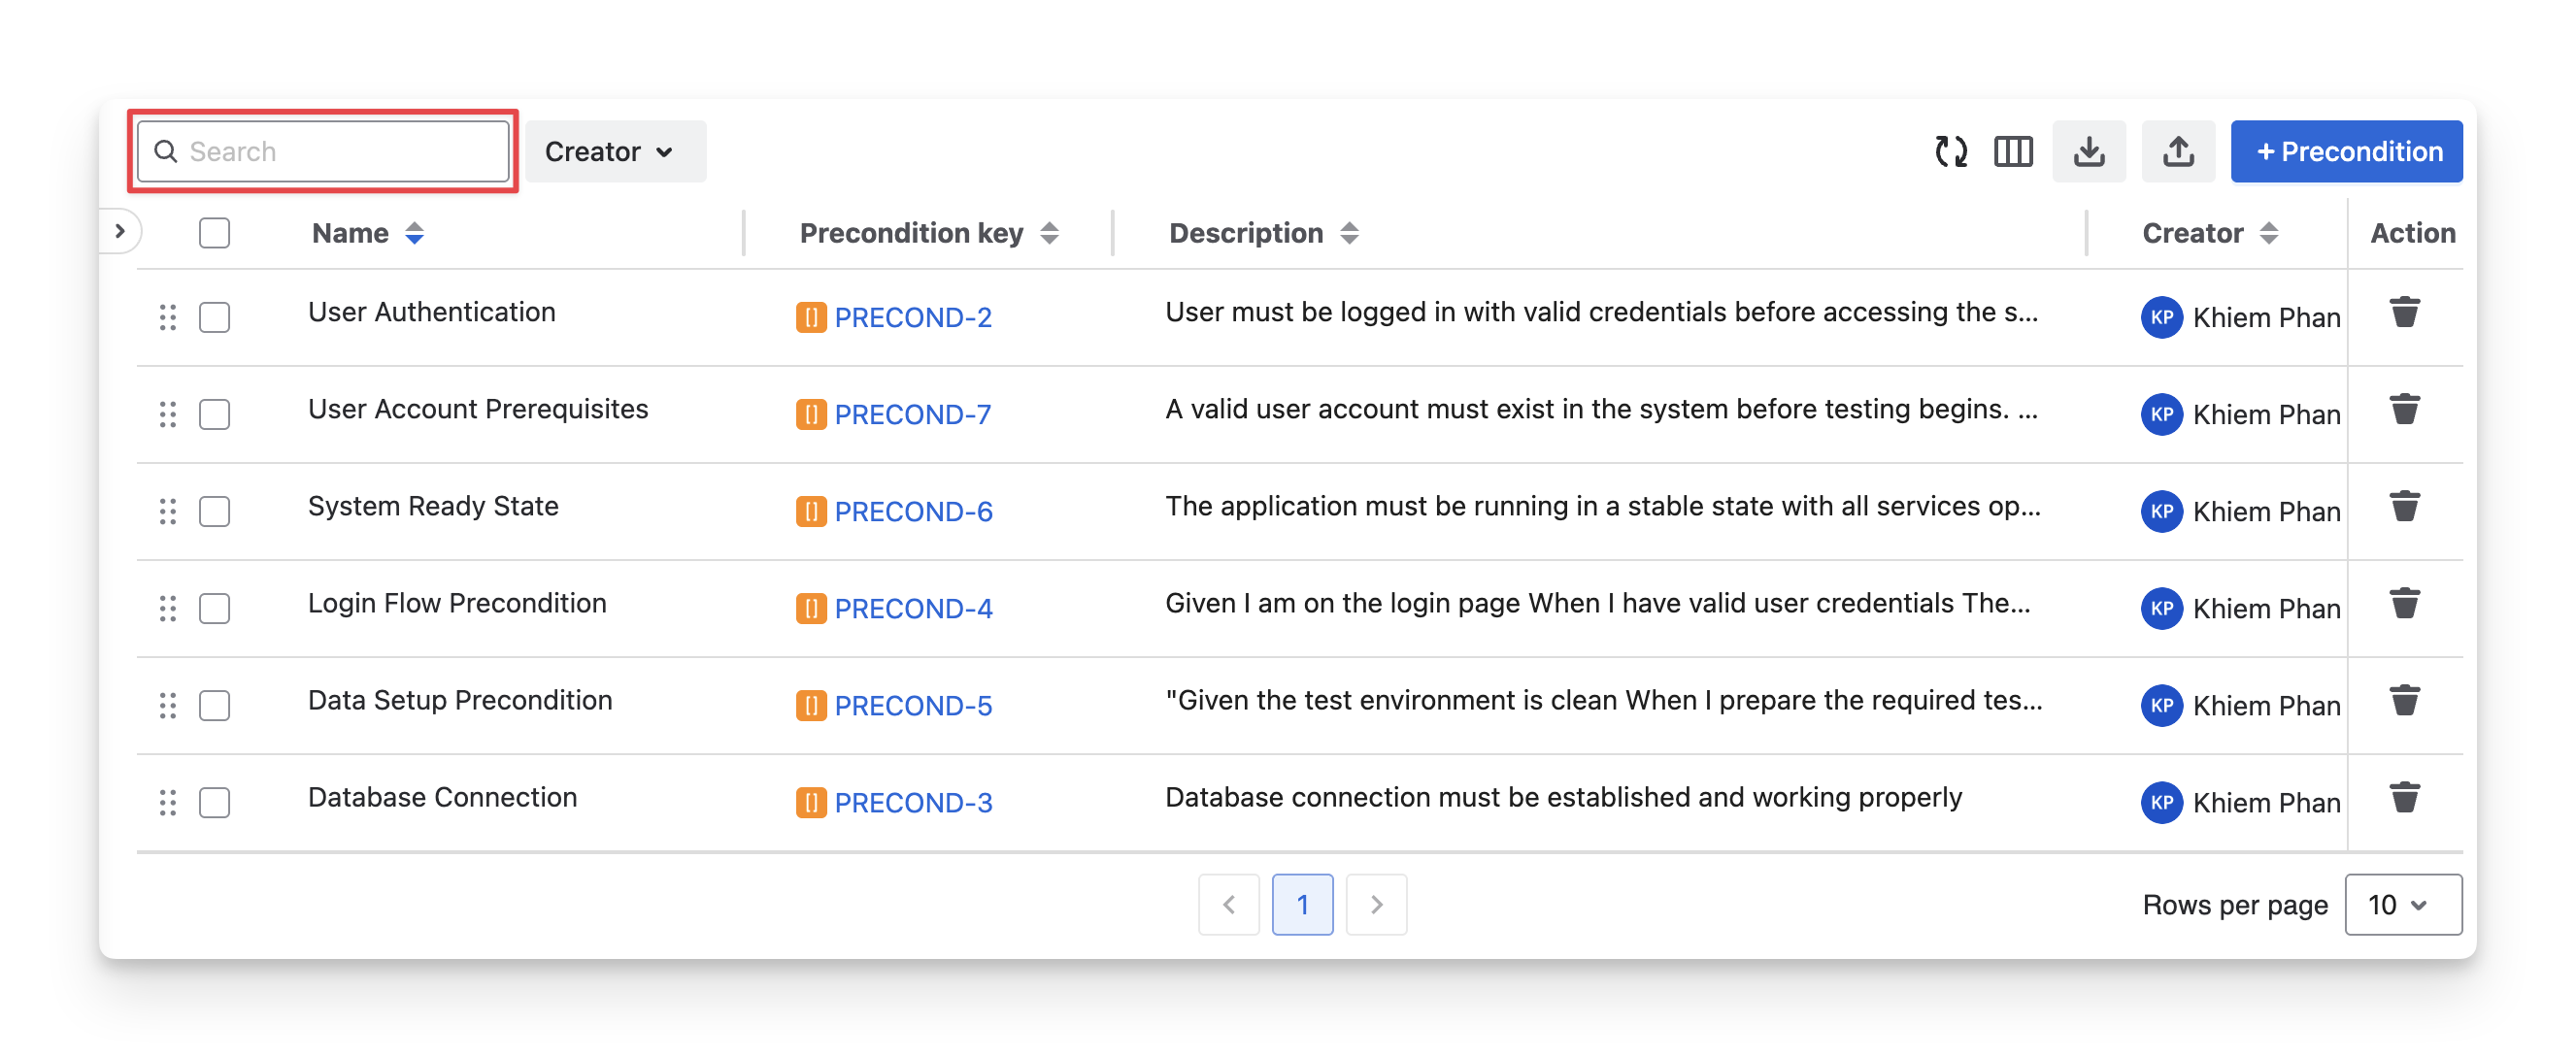
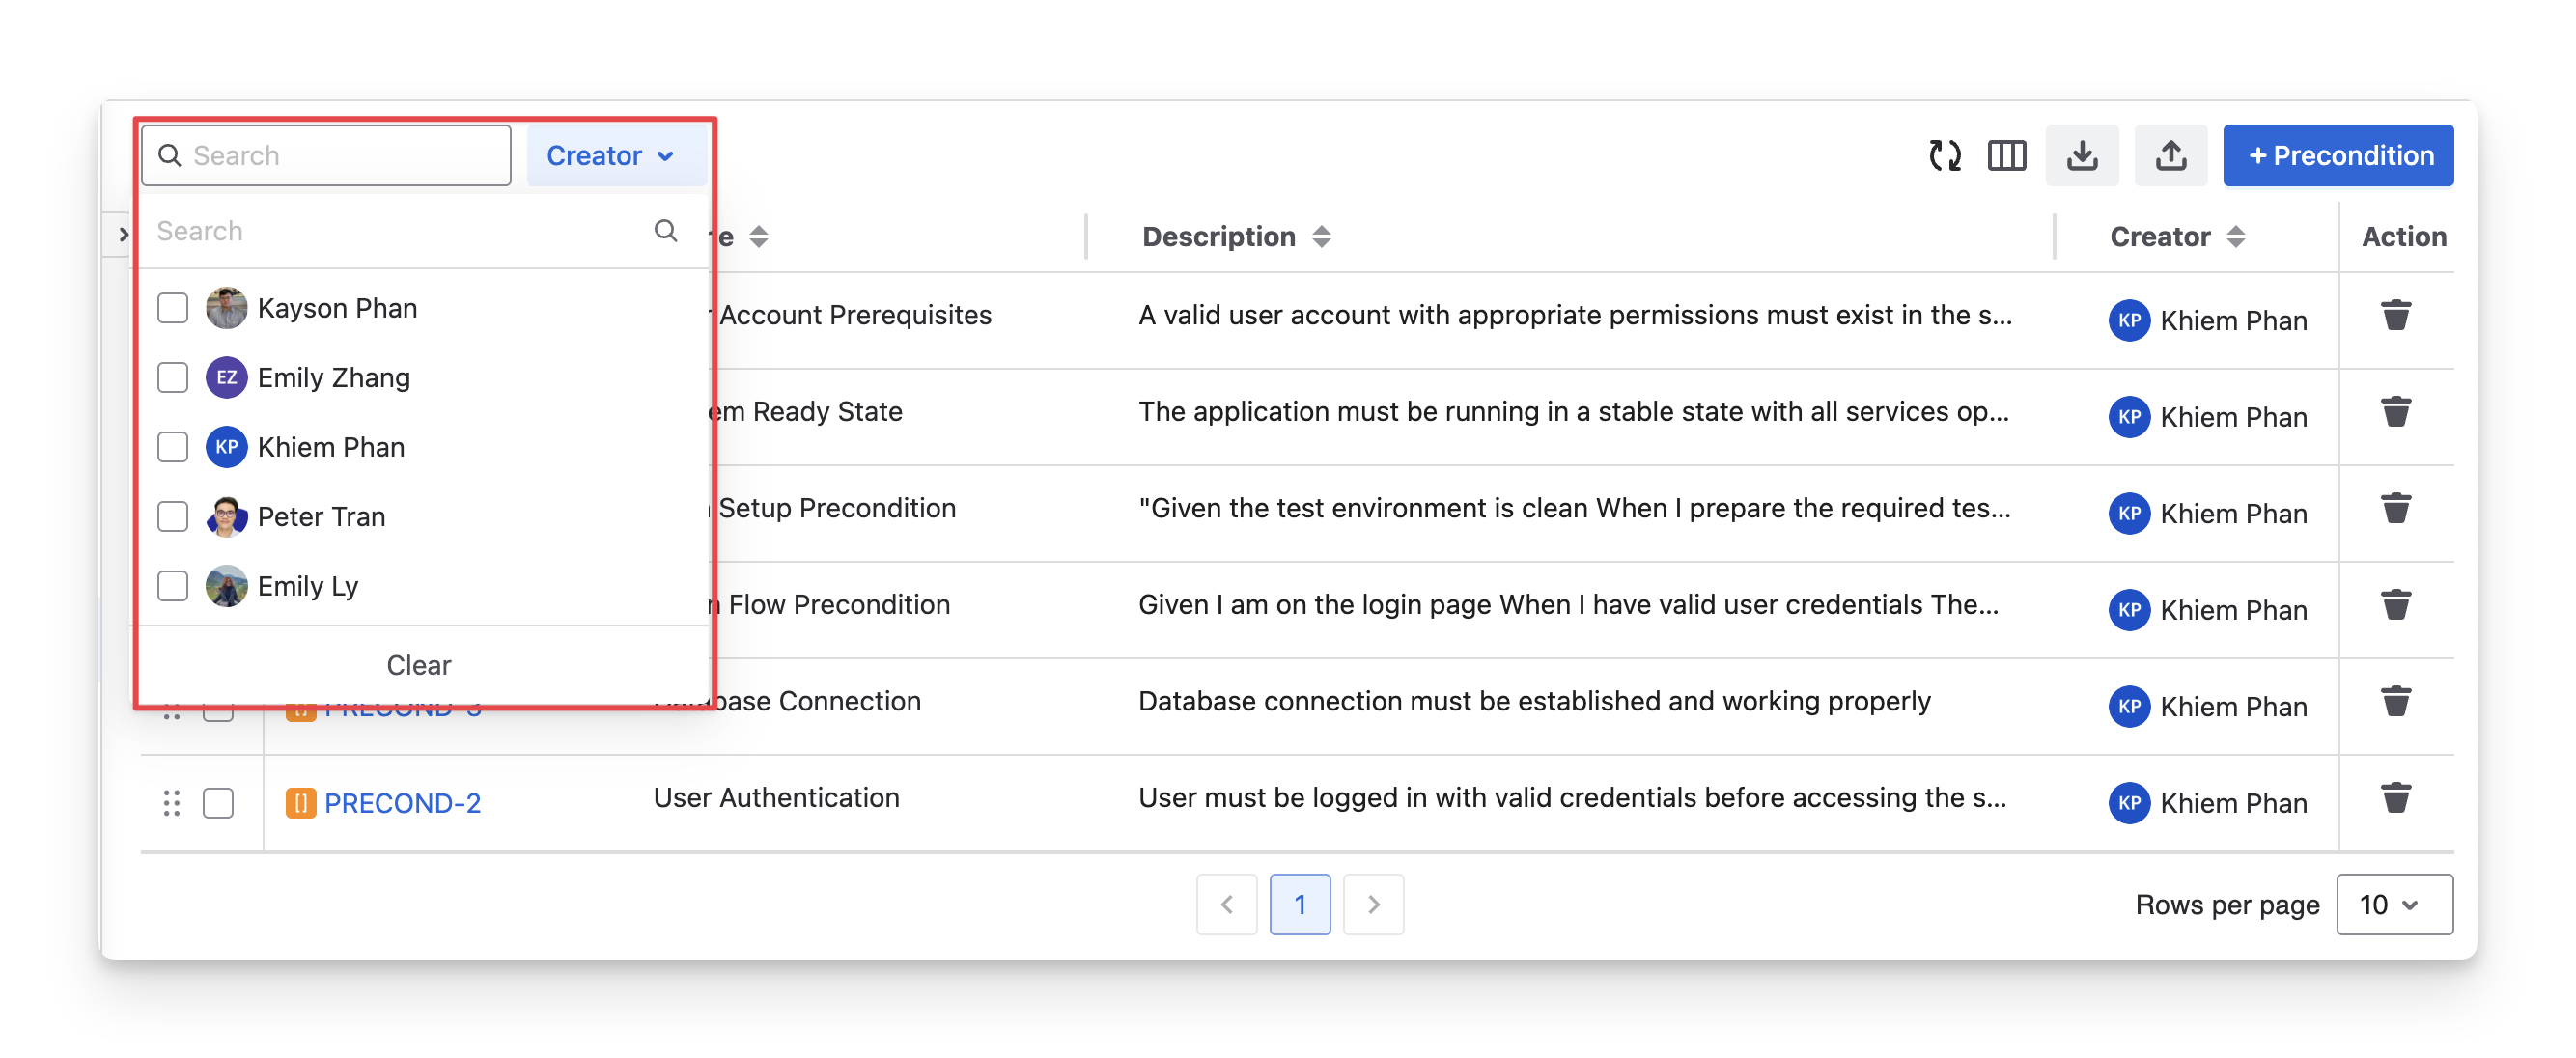
-
Apply Creator Filters to narrow down the list
2.5 Organize Precondition Into Folders
In the Precondition section, AgileTest provides a Precondition Folder feature that helps you categorize related preconditions into the same group. This makes them easier to track, navigate, and maintain throughout the project lifecycle. By grouping preconditions into folders, teams can improve visibility, keep test preparation well-structured, and simplify precondition management as the project grows.
One Precondition can only belong to one folder.
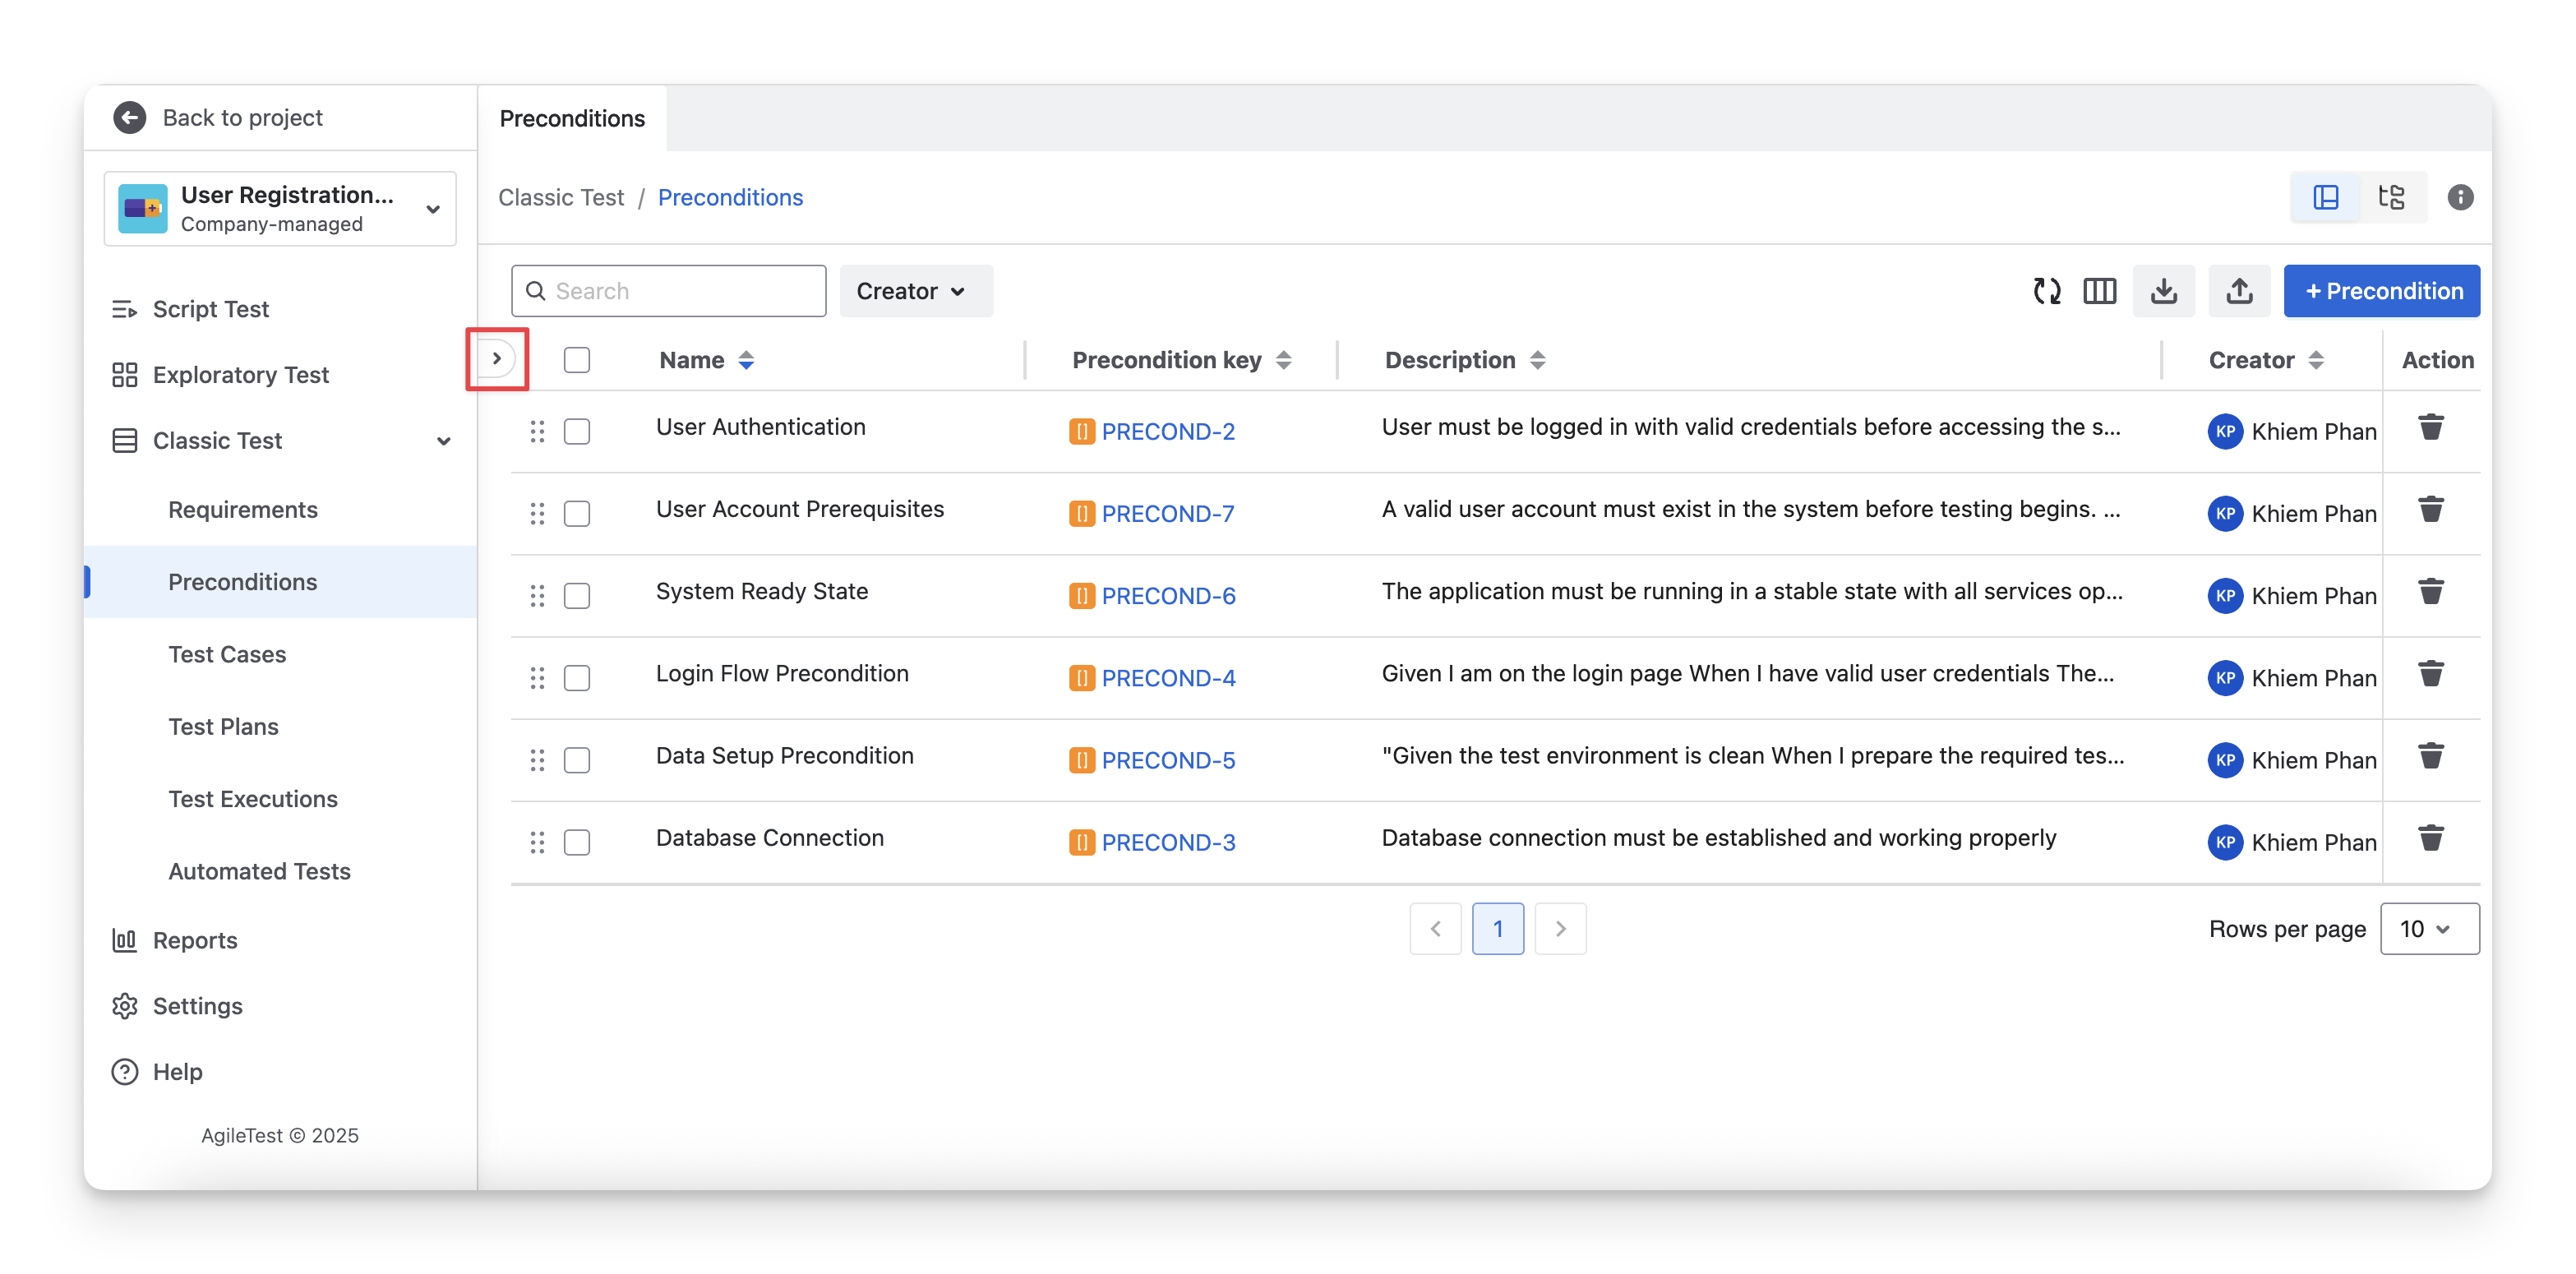
By default, in the Precondition section, you can see a precondition folder feature on the left-hand side, which allows you to organize preconditions in a hierarchical order.
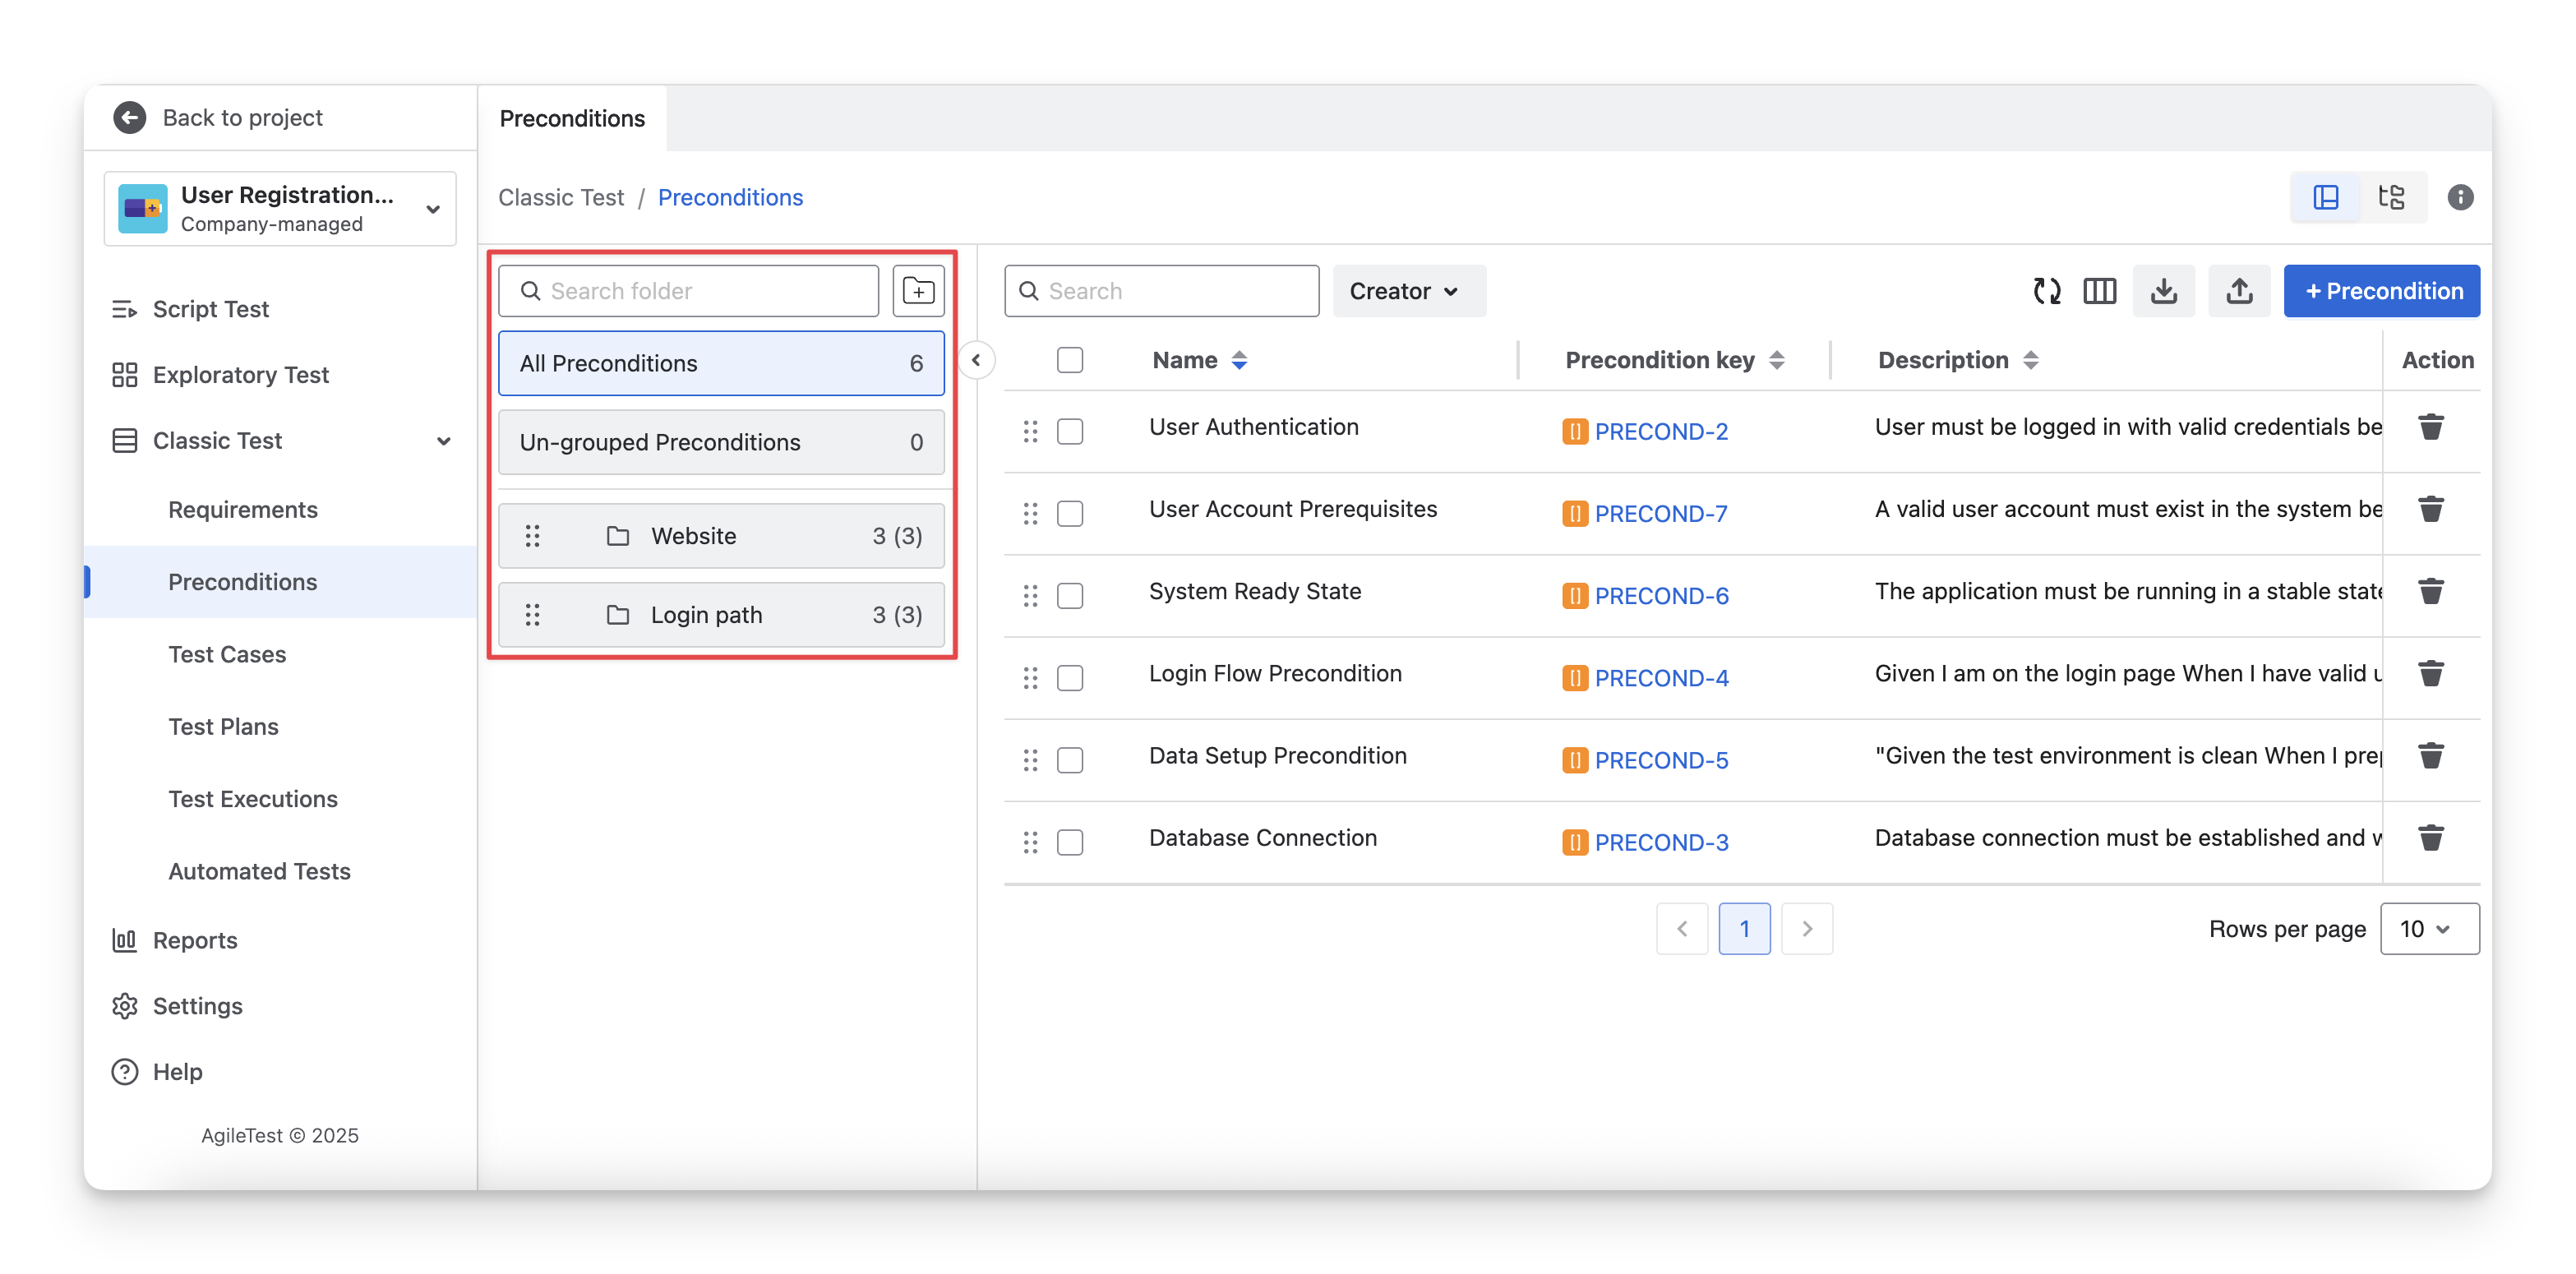
To open/close the folders, click on the ▶️ / ◀️ button on the left-hand side of the table.
To add preconditions into folders, you can multi-select these preconditions and drag them into suitable folders.
2.6 Export Preconditions
To download preconditions for internal storage and documentation, you can click on the “Export” button and select the CSV file type you would like to receive.
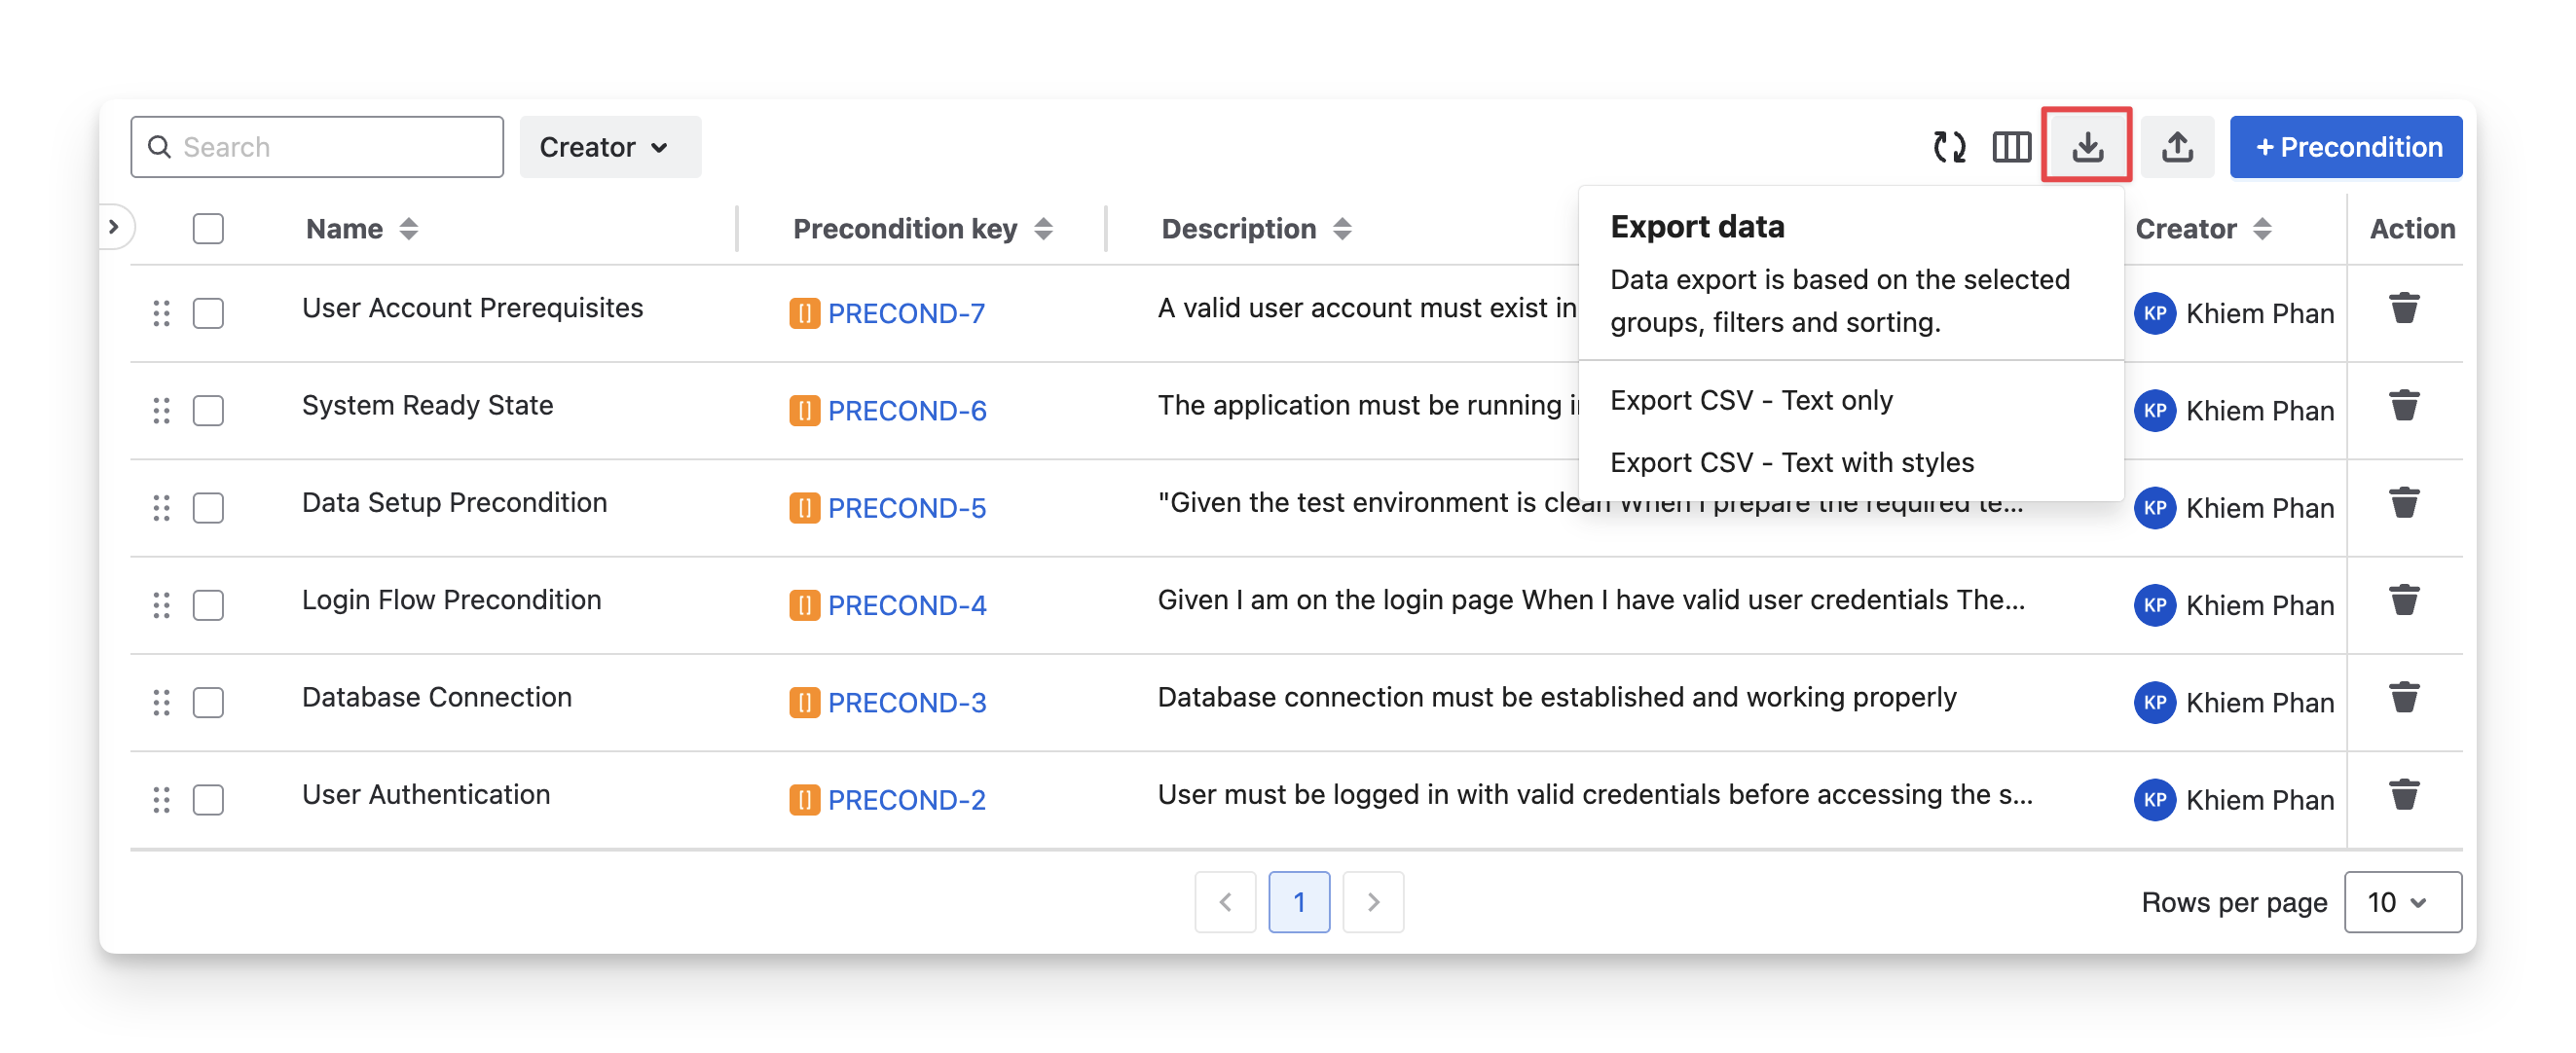
AgileTest supports you in exporting preconditions into 2 types of CSV files:
-
Text-only file: Exports preconditions as plain text without any formatting, ensuring maximum compatibility with other tools.
-
Text with styles file: Exports preconditions along with text formatting and styles, useful when you want to preserve the original appearance and structure.
Note that clicking the export button exports all preconditions filtered and sorted on your screen.
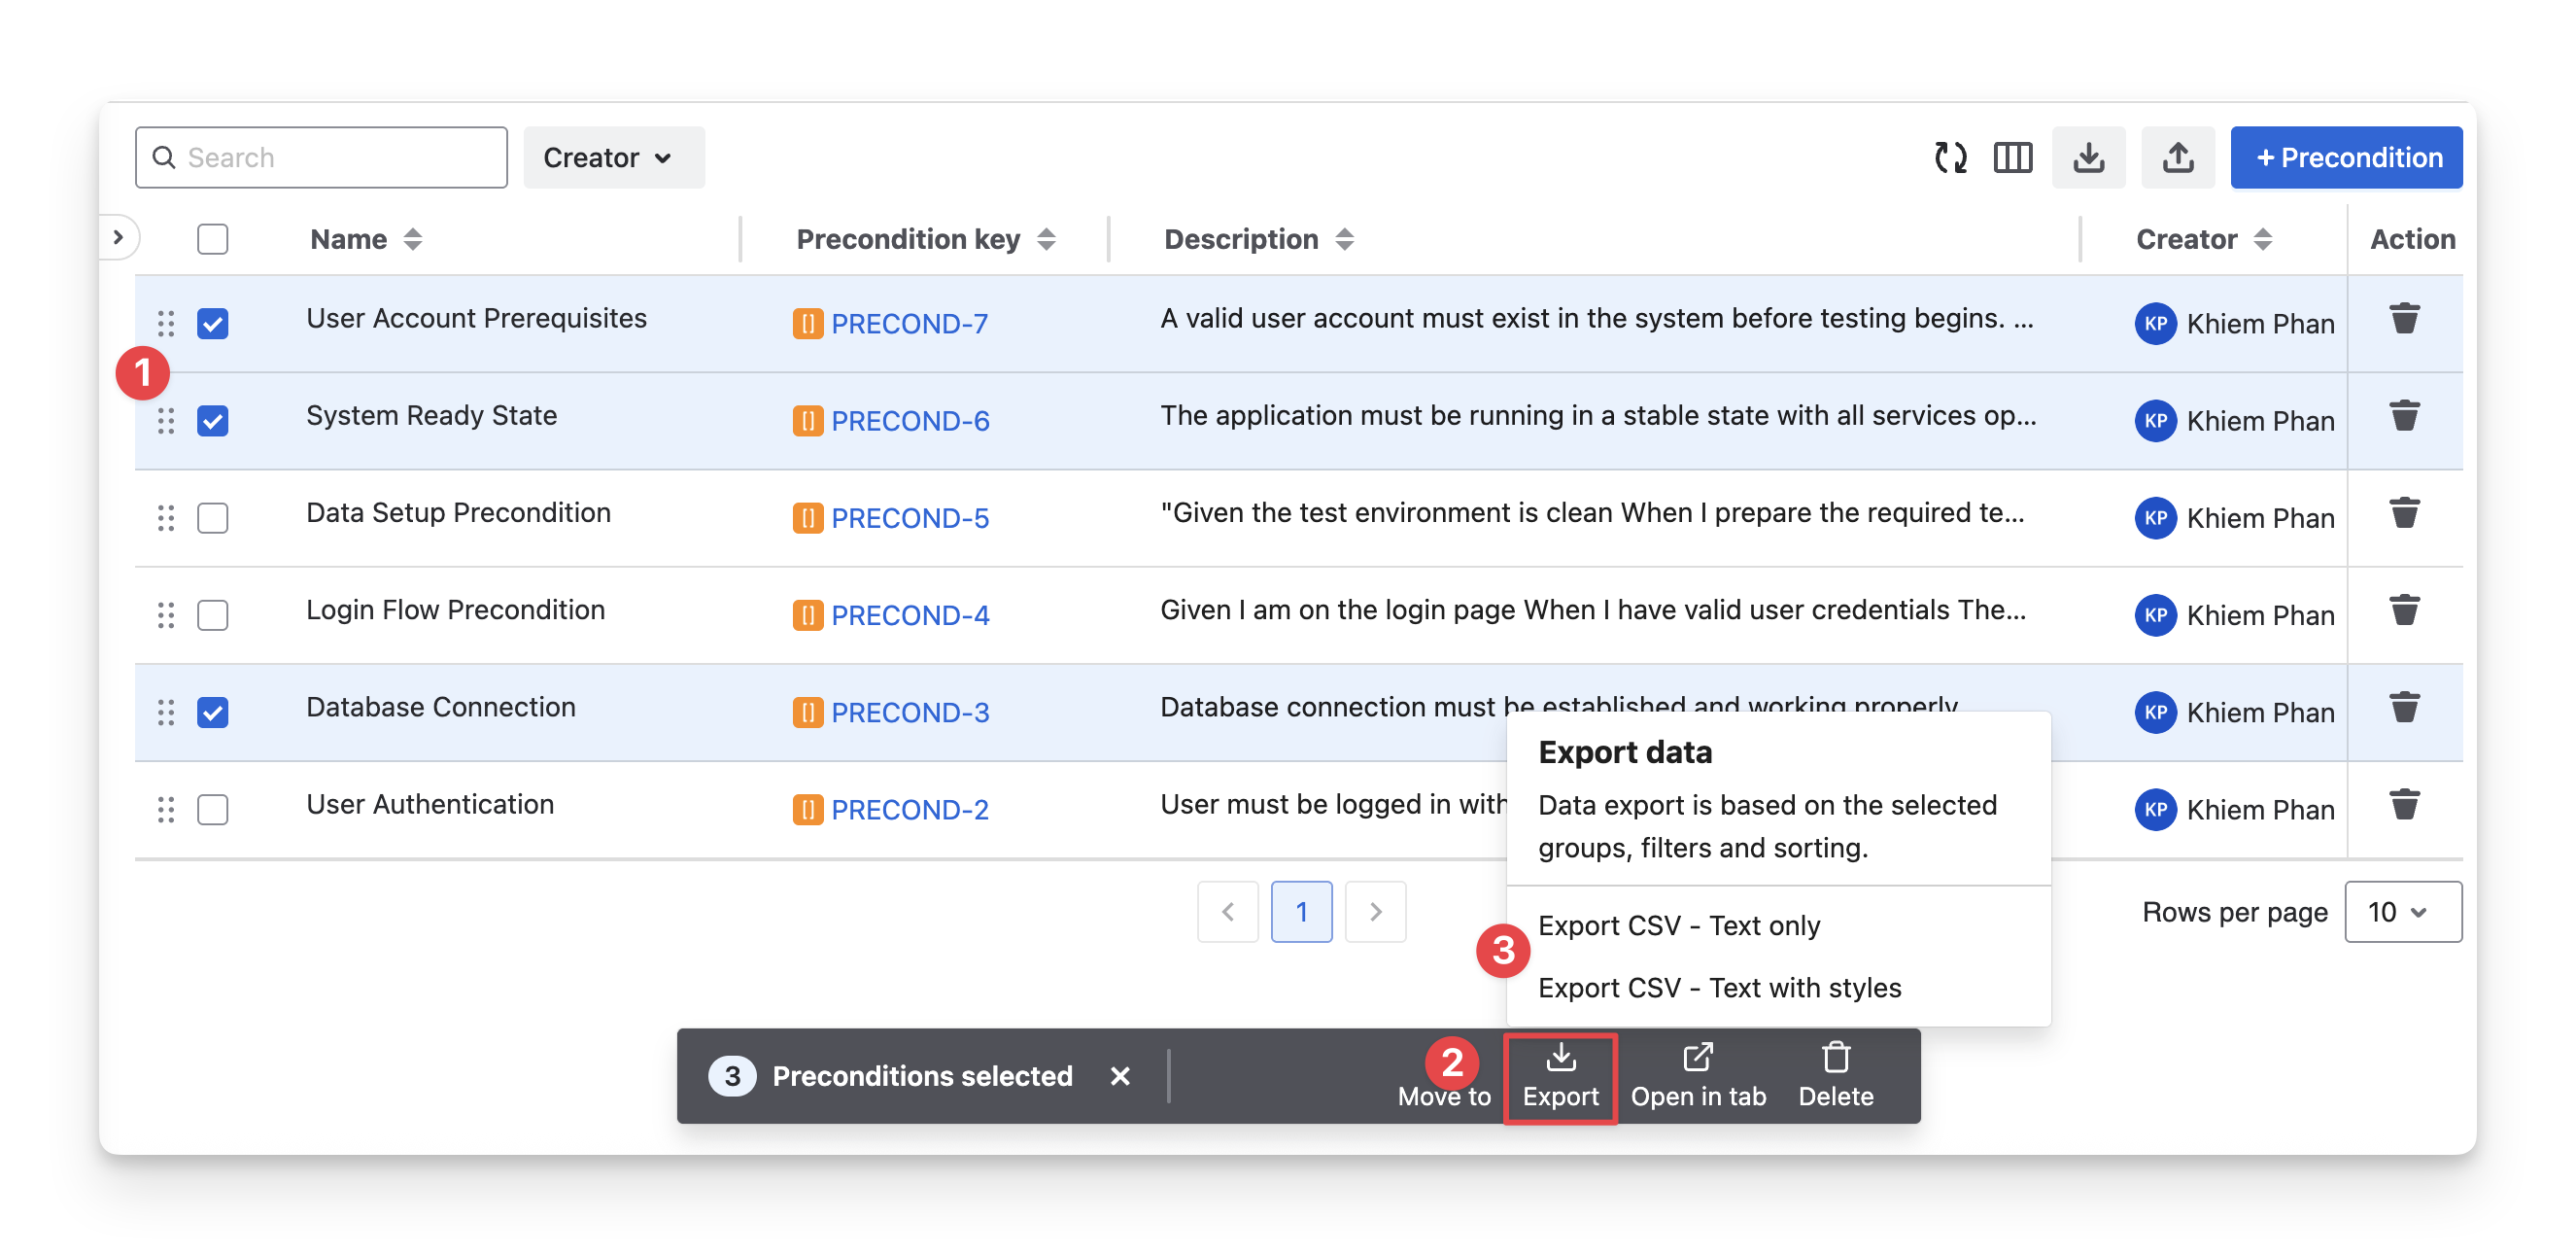
How to export random preconditions not in any filter or sorting format?
-
Select the preconditions you want to export.
-
A toolbar will appear at the bottom of your screen. Click the “Export button” in the toolbar.
-
Choose the file type you want to receive the data in.
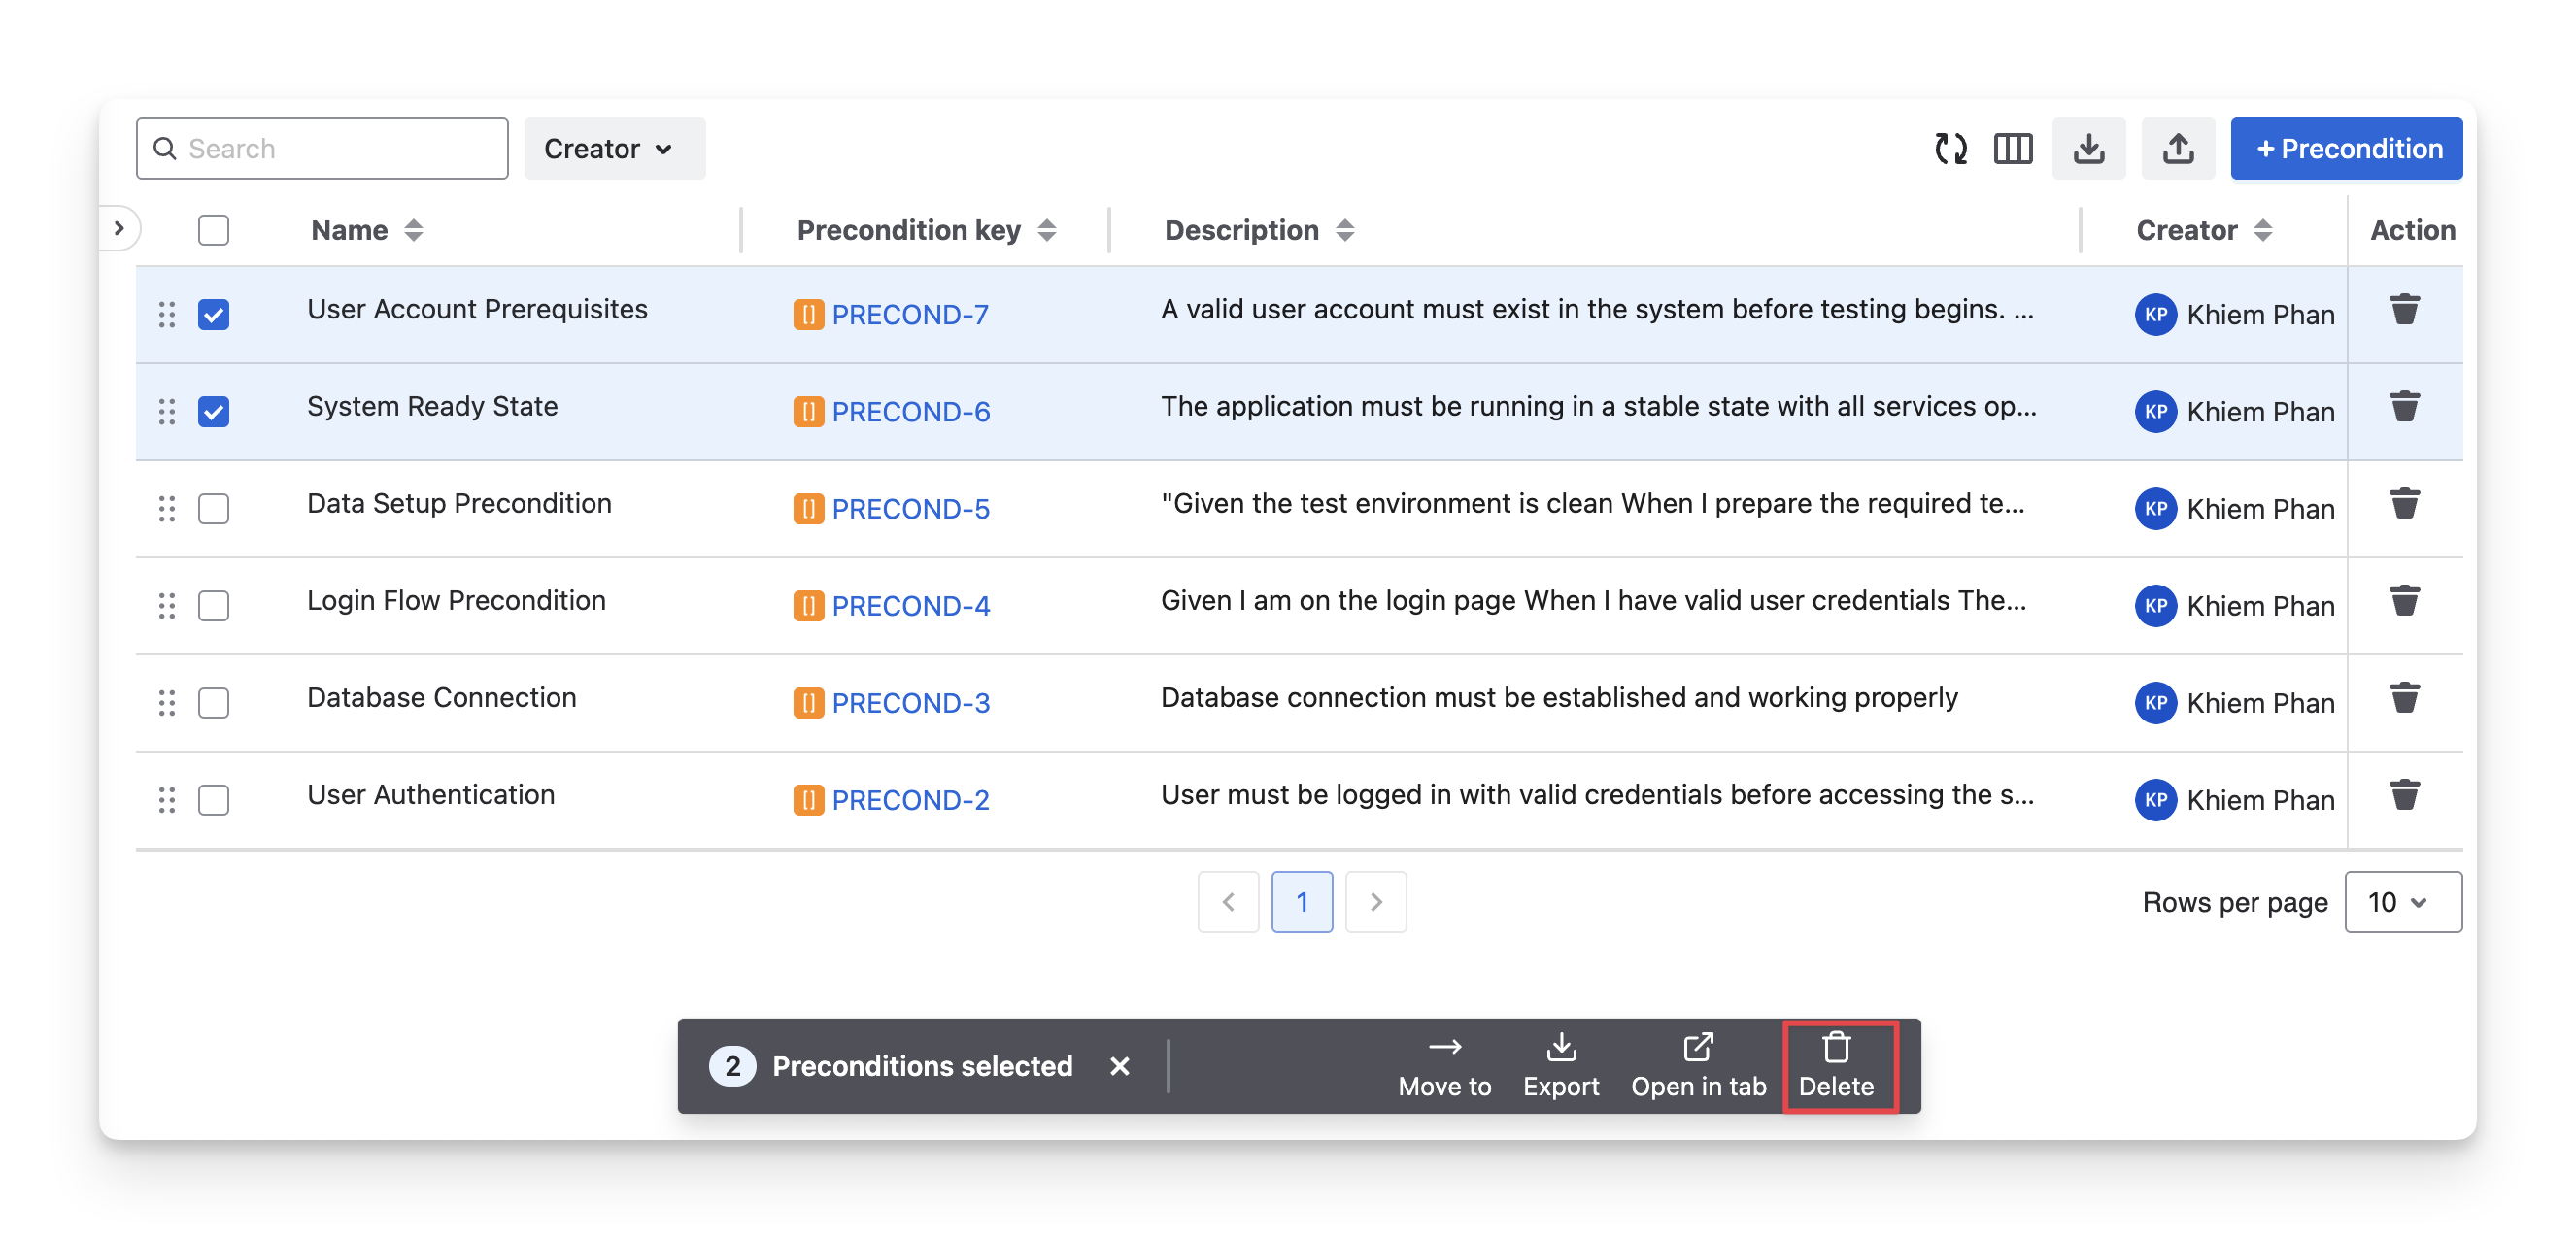
2.7 Delete Preconditions
You can delete a precondition by choosing the “Delete” button in the Action column.
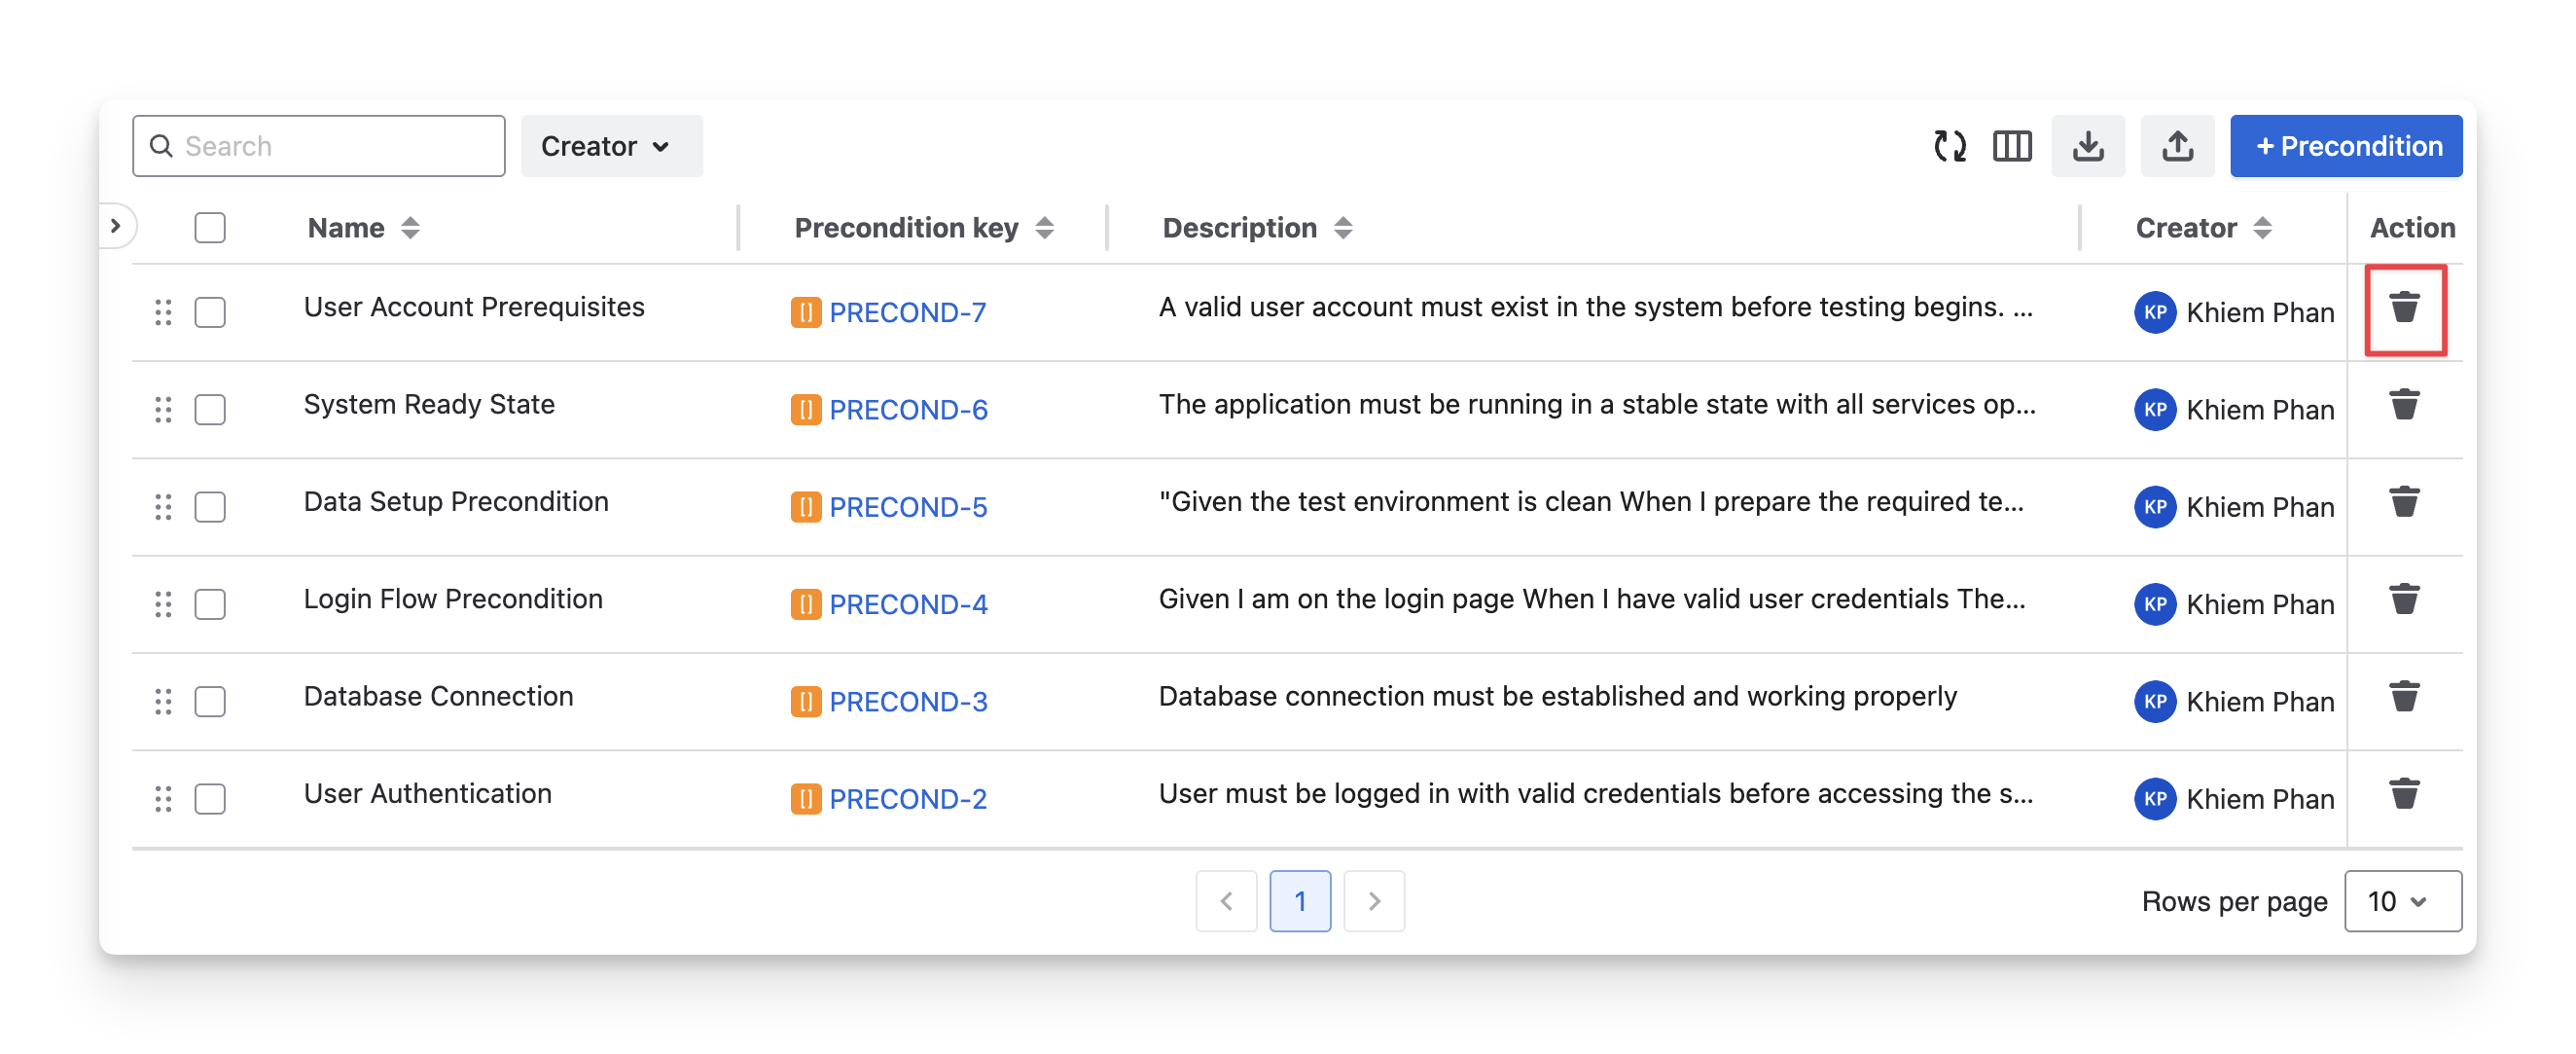
To multi-select preconditions for deletion, select them and click the “Delete” button on the toolbar.
Should you need any assistance or further AgileTest inquiries, contact our 24/7 Support Desk!