.png)
Actions from 1 to 7 are available for all Requirement, Precondition, and Test Case folders.
1. Drag Work Items Into Test Folder
To add work items into folders, you can multi-select these items and drag them into suitable folders.
A work item can belong to only one folder at a time.
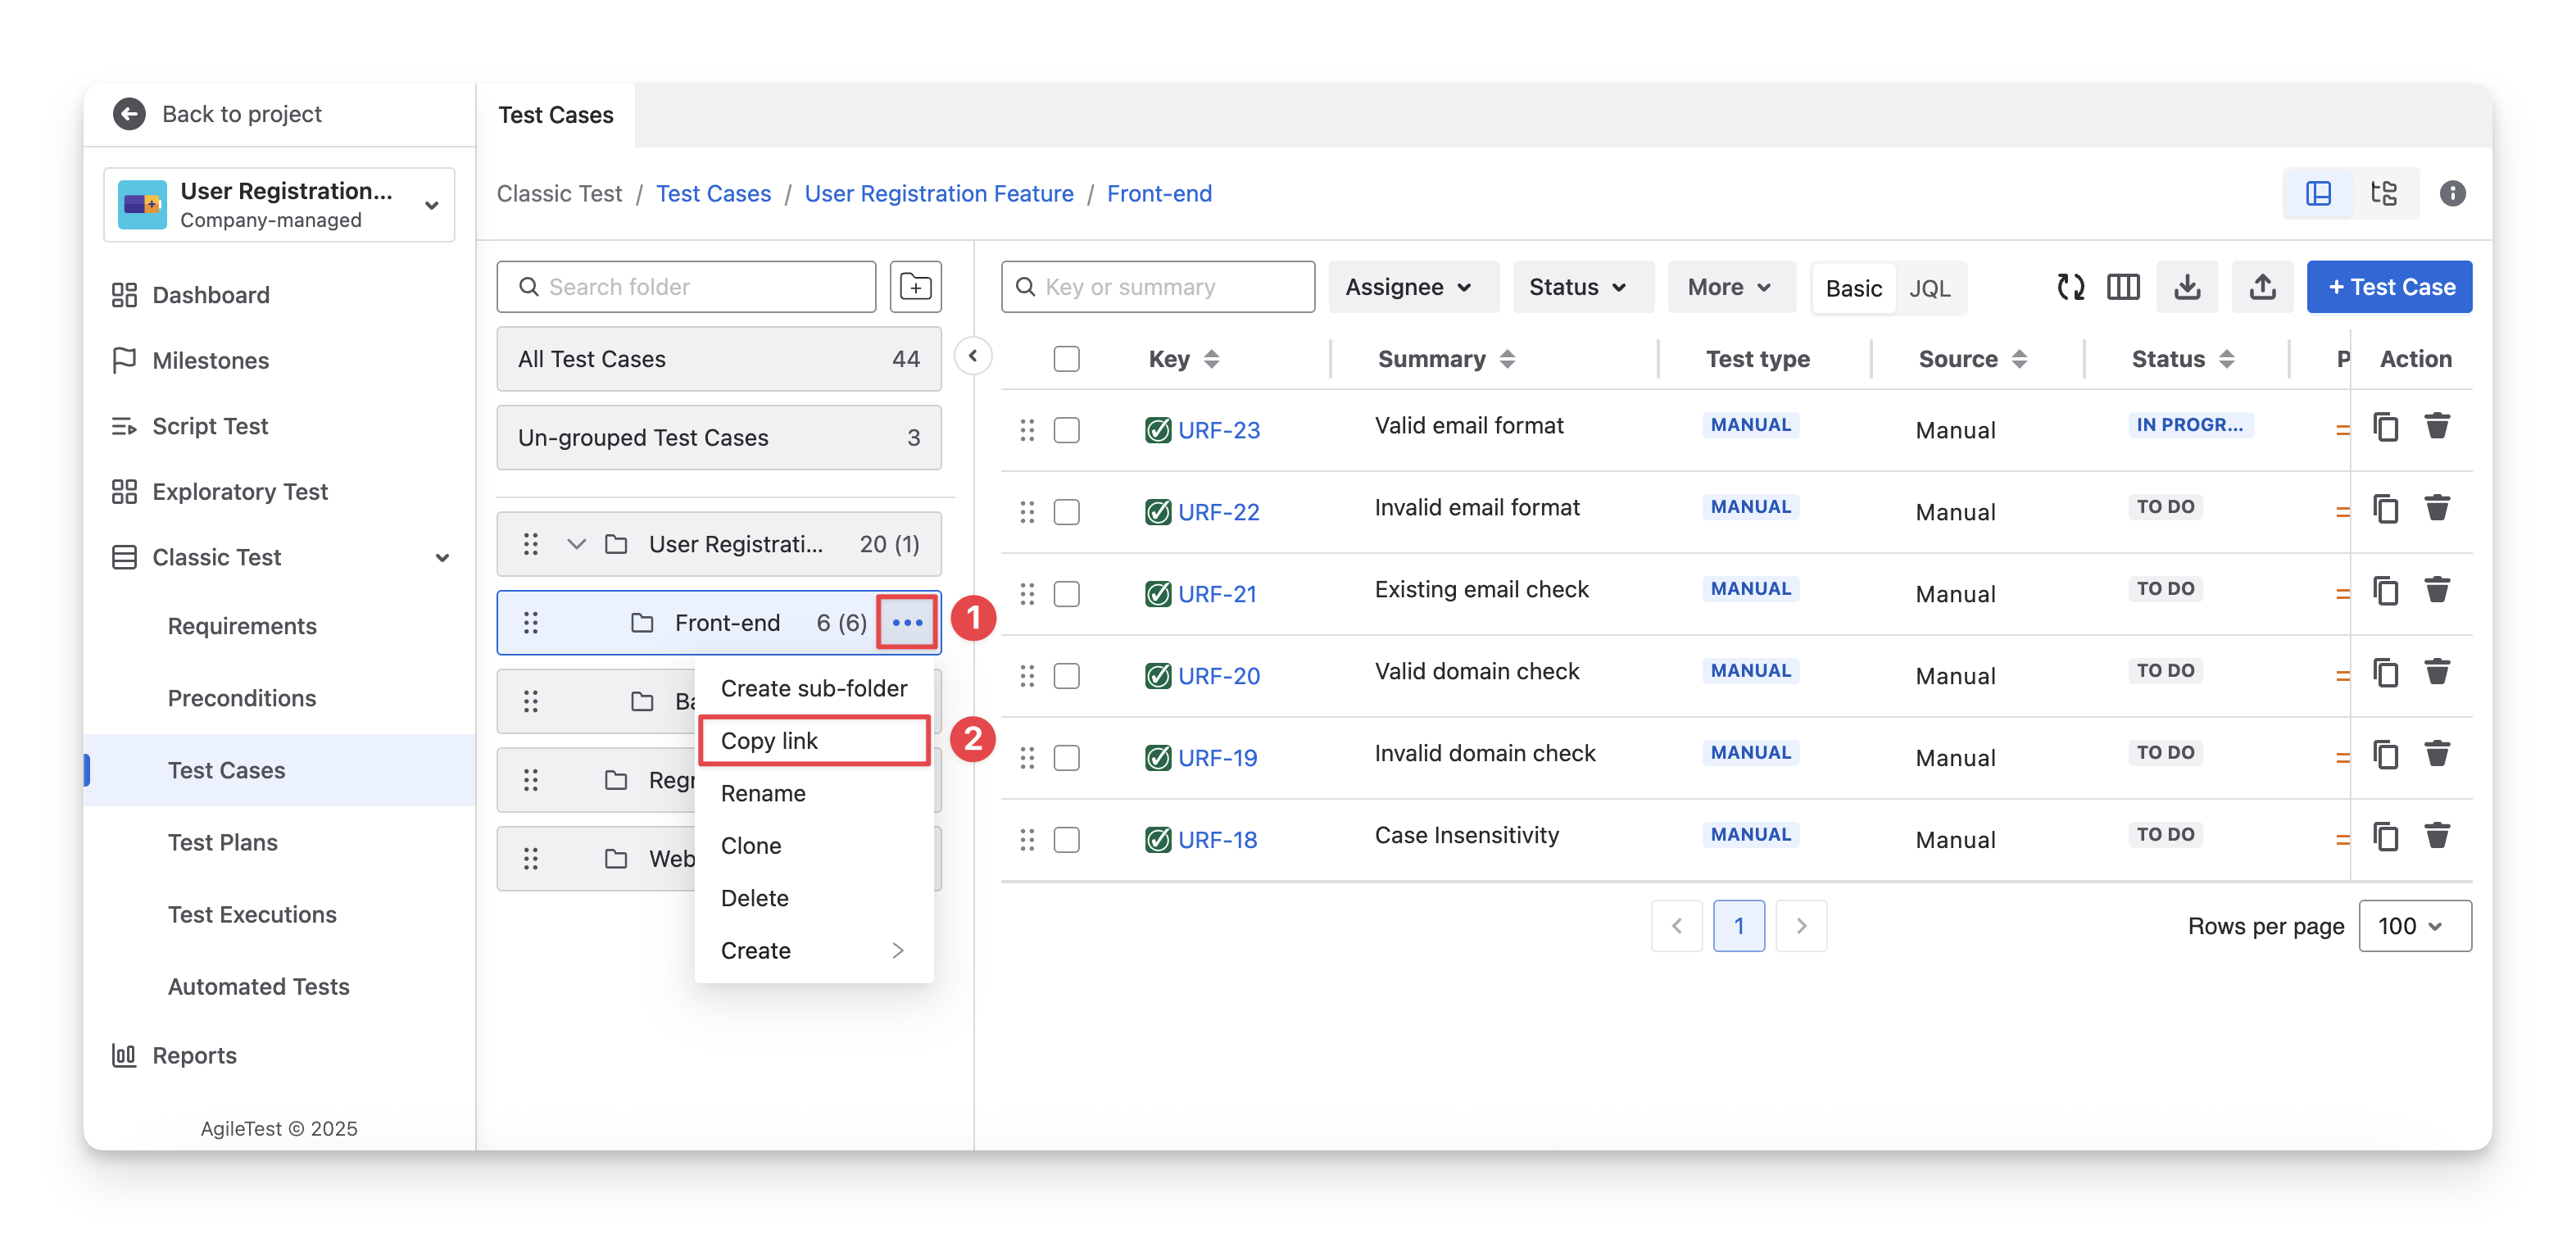
2. Copy Test Folder Link
To copy the folder link, follow these steps:
-
Navigate to a folder/subfolder you want to copy the link. Click on the
-
Select the “Copy link” option.
-
The folder or subfolder link is copied to your clipboard. When you share this link, anyone who opens it will be redirected to the folder view along with its associated work items.
3. Rename Test Folder
To rename a folder/subfolder, follow these steps:
-
Navigate to a folder/subfolder you want to rename. Click on the
-
Select the “Rename” option.

-
You can modify the name of this folder. Click
/
to save or discard your changes.
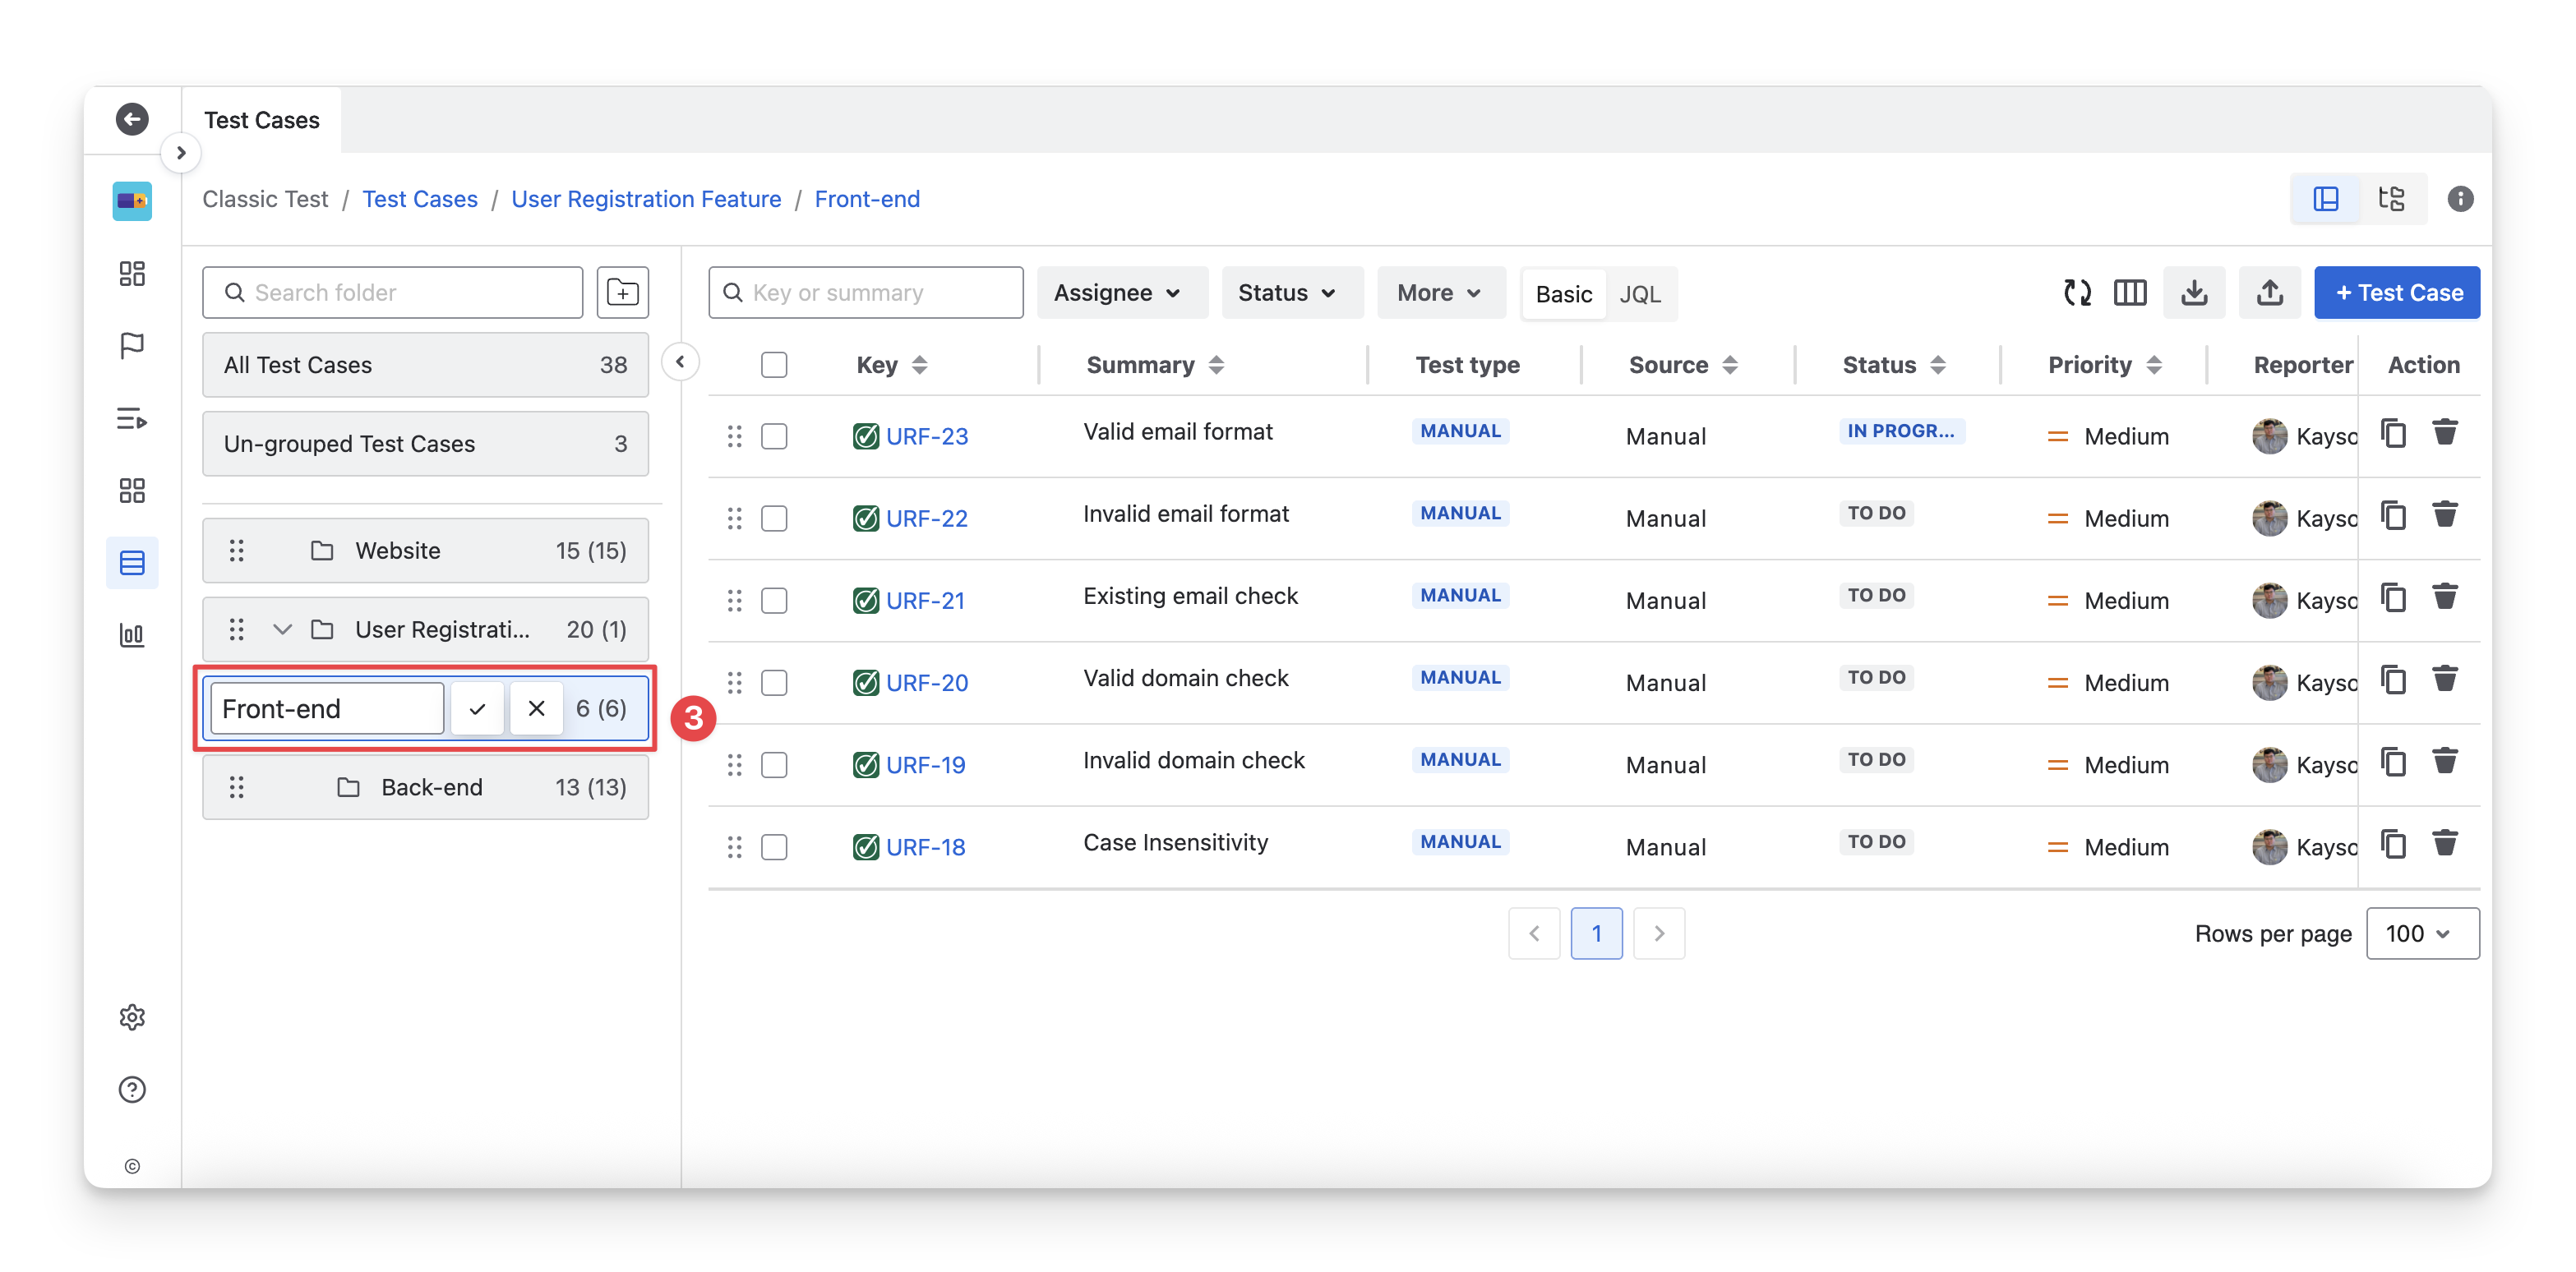
Or you can double-click on a folder/subfolder to quickly change its name.
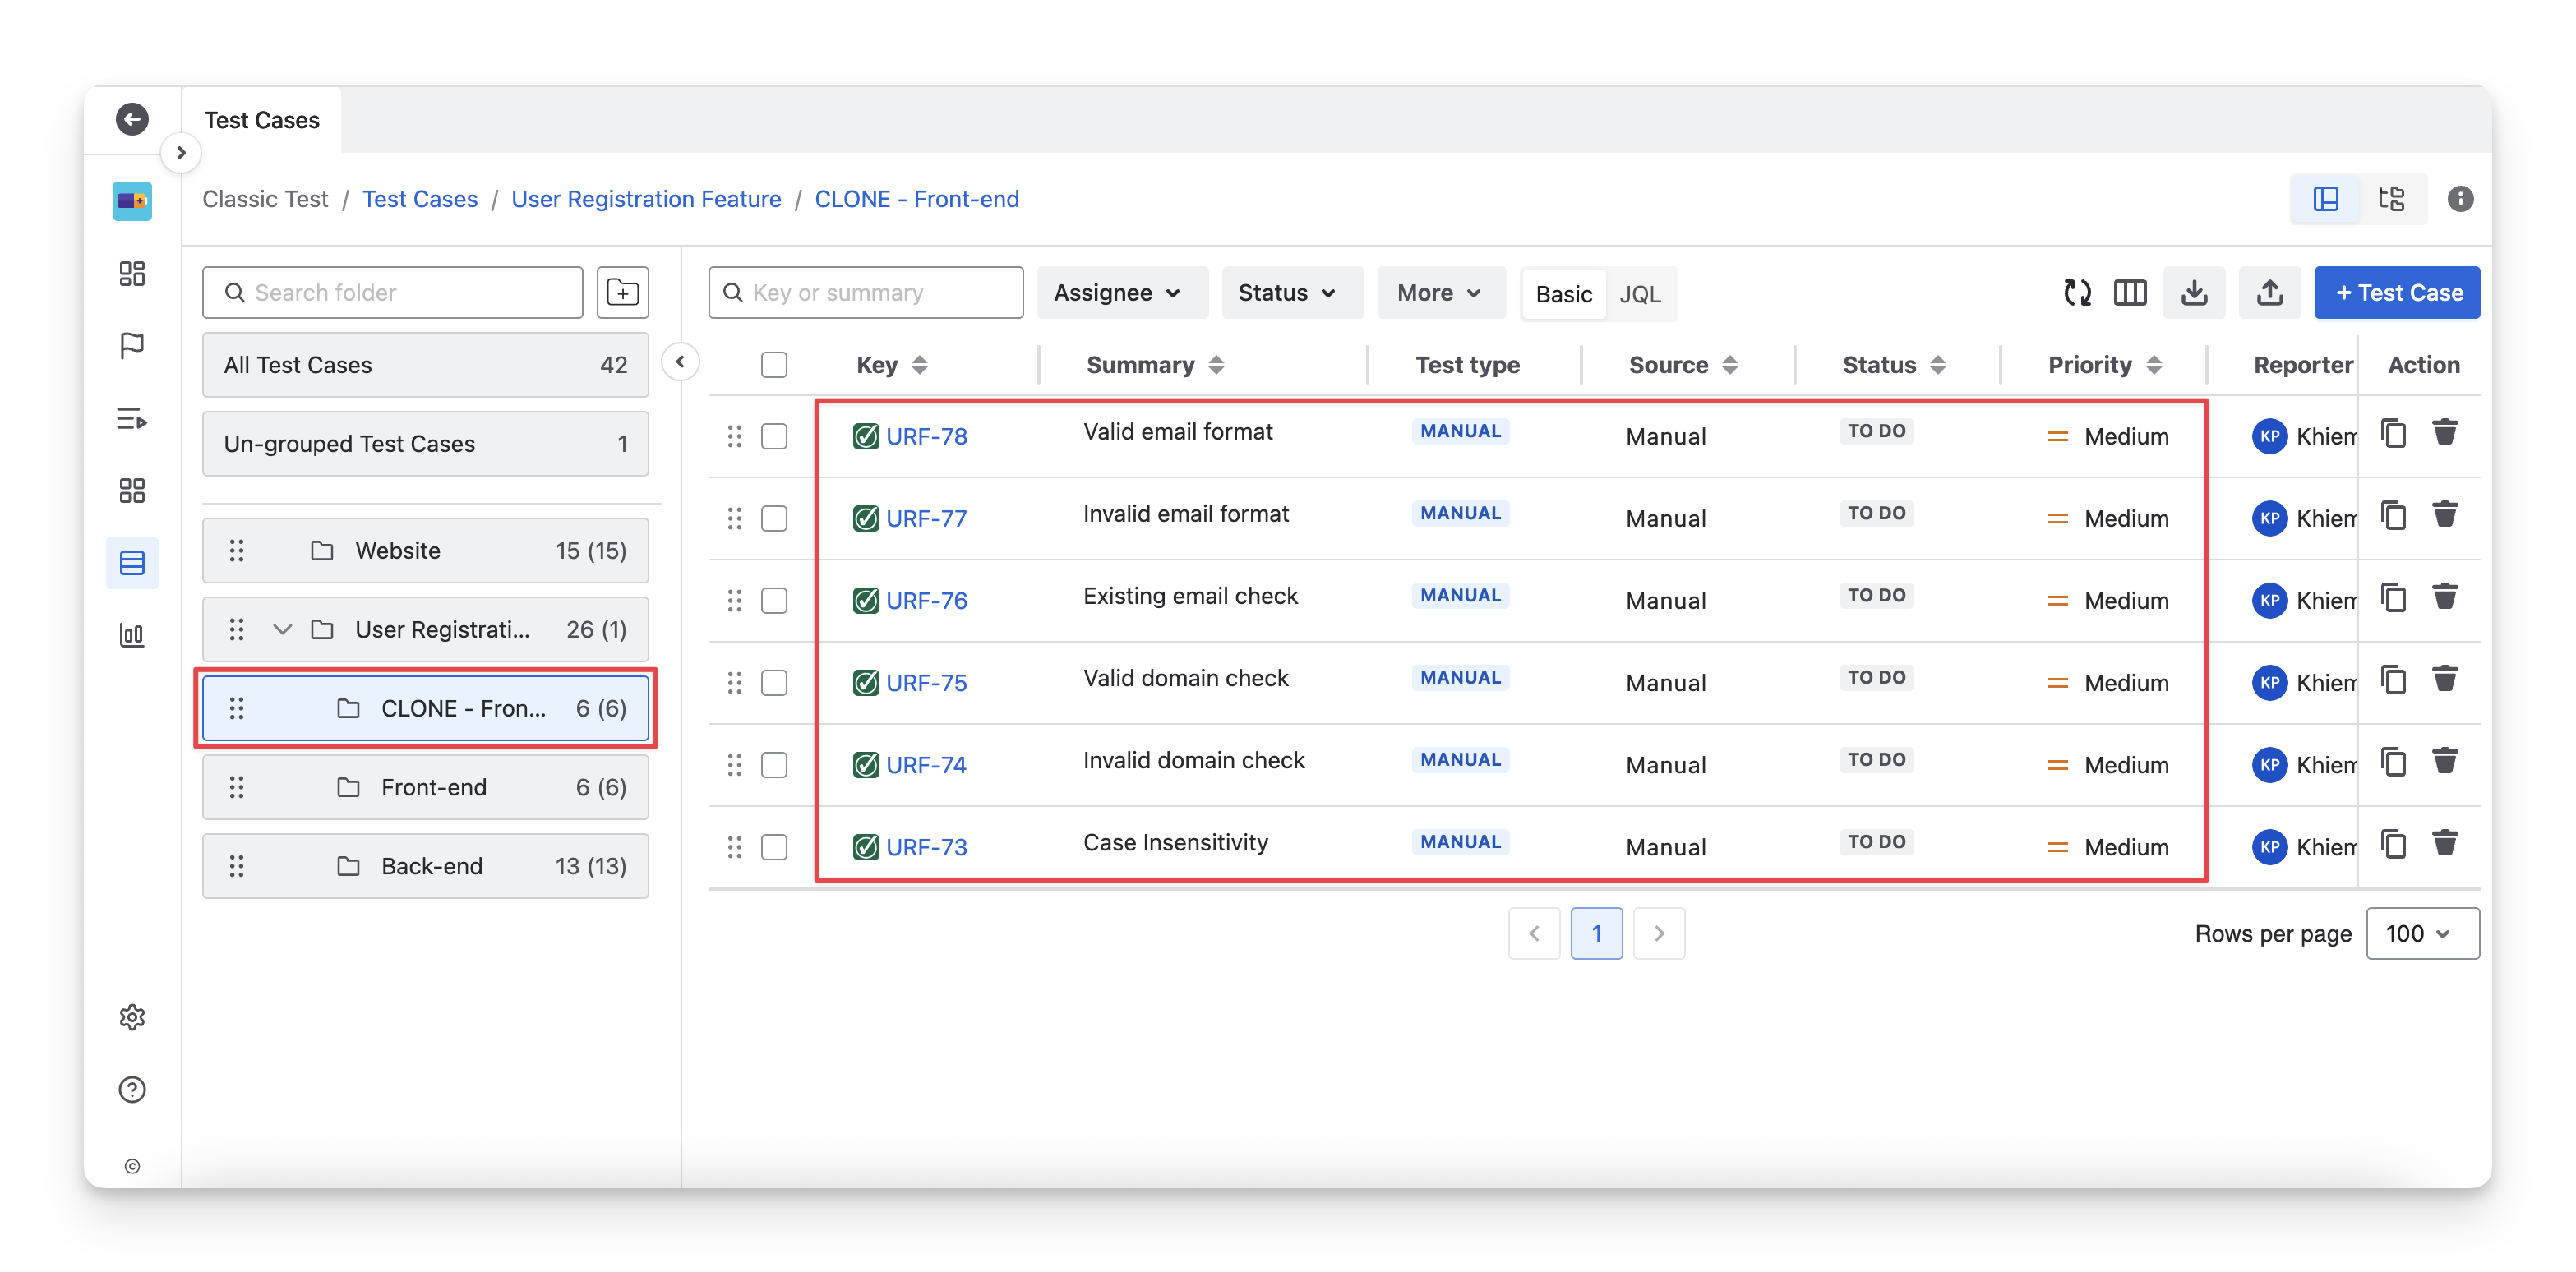
4. Clone Test Folder
To clone a folder/subfolder, follow these steps:
-
Navigate to a folder/subfolder you want to duplicate. Click on the
-
Select the “Clone” option.

Cloning a test folder will:
-
Create the cloned folder next to the original folder, preserving the same folder structure.
-
Duplicate all work items inside the folder. The cloned items retain the same details as the originals, but they are not automatically linked to other work items that were associated with the original folder.
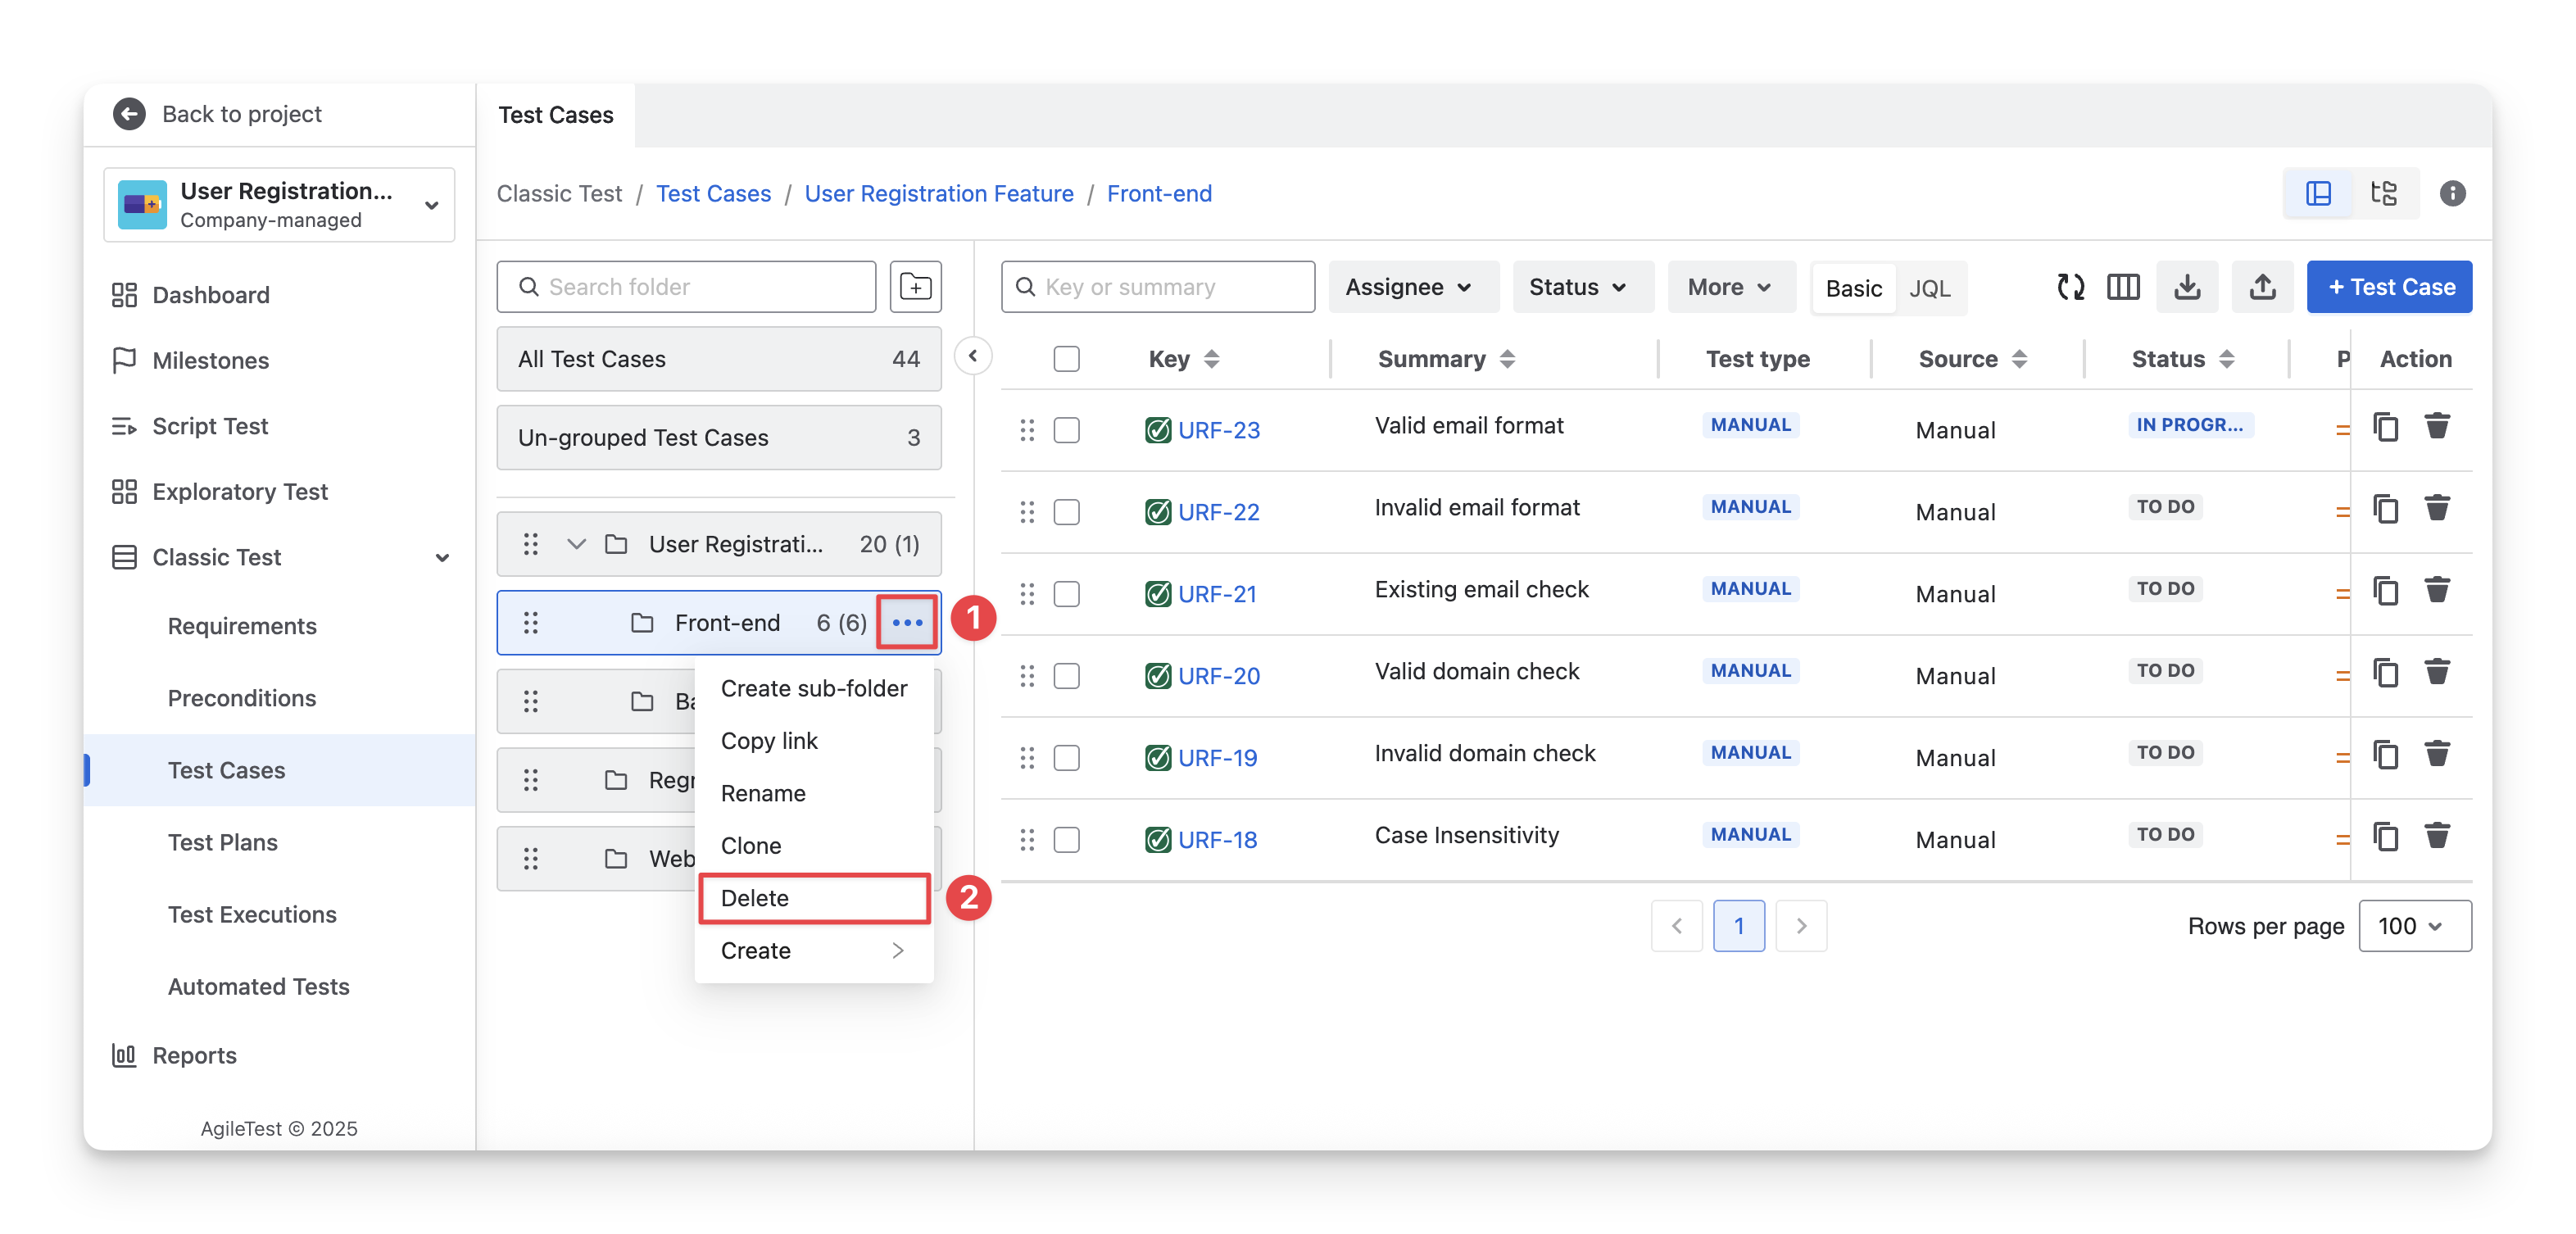
5. Delete Test Folder
To delete a folder/subfolder, follow these steps:
-
Navigate to a folder/subfolder you want to delete. Click on the
-
Select the “Delete” option.
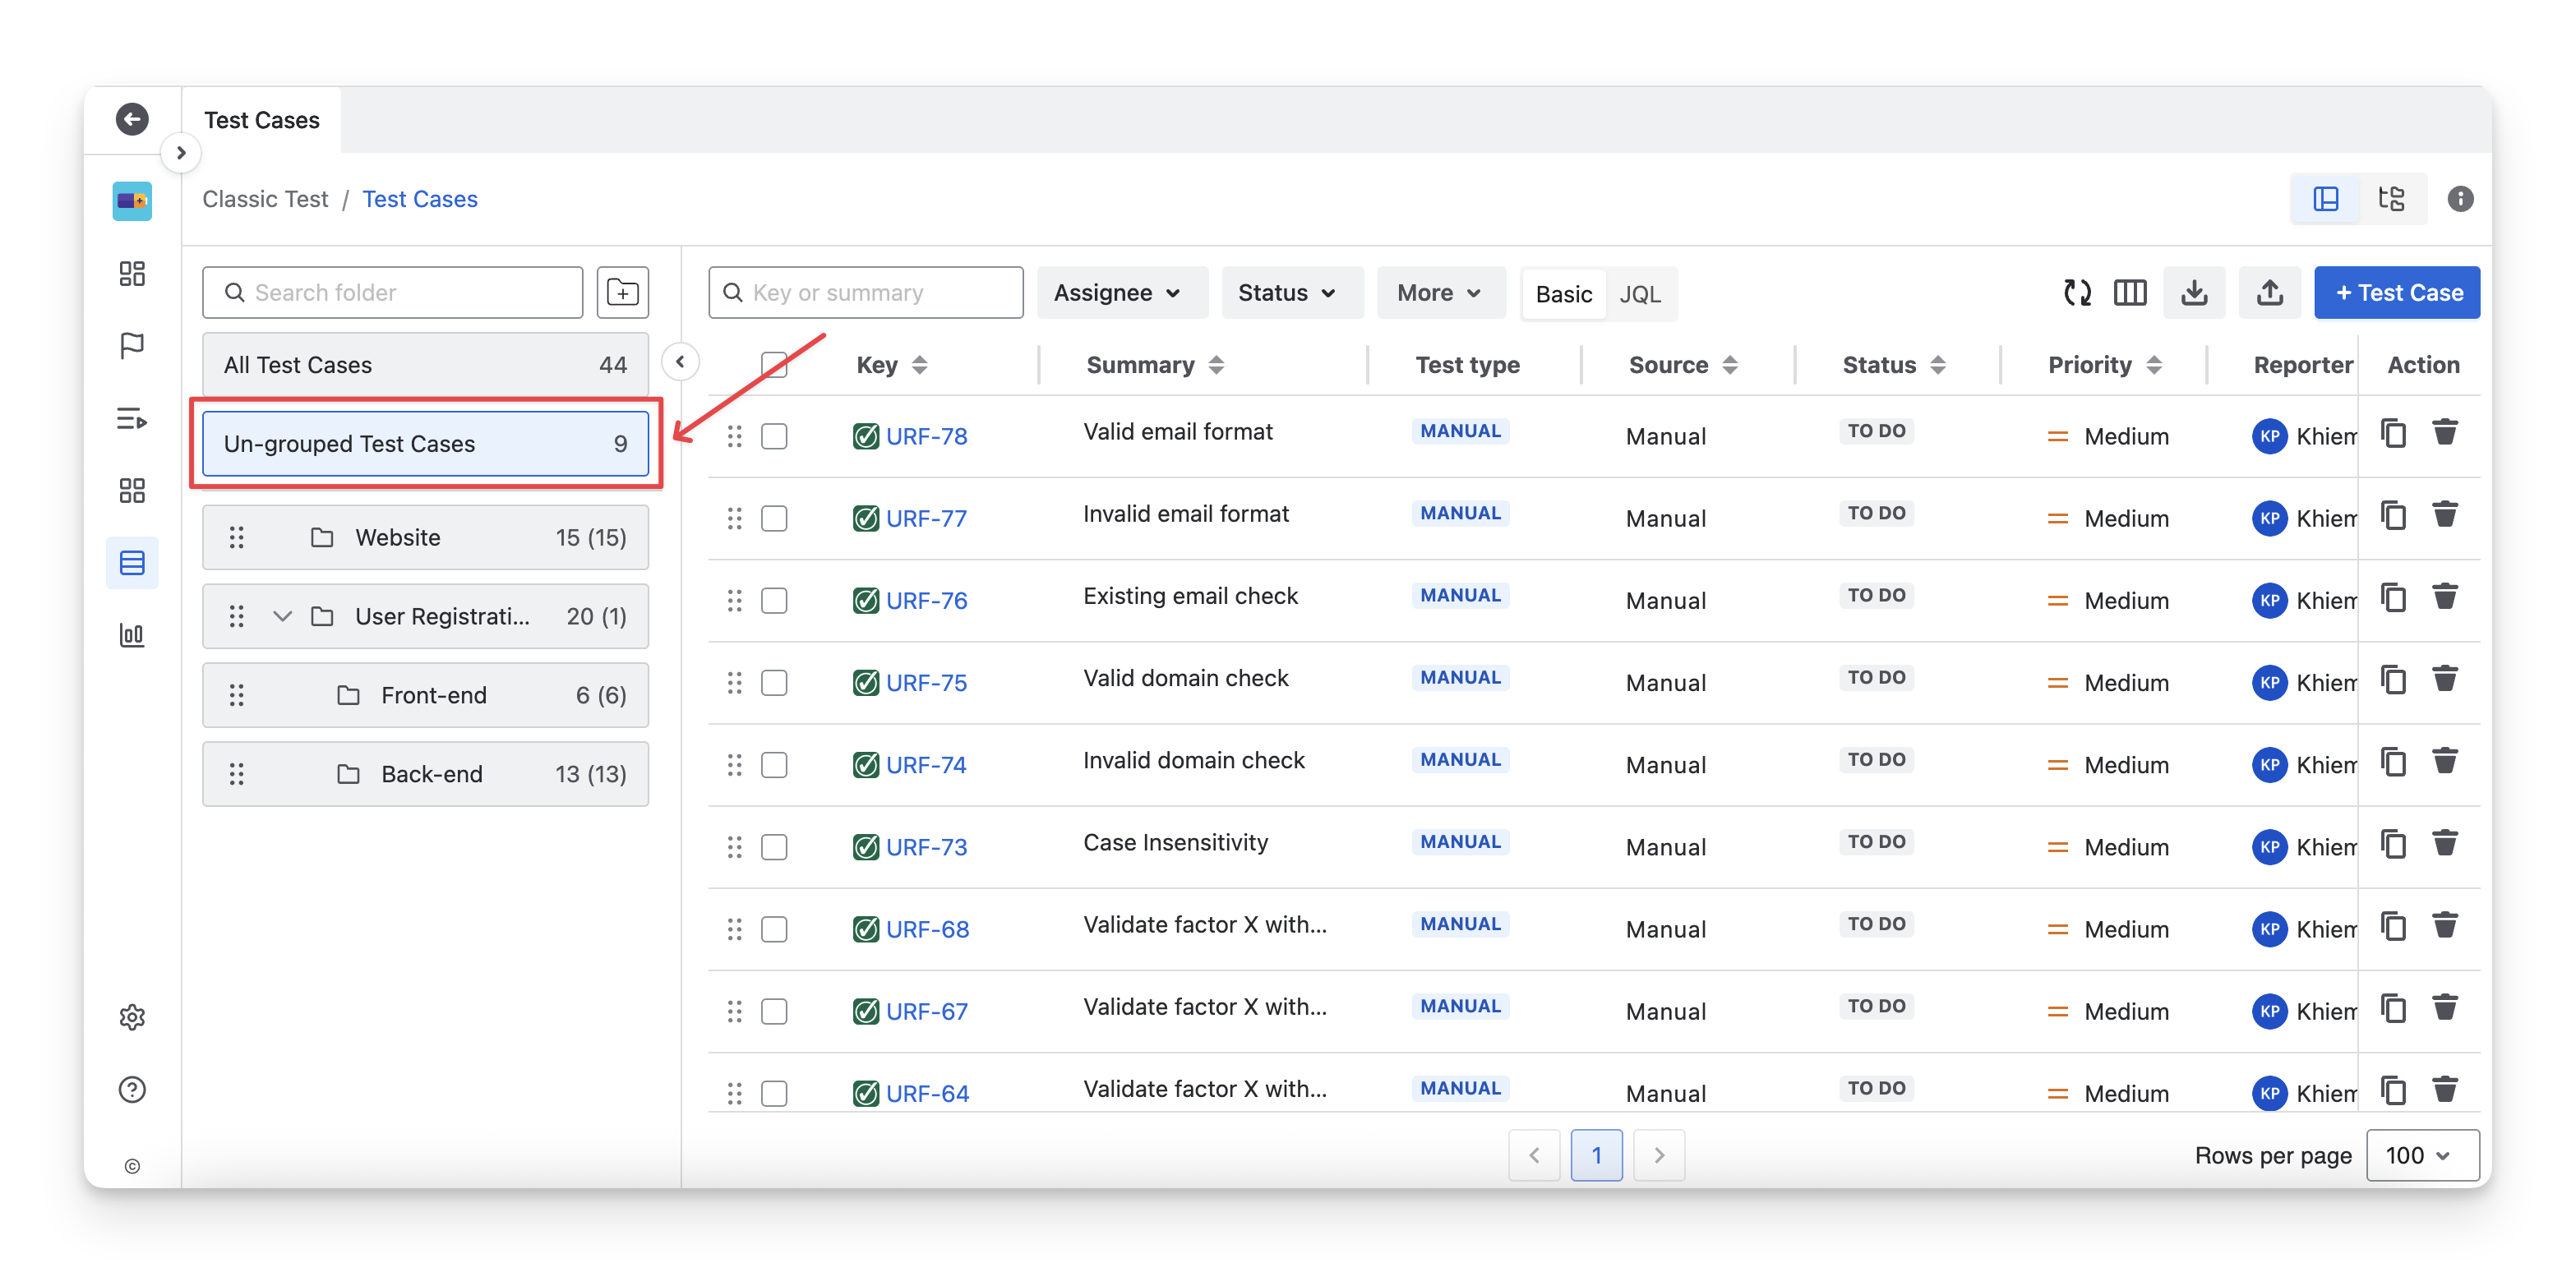
When you delete a folder or subfolder:
-
All associated sub-folders are deleted.
-
All work items are moved to the Un-grouped folder instead of being deleted. This ensures your data is preserved and can be reorganized later if needed.
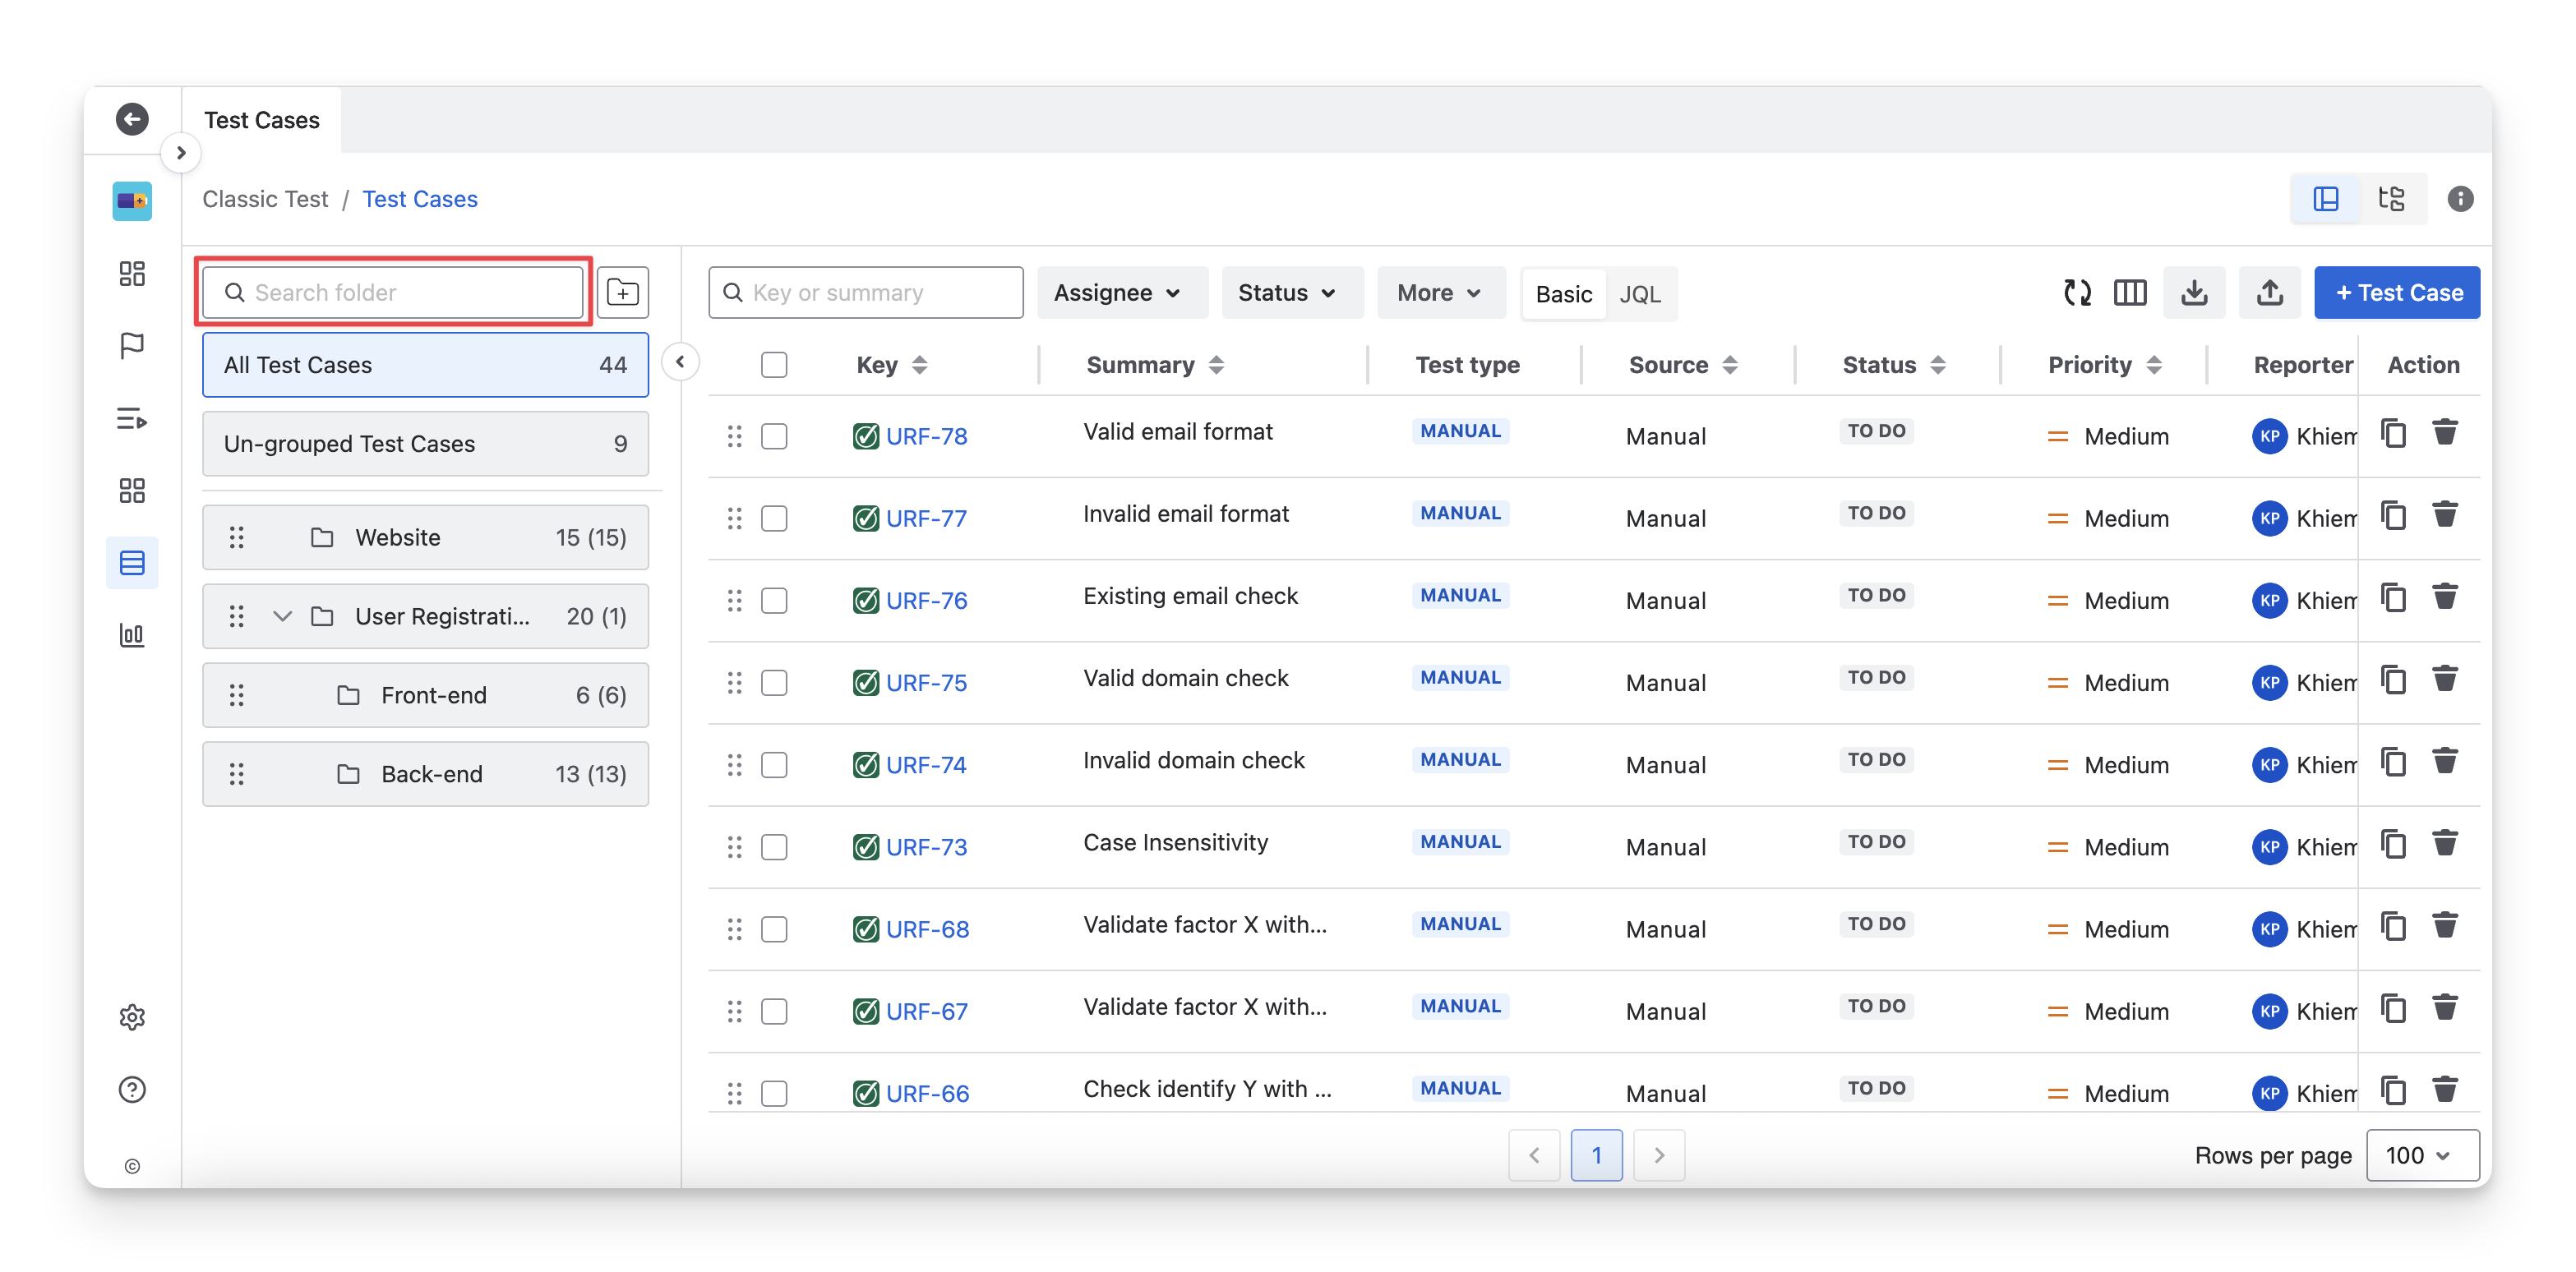
6. Search Test Folder
To quickly locate a test folder, enter the folder name in the search bar.
7. Rearrange Test Folder
To change the display order of test folders, drag and drop your folders to your preferred position. Any associated subfolders will move together with the parent folder.
Actions 8 and 9 apply only to Test Case folders, as they are related to test planning and execution.
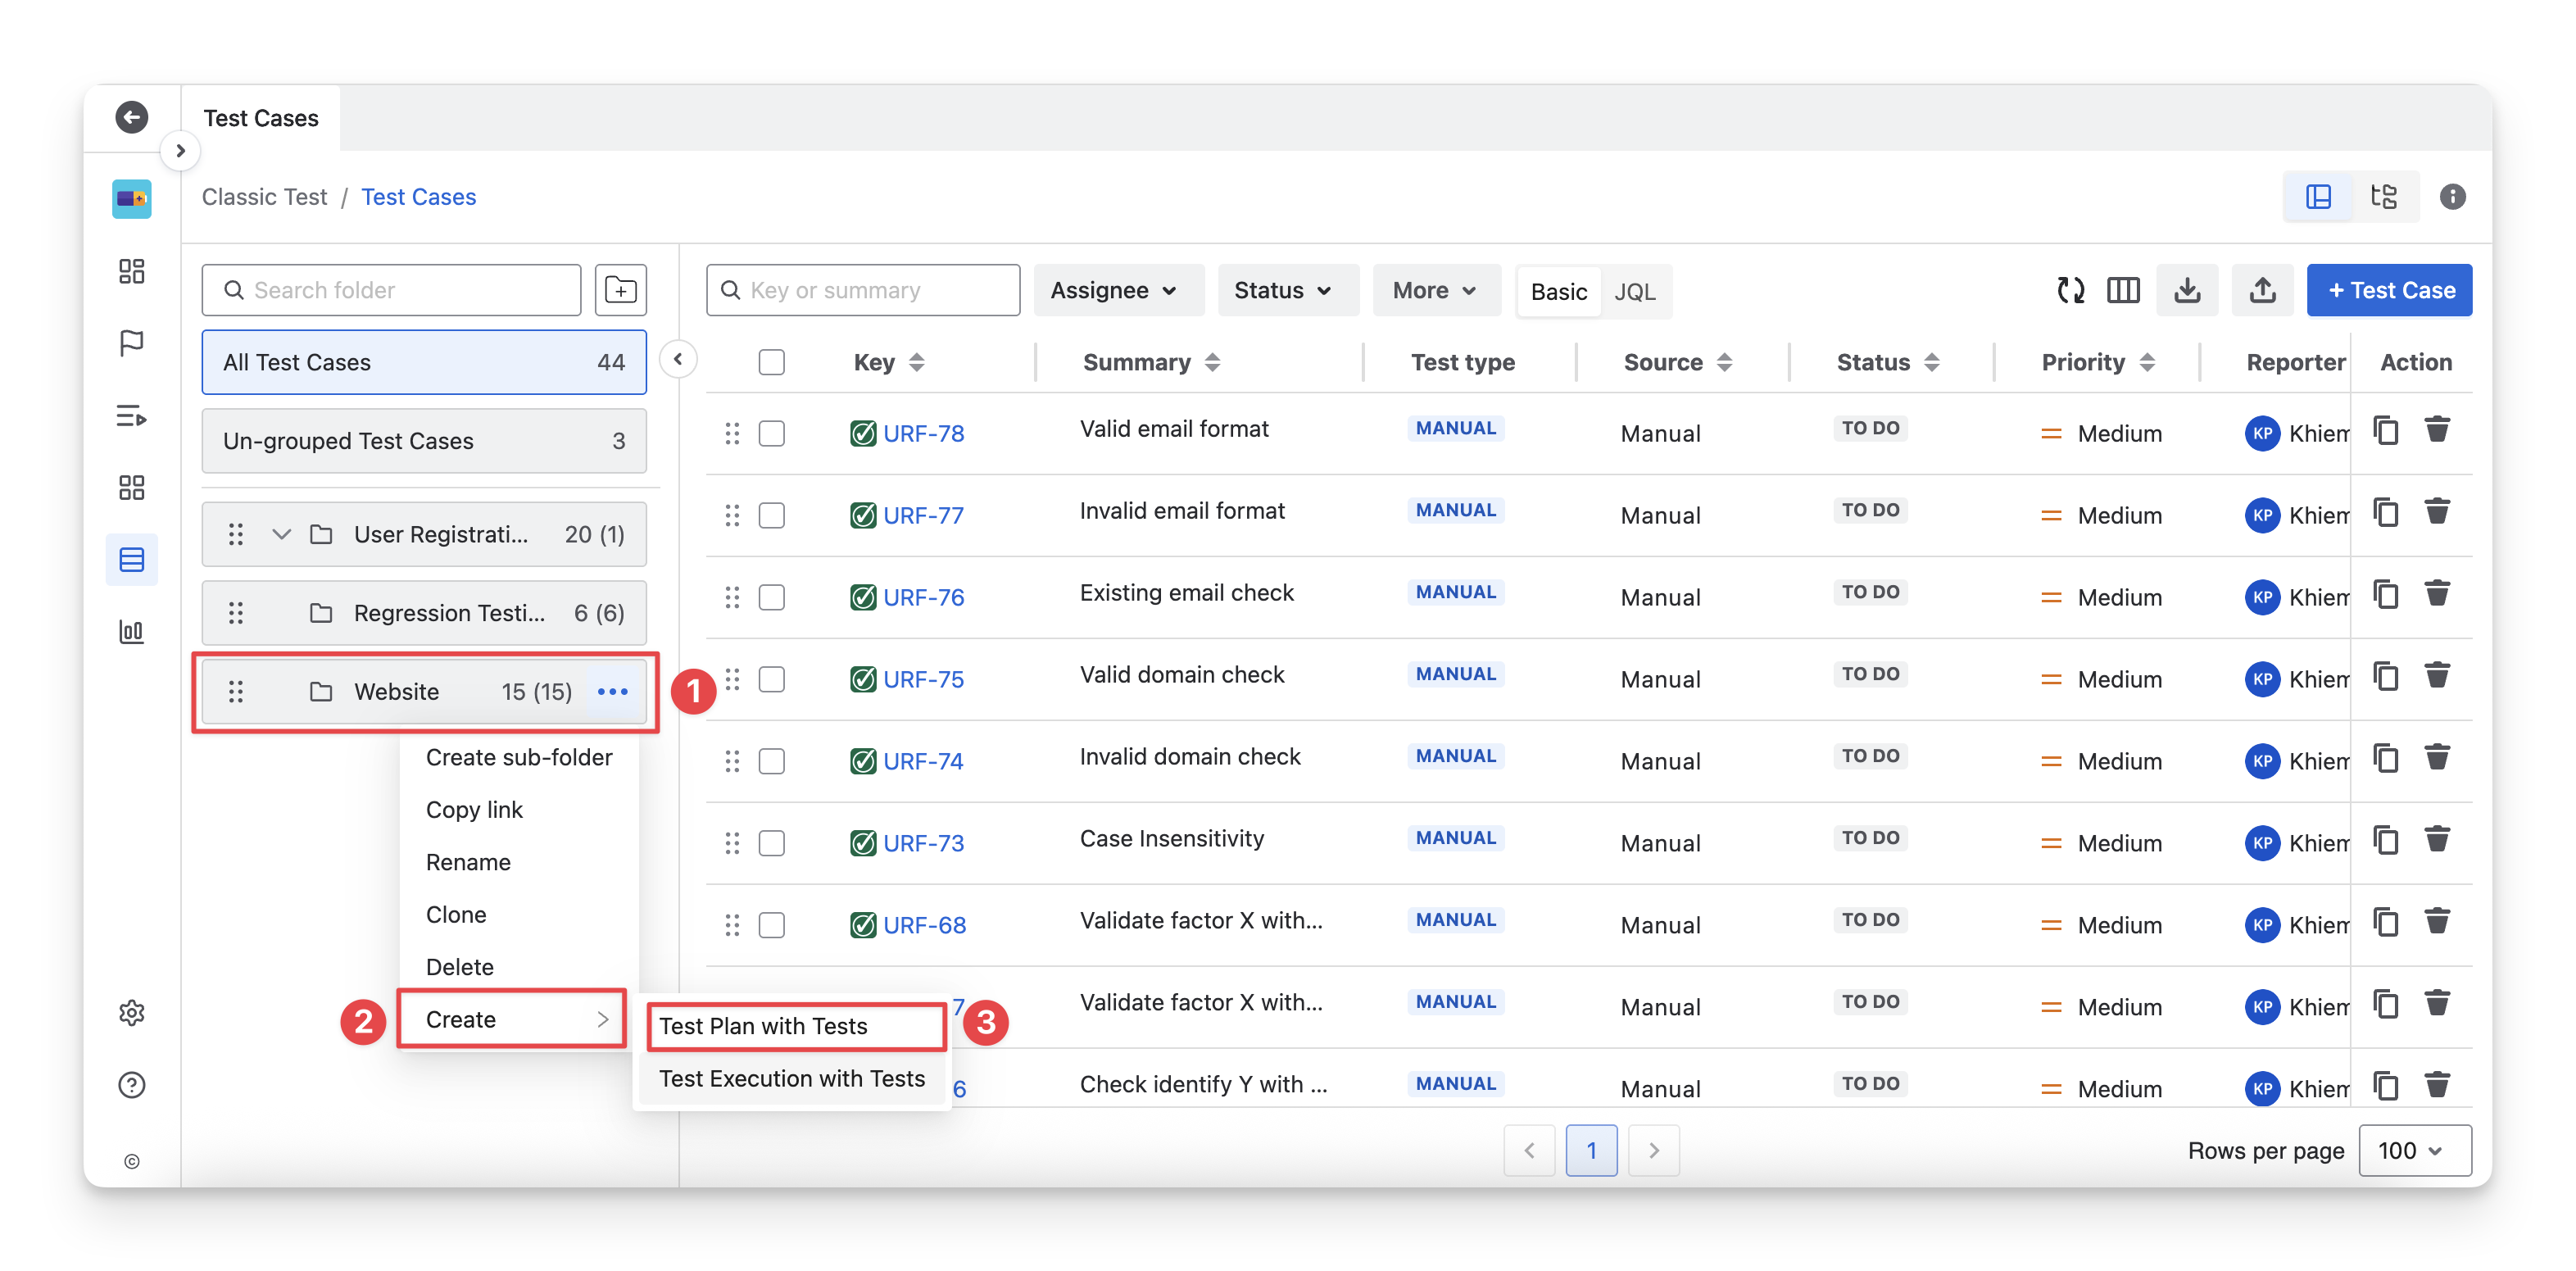
8. Create Test Plan with Tests from Test Folders
AgileTest supports you in creating a test plan that includes all test cases from a folder. This helps you quickly create test plans from a large group of test cases efficiently and ensures that all related tests are included in the planning process.
To do this, follow these steps:
-
Navigate to a test case folder/subfolder you want to create a test plan. Click on the
-
Select the “Create”.
-
Choose the “Test Plan with Tests” option.
-
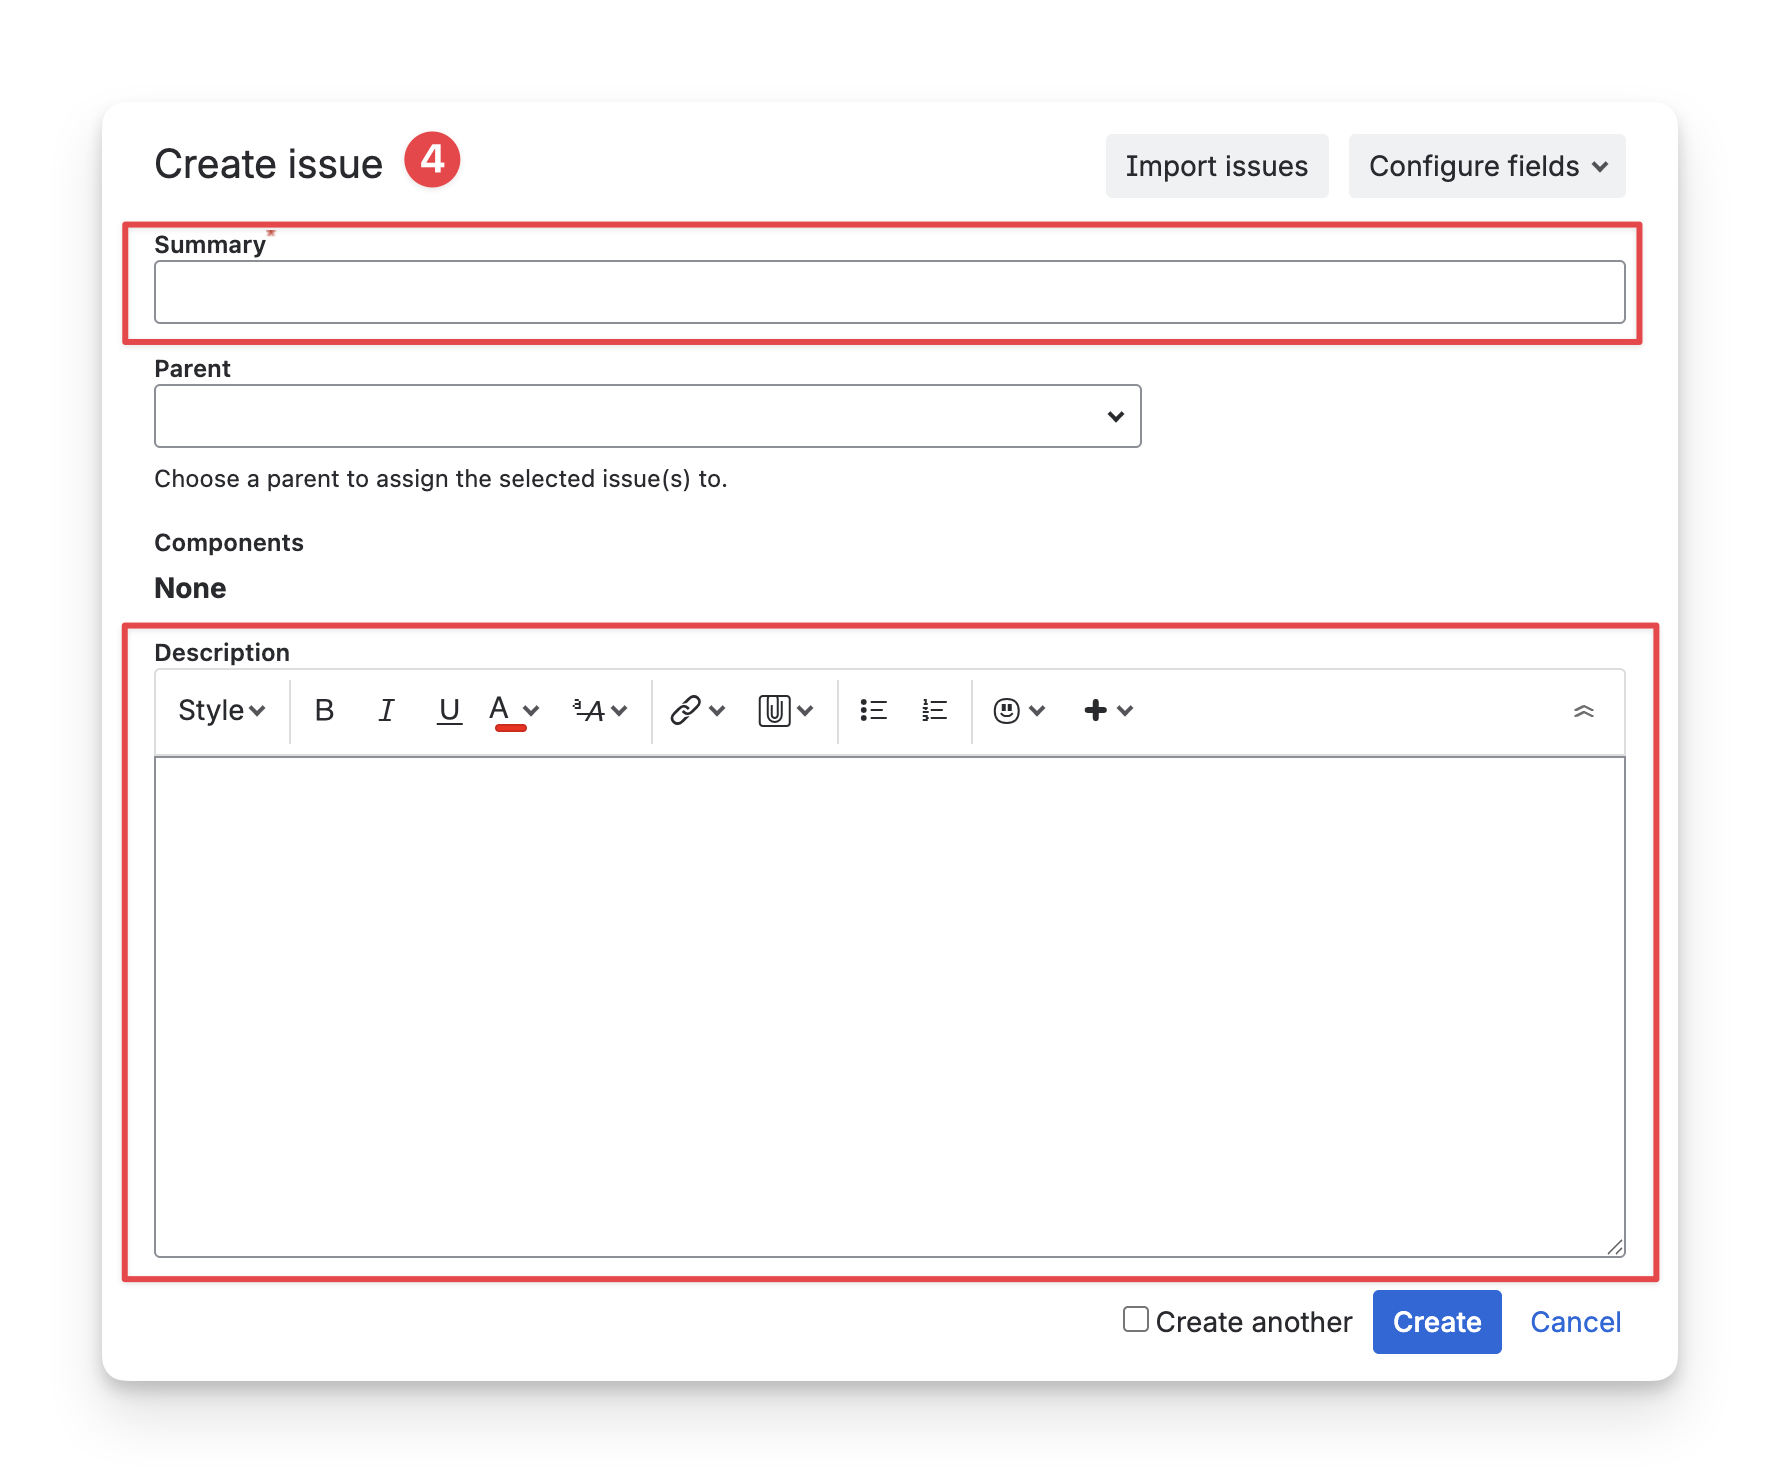
Fill in the Test Plan details
-
Summary: Enter a short and clear title that describes the purpose of the test plan (for example, the release name, sprint, or testing scope).
-
Description: (Optional) Provide additional details about the test plan, such as objectives, testing scope, timeline, or any important notes for the testing team.
Once created, the test plan will include all test cases from the selected folder.
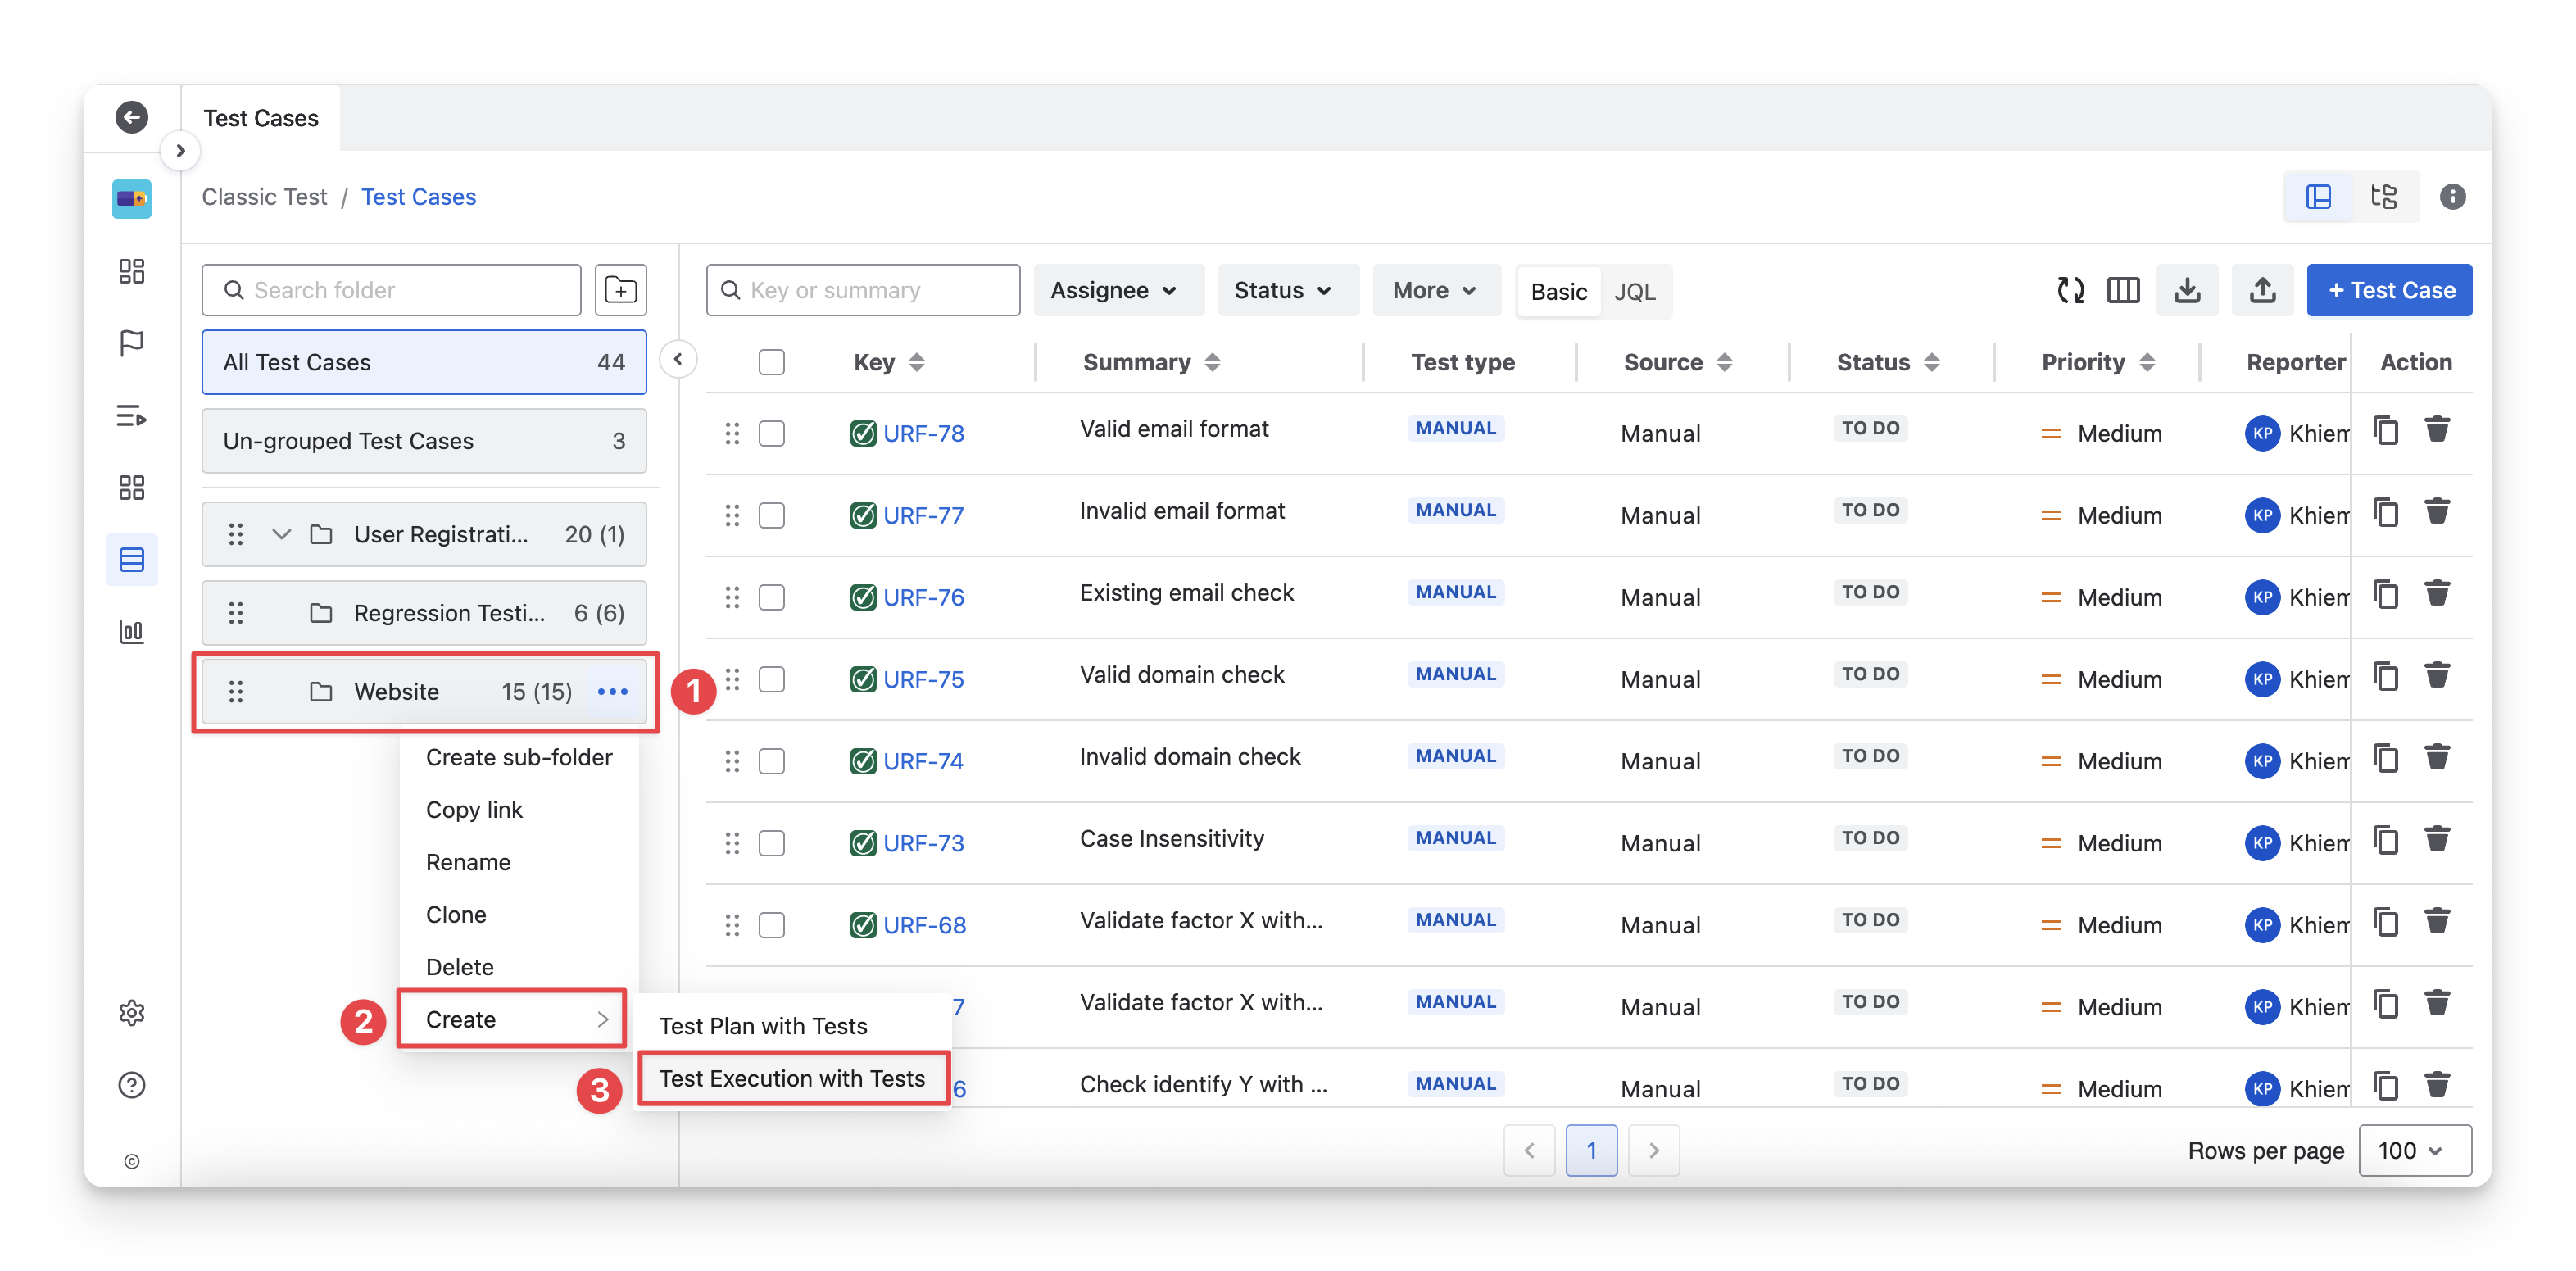
9. Create Test Execution with Tests from Test Folders
AgileTest allows you to create a test execution that includes all test cases from a folder. This helps you quickly start test runs for large groups of test cases, execute related tests together, and ensure consistent execution coverage across the selected testing scope.
To do this, follow these steps:
-
Navigate to a test case folder/subfolder you want to create a test execution. Click on the
-
Select the “Create”.
-
Choose the “Test Execution with Tests” option.
-
Fill in the Test Execution details
-
Summary: Enter a short and clear title that describes the purpose of the test execution (for example, the test cycle name, build version, or execution scope).
-
Description (Optional): Provide additional details such as execution objectives, environment information, timeline, or any notes relevant to the testing team.
Once created, the test execution will include all test cases from the selected folder.
Should you need any assistance or further AgileTest inquiries, contact our 24/7 Support Desk!