.png)
After integrating AgileTest with your CI/CD tools, automated tests are typically executed through pipeline triggers defined in your CI/CD configuration. However, in many testing scenarios, QA teams may still need to switch to these tools to manually run automated tests.
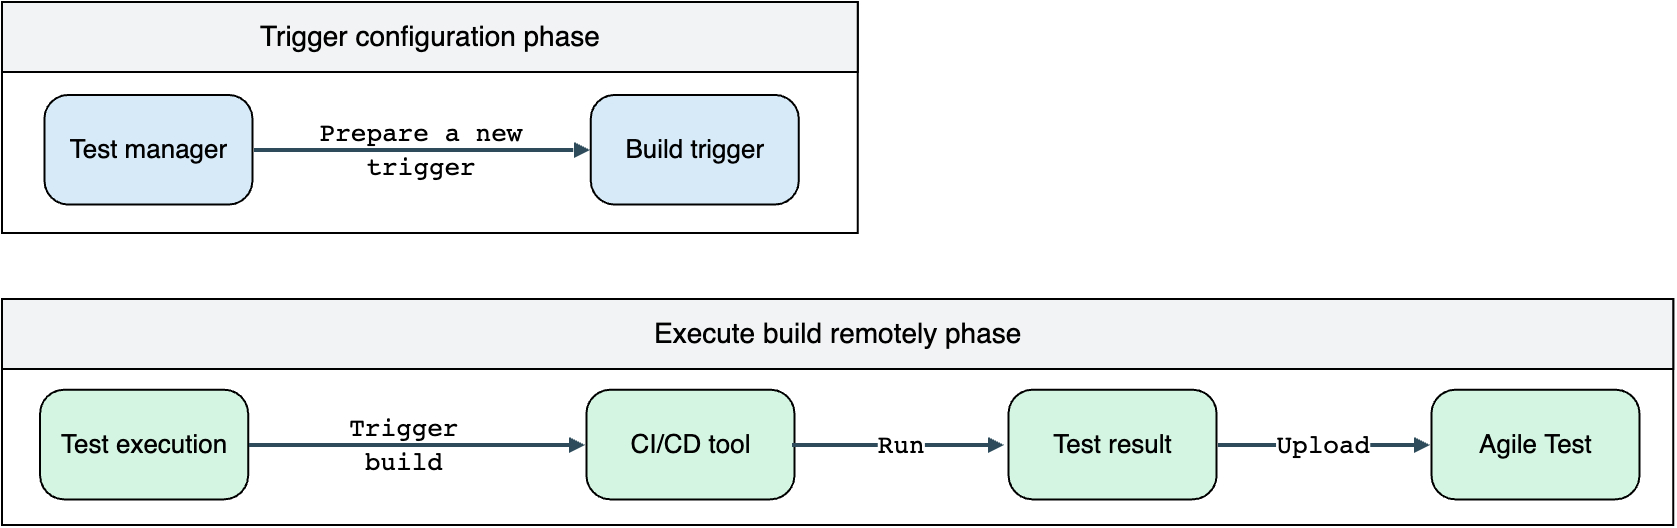
To reduce this manual effort, AgileTest allows you to configure triggers that enable automated tests to be executed directly from AgileTest.
1. Trigger Configuration
Before proceeding with this section, make sure you have completed the CI/CD Integration for your workspace. For more details, please refer to the document - CI/CD Tools Integration.
The process can be simplified by following the workflow below.
To access this feature, go to the AgileTest setting in your project by choosing Settings → Automated Test.
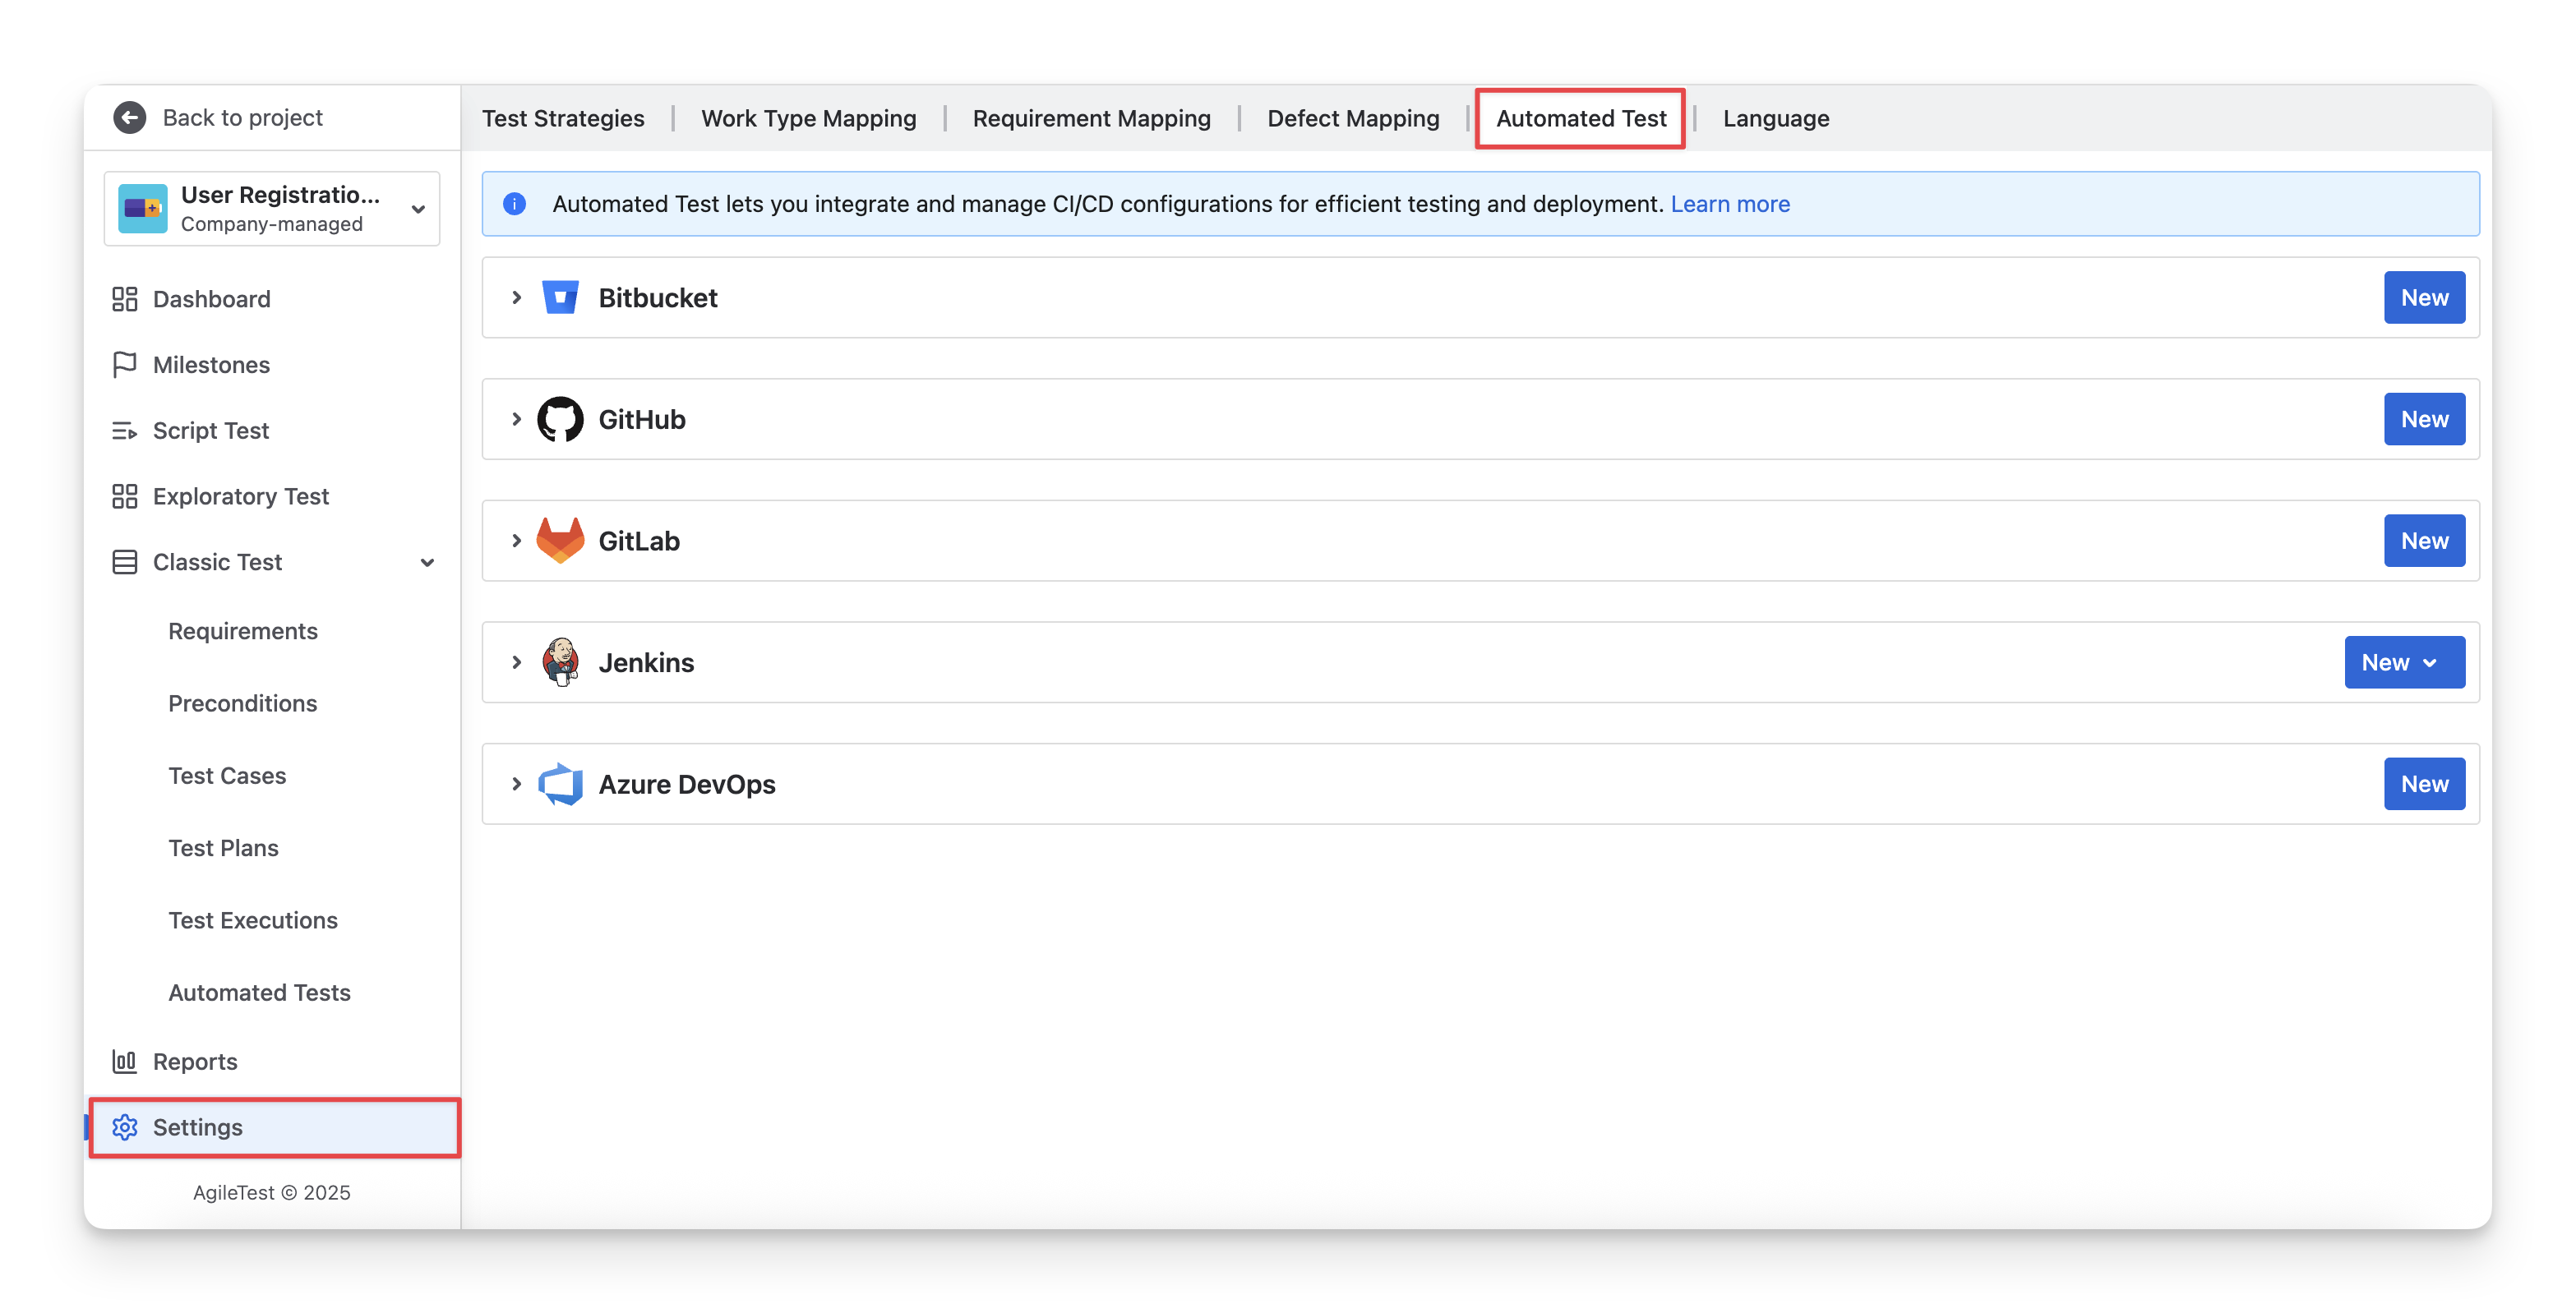
AgileTest currently supports you in triggering the 5 most common CI/CD tools, including
2. Execute Build Remotely
This step applies to any CI/CD configuration. Once the trigger setup is complete, open a Test Execution ticket.
On the right panel of the issue screen, under the Agile Test section, you will see the trigger you just created. Simply click Run to start your pipeline.
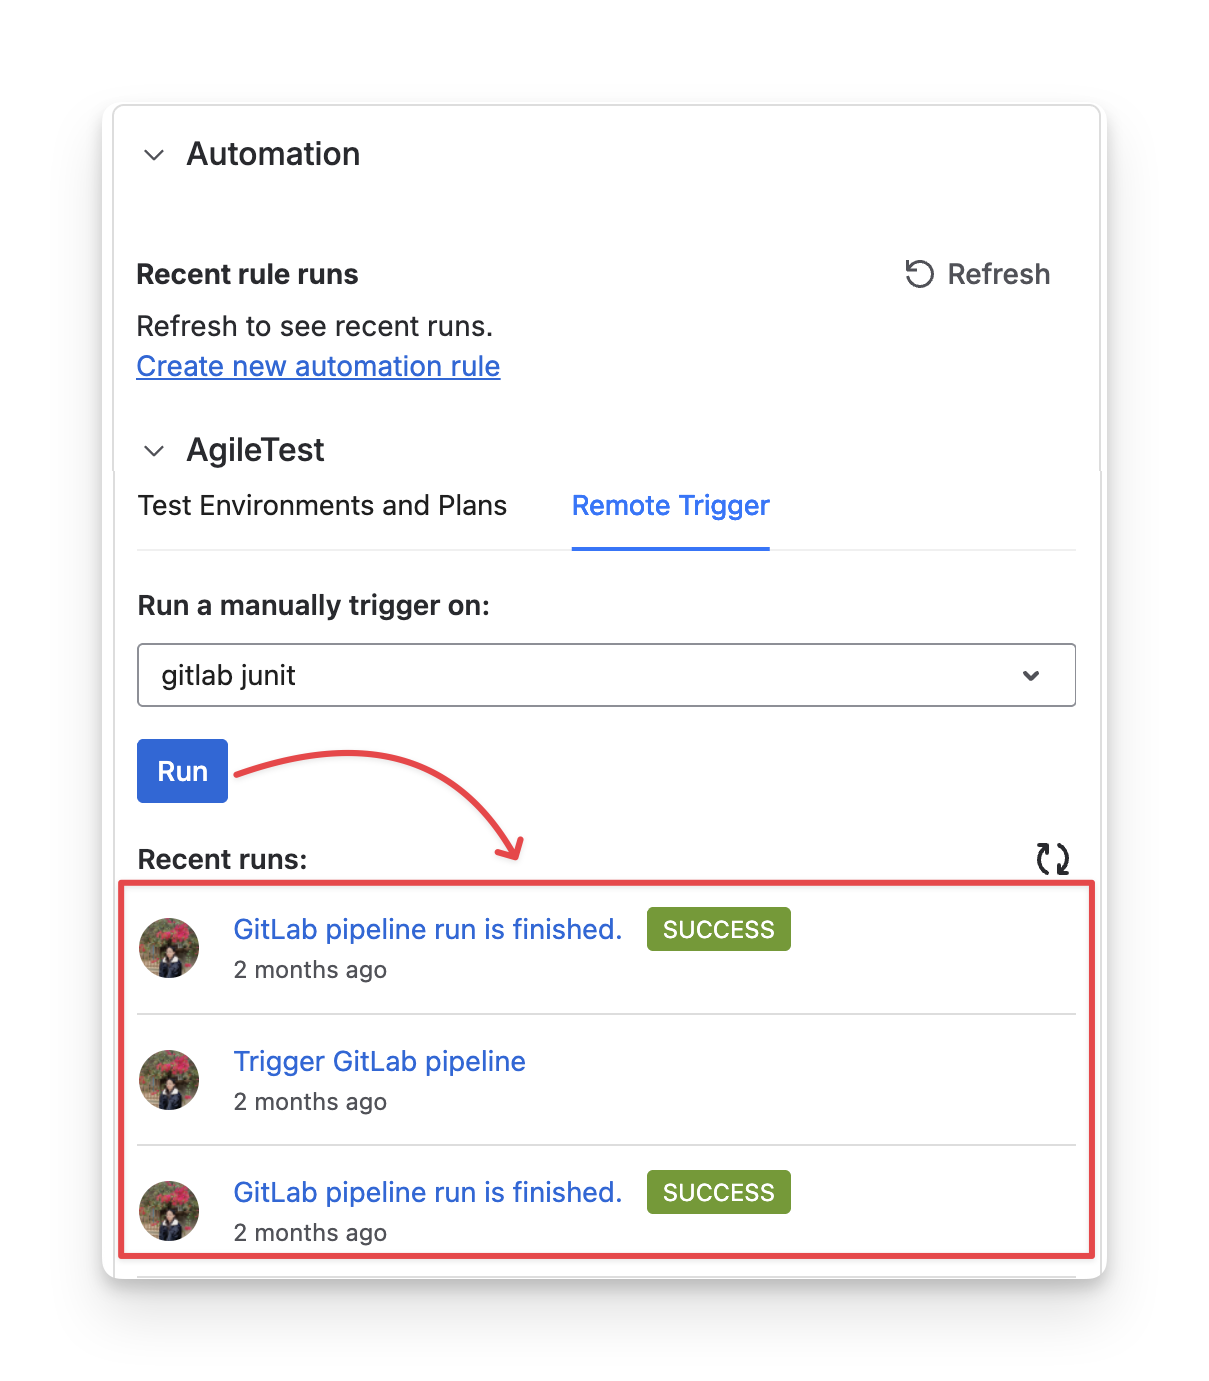
If everything is working correctly, clicking the Refresh button will display a confirmation message indicating that the pipeline has been triggered successfully.
Should you need any assistance or further AgileTest inquiries, contact our 24/7 Support Desk!